[62-362] Activating the Body | Project 2: Flow | Fall 2019 | Hugh Lee
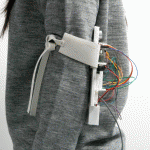
Side view of the device
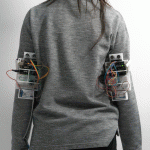
Front view of the device
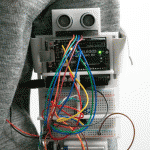
Close up view of the device
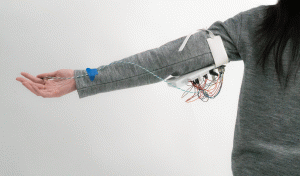
Close view of device attached on arm
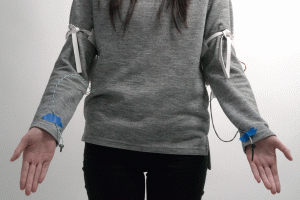
Both arms with device attached
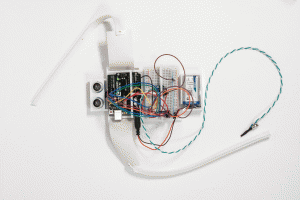
Device not attached
How the device works
Project Description:
Walking backwards is a project that explores the uncomfortable feeling of walking backwards. This project was inspired by a small exercise with Slow Danger, who have taught us several physical exercises in which walking backwards was one of them. They instructed us to walk and imagine our backs as the front of our body. This resulted in a very interesting movements, and explored the uncomfortable feeling of walking without seeing. The device that I created measures the distance between the device and any surrounding objects and transduces into vibration. The vibration indicates how close one is to any obstacles behind.
Process Reflection:
In the middle of the process, I quickly realized the limitations of the project. At the final critique, I came up with two devices, which each one would be strapped on both arms individually, but it would have been more successful if I had more devices to put on different parts of the body. At the Final Critique, when I put the devices on Alex’s arms, his movement was very timid, as if he didn’t trust the devices. More devices would have led to a more accurate measurement and variation of movements.
The device would have also benefited if I had not used a breadboard and used less components. The jumper wires continued to fall out unexpectedly. Also, having the Arduino chip and bread board as two large pieces separately made the device unnecessarily large.
Flow Diagram:
Arduino Code:
//Project no.2: Walking Backwards
//Hugh Lee
//The ultrasonic sensor measures the distance between the sensor and any object nearby and converts into vibration. There are three different types of vibration, indicating how close the object is to the sensor. The different types of vibration are pulled from the "Adafruit Drv2605.h" library.
#include <NewPing.h>
#include <Wire.h>
#include "Adafruit_DRV2605.h"

#define TRIGGER_PIN  12  // Arduino pin tied to trigger pin on the ultrasonic sensor.
#define ECHO_PIN     11  // Arduino pin tied to echo pin on the ultrasonic sensor.
#define MAX_DISTANCE 400 // Maximum distance we want to ping for (in centimeters). Maximum sensor distance is rated at 400-500cm.

Adafruit_DRV2605 drv;


NewPing sonar(TRIGGER_PIN, ECHO_PIN, MAX_DISTANCE); // NewPing setup of pins and maximum distance.


void setup() {
  Serial.begin(9600);
  Serial.println("DRV test");
  drv.begin();

  drv.selectLibrary(1);

  // I2C trigger by sending 'go' command
  // default, internal trigger when sending GO command
  drv.setMode(DRV2605_MODE_INTTRIG);
}

uint8_t effect = 1;

void loop() {
  //  Serial.print("Effect #"); Serial.println(effect);
  int ping = sonar.ping_cm();
  delay(50);                     // Wait 50ms between pings (about 20 pings/sec). 29ms should be the shortest delay between pings.
  Serial.print("Ping: ");
  Serial.print(ping); // Send ping, get distance in cm and print result (0 = outside set distance range)
  Serial.println("cm");


  if (ping < 5) {
    effect = 118; //if ping is smaller than 5, it uses vibration 118 from the "Adafruit_DRV2605.h" library
    drv.go();
  }
  else if (ping < 25) {
    effect = 48; //if ping is smaller than 25, it uses vibration 48 from the "Adafruit_DRV2605.h" library
    drv.go();
  }
  else if (ping < 50) {
    effect = 44; //if ping is smaller than 50, it uses vibration 44 from the "Adafruit_DRV2605.h" library
    drv.go();
  }
  else {
    drv.stop(); //stop vibrating for any other values
  }
  drv.setWaveform(0, effect);  // play effect
  drv.setWaveform(1, 0);  // end waveform
  // play the effect!

}
Comments are closed.