Using a hobby servomotor
A servomotor is any kind of motor which has “awareness” of the position of its output. Many motors, like the one that makes a fan blow, do not have sensors built in to know exactly what position their shaft is in, because it doesn’t matter. For more complex applications, for instance the motor that moves paper through a printer, it’s important to get the “feedback” of knowing the position of the motor’s output to do the job right.
A “hobby servo” is so called because these little devices are used in hobby projects: radio controlled model cars, planes, and boats. It is because they’re widely used for these crafts that their cost is low and supply abundant. Thanks, hobby people!
Using these motors is quite simple: the Arduino tells the motor what position to go to, and the motor’s control circuitry goes there as quickly as possible and holds that position.
The circuit

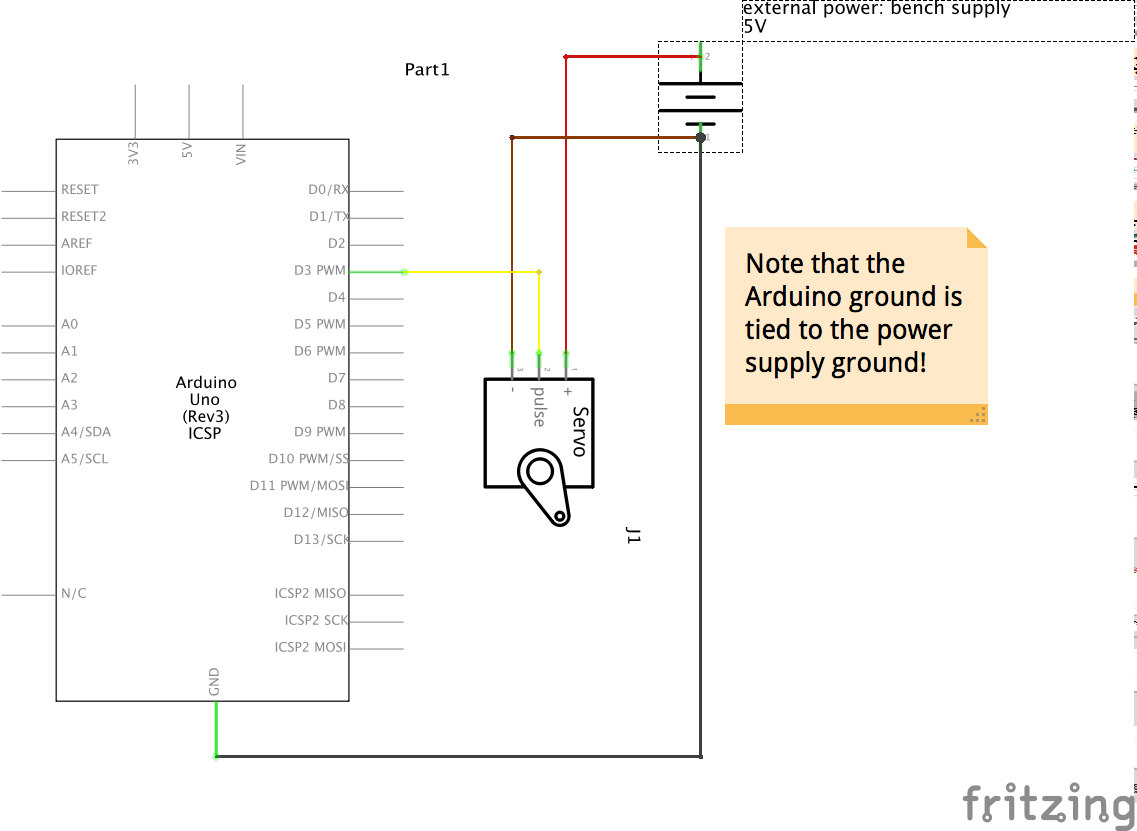
Wiring is easy because servo wire colors are standardized:
- red: ~+5V
- brown: ground
- yellow: digital signal
If you’re using the very smallest hobby servos (such as those included in the course kit) you can use the Arduino 5V supply to run the servo. However, it will run slow and may well cause the Arduino to “brown out,” i.e. suffer a voltage droop and produce unexpected effects. That’s why it’s good practice to use an external power source like a battery or bench supply as shown in the schematic.
Arduino code to move the servo around a bit
#include <Servo.h> // this allows you to use the Servo library

Servo myLittleMotor; // you can call the servo whatever you want
int servoPin = 3; // pin the servo data line is plugged into

void setup() {
  myLittleMotor.attach(servoPin); // set up the servo on that data pin
}

void loop() {
  myLittleMotor.write(10); // tell the servo to go to 10º
  delay(500); // wait a half second
  myLittleMotor.write(170); // tell the servo to go to 170º
  delay(800); // 8/10ths of a second
}
