Jarrek Holmes & Josh Danzig
Abstract:
Message in a bottle is an interactive expressive exhibit which allows children to share and express themselves through ordinary speech, but in a novel way. The exhibit extends the concept of a message in a bottle by allowing children to whisper messages into canning jars and magically leave those messages behind for other children to find.
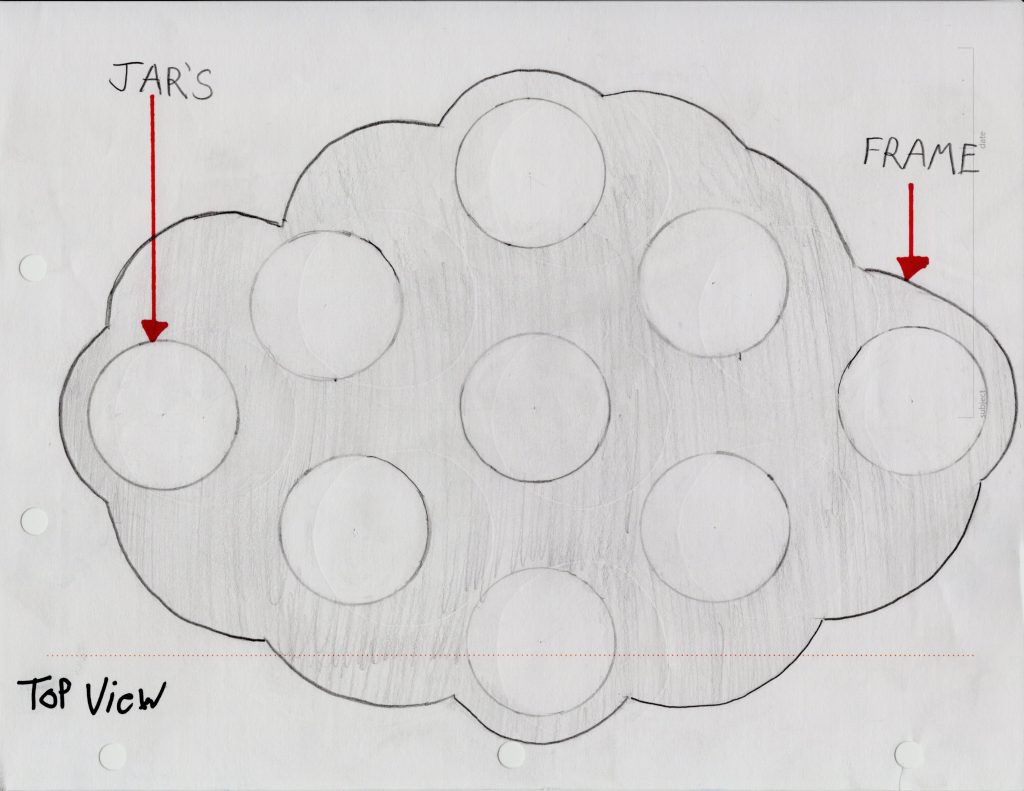
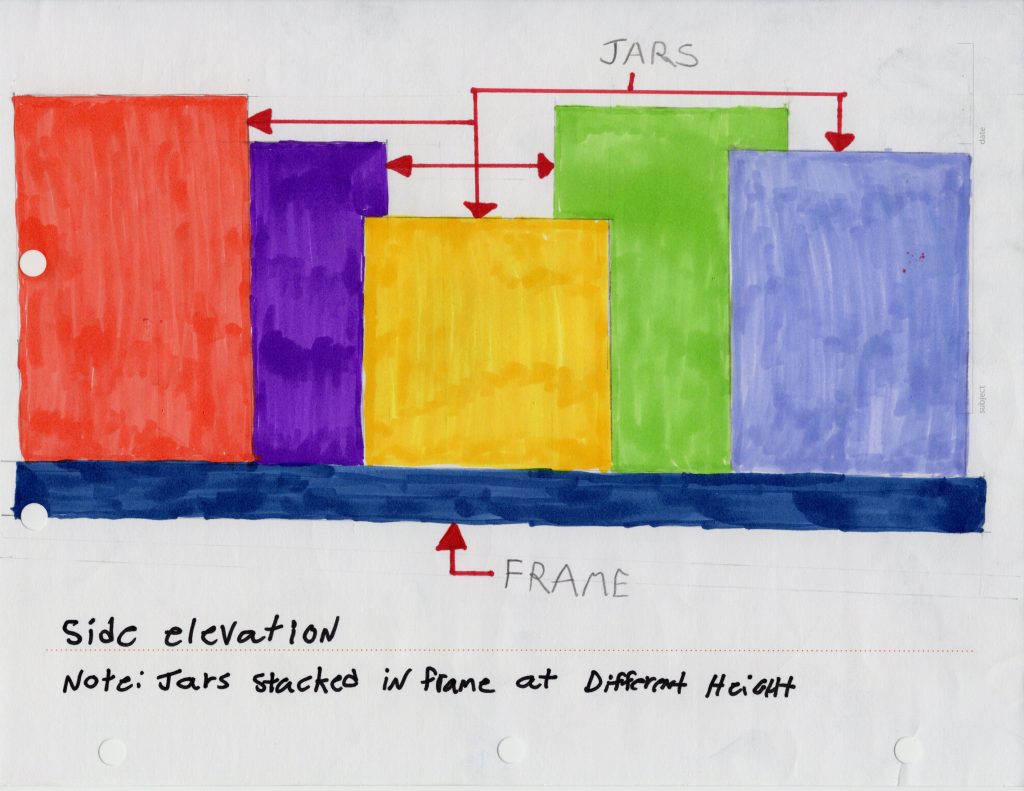
The exhibit would consist of roughly nine canning jars held in an artistic frame. LEDs inside the jars would light up different colors and capture children’s attention. Opening the jars would allow children to listen to or record messages for other children. Jars would light up different colors if they contained a message or if they were empty, helping to prompt children with what they were supposed to do. Children would be able to approach the exhibit, identify which jars have messages and which did not, and then record and listen to messages.
The primary metric of success would be the identification of jars with or without messages, engagement with recording and listening to others’ messages, and entertainment/joy received through the experience. A younger child might enjoy it for the lighting experience, while older children will be able to abstractly comprehend the lighting to message connection, making it appealing to a variety of age groups.
Technical overview:
The most difficult technical part of our project is controlling and storing audio from nine separate sources. Our approach includes a master arduino with a WAV shield, and a multiplexer. Each canning jar will include an arduino, a Neo Pixel ring of LEDs, a speaker, a microphone, and a break-beam to detect when the top of the jar comes on and off. The break-beam will be glued to the sides of the jar along the top, and the Neo-Pixel ring will be glued to the base of th the jars, along with a speaker to play back the recorded messages.
The frame housing the jars will be made of a dark acrylic or wood, so that the lighting is more dramatic.
The data storage will occur on the master arduino with the WAV shield, potentially using an Intel Edison Arduino for computational purposes. Each Arduino will be in contact with the master Arduino, and control its individual speaker, microphone, LEDs, and break-beam.
Early proof of concepts will include making sure that we can run a single jar using the master arduino and the individual Arduino. As well as ensuring that we can get enough processing power to successfully record and play audio from a large number of devices at once.
Milestone objectives:
Proof of concept: Here we would like to show that we can successfully record and play audio with reasonable quality As well, we would like to show mastery of simple NeoPixel-ring led concepts.
Phase 1 On-site test: The first on-site test will include one or two fully functioning jars for children to interact with. Some contingent outcomes we may experience:
- We were unable to get the master arduino working. Then the individual arduino will be stored inside the jar and play audio directly.
- We were unable to get the lights working, so the jars will simply play and record audio
Phase 2 On-Site Test: There will be 9 fully functioning jars for the children to interact with. A few contingent outcomes we may experience:
- We were unable to get the master arduino to work, so limited the number of jars and each jar has an arduino with a shield inside of it.
- We were unable to get the neo-rings functioning, and instead have a few LEDs inside of each jar that change colors
Management strategy:
We will work together on the conceptual model of the project, as well as collaborate on most aspects of the build. However, we will specifically be responsible for the following areas:
Josh: Fabrication, materials, lighting-related electronics
Jarrek: Programming, software design, sound-related electronics, data management
Bill of materials:
| Item | Qty needed for project | Qty in stock in lab | Qty need to purchase | Price per unit | Price extended |
| Break beam sensor PN0576 | 9 | 7 | 2 | $1.95 | $3.90 |
| Microphone PN0512 | 9 | 11 | 0 | N/A | N/A |
| 24 NeoPixel ring PN0914 | 9, but 1 already owned by student | Unknown, some QTY available at lending | Unknown | $19.99 | unknown |
| Music/ WAV shield PN0664 or PN0662 | 1 | Unknown, some QTY available at lending | Unknown, some QTY available at lending | N/A | N/A |
| Speaker PN0516 | 9 | 15 | 0 | N/A | N/A |
| Krylon I00810 Glass Frosting Aerosol Spray Paint, 12 Ounce | 1-2 | N/A | N/A | $9.30 (from Amazon) | $9.30-18.60 |
| Glass jars | 9 | N/A | N/A | Unknown at this time. Further child playtesting with sample units will determine actual jar model used. Samples range from $1-$16 a piece | |
| ¼ 4X8 sheet plywood | 1 | N/A | N/A | $24.99 | $24.99 |
| Multiplexer (sparkfun 74hc4051) | 3 | 0 | 0 | $1.95 | $5.85 |
| Hook up wire | Multiple varieties available in large quantities in lab | ||||
| Shrink tubing | Multiple varieties available in large quantities in lab | ||||
Budget:
While still being finalized, it will be between $60-$336
Timeline:
Week 1:
Solidify the process for storing, playing, and recording audio
Draw concept sketches
Write project proposal
Playtest jars
Week 2:
Place order for arduino shield
Place order for LED ring
Place order for break-beams, microphones, and speakers as necessary
Create audio prototype
Purchase jars and other materials for the physical aspect
Week 3:
Finish proof of concept for the audio
Put together a jar with all the necessary pieces for the on-site test.
- Lighting
- Speaker
- Microphone
- Arduino with connection to SD card and shield
Week 4:
Complete work on master arduino audio controls
Put together the second jar for the on-site test
Prepare for on-site test and begin iterating jars
Week 5:
Complete creation of every jar for the onsite test.
Wire every jar to the master arduino
Week 6:
Test jars for functionality
- Multiple people recording at once
- Multiple people listening at once
- Jars shaken, moved, and rotated
- Fingers poked into the jar.
- Pieces attempted to be removed and played with
Build frame for jars
Week 7:
Put jars into place on the frame
Attach wiring to master arduino, between jars,
Add final functionality for project completion
Test jars in frame
Sketches:
![]()
Leave a Reply
You must be logged in to post a comment.