Reach for the Sky
Jessica Lew, Jen Kwang
December 1, 2018
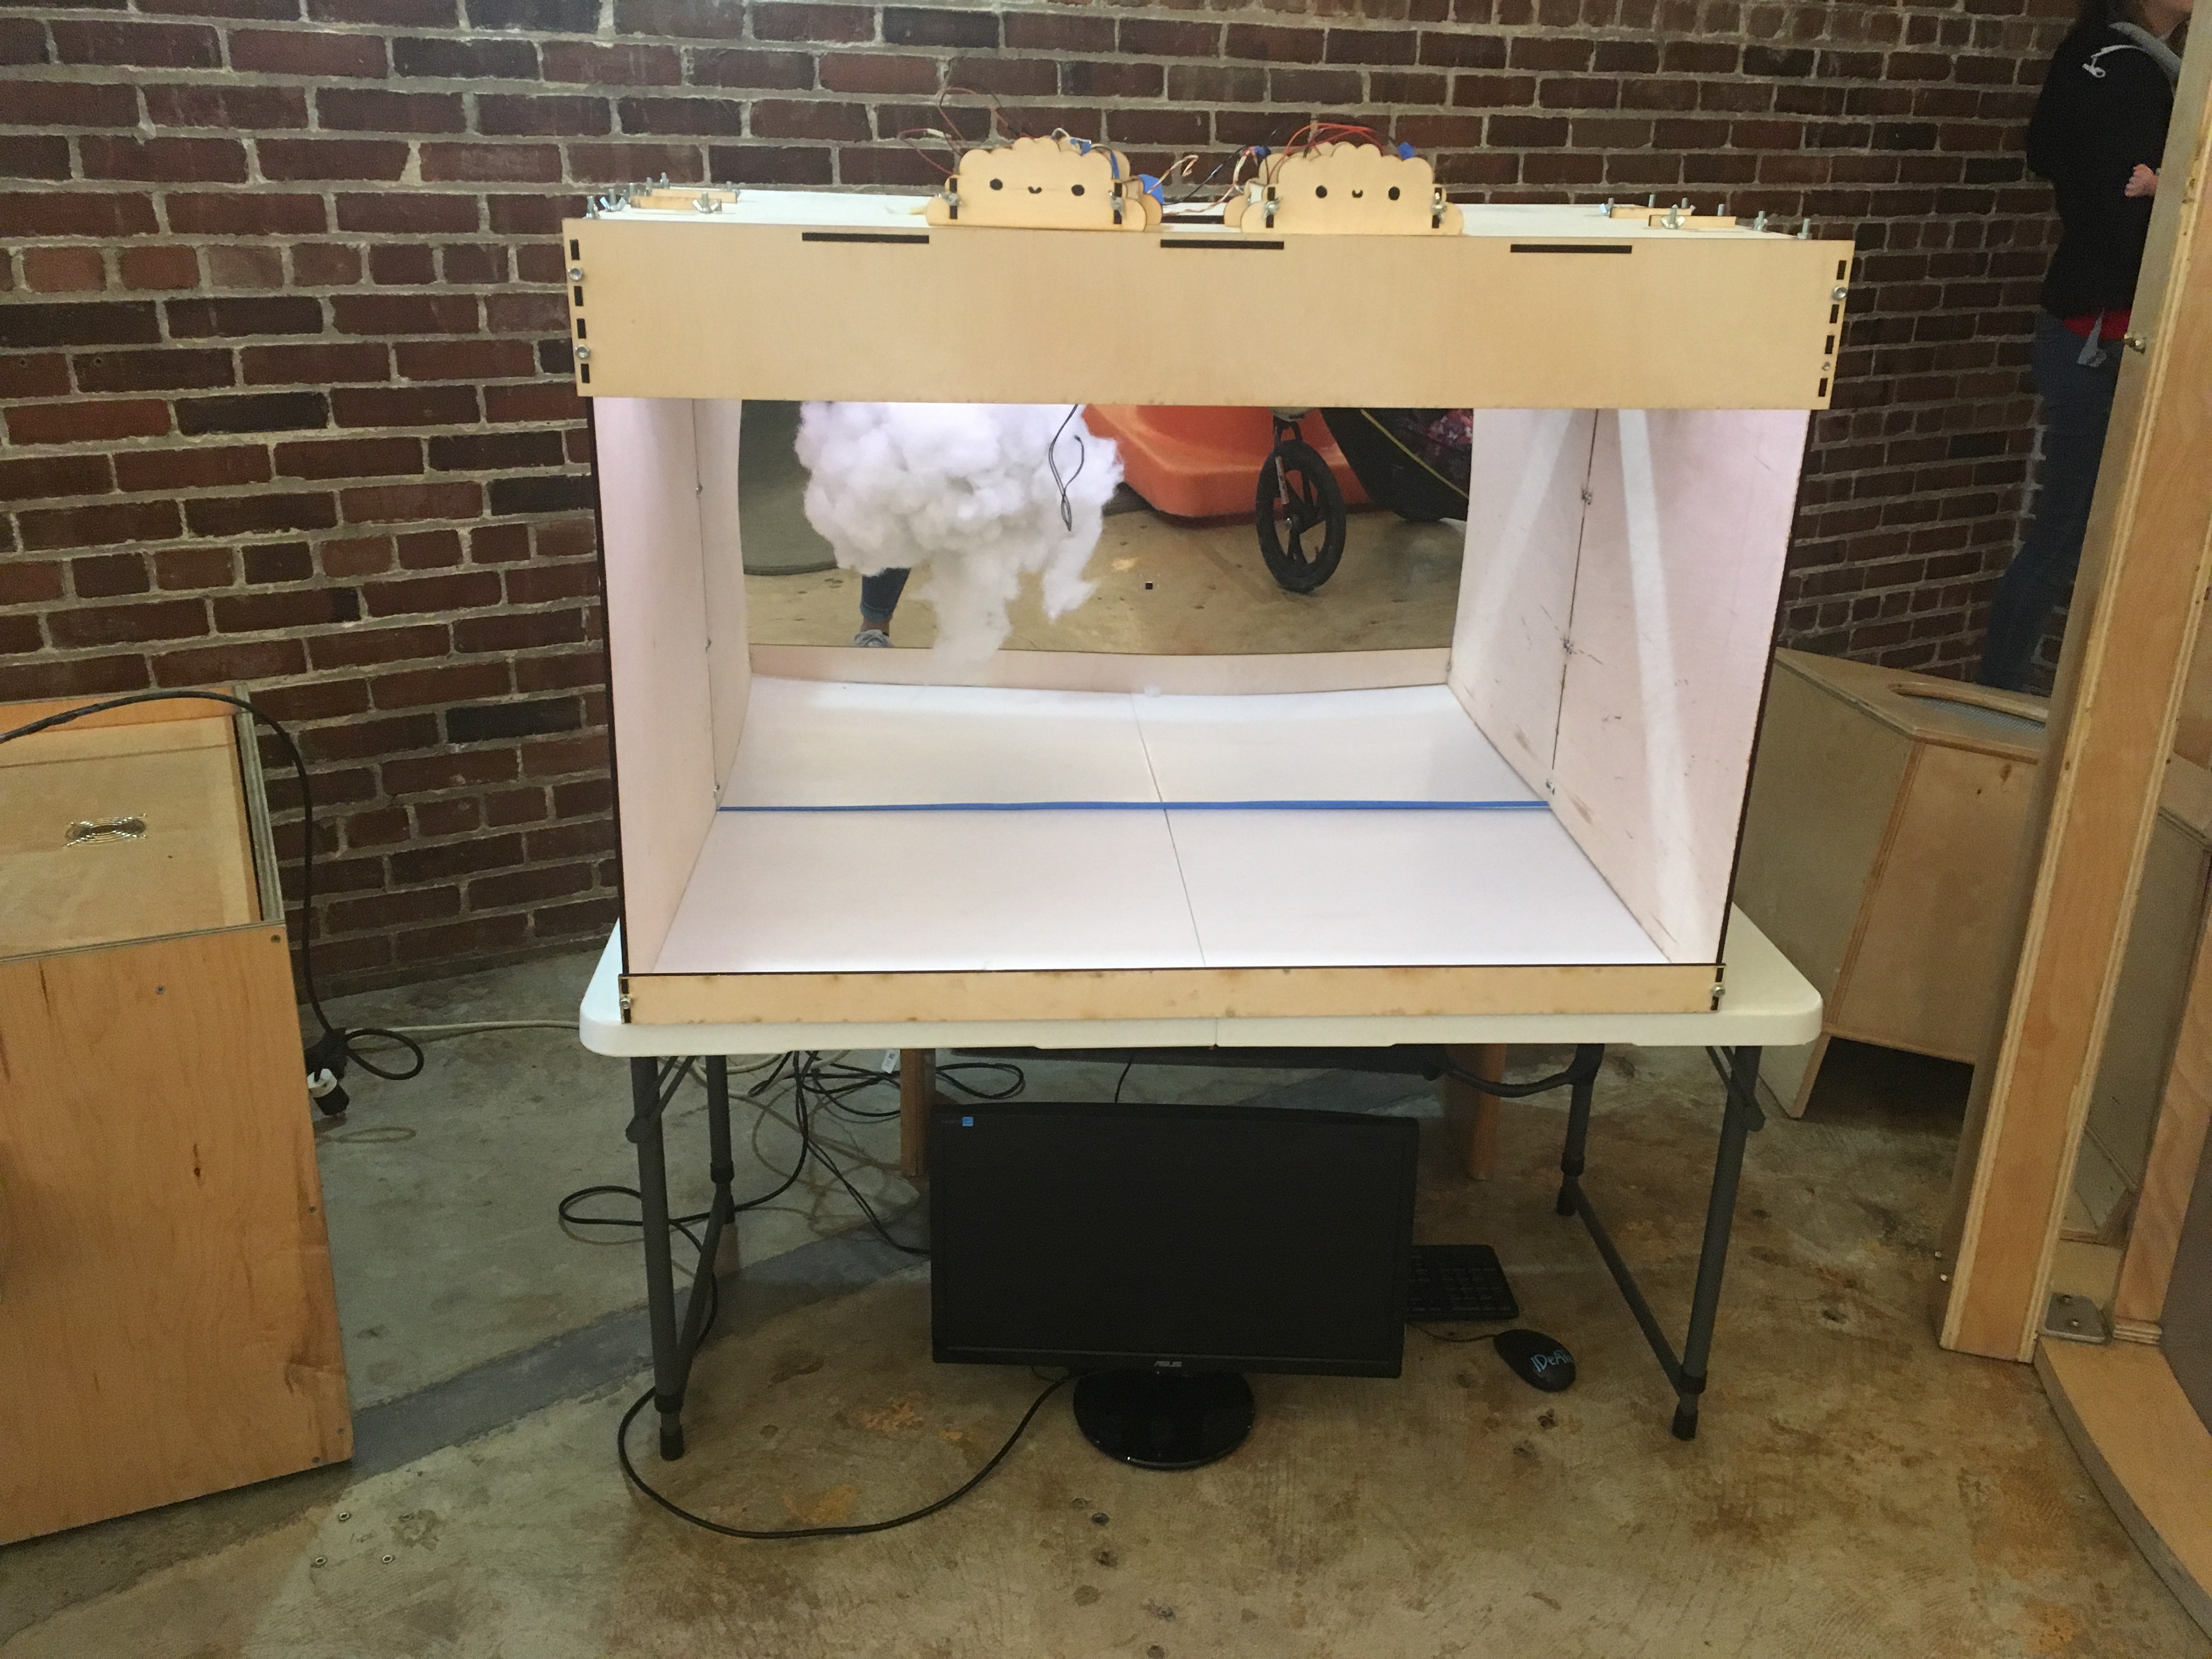 Figure 1. Project setup at museum. Monitor placed below project showed video feed from RPi face tracking program.
Abstract
Reach for the Sky is a computer vision controlled interactive experience that invites the user to explore the behaviors of an artificial cloud. With the use of face tracking, the cloud is able to detect the position of a users face, and then moves towards the user. Additionally, the user may choose to touch said cloud in order to affect the lighting of the project, such that artificial lighting is produced.
Objectives
- The cloud should follow the user’s movements with enough accuracy for the user to relate their change in position to the cloud’s change in position
- The LED strips at the top of the box should light up in response to user’s squishing the cloud to mimic lightning
- The stepper motor should move freely along the rack at an approximately constant speed
- The latency in the Raspberry Pi and Arduino should be reduced so that delays in changing the cloud’s position do not disrupt the experience
- The flex sensor should be embedded in the cloud such that the cloud can be handled in a variety of ways without breaking the sensor or resulting in unreliable data
Implementation
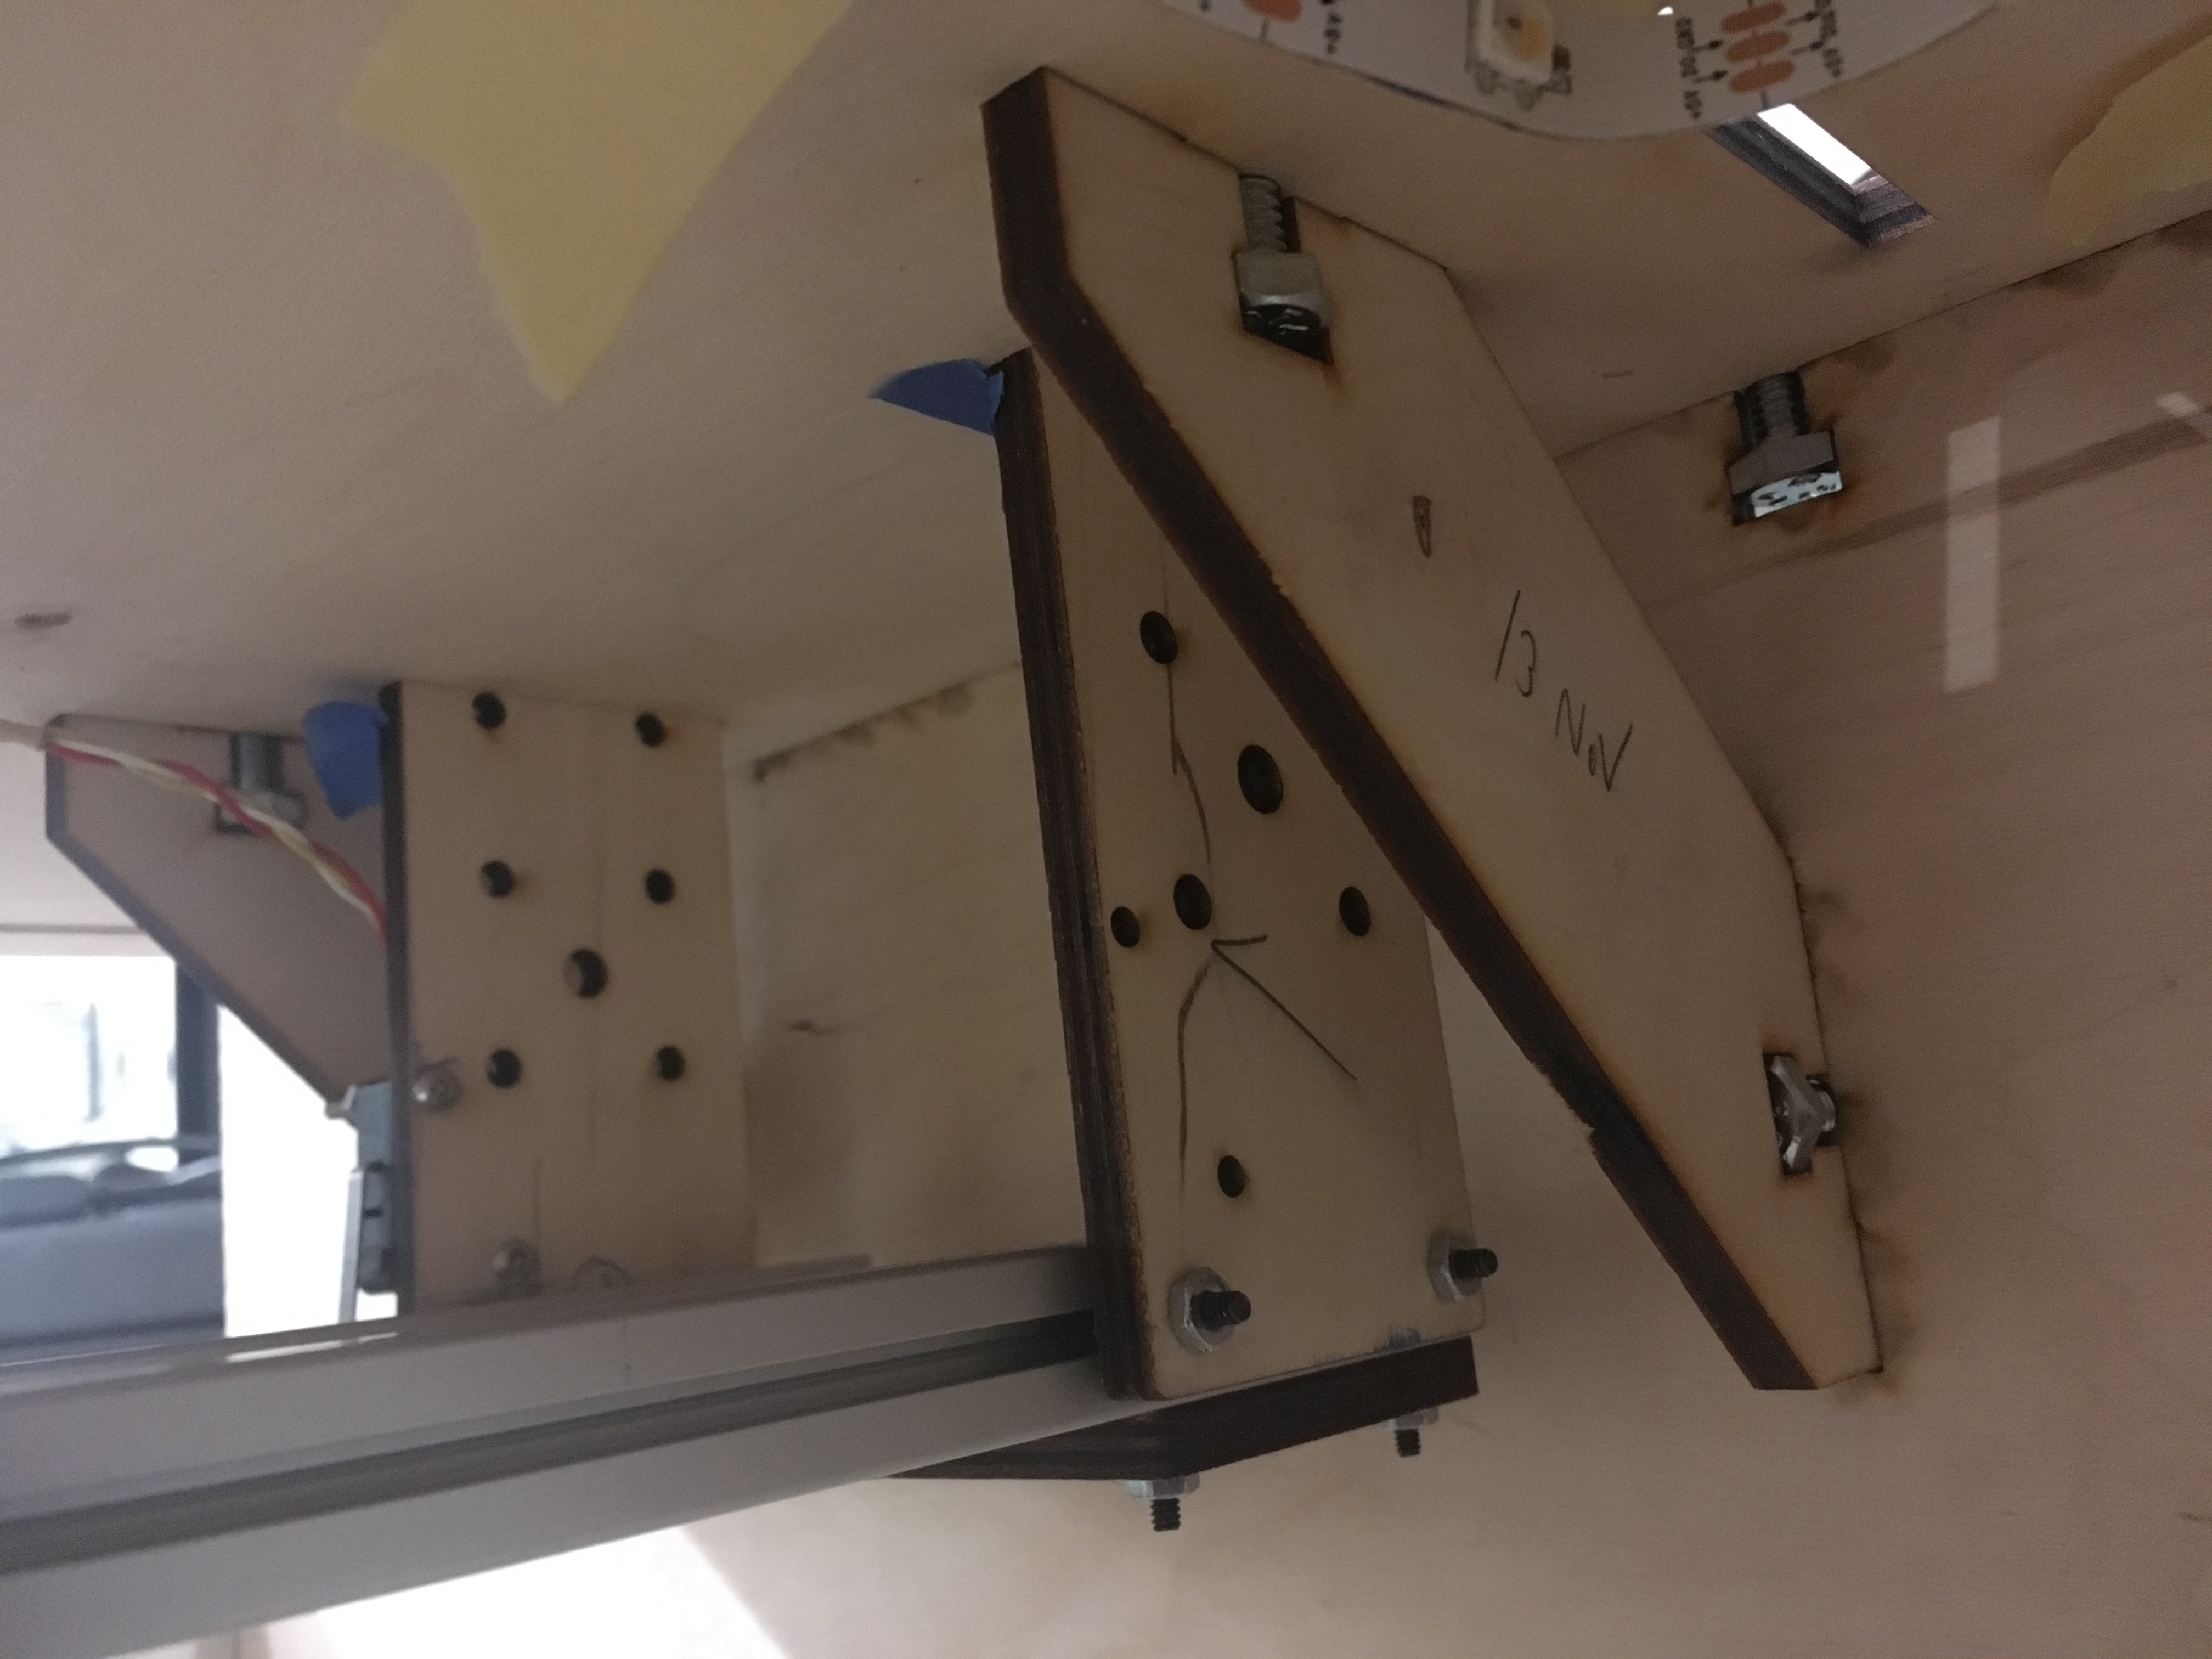
Figure 2. Container corner support pieces and mounts used for attaching cloud track to ceiling.
The container of this piece was originally built with the intent of implementing three artificial clouds (though in the end, only one was achieved). Note that all wood pieces seen in photo documentation are laser cut from 6mm plywood. The backing of the box was created from 3mm mirrored acrylic in order to allow users to see their body position in relation to the clouds. Because the box needed to be large enough to hold the three tracks on which the clouds would travel and to be sturdy enough to not collapse, support pieces were placed in between top and side planes of the box (see Figure 2). In addition to this, planes of the box were mainly held together by captive screws and fitted tabs.
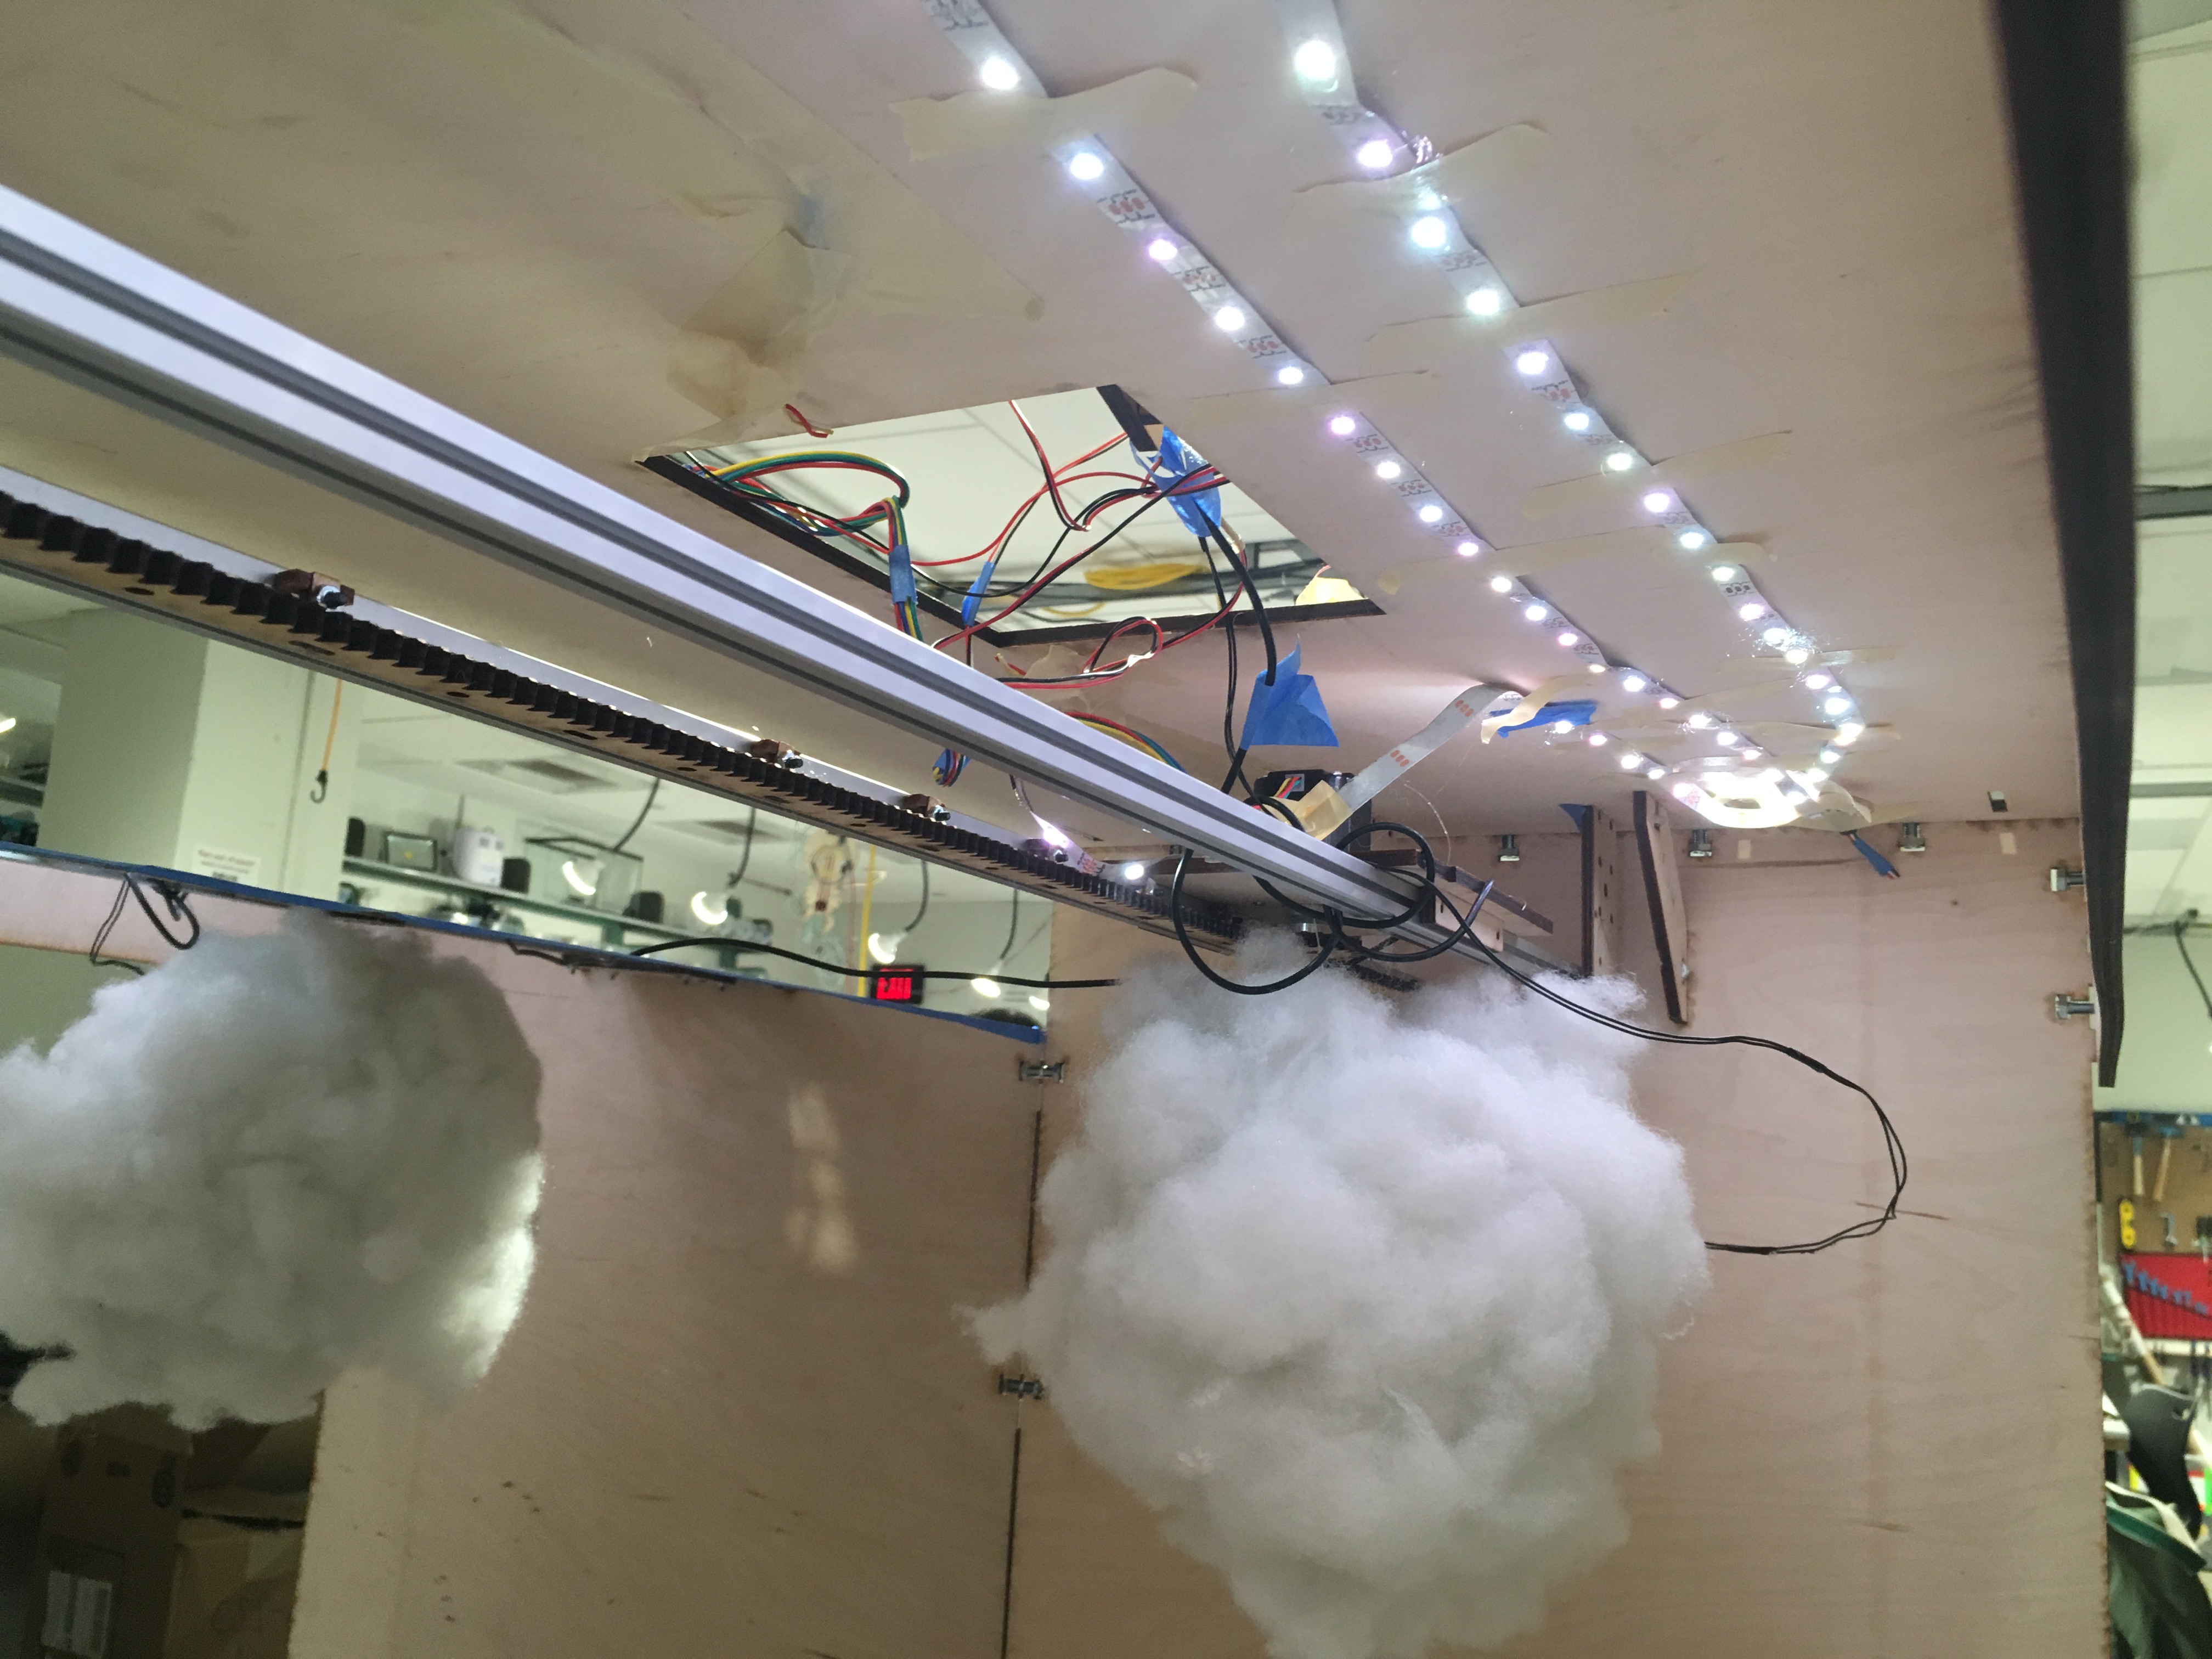 Figure 3. Inside project, view of top panel. Cloud travels by using a base that moves along an aluminum extrusion track. LEDs adhered to top are also visible.
Movement of the cloud was achieved by creating a base (to which the cloud is attached) that utilized a stepper motor to travel along a pair of one-meter long aluminum extrusions (see Figure 3). The motor was attached to a laser cut gear, which allowed movement along a spur rack attached to one of the aluminum extrusions (see below in Figure 4). This mechanism was created based on original designs from our instructor, Garth Zeglin, though several modifications were made to accommodate gravity, the size of the project, and to reduce friction. The artificial cloud was fabricated by filling a plastic bag full with polyester fiber stuffing, then hot gluing more stuffing to the outside. The LEDs were coded to display a pattern when the flex sensor showed a change from its initial value. Because the flex sensor had a tendency to become permanently bent, the Arduino code was created such that the initialized value could be updated if the sensor was damaged. A hole was cut into the bag for placement of the flex sensor and the cloud itself was attached to the base with fishing line.
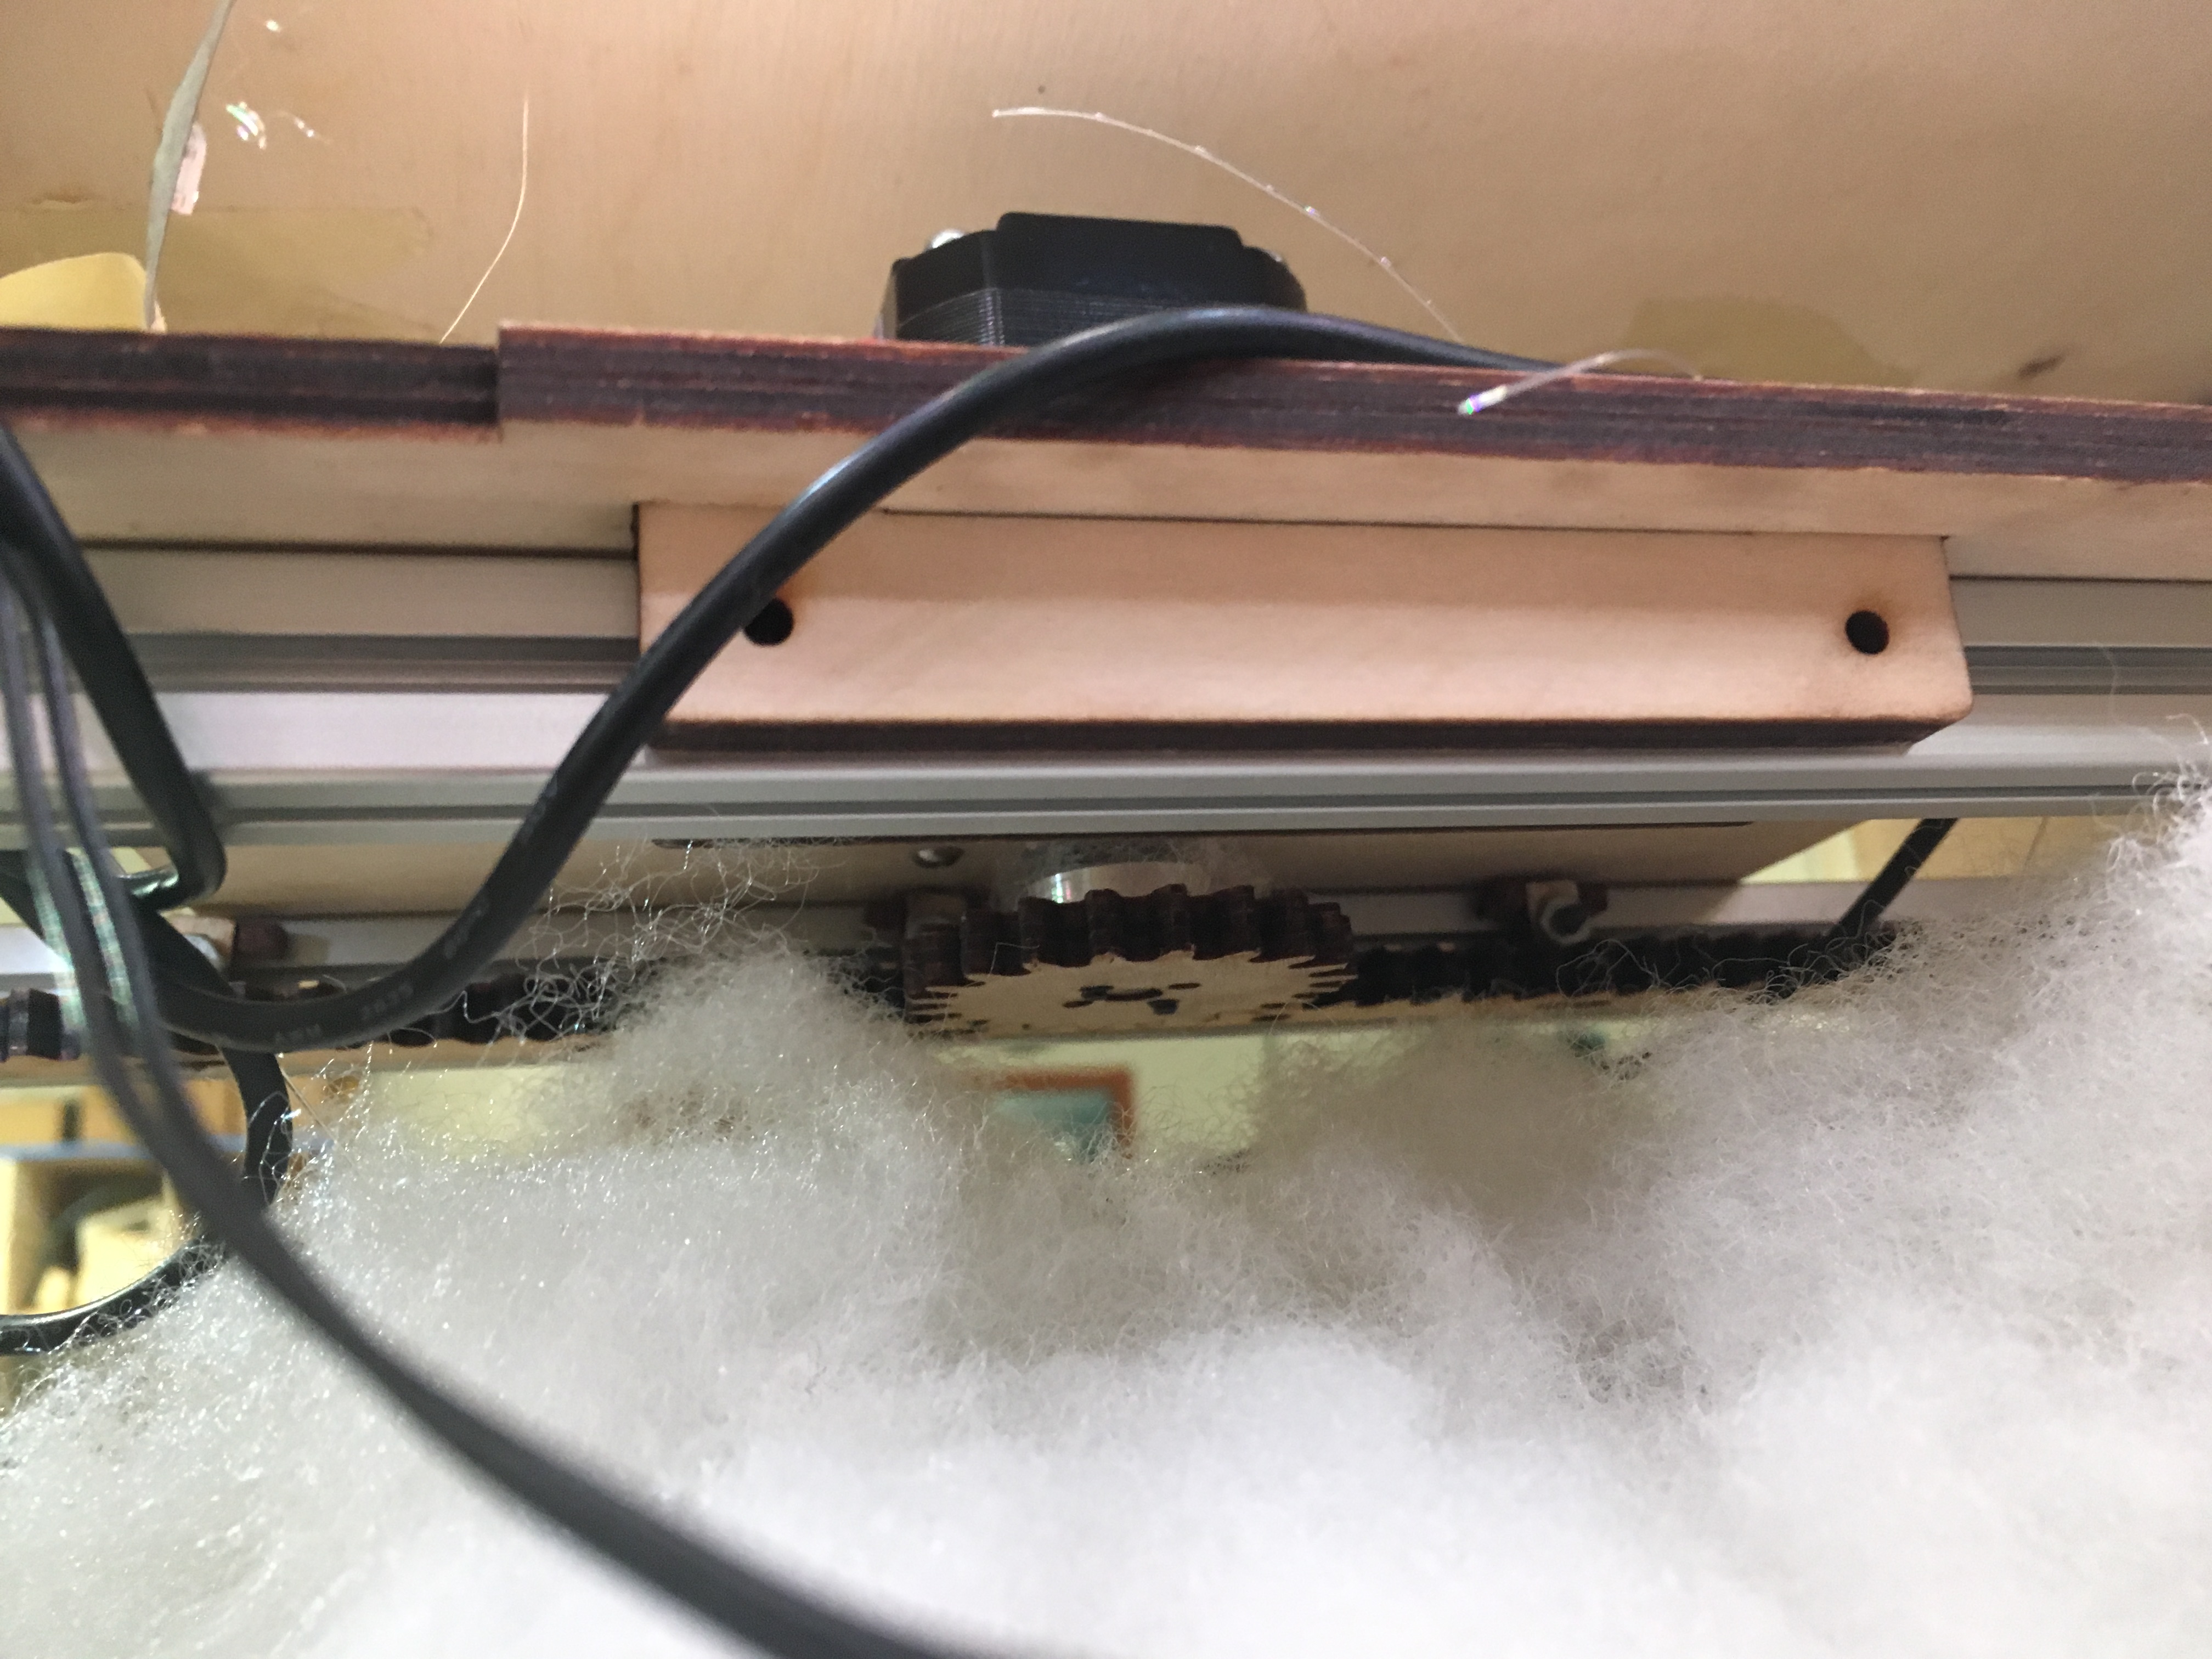
Figure 4. Close-up of stepper motor base and gear/spur rack mechanism.
The project utilized two Arduinos to help improve overall project latency. One of the Arduinos was used solely for detecting input from a flex sensor in the artificial cloud and modulating the LEDs to produce a lightning-like effect. The other Arduino was used to connect to a Raspberry Pi tracking the user’s face. The Raspberry Pi used OpenCV and Haar Cascades to detect all of the faces in a given frame. It then used the MOSSE tracking algorithm to track the largest face that was found in the frame. If the tracking algorithm could no longer track the face, the program resorted back to detecting faces. The use of both tracking and threading helped to greatly reduce latency and increase the overall fps. The program then found the x position of the center of the face and compared it with the current position of the stepper motor sent by the Arduino. If the stepper motor needed to change direction, the Raspberry Pi would send an integer corresponding to this change in direction. Otherwise, the stepper motor would continue to move until it reached the end of the rail. To control the stepper motor, we used the AccelStepper library which does not include delays, allowing the cloud to react to the messages sent by the Arduino almost immediately.
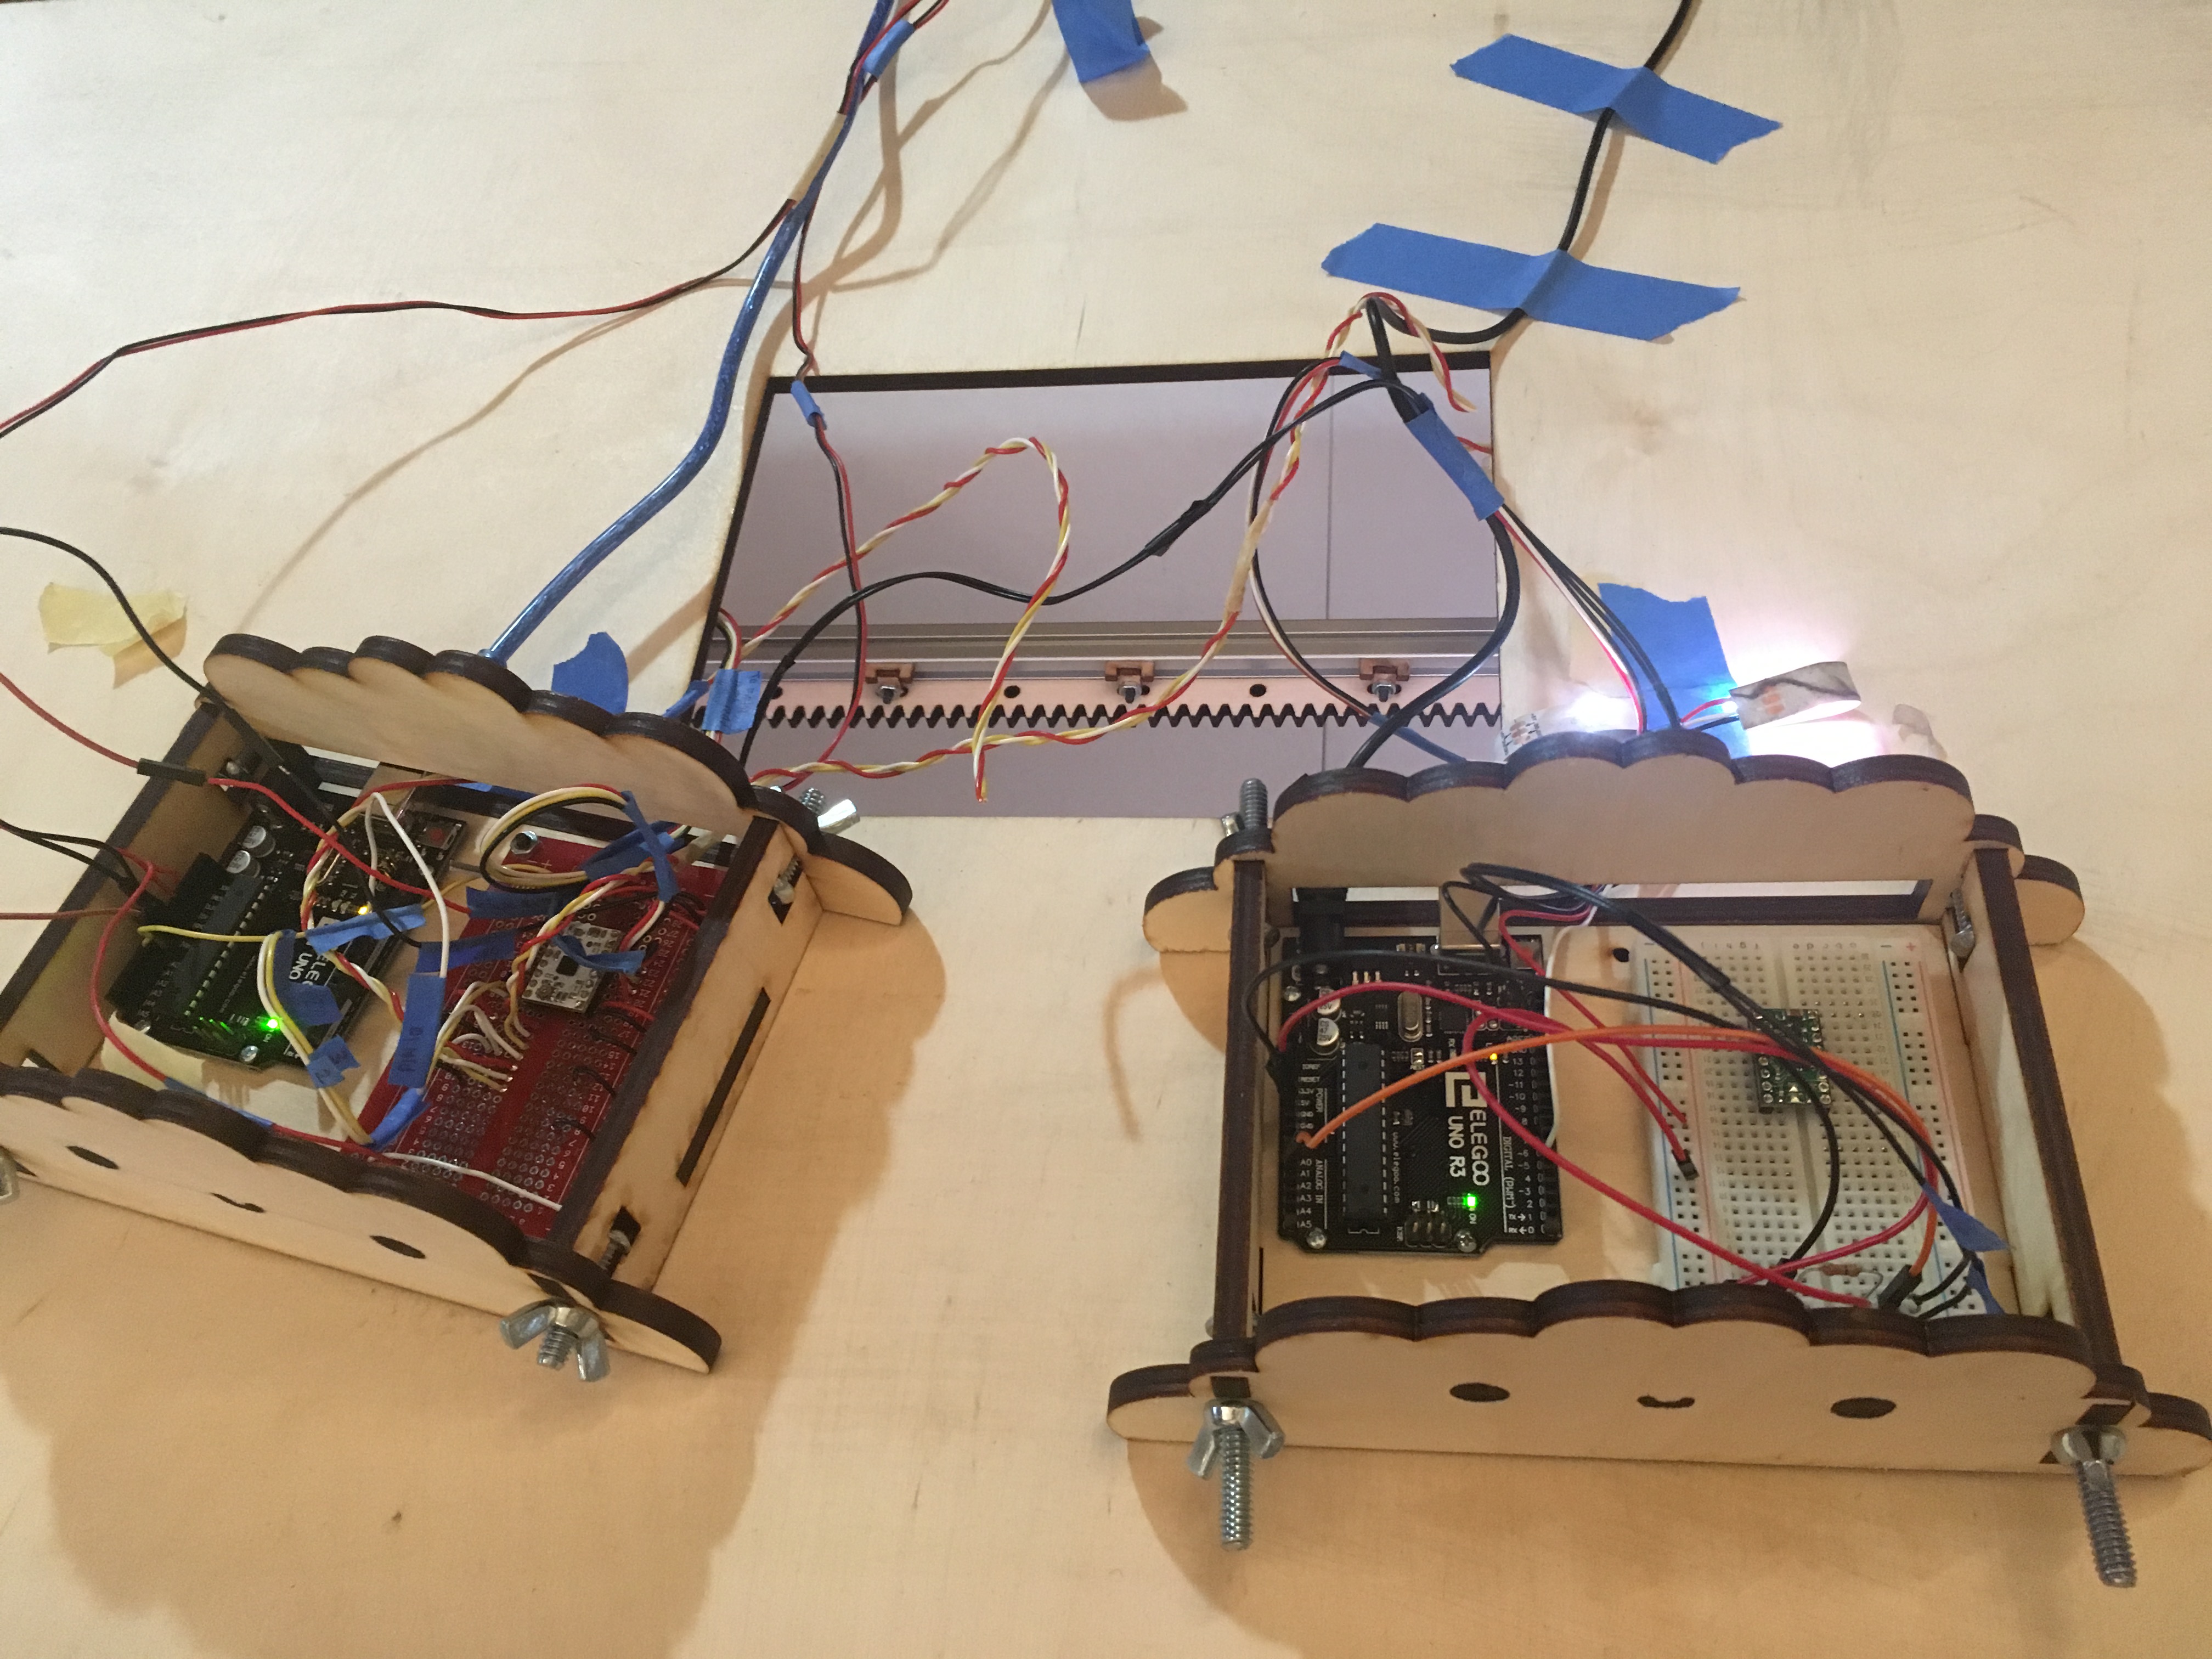 Figure 5. Laser cut clouds on top of project allowed for easy access to circuit. ‘Smilies’ were applied to the fronts of these containers to enhance user experience and boost morale of the build team.
A camera was connected to the Raspberry Pi for input to the face tracking program, which utilized the OpenCV library. The camera needed to be mounted in such a way that the artificial cloud would not come into view of the camera and to increase the area over where users’ faces could be tracked by the Rpi program.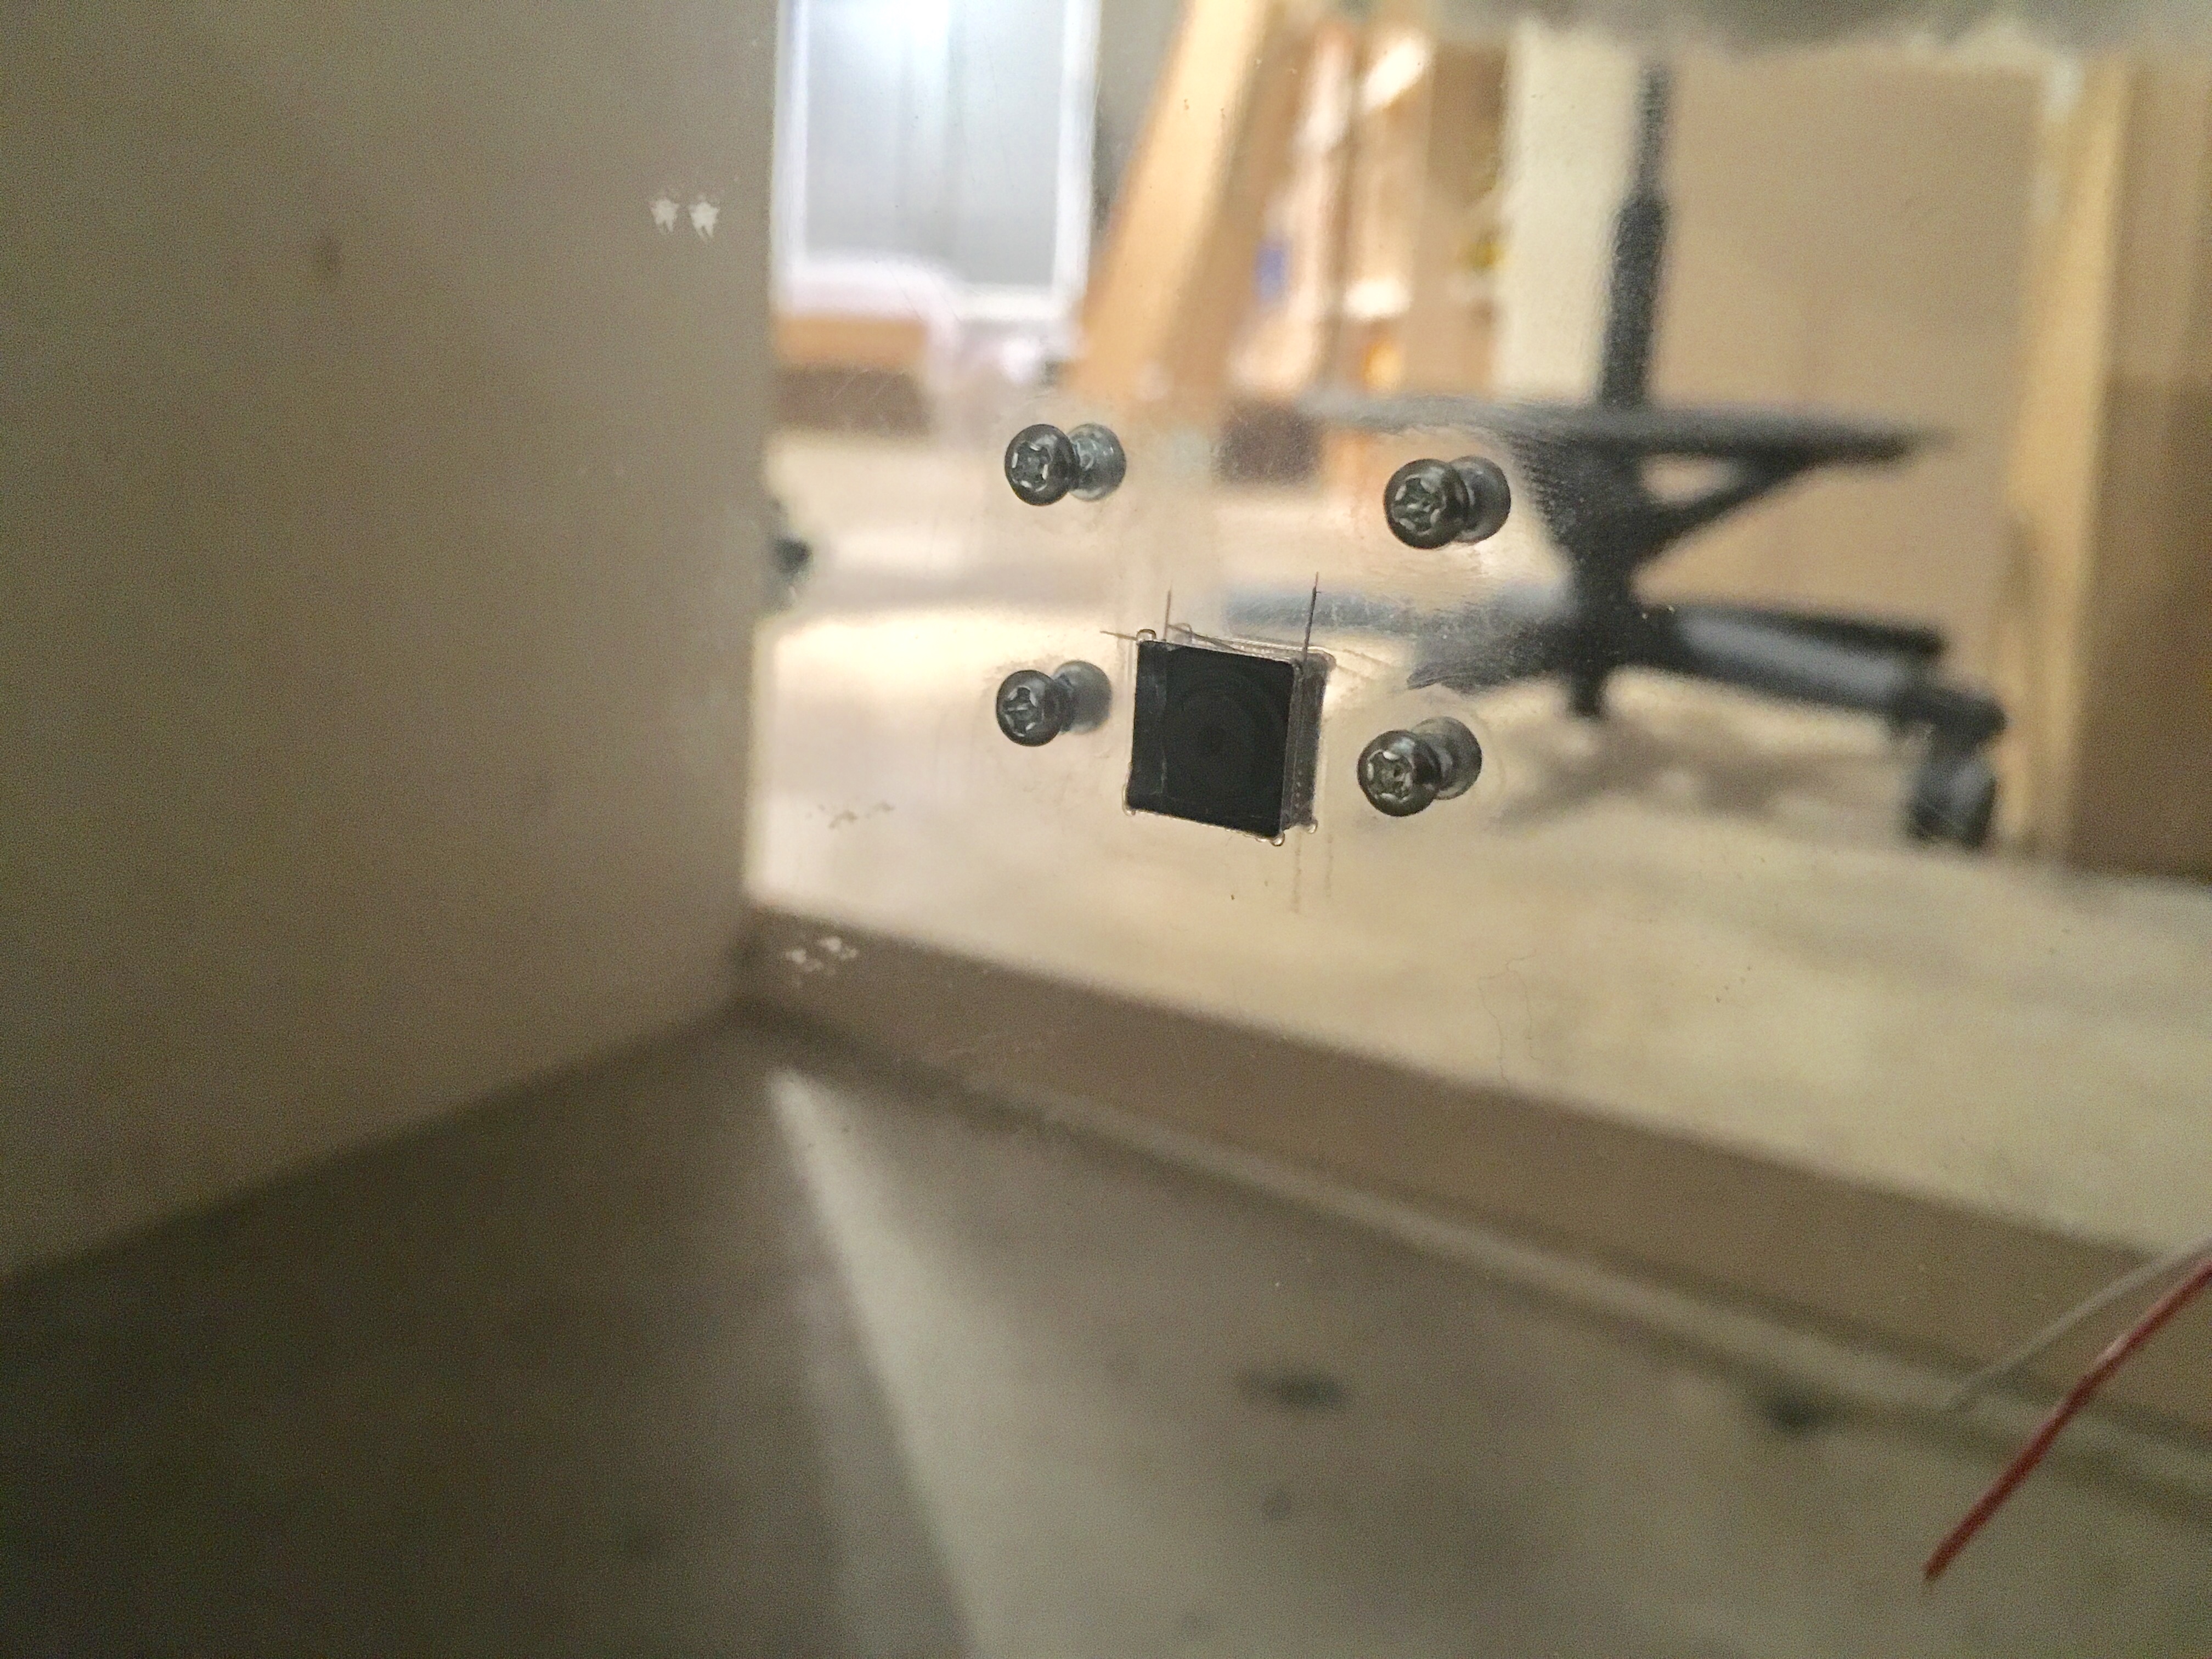
Figure 6. Raspberry Pi camera mount in mirrored acrylic backing.
Outcomes
The cloud in our final project successfully followed the user and lit up according to our objectives. Although there were some bugs which affected the experience for some users, the majority of users were patient enough to experiment with the movement of the cloud and recognized that the cloud was following them. We found that interactions with the cloud were not greatly affected by the presence of a parent as the child could understand the premise of the project and interact with it by themselves. If a parent was present, they would generally explain how the cloud’s movements were controlled by face tracking.
Originally, we had intended for the user to control the position of the cloud by pushing it away rather than for the cloud to follow the person. However, we found that because children wanted to test the outcomes of their own actions, they needed to perceive a result that made sense and was nearly immediate. Consequently, the level of precision required for children to perceive that they were controlling the clouds would not be possible given the time constraint. As a result, after the Children’s School demo, we switched the main objective of the project so that the cloud would follow rather than move away from the user. This allowed for a certain margin of error in the position of the stepper motor while making it easier for children to connect the abstract relationship between the cloud’s movements and their movements. To some extent, however, the problem of requiring immediate, reliable results in order to fulfill the child’s objectives of autonomy and industry carried through to final work, though they were greatly reduced. During the final demo, we found that the entire interaction was greatly dependent on the child’s first impression. If the child moved and the cloud did not move with them, they quickly lost interest. However, if the cloud moved more reliably, this generally led to a much longer, more meaningful interaction. Over more iterations, this problem could be further mitigated by making the tracking algorithm more reliable and making the LEDs more pronounced.
Another aspect of the project that greatly contributed to the quality of the interaction but that we had not initially considered were the aesthetics of the project. From the first Children’s Museum demo, we found that children were more hesitant to interact with the work if it did not appear finished. Although we accounted for this in the final demo by creating the box structure, hiding a majority of the wiring, adding the LEDs, and adapting the code so that the box could face the room rather than the wall, we think that keeping with the context of the museum and adding more eye-catching features would have made the project appear even more approachable. In this case, a coat of bright paint or music to hide the harsh sounds of the motors would have made the project more appropriate for a children’s museum.
Contribution
Both of us contributed to the overall design of the project and the electronics.
Jessica contributed to the Arduino/Raspberry Pi code associated with the movement of the clouds and the implementation of the stepper motor.
Jen contributed to the design of the box, rack/pinion/gear mechanism, code and implementation of flex sensor and LEDs.
Videos
Demonstration of the cloud’s movement in response to user’s face:
Demonstration of ‘lightning’ in response to handling cloud:
Citations
- Slider and Rail System
- Motor Driver Tutorial
- OpenCV References: (1), (2), (3)
- AccelStepper Library
- LED Tutorial
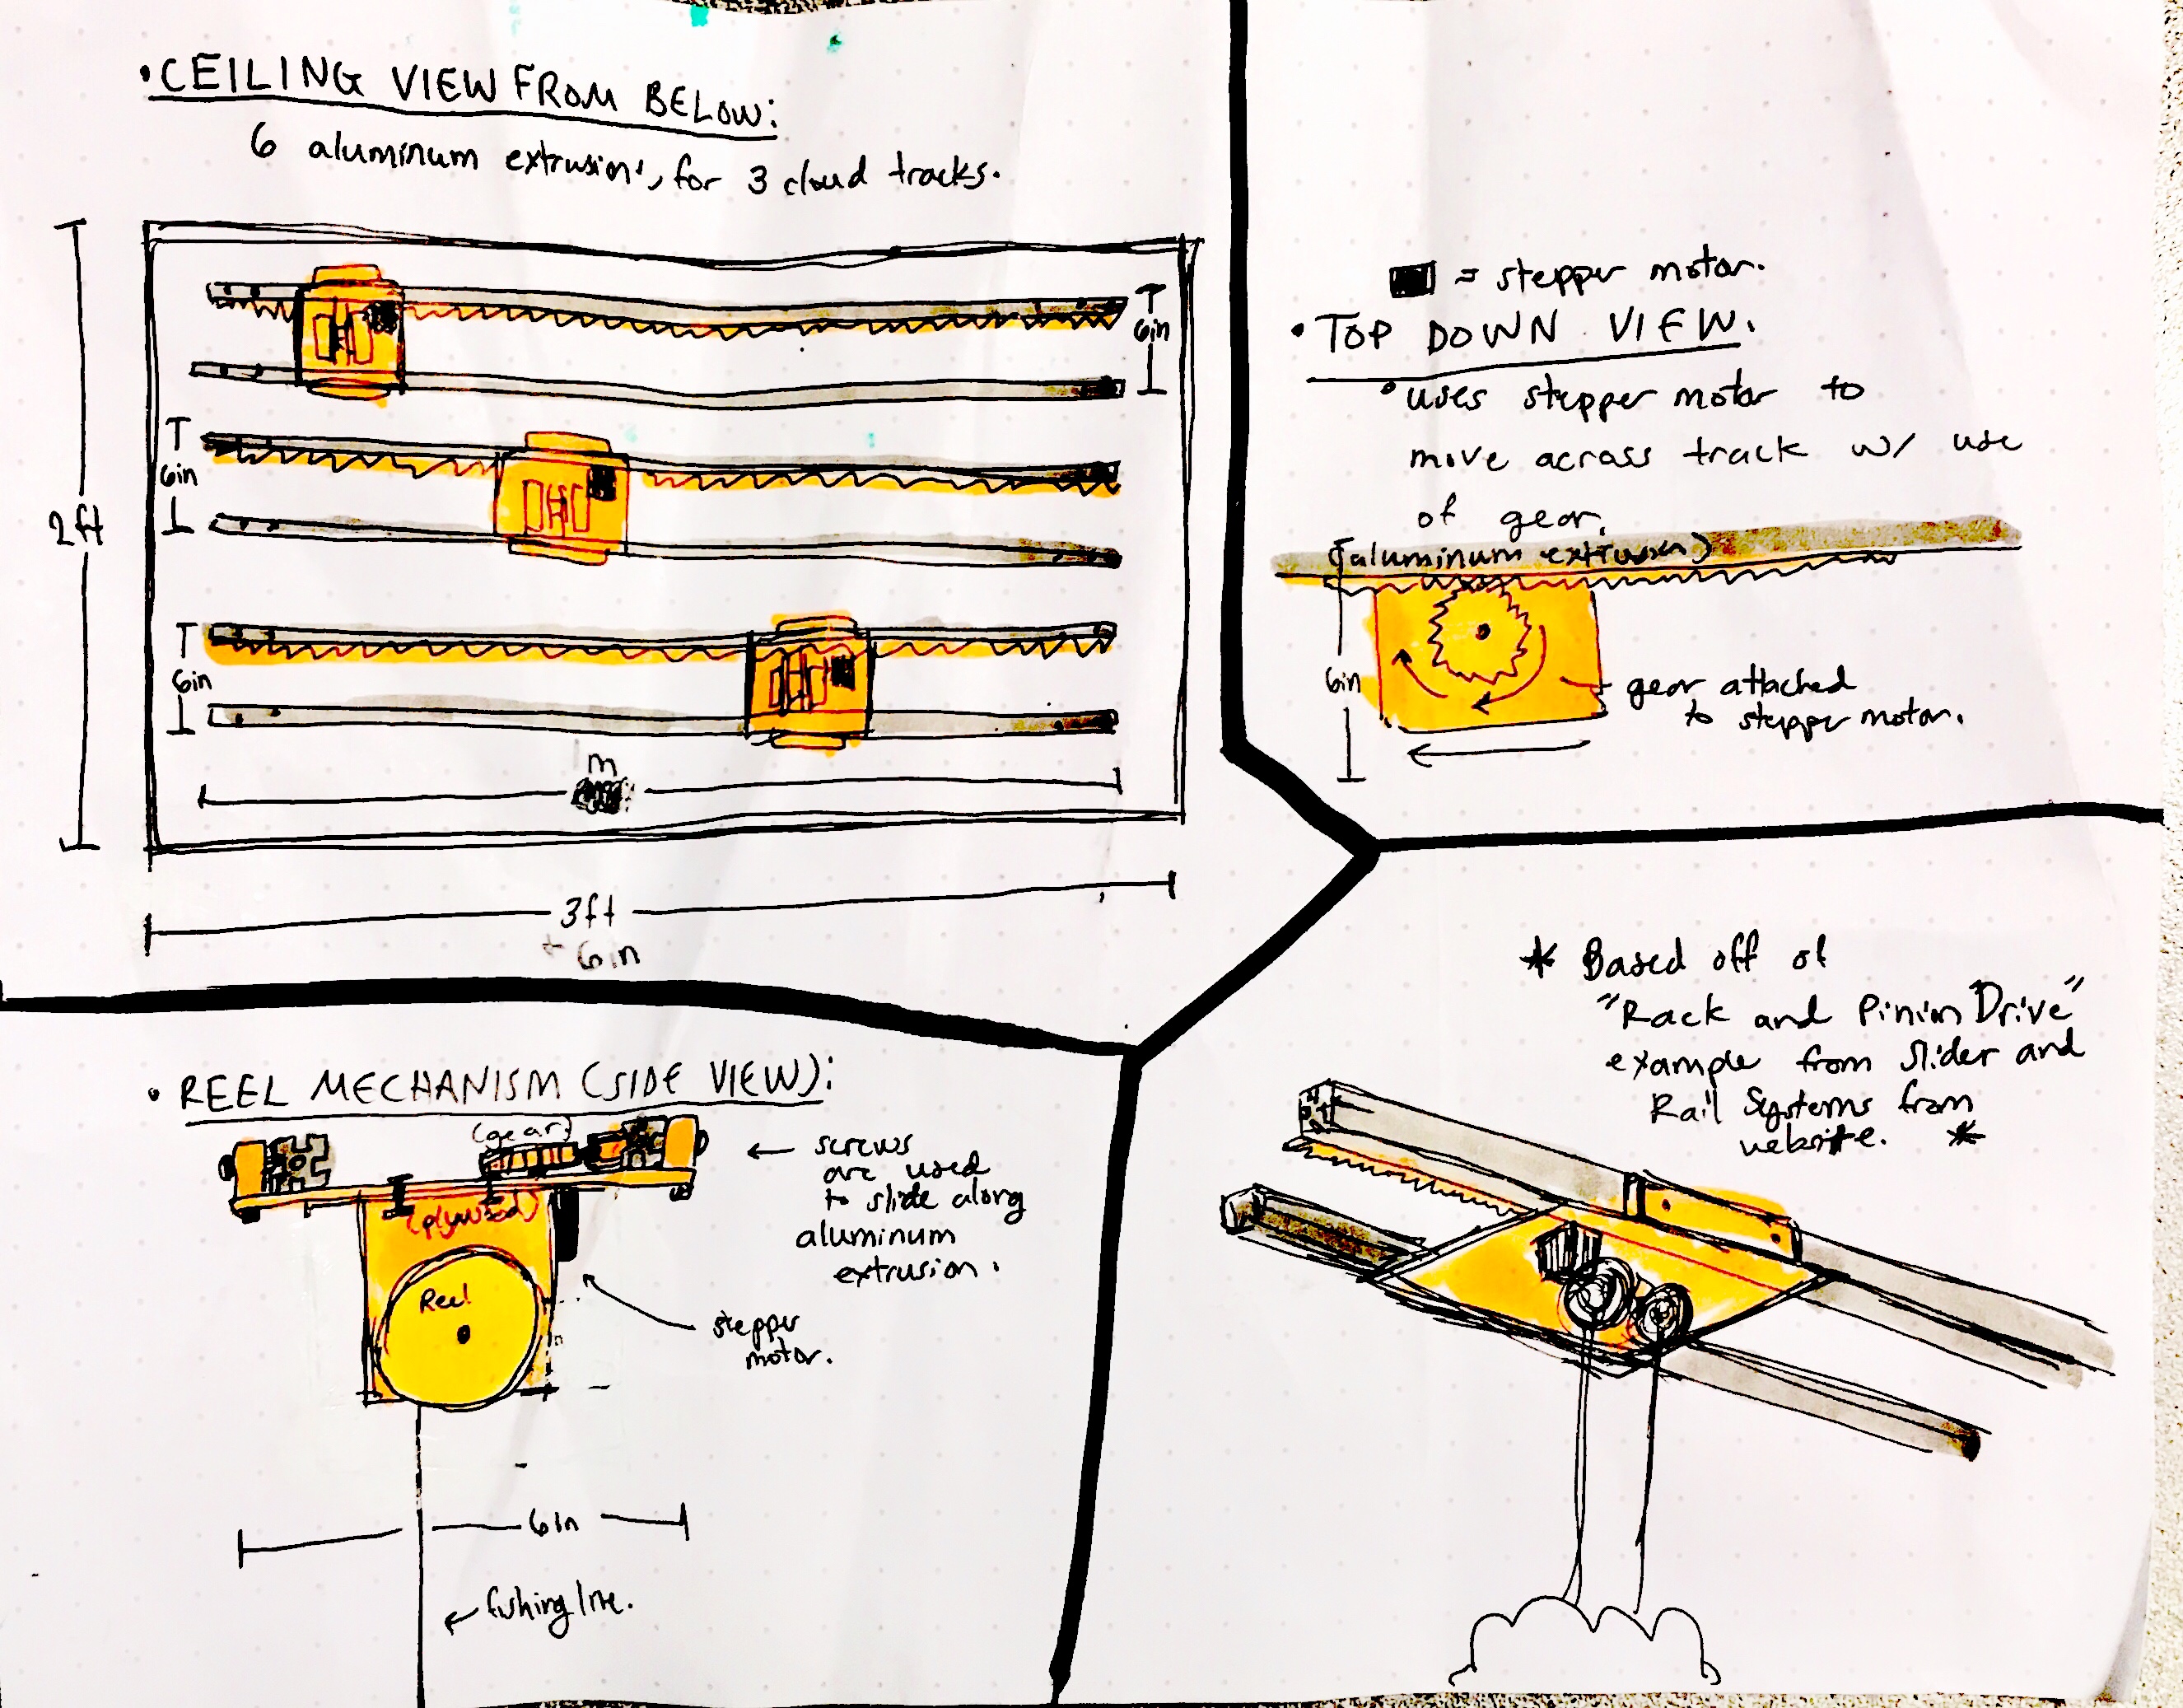
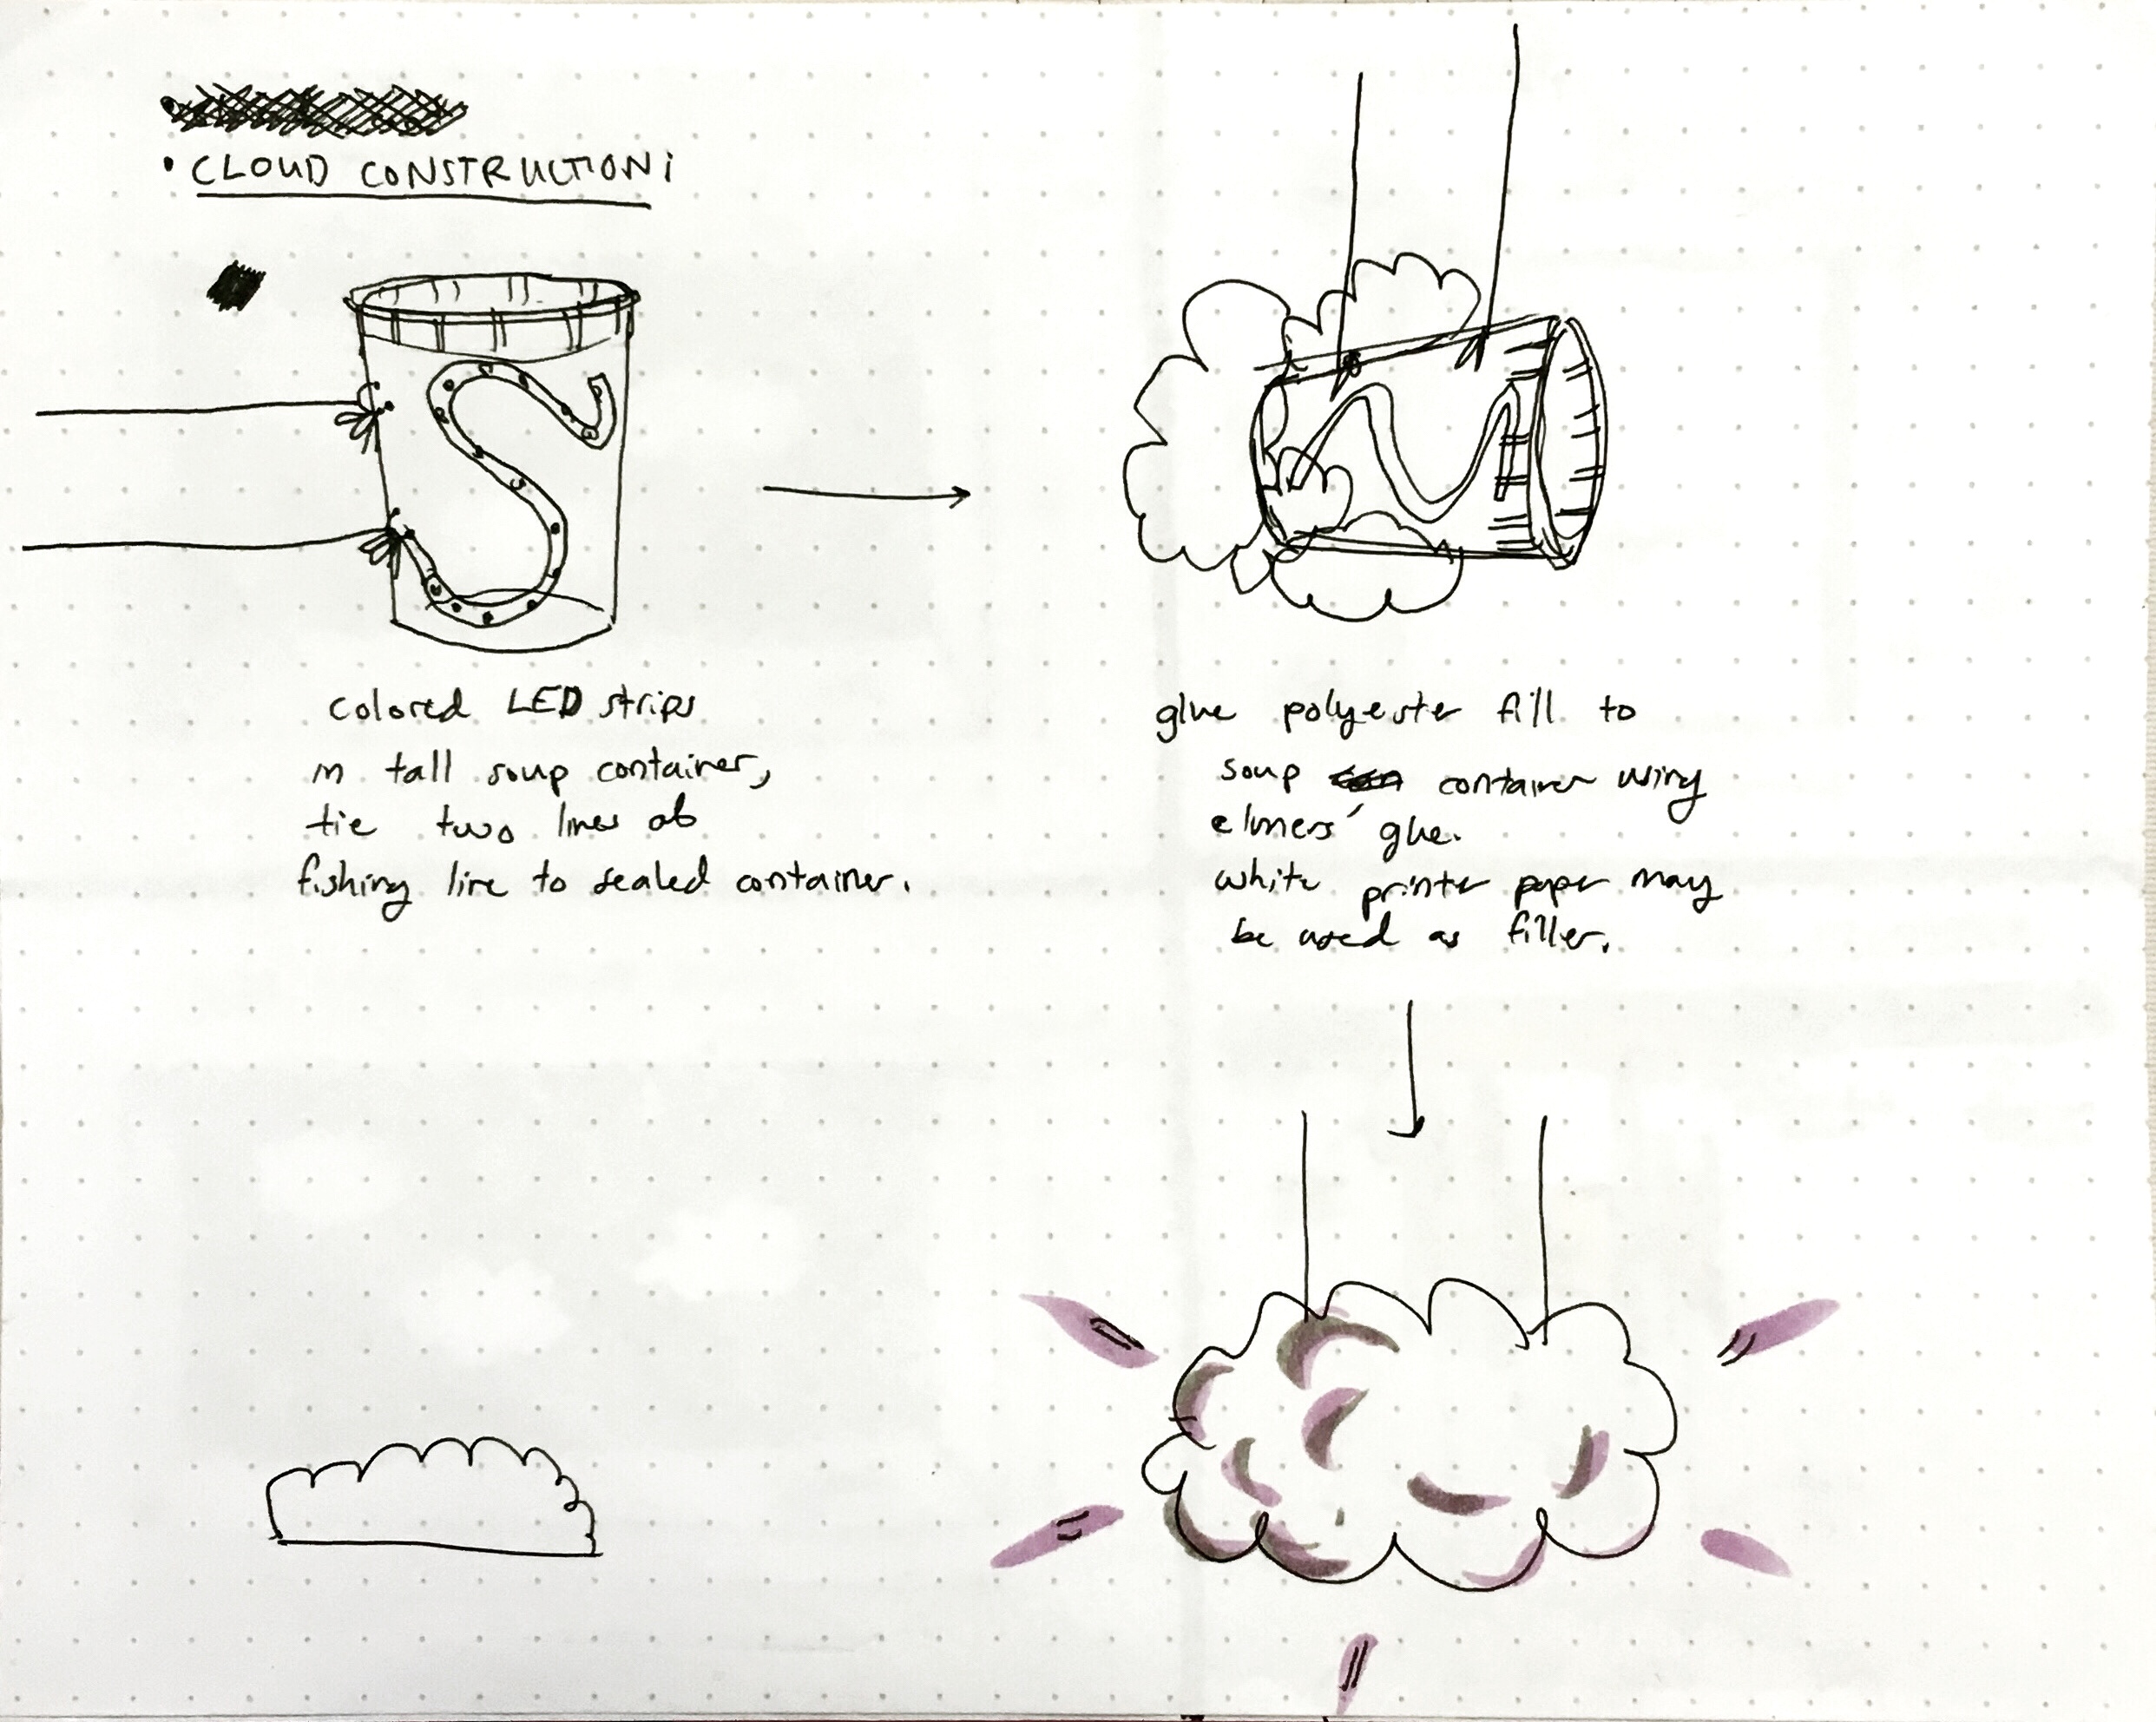
Supporting Material
(Note that these drawings were produced between beginning and intermediate project progress reports, and do not reflect the final experience. Many aspects in the following drawings were changed/excluded in later interactions of the project.)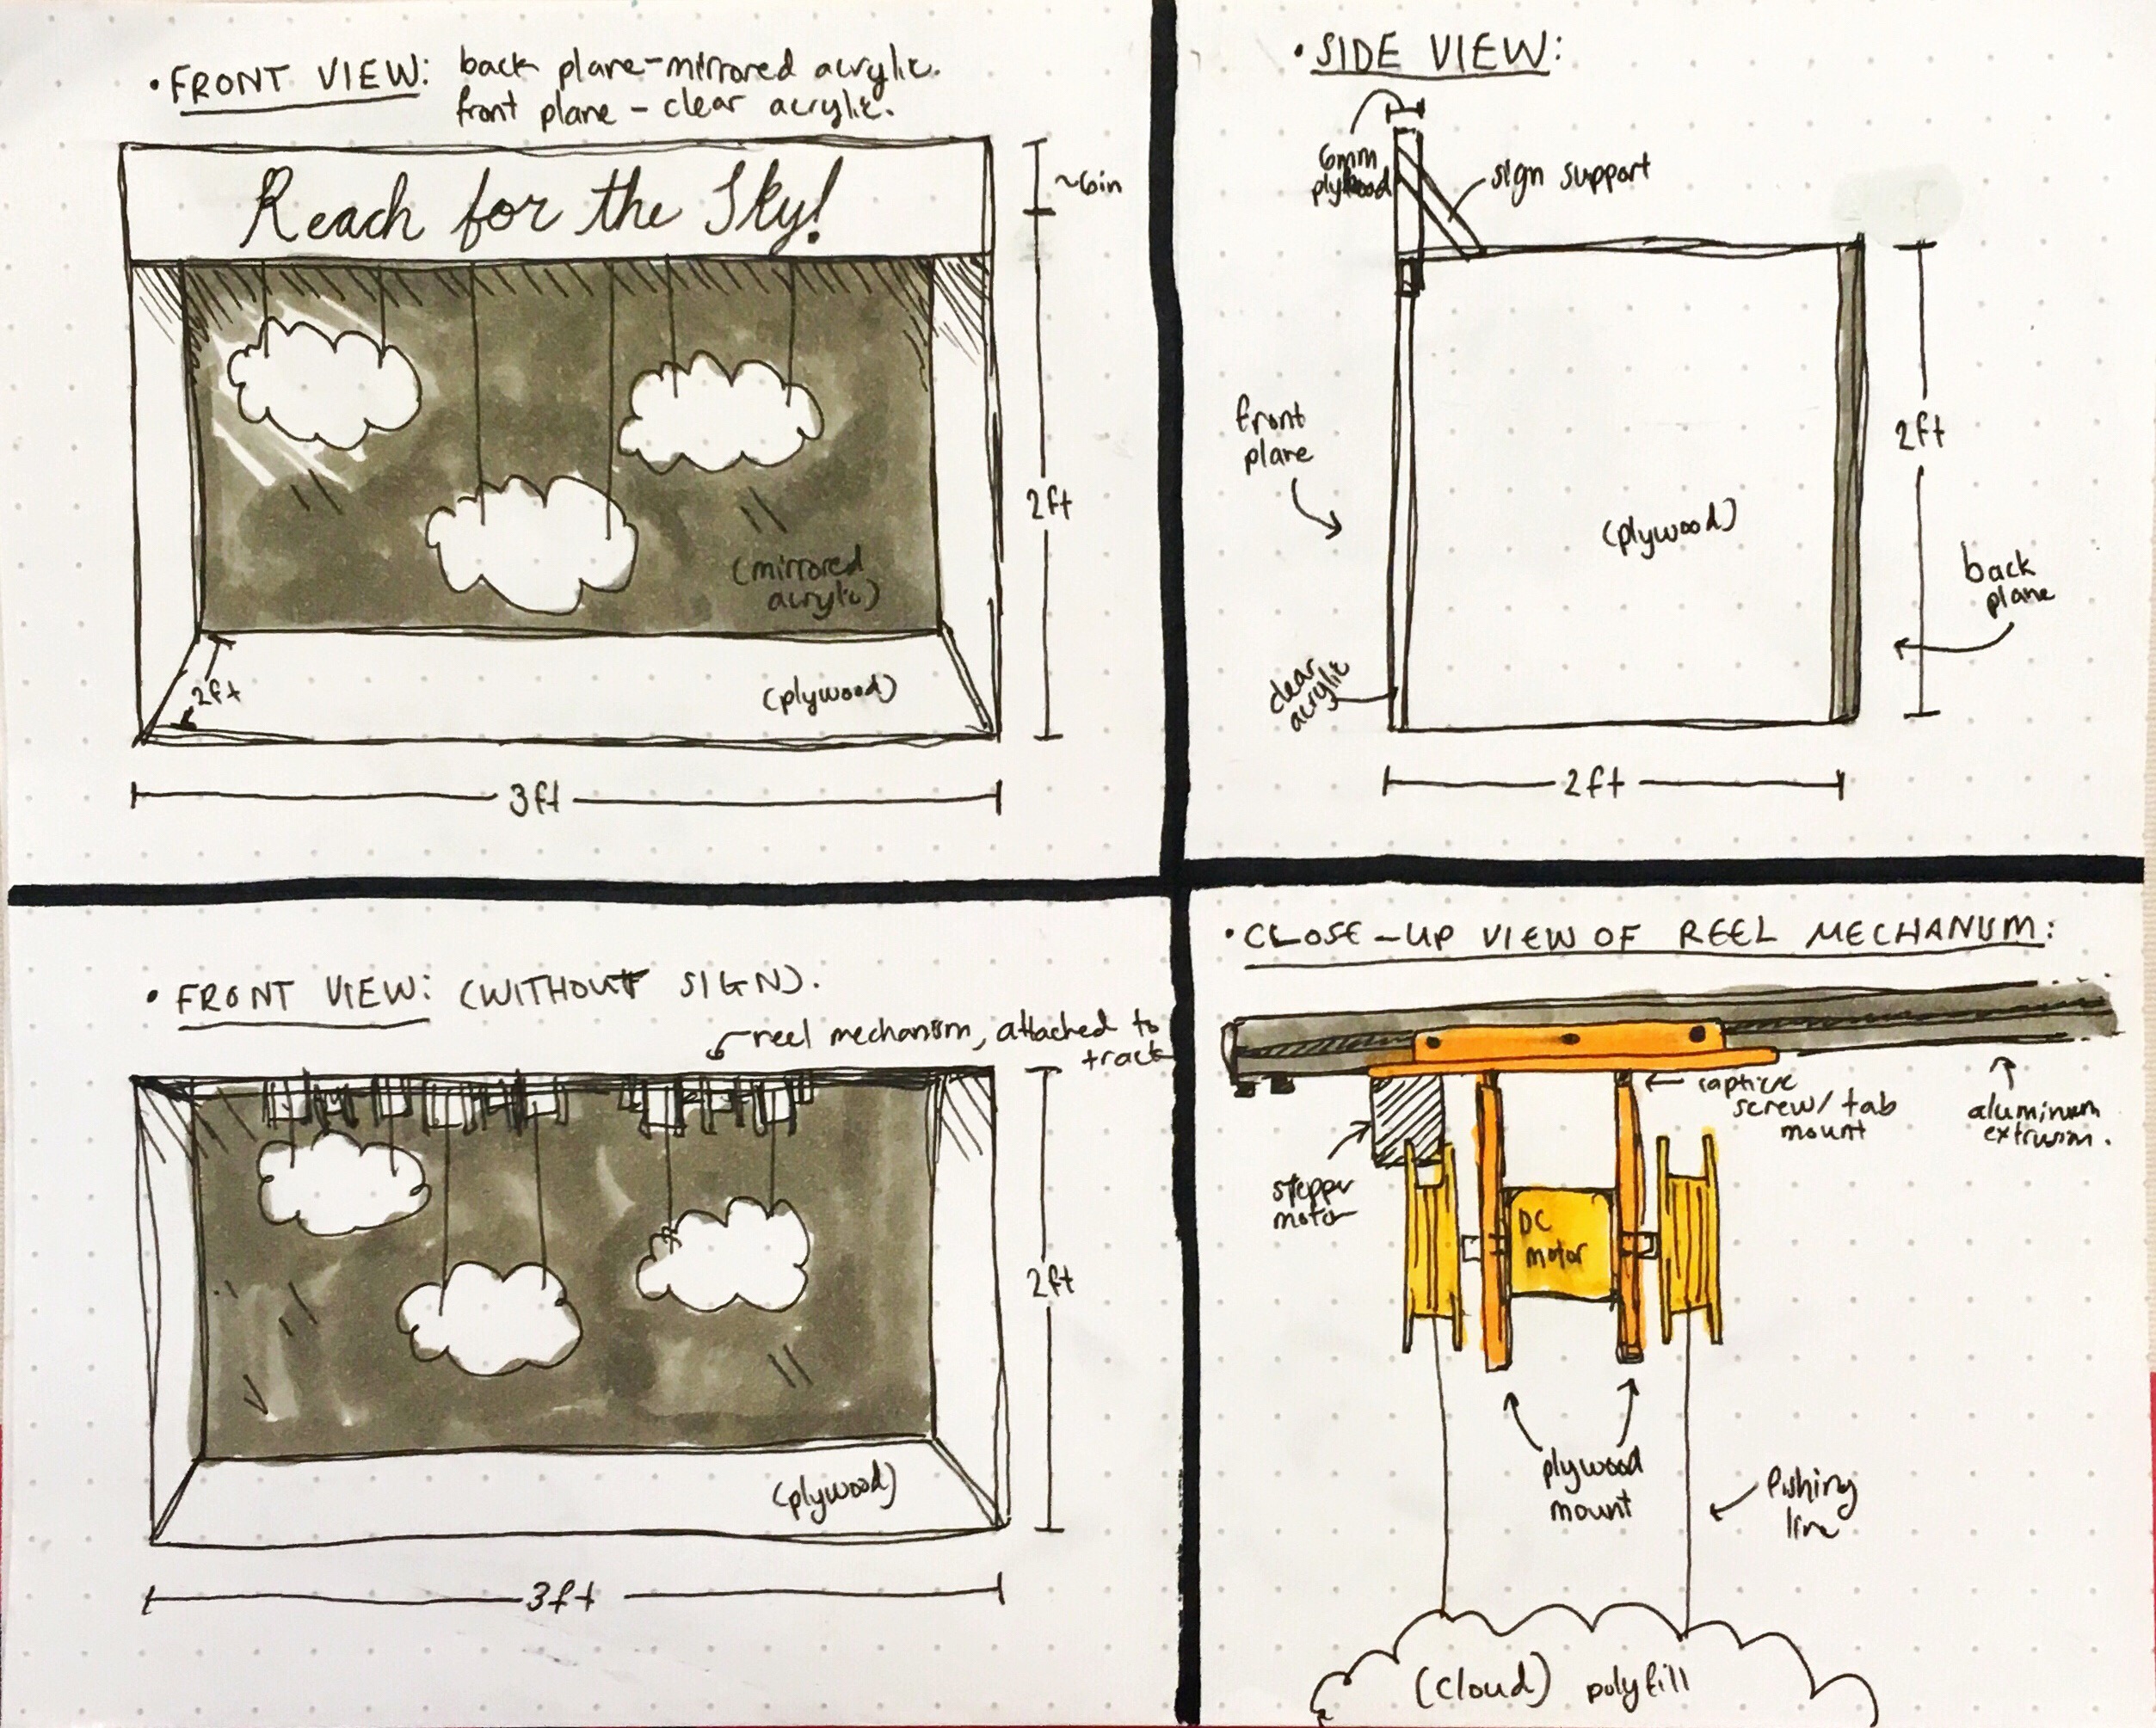
Leave a Reply
You must be logged in to post a comment.