For the second demo, I wanted to create a small pinball machine with two switches to control two servos that act as “flaps”
Brainstorming
For brainstorming, I drew what I visualized for the project, and estimated the dimensions.

After visualizing the “pinball machine”, I CADed the files on Solidworks. Below are the files for the parts and assembly files.
Implementation
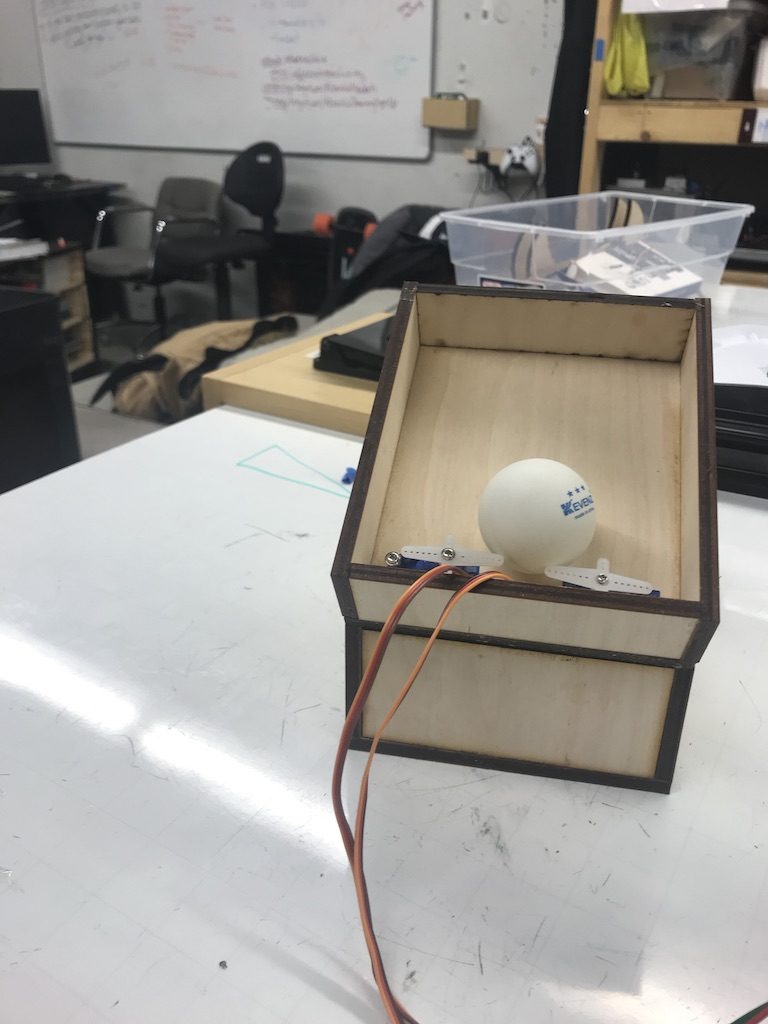
After lasercutting the individual pieces, I spent an hour filing the holes in the top, as I underestimated the size of the servos. I then glued all the parts together and screwed the servos into the top.
I then built the circuit for the servos and the switches for each servo.
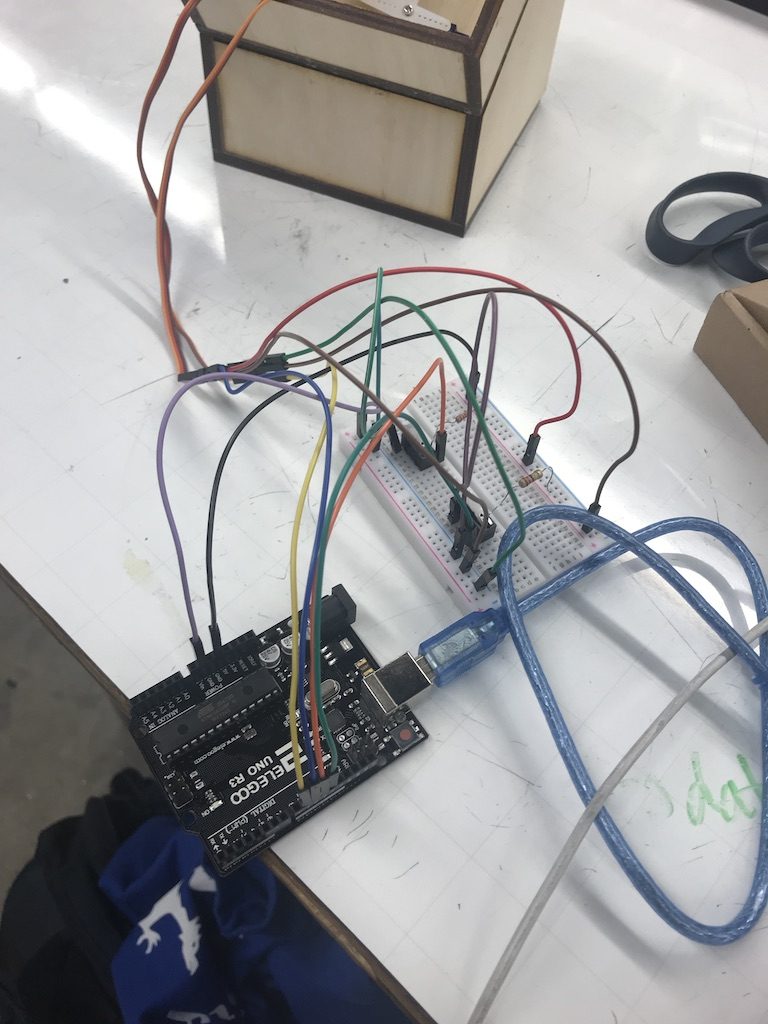
The circuit board, servos, and the structure together created this result:
Obviously, the ball did not travel as well up as I wanted it to go. This was partially due to the steep angle of the structure and also due to the lack of speed of the servos. In the future, I would want to make the structure have a less steep incline.
Code
#include <Servo.h>
const int buttonPin1 = 11; // the number of the pushbutton pin
const int buttonPin2 = 12; // the number of the pushbutton pin
// variables will change:
int buttonState1 = 0; // variable for reading the pushbutton status
int buttonState2 = 0; // variable for reading the pushbutton status
Servo servo1;
Servo servo2;
void setup() {
// initialize the LED pin as an output:
pinMode(ledPin, OUTPUT);
// initialize the pushbutton pin as an input:
pinMode(buttonPin1, INPUT);
pinMode(buttonPin2,INPUT);
servo1.attach(9);
servo2.attach(10);
}
void loop() {
// read the state of the pushbutton value:
buttonState1 = digitalRead(buttonPin1);
buttonState2 = digitalRead(buttonPin2);
if (buttonState1 == HIGH) {
servo1.write(150);
} else {
// turn LED off:
servo1.write(80);
}
if (buttonState2 == HIGH){
servo2.write(110);
}
else{
servo2.write(180);
}
}
Leave a Reply
You must be logged in to post a comment.