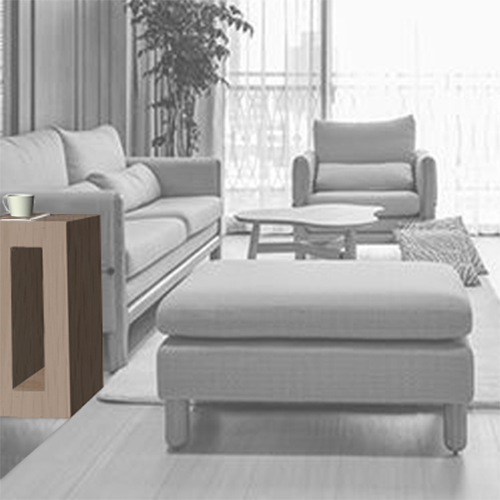
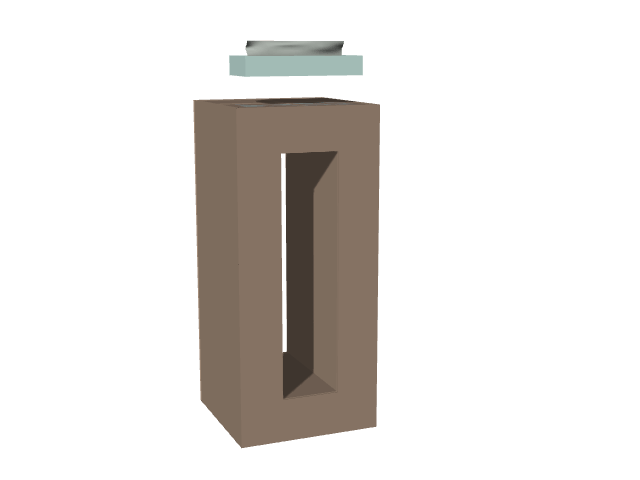
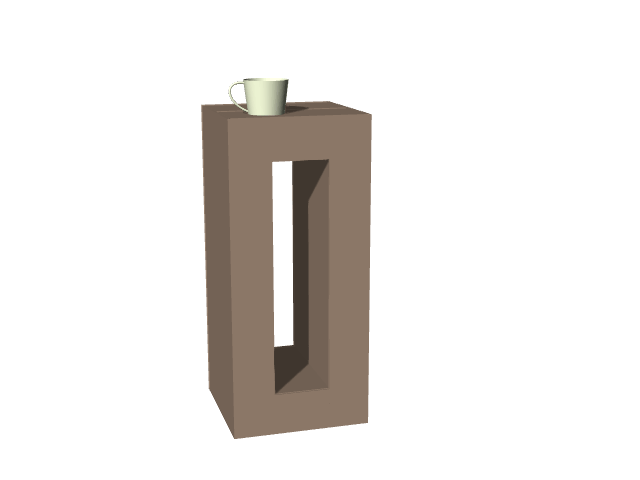
Imagine waking up, creating a cup of coffee and going to the living room to watch some TV. You would place the cup of coffee on elevate, which would lift your coffee up and provide a backlight. It’s easy to forget your mugs around the house, so elevate not only physically lifts your mug but lifts it to a higher level of importance. The goal is to make the user more conscious of their belongings, while also creating an aesthetic piece of furniture that users would want to use and interact with.
The goal of Elevate is to create a soothing and calming experience for the user, while also giving the user an indirect sense of companionship. Since the beginning of the pandemic, many individuals have remained quarantined from social interaction. Elevate aims to address the lack of interaction by providing a soft, subtle presence in everyday life. Whether it is your morning coffee, or an afternoon book, Elevate acknowledges your actions and highlights your daily routines.
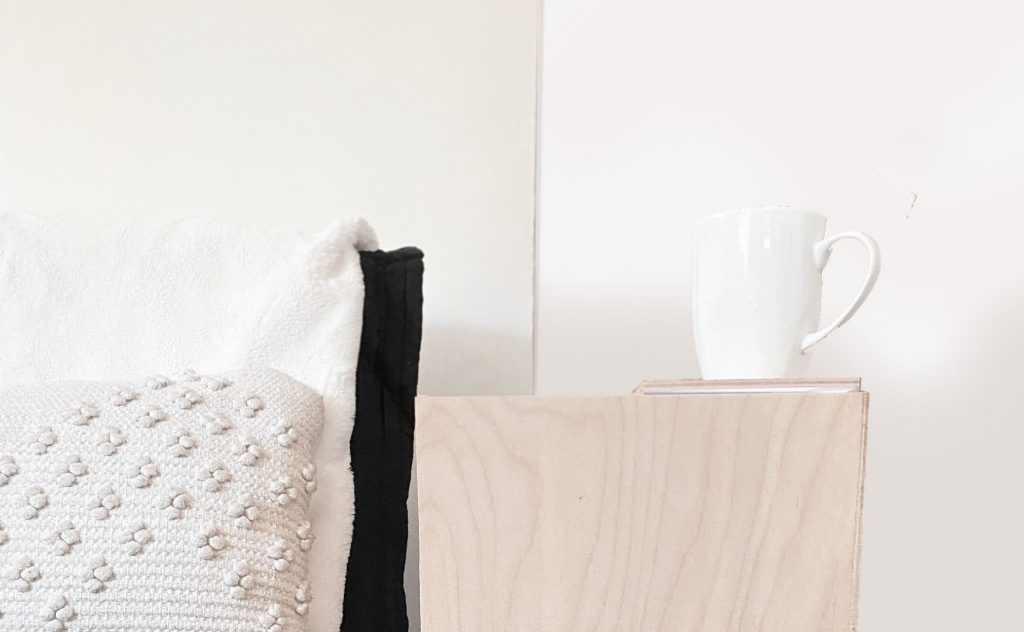
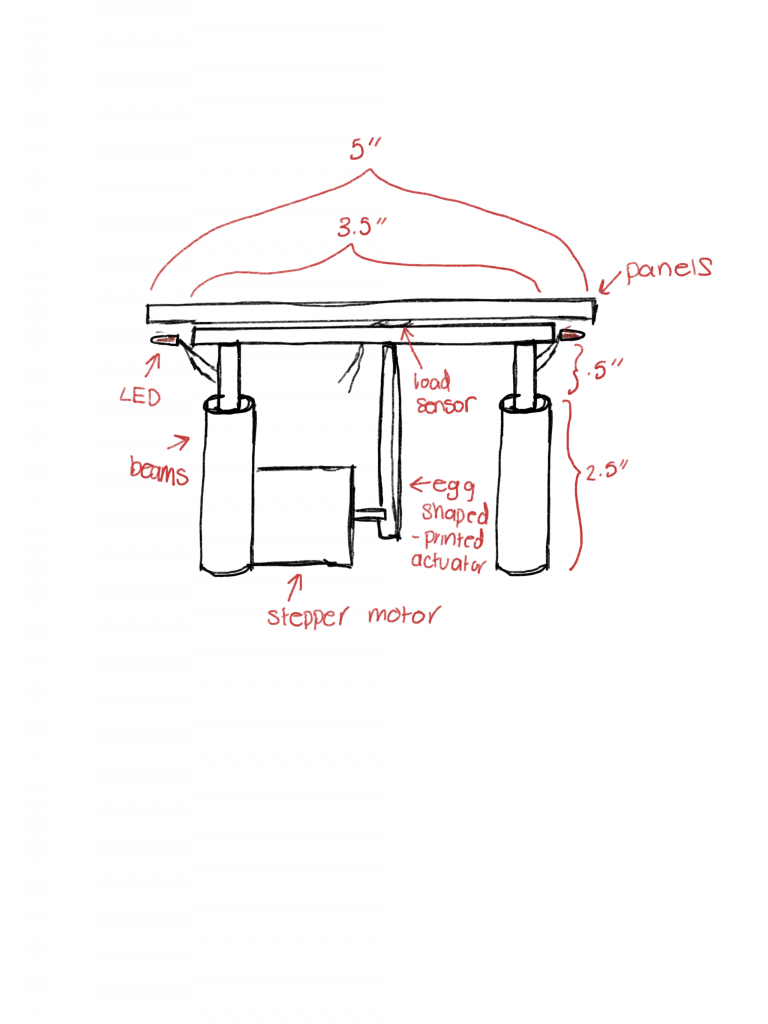
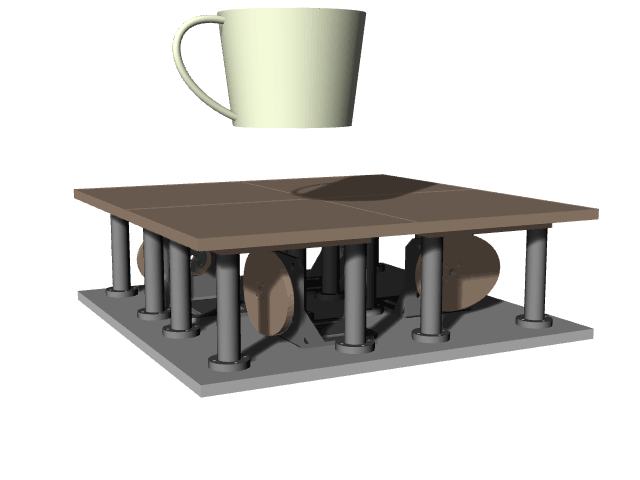
In order to achieve this our table includes LED lights which creates a back light for the panel that is lifted. This adds to the overall aesthetic of Elevate and further emphasizes the objects placed on the panel. Additionally, we control the stepper motor to move slowly and calmly for the user experience, but not too slow to the point where it is frustrating. The panel only slightly shifts upwards, around the height of one panel, because it is meant to emphasize and give importance to your objects, but not create an inconvenient level change. We also decided to create multiple panels, so that the table could highlight one specific area of the table, otherwise there wouldn’t really be an emphasis on a specific object if the entire table would lift.
A panel consists of an LED, force-sensitive resistor (FSR), and a stepper motor. The code includes state-machines for each panel. Each panel is either loaded or unloaded, based on the FSR reading. A panel is controlled by two Arduino, the Master Controller, which monitors the state using an FSR, and the Stepper Driver Arduino, which controls the Stepper motors.
Each loop, the Master Arduino runs each panel’s state machine, which maintains the state of the panel, and then checks the state of the panel to see if it is loaded or unloaded. If the panel is loaded and was previously unloaded, the master controller sends the state change to the Stepper Driver Arduino. The Driver Arduino loop iterates through a list of steps needed until a panel is at its state. If a panel has steps remaining, each step is taken incrementally, allowing for simultaneous stepper motor movements. When data is received from the master controller, the steps array is updated, and the motor is moved accordingly.
Below is an example of the State Machine for Panel A. When state_a is equal to 5, this means that the FSR was triggered and the panel is in the loaded state. When state_a is equal to 4, this means the panel is in the unloaded state and the state machine resets.
// STATE MACHINES
// Manages the state of the Motor/FSR/LED combo and updates according to
// FSR reading
void SM_a (){
state_prev_a = state_a;
switch (state_a){
case 0: //RESET
state_a = 1;
break;
case 1: //START
val_a = analogRead(aA);
if (val_a >= fsr_a_threshhold) {state_a = 2;}
break;
case 2: // SET TIME
t0_a = millis();
state_a = 3;
break;
case 3:// WAIT AND CHECK
val_a = analogRead(aA);
t_a = millis();
if (val_a < fsr_a_threshhold) {state_a = 0;}
if (t_a - t0_a > debounceDelay){
state_a = 5;
}
break;
case 4: // UNLOADED
state_a = 0;
break;
case 5: // LOADED
val_a = analogRead(aA);
if (val_a < fsr_a_threshhold) {state_a = 4;}
break;
}
}
The Stepper Driver loop calls the step_motors function, which checks if motors need to be stepped, and steps them. This function steps each motor incrementally, to allow for simultaneous stepper motor movement.
// Iterates through the steps array and steps each motor the required number of steps
// This allows for simultaneous movement of stepper motors
void step_motors() {
for (int i = 0; i < 4; i++){
//Rotate clockwise to loaded state
if (steps[i]>0){
//Case for A motor because A pins are not sequential on CNC Shield
if (i == 0) {
step (true, aDir,aStep);
steps[i] -= 1;
}else{
step (true, (4+i),(1+i) );
steps[i] -= 1;
}
//Rotate counterclockwise to unloaded state
} else if (steps[i] < 0){
if (i == 0) {
step (false, aDir,aStep);
steps[i] += 1;
}else{
step (false, (4+i),(1+i));
steps[i] += 1;
}
}
}
}
The full code is provided in the appendix.
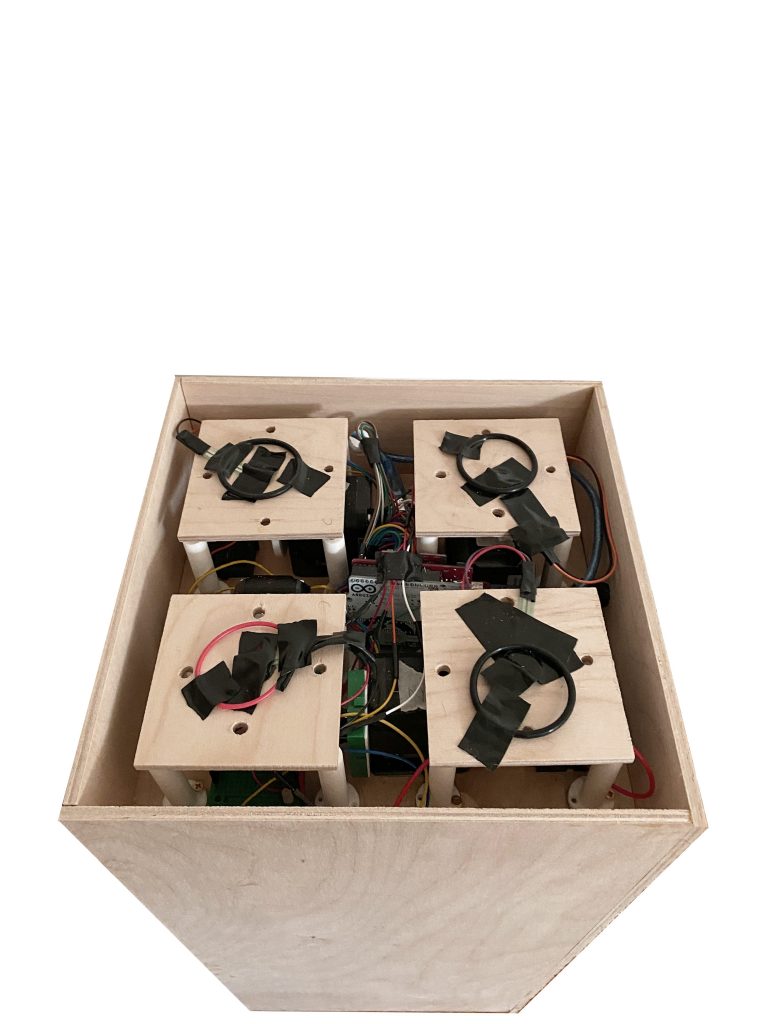
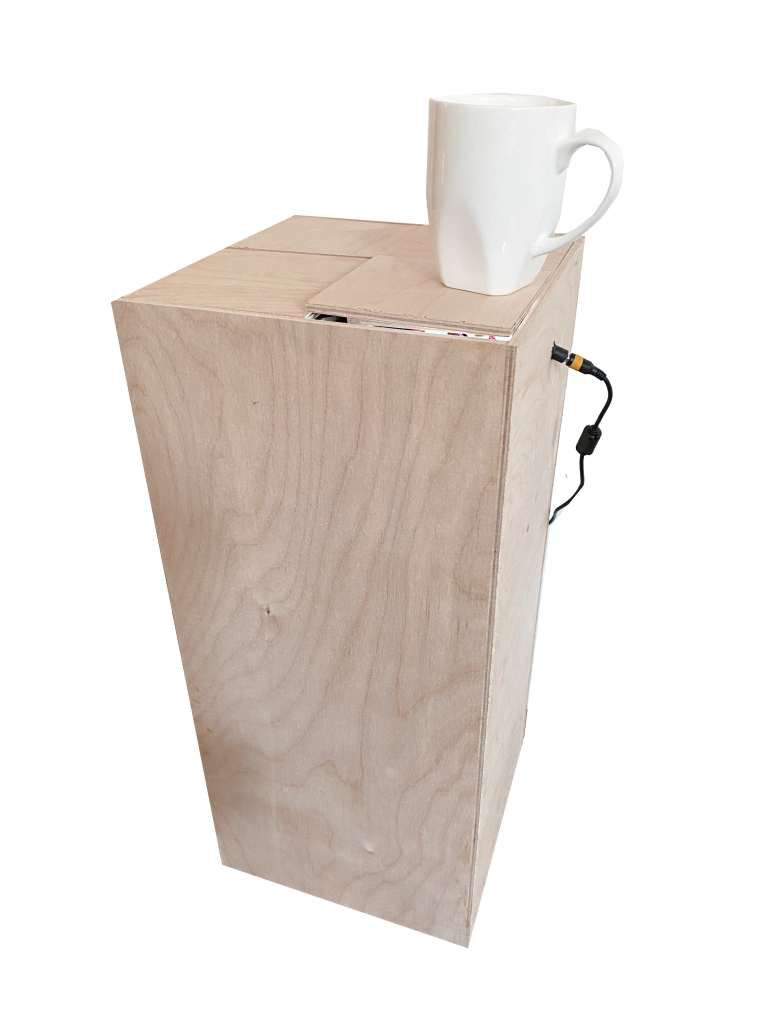
While we were able to place the circuit portion into the table we did come across multiple barriers. The first struggle was getting the panels to align correctly, since the FSR under the panels were creating uneven leveling. Additionally the FSR we were using were smaller circular ones, so if we had more time and resources to move forward we would probably shift to using the larger rectangular ones. Using the smaller ones led to the table not always responding when an item was placed on it because the force did not reach the sensor or was not strong enough. For this reason we had to thoughtfully place the mug near or on the sensors to get a response. We also had to sand down the panels so that they would not rub against each other and get stuck while moving, which ultimately led to gaps between panels. In a living room environment where liquids and food would be placed on the table there is lots of opportunities for spillage between the gaps causing the circuit to be destroyed.
Despite physical problems we do think our design was successful in creating the effect we desired. Our panel slowly elevate with a back light highlighting the mug we were running tests with. Elevate was successful in interacting with us and informing us that we have placed an item on it, and to not simply ignore it, but rather treat it with more consciousness. As we were dealing with the mug full of liquid we were definitely more aware of what we were doing with the mug and where it was being placed. This was mostly because we did not want to cause any spillage and ruin the device, but overall it was successful in giving the mug more importance.
Moving forward we would want to further improve our physical table and create a more leveled top to improve the overall design as well as the function. Additionally, we would work on fixing the code, so that it is able to lift an object that spans two panels because our current iteration is unable to do so. I also think we would want to explore ways we can make it water proof and have some sort of collection system for crumbs. Bowls with food and cups filled with liquid will be placed on this table, and currently it will just spill into the wires and circuit area. Moving forward we would want to prevent this to decrease stress for the user as it is supposed to be a calming piece in your living space.
Through this process and project we have learned that 3-D modeling is extremely idealistic especially with moving components. In rhino it is very easy to have complete control over each component, but in reality they bring their own hurdles that are not highlighted in a digital model.
Amal focused on the physical aspect of the table, while Chris worked with the electrical aspect.
Leave a Reply
You must be logged in to post a comment.