Team: Micheal Nguyen and Jason Perez
Abstract
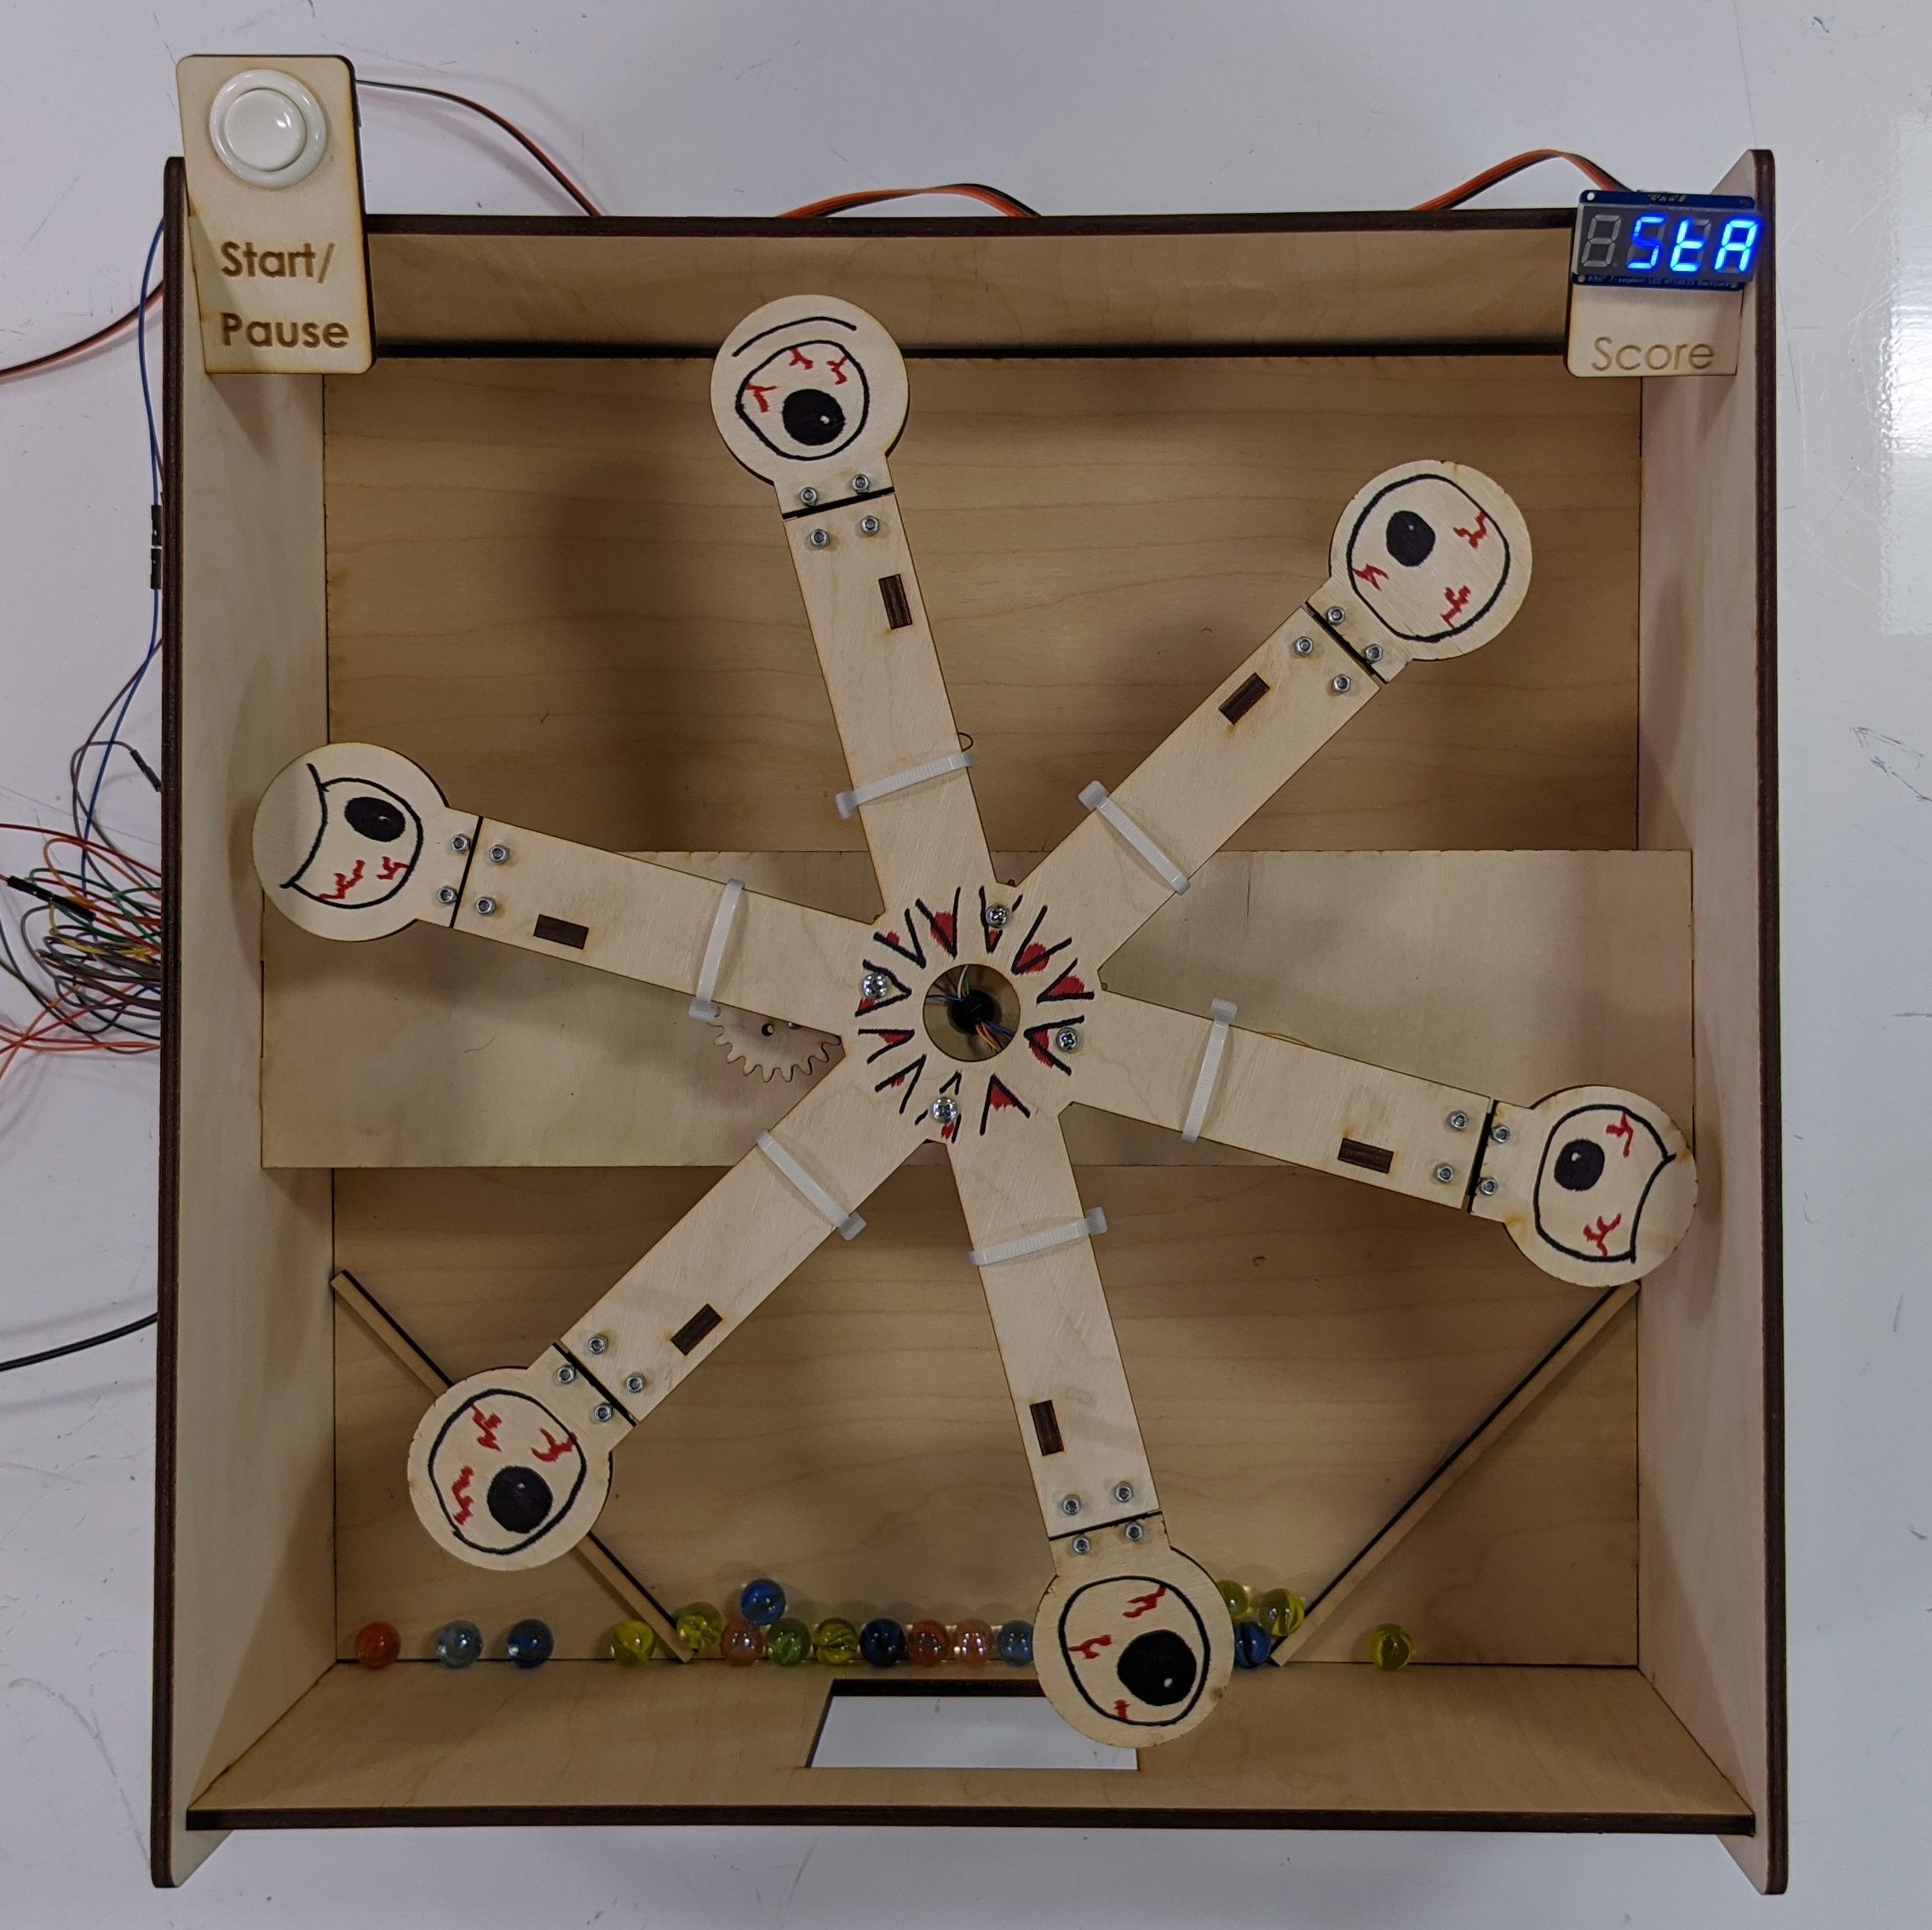
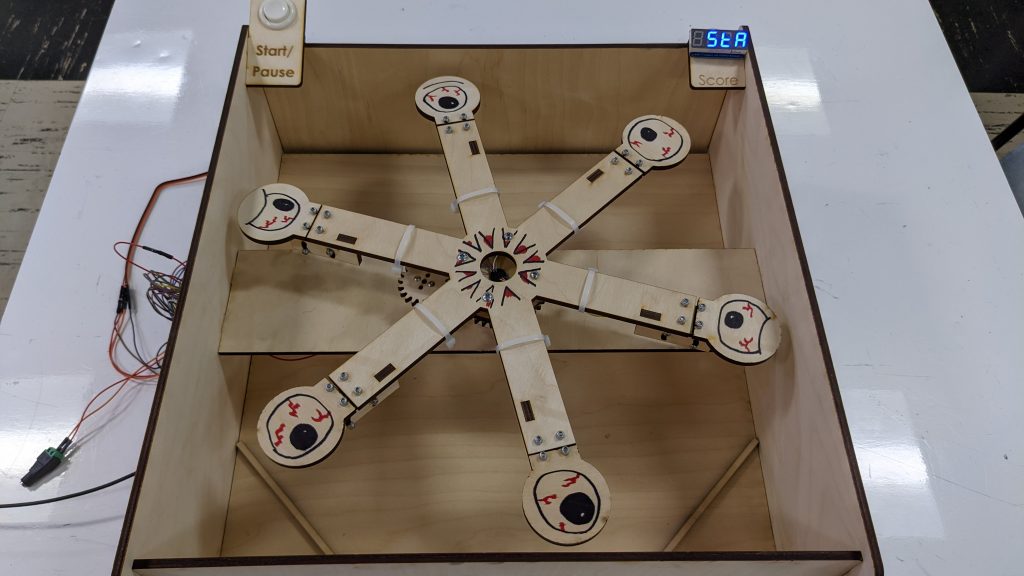
Our goal was to create an interactive game where a user could use marble projectiles to shoot at targets and score points, in an engaging or addictive fashion. eyeDrop Attack is an engaging, on-the-floor game that allows players to drop, throw or otherwise launch a marble projectile at any of the six eyes of the monster. Players score points based on how long the “eyes” or limit switches are pressed, which incentivizes strategies that target multiple eyes or target a single eye for a continuous period of time.
Objectives
While our original goal was to create an arcade-style shooter which uses a horizontal launch trajectory to target multiple vertical targets, we ended up simplifying our vision to a top-to-bottom or horizontal target surface, to improve the feasibility of the project. By simplifying our project we were able to focus our efforts and achieve a functional marble return system, LCD text and score display, and target movement system capable of 360-degree rotation.
Implementation
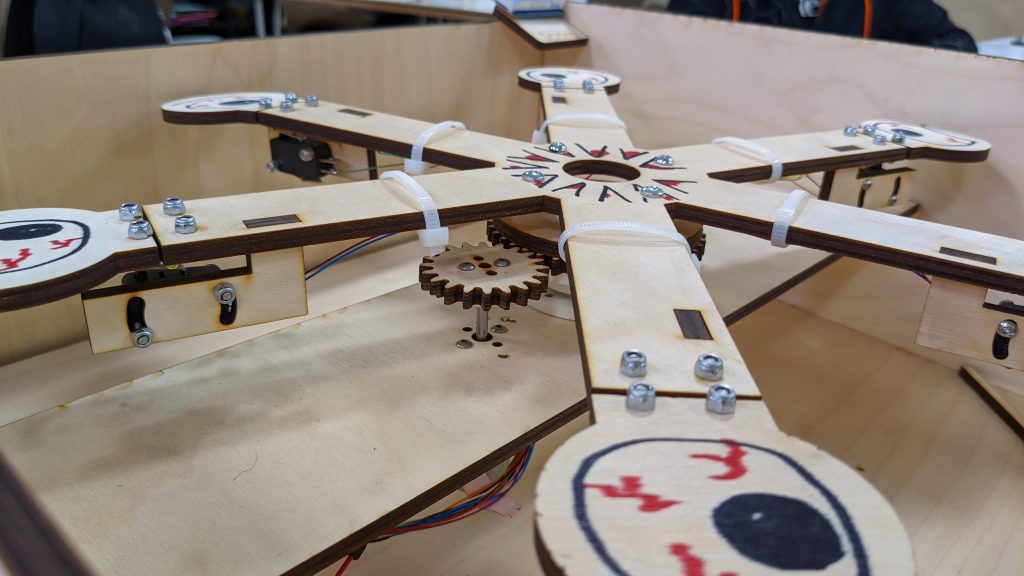
Our final implementation consisted of the hit registration system, the rotating movement system, and the control and scoring system. The hit registration system was designed based on a limit switch and hinge combo. This system proved difficult to implement because the original hinges we used had very loose tolerances which introduced more errors and made hit registration inconsistent. The newer metal hinges we purchased had much tighter tolerances and produced much better results.
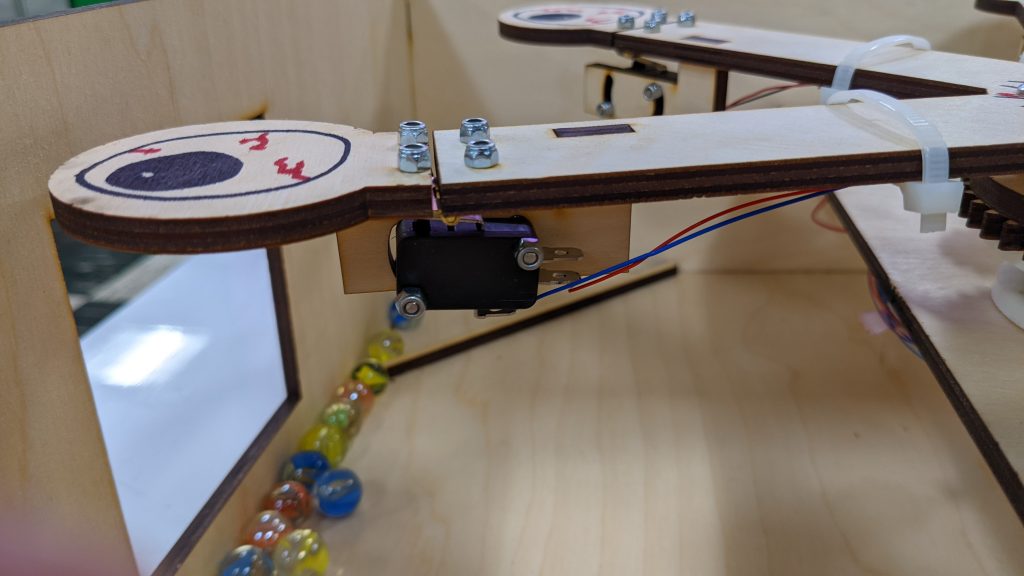
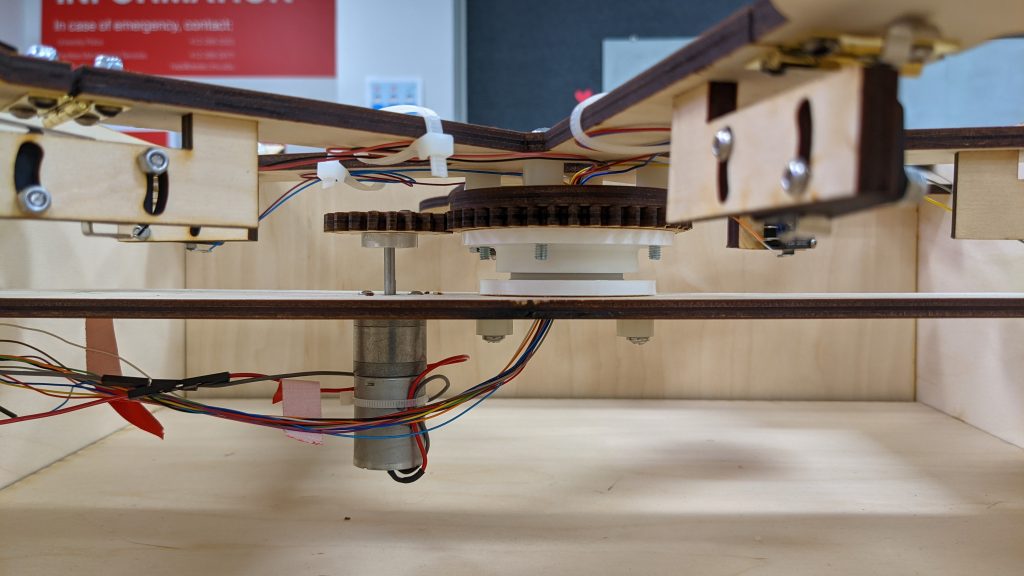
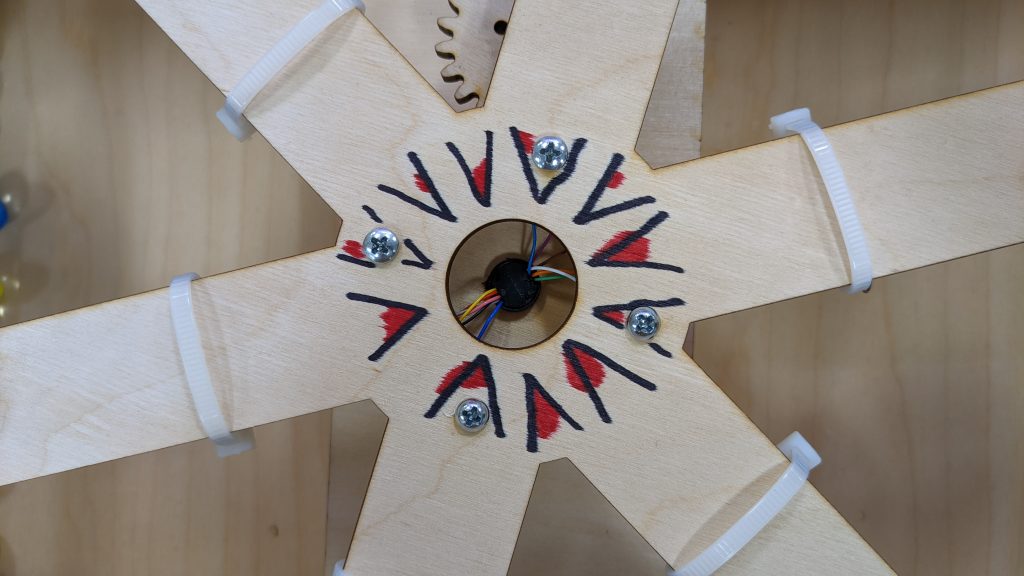
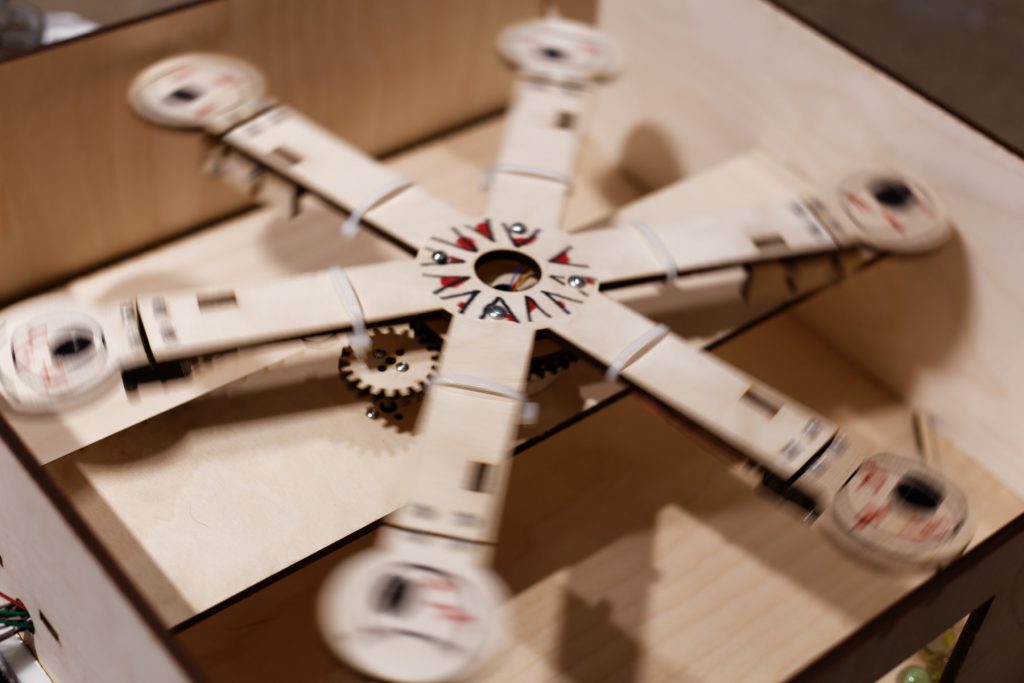
The rotational motion system produced the most interesting challenge as we wanted to produce a system with full 360-degree rotation and electronic components on both the rotating piece and the box. We were able to solve this issue using a slip ring which allowed us to connect our rotating switches to our fixed microcontroller. This slip ring needed to be at the axis of rotation which presented an issue as this would take the place of any axle-based system we might have otherwise used. Garth’s open hub design helped us solve this problem, by allowing us to create a rotational movement system with an open center, allowing us to pass wires through the center.
We controlled the motion system by tuning the speed of the motor to suit the state of the game. In demo mode, the motor will follow a simple sinusoidal wave. During play, the motor’s speed is the sum of two sinusoidal waves of differing periods creating a randomized effect. After a hit, the motor will operate with a higher speed floor, and a shorter sinusoidal period to create the illusion that the monster is recoiling from the hit.
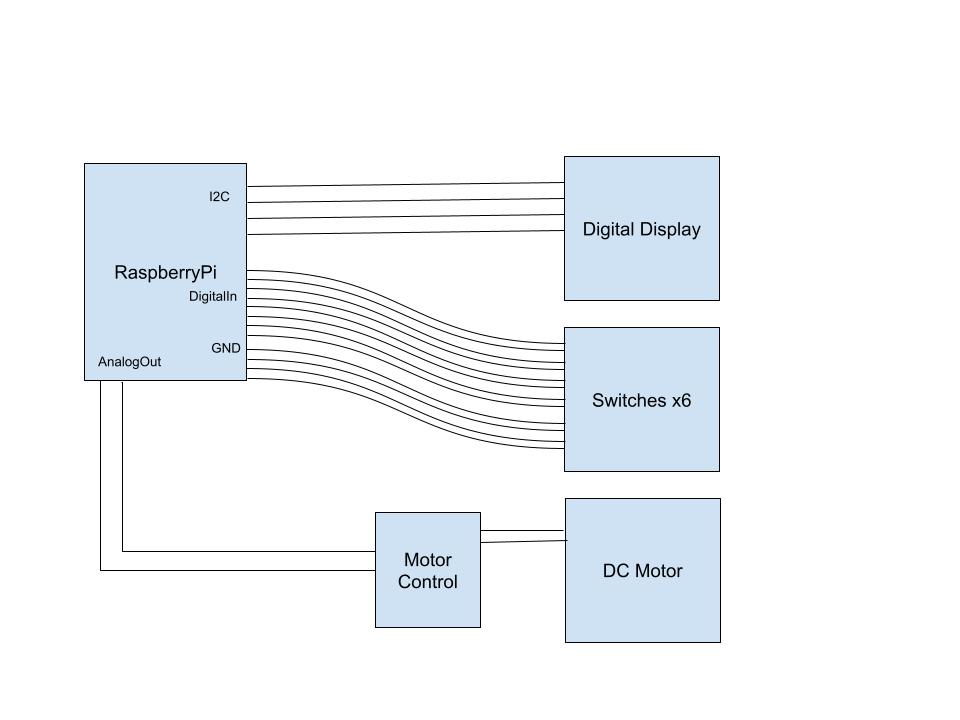
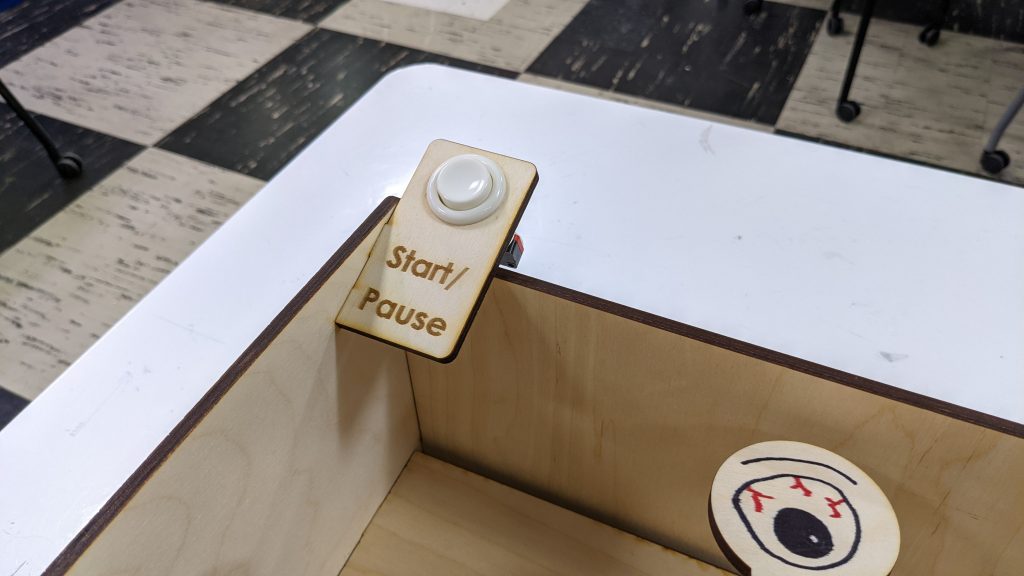
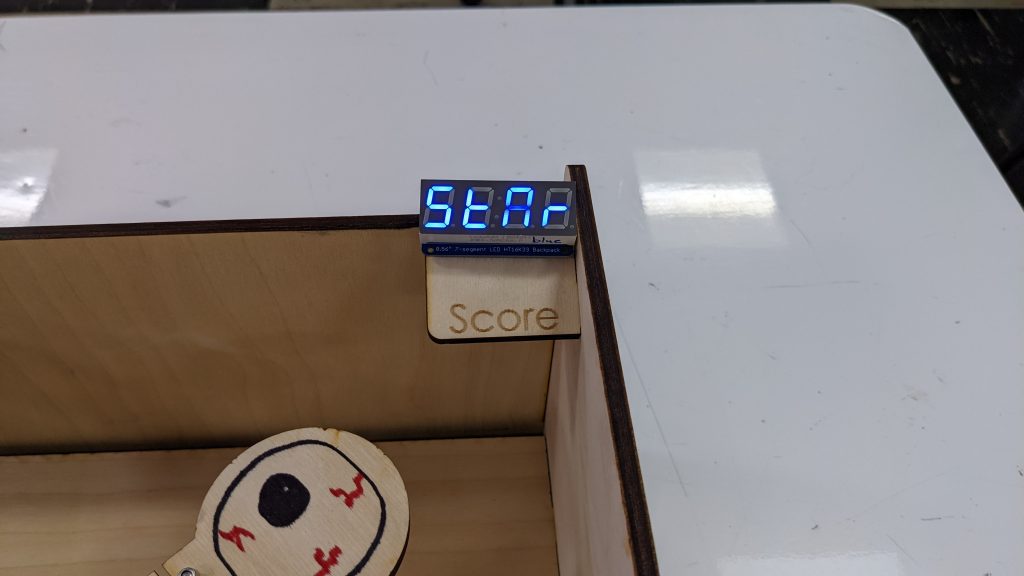
The electronics system also included the scoring system. The scoring system increments the score based on how long the switches on the eye have been pressed. This score is then displayed on the LCD display. The system also supports multiple games as the player can end the game by pressing the “Start/Stop” button to enter demo mode, and then pressing the “Start/Stop” button again to enter play mode once again. This action will set the score to zero.
Outcomes
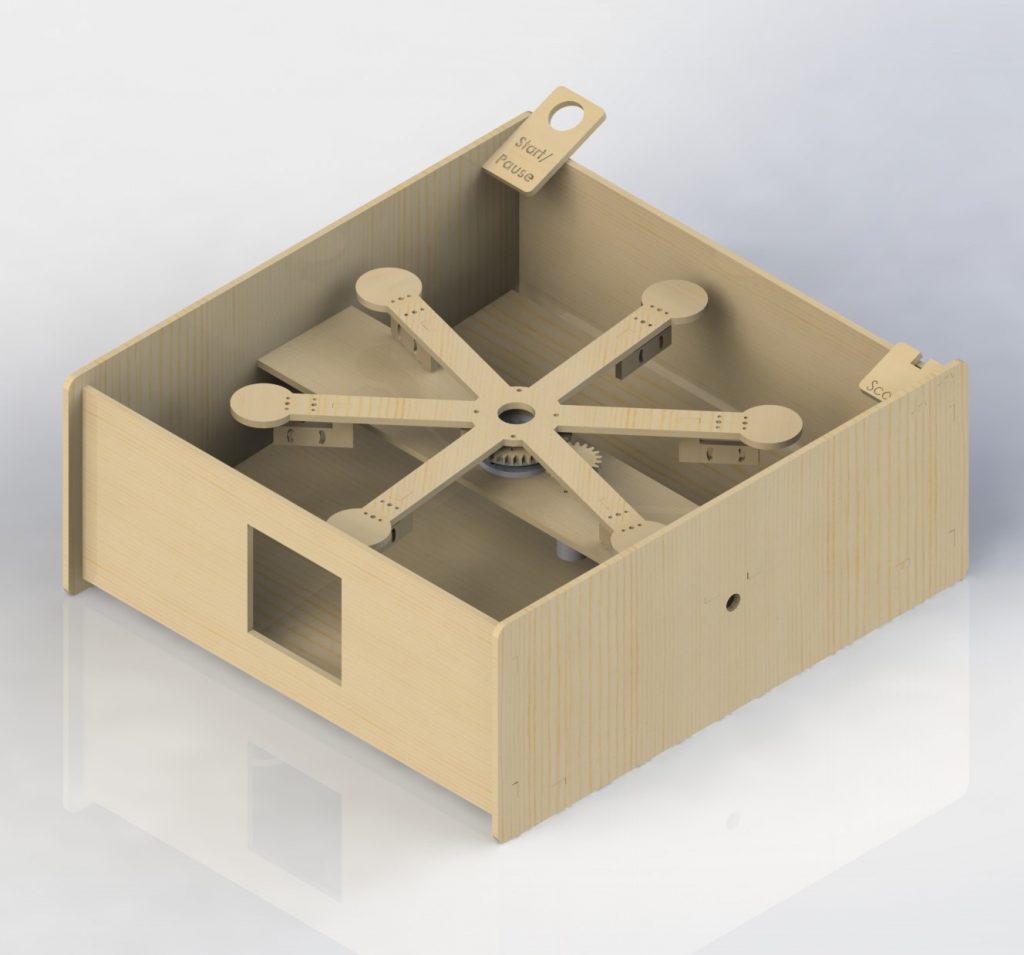
Our main successes were the use of the slip ring, switch mounting, and the long-running nature of our project. The early incorporation of the slip ring in our design allowed us to manage our wiring in one place and, most importantly, gave us full rotation on a single axis. The switch mounting also introduced another degree of freedom by allowing us to fine-tune the hit recognition system. The mounting was critical in determining which position would offer the most consistent actuation. Another important success was the persistence of our project. The centralized design and mounting ensured the rotating mechanism was able to keep moving for relatively long periods of time.
Unexpected successes arose when new players interacted with our project. Many of our users were captivated by both the crazy visuals and bizarre mechanical behavior of our machine. Their experience was enhanced through the self-imposed difficulty of our game as well as the feedback from scoring. Over time, users developed their own game modes, one of which was a co-op mode of sorts that involved various users dropping marbles.
Future Work
- Smoother and more accessible return system (possibel skeeball implementation)
- Sound from speakers with sound effects for hits and music
- More game modes
Contributions
Jason Perez – Helped come up with ideas during brainstorming, introduced hinges as a component to the target system, developed central rotator piece through CAD, developed switch mounting through CAD, programmed initial code for testing switches-motor-LCD, graphic design/theme of the project
Michael Nguyen – created Box Full Assembly CAD model, converted code to polling states to allow for simulated multitasking, motion profiled rotator for demo, play, and freakout states, designed gearbox and debugged LCD display.
Media
Video
Gallery
Citations
Motor Sample Code:
https://courses.ideate.cmu.edu/16-223/f2021/text/code/pico-motor.html#id7
Hub:
https://courses.ideate.cmu.edu/16-223/f2021/text/mechanism/open-hub.html
Code + CAD
# dual_spin.py
#
# Raspberry Pi Pico - DC motor motion demo
#
# Demonstrates operating two DC motors driven by a DRV8833.
#
# This assumes a Pololu DRV8833 dual motor driver has been wired up to the Pico as follows:
# Pico pin 24, GPIO18 -> AIN1
# Pico pin 25, GPIO19 -> AIN2
# Pico pin 26, GPIO20 -> BIN2
# Pico pin 27, GPIO21 -> BIN1
# any Pico GND -> GND
# DRV8833 carrier board: https://www.pololu.com/product/2130
################################################################
# CircuitPython module documentation:
# time https://circuitpython.readthedocs.io/en/latest/shared-bindings/time/index.html
# math https://circuitpython.readthedocs.io/en/latest/shared-bindings/math/index.html
# board https://circuitpython.readthedocs.io/en/latest/shared-bindings/board/index.html
# pwmio https://circuitpython.readthedocs.io/en/latest/shared-bindings/pwmio/index.html
################################################################################
# print a banner as reminder of what code is loaded
print("Starting dual_spin script.")
# load standard Python modules
import math, time
# load the CircuitPython hardware definition module for pin definitions
import board
# load the CircuitPython pulse-width-modulation module for driving hardware
import pwmio
import busio
import adafruit_ht16k33.segments
from digitalio import DigitalInOut, Direction, Pull
#--------------------------------------------------------------------------------
# Class to represent a single dual H-bridge driver.
class DRV8833():
def __init__(self, AIN1=board.GP18, AIN2=board.GP19, BIN2=board.GP20, BIN1=board.GP21, pwm_rate=20000):
# Create a pair of PWMOut objects for each motor channel.
self.ain1 = pwmio.PWMOut(AIN1, duty_cycle=0, frequency=pwm_rate)
self.ain2 = pwmio.PWMOut(AIN2, duty_cycle=0, frequency=pwm_rate)
self.bin1 = pwmio.PWMOut(BIN1, duty_cycle=0, frequency=pwm_rate)
self.bin2 = pwmio.PWMOut(BIN2, duty_cycle=0, frequency=pwm_rate)
def write(self, channel, rate):
"""Set the speed and direction on a single motor channel.
:param channel: 0 for motor A, 1 for motor B
:param rate: modulation value between -1.0 and 1.0, full reverse to full forward."""
# convert the rate into a 16-bit fixed point integer
pwm = min(max(int(2**16 * abs(rate)), 0), 65535)
if channel == 0:
if rate < 0:
self.ain1.duty_cycle = pwm
self.ain2.duty_cycle = 0
else:
self.ain1.duty_cycle = 0
self.ain2.duty_cycle = pwm
else:
if rate < 0:
self.bin1.duty_cycle = pwm
self.bin2.duty_cycle = 0
else:
self.bin1.duty_cycle = 0
self.bin2.duty_cycle = pwm
#--------------------------------------------------------------------------------
# Create an object to represent a dual motor driver.
print("Creating driver object.")
driver = DRV8833()
speed = 0.65
#LED
led = DigitalInOut(board.LED)
led.direction = Direction.OUTPUT
led.value = True
#7 Segment Display
i2c = busio.I2C(scl=board.GP5, sda=board.GP4)
display = adafruit_ht16k33.segments.Seg7x4(i2c)
#Switches
switchStart = DigitalInOut(board.GP9)
switchStart.pull = Pull.DOWN
switchStart.direction = Direction.OUTPUT
wasPressed = False
switch0 = DigitalInOut(board.GP10)
switch0.pull = Pull.DOWN
switch0.direction = Direction.OUTPUT
switch1 = DigitalInOut(board.GP11)
switch1.pull = Pull.DOWN
switch1.direction = Direction.OUTPUT
switch2 = DigitalInOut(board.GP12)
switch2.pull = Pull.DOWN
switch2.direction = Direction.OUTPUT
switch3 = DigitalInOut(board.GP13)
switch3.pull = Pull.DOWN
switch3.direction = Direction.OUTPUT
switch4 = DigitalInOut(board.GP14)
switch4.pull = Pull.DOWN
switch4.direction = Direction.OUTPUT
switch5 = DigitalInOut(board.GP15)
switch5.pull = Pull.DOWN
switch5.direction = Direction.OUTPUT
#States?
demoMode = True
#--------------------------------------------------------------------------------
# Begin the main processing loop. This is structured as a looping script, since
# each movement primitive 'blocks', i.e. doesn't return until the action is
# finished.
class Game:
def __init__(self):
self.score = 0
self.scoreScale = 5
self.motorTime = 0.01
self.nextMotorTime = 0.01
self.demoMode = True
self.wasReleased = True
self.startTime = time.time()
self.hurtTime = 0
def getSpeed(self,scale):
currTime = time.time() - self.startTime
speed = math.sin(currTime/scale)
return min(max(abs(speed), 0.6), 0.8) * (speed / (abs(speed) + 0.001))
def pollMainSwitches(self):
if not self.demoMode:
if switch0.value or switch1.value or switch2.value or switch3.value or switch4.value or switch5.value:
self.score += self.scoreScale
self.hurtTime = time.time() + 1
def pollMotors(self):
currTime = time.time()
if (currTime >= self.nextMotorTime):
self.nextMotorTime = currTime + self.motorTime
if (self.demoMode):
speed = self.getSpeed(2)
driver.write(1, speed)
elif (currTime <= self.hurtTime):
speed = 4 * self.getSpeed(0.001)
driver.write(1, speed)
else:
speed = self.getSpeed(2)
driver.write(1, speed)
def pollStart(self):
if not switchStart.value:
self.wasReleased = True
if self.wasReleased and switchStart.value:
self.demoMode = not self.demoMode
led.value = False
self.wasReleased = False
def pollDisplay(self):
if self.demoMode:
#Press
display.set_digit_raw(0, 0b01110011) #P
display.set_digit_raw(1, 0b01010000) #r
display[2] = "e"
display[3] = "5"
display.scroll(1)
display[3] = "5"
display.show()
display.scroll(1)
display[3] = " "
display.show()
display.scroll(1)
display.set_digit_raw(3, 0b01111000) #t
display.show()
display.scroll(1)
display.set_digit_raw(3, 0b01011100) #o
display.show()
display.scroll(1)
display[3] = " "
display.show()
display.scroll(1)
display[3] = "5"
display.show()
display.scroll(1)
display.set_digit_raw(1, 0b01111000)
display.show()
display.scroll(1)
display[3] = "a"
display.show()
display.scroll(1)
display.set_digit_raw(3, 0b01010000)
display.show()
display.scroll(1)
display.set_digit_raw(1, 0b01111000)
display.show()
display.scroll(1)
display[3] = " "
#Start
#display[0] = "5"
#display.set_digit_raw(1, 0b01111000)
#display[2] = "A"
#display.set_digit_raw(3, 0b01010000)
#display.set_digit_raw(1, 0b01111000)
else:
display.print("%04d" % self.score)
print("Starting main script.")
scale = 2.0
startTime = time.time()
game = Game();
while True:
currTime = time.time() - startTime
led.value = game.demoMode
game.pollMotors()
game.pollDisplay()
game.pollMainSwitches()
game.pollStart();
CAD Files:
https://drive.google.com/file/d/1EFqiocY5mWaKRPtHlE2MzSBPyFFcaLiz/view?usp=sharing
Leave a Reply
You must be logged in to post a comment.