On the technical side:
We programmed the microcontrollers, and our setup involves two Arduinos:
- One is connected to the multi-touch grid. This arduino is controlled by a processing sketch and sends signals to the other arduino for outputs other than sounds.
- One is connected to all other input&output components: neopixel LEDs, vibration motors, and fabric buttons. This arduino is controlled by a arduino sketch and receives signals from the other arduino.
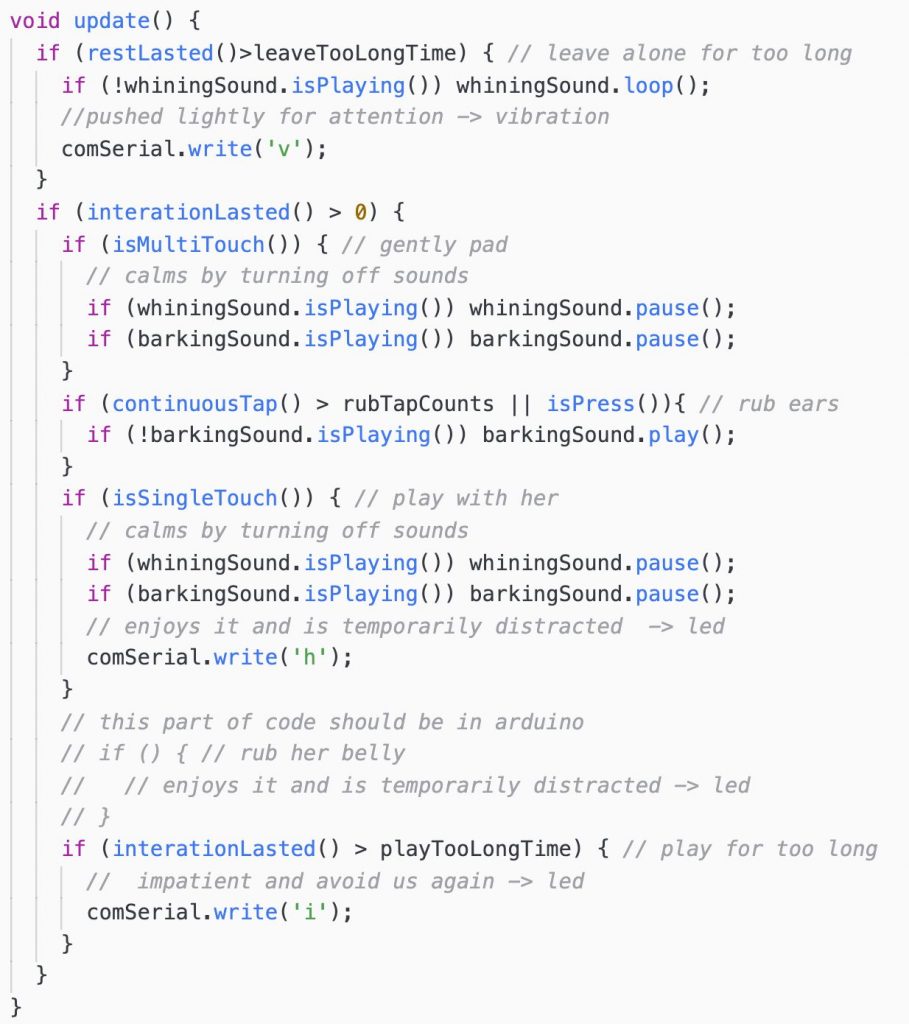
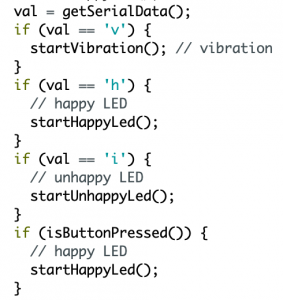
The startHappyLed() starts a sequence of colored LEDs synchronous blinkings and is followed with a sequence of synchronous blinking of only a subset of these colored LEDs at a time.
The startUnhappyLed() starts a sequence of red LEDs synchronous blinking and followed with a sequence of synchronous blinking of only a subset of these red LEDs at a time.
On the page fabrication side:
We finished making the page and started integrating the elements:
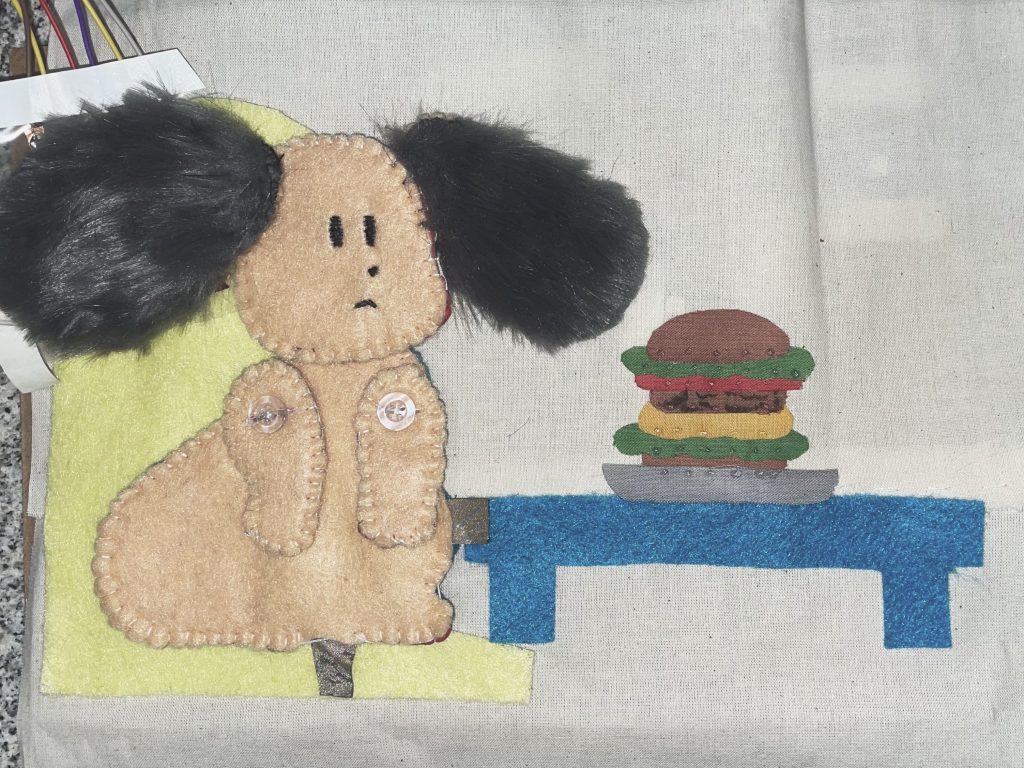
Full page 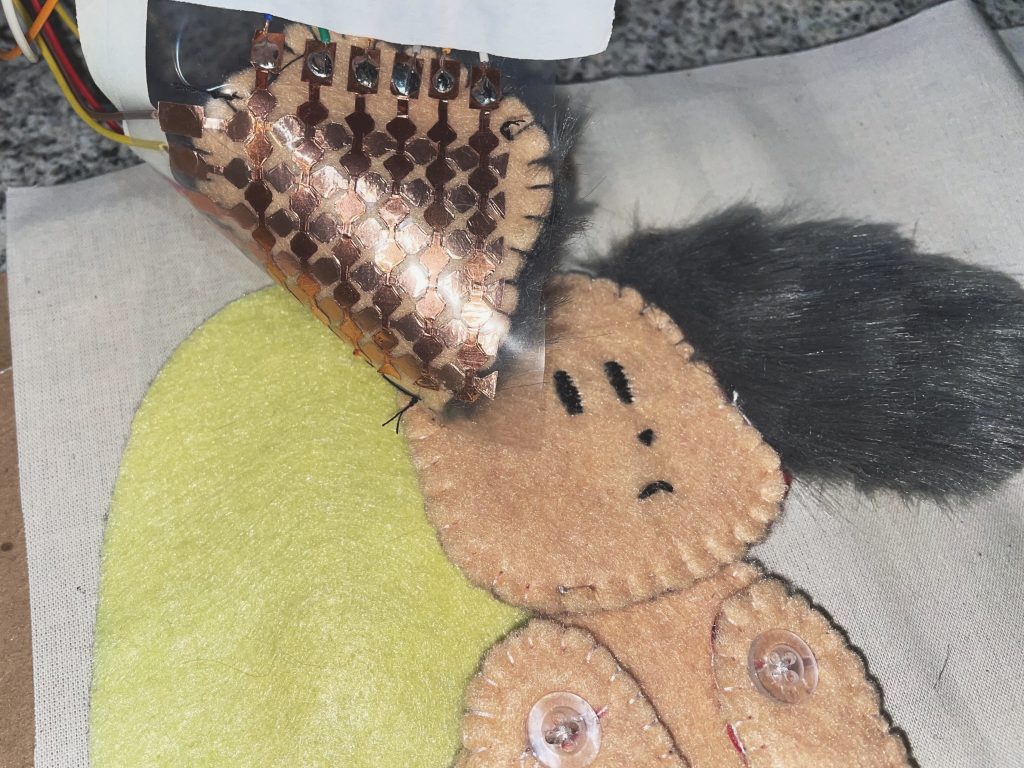
Touch grid close up
Besides the multi-touch grid, we decides to use 4 neopixels and 1 fabric button to control the vibration disc. The video shows the effect of the neopixels and multi-touch interactions. We will integrate in vibration feedback later.