
Overview
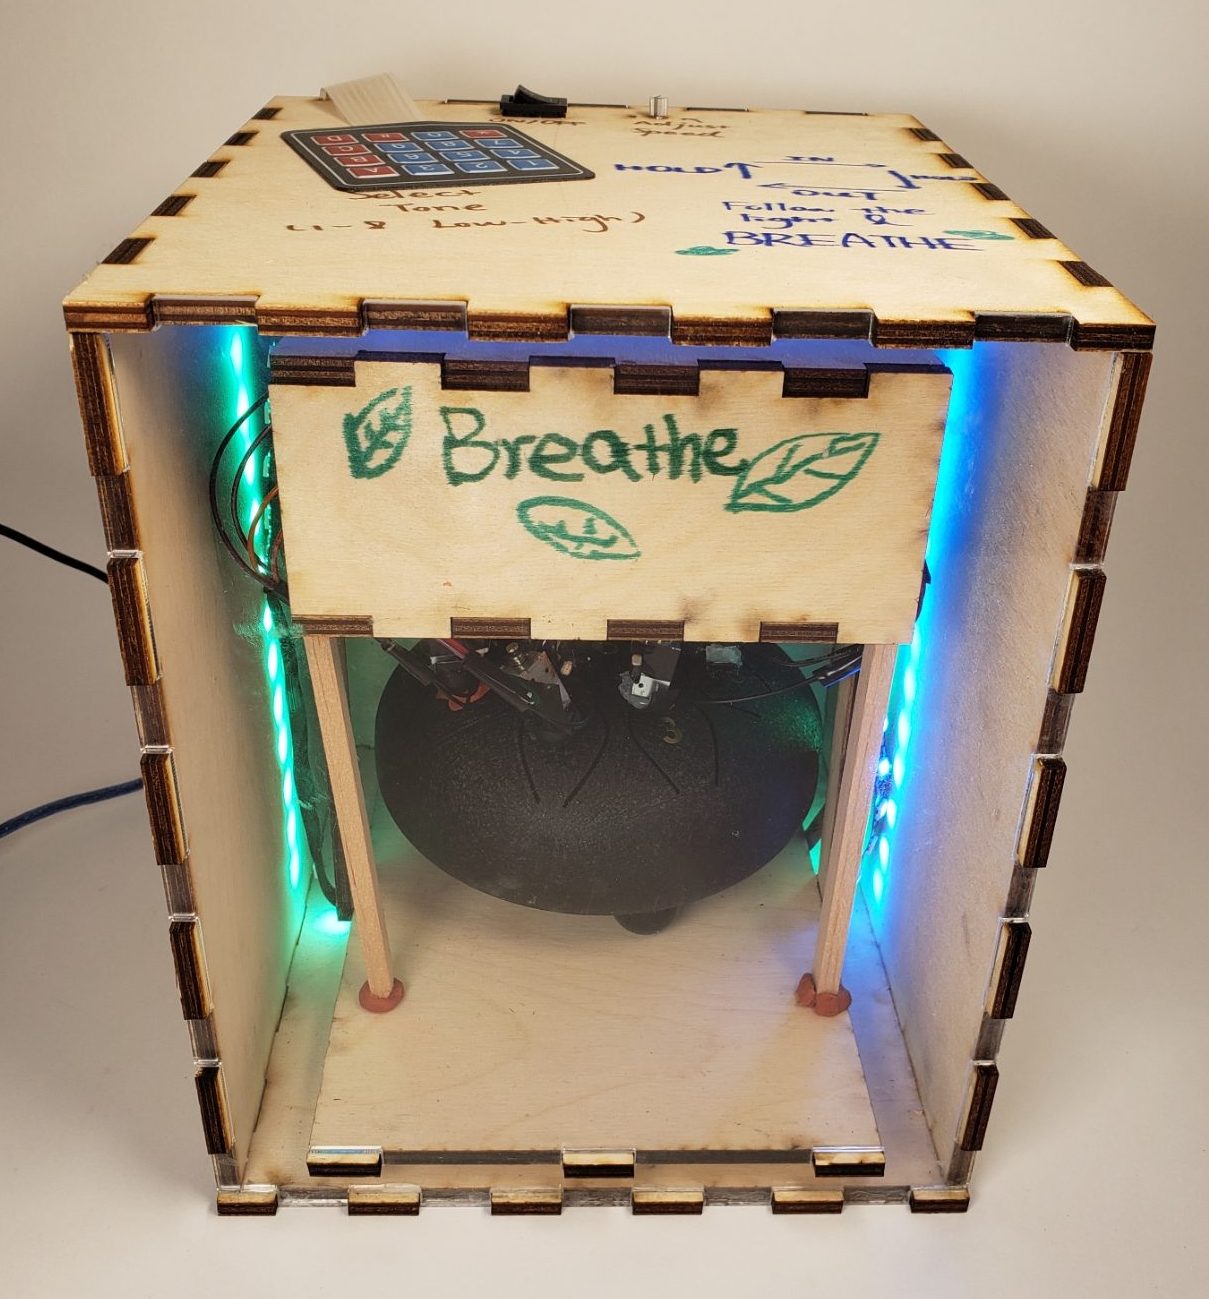
This device guides my breath with the box breathing technique through both visual (the LED lights) and auditory (steel tongue drum tones) channels.
Moving Image: Power on. Changing tone with the keypad. Adjusting speed with the potentiometer.
Detail Highlight: the rocker switch (on/off) and the potentiometer (speed control) are mounted to the top panel.
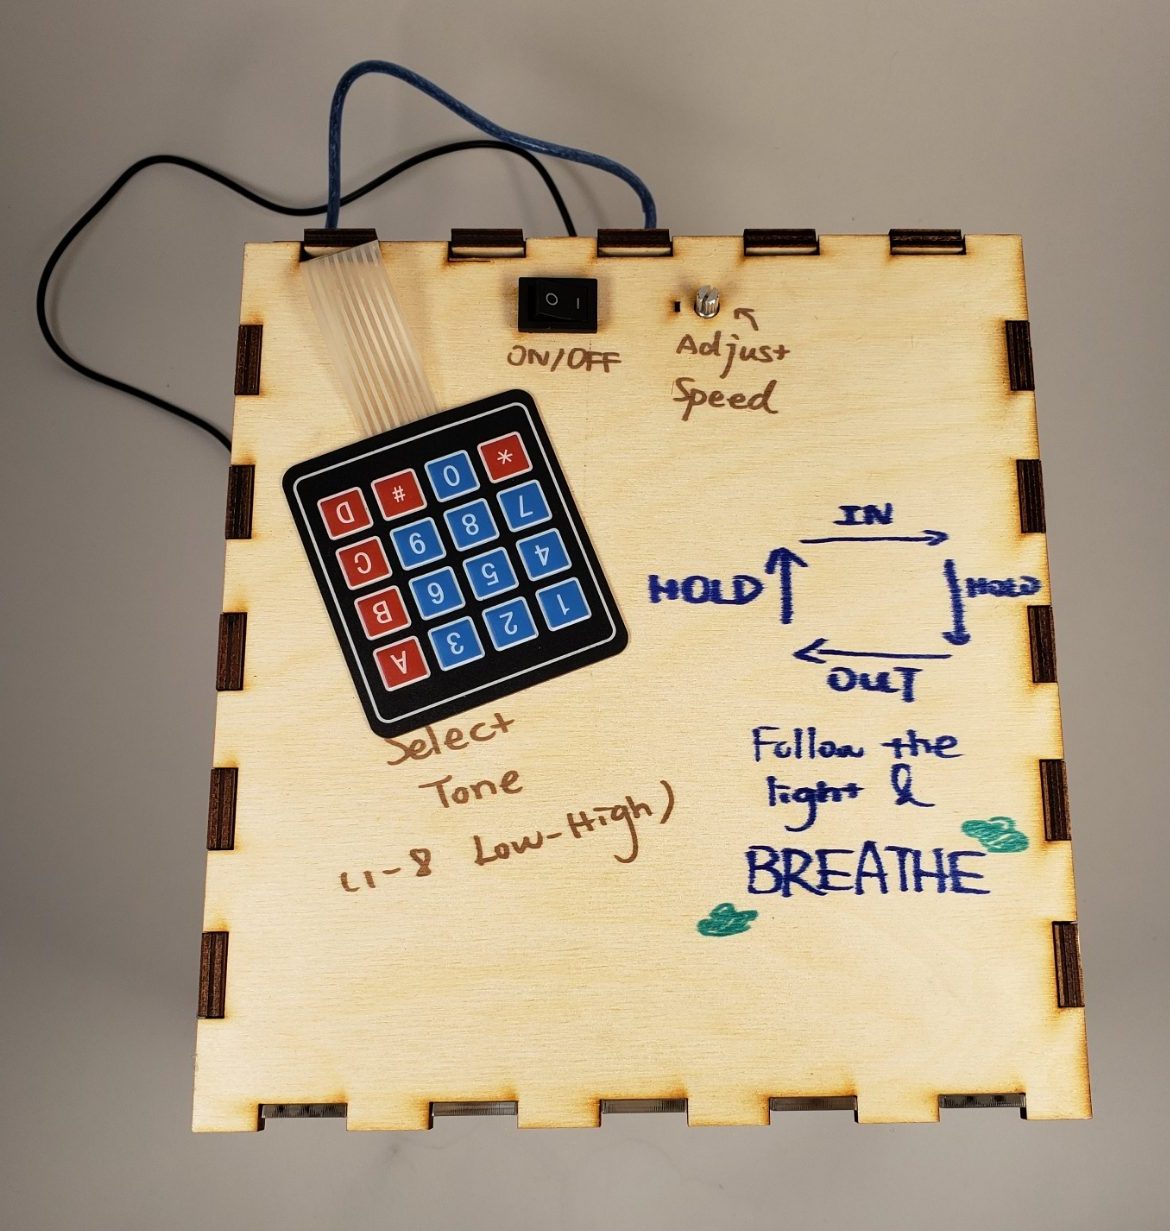
Detail Highlight: Top of the Box with instructions and controls (keypad, rocker switch, and potentiometer)
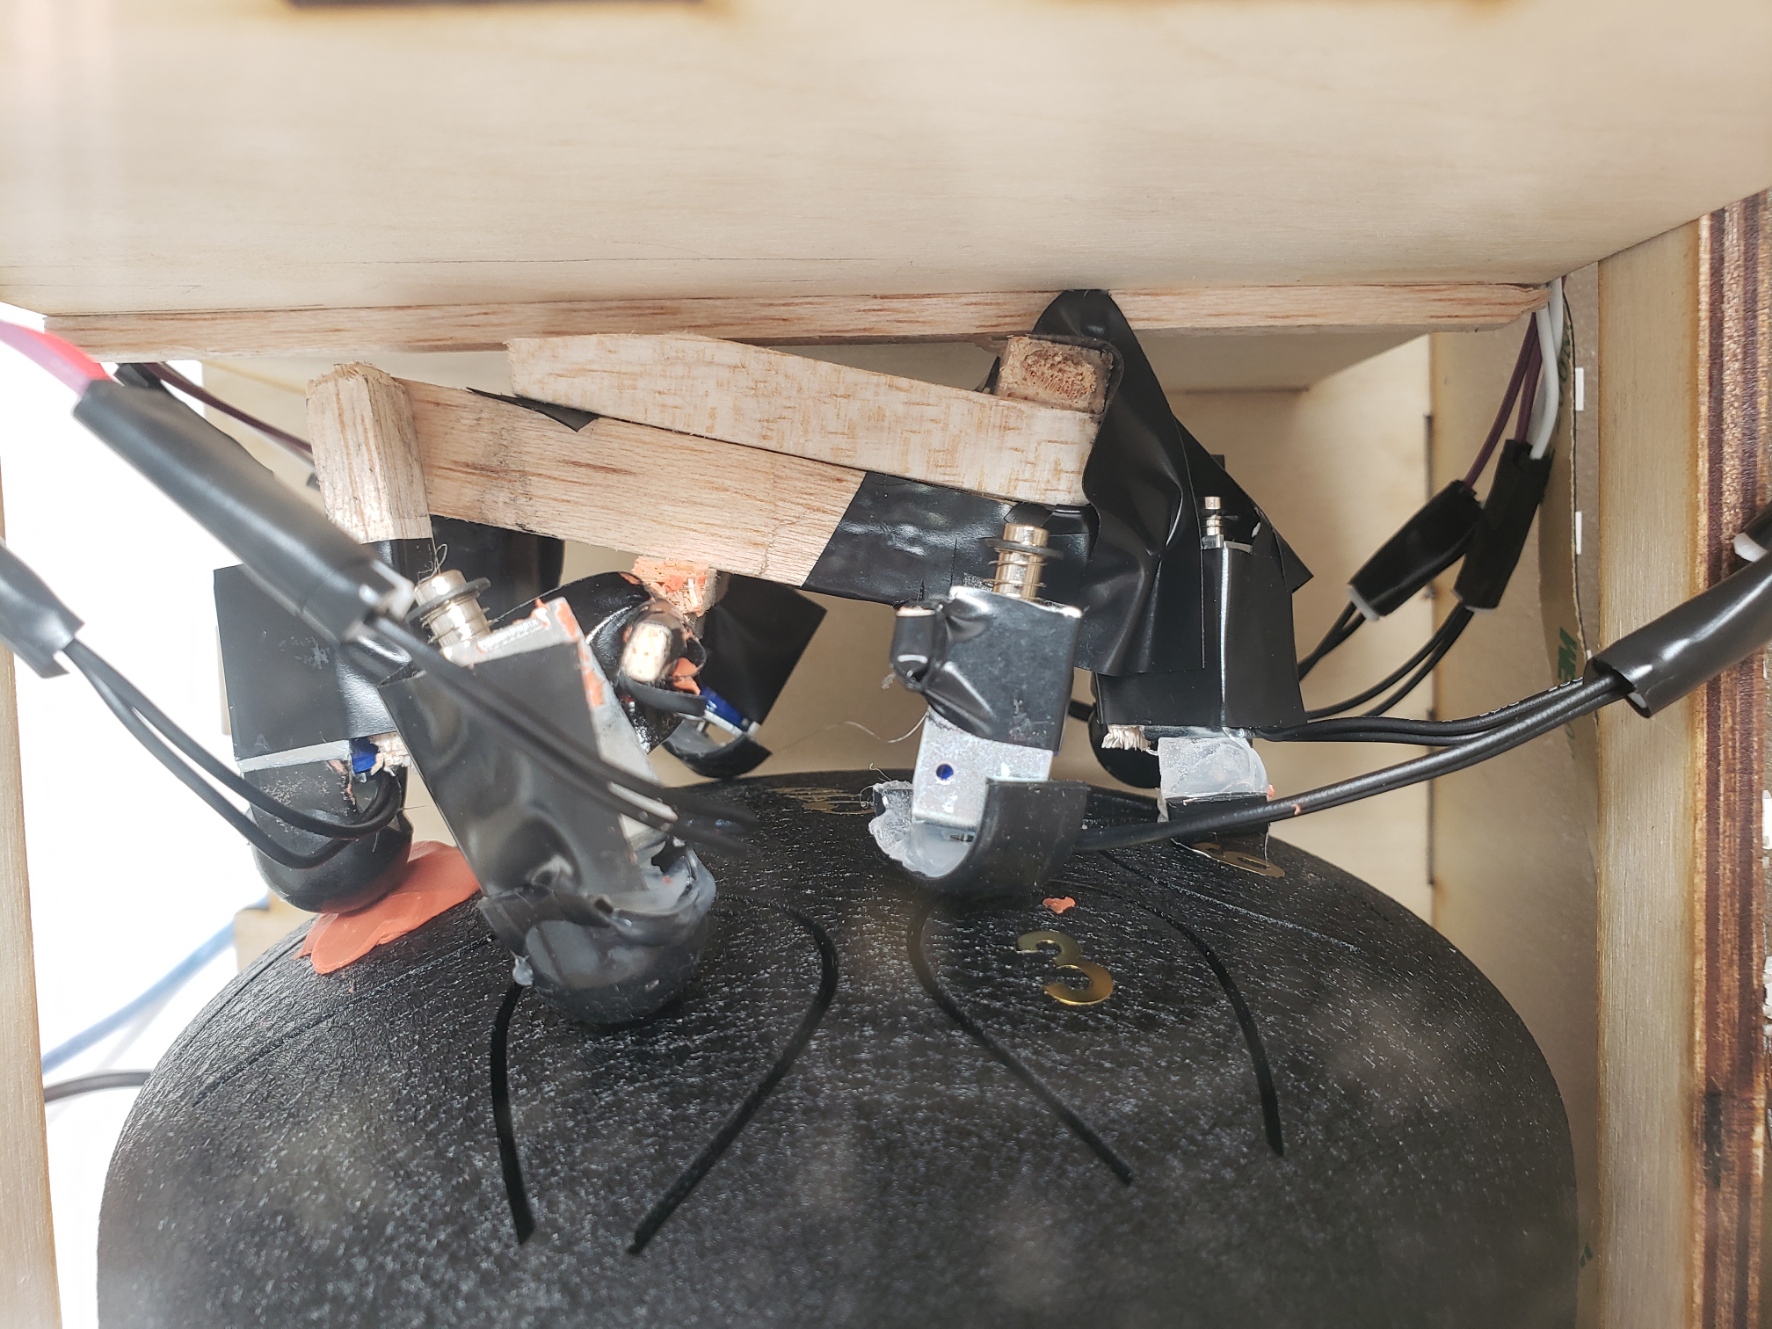
Detail Highlight: The sound mechanism; aka the ugly taped solenoid & glued balsa wood vs. gravity
Close-up shot of the solenoid hitting the instrument while the Box is use.
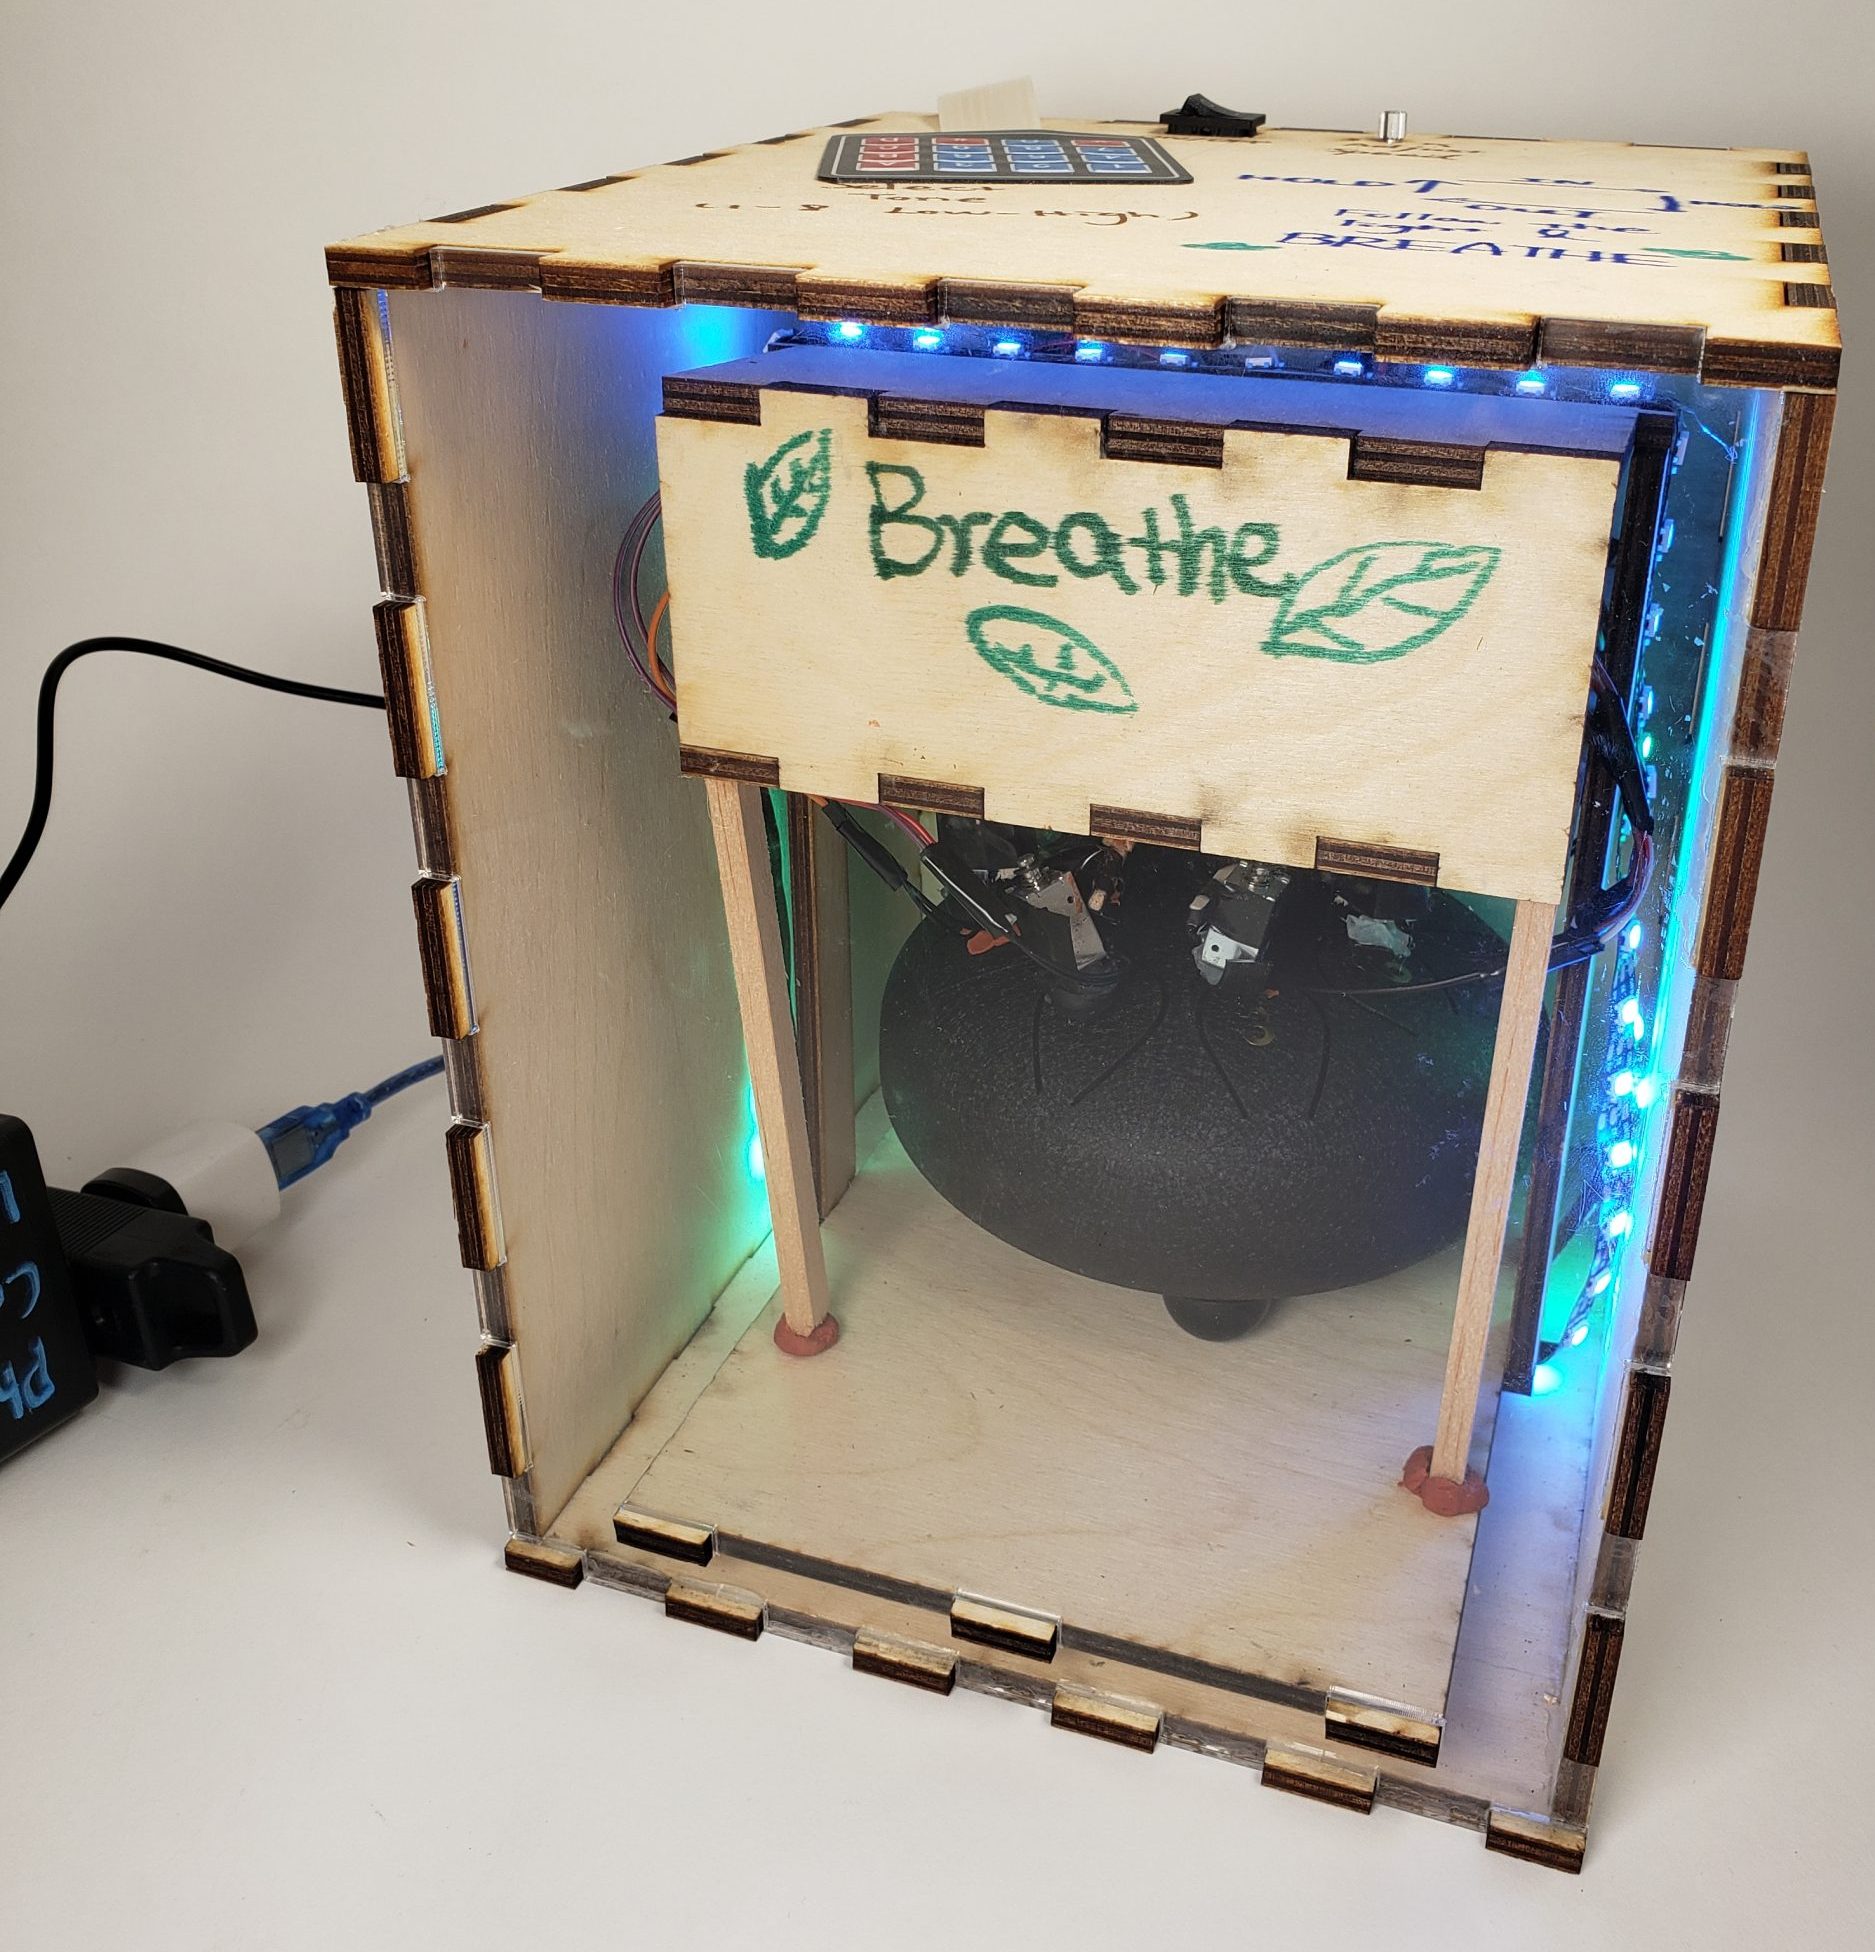
The Box plugged in and in use.
Progress Images & Decision Points
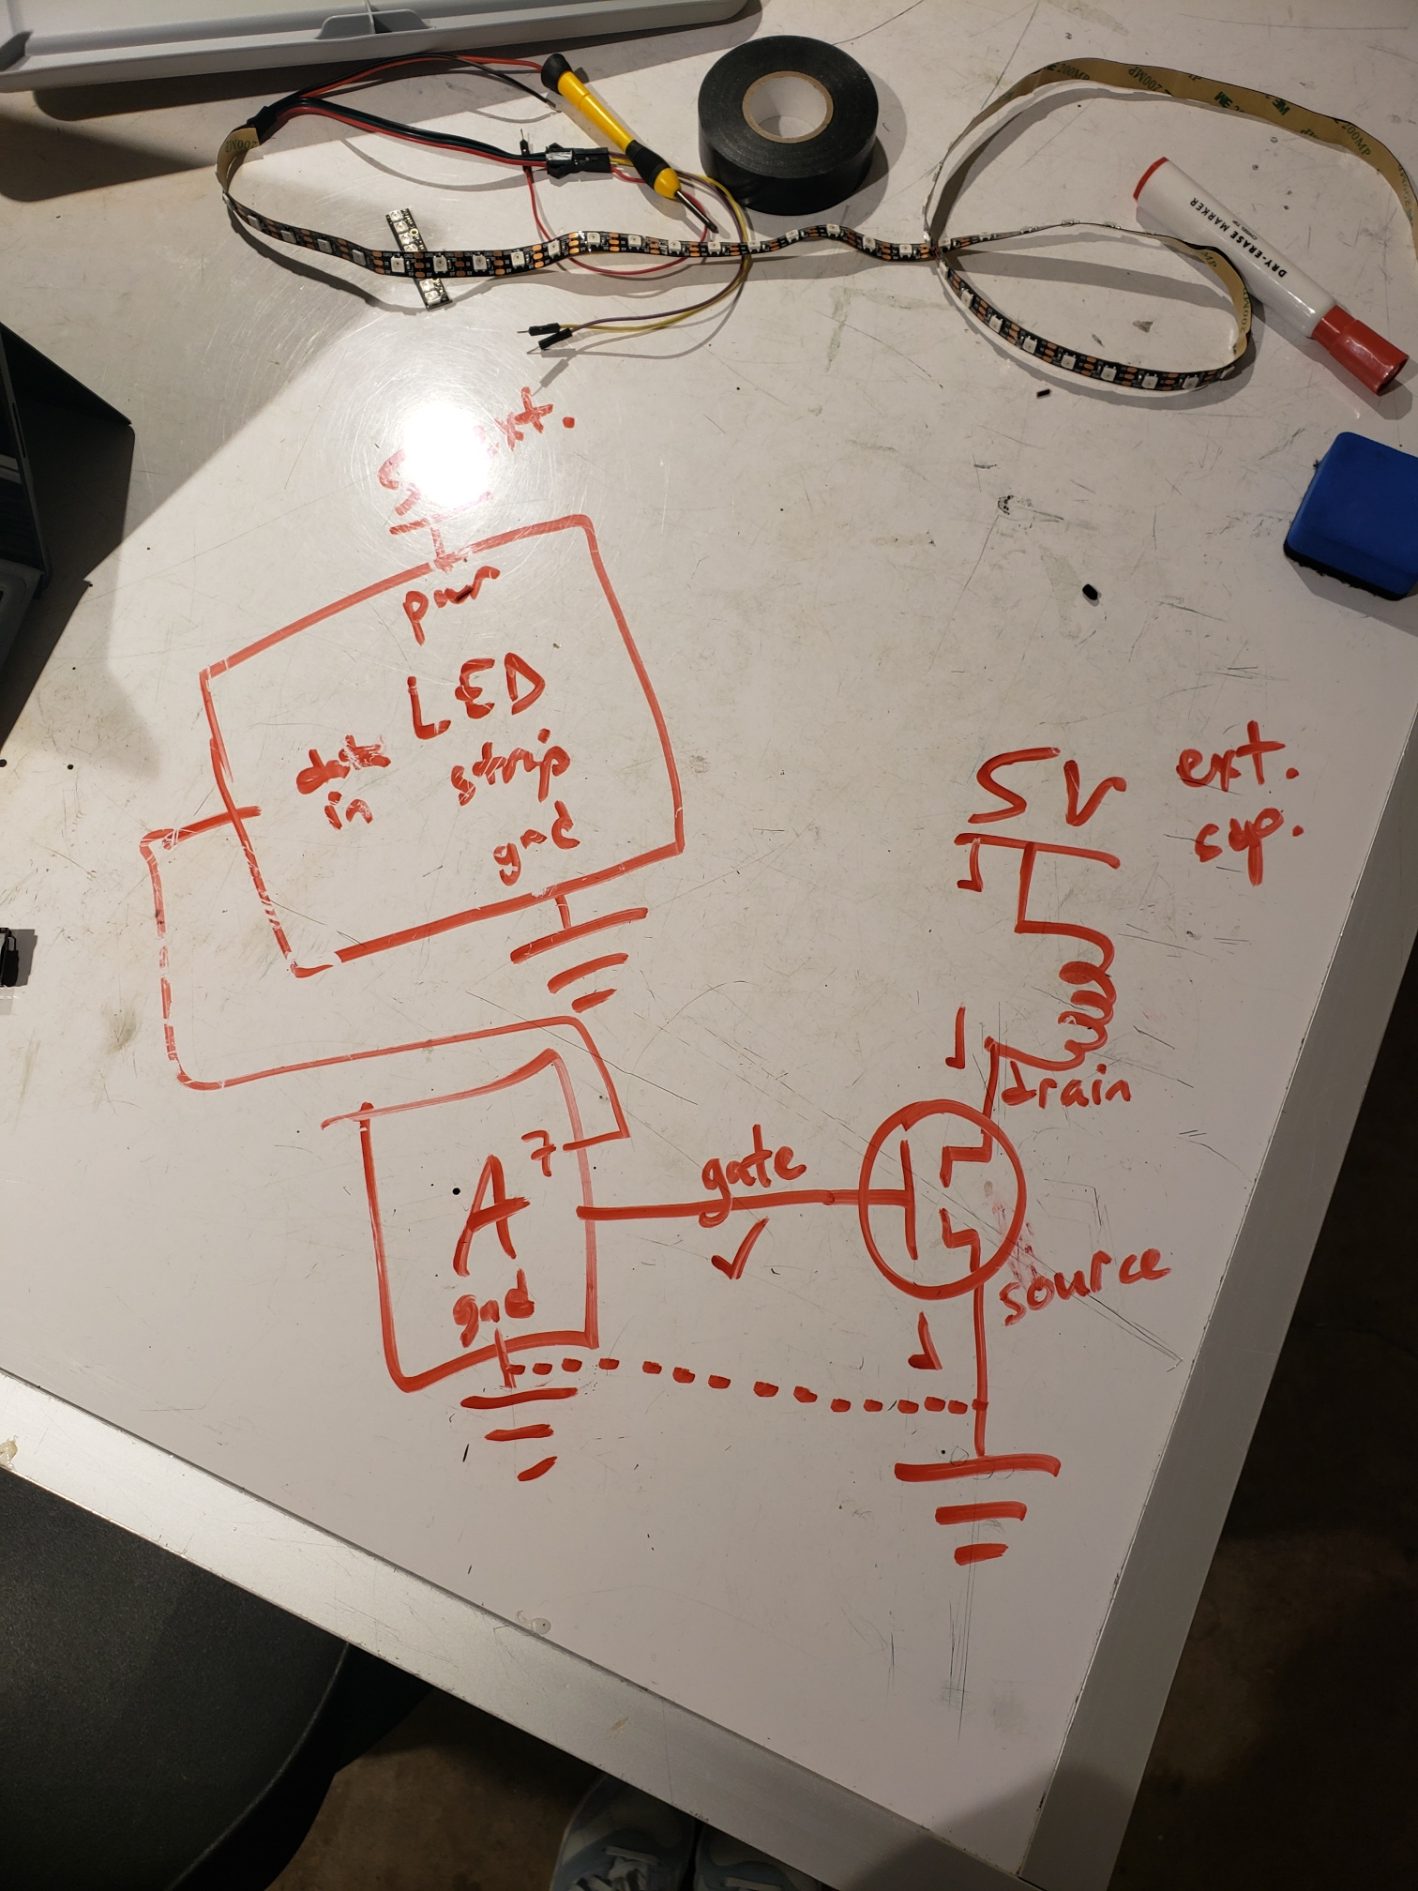
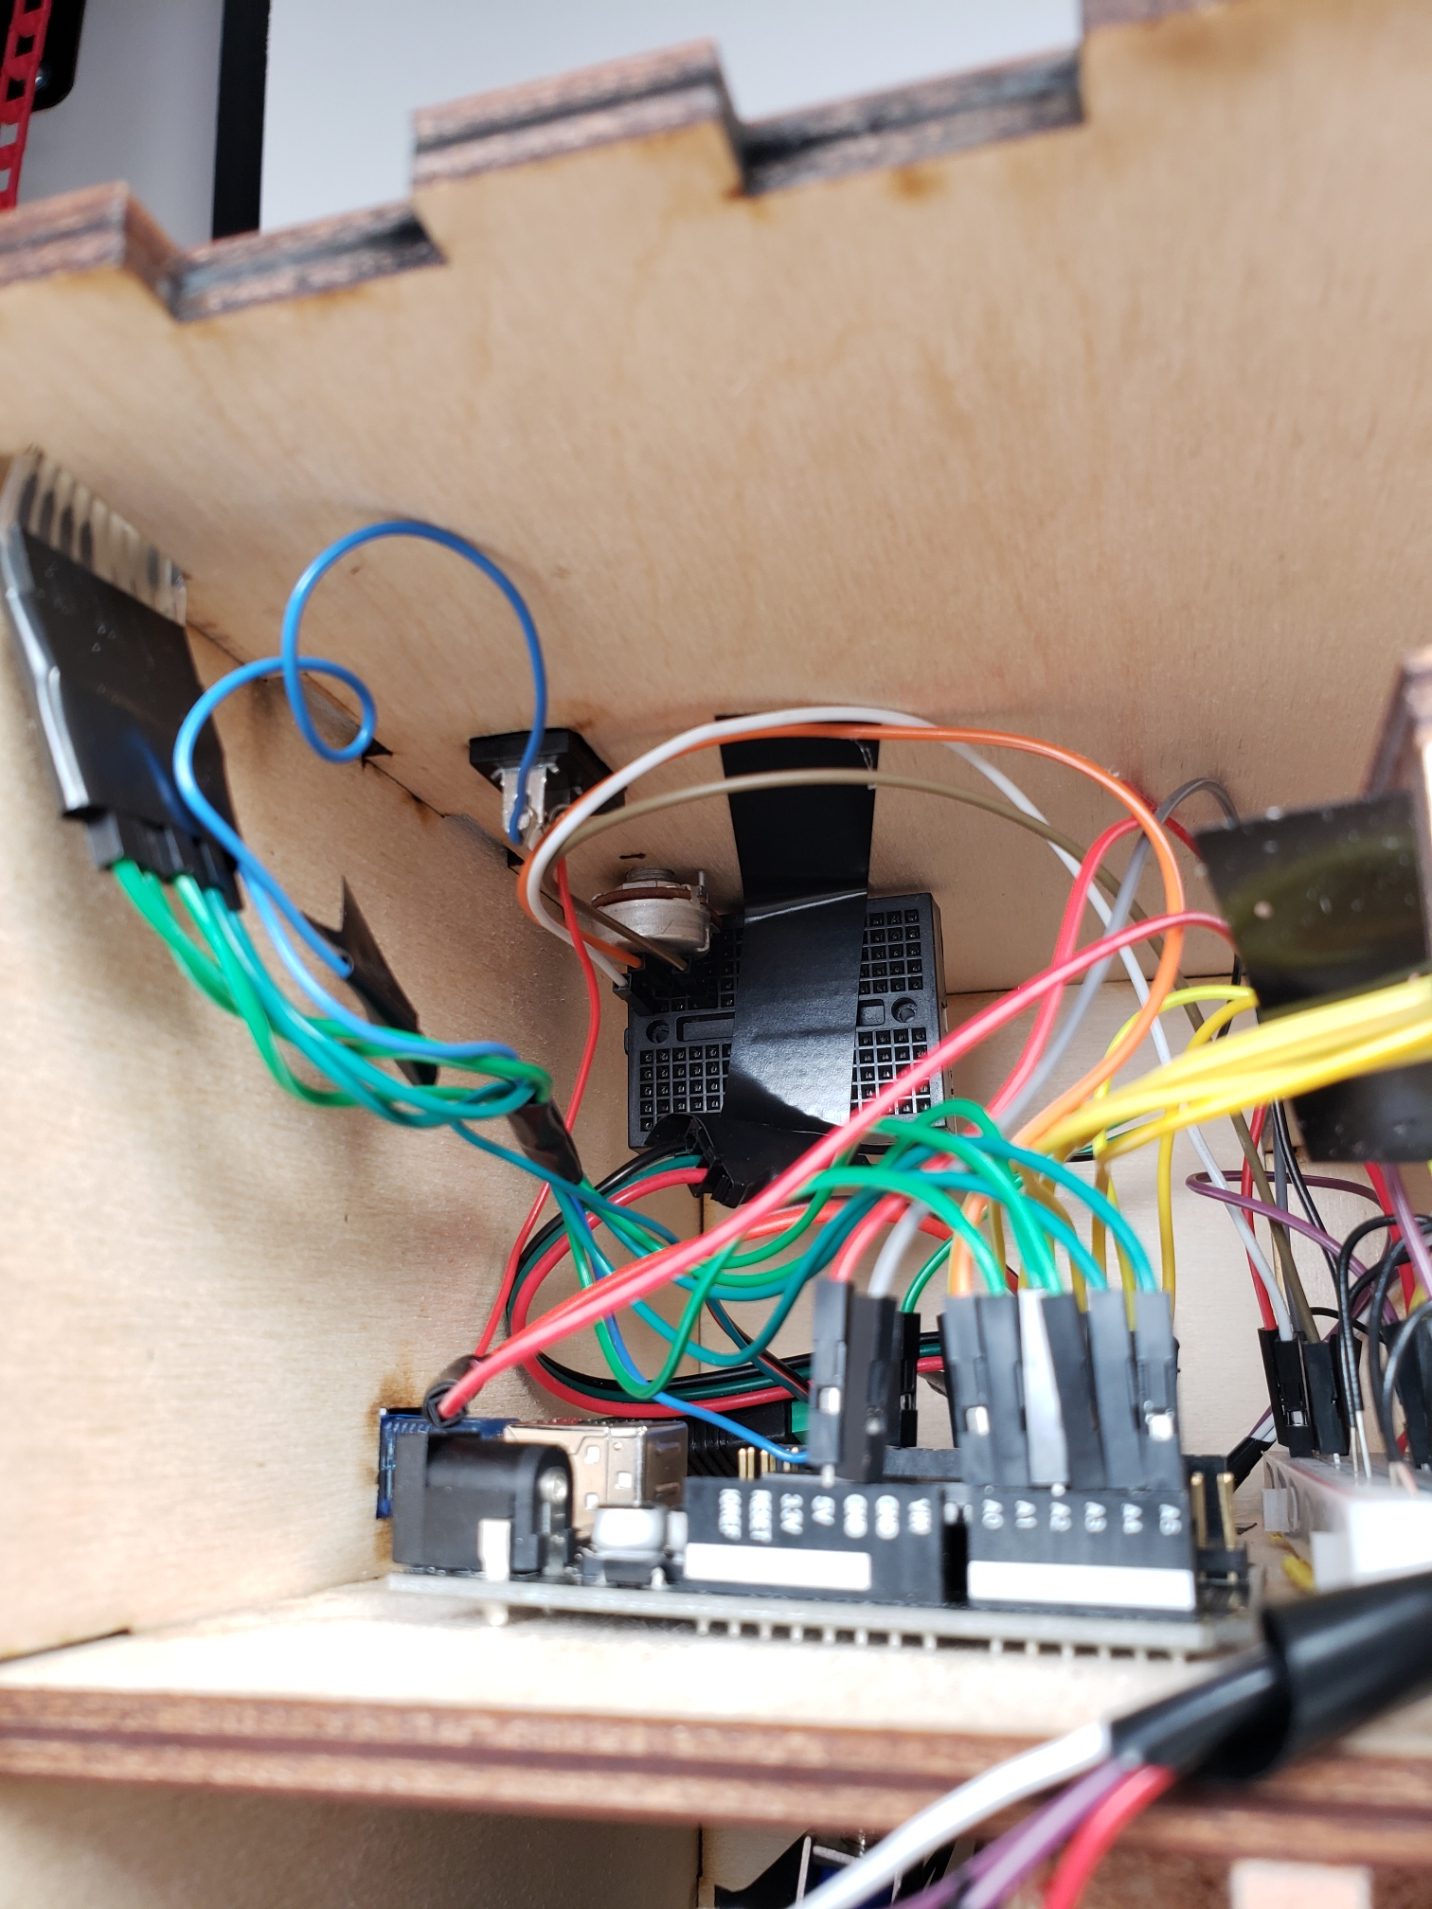
Progress Image: Professor helped in going through the wiring of the LED strip and solenoid.
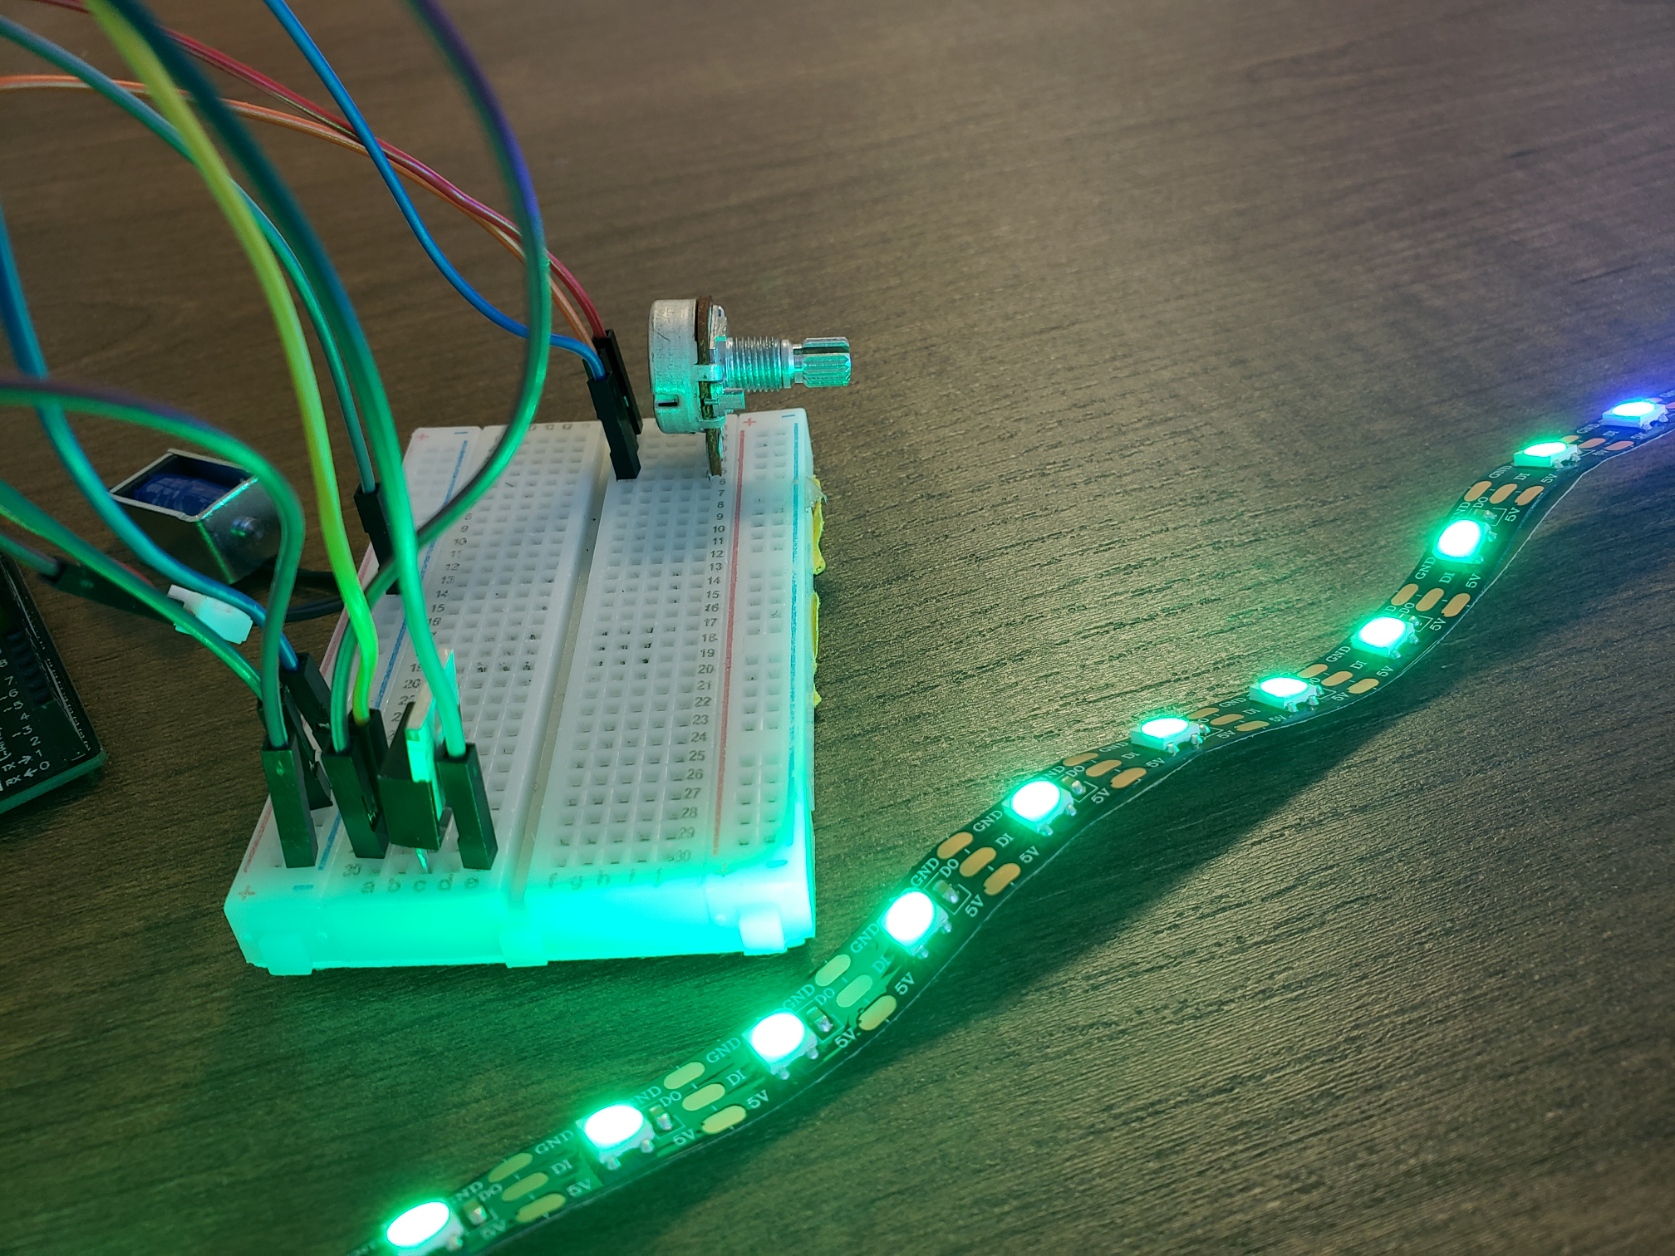
Progress Image: Getting the potentiometer to control the changing speed of lights on the LED Strip.
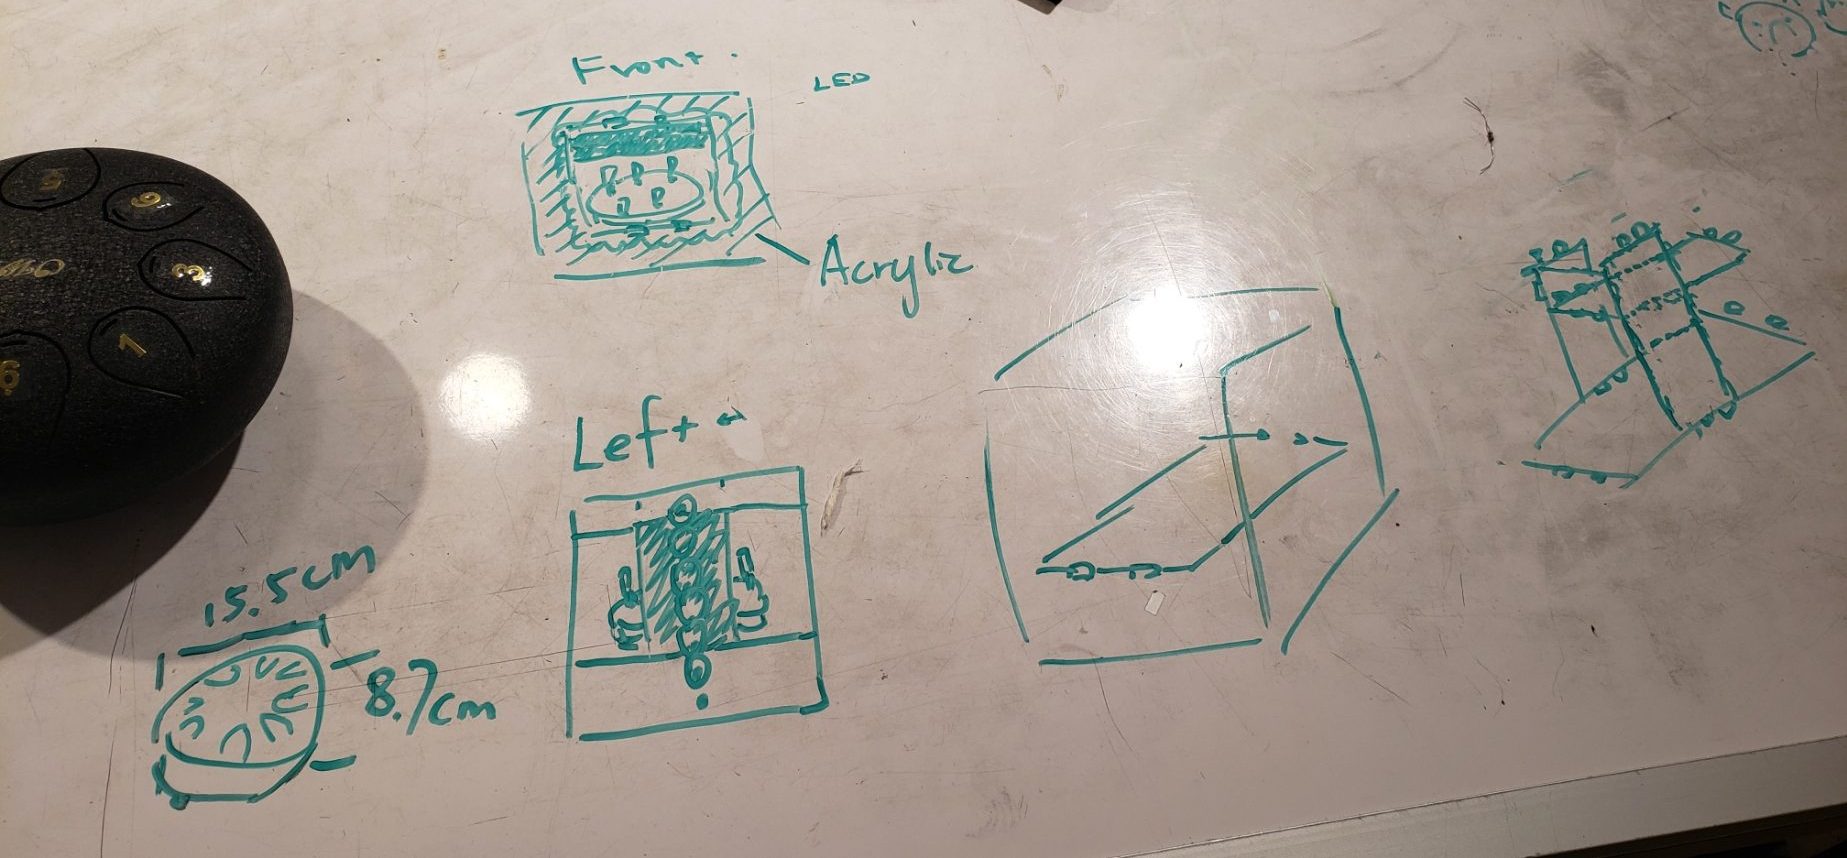
Decision Point 1: Deciding the structure and material of the box; use of acrylic in the front for viewing and inclusion of an area to hide wires.
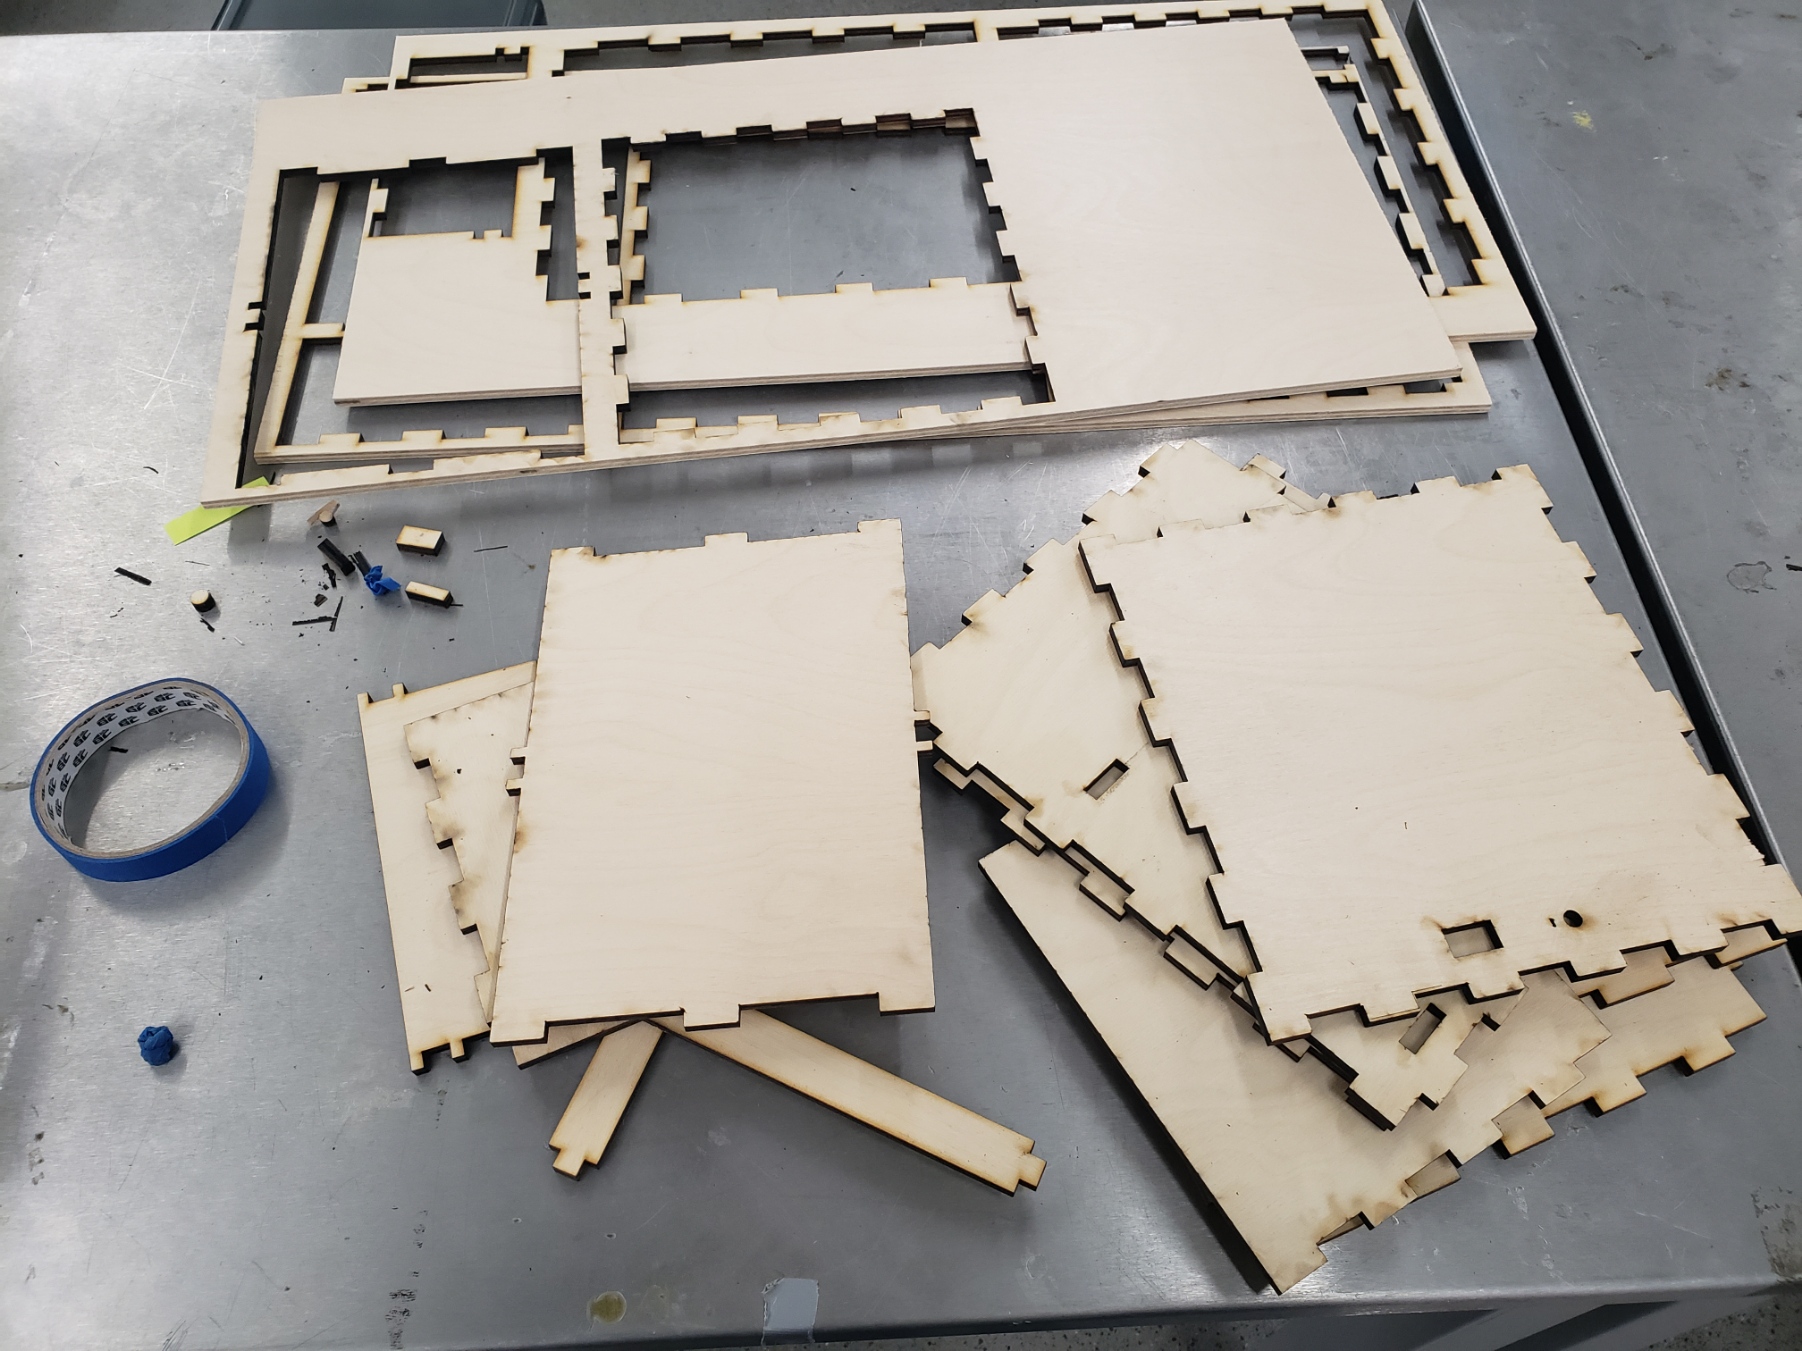
Progress Image: Laser cut pieces!
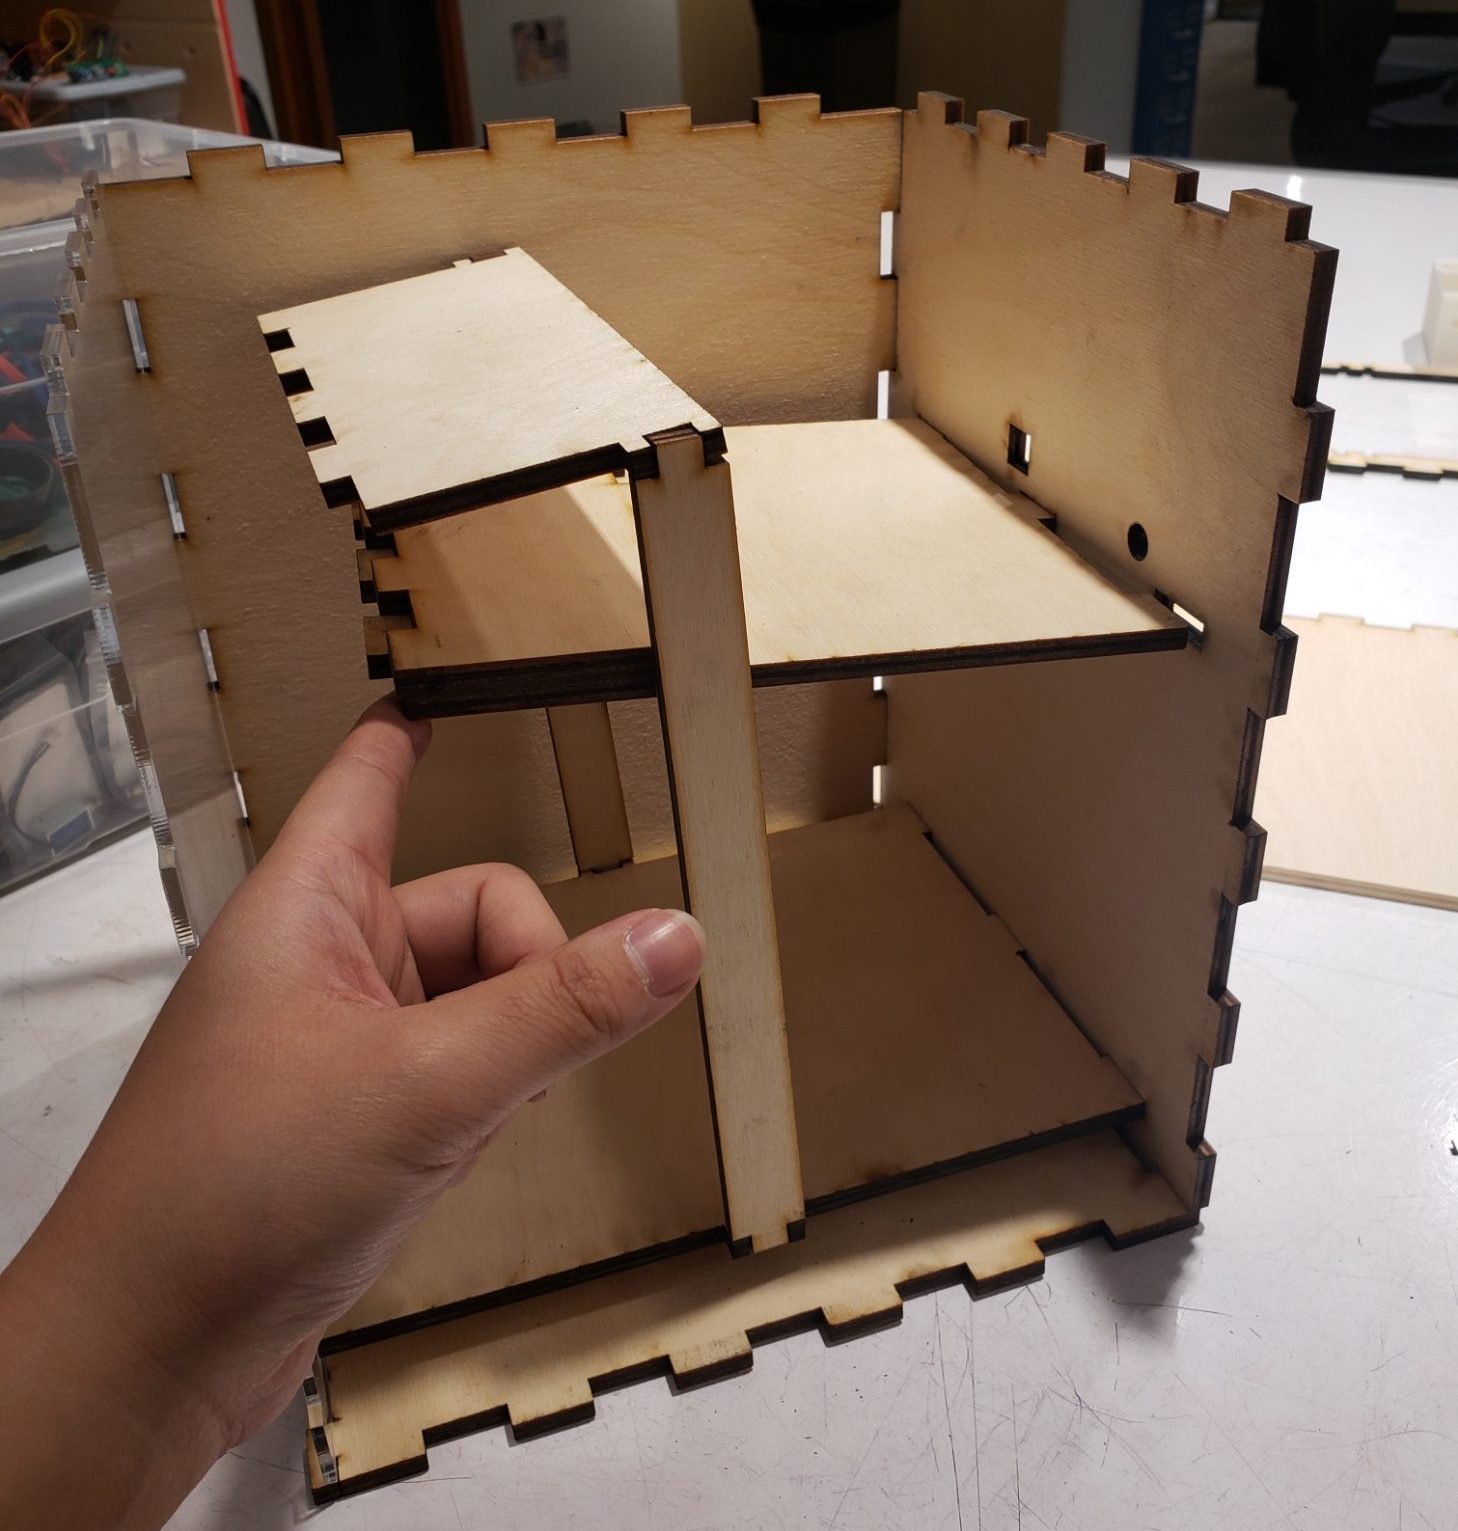
Progress Image: pieces fitting together YAY
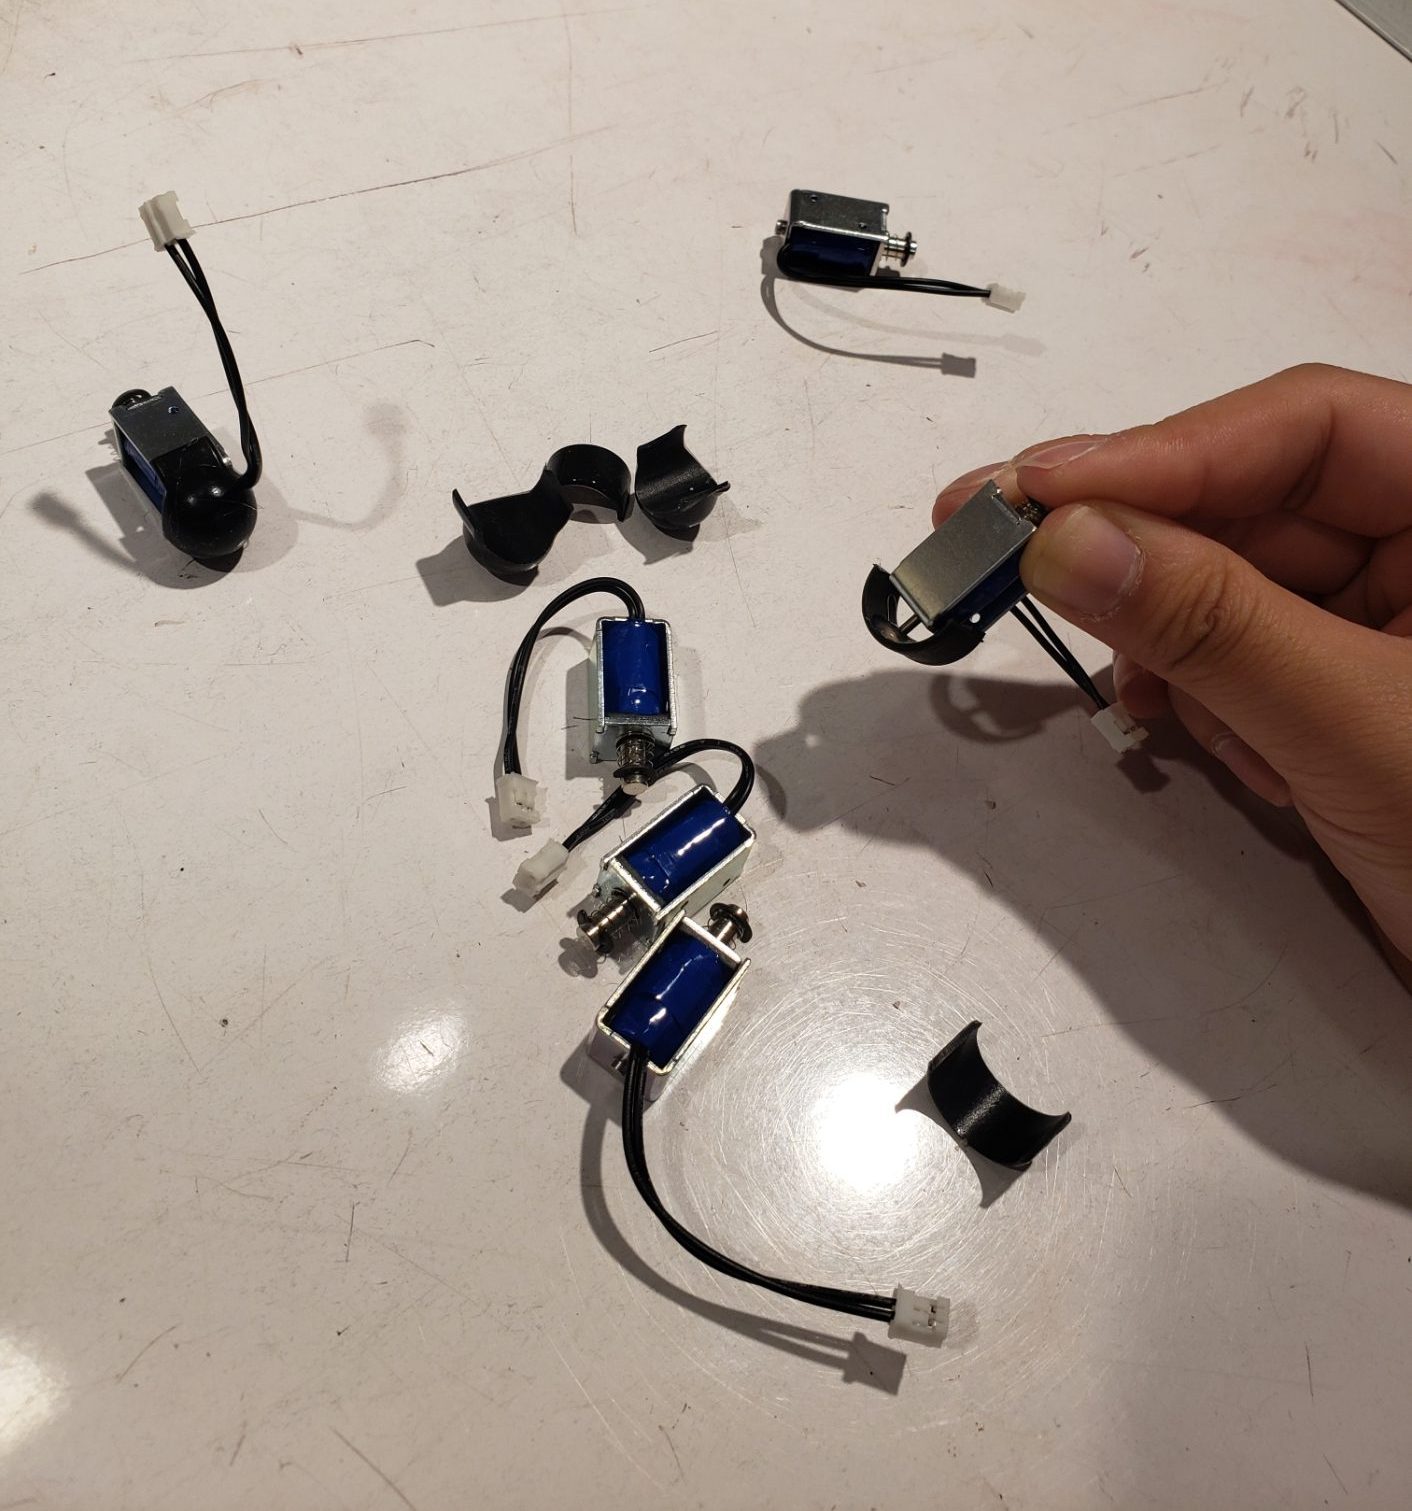
Decision Point 2: attaching the finger mallet to the solenoid. This created better impact sound rather than having metal hitting each other.
Discussion
“Some openings in the box might help the sound travel” I originally disagreed with this comment; I believed the sound being dull was due to the imperfect position of the solenoids. However, after some experimentation with the side of the box off, I found the wood does block some sound. I liked the one suggestion of having some openings on the sides of the box to allow more sounds to travel out.
“Love that you used an actual instrument, because you could’ve done something with a speaker instead” Using a speaker was definitely considered at one point, but the professor suggested it will be more fun to have an actual instrument and implement a mechanical hitting of the instrument. I also thought it would be cool for the process to be visible. This was definitely challenging, but I’m glad I went this route of using an actual instrument.
Overall, I’m quite content with my project because it does satisfy the intended goal: guiding breathing with lights and sound. However, I’m not entirely satisfied. There are at least three things I would want to improve on. One is the sound: the steel tongue drum I got had 8 notes and currently not all of them are producing pleasant sounds due to the solenoid positions. Two is the lights. I would want to add a control for the lights, so the user can change the color. Three is the appearance of the box. I could have done a better job of hiding the wires. Though I made the inside upper component solely for hiding wires, it’s still not a clean view. Messy wires are definitely not pleasant to see at all. Furthermore, on the wood panels, I could have used engraving or scoring either for the instructions or some decorations for aesthetics.
There were two major hang-ups for the project. One is the solenoid positions. They are placed to be against gravity and currently just taped and glued to random balsa wood pieces. Advice to my past self would be to spend more time on the position and create a proper holder for the solenoids. The other is the laser cutting parts. Due to unfamiliarity with Fusion 360, the sketch step took way longer than I expected. However, I think this learning process will be good for the future.
Technical Information
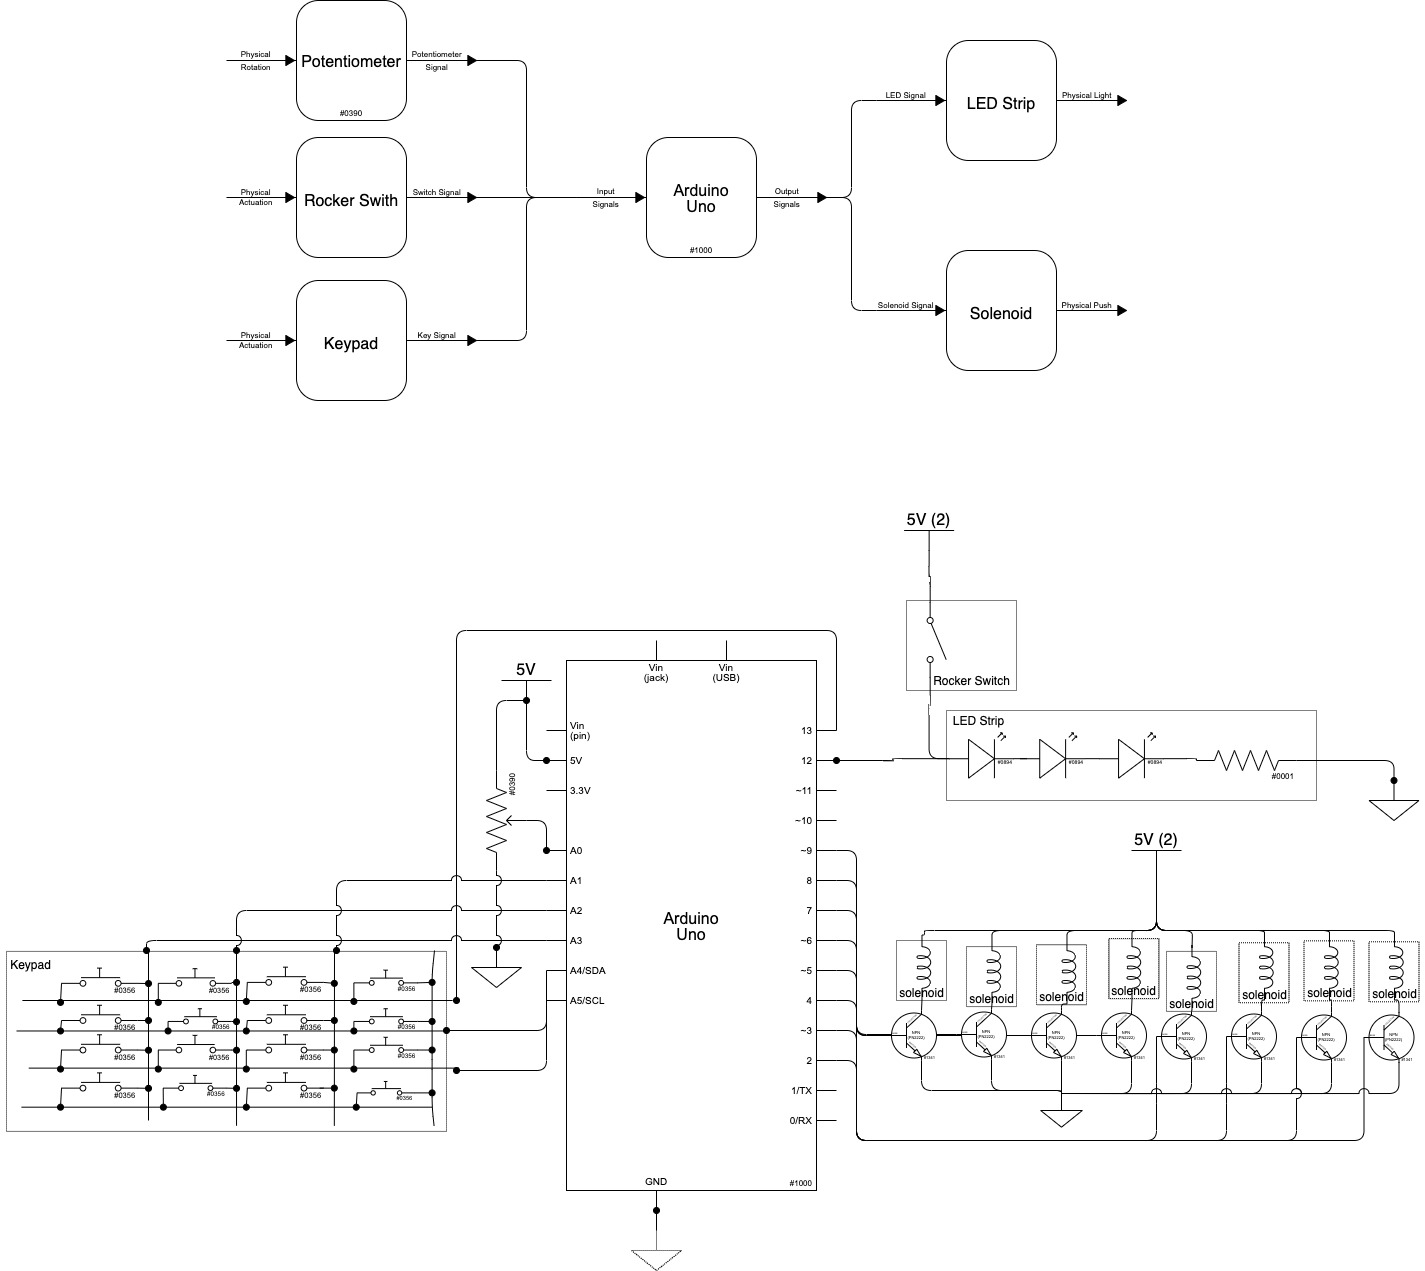
Block and Schematic Diagrams
Code
/*Project Title: Box Breathing Box
  Team Members: Yuqi (Alice) Zhou
  Description: Arduino takes in inputs from three components: rocker switch, potentiometer, and keypad.
               The rocker switch is the switch for the overall system. Once on, the LED strip will change
               color one by one with speed dictated by the potentiometer's position. The output solenoid
               is fired based on that speed as well. Which solenoid is determined from the keypad input.
  Pin mapping:
    Arduino pin | role   | description
    ------------|--------|-------------
    A0            input     potentiometer pin 1
    A1            input     keypad c3
    A2            input     keypad c2
    A3            input     keypad c1
    13            input     keypad r1
    A4            input     keypad r2
    A5            input     keypad r3
    2             output    solenoid RE
    3             output    solenoid LAL
    4             output    solenoid MI
    5             output    solenoid DOL
    6             output    solenoid DOLH
    7             output    solenoid SOL
    8             output    solenoid LA
    9             output    solenoid SOLL
    12            output    LED Strip

  Keypad Code adapted from https://www.circuitbasics.com/how-to-set-up-a-keypad-on-an-arduino/
*/

#include <PololuLedStrip.h>

// Create an ledStrip object and specify the pin it will use.
PololuLedStrip<12> ledStrip;

// Create a buffer for holding the colors (3 bytes per color).
#define LED_COUNT 60
rgb_color colors[LED_COUNT];

// interval bewteen individual LED light change, controlled by the potentiometer
int delayTime = 500;
int i = 0;
// potentiometer value
int pVal = 0;

// LED strip colors *adjustable
rgb_color blue = rgb_color(28, 73, 255);
rgb_color green = rgb_color(46, 255, 47);
unsigned long sTimer;
// how many lights each side has
int sFactor = 15;

// link pin number to tone on the drum
const int SOLL = 9;
const int LAL = 3;
const int DOL = 5;
const int RE = 2;
const int MI = 4;
const int SOL = 7;
const int LA = 8;
const int DOLH = 6;
int notes[] = {SOLL, LAL, DOL, RE, MI, SOL, LA, DOLH};

// the pin to be pushed this round, default to 2
int pushPin = 2;

// initializing keypad
#include <Keypad.h>

const byte ROWS = 3;
const byte COLS = 3;

char hexaKeys[ROWS][COLS] = {
  {'1', '2', '3'},
  {'4', '5', '6'},
  {'7', '8', '9'}
};

byte rowPins[ROWS] = {13, A5, A4};
byte colPins[COLS] = {A3, A2, A1};

Keypad notePad = Keypad(makeKeymap(hexaKeys), rowPins, colPins, ROWS, COLS);

//flow rate (fastest and slowest breath rounds in milliseconds) *adjustable
int durLow = 70;
int durHigh = 300;

// solenoid move function
void sMove(int pushPin) {
  digitalWrite(pushPin, HIGH);
  delay(10);
  digitalWrite(pushPin, LOW);
}

void setup()
{
  pinMode(A0, INPUT);
  for (uint16_t i = 0; i < LED_COUNT; i++) {
    colors[i] = blue;
  }
  ledStrip.write(colors, LED_COUNT);
  pinMode(SOLL, OUTPUT);
  pinMode(LAL, OUTPUT);
  pinMode(DOL, OUTPUT);
  pinMode(RE, OUTPUT);
  pinMode(MI, OUTPUT);
  pinMode(SOL, OUTPUT);
  pinMode(LA, OUTPUT);
  pinMode(DOLH, OUTPUT);
}

void loop()
{
  sTimer = millis();
  // Update the colors.
  for (i; i < LED_COUNT; i++)
  {
    // note detection
    char note = notePad.getKey();
    int noteNum = note - '0';
    if (noteNum == 1) {
      pushPin = SOLL;
    } else if (noteNum == 2) {
      pushPin = LAL;
    } else if (noteNum == 3) {
      pushPin = DOL;
    } else if (noteNum == 4) {
      pushPin = RE;
    } else if (noteNum == 5) {
      pushPin = MI;
    } else if (noteNum == 6) {
      pushPin = SOL;
    } else if (noteNum == 7) {
      pushPin = LA;
    } else if (noteNum == 8) {
      pushPin = DOLH;
    }

    // solenoid control
    if ((millis() - sTimer) >= delayTime * sFactor) {
      sMove(pushPin);
      sTimer = millis();
    }
    // read potentiometer value
    pVal = analogRead(A0);
    // map into the time range of breath
    delayTime = map(pVal, 0, 255, durLow, durHigh);
    colors[i] = green;
    ledStrip.write(colors, LED_COUNT);
    delay(delayTime);
  }

//resetting the color at the end of the strip to start a new round
  if (i == LED_COUNT) {
    i = 0;
    for (uint16_t i = 0; i < LED_COUNT; i++) {
      colors[i] = blue;
    }
    ledStrip.write(colors, LED_COUNT);
    sMove(pushPin);
  }
}