A container incorporated into the structure of a refrigerator that shows how long an item has been inside of it.
Images
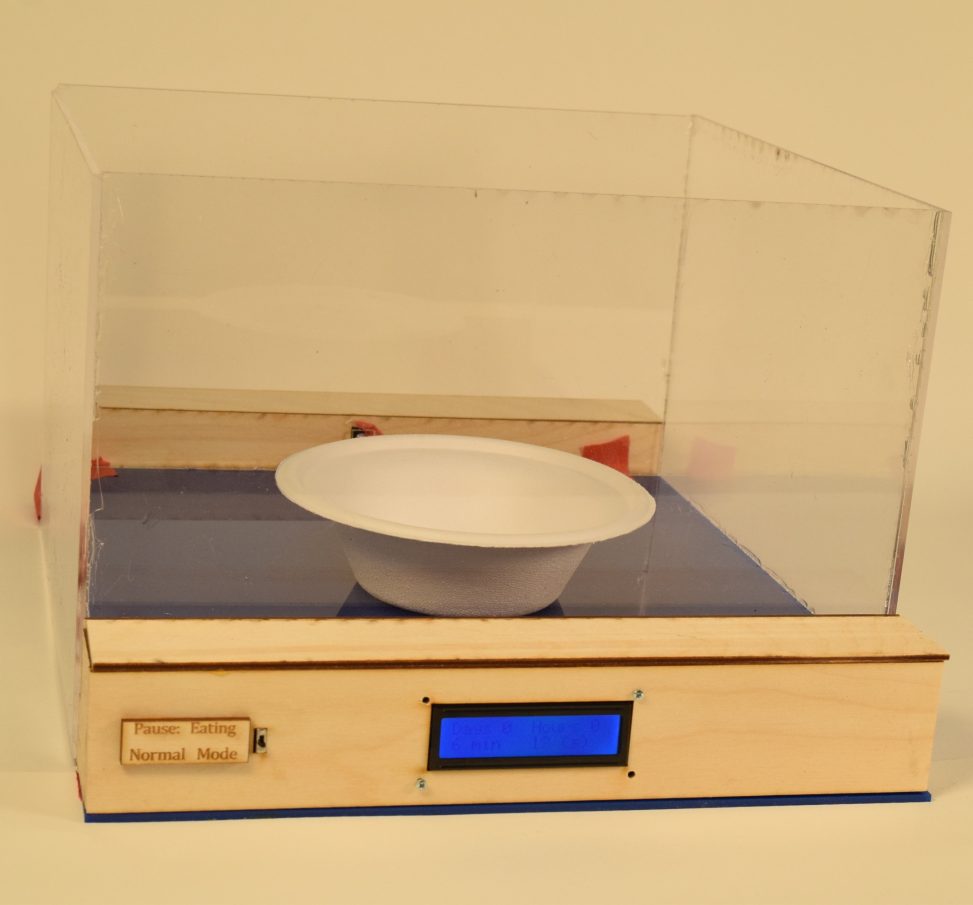
Overall Photo:

Fig(1): This image displays the full container meant to show scale. A bowl is placed to show volume of container. There is an LCD screen in the front which notifies the user of how long an item has been placed in the container as well as a pause switch to continue the timer if an item is taken out of the container. The wooden housing contains both the emitter and detector of the break beam sensor with the Arduino and breadboard located underneath the blue acrylic.
Detailed Views:
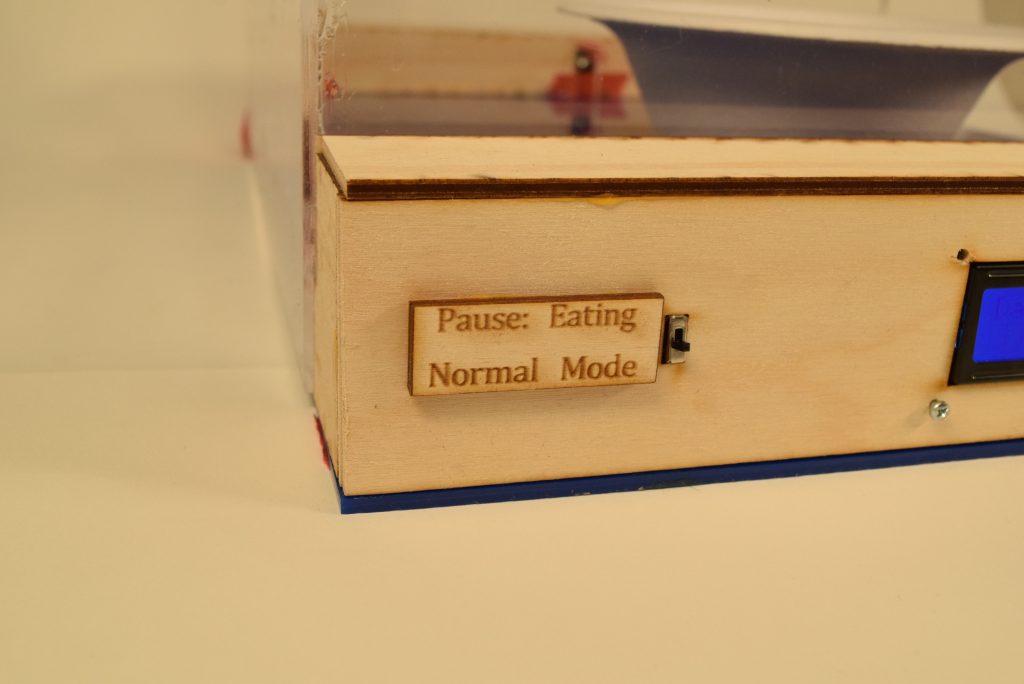
Fig(2) Pause Switch: This switch is used when the user wants to take something out of the container to eat but still wants the timer to run for the item. They can flip the switch up to make the timer continue to run even if the break beam sensor does not show anything in the container. The switch in normal mode means that the timer will reset once the sensor no longer detects an item in the container.
Use Images:
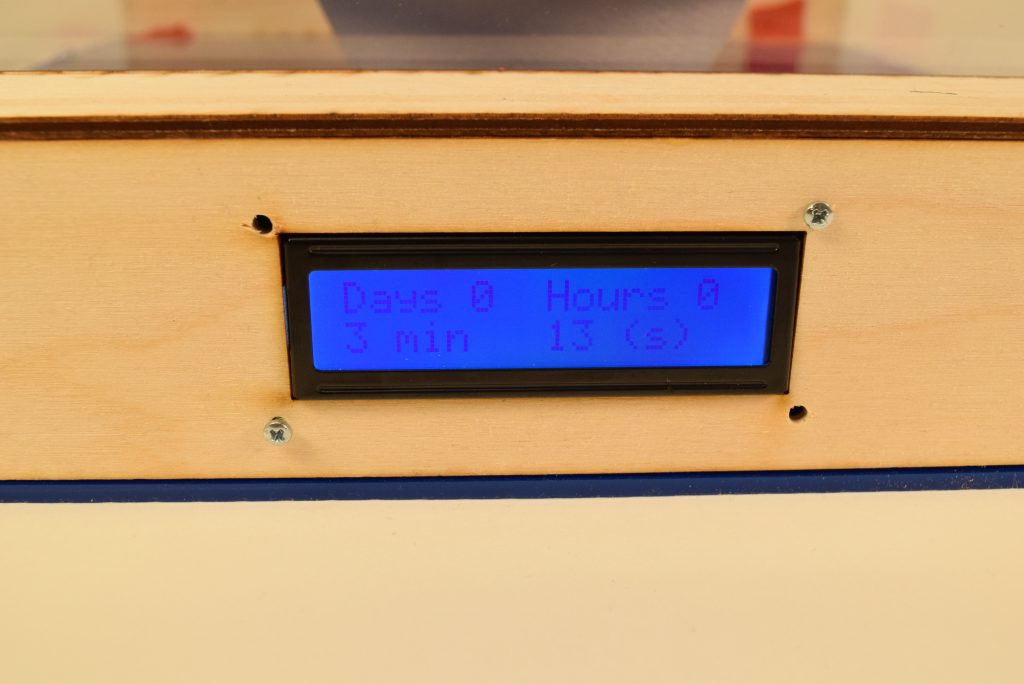
Fig(3) LCD Timer Screen: This picture shows the LCD screen which shows the user the amount of time an item has been inside of the container. The timer shows days, hours, minutes and seconds and increments as long as an item is inside.
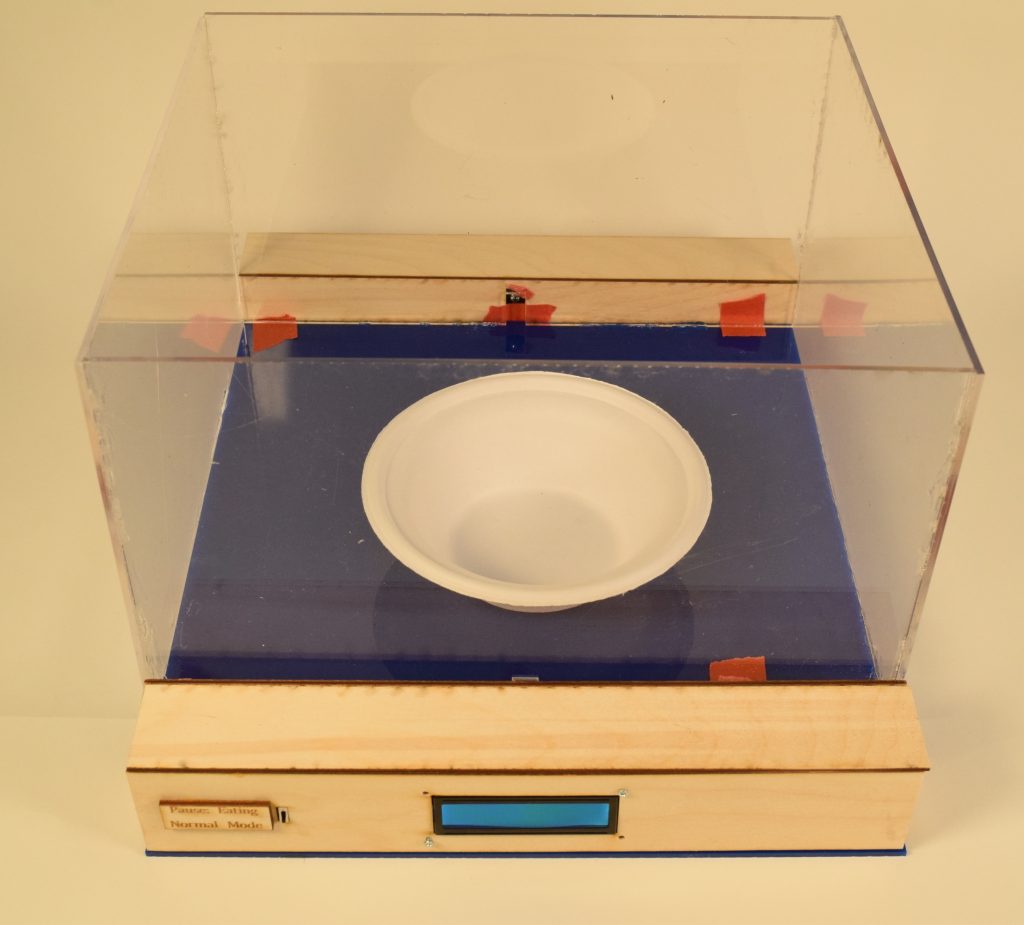
Fig(4) Full Working Photo: As seen in the photo, as the break beam detector (taped in the back) no longer can detect the light it means that an item is in the container. The bowl causes the different reading with the sensor and thus starts the timer and lights up the LCD screen as seen on the bottom of the picture.
Process
Decision Points:
- The first major decision point was determining which type of sensor to use in the application. This would effect the overall structure of the container as well as become the main input into the system. The decision to go with a break beam sensor was made due to the conditions the container when used in the actual application. As a refrigerator has no light when the door is closed this meant that a photoresistor could not be used. Other sensors considered were proximity sensors and ultrasonic range finders but these sensors were not as useful in this application as a break beam sensor. The input the system wants is simply whether an item is in the container or not and those sensors mean that there would be an extra step of converting distance to presence. The break beam sensor was perfect because it tells simply whether an item is present between the detector and emitter is all we wanted. This choice was important as the container was made to house the sensor at a distance and placement that it worked well.
- The second major decision point was to use laser cut components and glue to build the structure of the container. This led to changes in design from the front and back wooden structures to the acrylic center. Deciding to glue the structure meant everything needed to be flush with one another. It also led to the need for certain pieces to have lips built on in order for different pieces to easily fit on top of the lips. This made the design process easier in the sense that there was no need to drill any holes or use any fasteners besides with mounting the LCD screen.
Process Pictures:
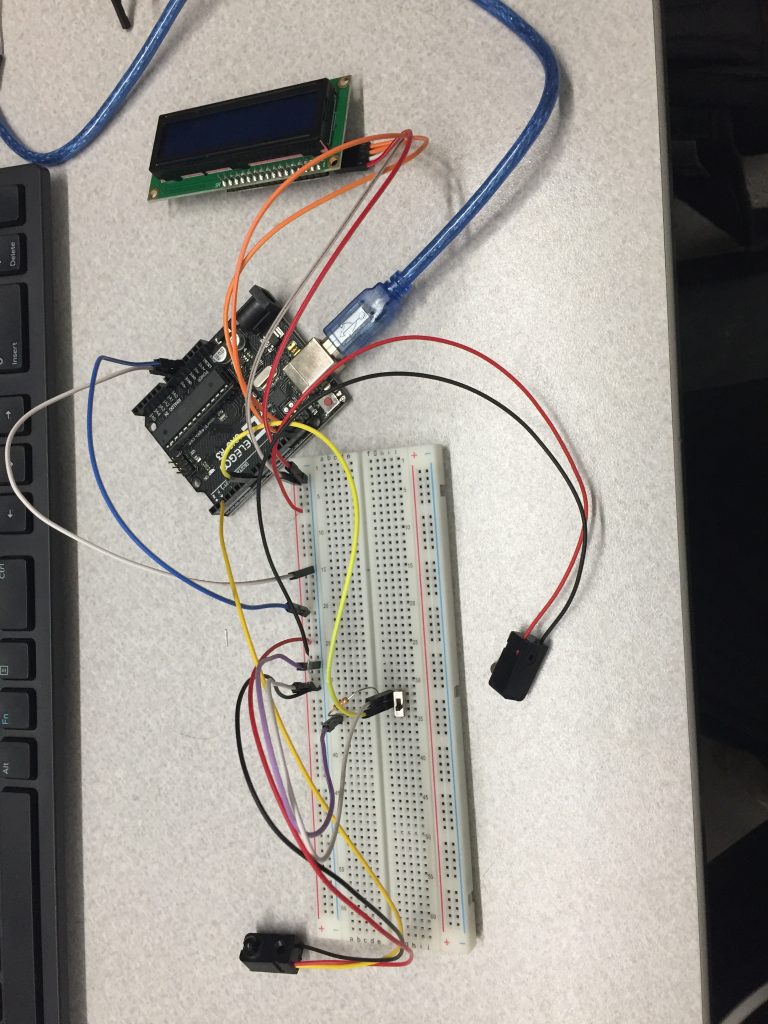
Figure(5) Circuit Design: The first step was to build the circuit and write the code for it. I began by wiring the LCD display the the Arduino and creating the code to run the timer. As this was the basis of the system it was important to get the timer to work first. From there I added the break beam sensor and made it turn on and off the timer based on waving my hand to break the beam. Then I added the pause switch which made the timer still run no matter what the sensor input was. From here I had all the functionality I needed out of the different components and would later have to solder connecting wires to the different parts of the break beam sensor and switch in order to add the length to reach the breadboard.
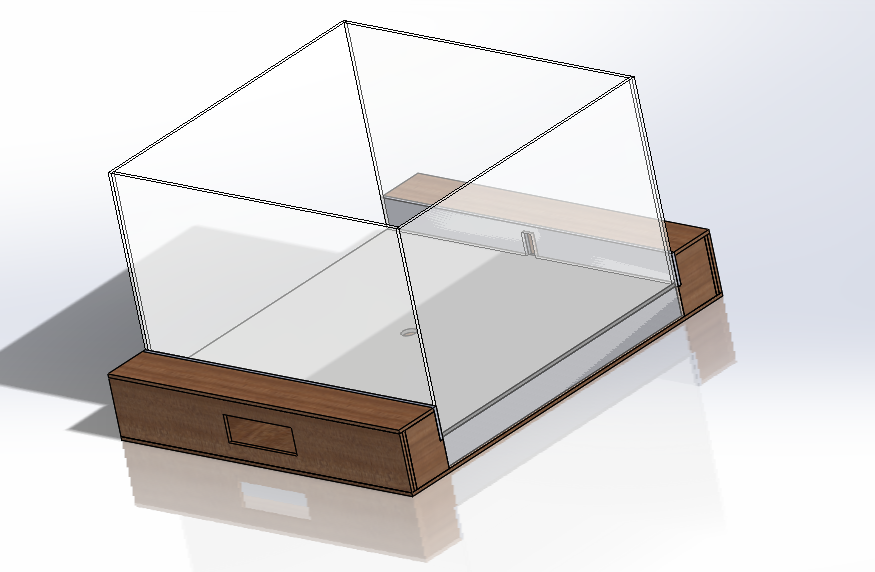
Fig(6) SolidWorks Model. Once I completed the circuit I was able to get all the dimensions of the different components in order to create the SolidWorks Model. I began the model by making the front wooden structure which houses the LCD display, switch, and break beam emitter. Then I was able to copy a similar structure to create the housing in the back of the container. Then I was able to create the plastic center walls/base based upon how large a container should be to properly house everything from plates to leftover boxes. I was able to create the assembly to make sure everything would properly mate together and then created the drawing files to cut the parts on the laser cutter.
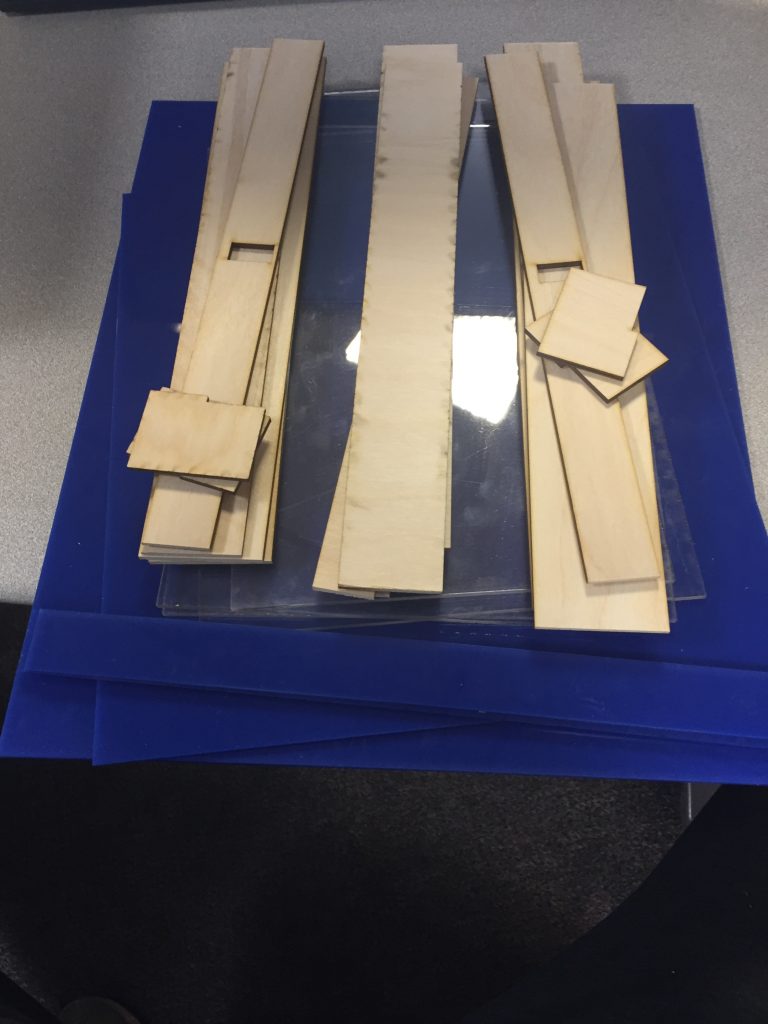
Figure(7) Laser Cut Parts: I then laser cut the 20 parts necessary to create the container. The high number of parts is due to needing to house the LCD display and sensor in the wooden structures as well as having a raised platform in order to house the Arduino and breadboard below the container. I was able to take the laser cut parts and quickly test how they matched up to see if I could successfully build the structure.
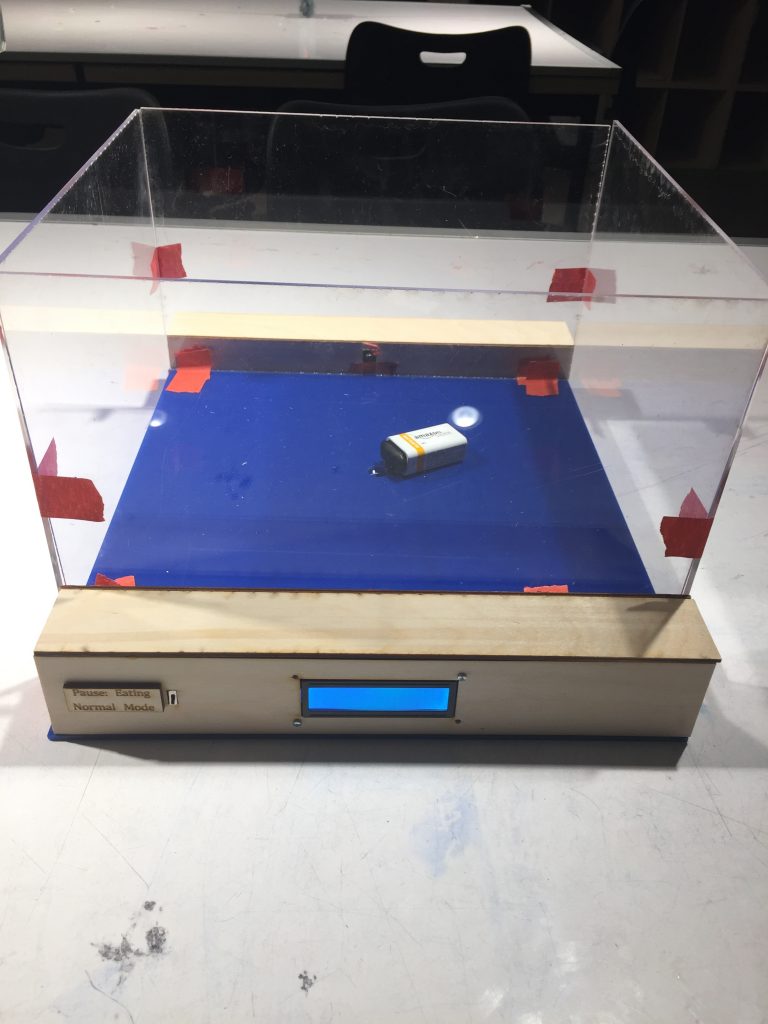
Figure(8) Fully Built Prototype: Then I was able to fully build the structure and incorporate the circuit. I began by building the wooden structures, drilling the holes to screw in the LCD display, and fixing the switch and sensor in their proper locations. From there I was able to add the acrylic sections which served as the bottom of the container, the raised platform and the surrounding walls. I was able to glue what I could and then added tape to provide last minute rigidity to the structure to make up for tolerance issues with some of the dimensions of different parts. The hole where the battery is attached was originally meant for the usb cord in case I needed to make any coding changes after construction. Overall everything was able to fit well within the structure and it was able to successfully work.
Discussion
Self Critique:
I am pleased about certain aspects of how my project came out. From an aesthetics stand point I would have liked to not have had to use tape to hold certain parts together. The wood sheets were slightly undersized which led to everything not matching up perfectly as planned. I should have taken the time to add fixtures to the design rather than have everything be flush to one another and glueing it. The CAD design had white acrylic which gave it a more distinguished look and would better fit in with the white inside of most refrigerators but there was not any large white sheets of acrylic that I could use. From a technical standpoint I think the use of the break beam sensor worked perfectly for the application. It never had a problem not detecting an object. I was happy with the timer on the LCD display and thought it worked well.
The biggest surprise along the way had to due with building the actual structure. Not having all the correct materials that I wanted led to having to change certain things from using different color acrylic to using tape to hold things together. The break beam sensor worked better than I thought that it would in that it did not have a lot of noise when putting an item in or taking an item out that led to the timer being messed up. From a project overview perspective there was some critique about the functionality of the product and if it was necessary. I think largely for people who live alone or are more organized this product may seem unnecessary. I think it can still be beneficial to everyone but can largely help in houses where a lot of people live and fridges can be stocked with many different random items/leftovers. It will help to distinguish some of the clutter and become more organized.
I learned many things throughout this process. I think that I was able to get through the electronics hardware/coding parts relatively easily. This has given me the confidence to try harder and more involved projects in the future. Not having any experience coming into this class I think I have picked up on things well and am looking forward to trying to create more difficult systems in the future. I also learned a lot about building in tolerances to my design. As I simply made every piece fit flush on my CAD model with the thought that I would glue it it leaves little room for error. If I were to have designed the structure to be fastened with screws or different fixturing methods I would have had an easier time putting slightly ill fitting pieces together. I think putting more time and effort into the structure would have been very beneficial in the end.
If I were to build another iteration of this project I would focus more on how to integrate the structure into an existing fridge. Whether this would be working on creating a drawer with a similar functionality or creating a shelf that could detect the same thing I think in order to make the design more robust I would have to make it work in an actual fridge. From this process I think the break beam sensor has proved that it is a good option to use. I think possibly adding multiple break beam sensors in almost an array pattern would be able to tell if items were in different parts of the container and not just simply in the middle. Overall I think the functionality of the product could be incorporated many different ways into a refrigerator so it would be interesting to test different options to see what would work the best.
Technical Information
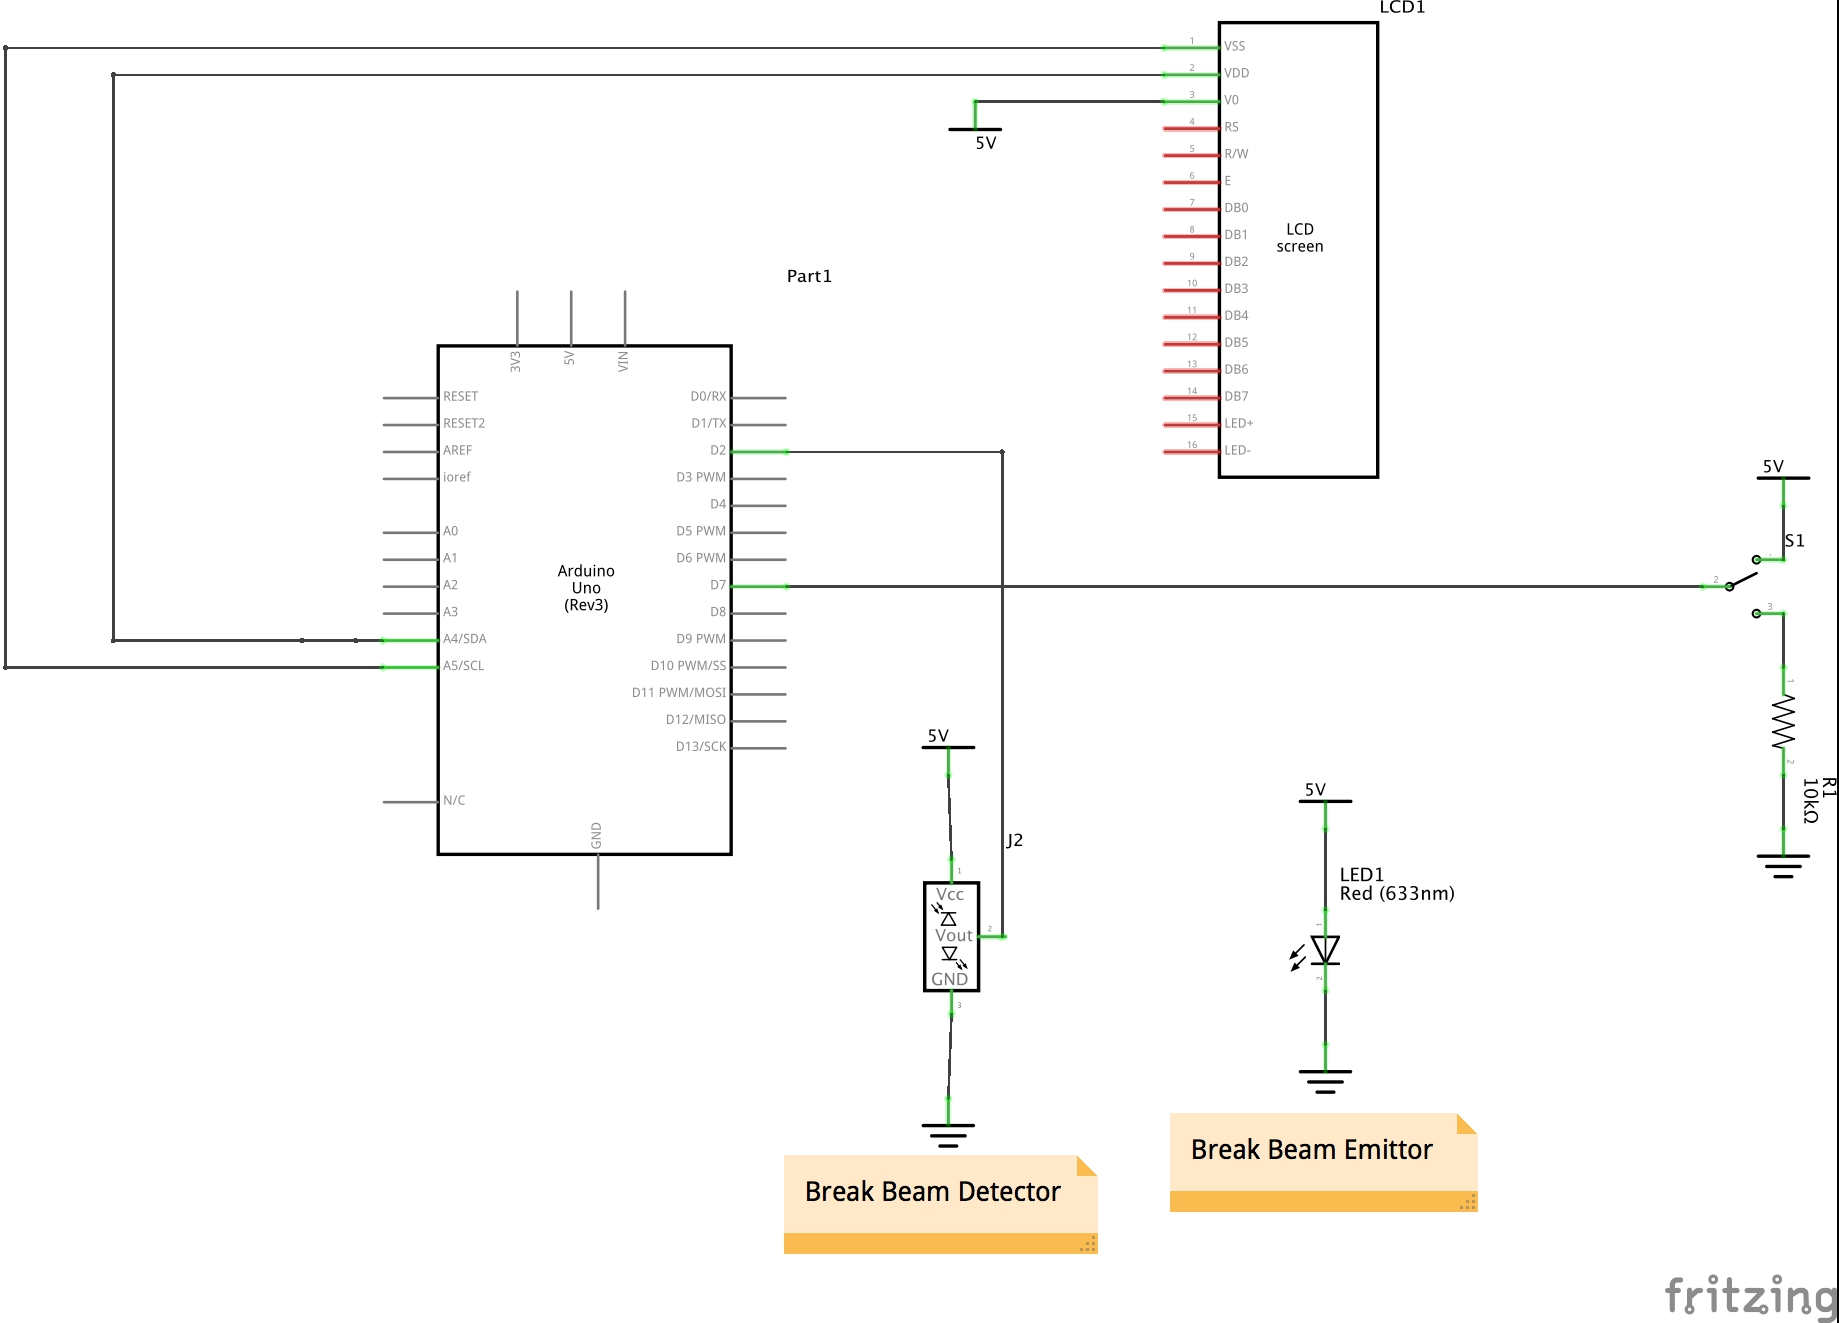
Circuit:
Code:
code language = "C"
 #include <Wire.h>
 #include <LiquidCrystal_I2C.h>
 #include <Math.h>

LiquidCrystal_I2C lcd(0x27,16,2); // set the LCD
 unsigned int Seconds = 0;
 unsigned int Minutes = 0;
 unsigned int Hours = 0;
 unsigned int Days = 0;
 unsigned long Timer = 0;
 const int Sensor = 2;
 const int Switch = 7;
 int SensorVAL = 0;
 int SwitchVAL = 0;

void setup(){
 lcd.init(); // initialize the lcd
 lcd.backlight();
 pinMode(Sensor,INPUT);
 pinMode(Switch,INPUT);
 Serial.begin(9600);
 }

void loop(){
 SensorVAL = digitalRead(Sensor);
 SwitchVAL = digitalRead(Switch);
 Serial.println(SwitchVAL);
 if(SensorVAL == LOW && SwitchVAL == LOW){
   Serial.println(millis());
   Serial.println(Timer);
   Serial.println(round((millis()-Timer)/1000));
   Seconds = (round((millis()-Timer)/1000))%60;
   Minutes = (round((millis()-Timer)/60000))%60;
   Hours = round((millis()-Timer)/3600000)%24;
   Days = round((millis()-Timer)/(3600000*24));
   lcd.setCursor(8,0); // sets cursor to 3rd line
   lcd.print ("Hours ");
   lcd.print (Hours);
   lcd.print (" ");
   lcd.setCursor (0,0); // sets cursor to 4th line
   lcd.print ("Days ");
   lcd.print (Days);
   lcd.setCursor (0,1); // sets cursor to 2nd line
   lcd.print (Minutes);
   lcd.print (" min ");
   lcd.setCursor (8,3); // sets cursor to 1st line
   lcd.print (Seconds);
   lcd.print (" (s) ");}
 if(SensorVAL == HIGH && SwitchVAL == LOW){
   Timer = millis();}
 if(SwitchVAL == HIGH && SensorVAL == HIGH){
   lcd.setCursor(0,0);
   lcd.print ("Paused");
   Seconds = (round((millis()-Timer)/1000))%60;
   Minutes = (round((millis()-Timer)/60000))%60;
   Hours = round((millis()-Timer)/3600000)%24;
   Days = round((millis()-Timer)/(3600000*24));
   lcd.setCursor(8,0); // sets cursor to 3rd line
   lcd.print ("Hours ");
   lcd.print (Hours);
   lcd.print (" ");
   // lcd.setCursor (0,0); // sets cursor to 4th line
   // lcd.print ("Days ");
   // lcd.print (Days);
   lcd.setCursor (0,1); // sets cursor to 2nd line
   lcd.print (Minutes);
   lcd.print (" min ");
   lcd.setCursor (8,3); // sets cursor to 1st line
   lcd.print (Seconds);
   lcd.print (" (s) ");}
 if(SwitchVAL == HIGH && SensorVAL == LOW){
   lcd.setCursor(0,0);
   lcd.print ("Paused");
   Seconds = (round((millis()-Timer)/1000))%60;
   Minutes = (round((millis()-Timer)/60000))%60;
   Hours = round((millis()-Timer)/3600000)%24;
   Days = round((millis()-Timer)/(3600000*24));
   lcd.setCursor(8,0); // sets cursor to 3rd line
   lcd.print ("Hours ");
   lcd.print (Hours);
   lcd.print (" ");
   // lcd.setCursor (0,0); // sets cursor to 4th line
   // lcd.print ("Days ");
   // lcd.print (Days);
   lcd.setCursor (0,1); // sets cursor to 2nd line
   lcd.print (Minutes);
   lcd.print (" min ");
   lcd.setCursor (8,3); // sets cursor to 1st line
   lcd.print (Seconds);
   lcd.print (" (s) ");}
 }

/code
Leave a Reply
You must be logged in to post a comment.