This slouch detector will calibrate to fit your individual posture and will alert you with an LED and on-screen text when you are slouching.
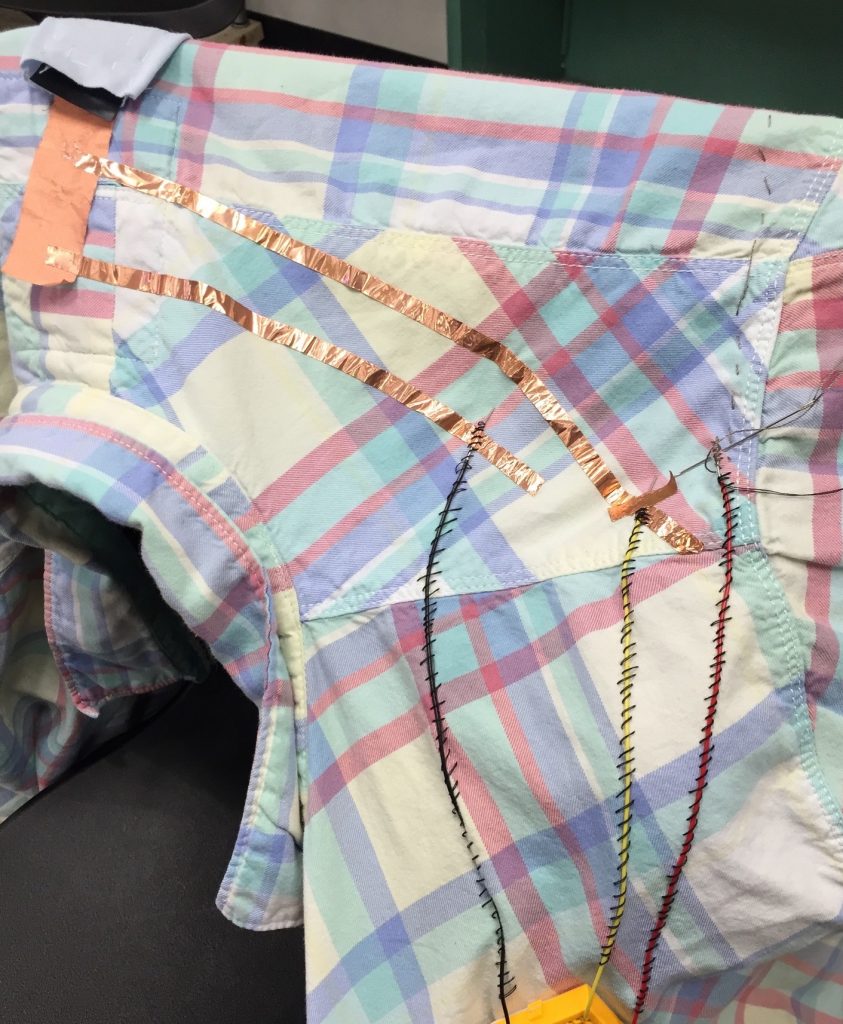
The detector was attached to an XL mens shirt
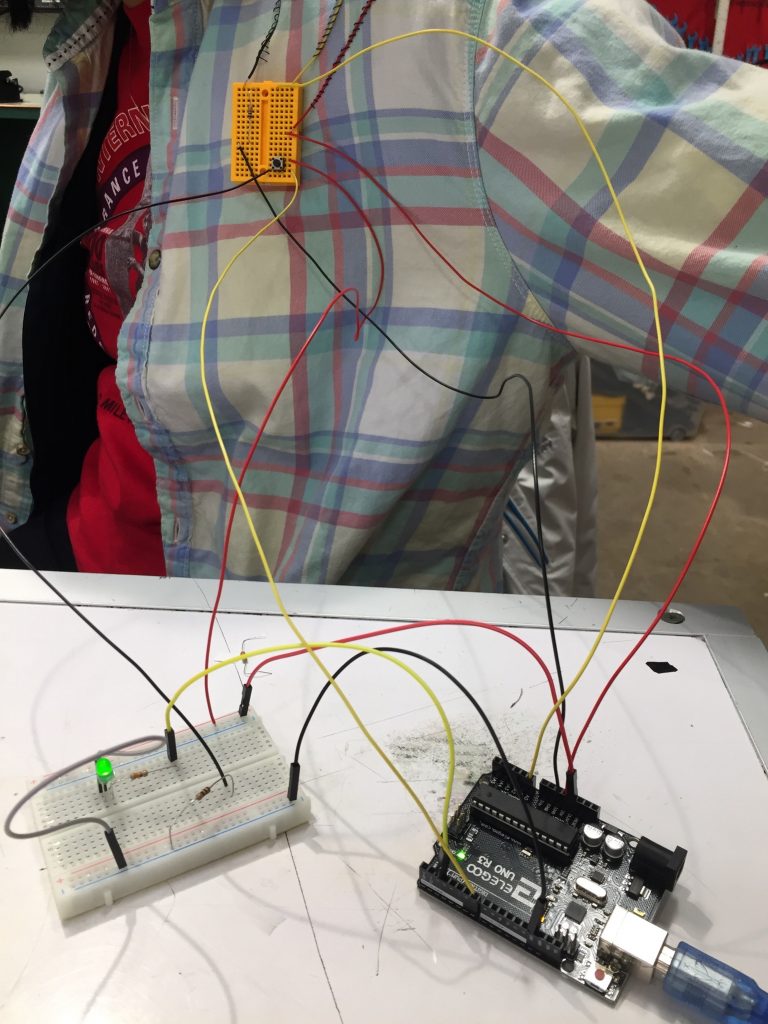
Volunteer using the detector
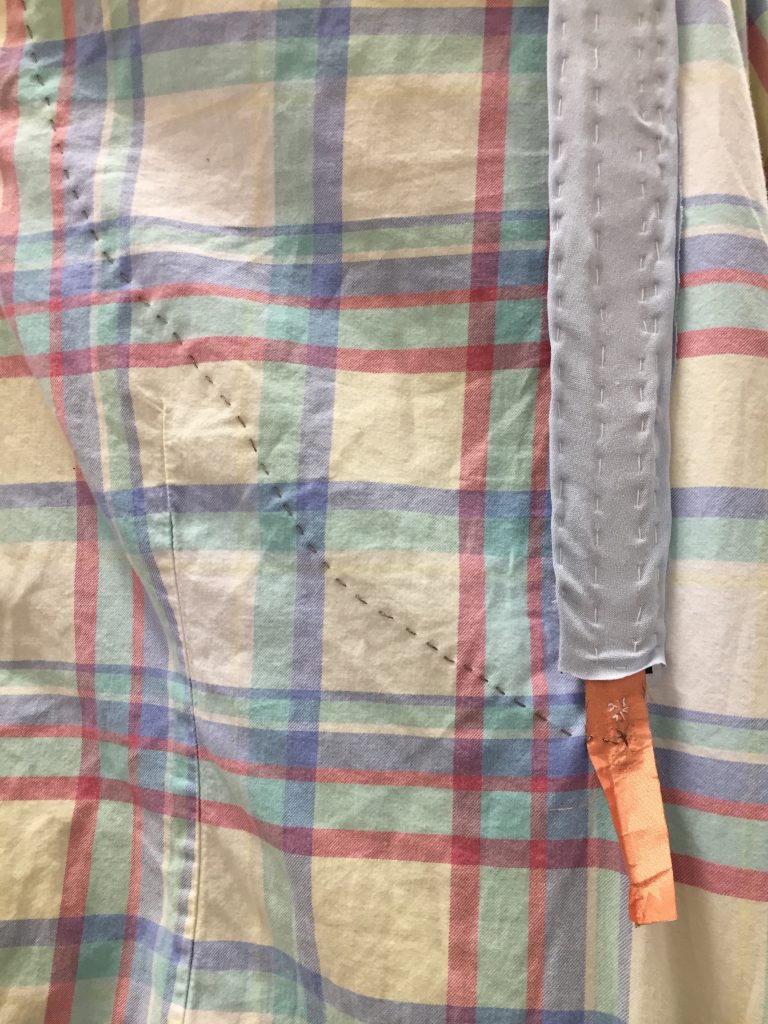
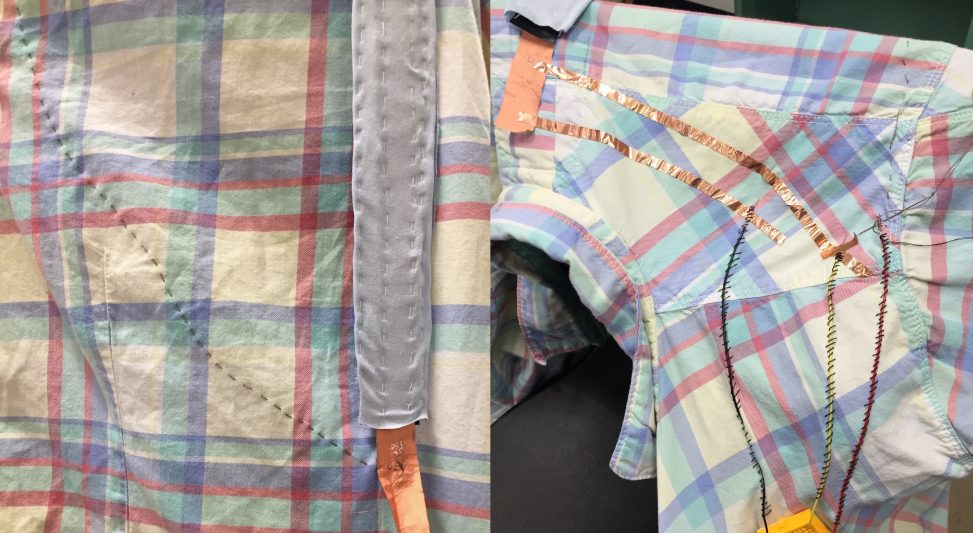
The bottom of the sensor sewn with conductive thread to the shirt
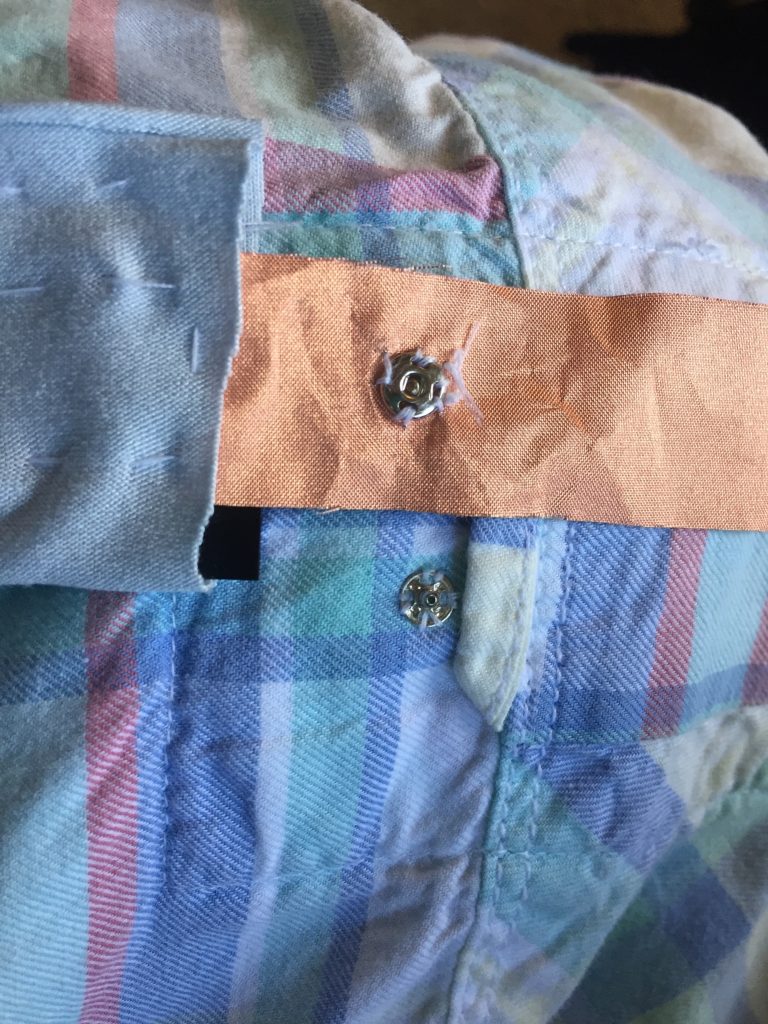
Button snaps were sewn onto the conductive fabric and a shirt to allow for easy access when adjusting the project.
Process:
My original idea was to create a conductive stretch sensor that would sit either perpendicular or parallel with the spine and the slouching movement would stretch the yarn, thus completing the circuit.
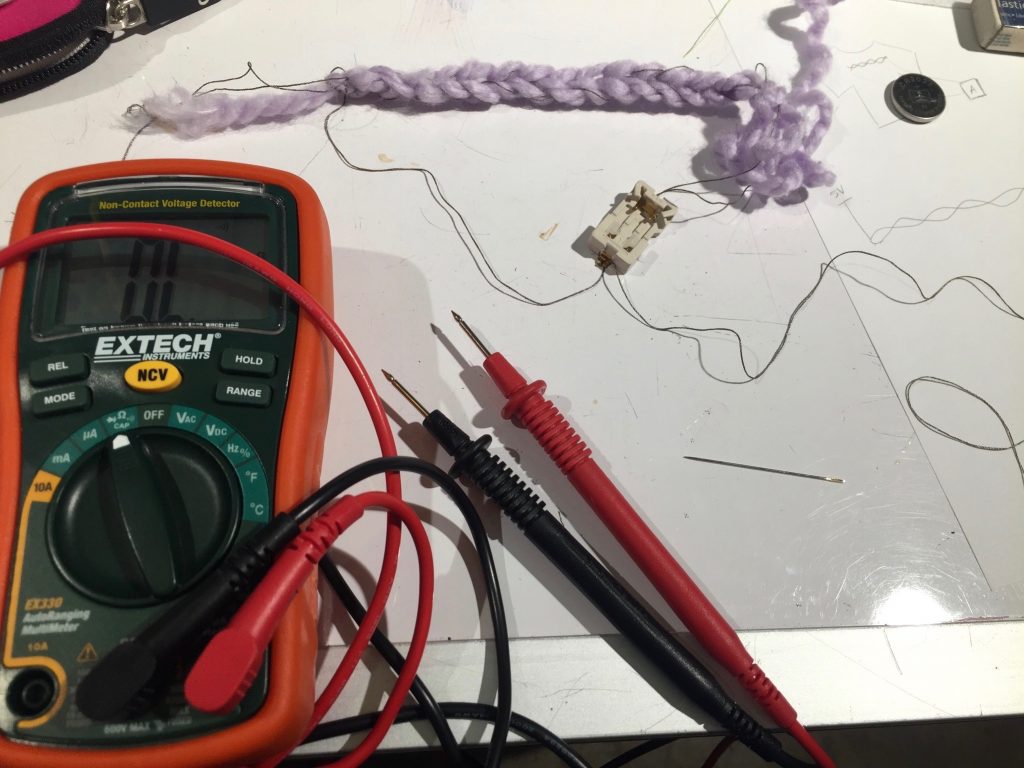
First setup: crocheted thick yarn (purple) with conductive thread used with an ohmmeter to test resistance readings and complete circuitry.
I knew one design decision I had to make was which nonconductive yarn to use so I started with a thick yarn and conductive thread because the thread was the only conductive material I had that could be incorporated into a stretchy fabric, and the thick yarn would provide resistance so that the circuit wasn’t always on (only when it was stretched).
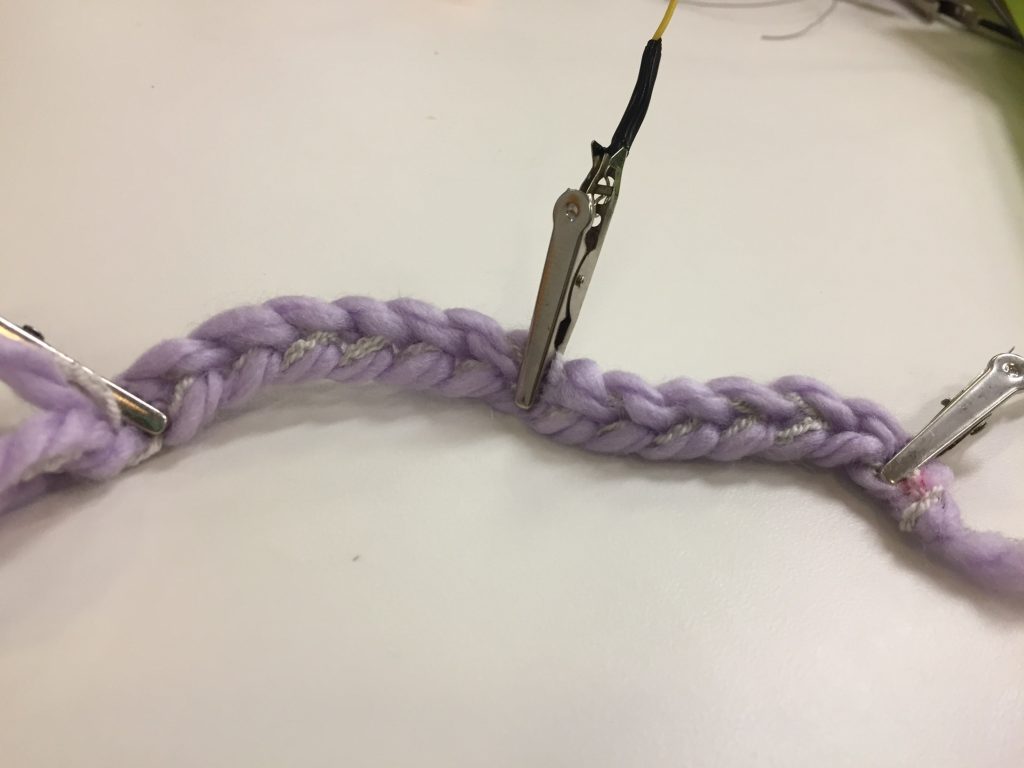 Crochet chain with thick yarn (purple) and conductive thread (grey)
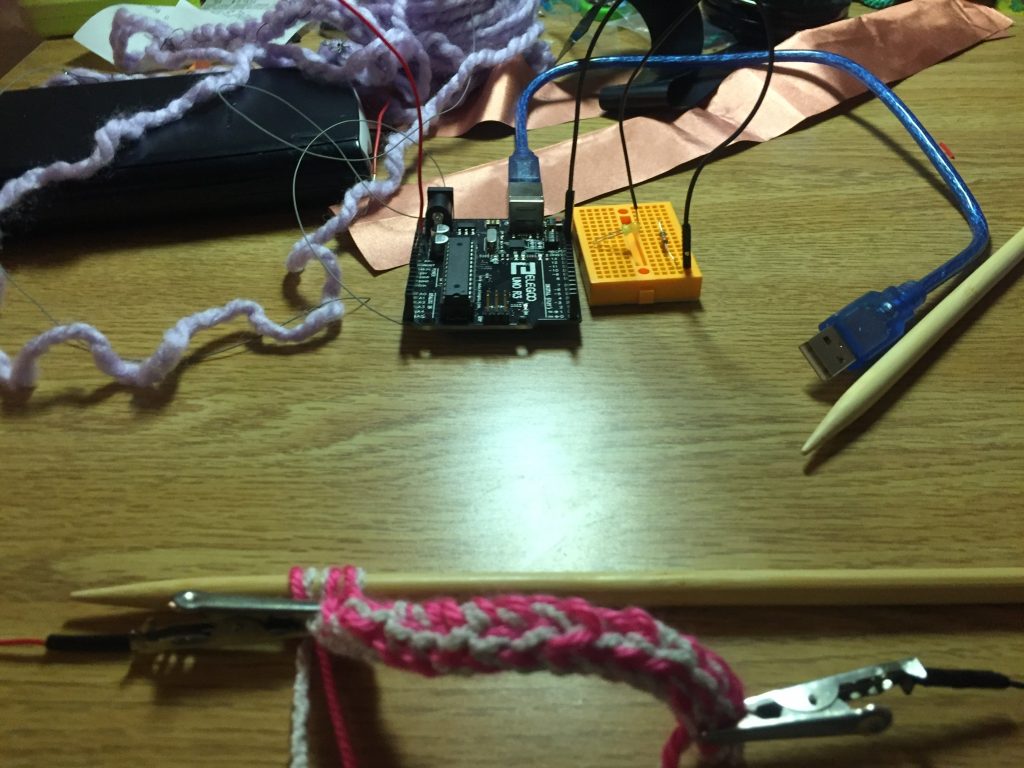
Testing of knit I-cord made with thin yarn (pink) and conductive yarn (grey).
I realized that the type of stitch I used would also make a difference because more “entangled” stitches would allow for more contact of the conductive yarn and also more stretch to the chain. The I-cord is an example of a stretchy, “entangled” stitch because it is knit around in a circle, providing many contact points for the yarn.
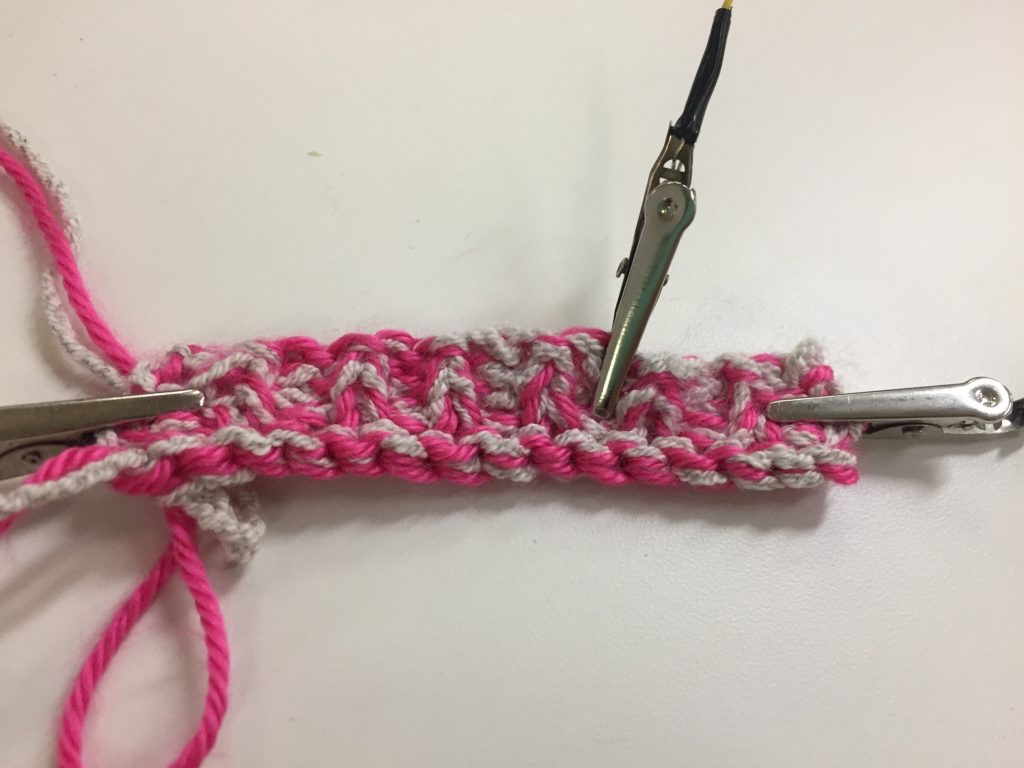
K1P1 (knit 1, purl 1) rib stitch with thin yarn (pink) and conductive yarn (grey)
Sweaters typically feature a knit 1 purl 1 rib stitch which is very stretchy so I decided to try it because the I-cord wasn’t responding well to stretches (no clear distinction in the readings). I tested samples by waiting for the readings to stabilize (shown below), and then stretching and relaxing them at a constant rate to see if the readings could pick up the stretching.
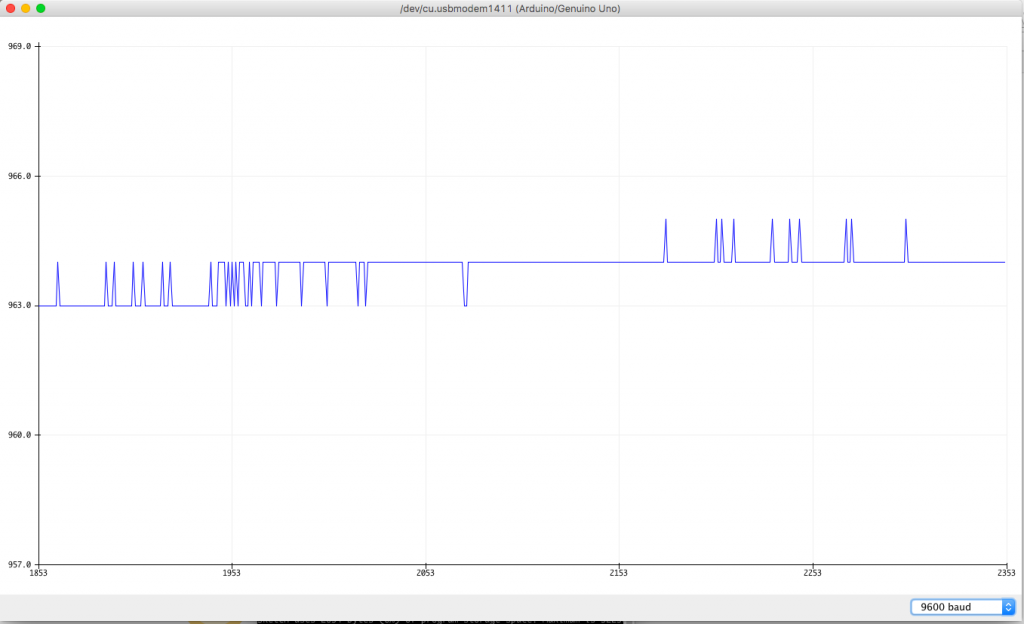
Steady state readings for K1P1 thin yarn and conductive yarn
An example of readings with no clear distinction between stretching and relaxing:
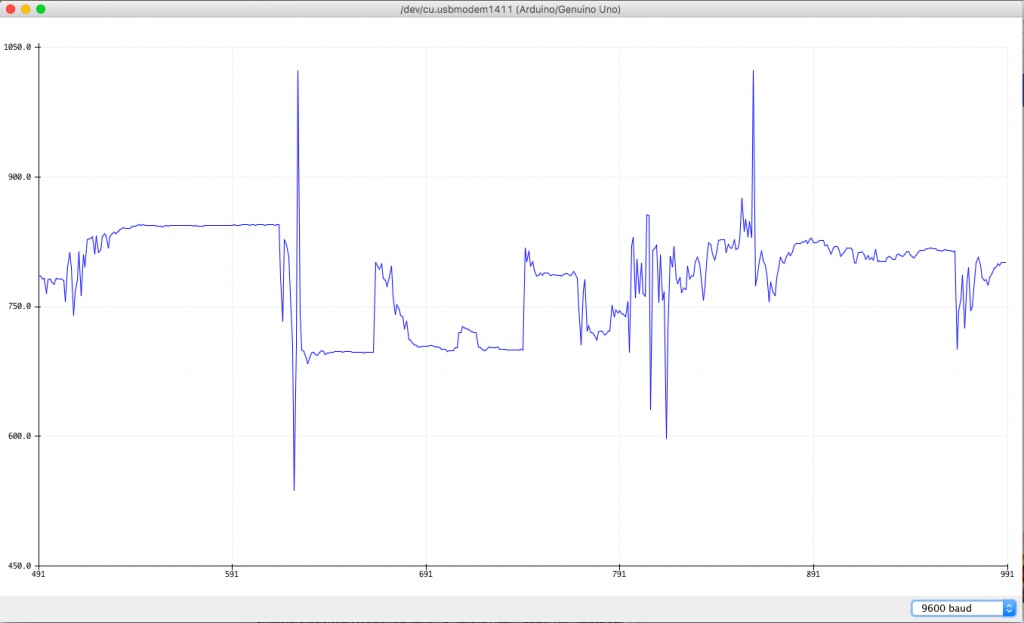
Readings for crocheted chain of thin yarn and conductive yarn
Example of decent readings:
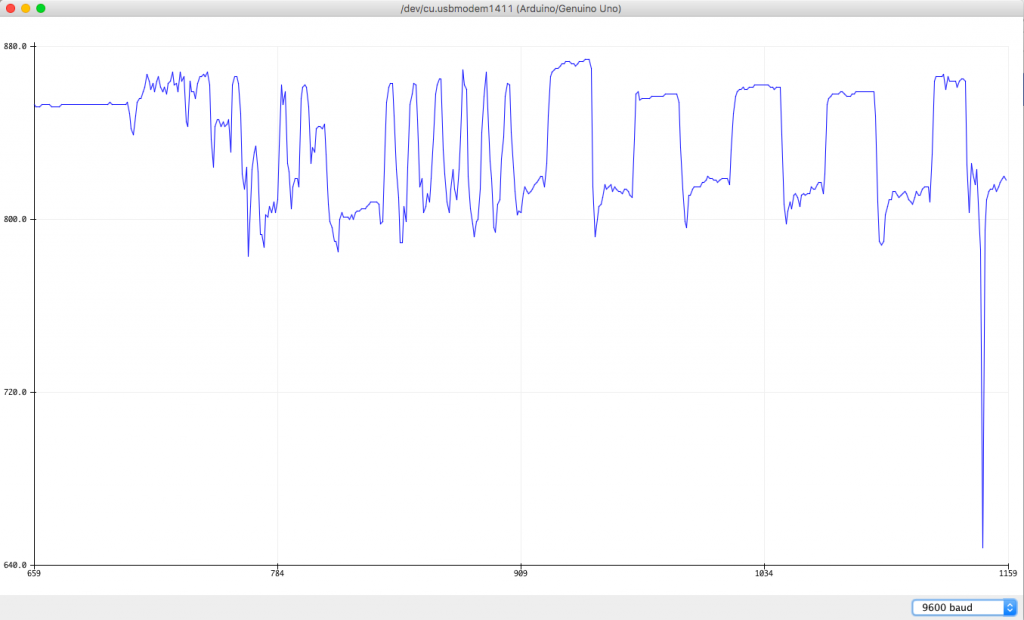
Readings for crocheted chain of conductive yarn
It seemed that the I-cord was too entangled to get good readings, so it was narrowed down to the crocheted chain and K1P1 rib stitch. I then progressed to using the conductive yarn by itself because the readings of nonconductive yarn + conductive yarn had a lot of noise in them.
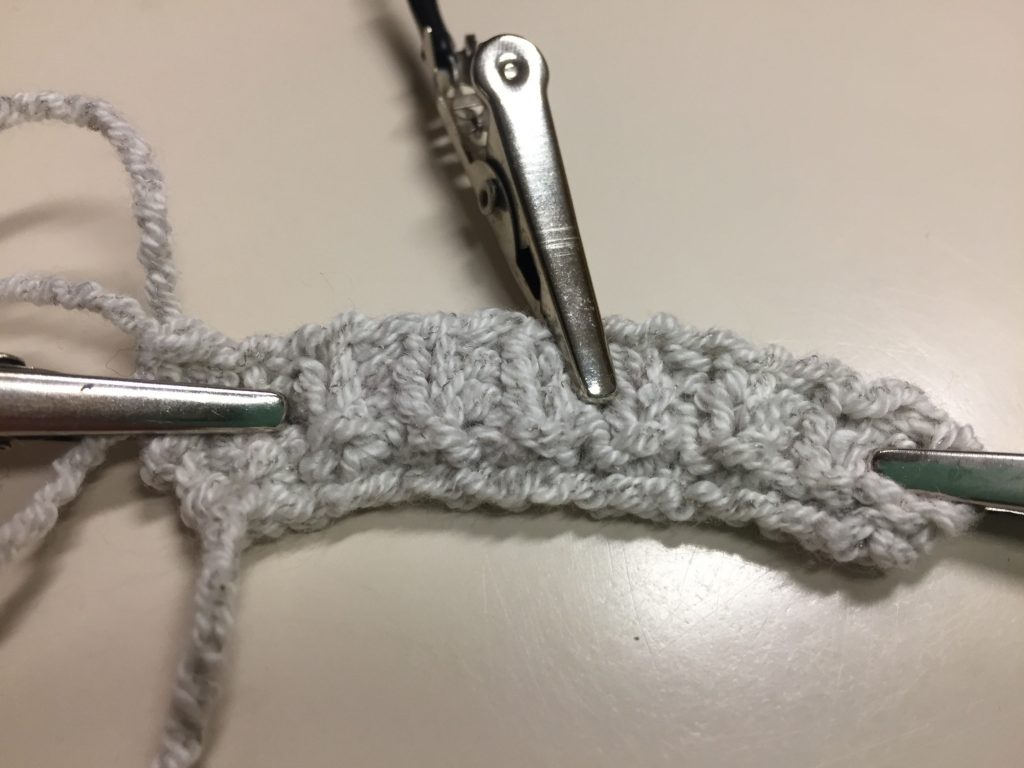
K1P1 rib stitch with conductive yarn
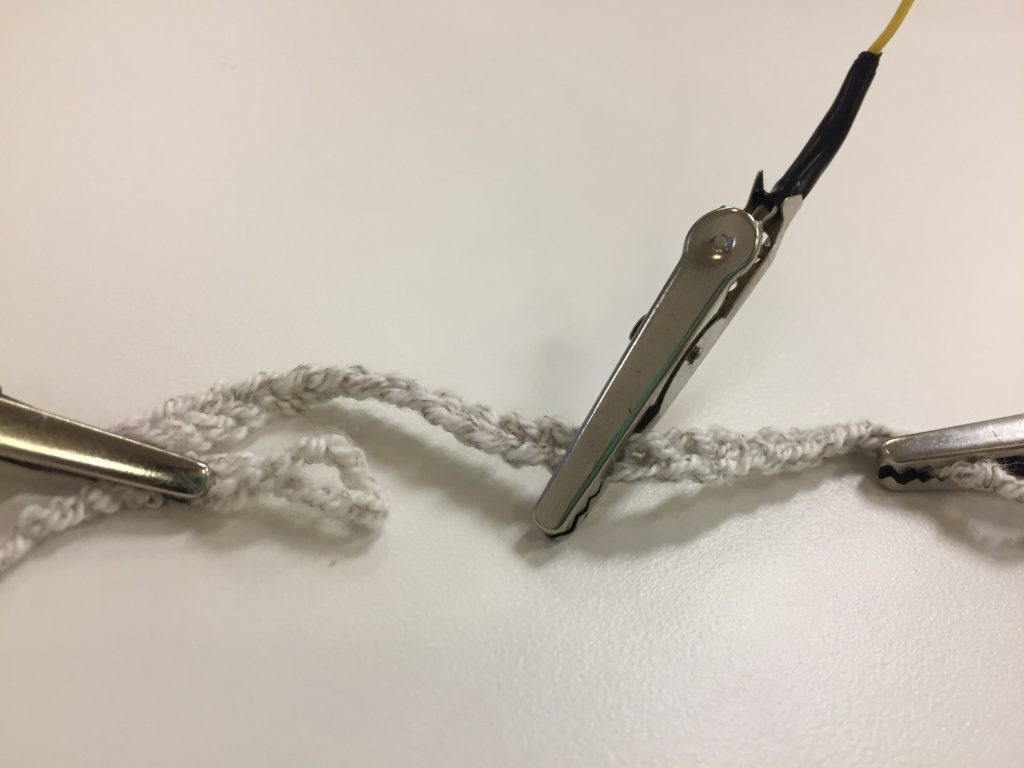
Crochet chain with conductive yarn
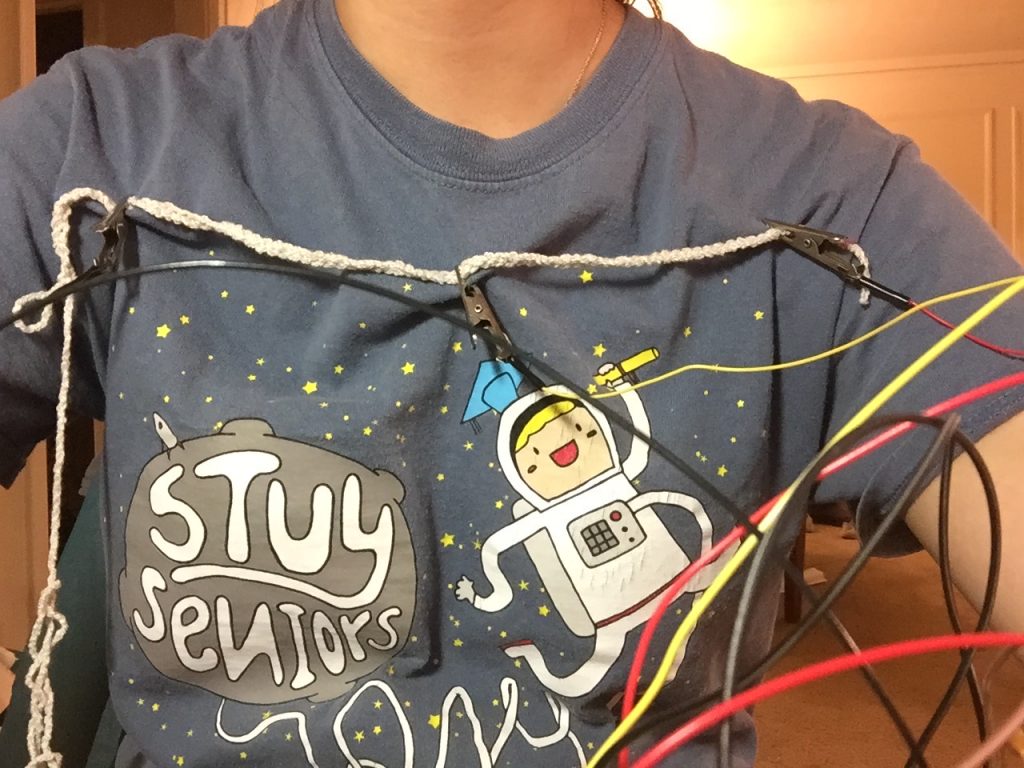
Human trials: crocheted chain of conductive yarn
Although the conductive yarn picked up the distinction between stretched and relaxed, it was very sensitive in that the readings would only have a range of ~80. This was not a large enough range considering that the steady state wasn’t 100% stable. I had other nonconductive yarn available as well as many other stitches to try, I had to decide if I wanted to go through with it or move on so I decided to try it on myself to see if it had some potential. It performed worse than when I was manually stretching it so it was time to try a sewn pressure sensor.
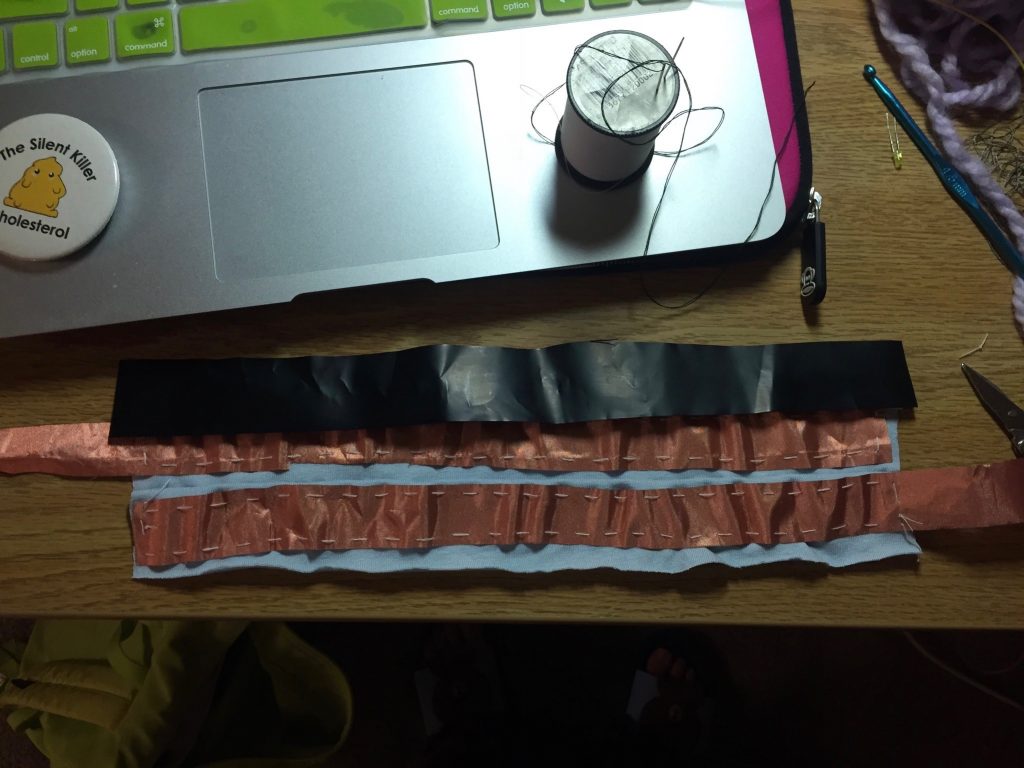
How the pressure sensor was made: Conductive fabric sewn to jersey knit as the bread, with velostat as the lunch meat. Note that the velostat is not sewn in to prevent the conductive fabric from touching all the time.
The pressure sensor was pretty stable at steady state and could distinguish between stretched and relaxed with a range of ~200, so this was the best solution by far. Thus the final design decision was to let go of the stretch sensor and proceed with the pressure sensor. Since the readings still fluctuate a little, I had to adjust my code to take a number of readings and average them to get a reliable output.
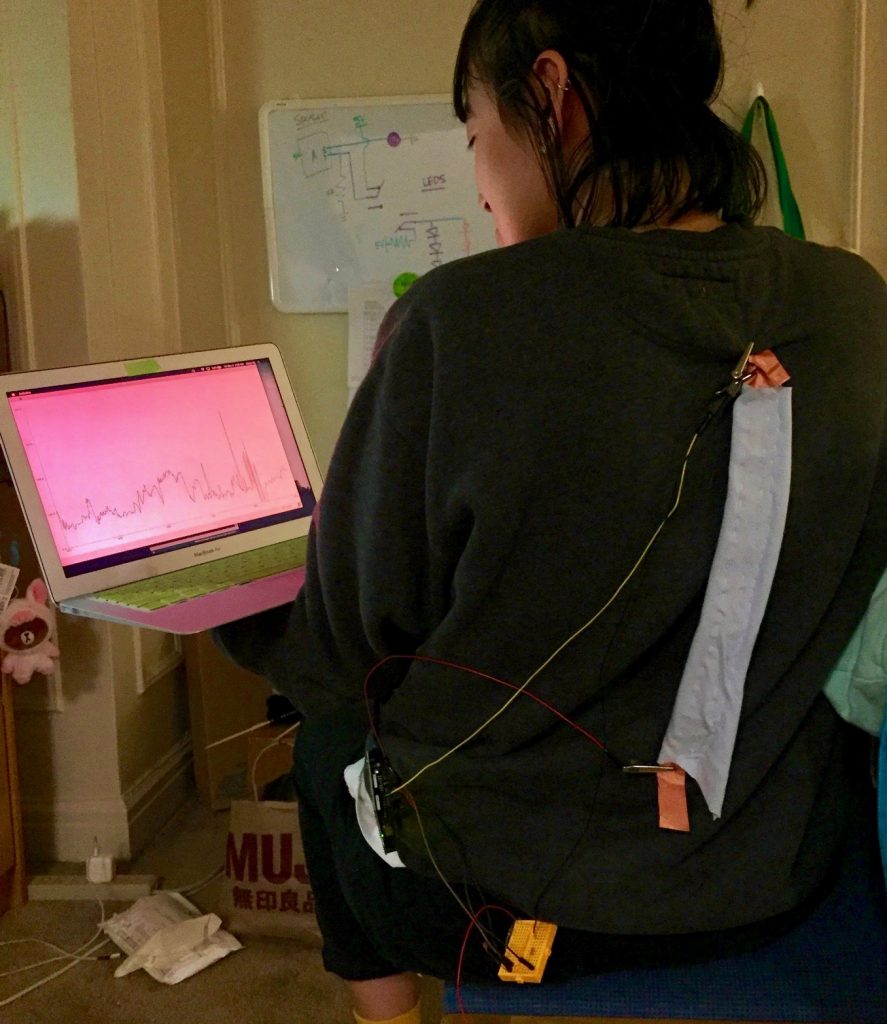
Human trials: pressure sensor prototype
Discussion:
I am happy with the way the project came out because the slouch detector is quite responsive and works well. However, the wires are annoying so while I am glad the shirt allows for more movement, I wish I was able to self contain the entire project so that it could work with any shirt and wouldn’t be attached to anything else (like the computer). I am also a little peeved I didn’t know about a flex sensor because although making my own sensor was fun, I could have used the time I spent on the stretch sensor on the project housing instead.
I was surprised that the conductive yarn by itself worked better than with a nonconductive material, because I expected the conductive yarn to be too sensitive and never stabilize. Although the project works, completing it took so long that even if it didn’t work, the amount of effort I put in would encourage me to just remind myself to sit up straight. Or maybe not, because bad habits are hard to break and I’m not sure I’ll actively use my project until I have full blown back problems in 10 years.
I found that the hardest part of this project was actually implementing my idea. When I imagined my project, there were no wires so actually building the project was harder than I expected because I had to put in the wires and try to hide them. So I learned that I like to see the big picture, which is helpful for keeping in mind the end goal but it isn’t helpful for going over the nitty gritty details. If I had to do it again, I would tell myself not to get so hung up on perfecting details because I spent a lot of time experimenting with the stretch sensor and was almost going to use a design of experiments in order to test the statistical importance of the different factors (yarn type, stitch, conductive thread vs yarn). Although I already had the idea to use the pressure sensor, the thought of sewing it together put me off because I thought I would waste a lot of time restarting my project. However, I was only making little improvements with the stretch sensor and trying more experiments didn’t seem like it would make it work perfectly so ultimately the time constraint was what made me try the pressure sensor, which worked on the first try! I found that putting it together only took about 30 minutes once I found a fabric to sew the sensor onto so I should have let go of the stretch sensor sooner.
I want to build another iteration of this project, but I’d probably scrap what I already have and either create a new sensor or use a flex sensor just so that it is more reliable. The current iteration has to be adjusted every 10 minutes because the velostat likes to slide down the sensor, allowing the top part of the conductive fabric to touch. I’d also have to come up with another way to attach it to me because I don’t like that it only works with one shirt. The shirt probably won’t stand up to a wash so this iteration was only good for a demonstration. In addition, I would add positive or negative reinforcement so that other people who need more than just a reminder to fix their posture can also use it.
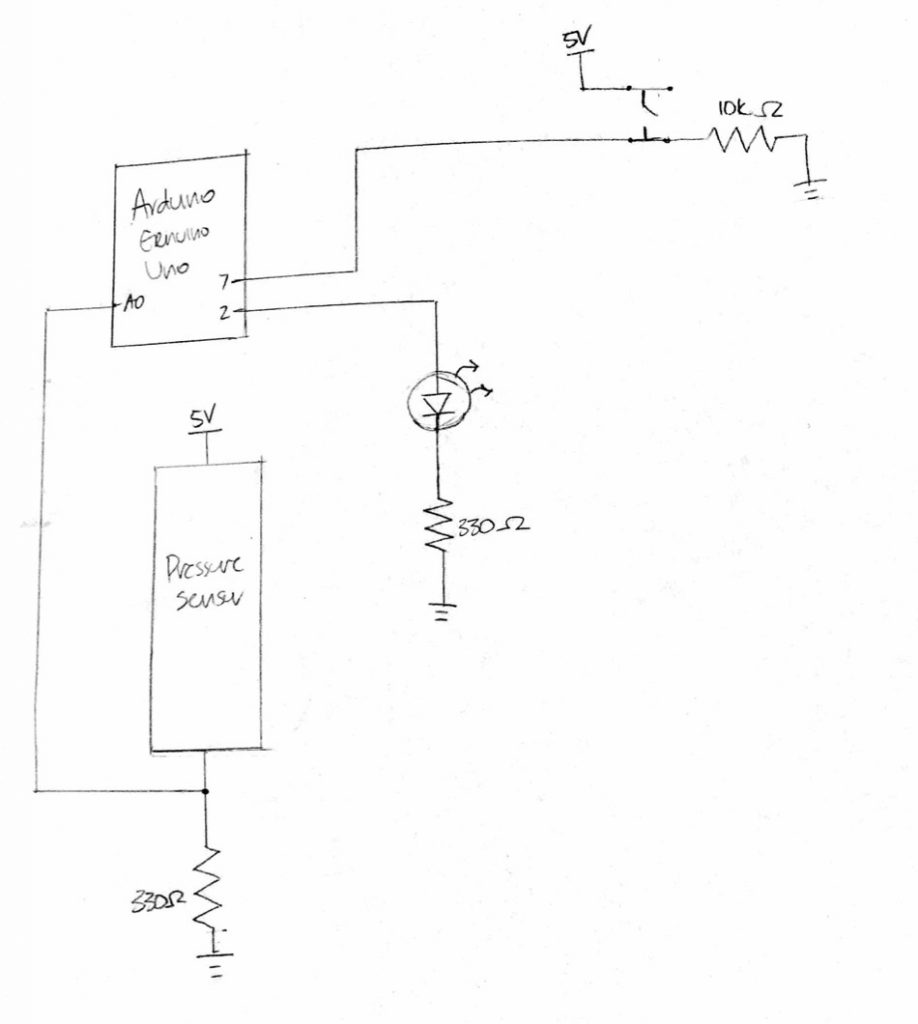
Diagram of circuit
Code:
int r = 7;
int startup = 0;
int LED = 2;
unsigned int slouchTotal;
unsigned int straightTotal;
unsigned int slouch; //avg "slouch" reading
unsigned int straight; //avg "sitting straight" reading
const int numReadings = 20; //number of readings to get an accurate avg
unsigned int slouching[numReadings];
unsigned int sittingStraight[numReadings];
int slouchIndex = 0;
int straightIndex = 0;

void setup() {
 pinMode(A0, INPUT);
 pinMode(r, INPUT);
 pinMode(LED, OUTPUT);
 Serial.begin(9600);
 for (int i = 0; i < numReadings; i++){
 slouching[i] = 0;
 sittingStraight[i] = 0;
 }
 Serial.println("hello! in 3 seconds, you will be asked to slouch");
 Serial.println("press the button if you want to reset!");
 delay(3000);
}

void resetSlouch(int foo){
 slouching[slouchIndex] = foo;
 slouchTotal += foo;
 //only determine avg if more than one reading has been made
 if (slouchIndex != 0){
 slouch = slouchTotal/slouchIndex;
 }
 if (slouchIndex == numReadings-1){
 startup ++;
 Serial.println("done calibrating your slouch! in 3 seconds, you will be asked to sit up straight");
 delay(3000);
 }
 slouchIndex ++;
}

void resetStraight(int foo){
 sittingStraight[straightIndex] = foo;
 straightTotal += foo;
 //only determine avg if more than one reading has been made
 if (straightIndex != 0){
 straight = straightTotal/straightIndex;
 }
 if (straightIndex == numReadings-1){
 startup ++;
 Serial.println("done calibrating your good posture!");
 delay(1000);
 }
 straightIndex ++;
}

void loop() {
 if (digitalRead(r)){
 Serial.println("resetting");
 Serial.println("you will be asked to slouch in 3 seconds");
 startup = 0;
 slouchIndex = 0;
 straightIndex = 0;
 //give time for person to respond
 delay(3000);
 }

 //calibrate slouching
 if (startup == 0 && slouchIndex < numReadings){
 Serial.println("please slouch...");
 resetSlouch(analogRead(A0));
 }

 //calibrate sitting straight only after slouching is calibrated
 if (startup == 1 && slouchIndex == numReadings){
 Serial.println("please sit up straight...");
 delay(200);
 resetStraight(analogRead(A0));
 }

 //done calibrating so check posture
 else if (startup == 2) {
 if (analogRead(A0) >= (slouch+straight)/2){
 //Serial.print(slouch); Serial.print(straight);
 digitalWrite(LED, HIGH);
 Serial.println("stop slouching!!!!!!!!");
 }
 else{
 digitalWrite(LED, LOW);
 }
 }

 delay(500);
 Serial.println(analogRead(A0));

}
Leave a Reply
You must be logged in to post a comment.