Title and introduction
For this project, small groups were connected with clients with physical disabilities to collaboratively create an assistive device that aids the client. Our client, Brenda, enjoys acrylic pour painting but has cerebral palsy that necessitates a lot of assistance to create the paintings. Our team (Daniela, Erica, and Tate) created a device that allows her to create these paintings by herself with ease. For more information about our initial meeting with Brenda, refer to: Initial client interview documentation.
What we built
Description
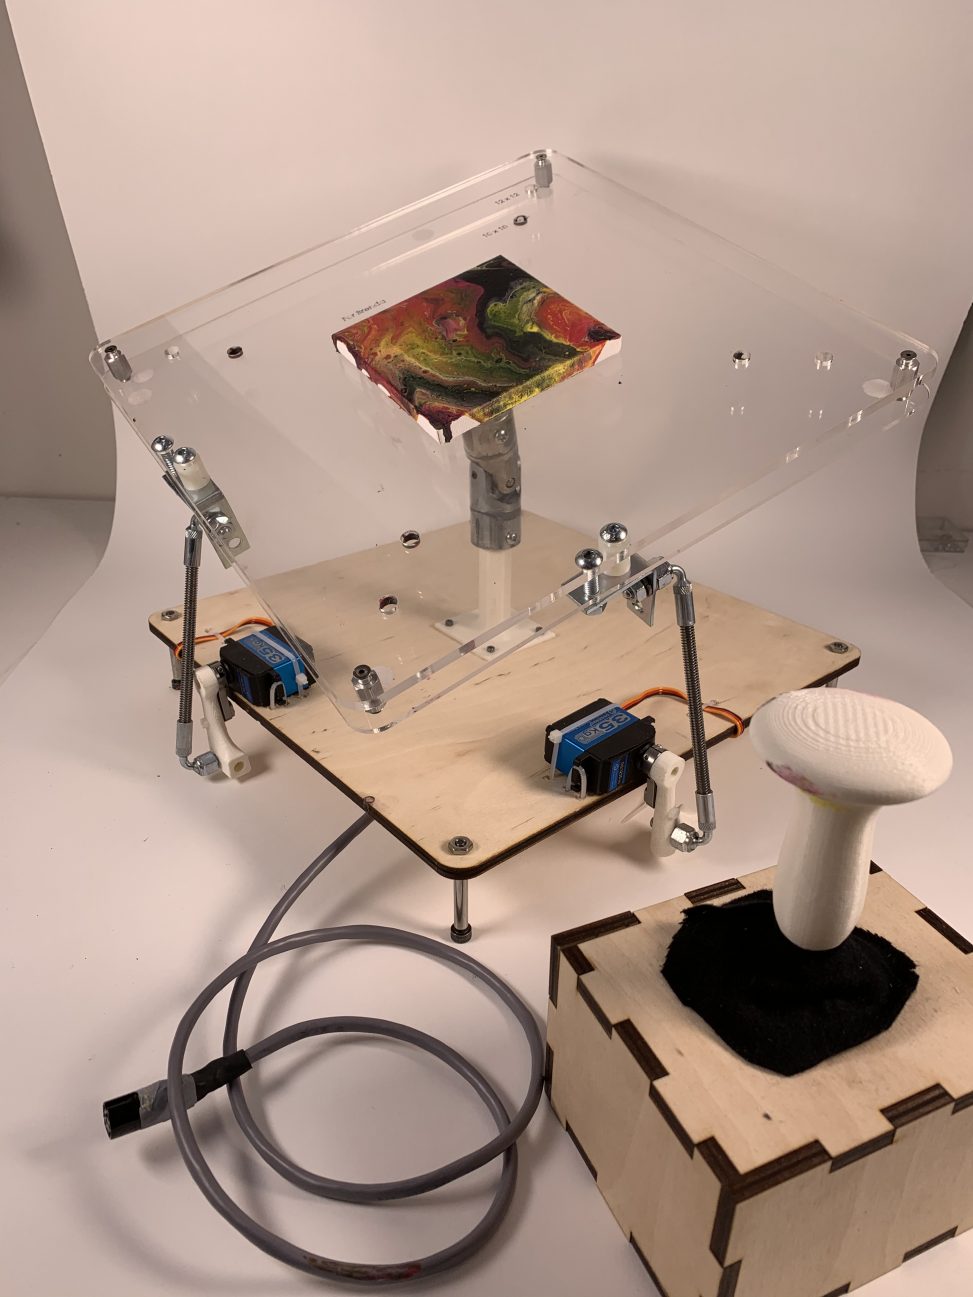
Our final device is a moving platform that allows her to move and tilt her canvases in space and manipulate them to her desire. Two motors raise and lower points of the canvas platform to create any desired combination of tilts. A joystick controls the movement and tilt of the canvas, and a washable two-layer plate and shroud setup allows her to clean the paint from the device.
Images
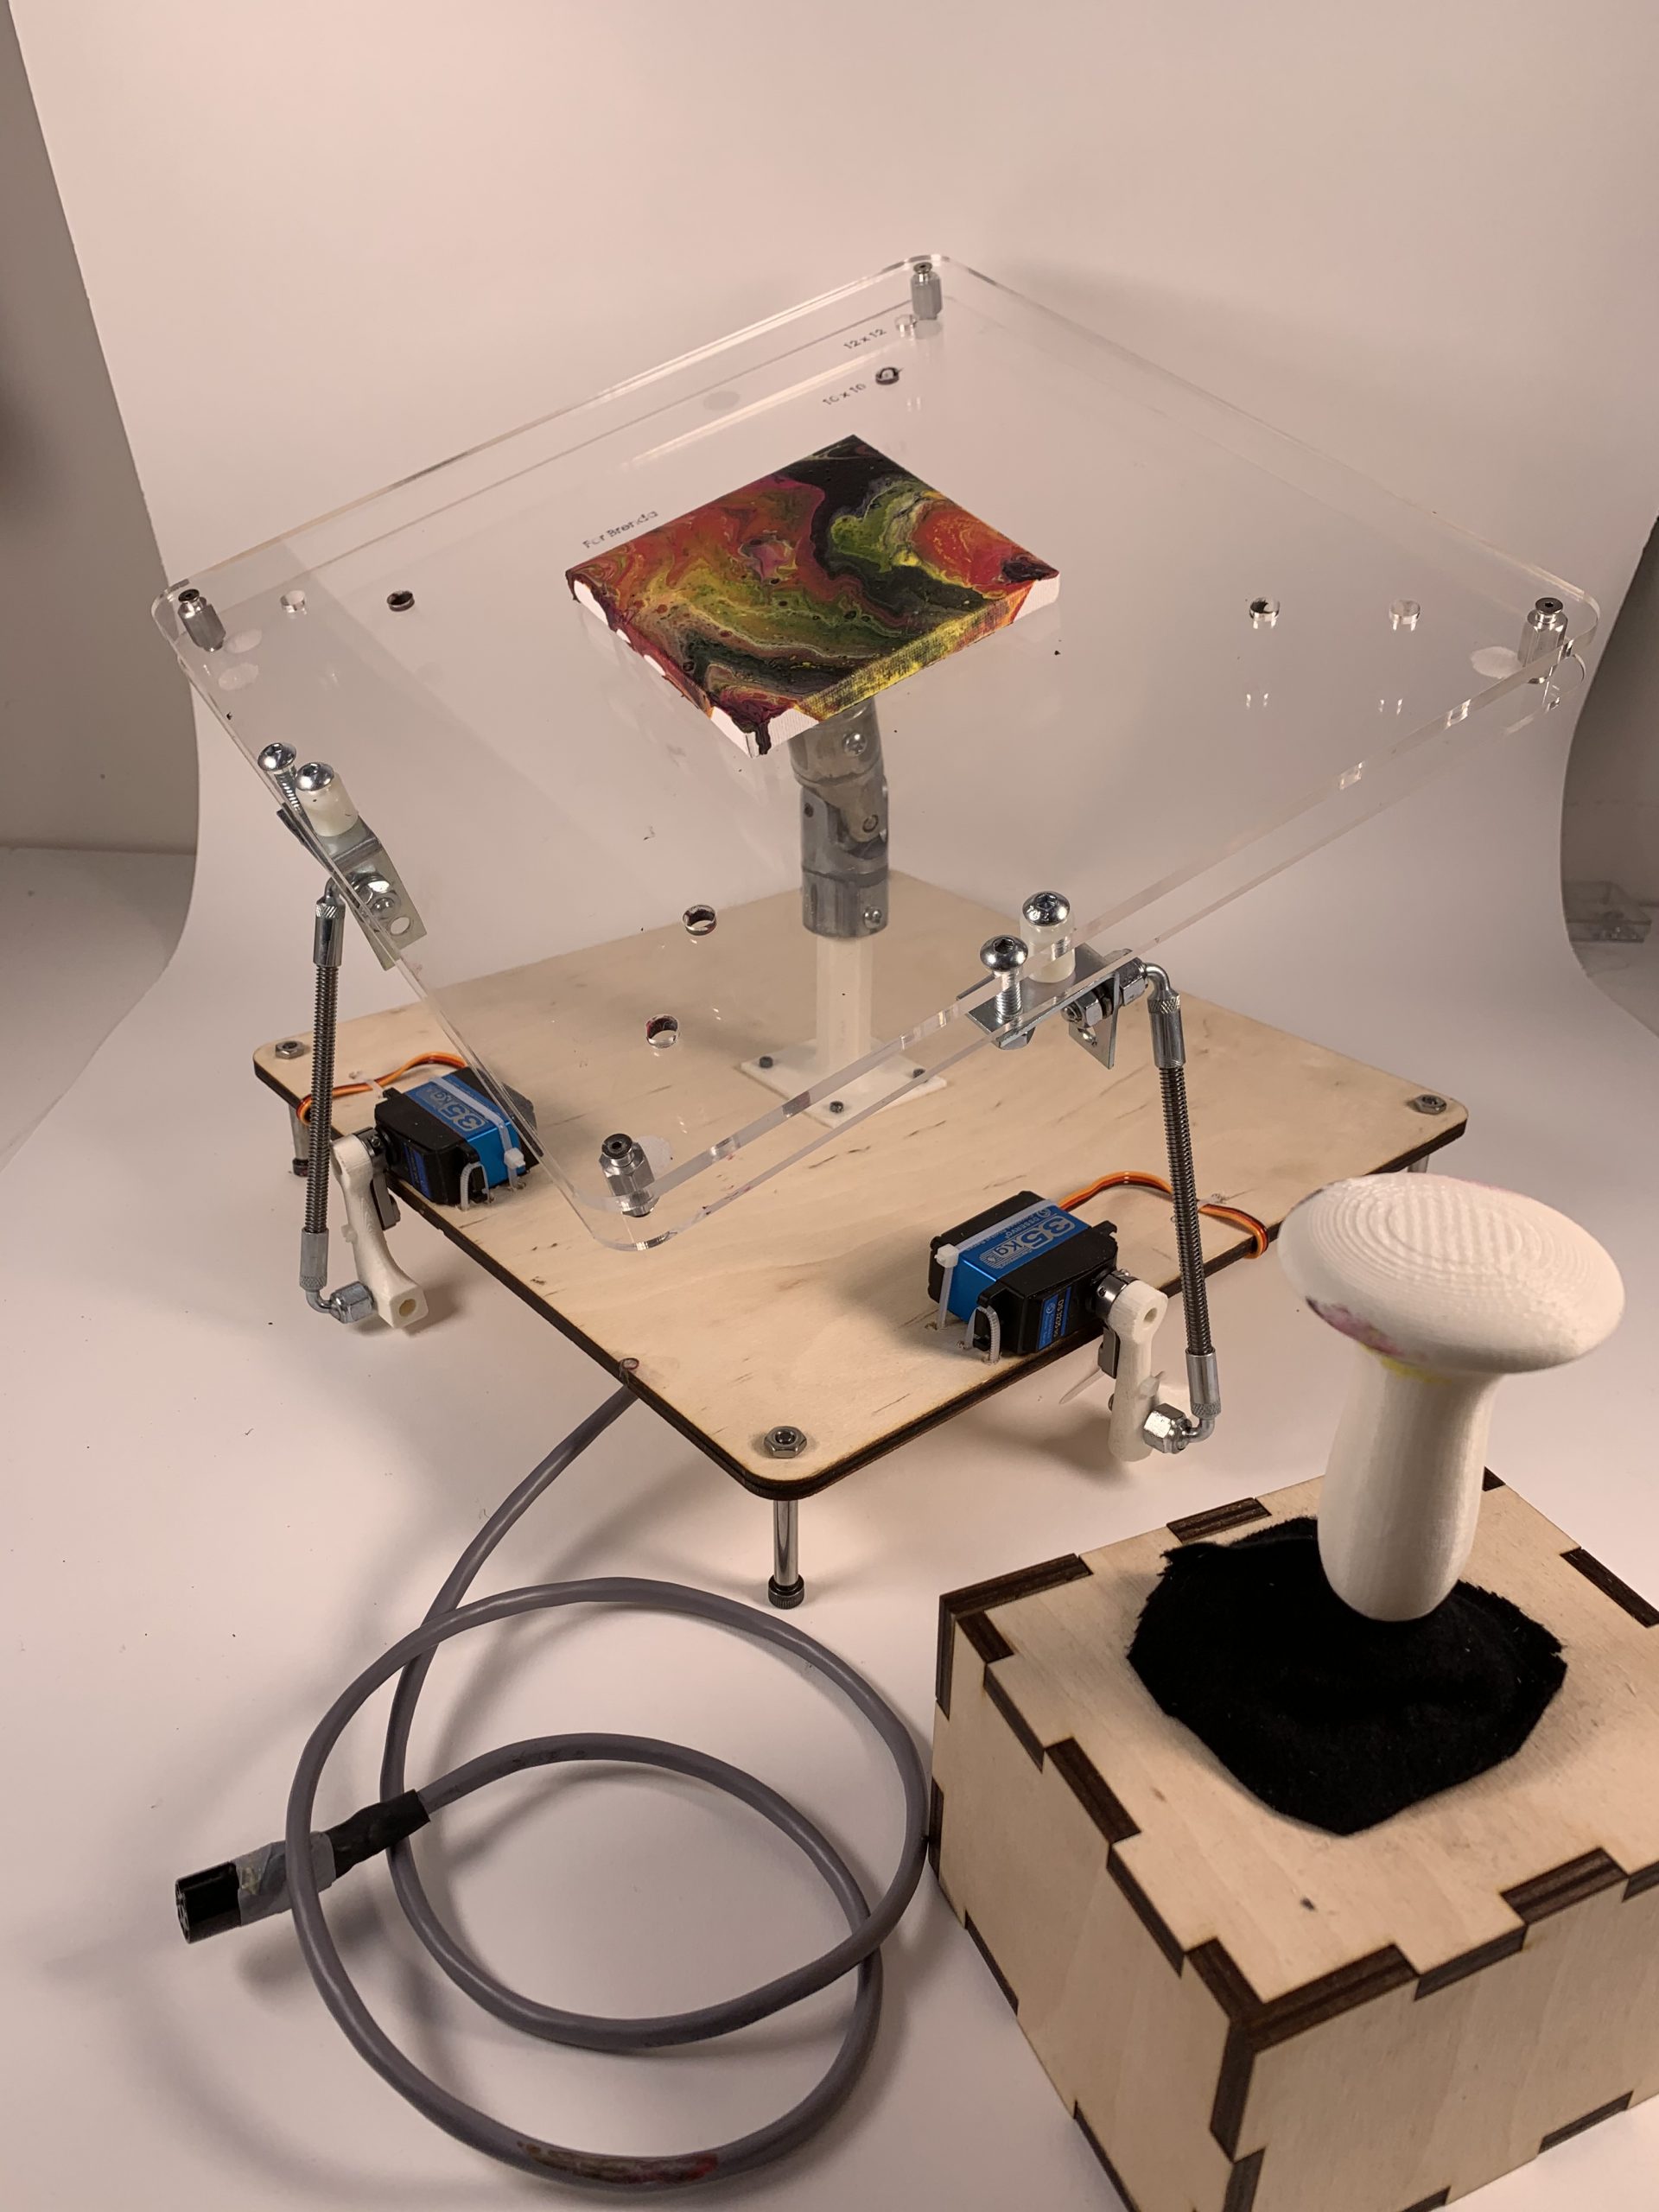
An overview image of the device with a painting we made using it.
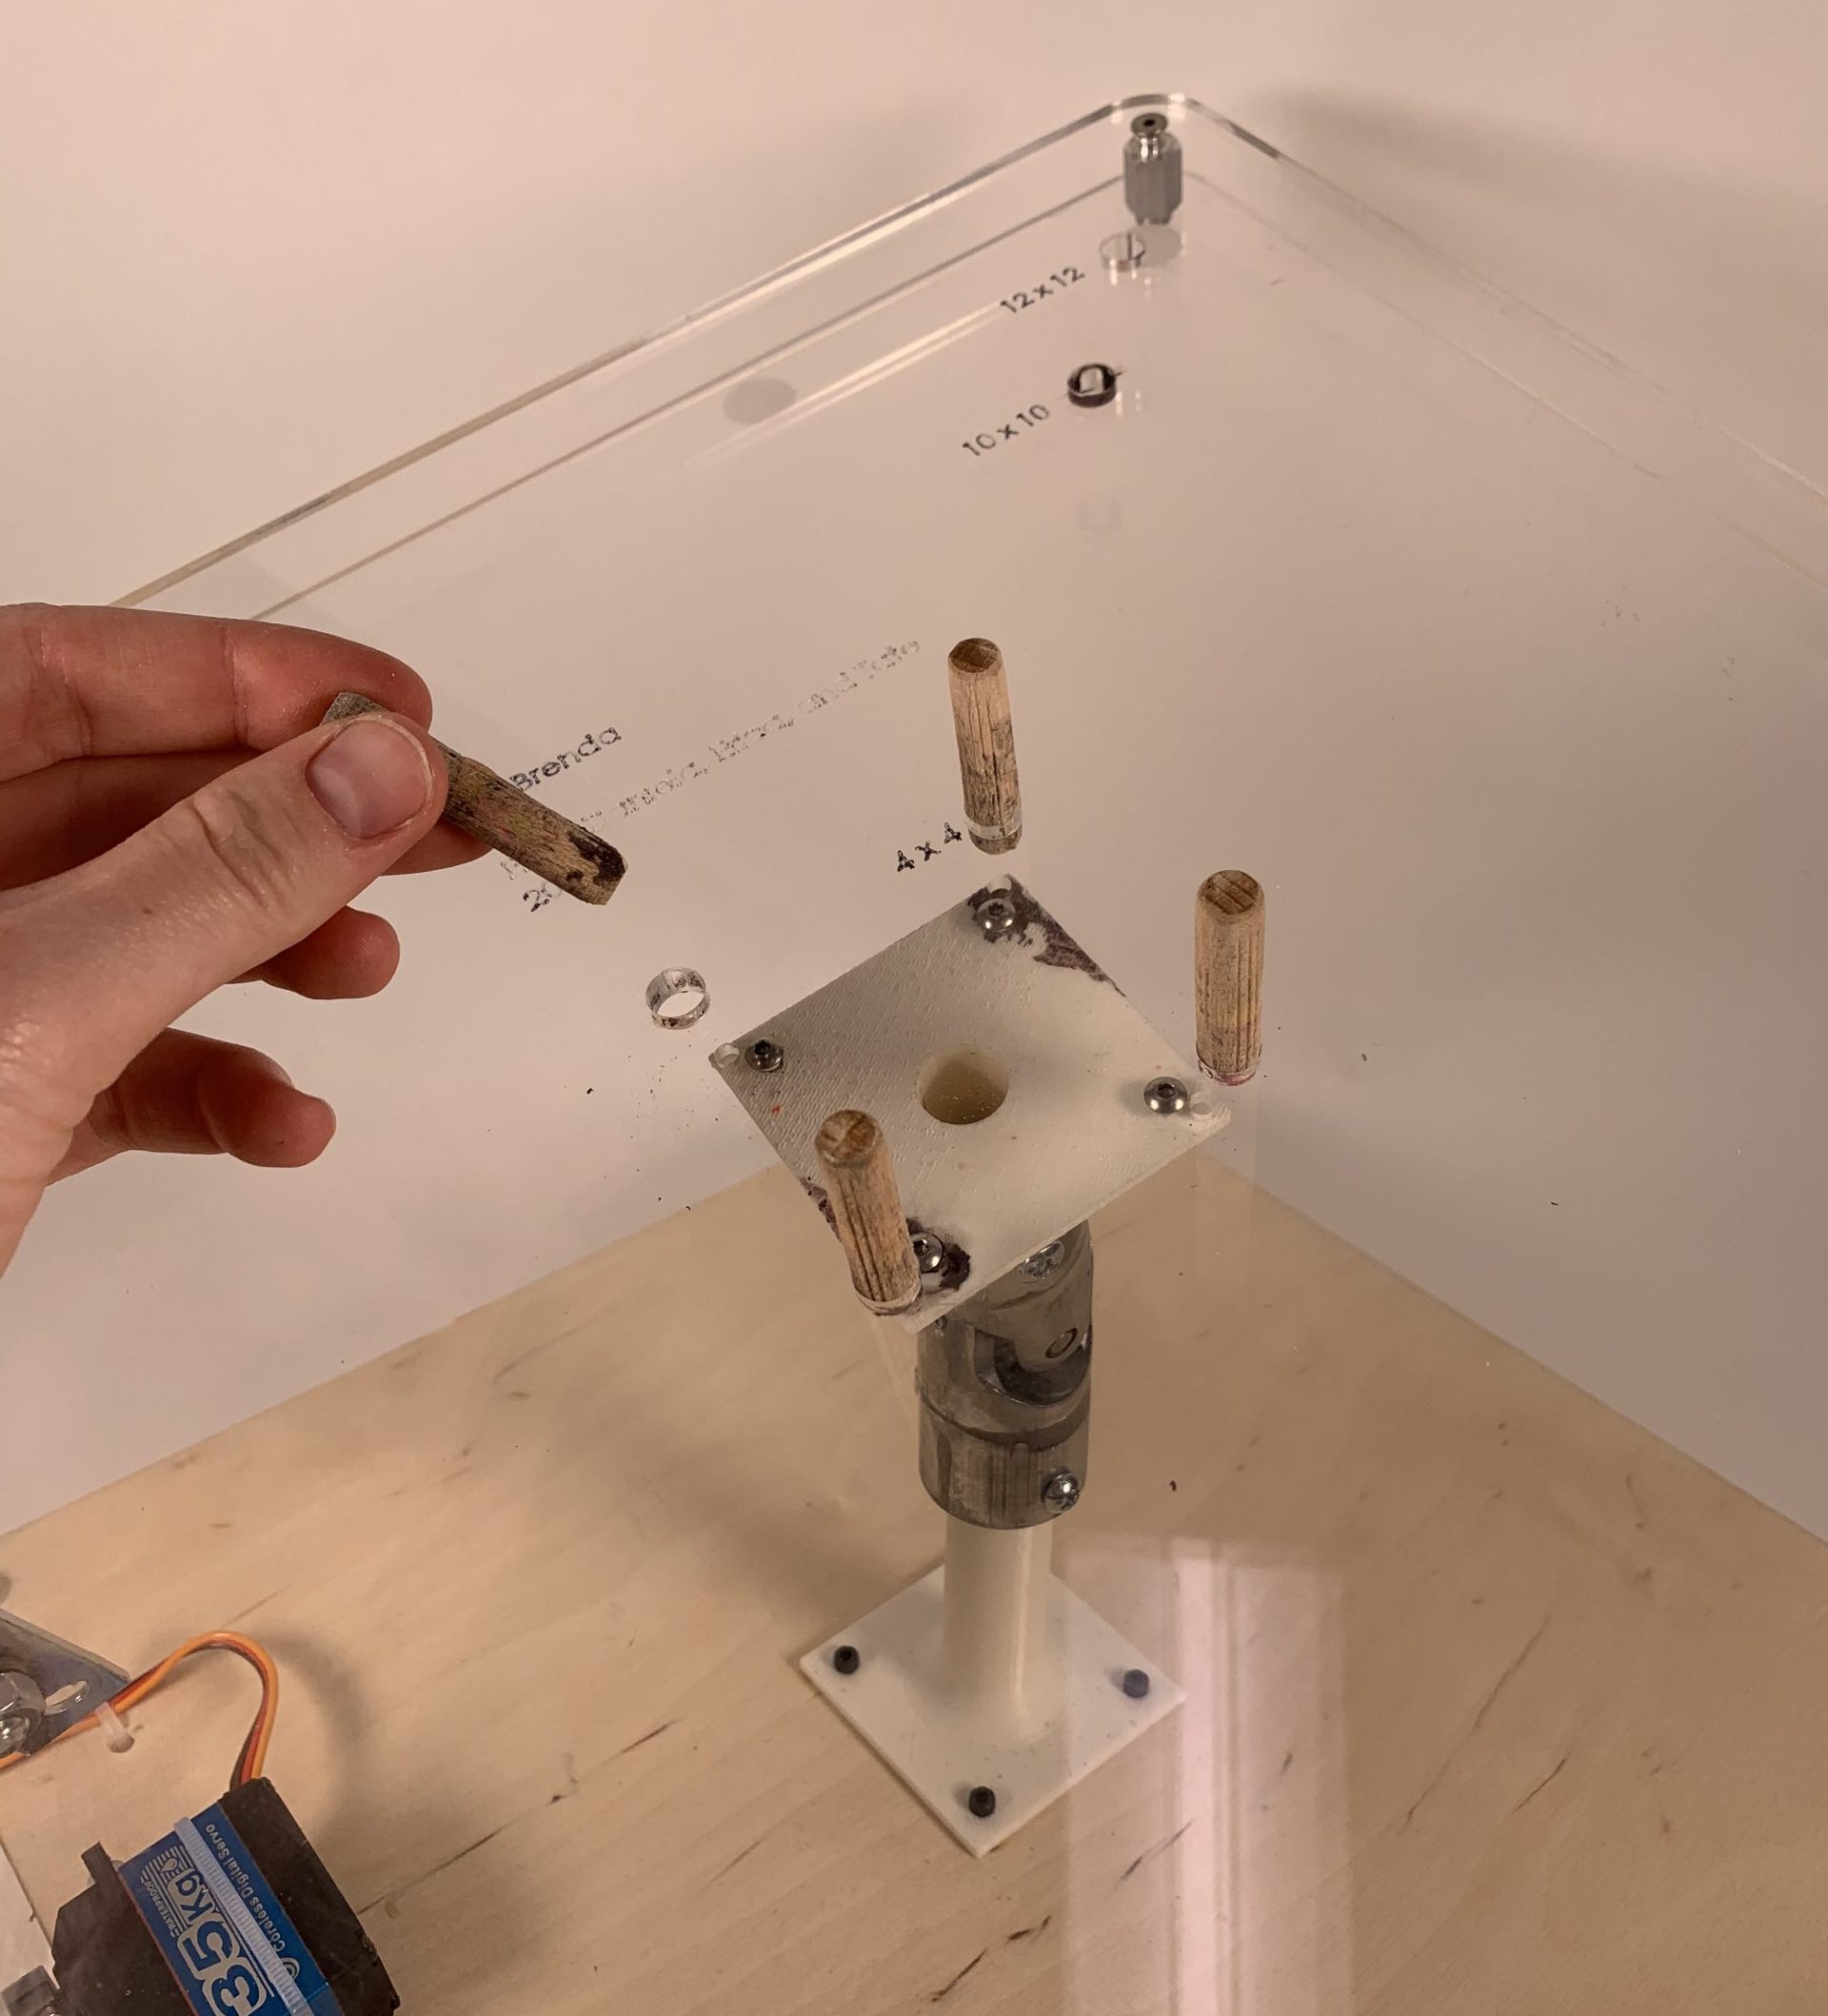
Removable pegs make it easy to adjust for differing canvas sizes.
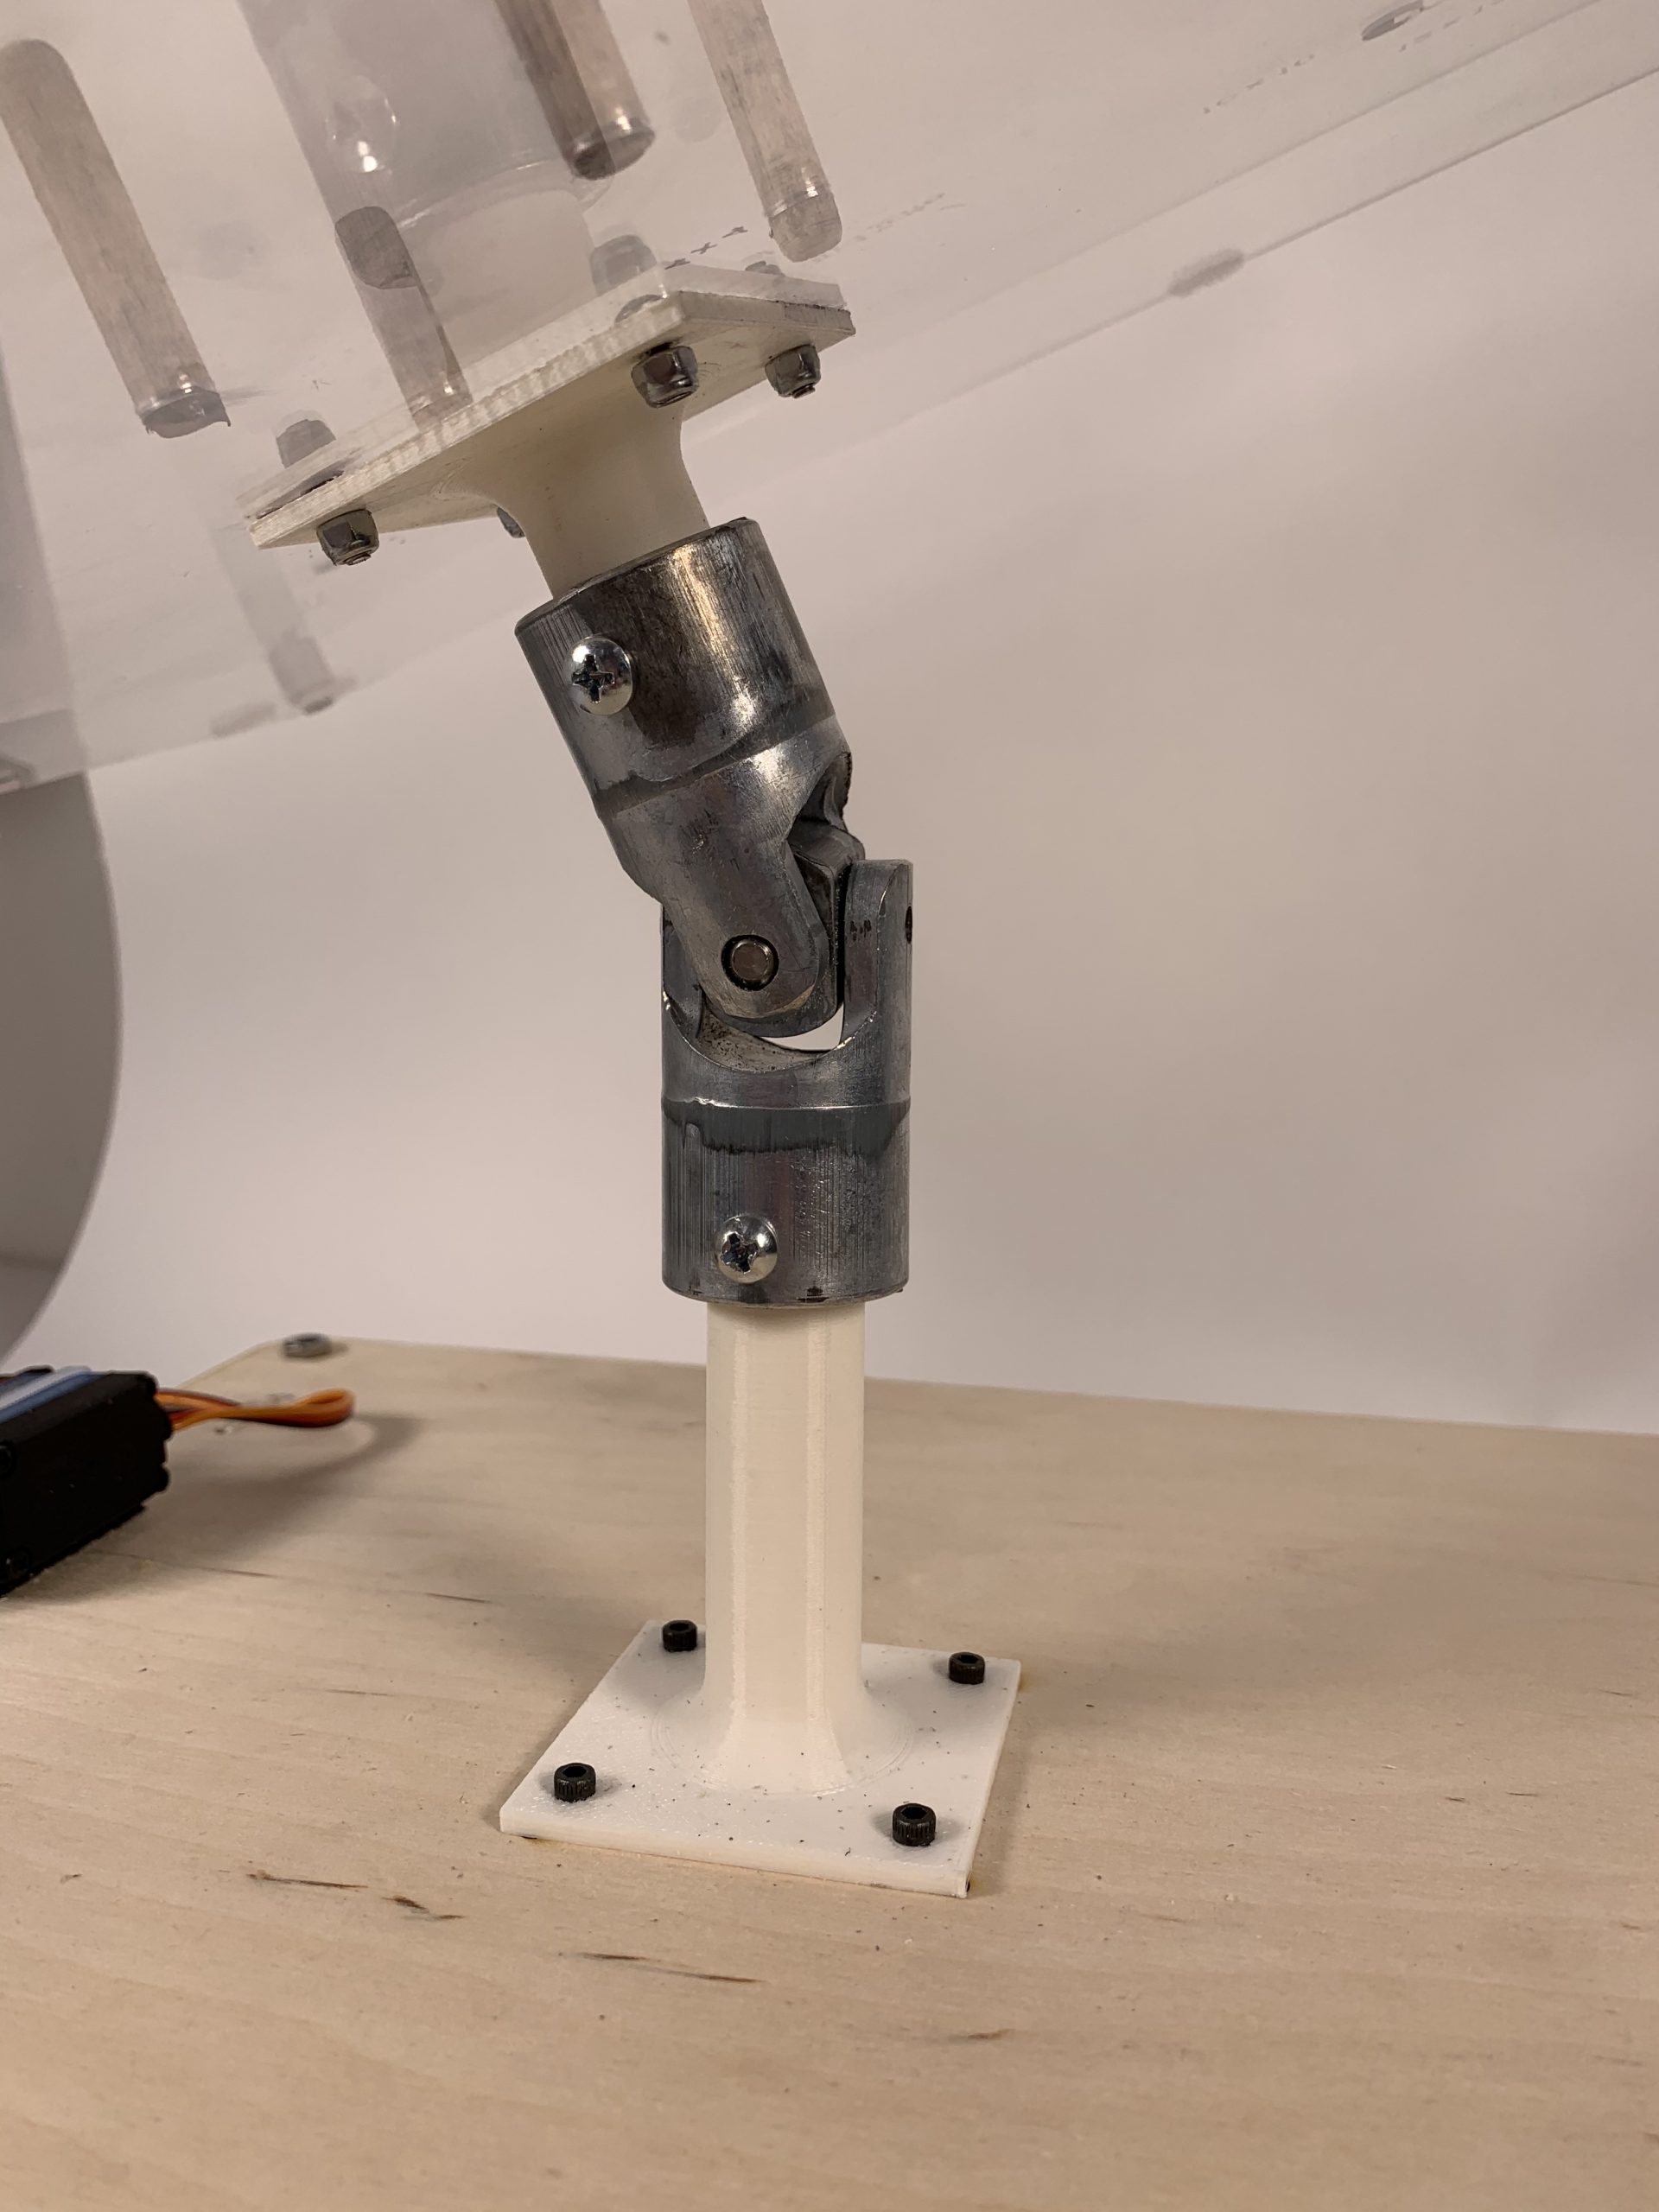
A metal universal joint allows the bed of the device to tilt at drastic angles to create desired effects with the paint.
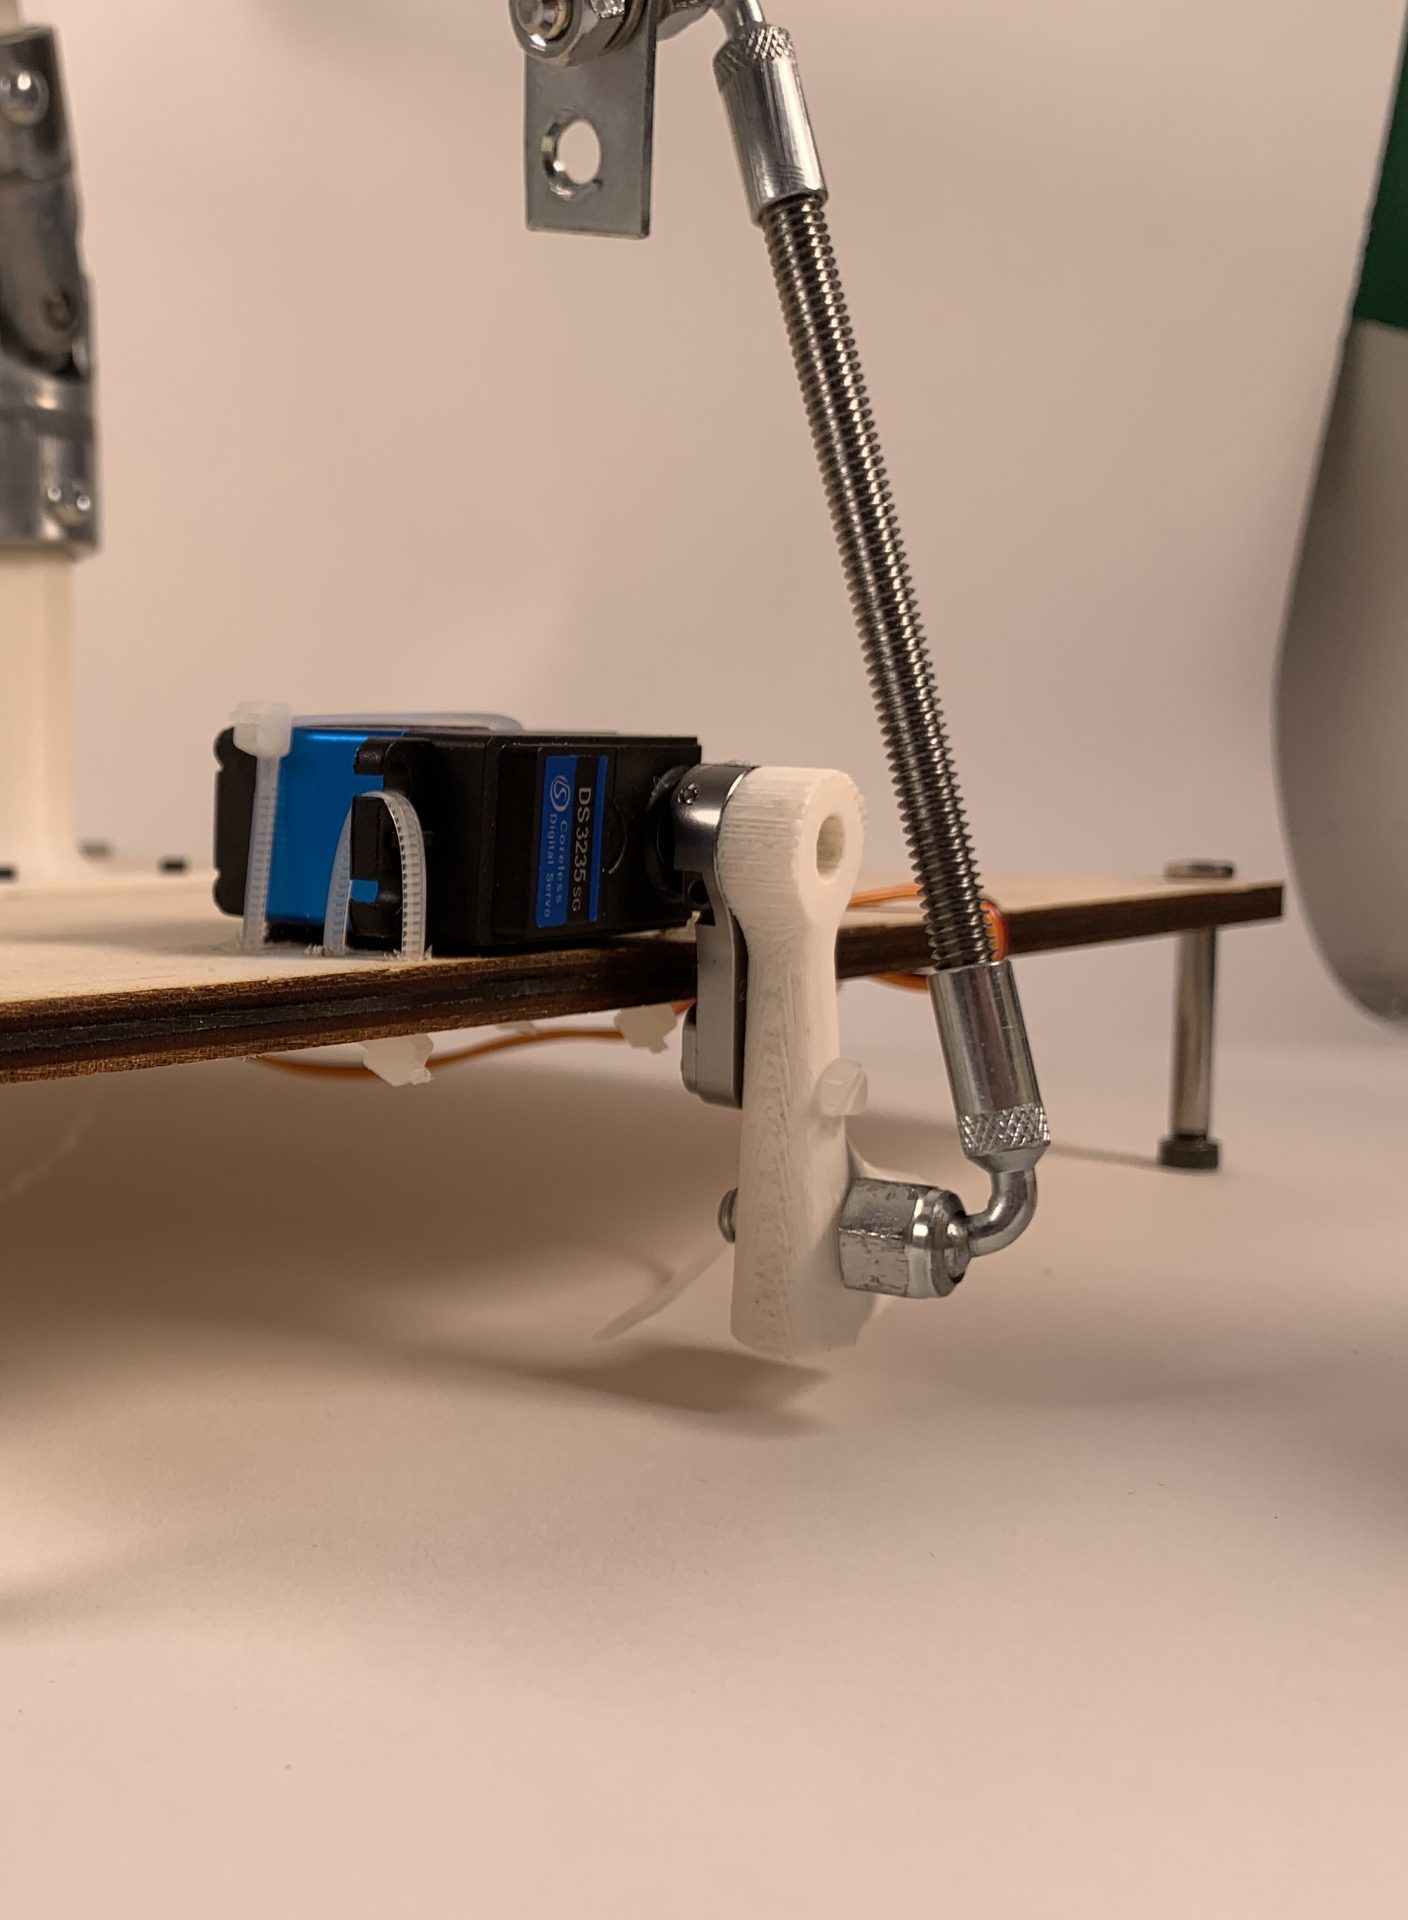
3D printed arm extensions allow us to connect the servo arm movement to the top plate.
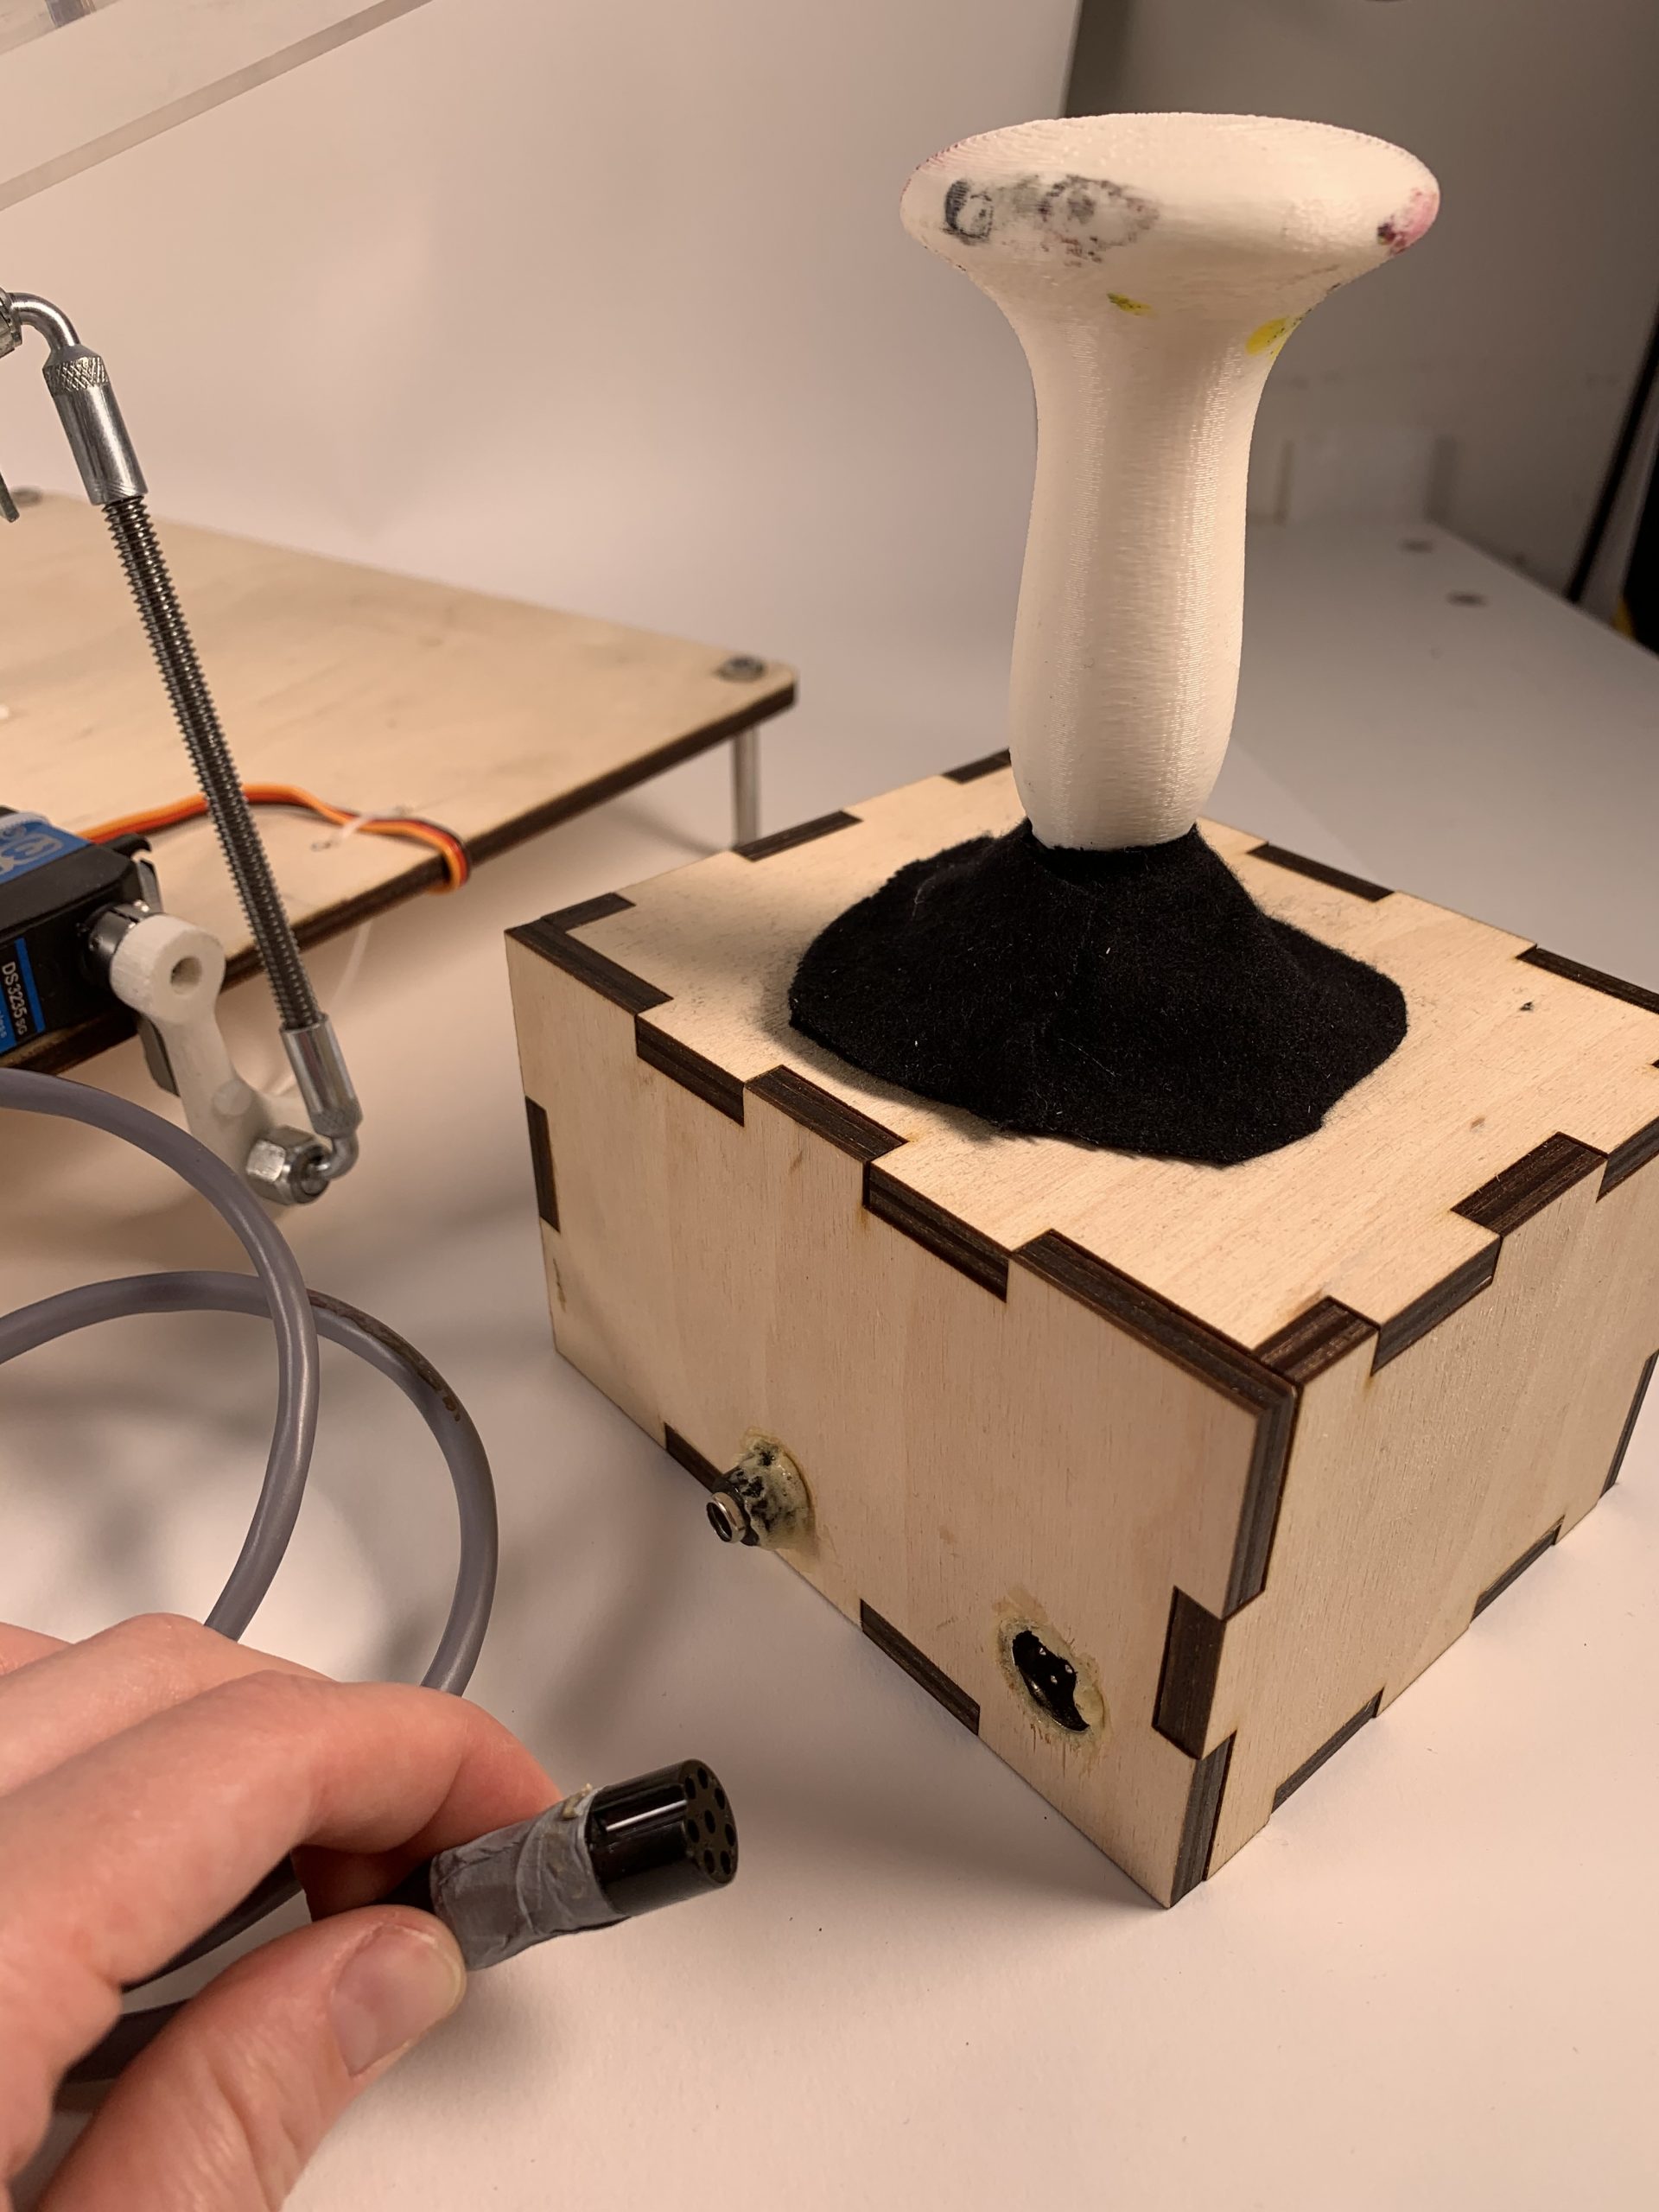
The joystick control box is fully detachable from the base, and the elongated joystick handle makes it very easy to manipulate with little force.
Narrative sketch
When Brenda wishes to make a painting, she first connects the wires of the joystick module to the platform, then plugs the power cord into the joystick module. After the platform aligns to flat, she moves the pegs on the top surface to fit her desired canvas size. She then loads the canvas onto the pegs. After this is completed, she can begin painting. She manipulates the canvas by using the joystick and adds paint as needed. Once she is satisfied with the painting, she removes it from the pegs to dry. Brenda unplugs the device from power and to the motors. She can then either let the paint dry on the platform surface or remove the plate, shroud, and pegs and wash them in a sink to remove paint. After these dry, she adds them back to the platform module. The device is now ready to be used again.
How we got here
Because our project relies on the interactive functionality of multiple sub-systems, we created three different prototyping areas that all integrate together for a working model of the whole system.
Prototype 1 (Tate)
This prototype was built to answer questions about how the canvas will attach to the device and whether we needed to implement a third DOF for the rotation of the device. The prototype was made with laser cut cardboard and wooden dowels. The holes on the cardboard interface with the 3D printed pieces that connect to the center joint so that the plate could be screwed directly onto the pieces. A slipping was also tested at the base of the center joint connector, but after considering the complexity that this adds to the system and Brenda’s existing solution of a lazy Susan, we decided to not move forward with it.
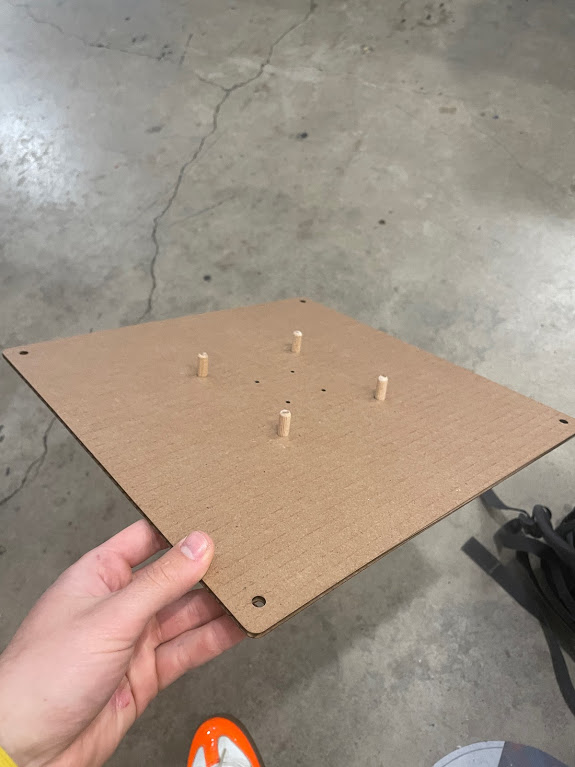
Pegboard prototype
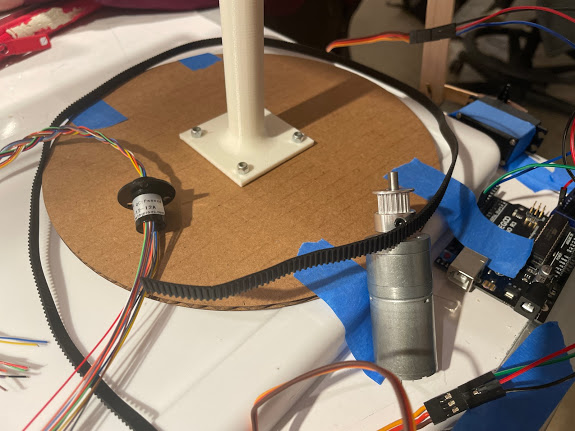
Slip ring and baseplate testing
Because of the integrated nature of our three prototypes, other images and video of this device in use are shown in the later prototyping sections.
The prototype answered many questions for us and posed some new ones. The first being that it confirmed that a laser cut plate with an array of peg holes for variable canvas sizes would work. It also met the sizing requirements that we needed and didn’t contact the surface when the pitch was at it’s highest angle. We discovered that the weight of the plate could be an issue, especially when it needs to be modulated quickly by the servos. This was one of the motivating factors that led us to purchase higher torque servos for the final device. By actually integrating the prototype into the larger system it allowed us to check how it interacted with all other components and movement.
We had previously not considered the negative effects of the paint dripping into the internal components. This prototype visualized the system such that we designed the two-plate system used for the final device to create both a stopping surface for the pegs as well as preventing paint from dripping below. We also explored a slipping and a belt to allow for controlled rotation of the platform, but after discussing more with Brenda and doing loose fittings of the system, we found that it adds significant complexity without being much better than what Brenda currently uses, a lazy Susan. We received generally positive feedback for this prototype so we moved forward with most of our original design for the final device.
Prototype 2 (Erica)
The question that this prototype aimed to answer – How can we make a 2 degree of freedom platform with two servo motors? Will the combination of the joystick and servo motors move the platform in a way that could be used for pour painting?
I used popsicle sticks with brass fasteners, two servo motors, and a joystick module to construct arms that would move up and down to tilt the platform. The joystick module would let the user tilt the platform to a specific angle so that the paint would drip to different parts of the canvas.
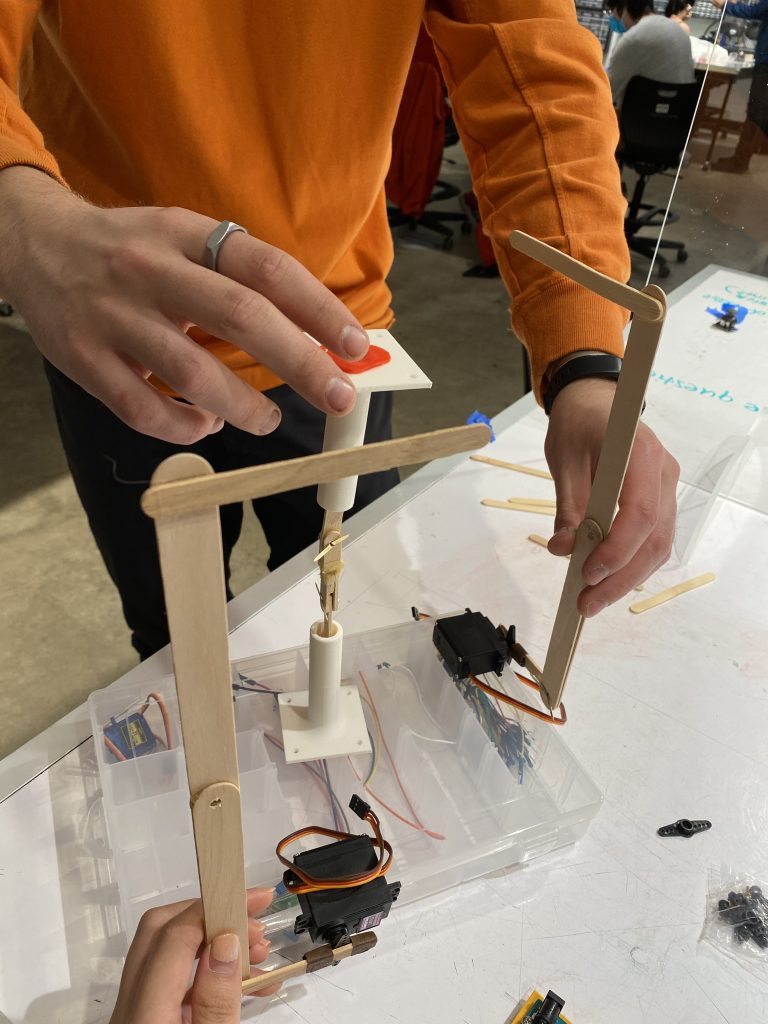
I used the servo motors and popsicle sticks with brass fasteners to create arms for the platform. Here, Dani’s prototype is also pictured to compare the heights.
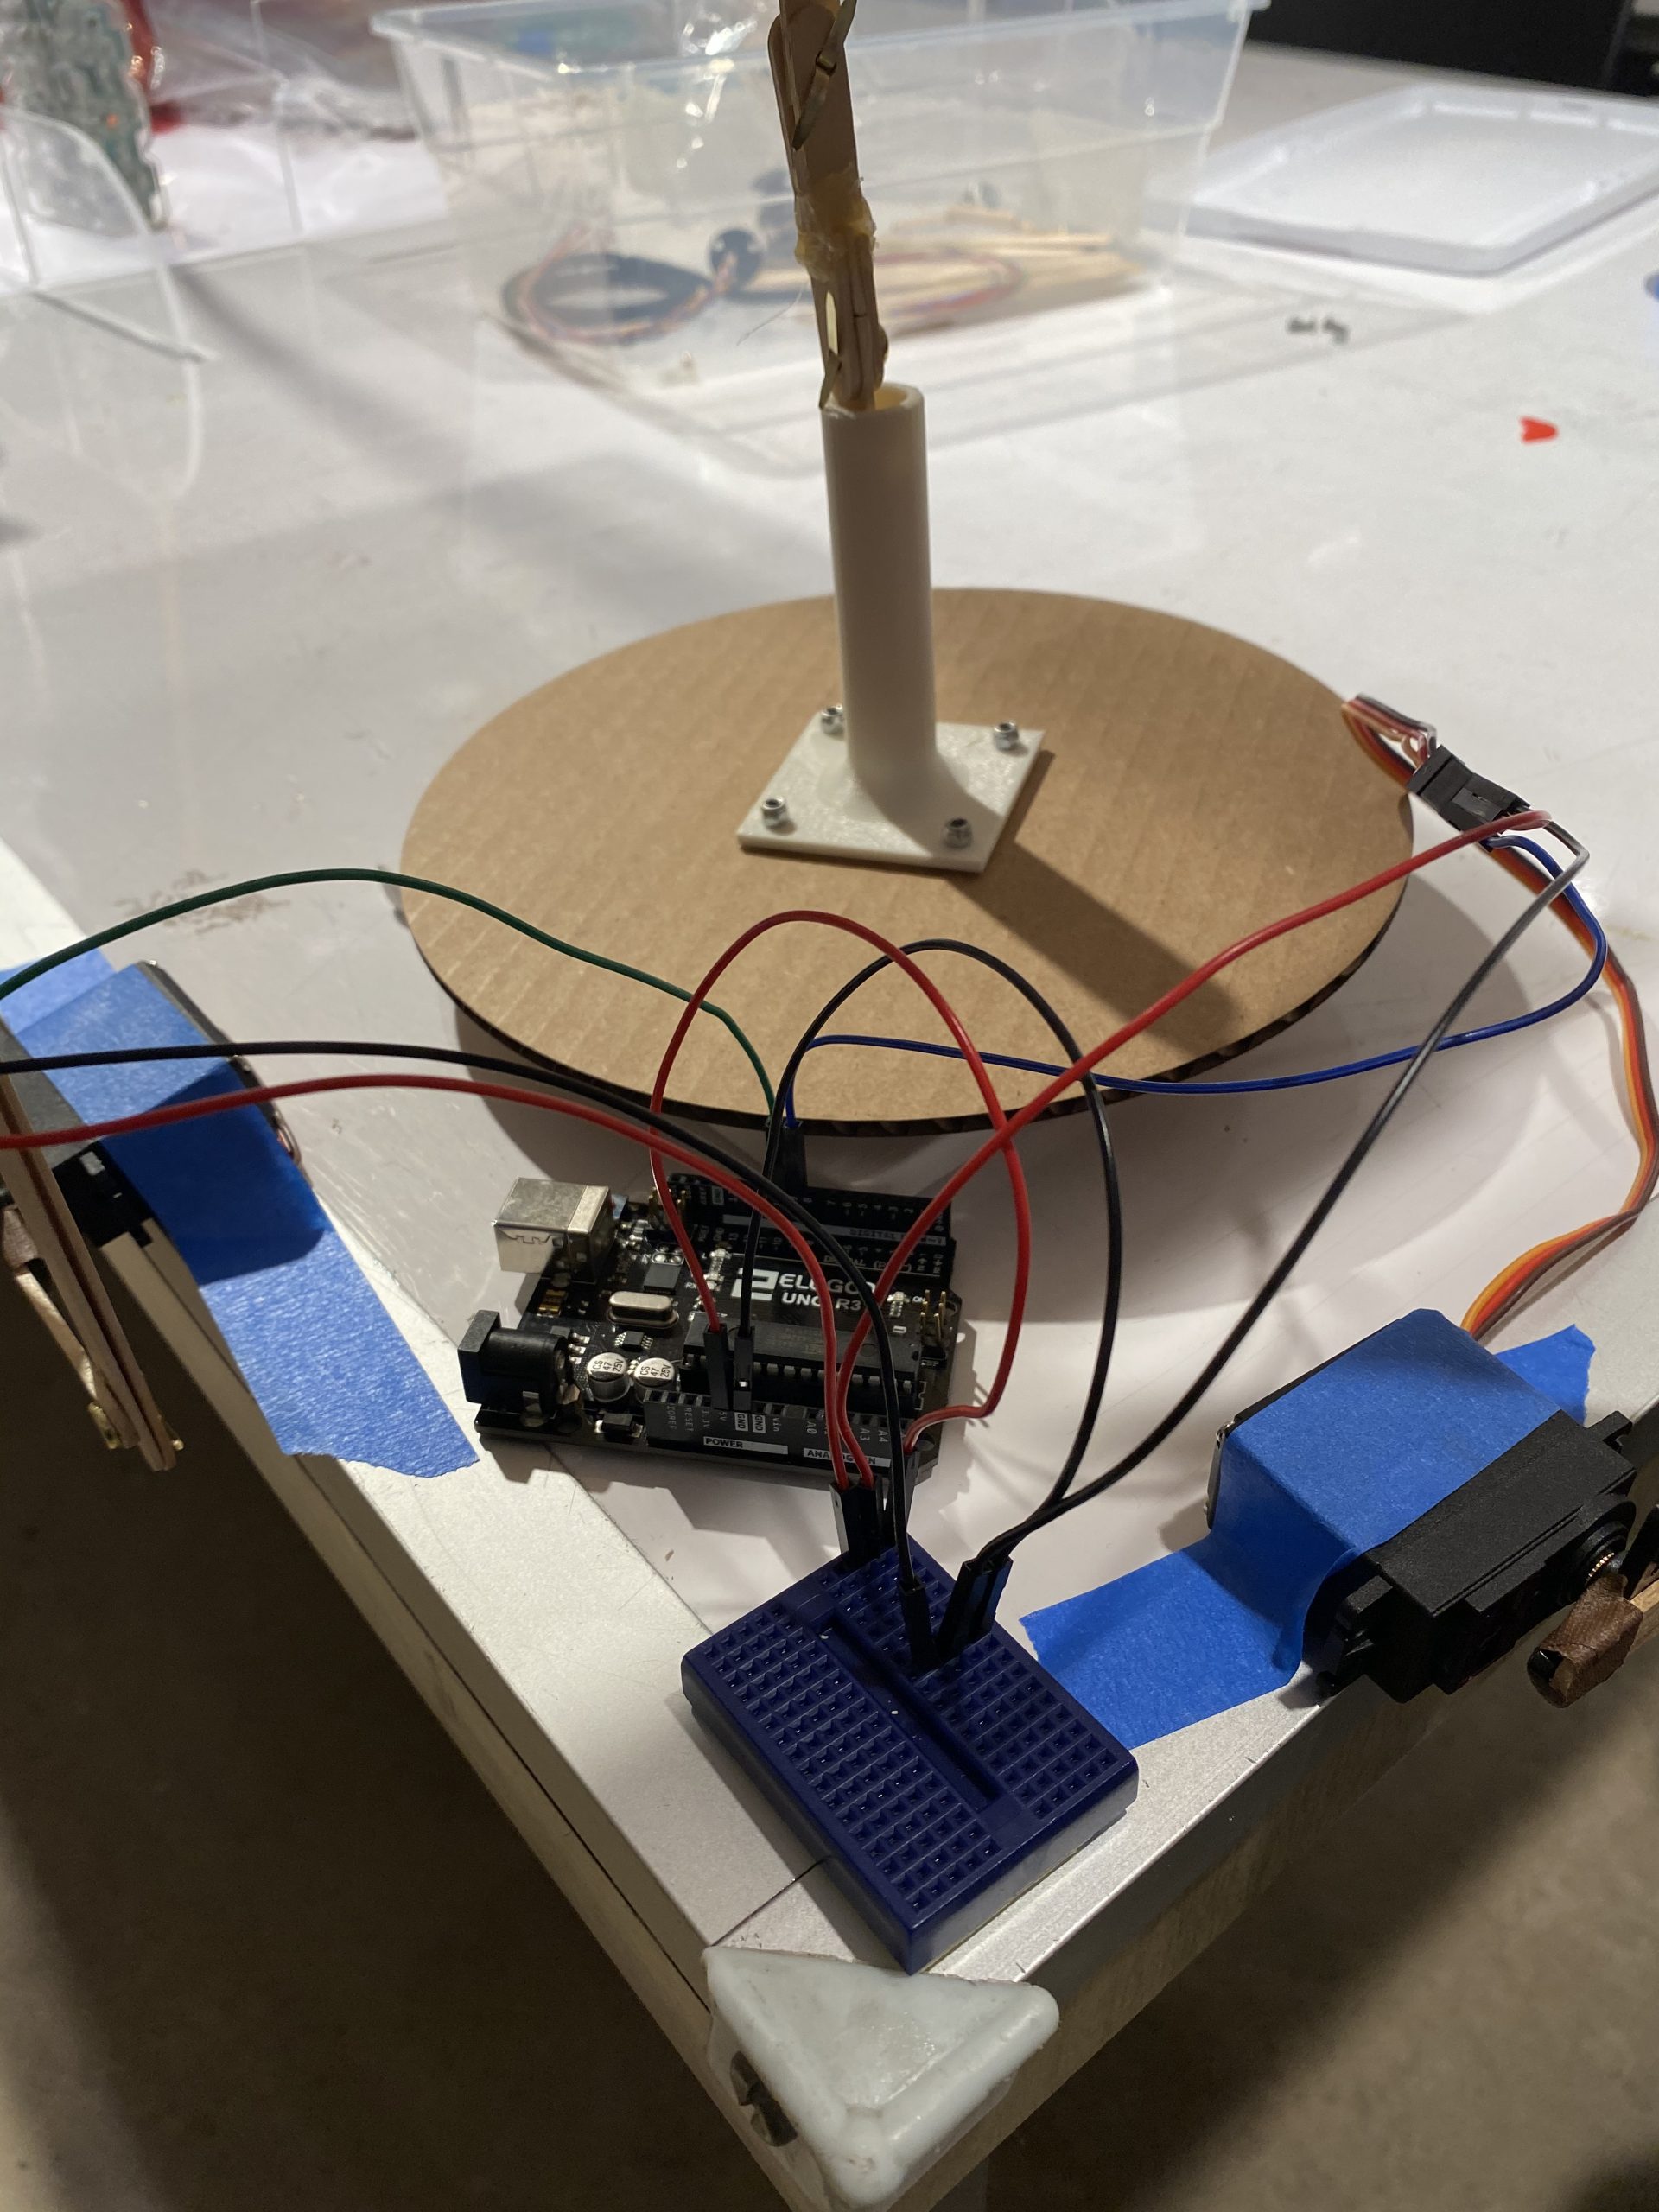
I connected the servos to the Arduino. At this point, we connected all the prototypes and tested code to see if the servos would move the platform the way we wanted it to move.
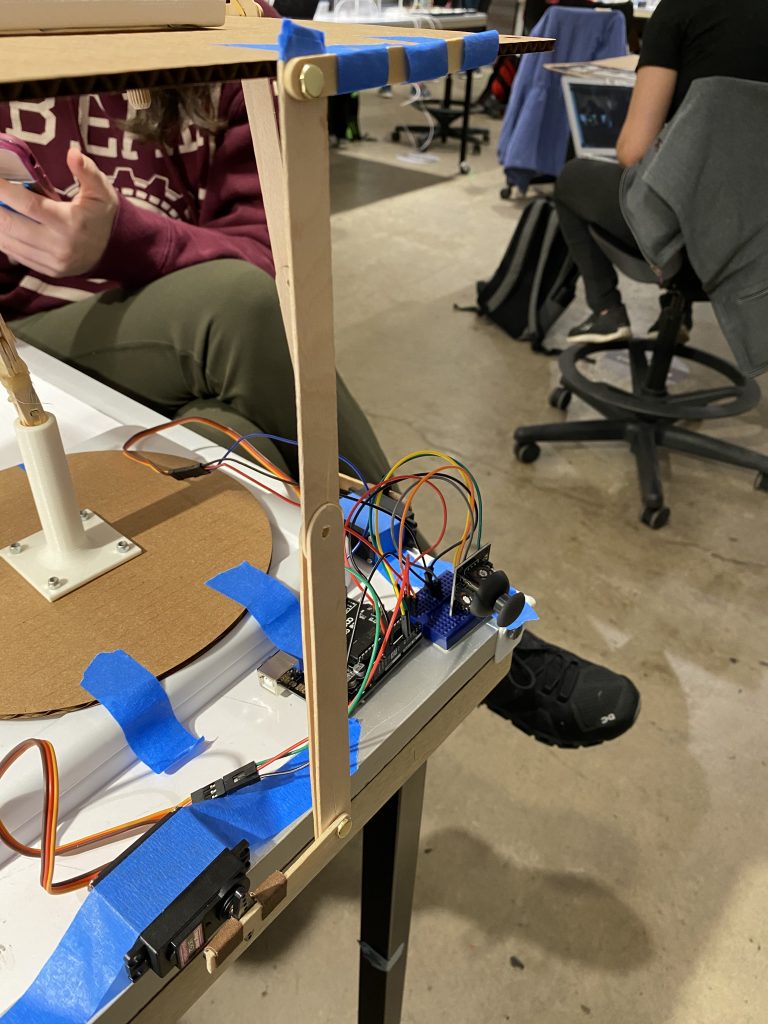
Here, the servo motors and joystick module are all connected to the Arduino. We tested code to ensure that the joystick could be used to tilt the platform.
Prototype development/feedback process
This video shows the initial run of the code after the servos, platform, u-joint (but not the joystick module) were all combined. The movement was initially very shaky but the servos were able to tilt the platform in two degrees as we intended.
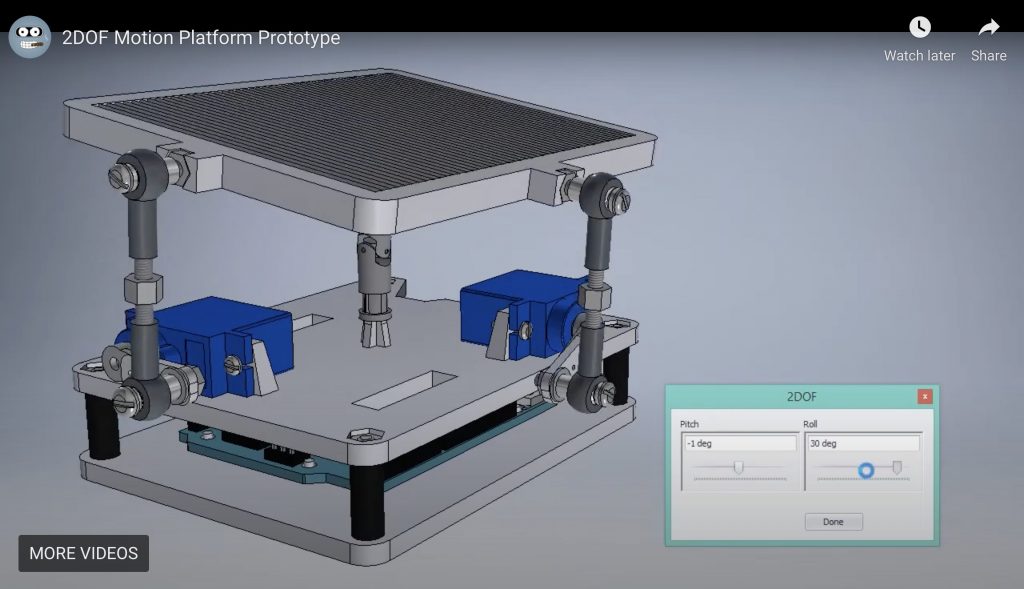
Here is a video of the 2DOF motion platform that we were heavily inspired by for this project (https://www.youtube.com/watch?v=mVDGjfTJ4C8&feature=emb_title). One of the key questions I answered was whether this 2DOF motion platform model worked.
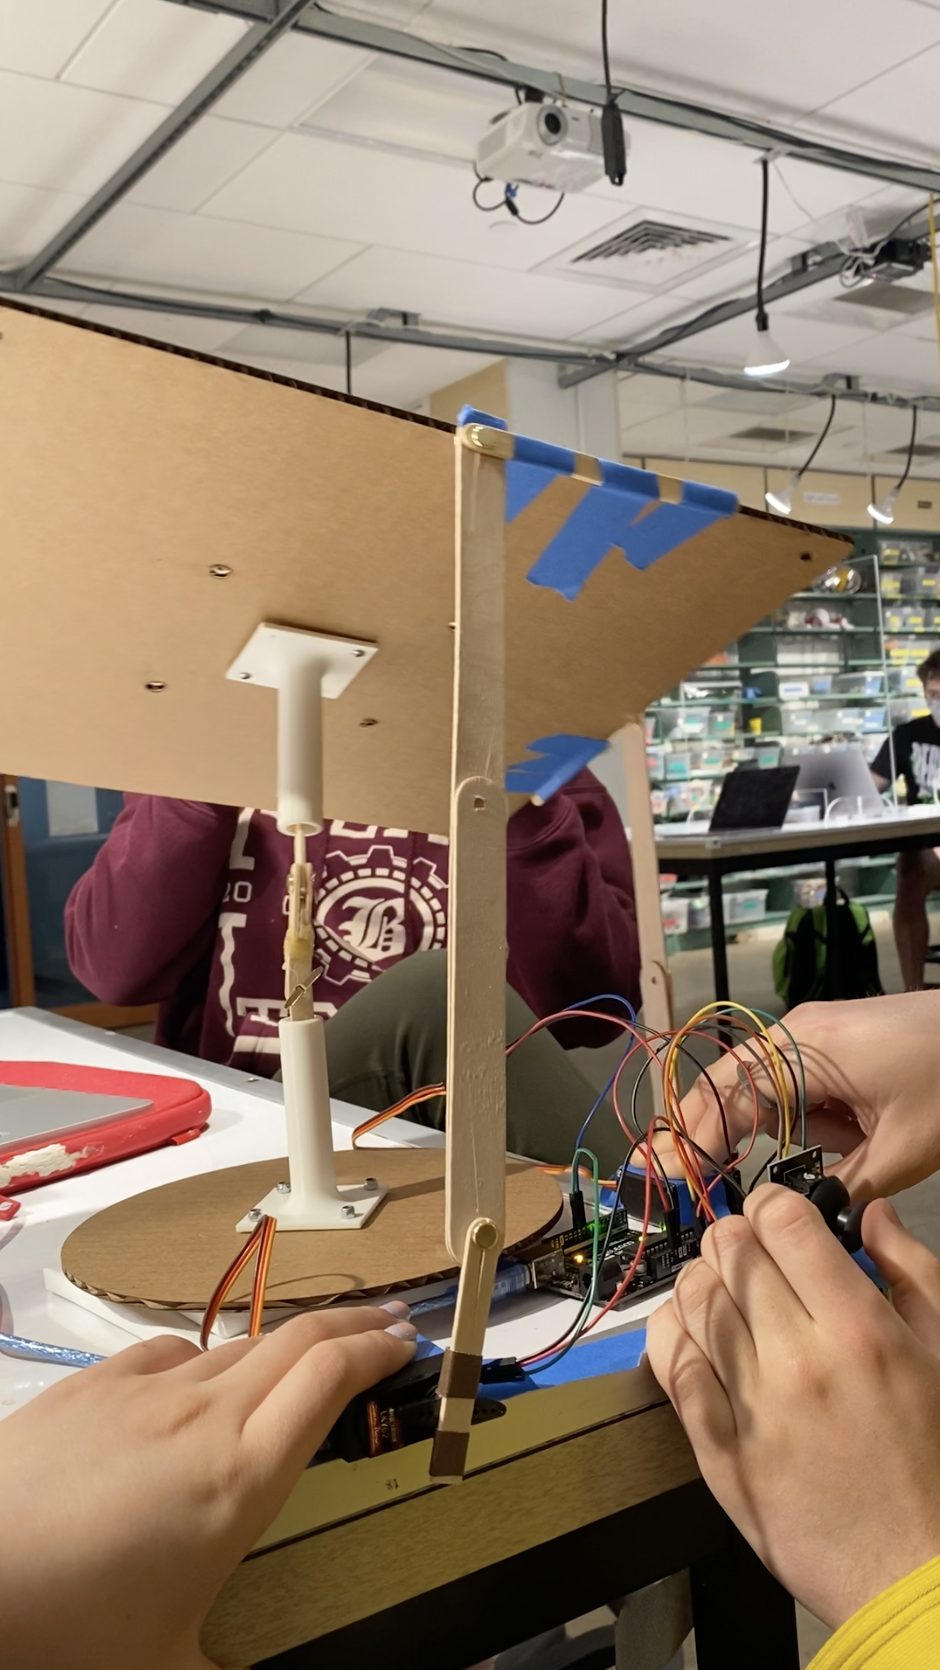
One noticeable aspect of our prototype that needed to be addressed was the connection of the servos to the bottom platform. Since the servos would move quite a lot, I had to use my hand to hold down the servo motor or else it would lift up quite easily.
Through this prototype, we confirmed that the 2DOF model we found worked well and that overall we should continue with using the servo motors and joystick as planned. To start, we found a 2DOF motion model online as inspiration for a simple but effective solution for our needs. We wanted a platform that could tilt at any angle with decent control so that Brenda could easily change how the canvas was tilted to drip the paint around. We found many solutions, some that even included a 6 servo motors, so we were unsure whether such a simplified model would work, but through testing with the popsicle stick arms, we found that this two servo model was sufficient for our purposes. Furthermore, we found that tilting the platform with the joystick module was quite intuitive since the platform would just mirror the motion of the angle of the joystick. Thus, we decided that we should continue using the Arduino parts that we initially planned.
Furthermore, by testing the code with the flimsy parts we had, we concluded and Brenda also noted that the movement of the platform was very twitchy which would not be ideal for Brenda to use. We attempted to smooth the code a little and prevent over-reading from the joystick module, however the movement still ended up being more sporadic than intended. We decided that at this point this may be caused mostly by the instability of the prototyped parts (ie. the servo motors had to be manually held down, the popsicle sticks would wobble) so we kept the current version of the code and only changed it after constructing the project again with the more stable parts.
Prototype 3 (Daniela)
The question that this prototype aimed to answer – What are the limitations of the motion of the canvas, and what range of angles are necessary?
My prototype consists of a universal joint (U-joint) made from popsicle sticks. This type of joint allows the canvas bed to move in two axes, which is what we were aiming for.
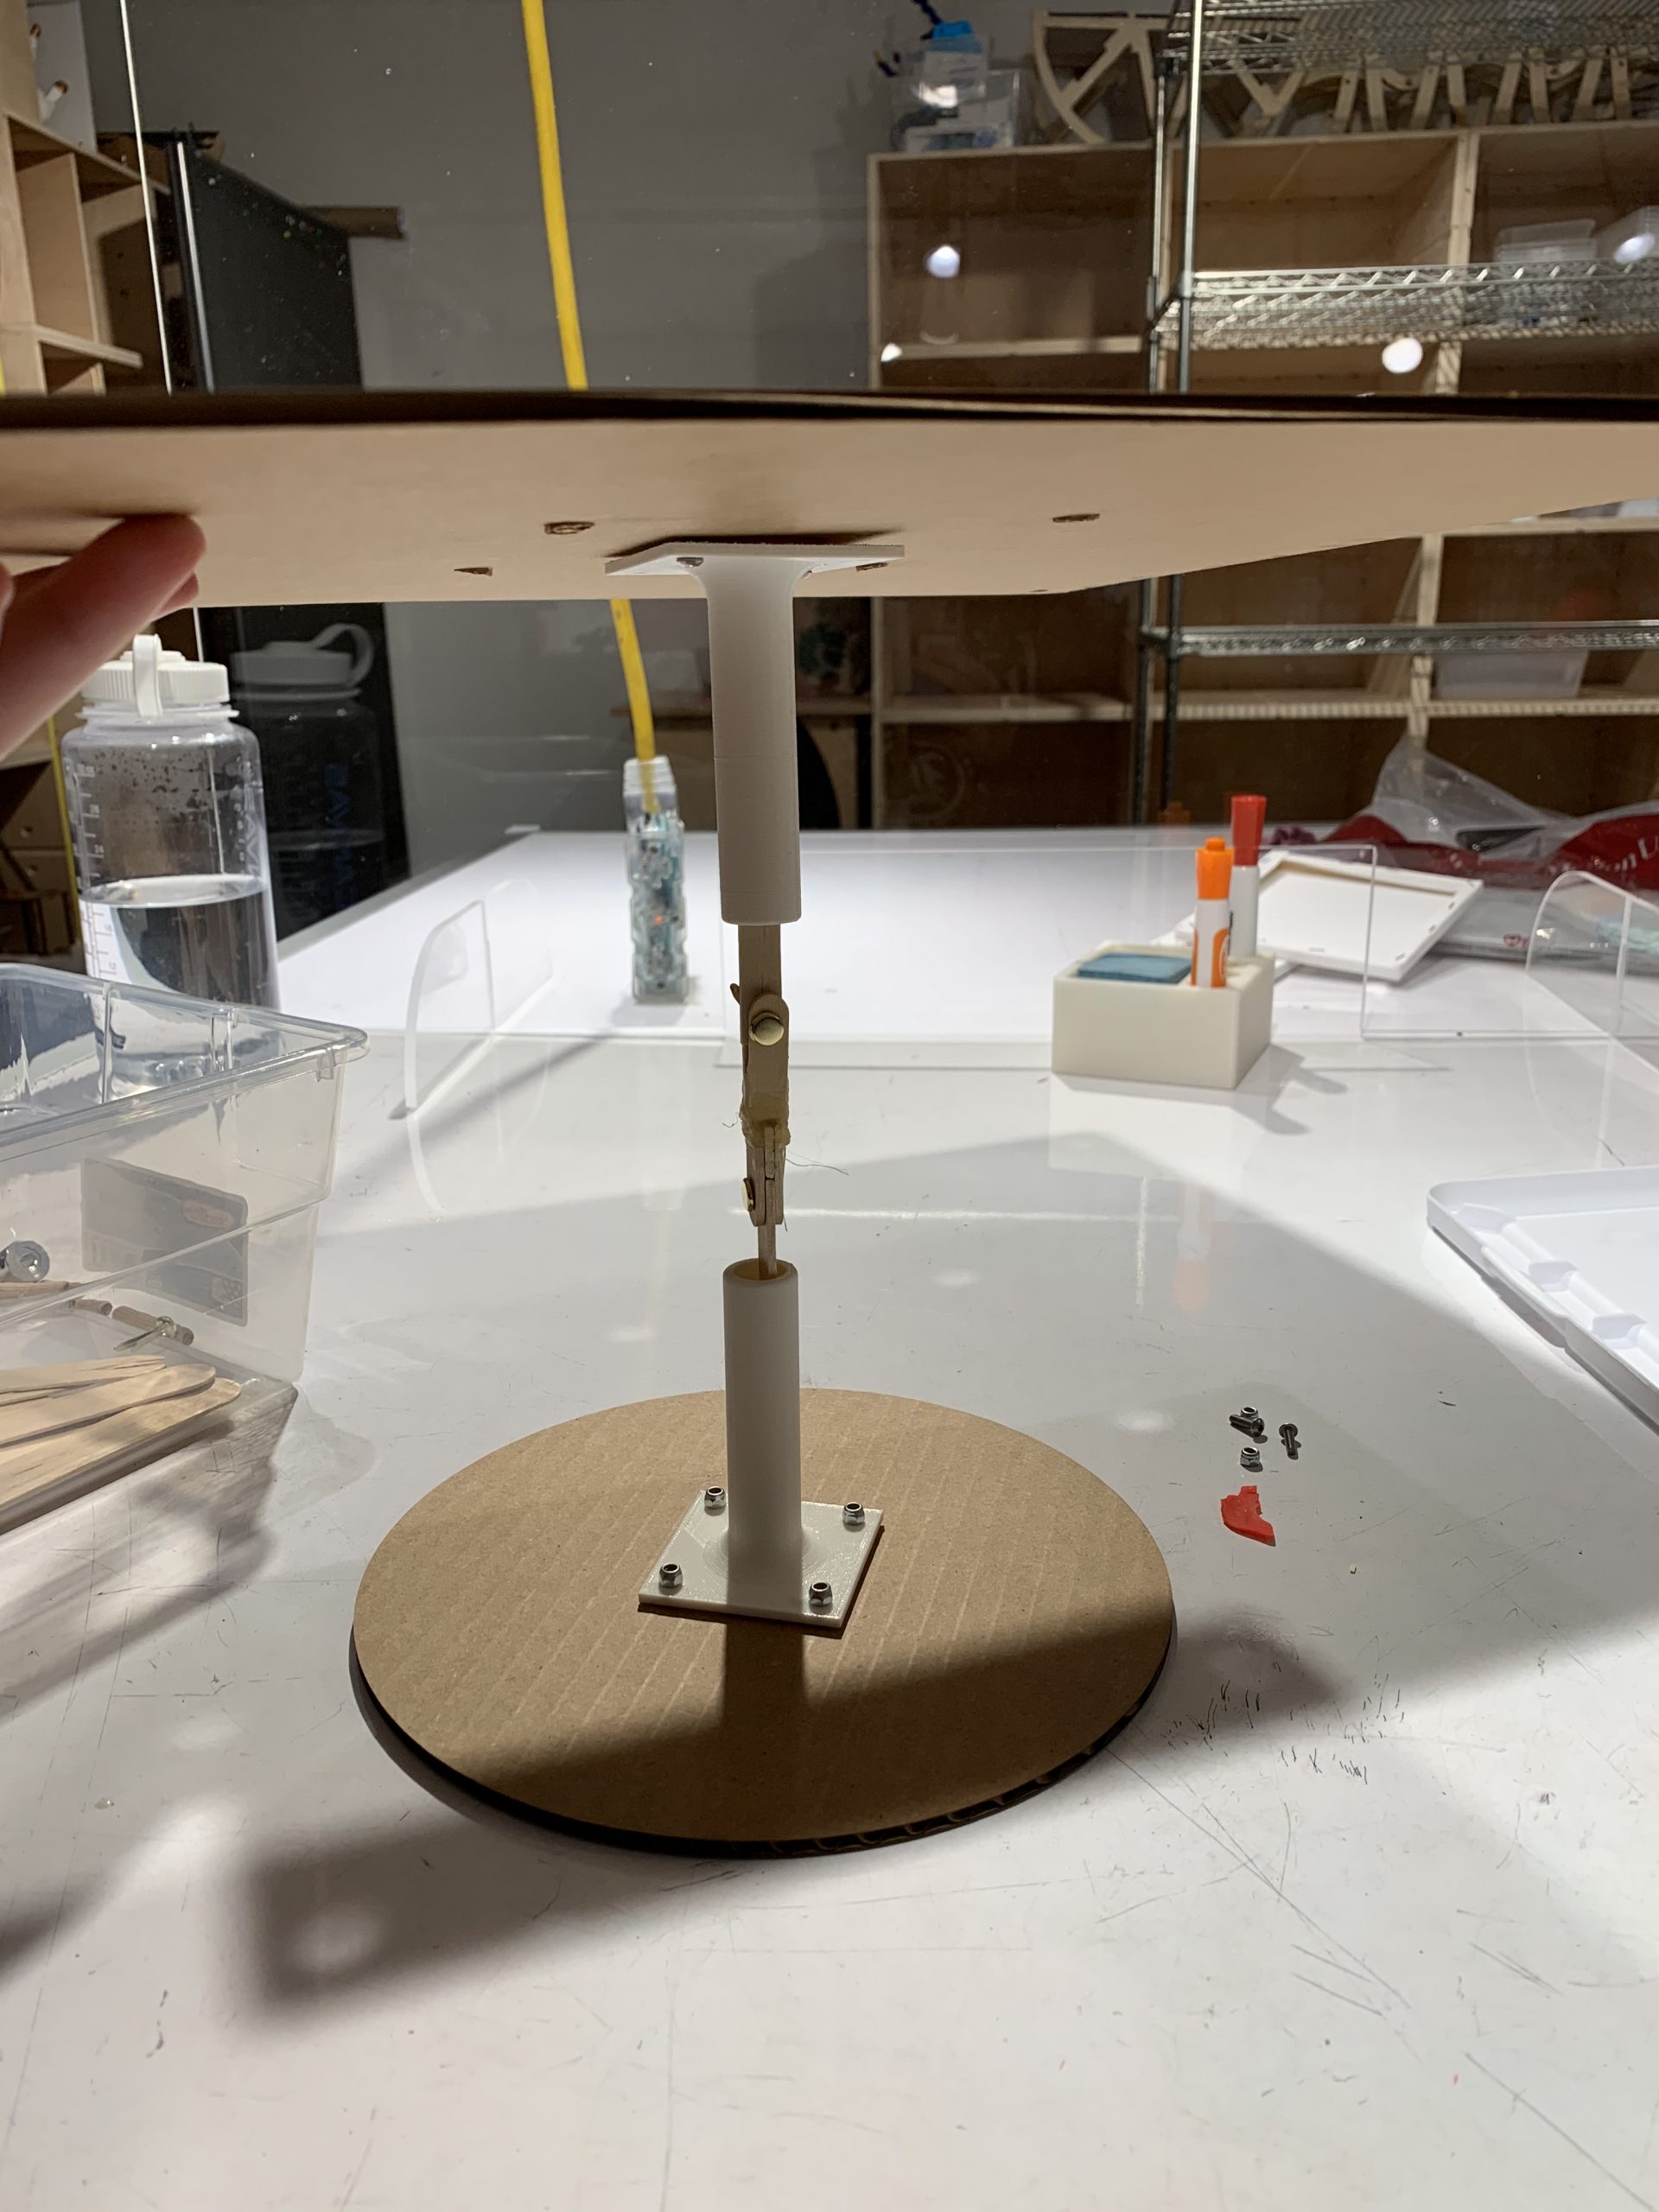
Here, the joint is imbedded into the product and is in the neutral position.
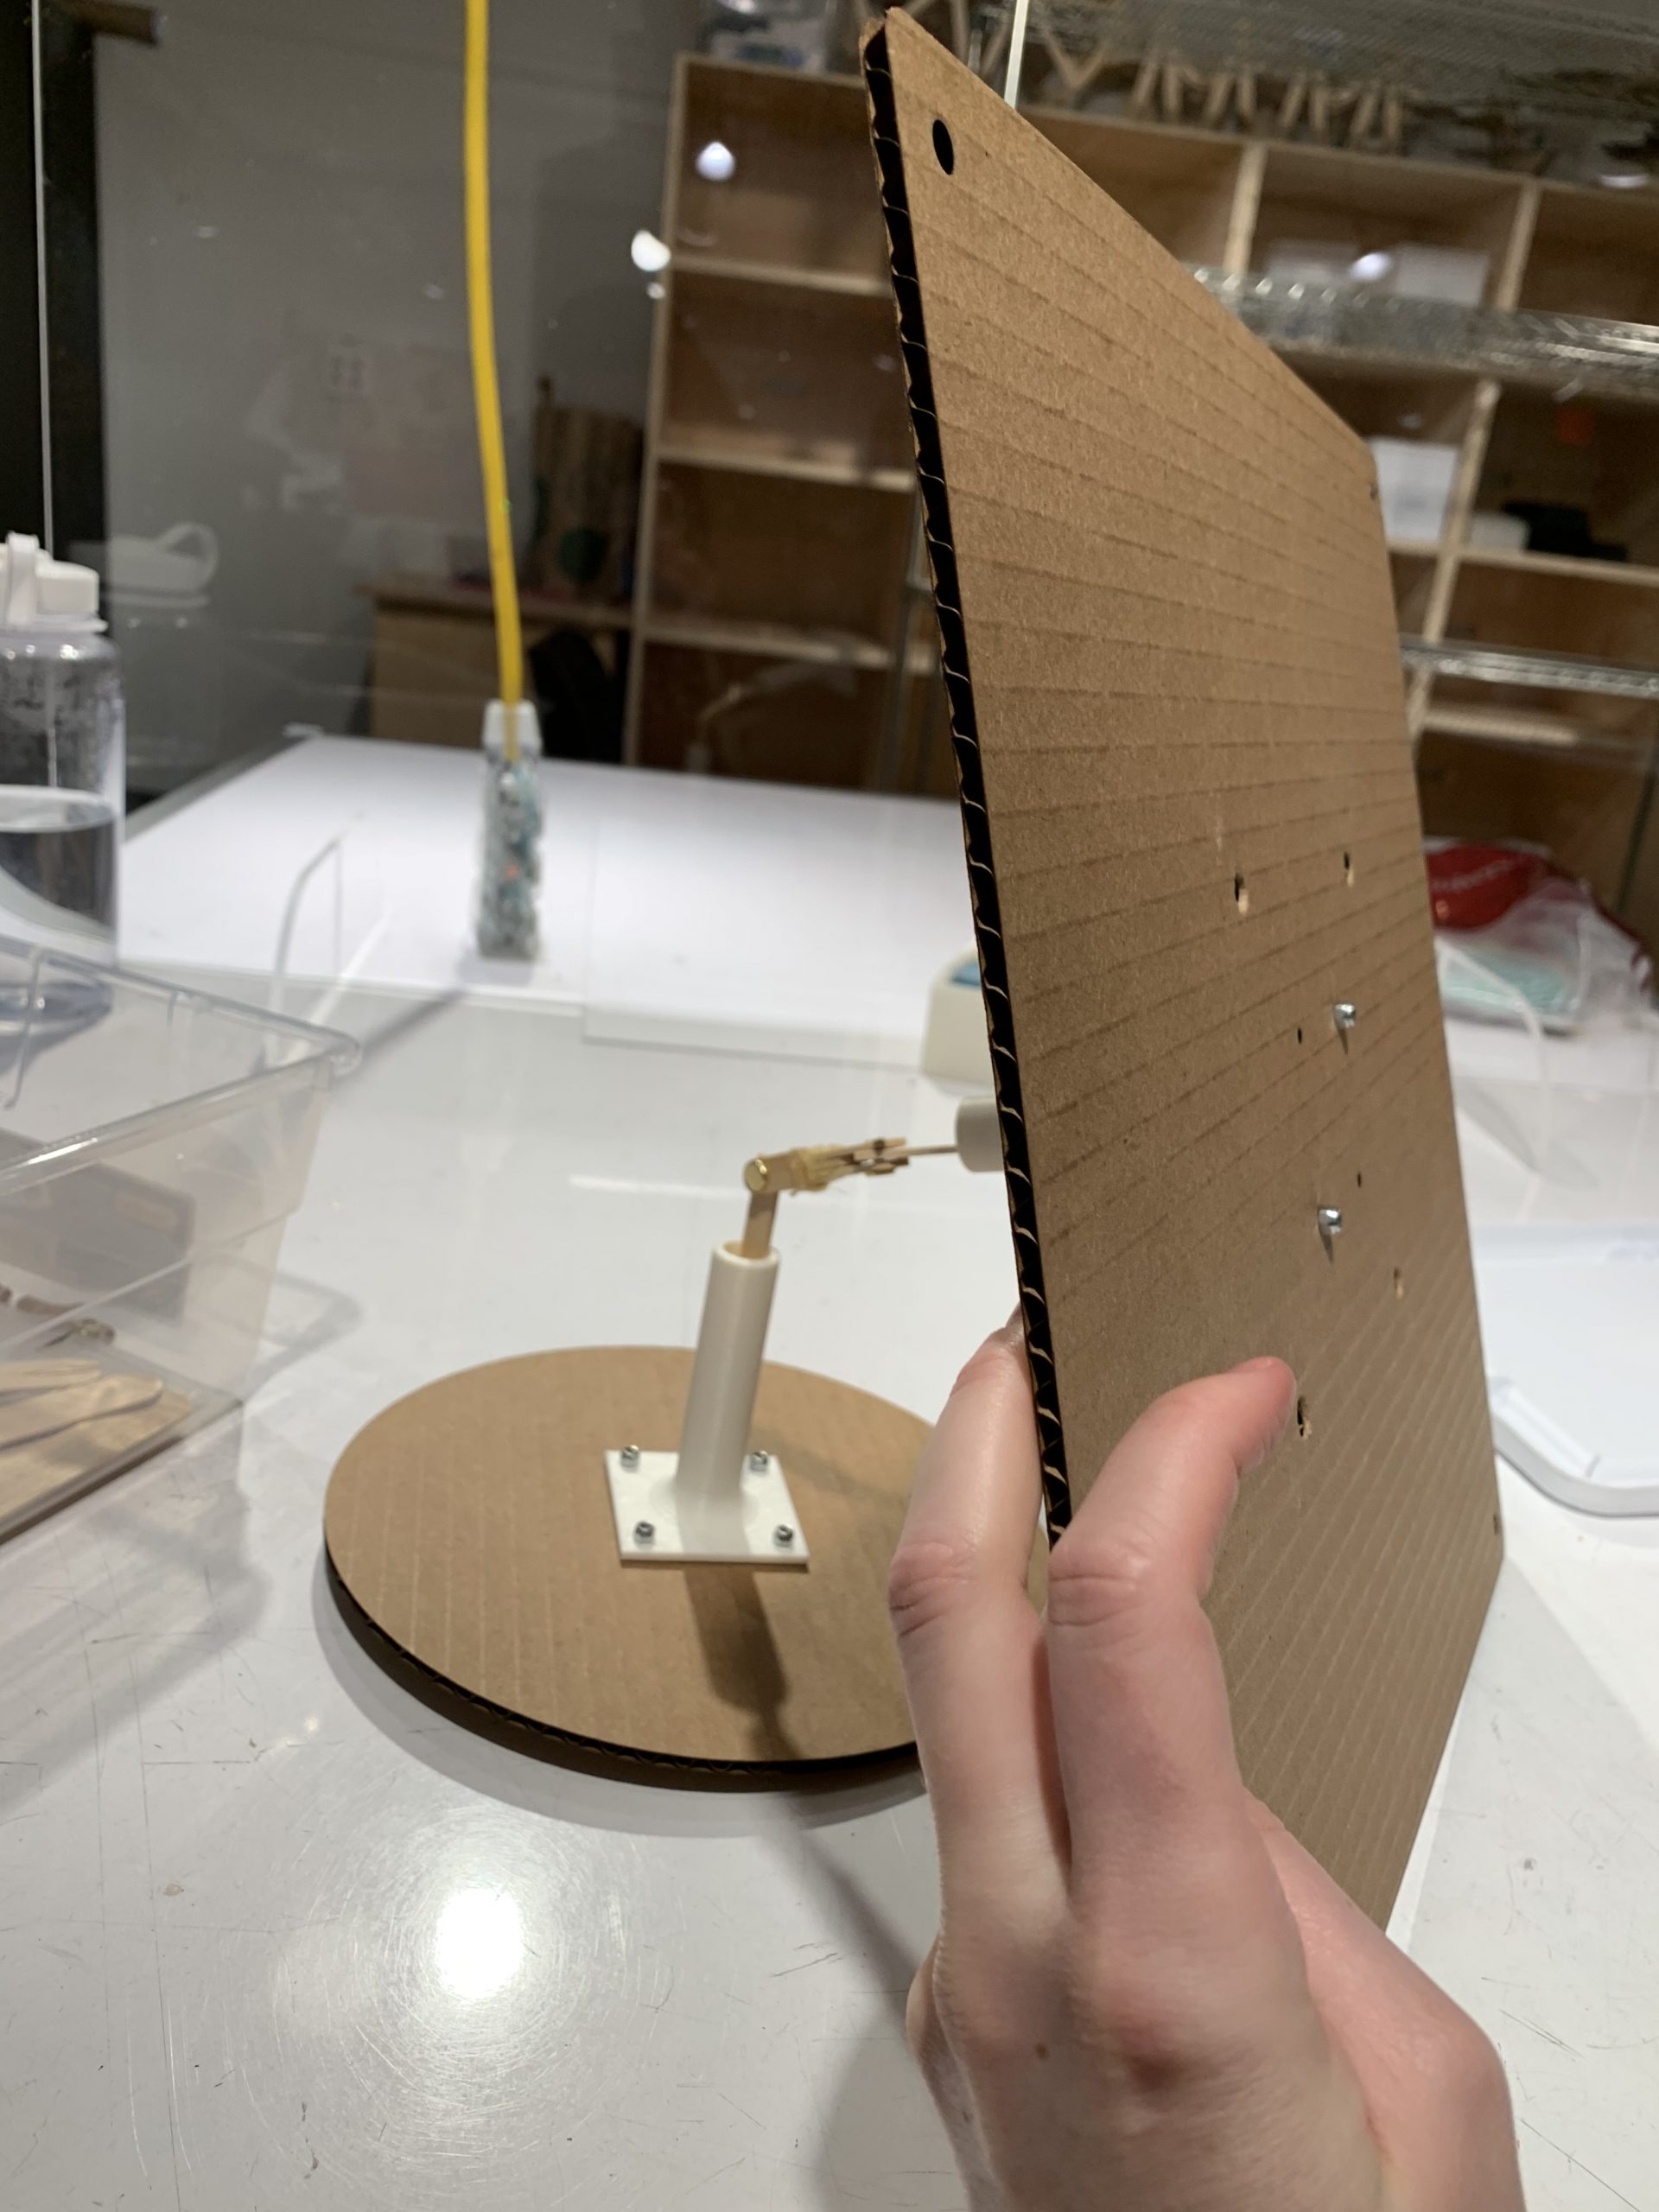
Here, the U-joint is rotating about the bottom pivot. The angle of rotation is very drastic.
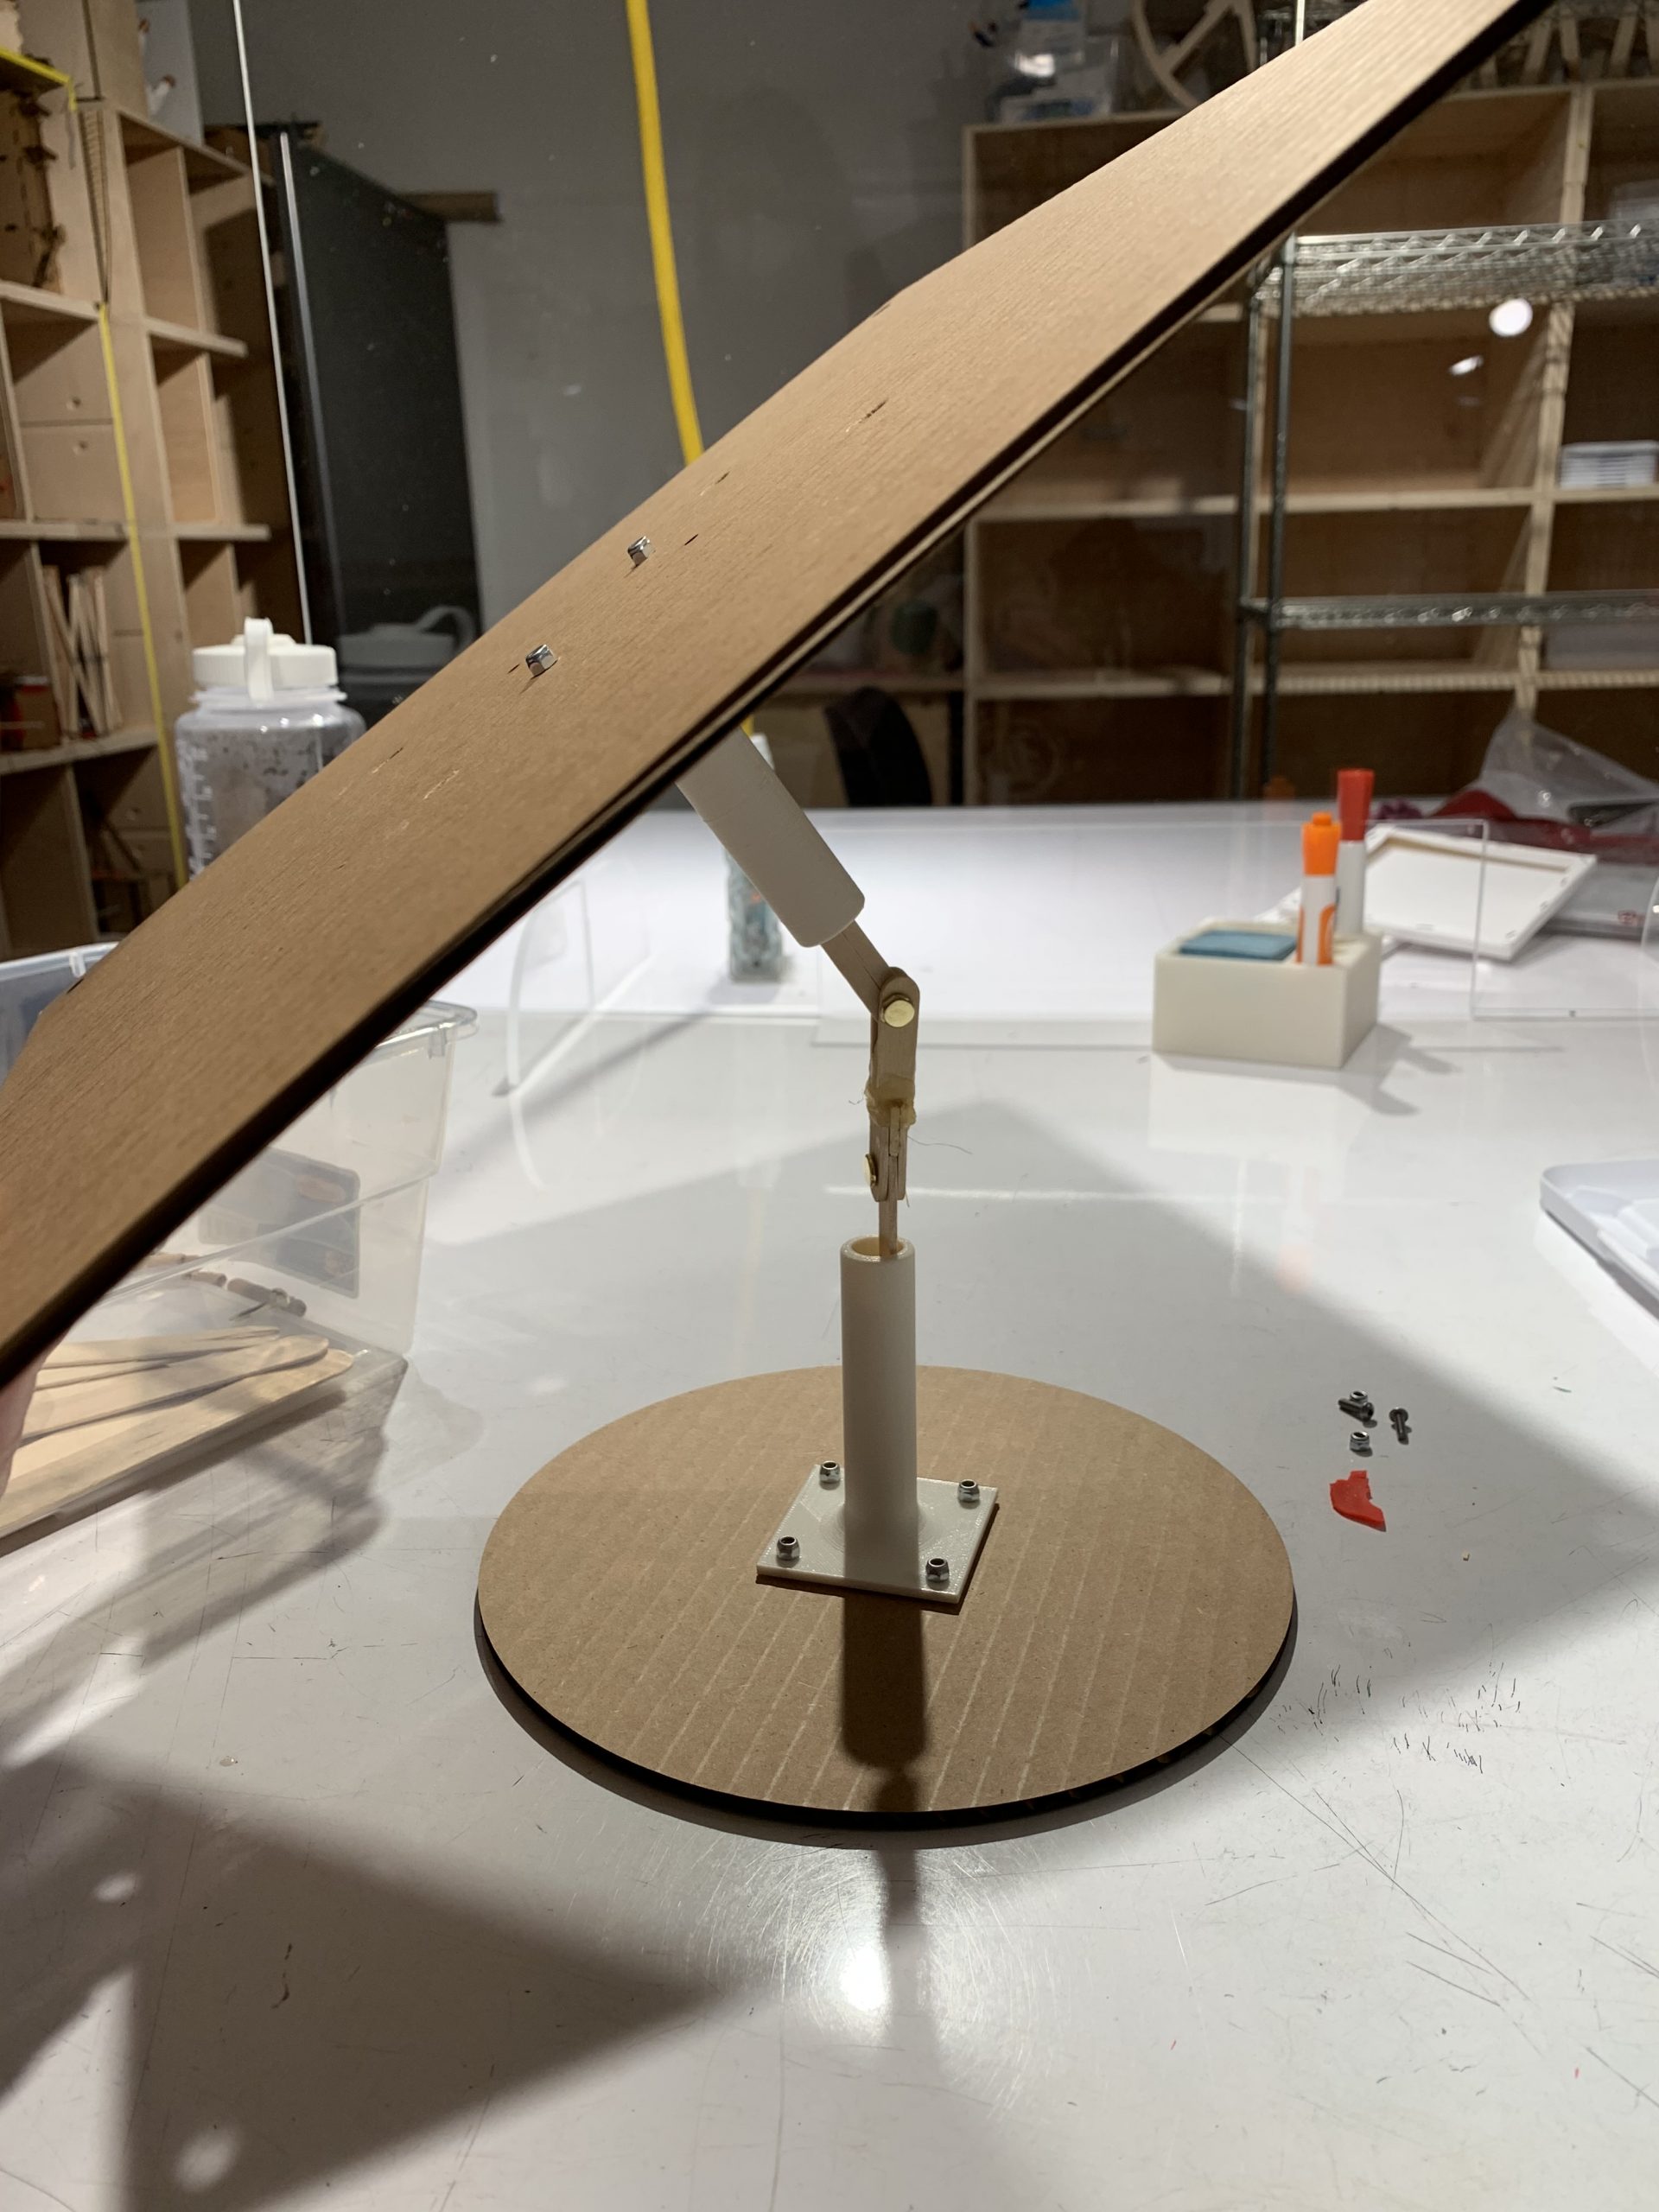
The U-joint is pivoting about the upper joint now along the secondary axis.
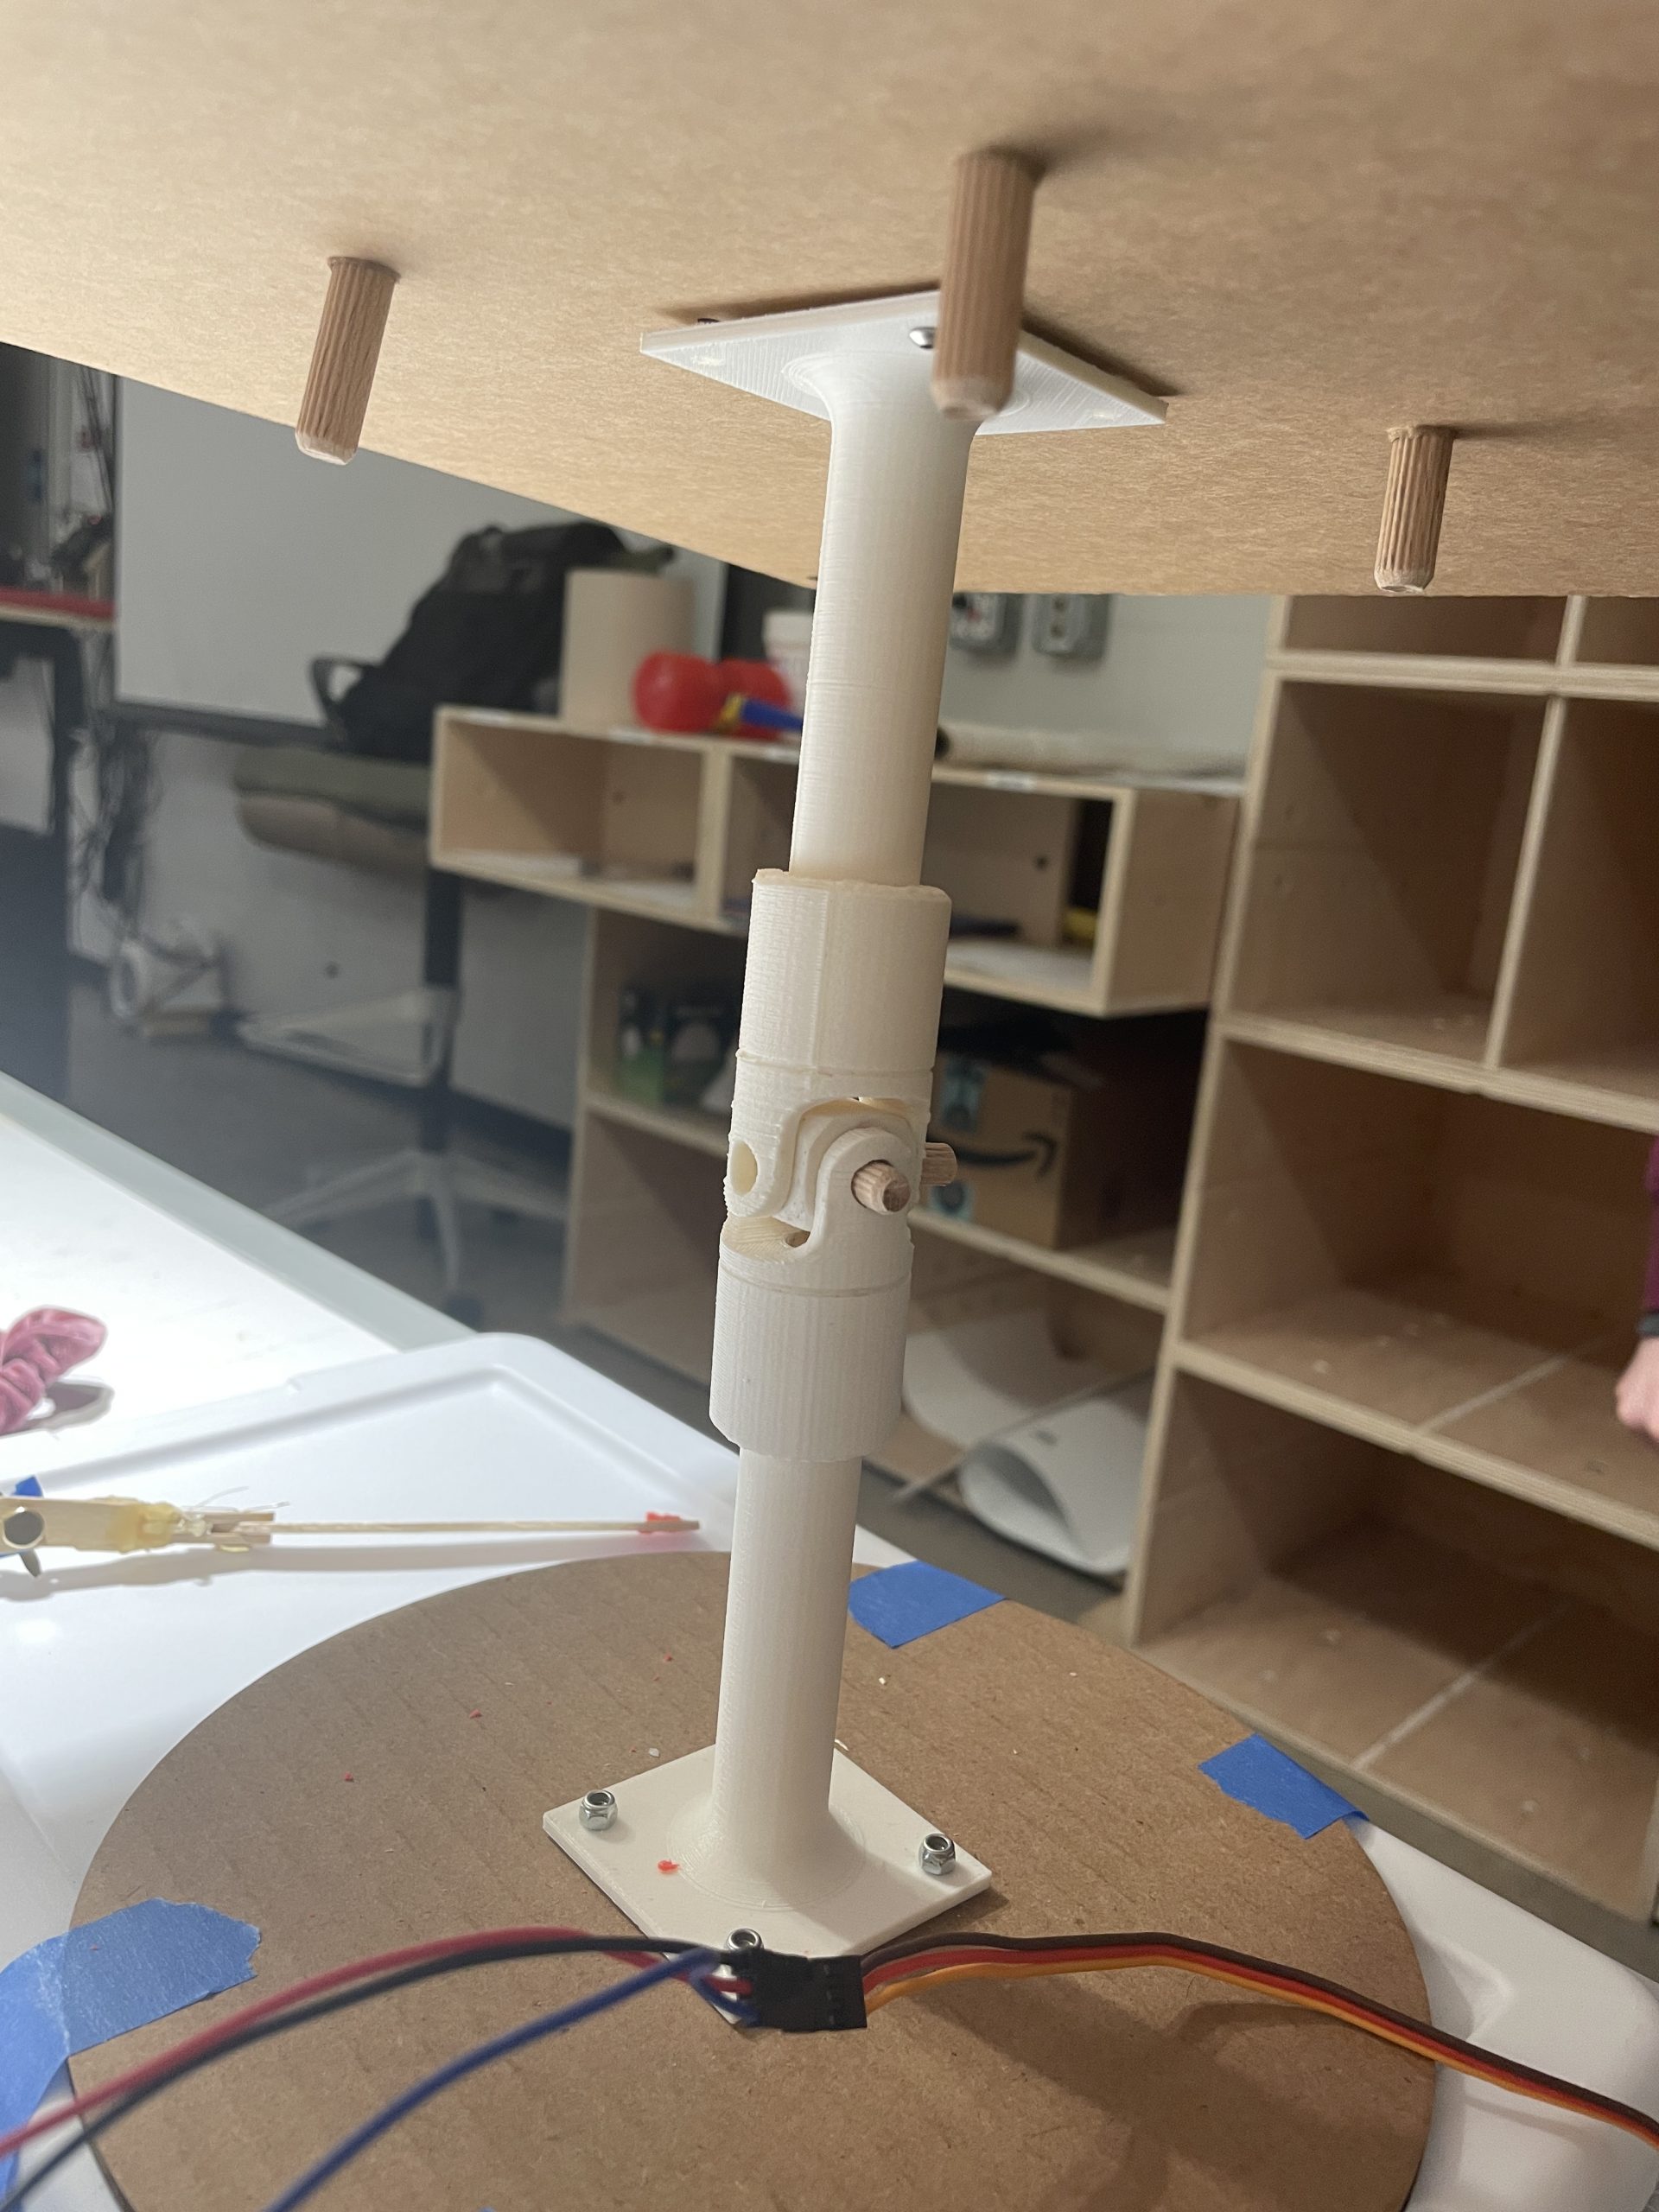
The new 3D printed U-joint to increase stability.
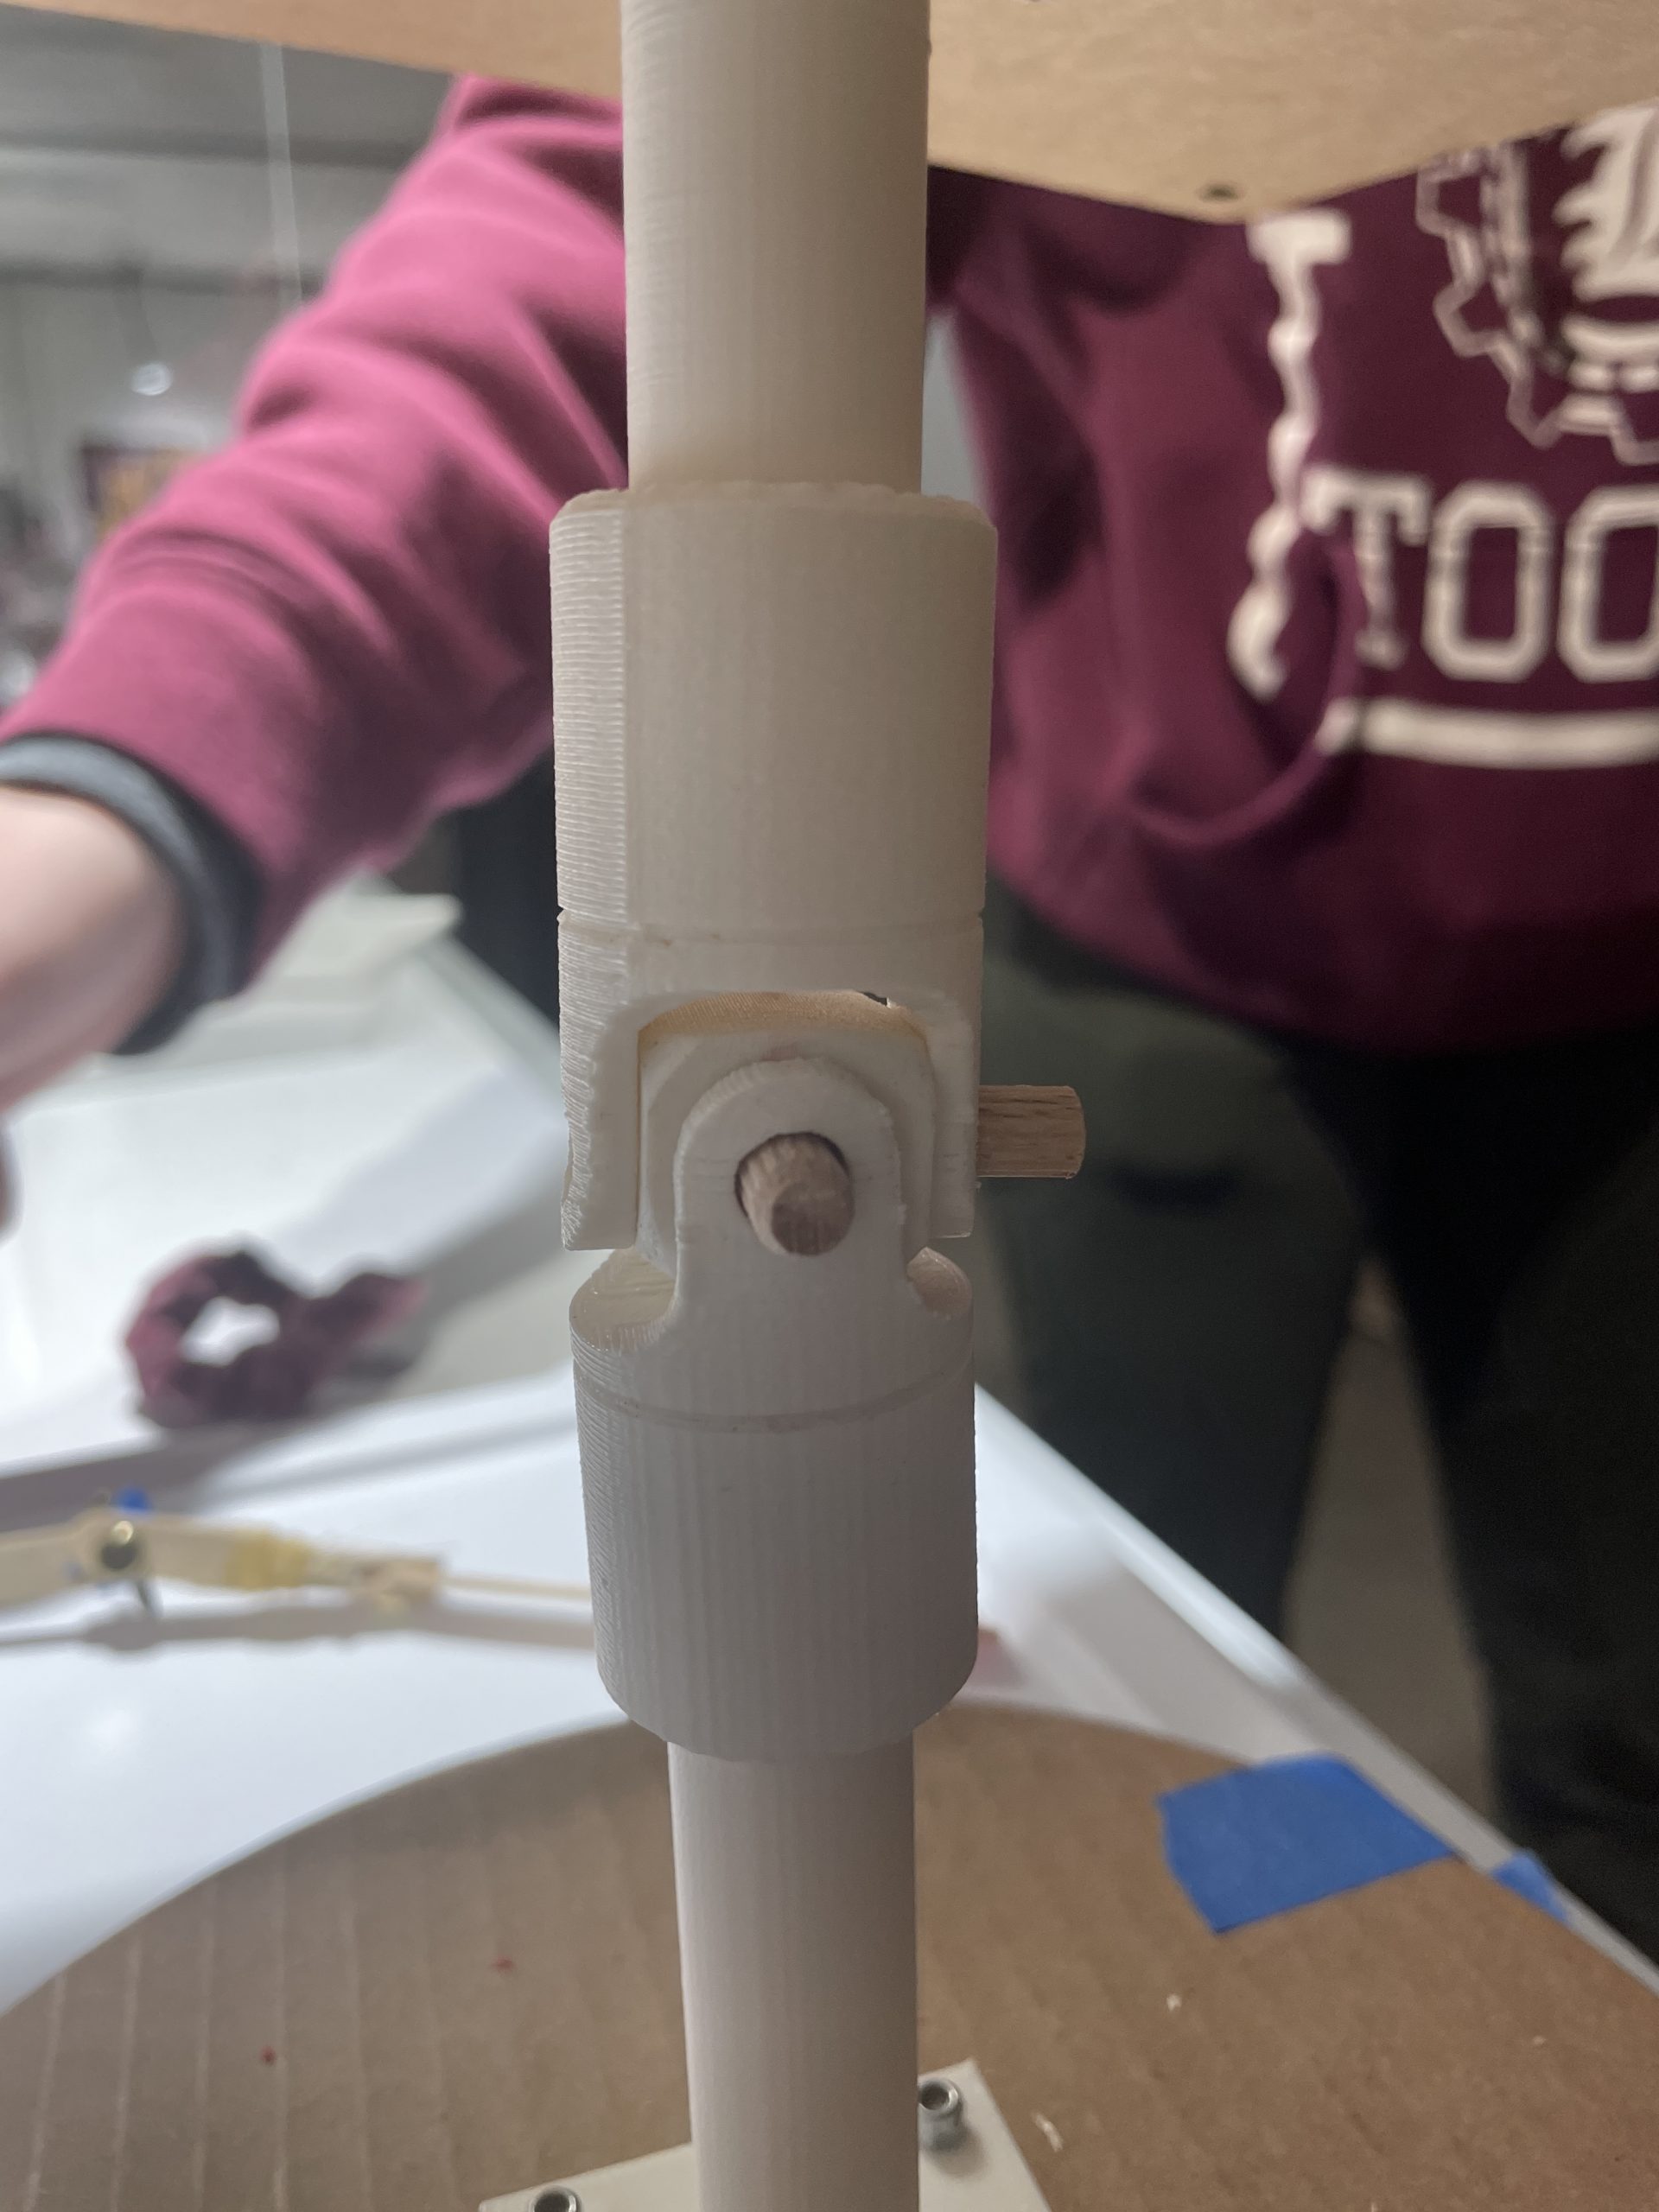
A close up of the 3D printed U-joint to show that both axes pivot about the same point which is different from the popsicle stick version. This was more robust than the popsicle sticks, however its range of motion was more limited.
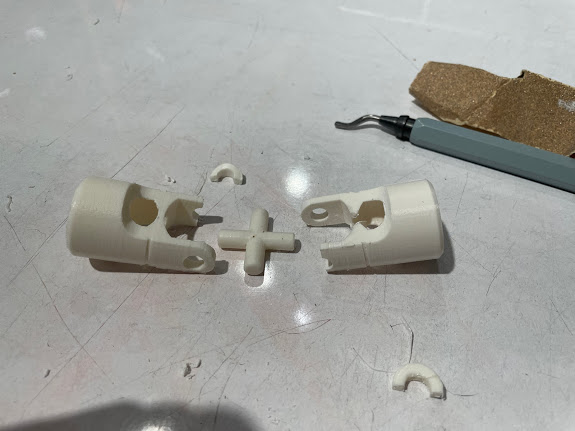
The second 3D printed joint (created after the initial prototype) did not survive long due to too much applied forced. This was created in an effort to increase the range of angles.
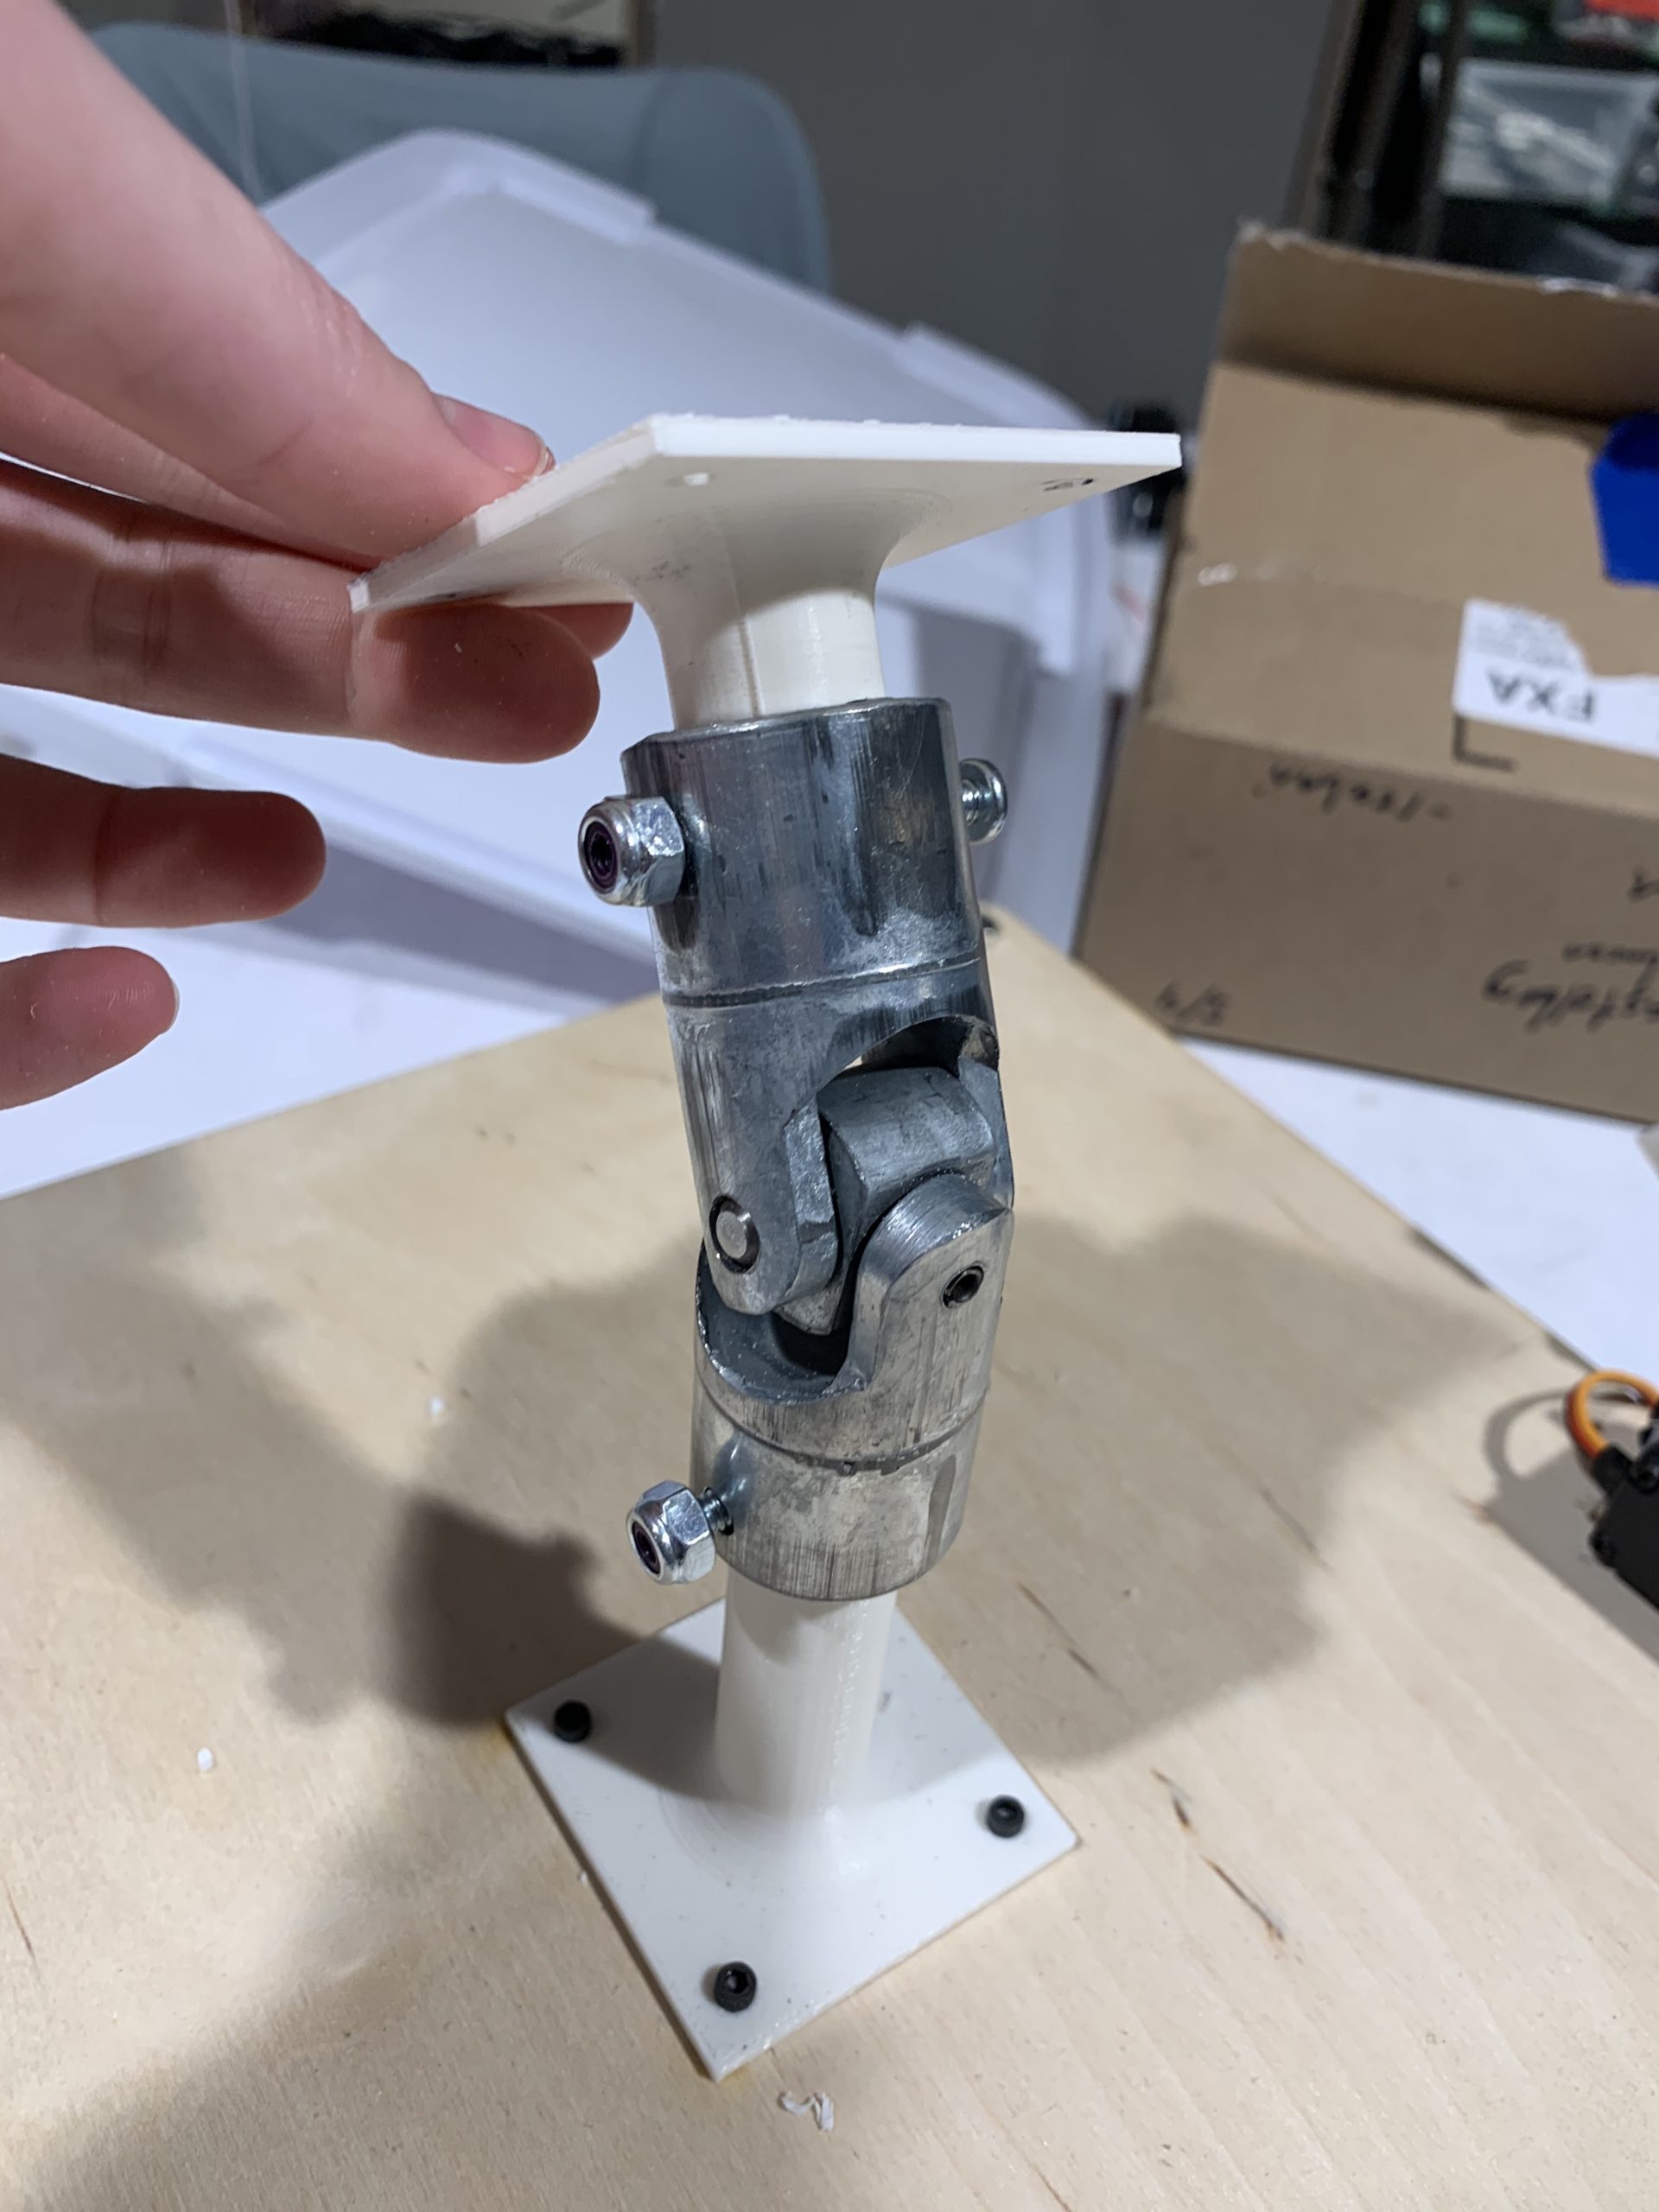
The final joint we ended up going with (after the initial prototype). The real u-joint from McMaster which provided much needed support while still achieving desired angles.
This prototype answered many questions, both expected and unexpected. To begin with, we found that the U-joint made from popsicle sticks was not accurate enough because the two pivot points were too far away from each other. This led us to 3D printing our own version of a U-joint that we found on McMaster Carr. This new joint was much more robust and introduced less error than the popsicle stick version. This was expected because the popsicle stick version was never meant to be a long term solution. However, even though the new joint was more stable, it did not have as much range as the popsicle stick joint which was a downside. Our next steps after the initial prototype included modifying the CAD model of our U-joint to allow it to reach larger angles of rotation to fit our needs. The modification worked for achieving the more drastic angles, but was still not robust enough. For our final design we chose to order the actual part from McMaster which worked very well in terms of both structural stability and range of motion.
An unexpected discovery from the initial prototype was that the joint should be placed much closer to the bottom of the canvas bed to better mimic the actual motion of a human tilting the canvas. In our second iteration we made the top support shaft shorter to account for this change. The feedback we received from our client was generally very positive, and the few concerns she had did not have to do with the joint.
Process
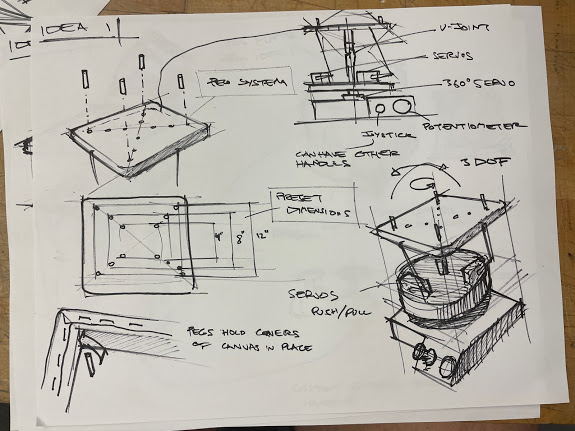
First sketches of the concept.
Most of the ideas from the initial sketches were used in the final project. We used a pegboard to mount the canvas on the platform, used two servos and a joystick module to control the tilt, and used a U-joint at the center. Some notable divergences from the original sketches are that we removed a degree of motion (being able to mechanically rotate the whole platform) since we thought we already had enough complexity in our project and Brenda noted that she already had a lazy Susan she could use to the manually turn the whole project.
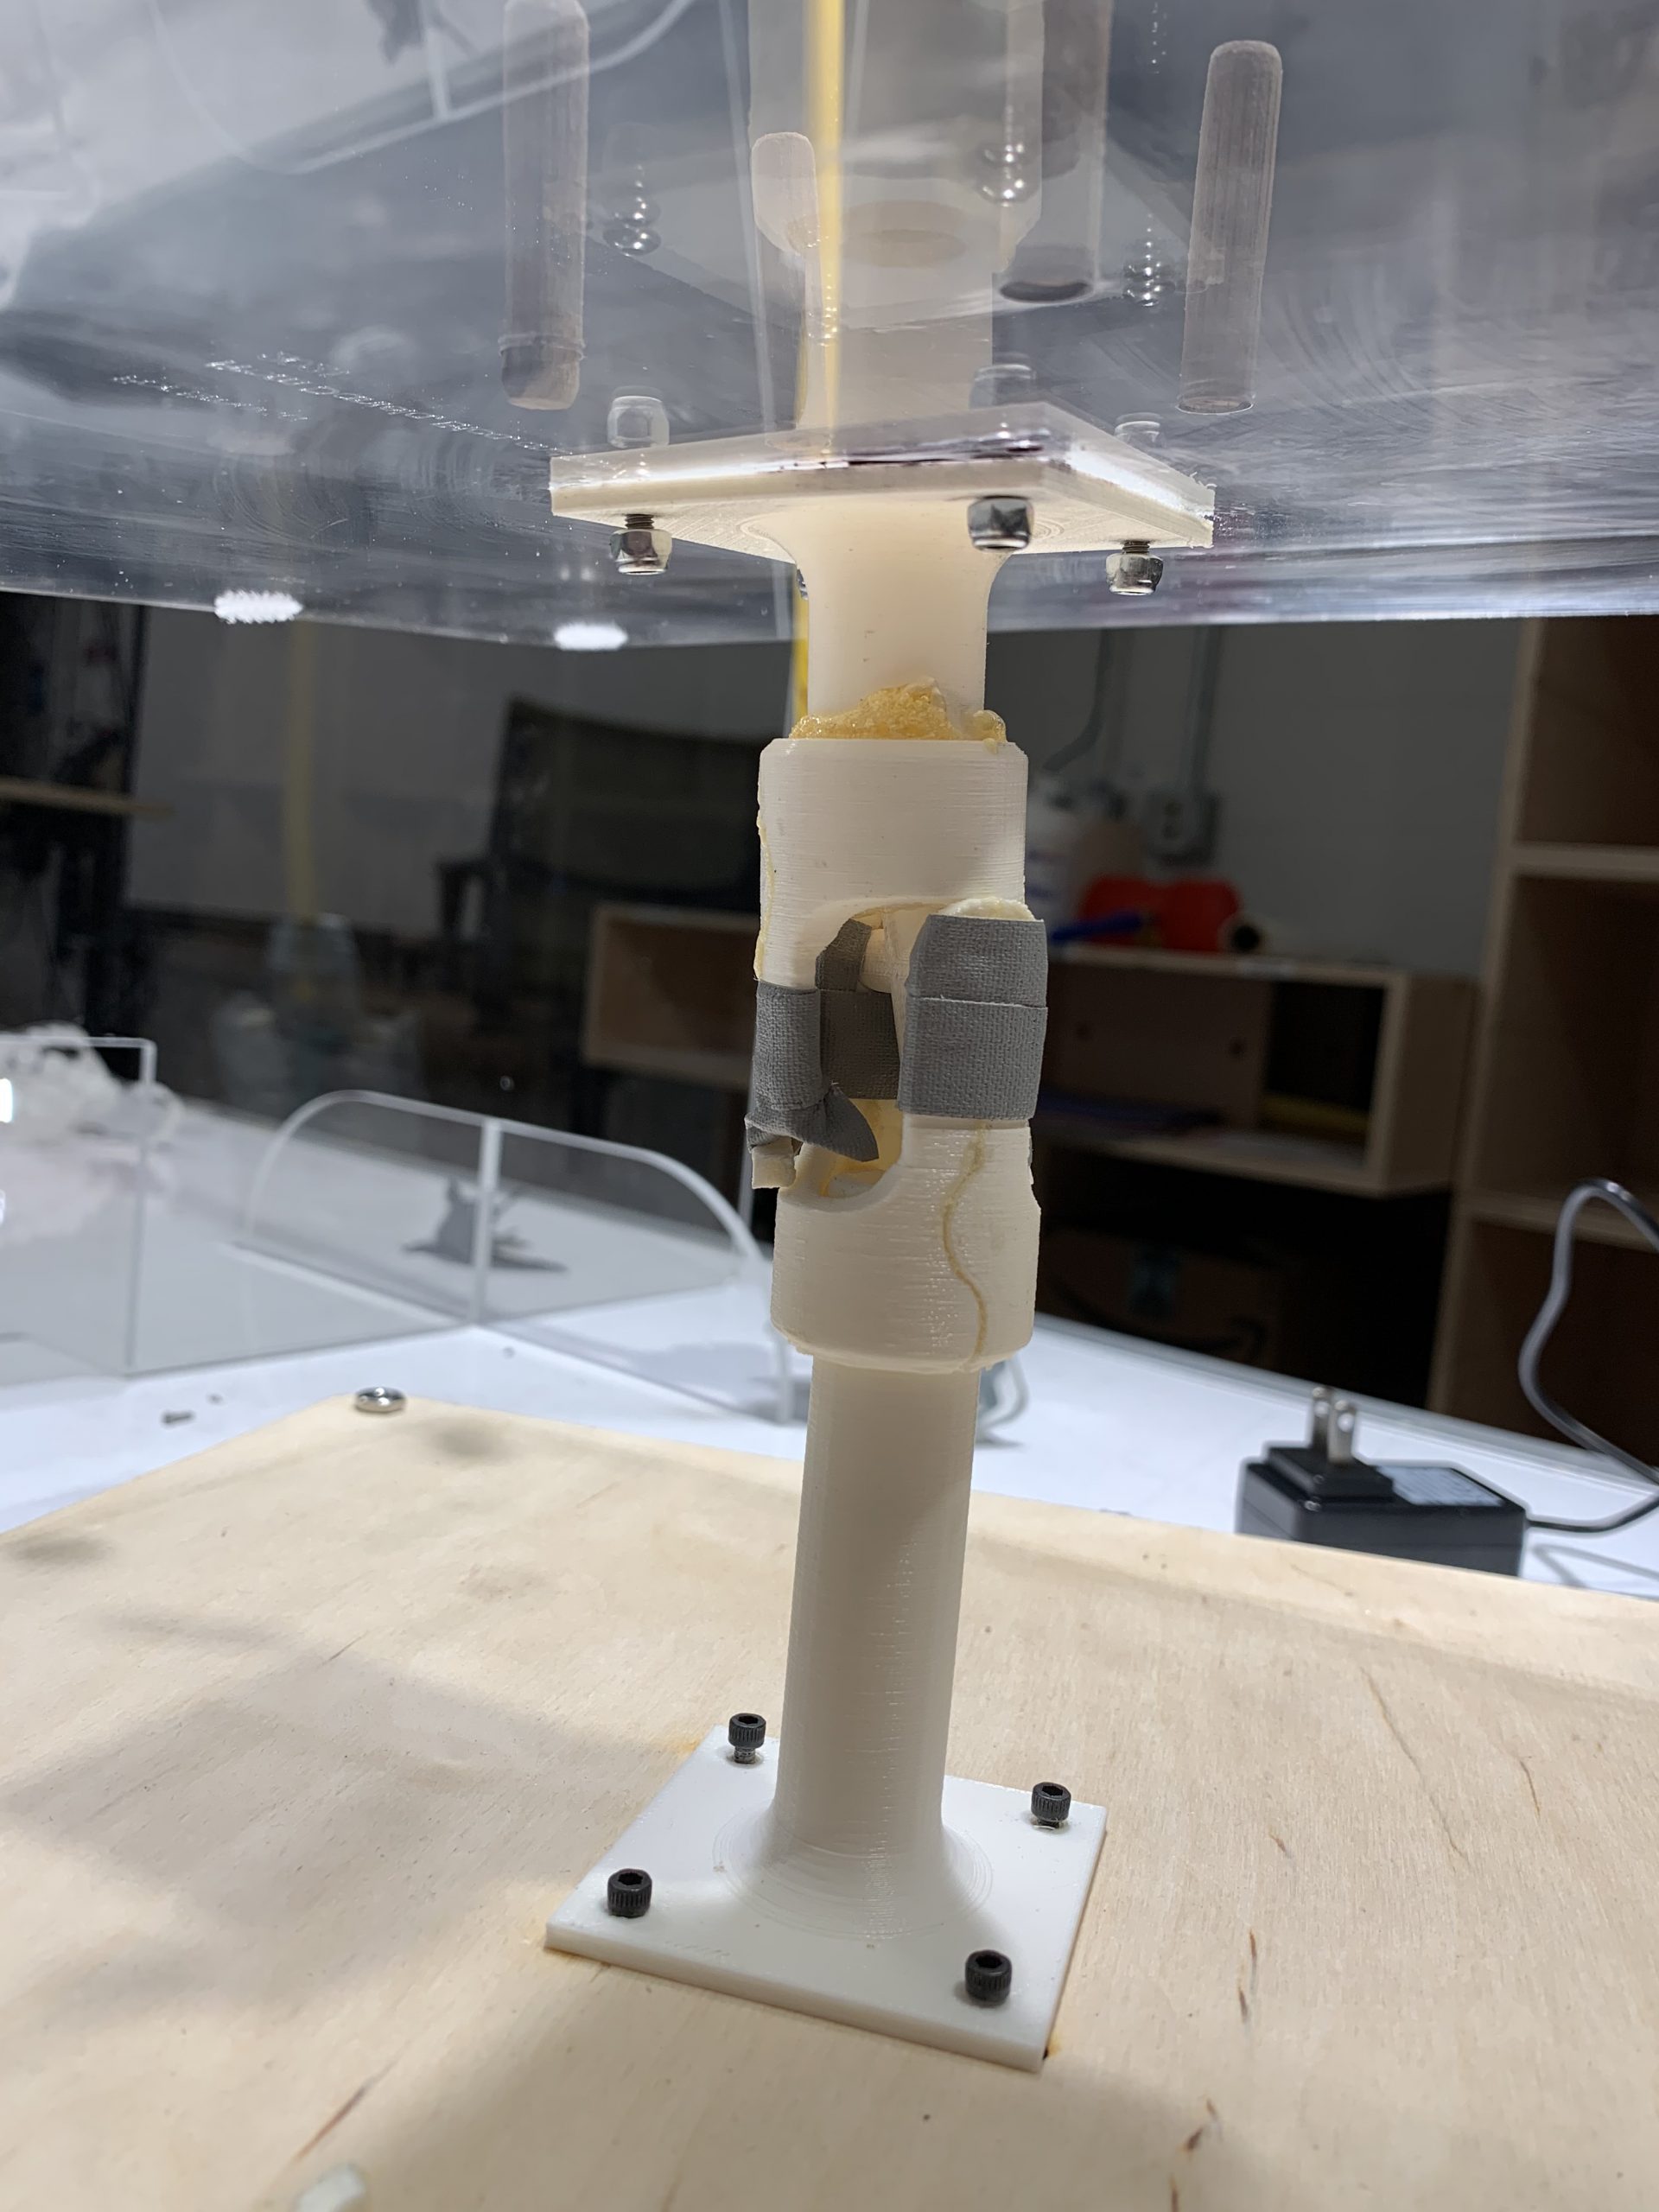
Our third universal joint stress break
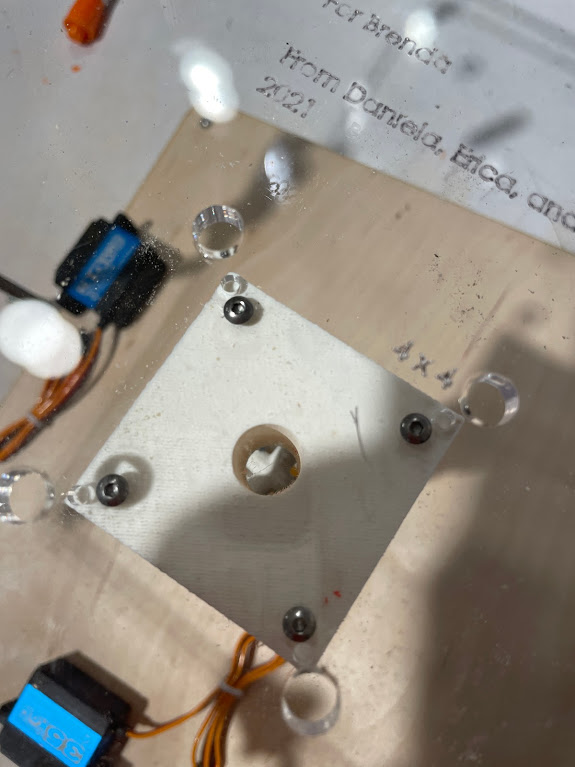
Laser-cut hole alignment fitment
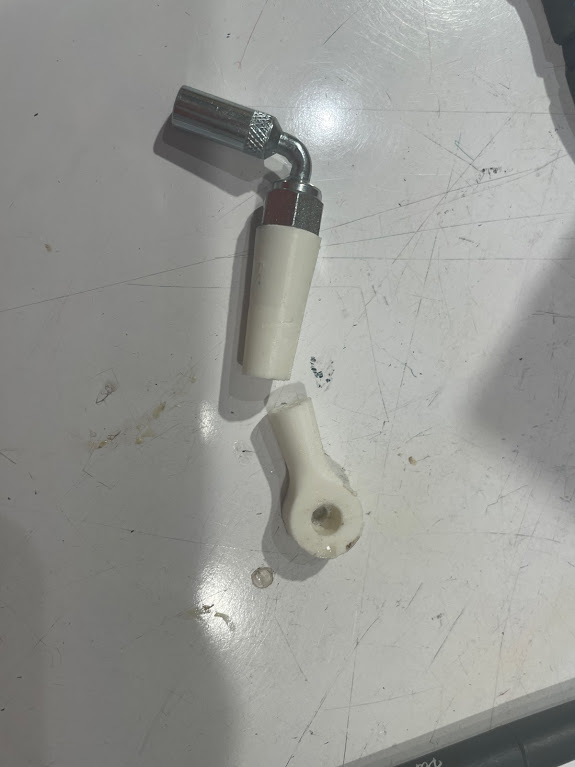
Ball joint arm cracking
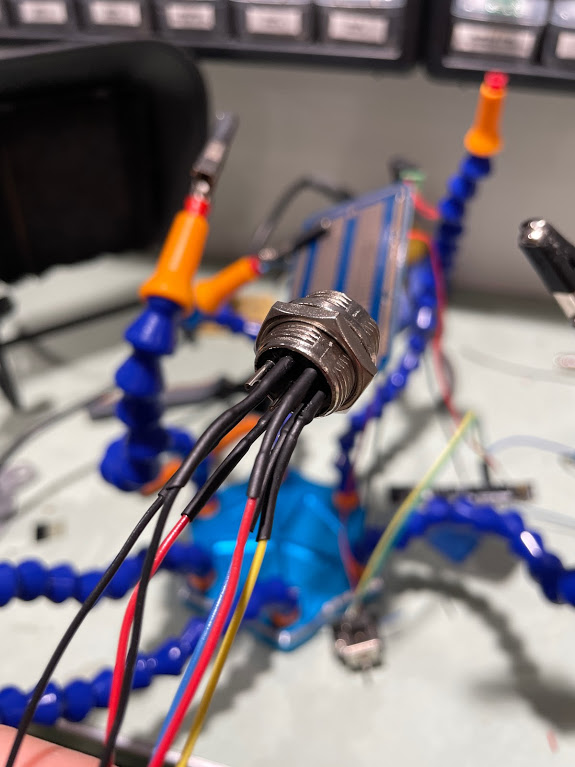
6 pin port alignment and soldering
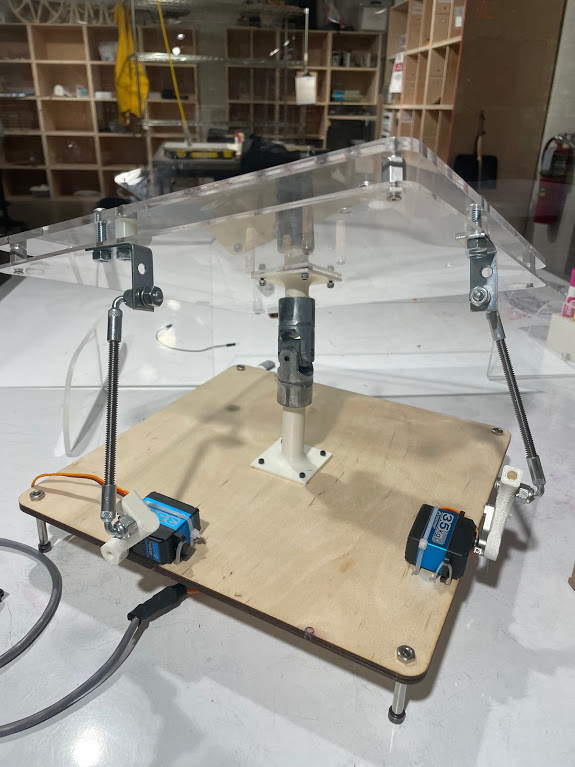
Testing the more robust metal universal joint. The servos are meant to be horizontal to the table in this image, but we were accidentally not providing enough power to the motors so they were acting strange until we solved the problem.
We followed our original schedule as outlined on the Gantt chart relatively closely. Since we had many parts to our project, we knew that we needed to order parts early in order to bring everything together and test. We managed to keep our original goals since we started off each class or meeting by outlining things that needed to be completed and communicated with each other well. We did encounter some setbacks with our 3D printed parts cracking, however we were able to replace those relatively quickly with another 3D printed part, adding more support, or by purchasing a more mechanically stable part.
Conclusions and lessons learned
Final critique
We had one comment that expressed “Slightly worried about the stress on the servos- could break the tip off easily.” Similarly, another person asked, “How strong are the linkages on the servos? I’m not sure how much of a problem the strength of them would be when working with larger paintings (12”x12”).” Our initial connection to the servo motors (the ball joint) did break so we already strengthened the joint by adding more connections. Although the connection looks like it is mostly 3D printed, the 3D printed part mostly serves the purpose of extending the standard servo arm while the actual connection is strengthened by tight mechanical connections with the screws and mechanical ball joints. Thus, we understand that there is a concern and if we could rebuild the project we would make the design be better customized to not stick out as much, however the connection should be strong enough to hold a substantial amount of weight.
There were also concerns about the paint getting onto our device. Specifically, someone noted “Is paint dripping off the platform an onto the base/servos a concern? Even with a plastic cover. Maybe a rim around the platform to catch drips/spills?” If we had more time, building a base would probably be very helpful for Brenda since she currently uses puppy pads to protect her work surfaces, so if we were given more time, including something to catch the paint would likely be helpful.
Finally, we had some comments about the movement of the platform. “The rotation is a little fast, and it would only be an issue if it changed how the paintings looked. It might be a desirable effect, but the flexibility of rotation speed could be nice.” We focused more on the smoothing part of the code rather than adding speed variability. However, given the chance it would be interesting to continue testing and adding speed flexibility in the tilt to see how it affects paintings.
Overall, the feedback was relatively positive and we were happy to see that people enjoyed the final result.
Working remotely
Working remotely with our client, Brenda, was a little bit of a struggle because it was harder to contact her at times, however it was a relatively pleasant experience and we were very happy to work with her. Since Brenda was unfortunately sick at the time of presenting our first prototype, we were not able to get any feedback right away from Brenda, but we still had to order parts or else we would not be able to finish the project on time. We were concerned that Brenda would not approve of the prototype; however we had no choice but to continue with our project because of the time constraints. Luckily, after meeting with Brenda about a week after presenting our prototype, Brenda really loved our prototype, had minimal critiques, and no comments that would drastically change any of the mechanical components.
Overall, we really enjoyed working with Brenda because she was very enthusiastic about the project from the start to the end. She gave very concise and helpful feedback that made it easy for us to understand her goals for the project and adjust accordingly. Also, seeing her reaction to the final project we made was very rewarding and we were very grateful to have the opportunity to make something for her.
Concluding thoughts
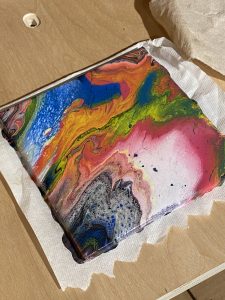
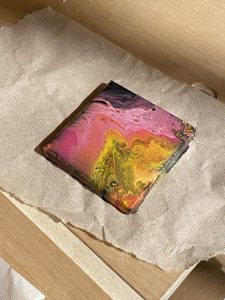
Overall, we really enjoyed working on this project. The prompt we received was a little more creative which made testing the final product very exciting. Here are some of the pour paintings we were able to make while testing our device.
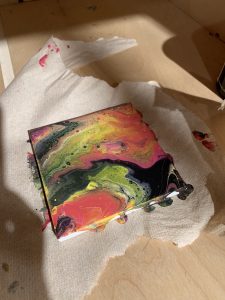
Since our backgrounds were quite varied (our majors were Industrial Design, Mechanical Engineering, and Information Systems), we were able to work off our strengths and combine our skills very effectively throughout this project. The individual parts all took a while to construct, and sometimes we had to make parts twice to ensure that they were durable, but at the end they all came together very nicely to make a very strong final product.
Technical details
Code
/* Acrylic Pour Painting Servo and Joystick Code
   By: Daniela, Tate, Erica
   Last Updated: 05/13/2021

   Description:
   This code was developed
   for a school project to allow
   our client with cerebral palsy
   to make acrylic pour paintings
   without assistance from another person.

   Electrical Components:
   1 arduino uno
   2 high torque servo motors
   1 joystick

   How it works:
   The joystick x and y directions
   determine the motion of one servo each.


   Pin mapping:
   Arduino pin | type   | description
   ------------|--------|-------------
   9            OUTPUT   high torque servo (x direction)
   10           OUTPUT   high torque servo (y direction)
   A1           INPUT    x signal from joystick
   A2           INPUT    y signal from joystick
   2            INPUT    button press  from joystick (not used in project)

  Some of the Joystick code originally from:
  https://create.arduino.cc/projecthub/MisterBotBreak/how-to-use-a-joystick-with-serial-monitor-1f04f0
*/

#include <Servo.h>

// SERVO VARIABLES //
Servo xServo;  // servo controlled by x motion on joystick
Servo yServo;  // servo controlled by y motion on joystick

int xServoPin = 9;
int yServoPin = 10;

int maxServoAngle = 180; // ranges of servo motion
int minServoAngle = 0;

int minAngle = 5; // prevents the servos from physically going too far down


// JOYSTICK VARIABLES //
const int joyXPin = A1; // Analog input pin for X movement
const int joyYPin = A2; // Analog input pin for Y movement

// Variables to keep track of the current and previous positions
int joyXPos = 0;
int joyYPos = 0;
int prevX;
int prevY;

int joyMax = 1023; // maximum value from the joystick

int noiseLimit = 1; // denoising (increase value to increase steadiness when bed is flat)


void setup() {
  // start serial communications
  Serial.begin(9600);

  // Setup the joystick inputs
  pinMode(joyXPin, INPUT);
  pinMode(joyYPin, INPUT);

  // attach servos motors and set to initial angles
  xServo.attach(xServoPin);
  yServo.attach(yServoPin);
  xServo.write(90);
  yServo.write(90);
}

void loop() {
  // Get the current joystick states
  joyXPos = analogRead(joyXPin);
  joyYPos = analogRead(joyYPin);

  // Send the data over serial for debugging
  Serial.print("X: ");
  Serial.print(joyXPos);
  Serial.print(" Y: ");
  Serial.print(joyYPos);

  // map the joystick input to servo output in degrees
  int xpos = map(joyXPos, 0, joyMax, minServoAngle, maxServoAngle);
  int ypos = map(joyYPos, 0, joyMax, maxServoAngle, minServoAngle);

  // move the servos to the position determined by the joystick
  // only move if position change it greater than the noise limit
  if (abs(prevX - joyXPos) > noiseLimit && xpos > minAngle) {
    xServo.write(xpos);
  }
  if (abs(prevY - joyYPos) > noiseLimit && ypos > minAngle) {
    yServo.write(ypos);
  }

  // Store the previous joystick position
  prevX = joyXPos;
  prevY = joyYPos;

  // Delay to not send messages too fast and confuse the servos
  delay(50);
}
