Joseph Paetz Weaving

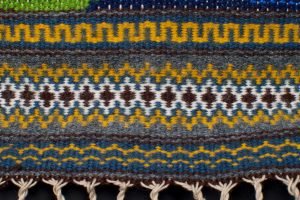
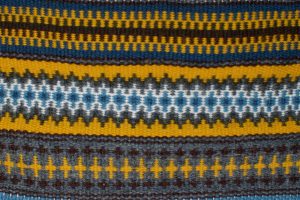
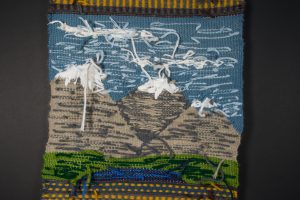
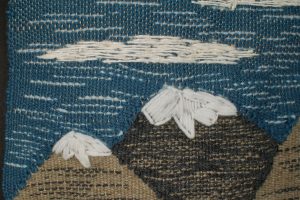
For my final weaving project I created a mountain scene bordered by sections of traditional Norwegian weaving techniques.
Intention
When I started thinking about my final weaving, I was trying to decide between weaving patterns and weaving a mountain scene. In either case I hoped to play with leno and textured patterns, both of which I experimented with in my sample. However, as we began discussing the encoded cloth project in class I decided to look up Norwegian weaving techniques as I am of partial Norwegian descent. This shifted my focus to Norwegian weaving techniques and I decided to combine these techniques and patterns with my original idea of a mountain scene. I decided to follow through with this idea because I thought it would be visually interesting and also allow me to experiment with techniques I didn’t try in my sample. Once I had decided on the general layout of the piece, I made most of my decisions as I reached new sections of the weaving. I usually plan everything out as much as possible ahead of time, but making decisions about patterns on the fly was refreshing. It allowed my earlier decisions to inform my later ones. This was especially helpful during the weaving of the mountain scene which was much more free form than the rather rigid Norwegian patterns.
Process
For my materials I used a variety of yarns. Some I purchased online a while ago so I could experiment with them in my sample. However, most of them were from Creative Reuse or the class yarn supply. When choosing my yarns, I was mostly focused on color, but I also considered texture. I really like natural/muted colors, so I tried to find colors that fit that and also went well together. However, I also got a few cheap variety bags of yarn at creative reuse. These were great for giving me the option to have stronger colors in the grass/pond of my mountain scene. The variety also prompted me to try adding in a secondary color over some of the warp while weaving a block of color. This technique then defined my mountain section. While color was important, I also considered texture. For the Norwegian patterns, I knew I wanted color and not texture to be the prominent pattern element. However, for the mountain scene, I knew I wanted some texture. When I thought of adding clouds to the scene, I decided to use the 1 ply inconsistently thick yarn from our class supply. The thicker wool sections of this yarn added some nice depth to the clouds.
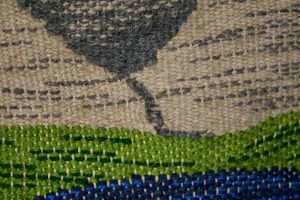
For techniques, I thought I would using the techniques I tested in my sample weaving. However, during the sample critique, I saw how nicely shapes could be woven if they were woven on their own before adding the surrounding color (as opposed to weaving each row at the same time using multiple shuttles). This is the technique I used for the mountain scene. This allowed me to much more easily form and adjust the shape of the mountains. When weaving the mountain scene, I also used a secondary color to add shading. To accomplish this, I laid down the primary color of the section and then added some of a secondary color along side sections of the primary color in the shed before beating and switching positions. This caused the back of the piece to be very messy, but I really like how the front came out. The final technique I used in the mountain scene was embroidery. I used this for the clouds and snow caps. I chose this because it added depth and texture to the scene, but also because it made weaving easier. I was able to weave the base shapes and then add the clouds and snow after the fact. Embroidery also allowed me to add directionality to those sections. By controlling the direction and length of the stitches I could make the snow seem to follow the terrain of the mountains and the clouds seem windswept. The other technique I used in the piece was krokbragd. This is a Norwegian weft faced weaving technique. I chose it because I was very intrigued by the fact the pattern was not made by a complex sequence of pick up stick operations, but by varying the colors used during a set series of pick up stick operations. I was also able to use an auxillary heddle to make the weaving process much faster. I found this pdf on Norwegian weaving techniques and this tutorial on krokbragd especially useful (the krokbragd tutorial shows an auxillary heddle)
Learning
The primary lesson I took away from this project was that it isn’t necessary to pre-plan a project to have it turn out well. I really enjoyed making decisions about my piece as I wove. Going in with just a rough idea was not too vague for me. I am also very glad I learned about krokbragd. I am seriously considering weaving some more krokbragd for my final project (especially since it is a very festive technique and Christmas will be coming up). If I were to continue, I would like to try more krokbragd patterns and also come up with some of my own. After weaving several sections of it I feel like I have a much better understanding of what it can and cannot accomplish. However, in the future I think I might try different thicknesses of weft yarn to see how that affects the krokbragd. in the future I would also want to work on keeping my selvage more consistent, as it was quite difficult during the krokbragd sections. Finally, I am very glad I learned the advantages of embroidery over a woven design. I didn’t think about this until I was in the process of weaving and I think it made the final piece better.
Sample

During my sample I tested several techniques, but I most enjoyed leno, rya knots and soumak.
