Final Documentation: 10-9-20
By William Lamkin
Warp Field

(Name changed from the prototype title Cut. )
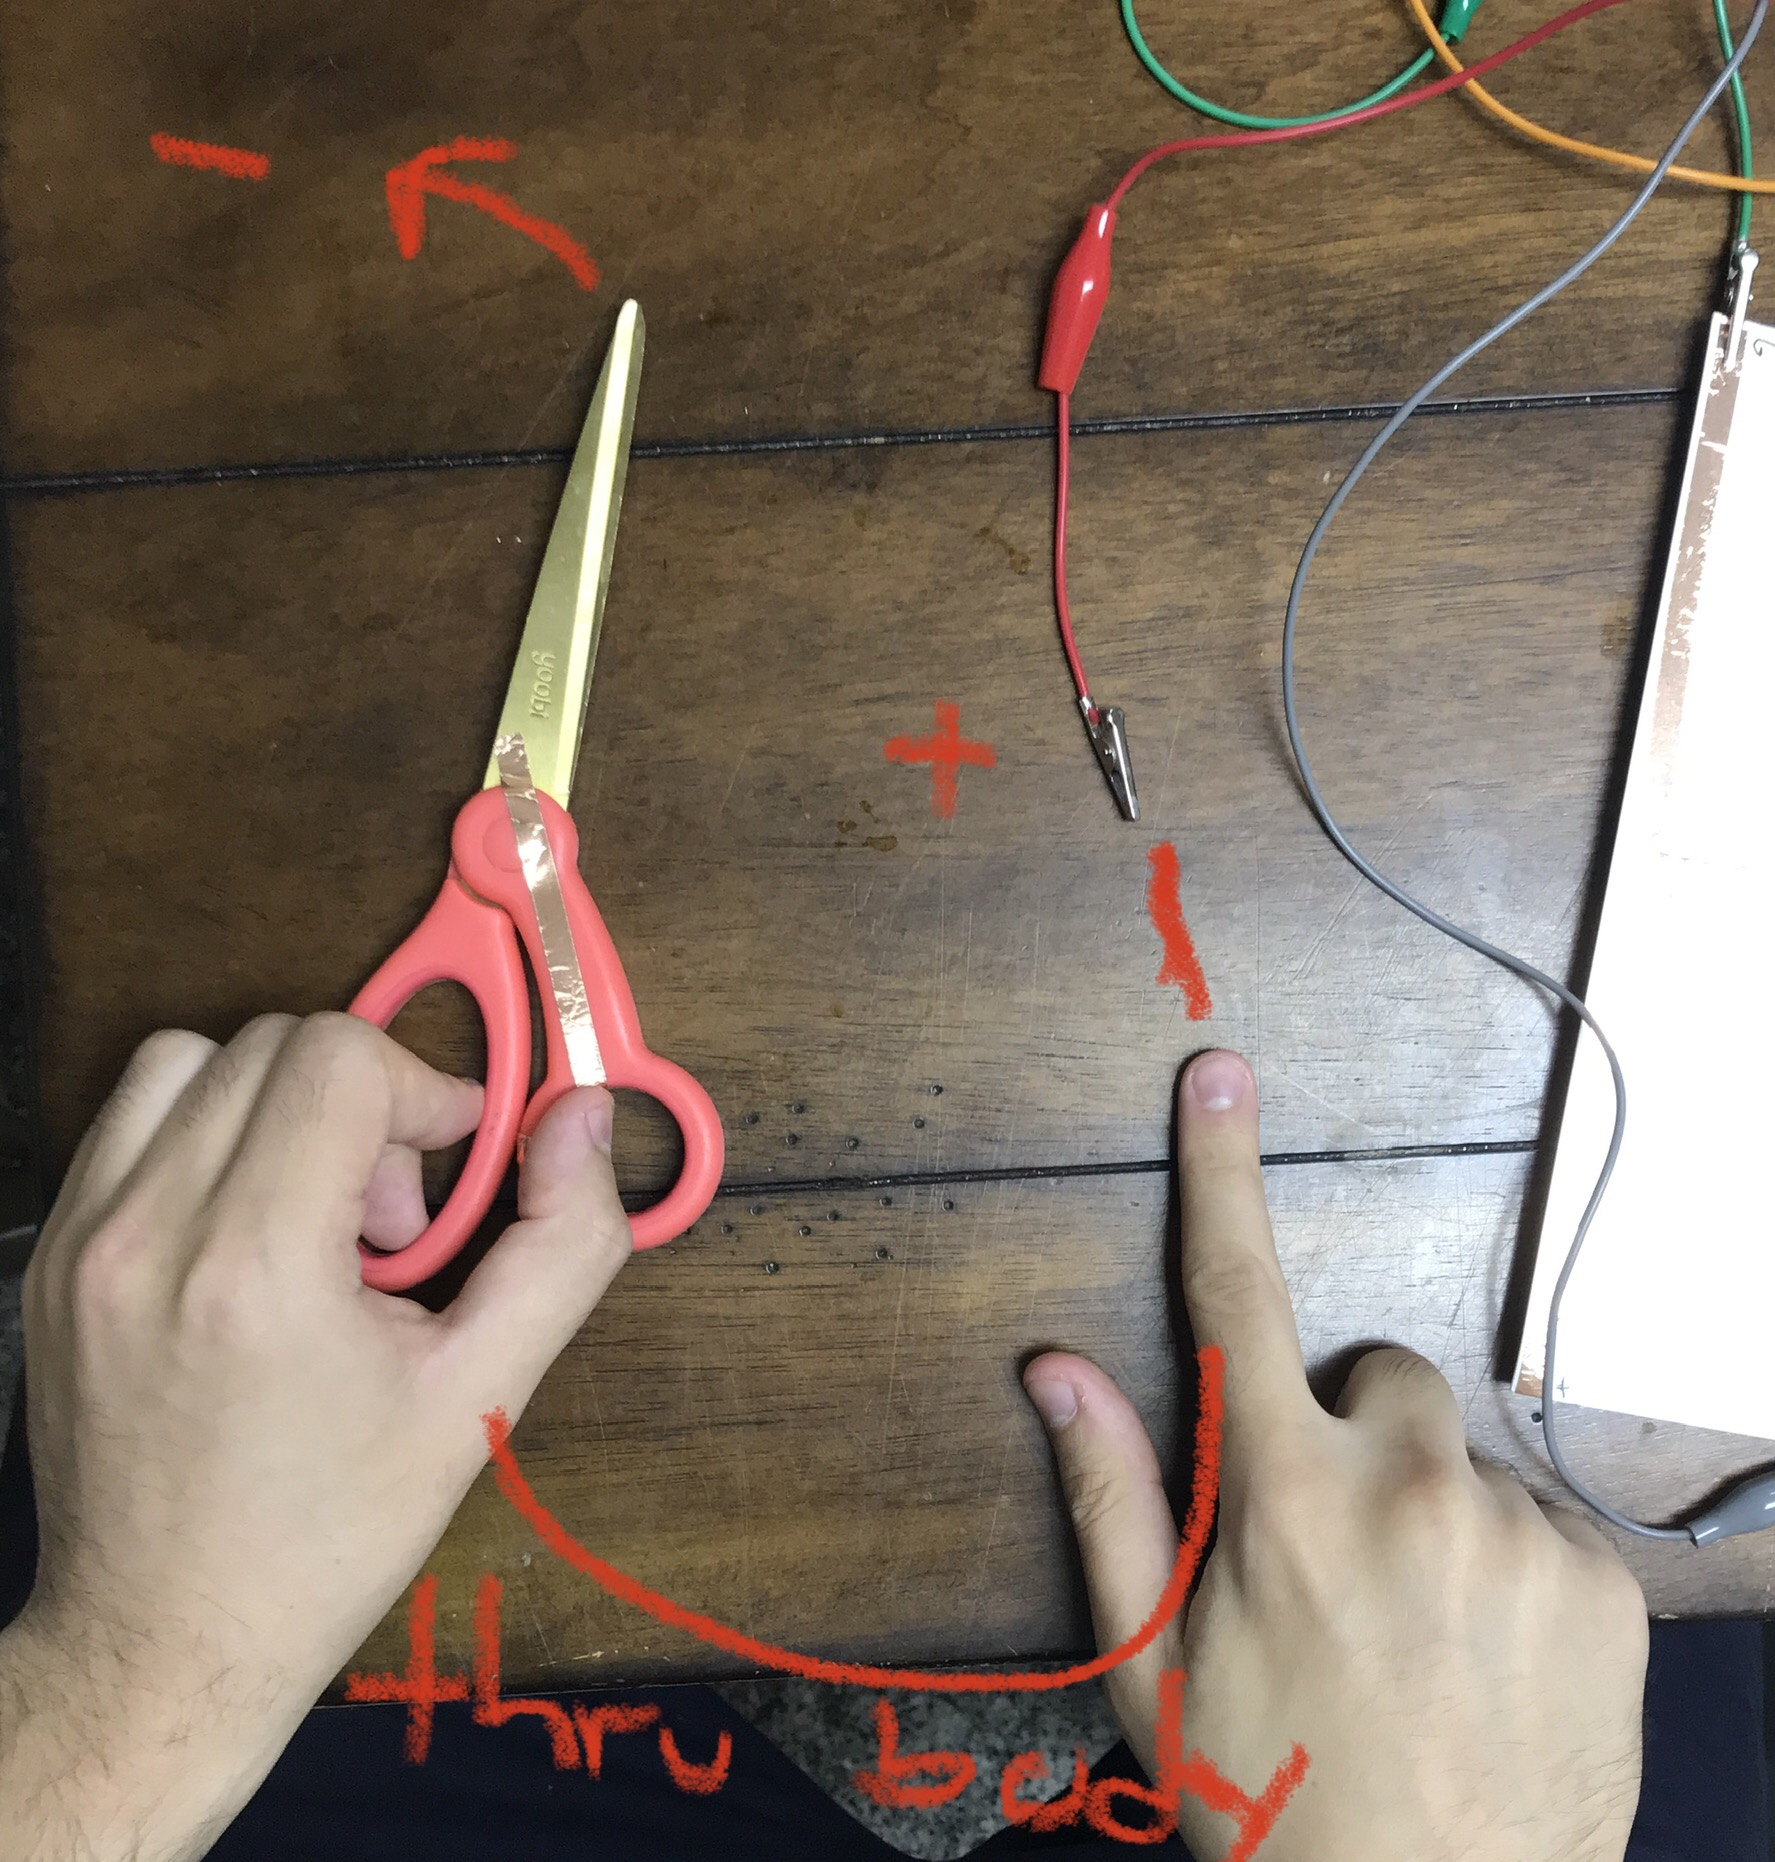 Originally, the plan was for the signal to be transmitted through the body like so. However, this proved to not be feasible as the body introduced too much resistance.


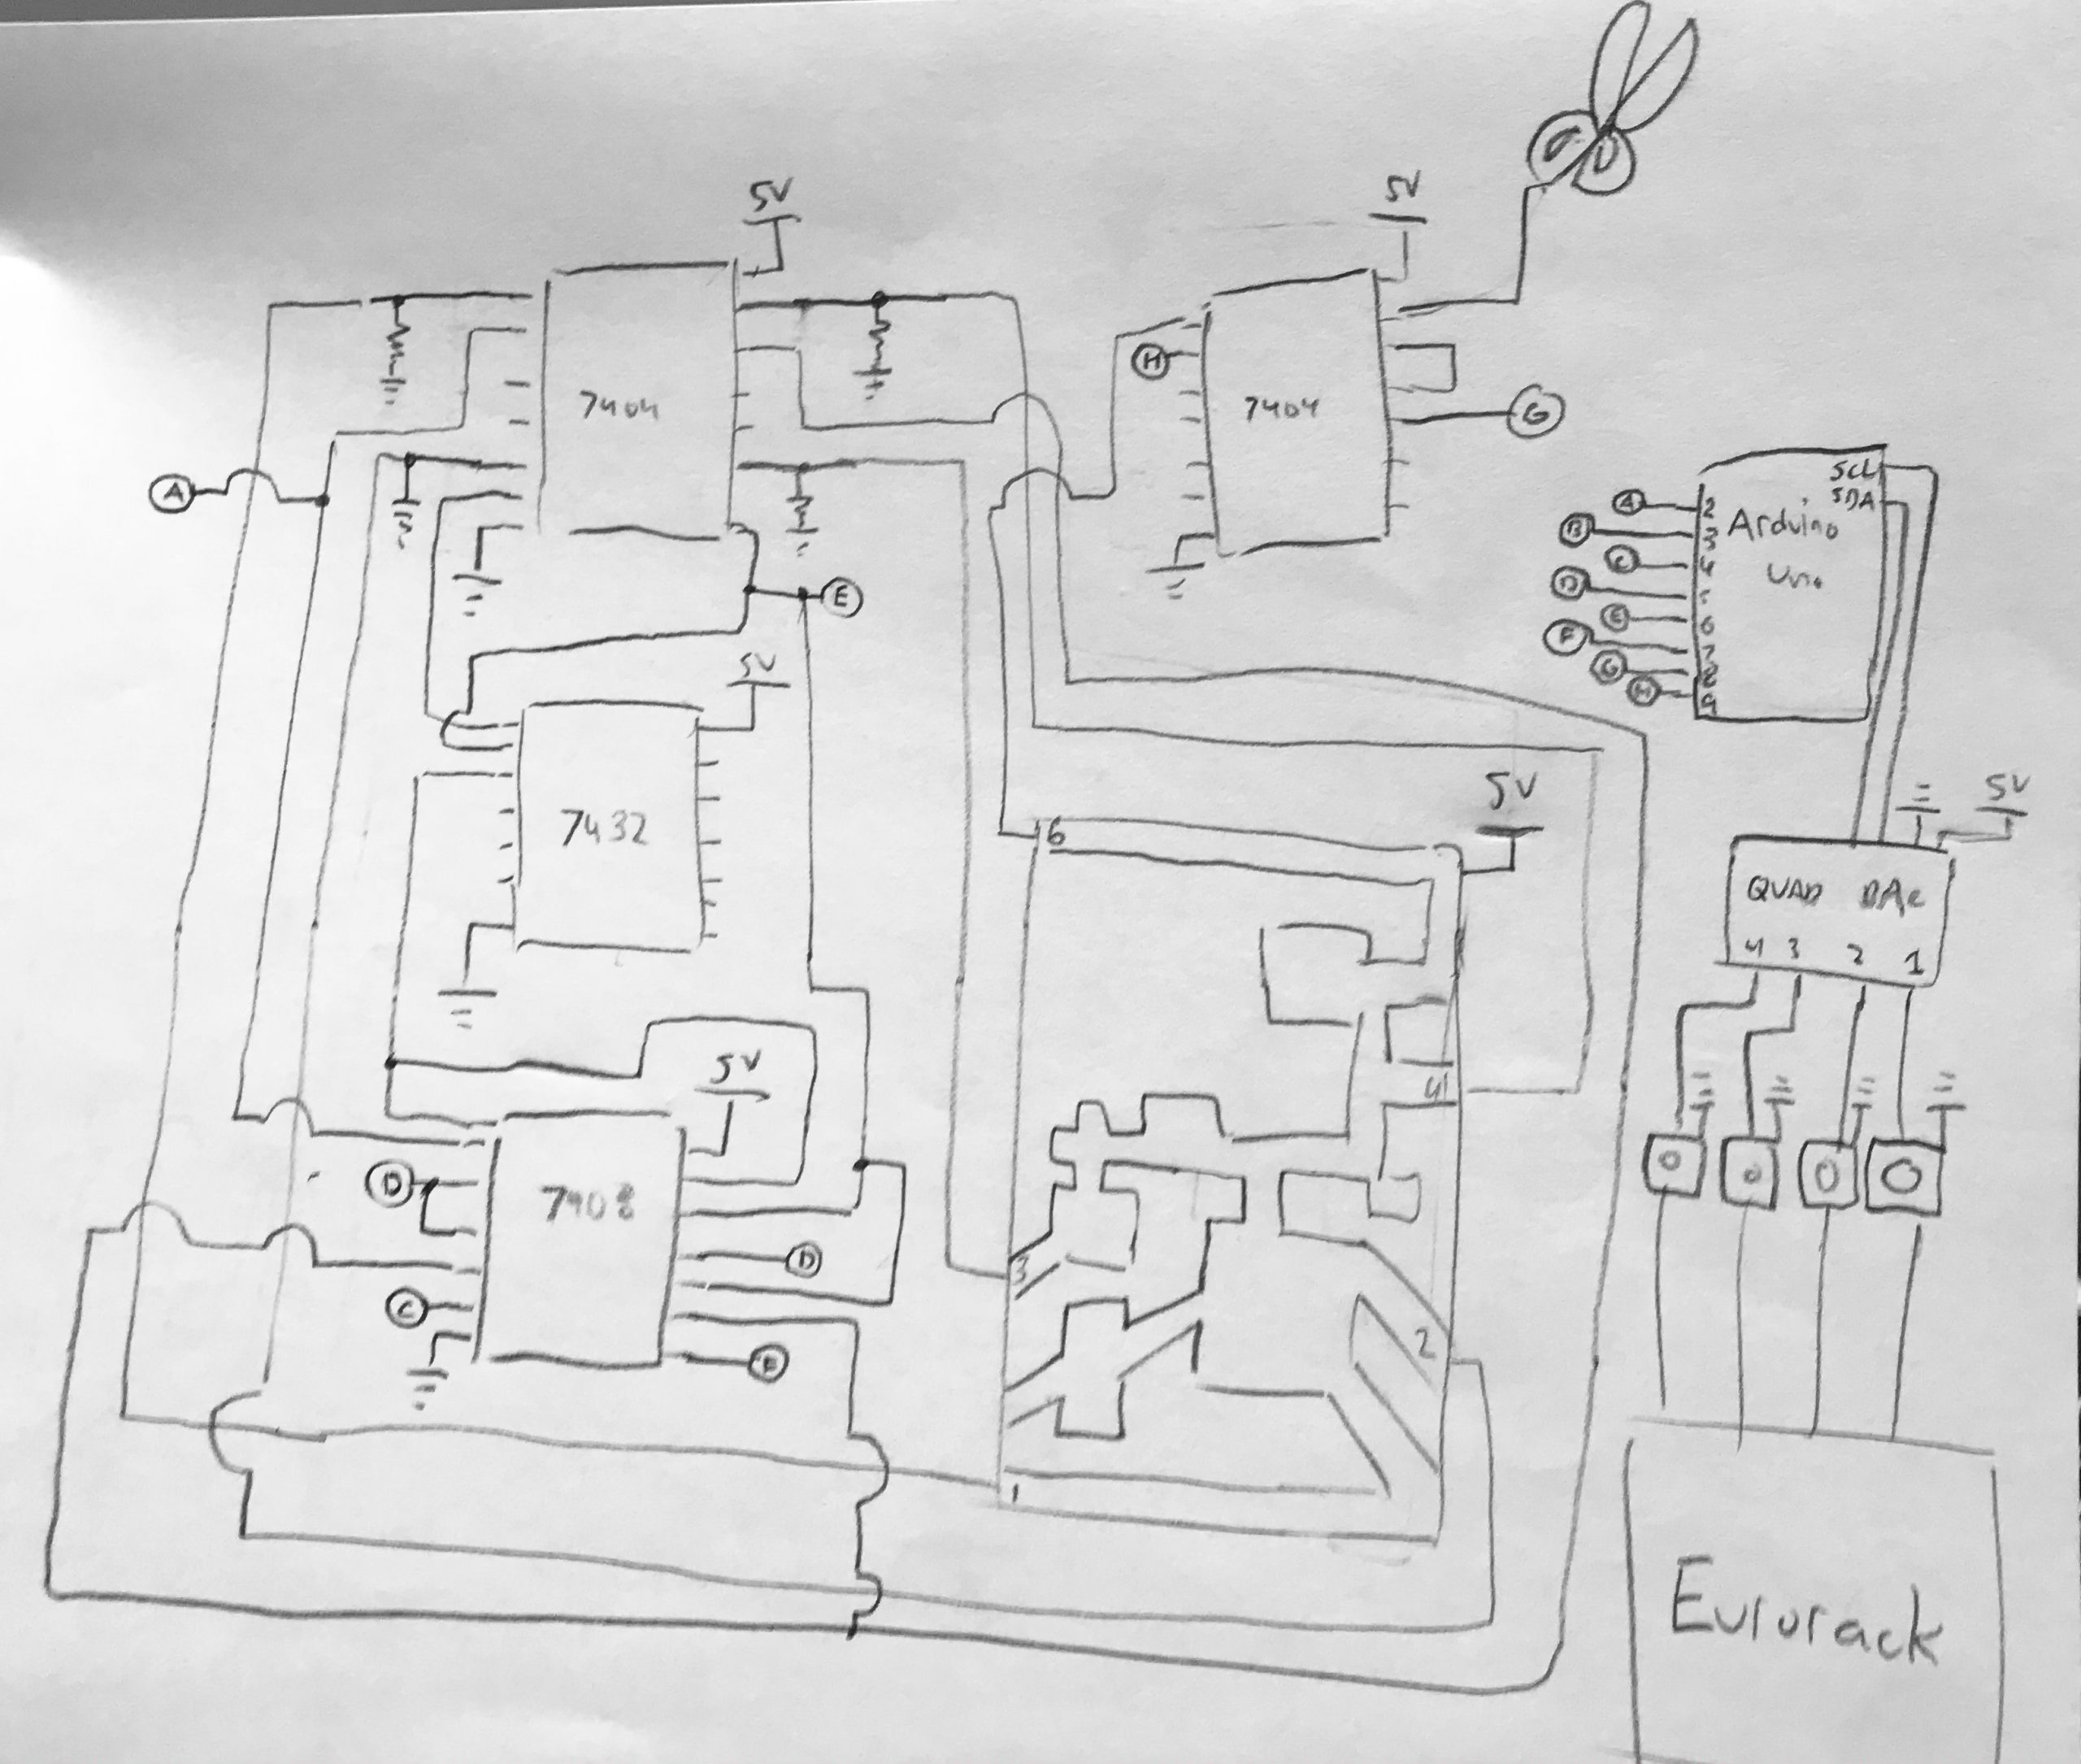
/*  Warp Field
 *  William Lamkin
 *
 *  This code takes inputs from the external Logic Gates and sends
 *  predetermined voltage values out of the 4 outputs of the
 *  Adafruit MCP4728 Quad DAC. These voltage signals are then
 *  sent into a Eurorack synthesizer to control sounds.

*/

#include <Adafruit_MCP4728.h>
#include <Wire.h>

//assign pin names
const int pinA = 9;
const int pinB = 2;
const int pinC = 3;
const int pinD = 4;
const int pinE = 5;
const int pinF = 6;
const int pinG = 7;
const int pinH = 8;

//defining variables for the values of pins
int A = 0;
int B = 0;
int C = 0;
int D = 0;
int E = 0;
int F = 0;
int G = 0;
int H = 0;

Adafruit_MCP4728 mcp;

void setup() {

  //activating pins
  pinMode(pinA, INPUT);
  pinMode(pinB, INPUT);
  pinMode(pinC, INPUT);
  pinMode(pinD, INPUT);
  pinMode(pinE, INPUT);
  pinMode(pinF, INPUT);
  pinMode(pinG, INPUT);
  pinMode(pinH, INPUT);


  // checks for I2C connection to the MCP4728 (code from Adafruit)
  Serial.begin(115200);
  while (!Serial)
    delay(10); // will pause Zero, Leonardo, etc until serial console opens

  Serial.println("Adafruit MCP4728 test!");

  // Try to initialize!
  if (!mcp.begin()) {
    Serial.println("Failed to find MCP4728 chip");
    while (1) {
      delay(10);
    }

  }

  //default values for the outputs
  mcp.setChannelValue(MCP4728_CHANNEL_A, 0);
  mcp.setChannelValue(MCP4728_CHANNEL_B, 0);
  mcp.setChannelValue(MCP4728_CHANNEL_C, 0);
  mcp.setChannelValue(MCP4728_CHANNEL_D, 0);

}

void loop() {

  //update pin state variables
  A = digitalRead(pinA);
  B = digitalRead(pinB);
  C = digitalRead(pinC);
  D = digitalRead(pinD);
  E = digitalRead(pinE);
  F = digitalRead(pinF);
  G = digitalRead(pinG);
  H = digitalRead(pinH);


  // Had to mirror the logic of the gates in here since only one
  // value can be sent to an output at a time

  // Channel B controlled the lowpass filter cutoff on the drone
  if (A == HIGH) {
    if (H == HIGH) {
      mcp.setChannelValue(MCP4728_CHANNEL_B, 0);
    }
    if (H == LOW) {
       if (B == LOW) {
            mcp.setChannelValue(MCP4728_CHANNEL_B, 1024);
          }
       else if (B == HIGH) {
          if (C == LOW) {
            mcp.setChannelValue(MCP4728_CHANNEL_B, 2048);
          }
          else if (C == HIGH) {
            mcp.setChannelValue(MCP4728_CHANNEL_B, 4095);
          }
       }
    }
  }


  // Channel C controlled the amount of resonance on that filter
  if (D == HIGH) {
    if (F == HIGH) {
      mcp.setChannelValue(MCP4728_CHANNEL_C, 4095);
    }
    else if (F == LOW) {
      mcp.setChannelValue(MCP4728_CHANNEL_C, 2048);
    }

  }

  // Channel D controlled the volume of the random pitch granular
  if (E == HIGH) {
    if (H == HIGH) {
      mcp.setChannelValue(MCP4728_CHANNEL_D, 0);
    }
    else if (H == LOW) {
      if (F == LOW) {
        mcp.setChannelValue(MCP4728_CHANNEL_D, 2048);
      }
      else if (F == HIGH) {
        mcp.setChannelValue(MCP4728_CHANNEL_D, 4095);
      }
    }
  }

  // Channel A checks if the scissors are touching the circuit
  if (G == HIGH) {
    mcp.setChannelValue(MCP4728_CHANNEL_A, 4095);

  }
  else if (G == LOW) {
    mcp.setChannelValue(MCP4728_CHANNEL_A, 0);

  }


}
Group Check-In 2: 9-30-20
By William Lamkin
Made significant progress from Monday in that I discovered how logic chips function! Got an AND gate to function with the scissors, showing its ability to be conductive, and also how that could successfully route through the human body. Video below:
Video of conductive scissors working with logic chip
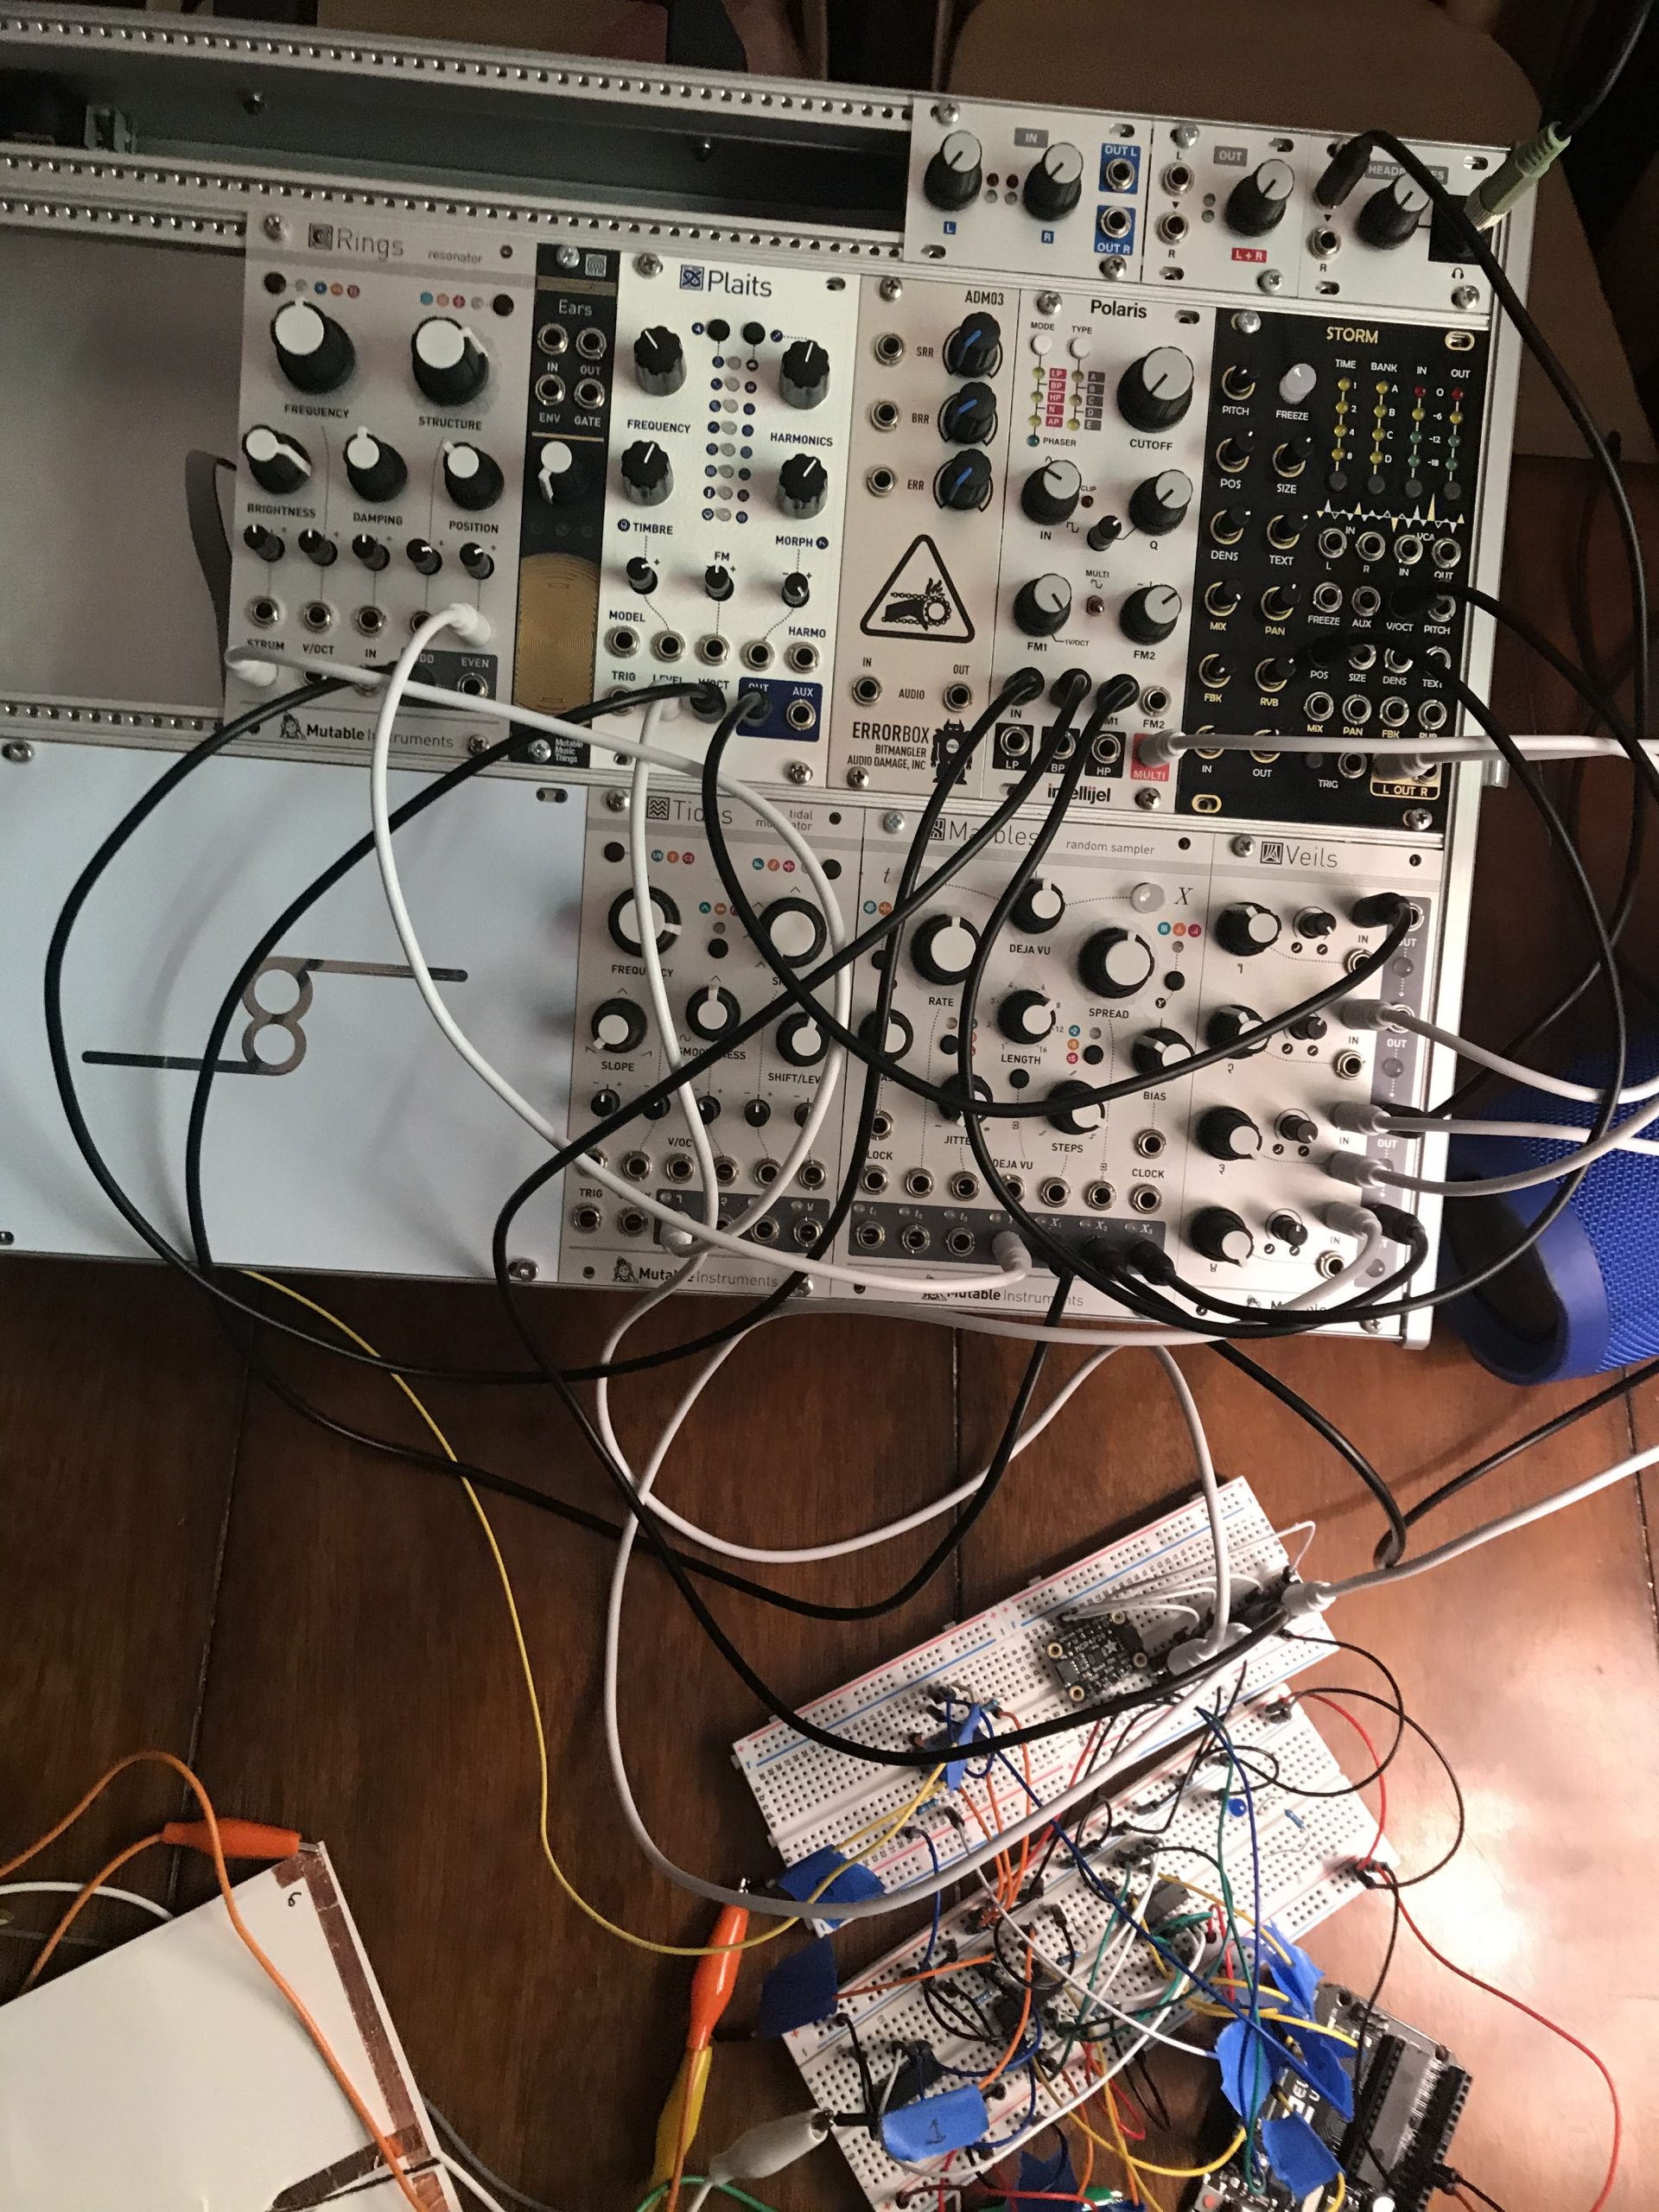
I am still waiting on my Adafruit Quad DAC to come in, from which I could complete my circuit and be able to control my synthesizer, since it would allow my Arduino to send out a full range of voltages.
Process Blog Check-In 9-28-20
By William Lamkin
In reflecting on how to utilize ambient sound that adaptively changes, I’ve decided to use a modular synthesizer to generate sounds. I had toyed around with the idea of using an mp3 playing device that would work with an Arduino, but I realized that the technology involved with those wasn’t as fully interactive as I would like it to be. My goals for this project are for the actions of the user to have a significant effect on the sound.
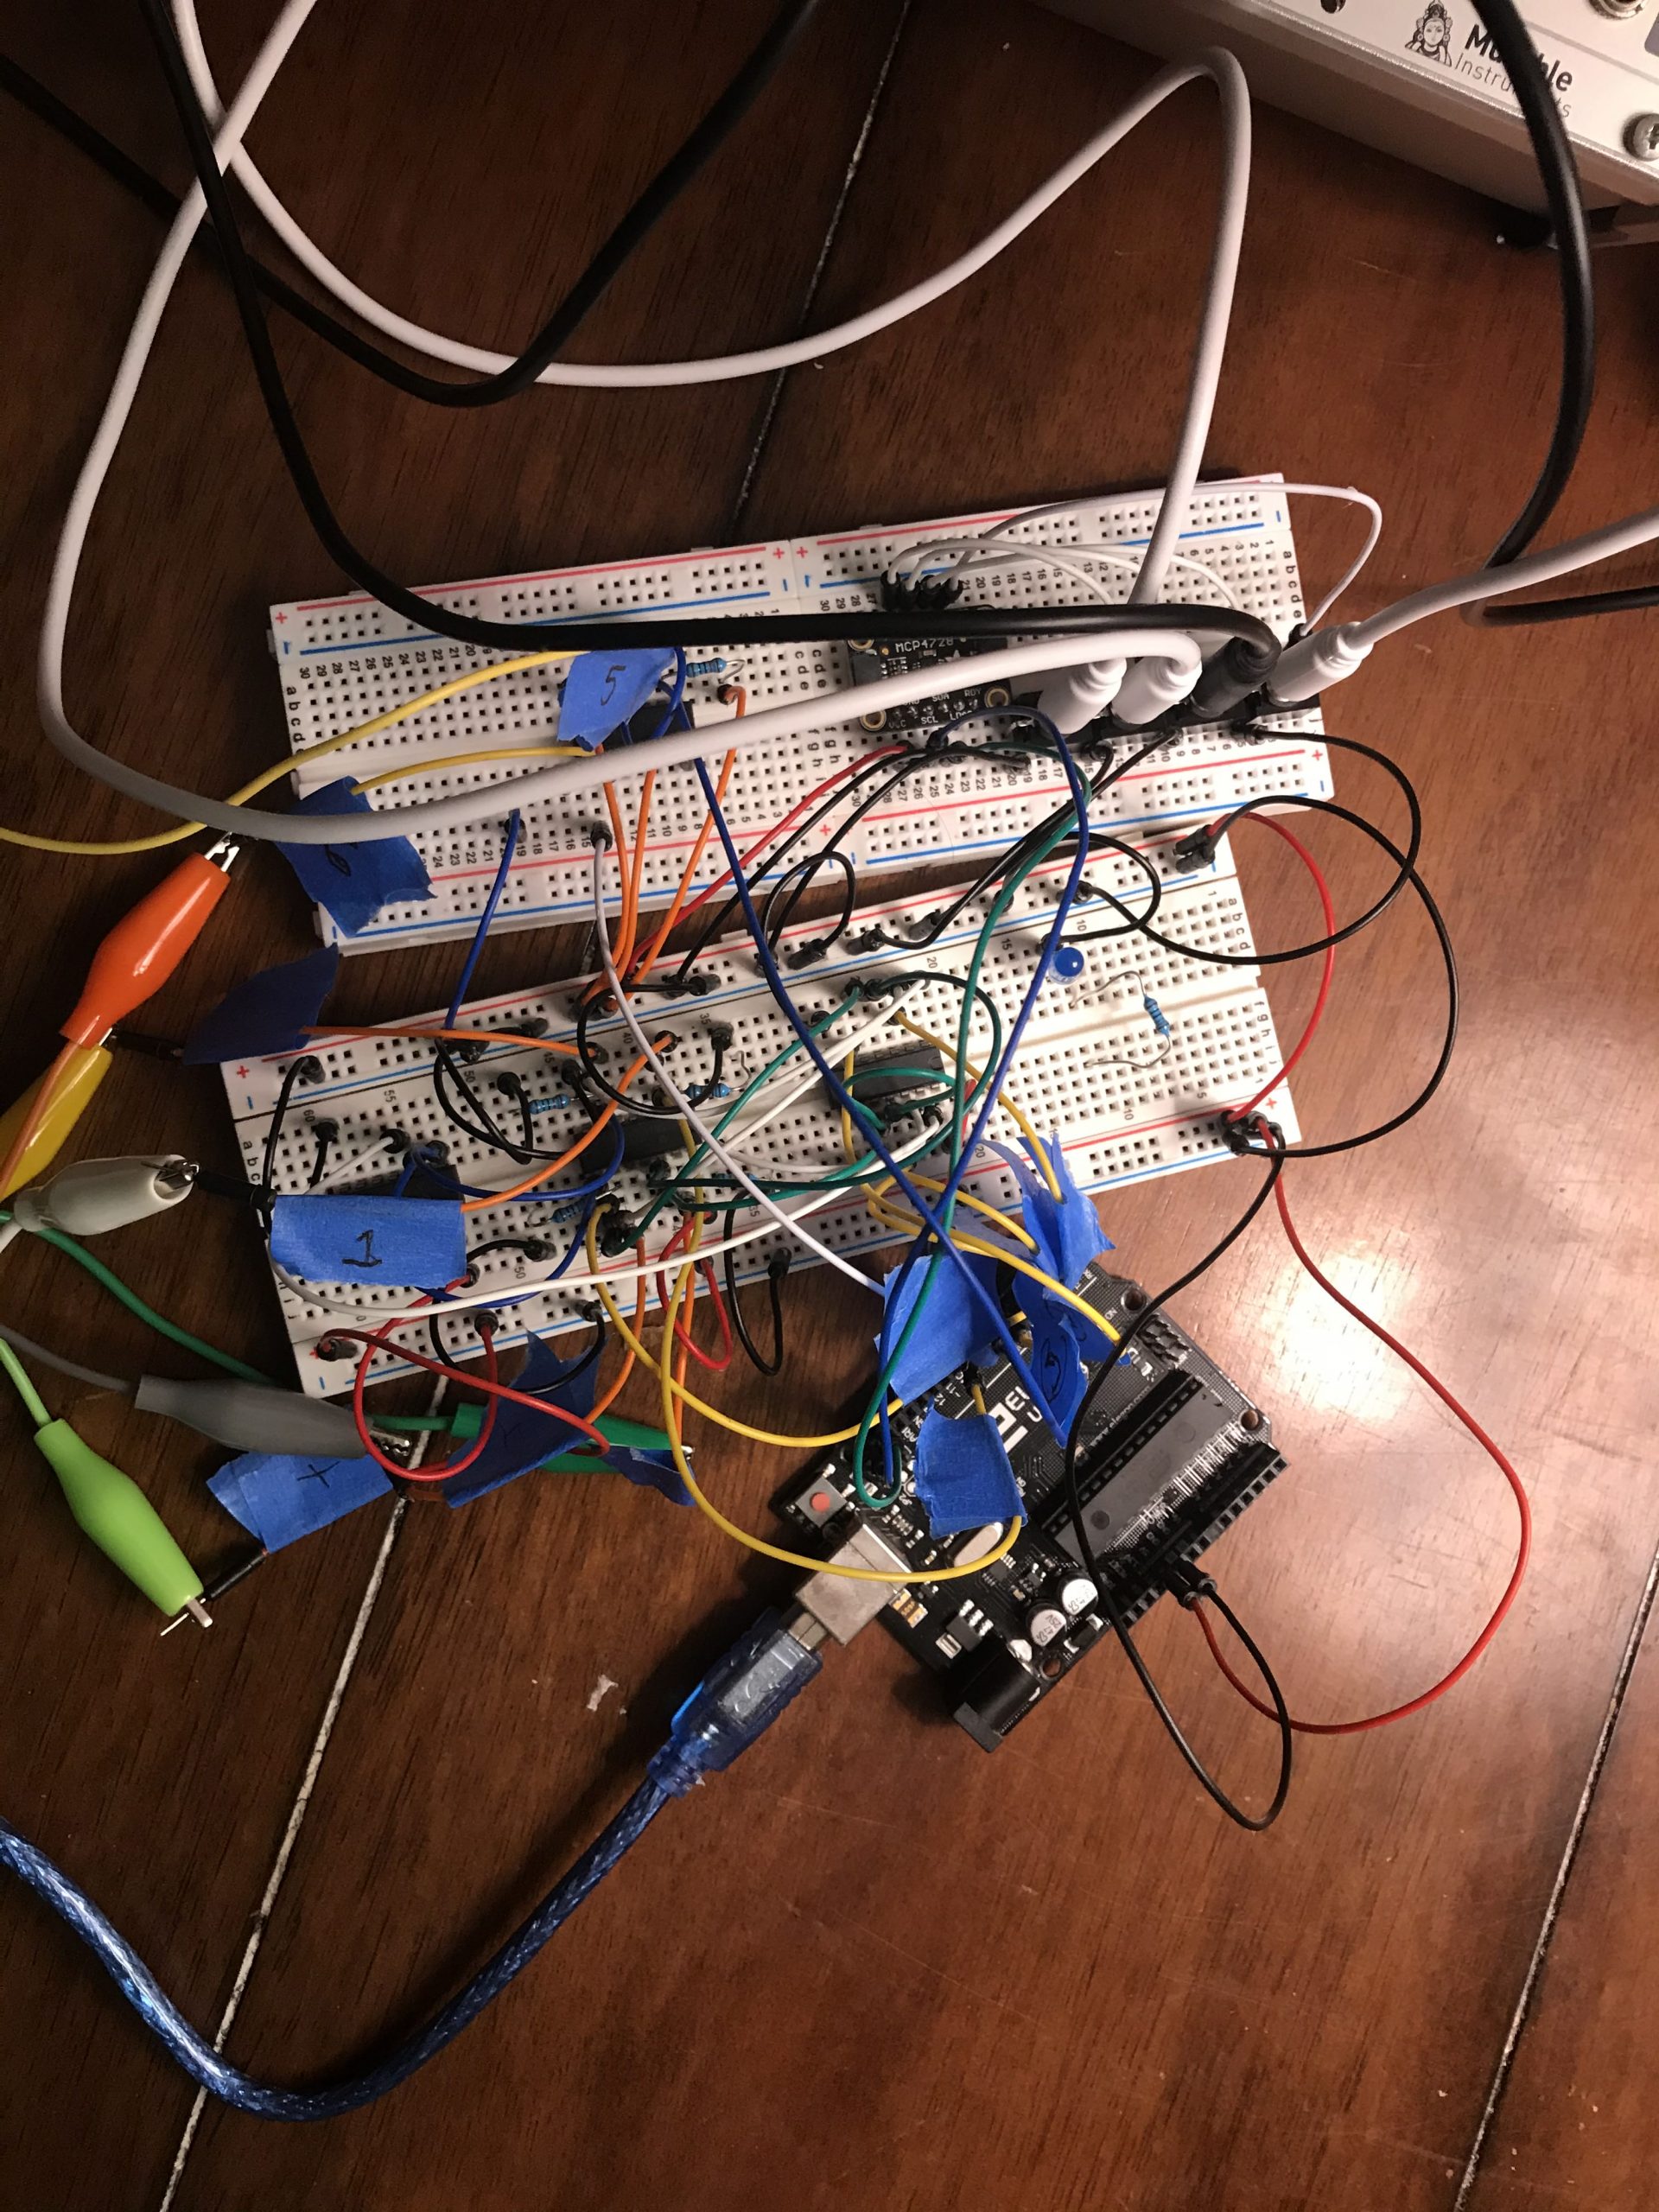
I will be using logic chips for all of connections, and these will be connected to the board to be cut via a alligator clips, and the output signals of these logic chips will then be sent into the inputs of the Arduino. The Arduino will send out voltages through an Adafruit Quad DAC which I have ordered and I will be able to connect to the synthesizer via these audio jack parts. In the link is a demo of the kinds of sounds that can be made and changed.
Here is a diagram of what I want the setup to be like! I do want it to be a dark and isolated experience so the user can focus on what they are doing. For documentation purposes, I will be recording a video of myself at home working on this.
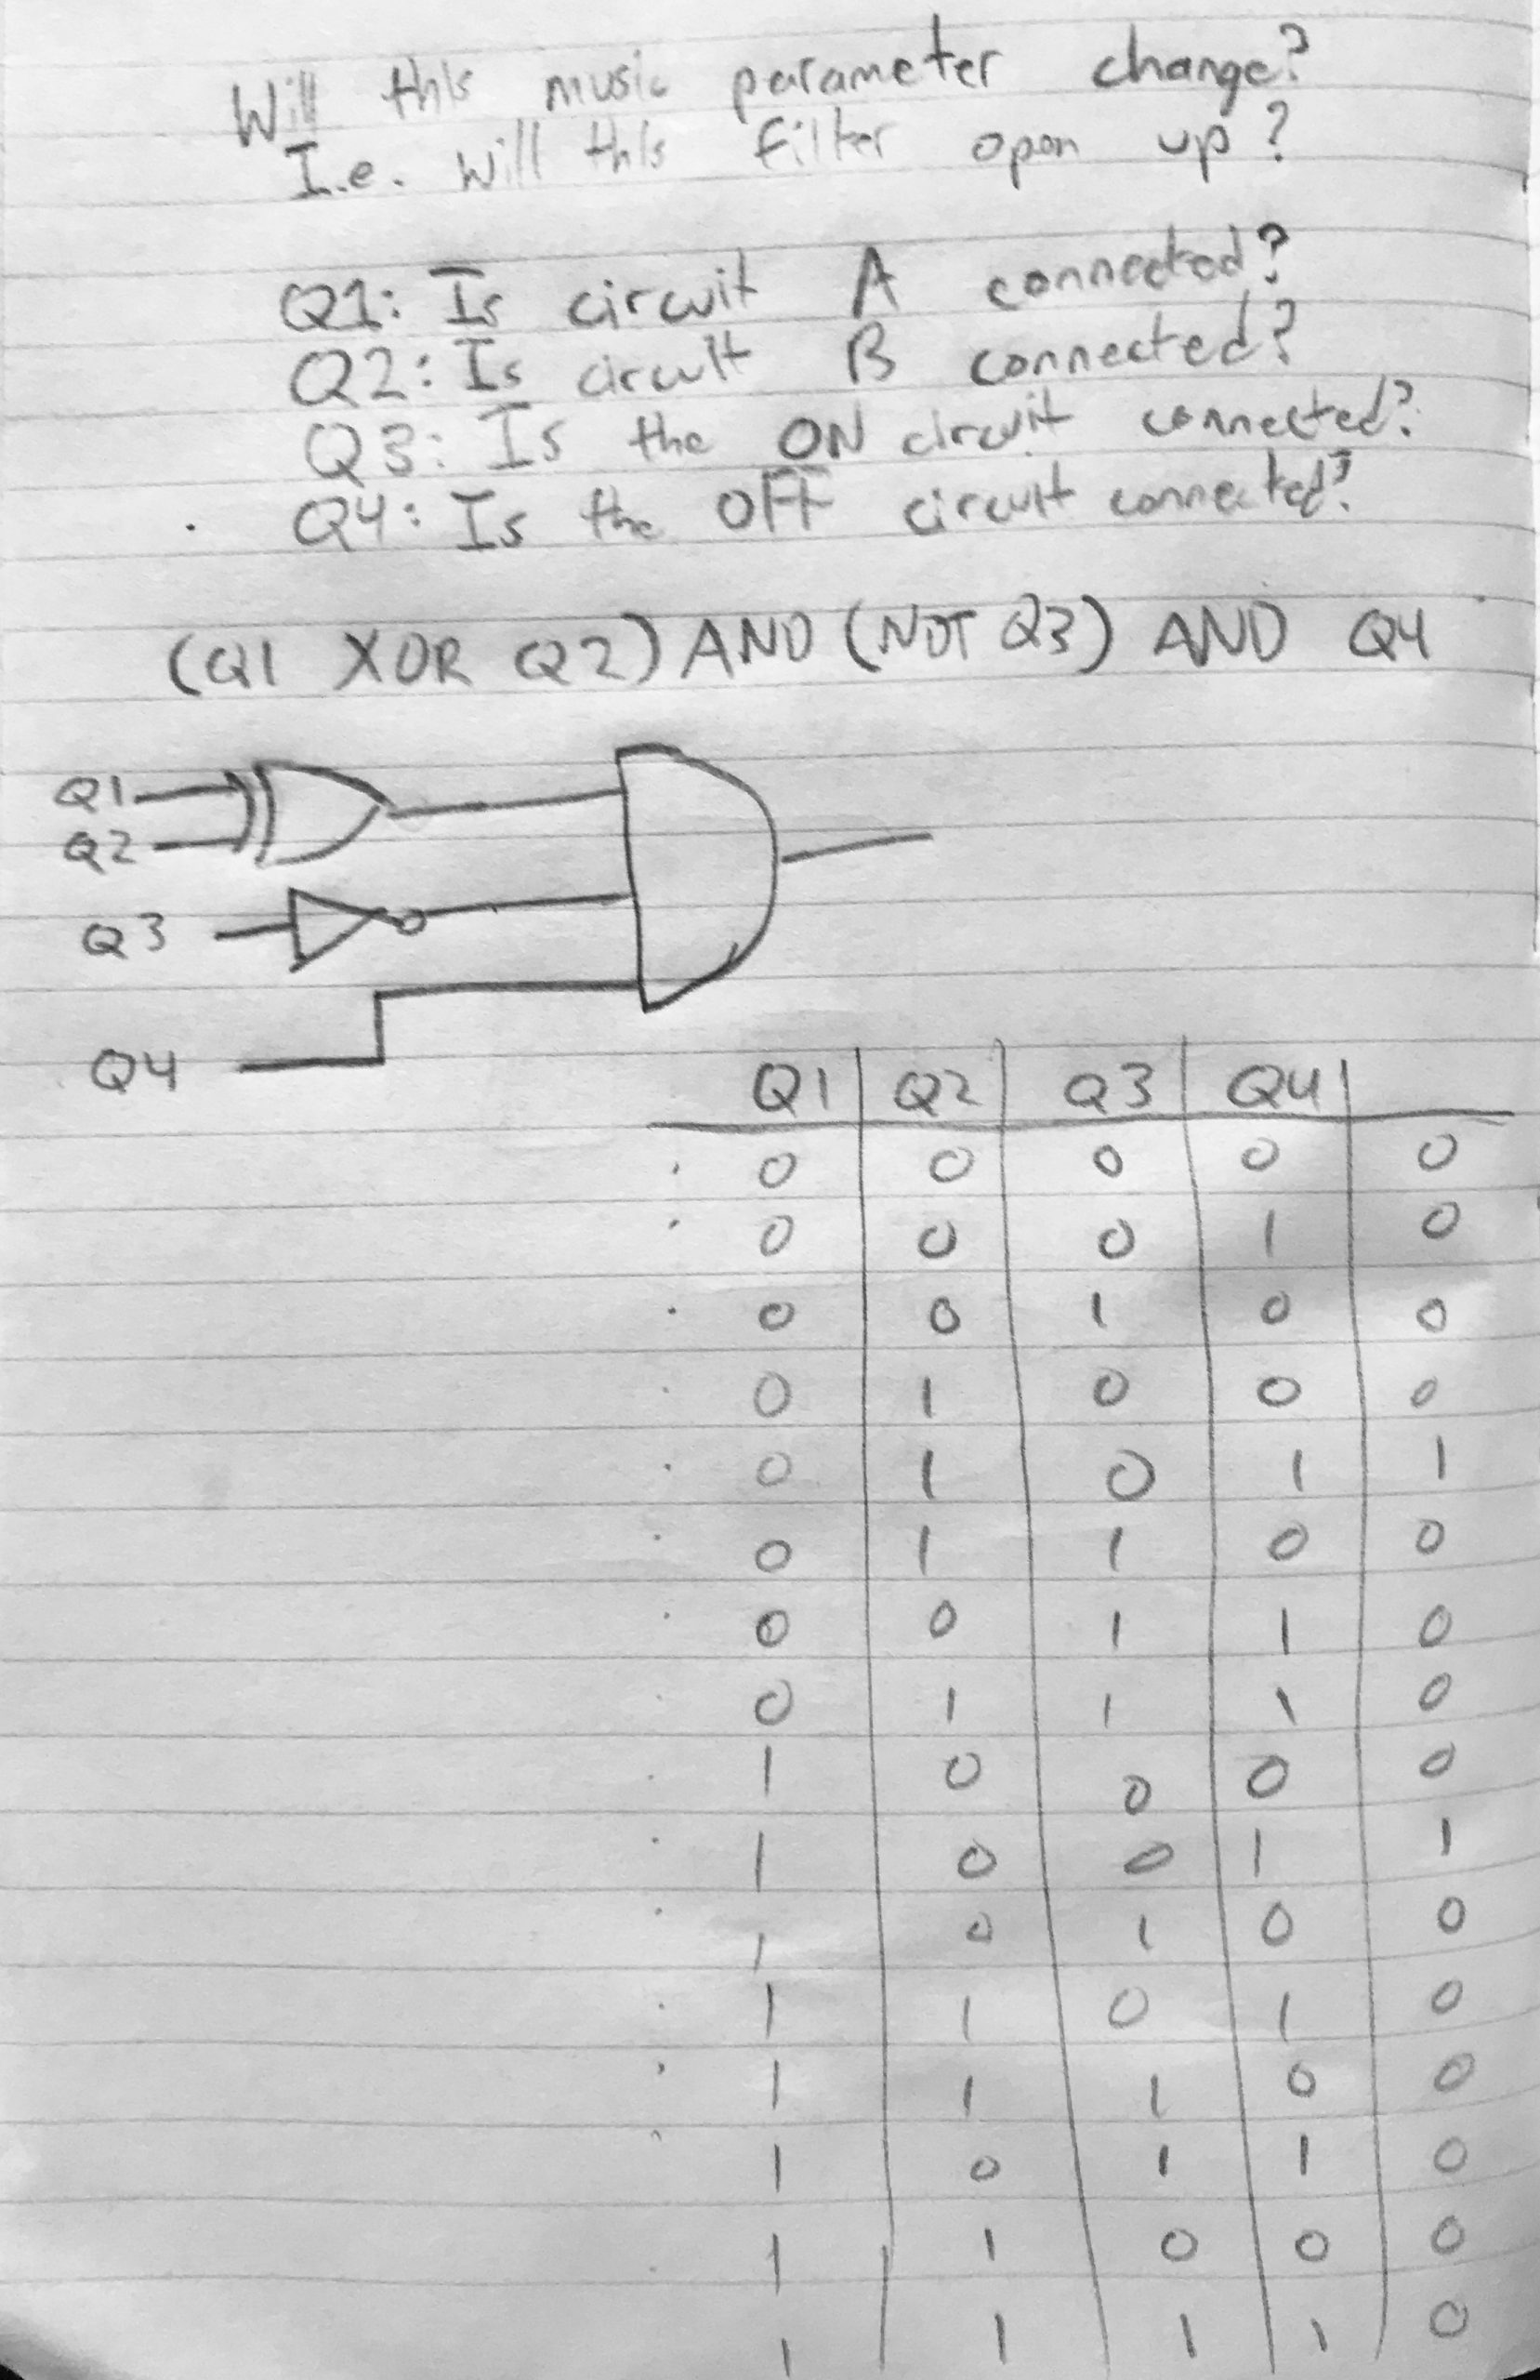
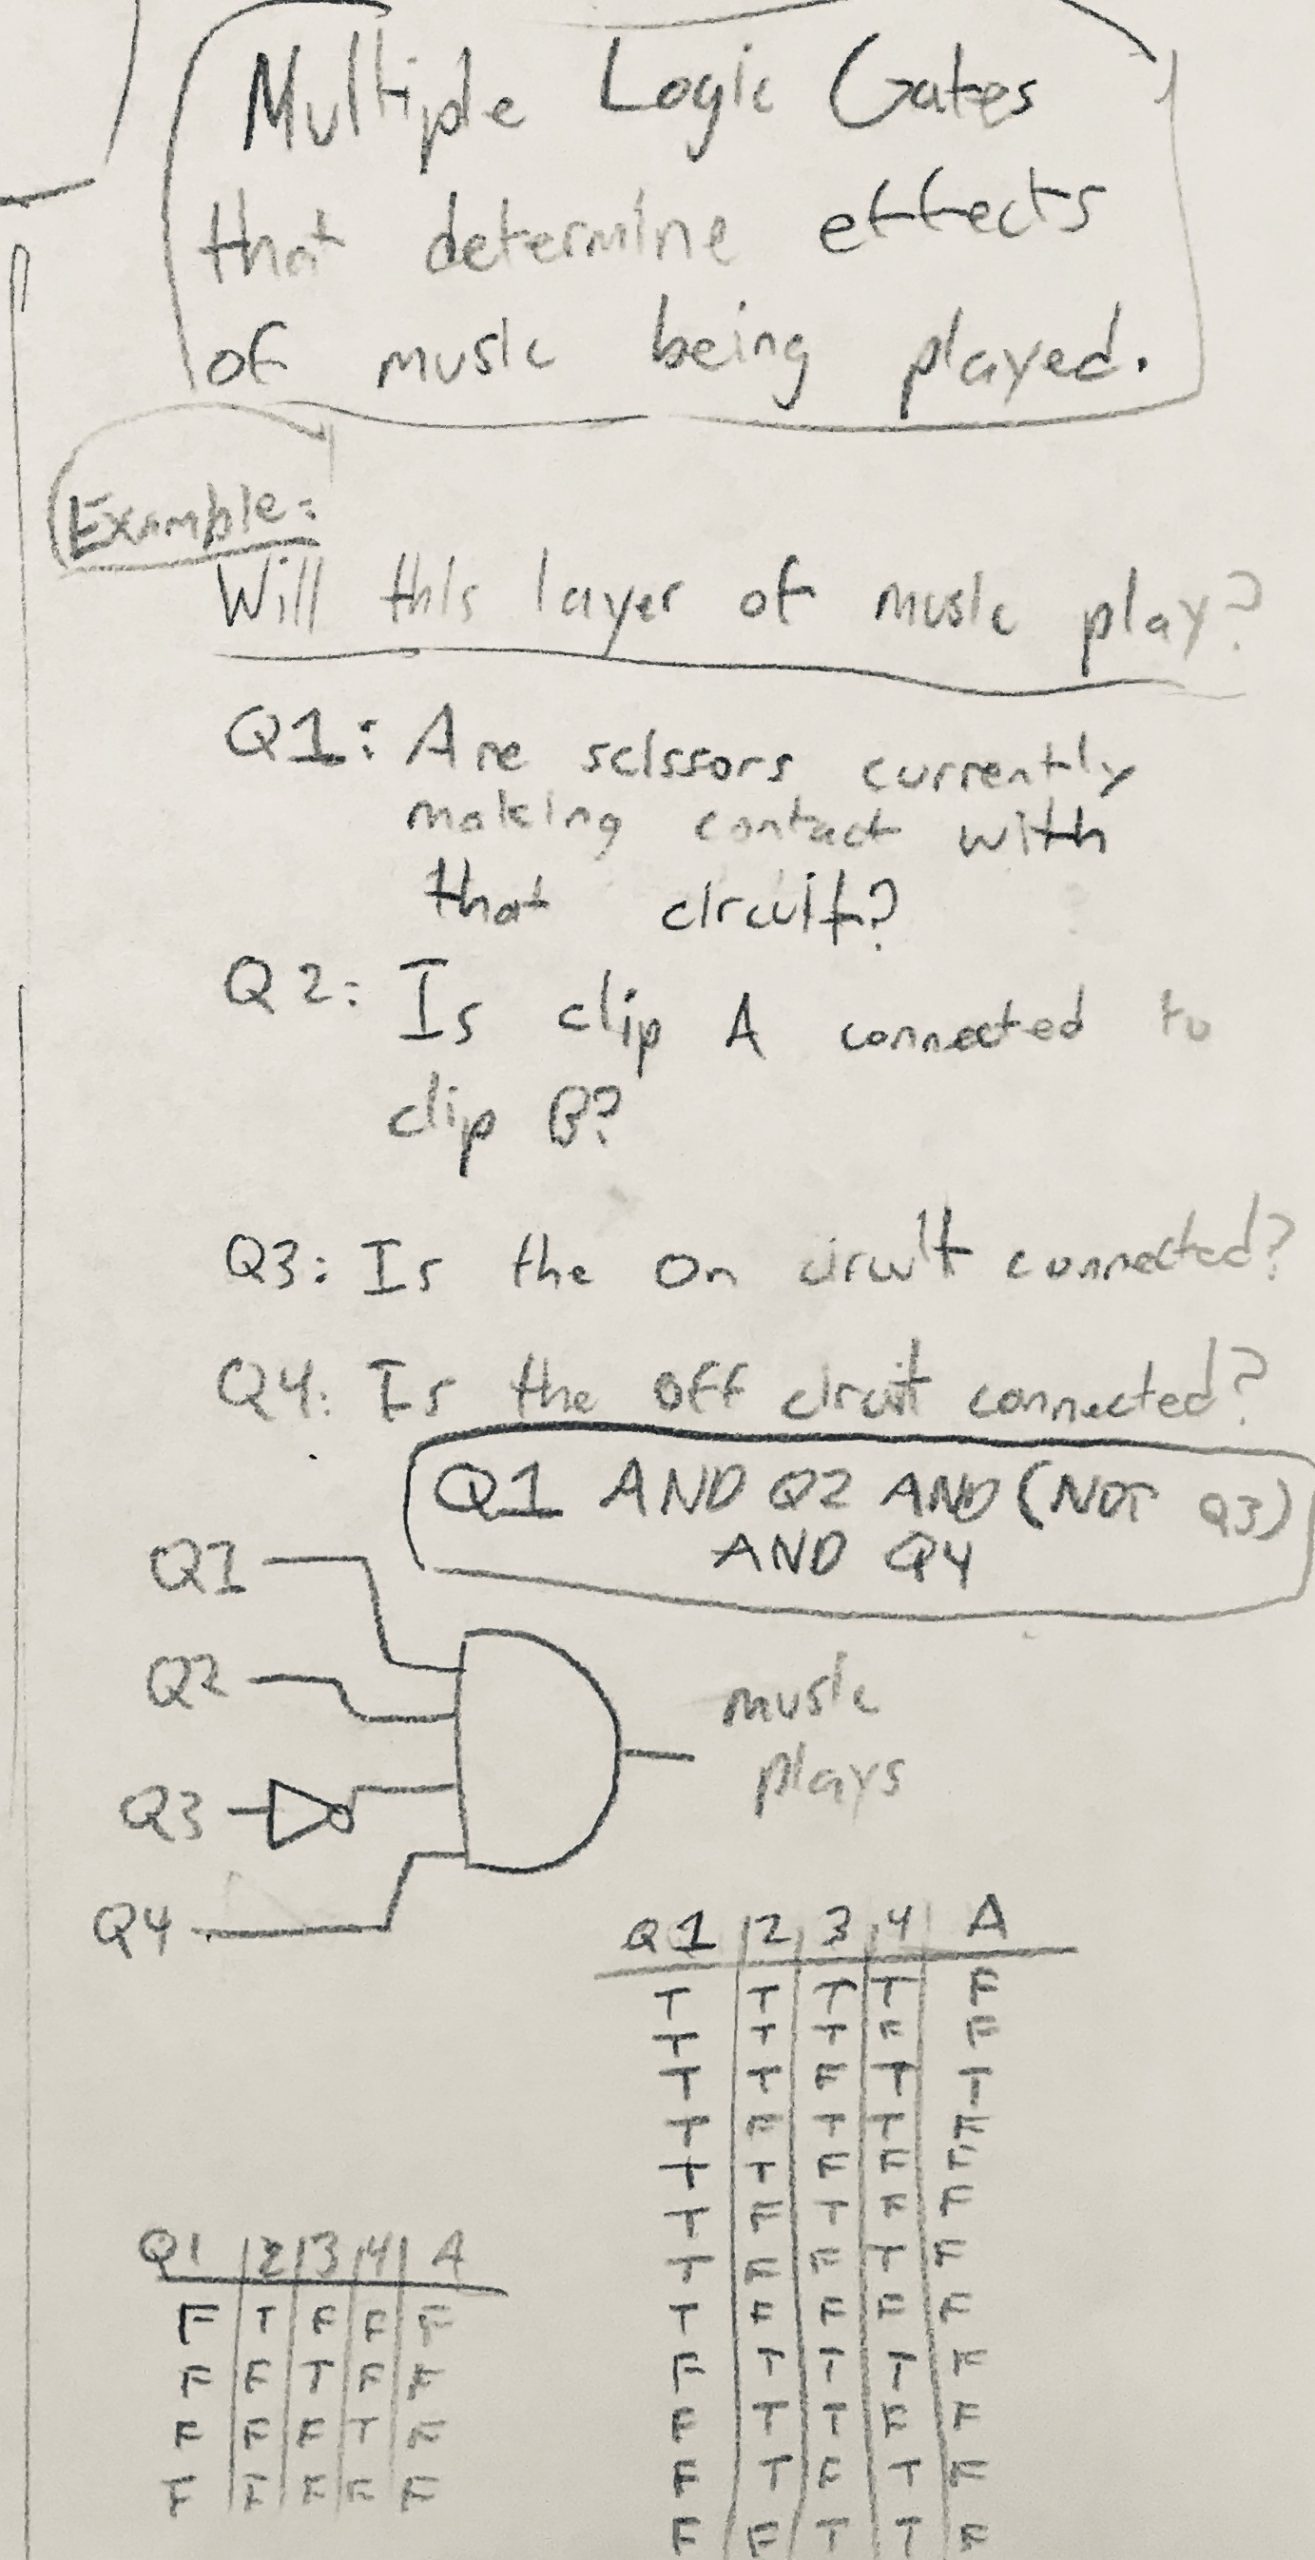
Here is an example logic problem for how a parameter of music could be changed.
In Process Critique: 9-23-20
By William Lamkin

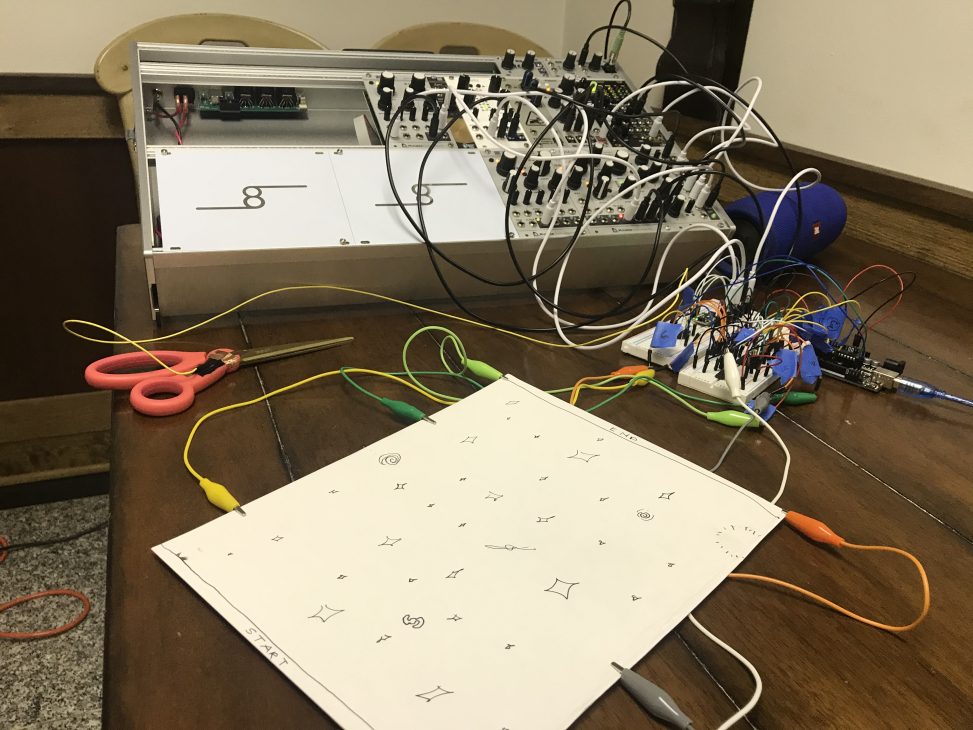
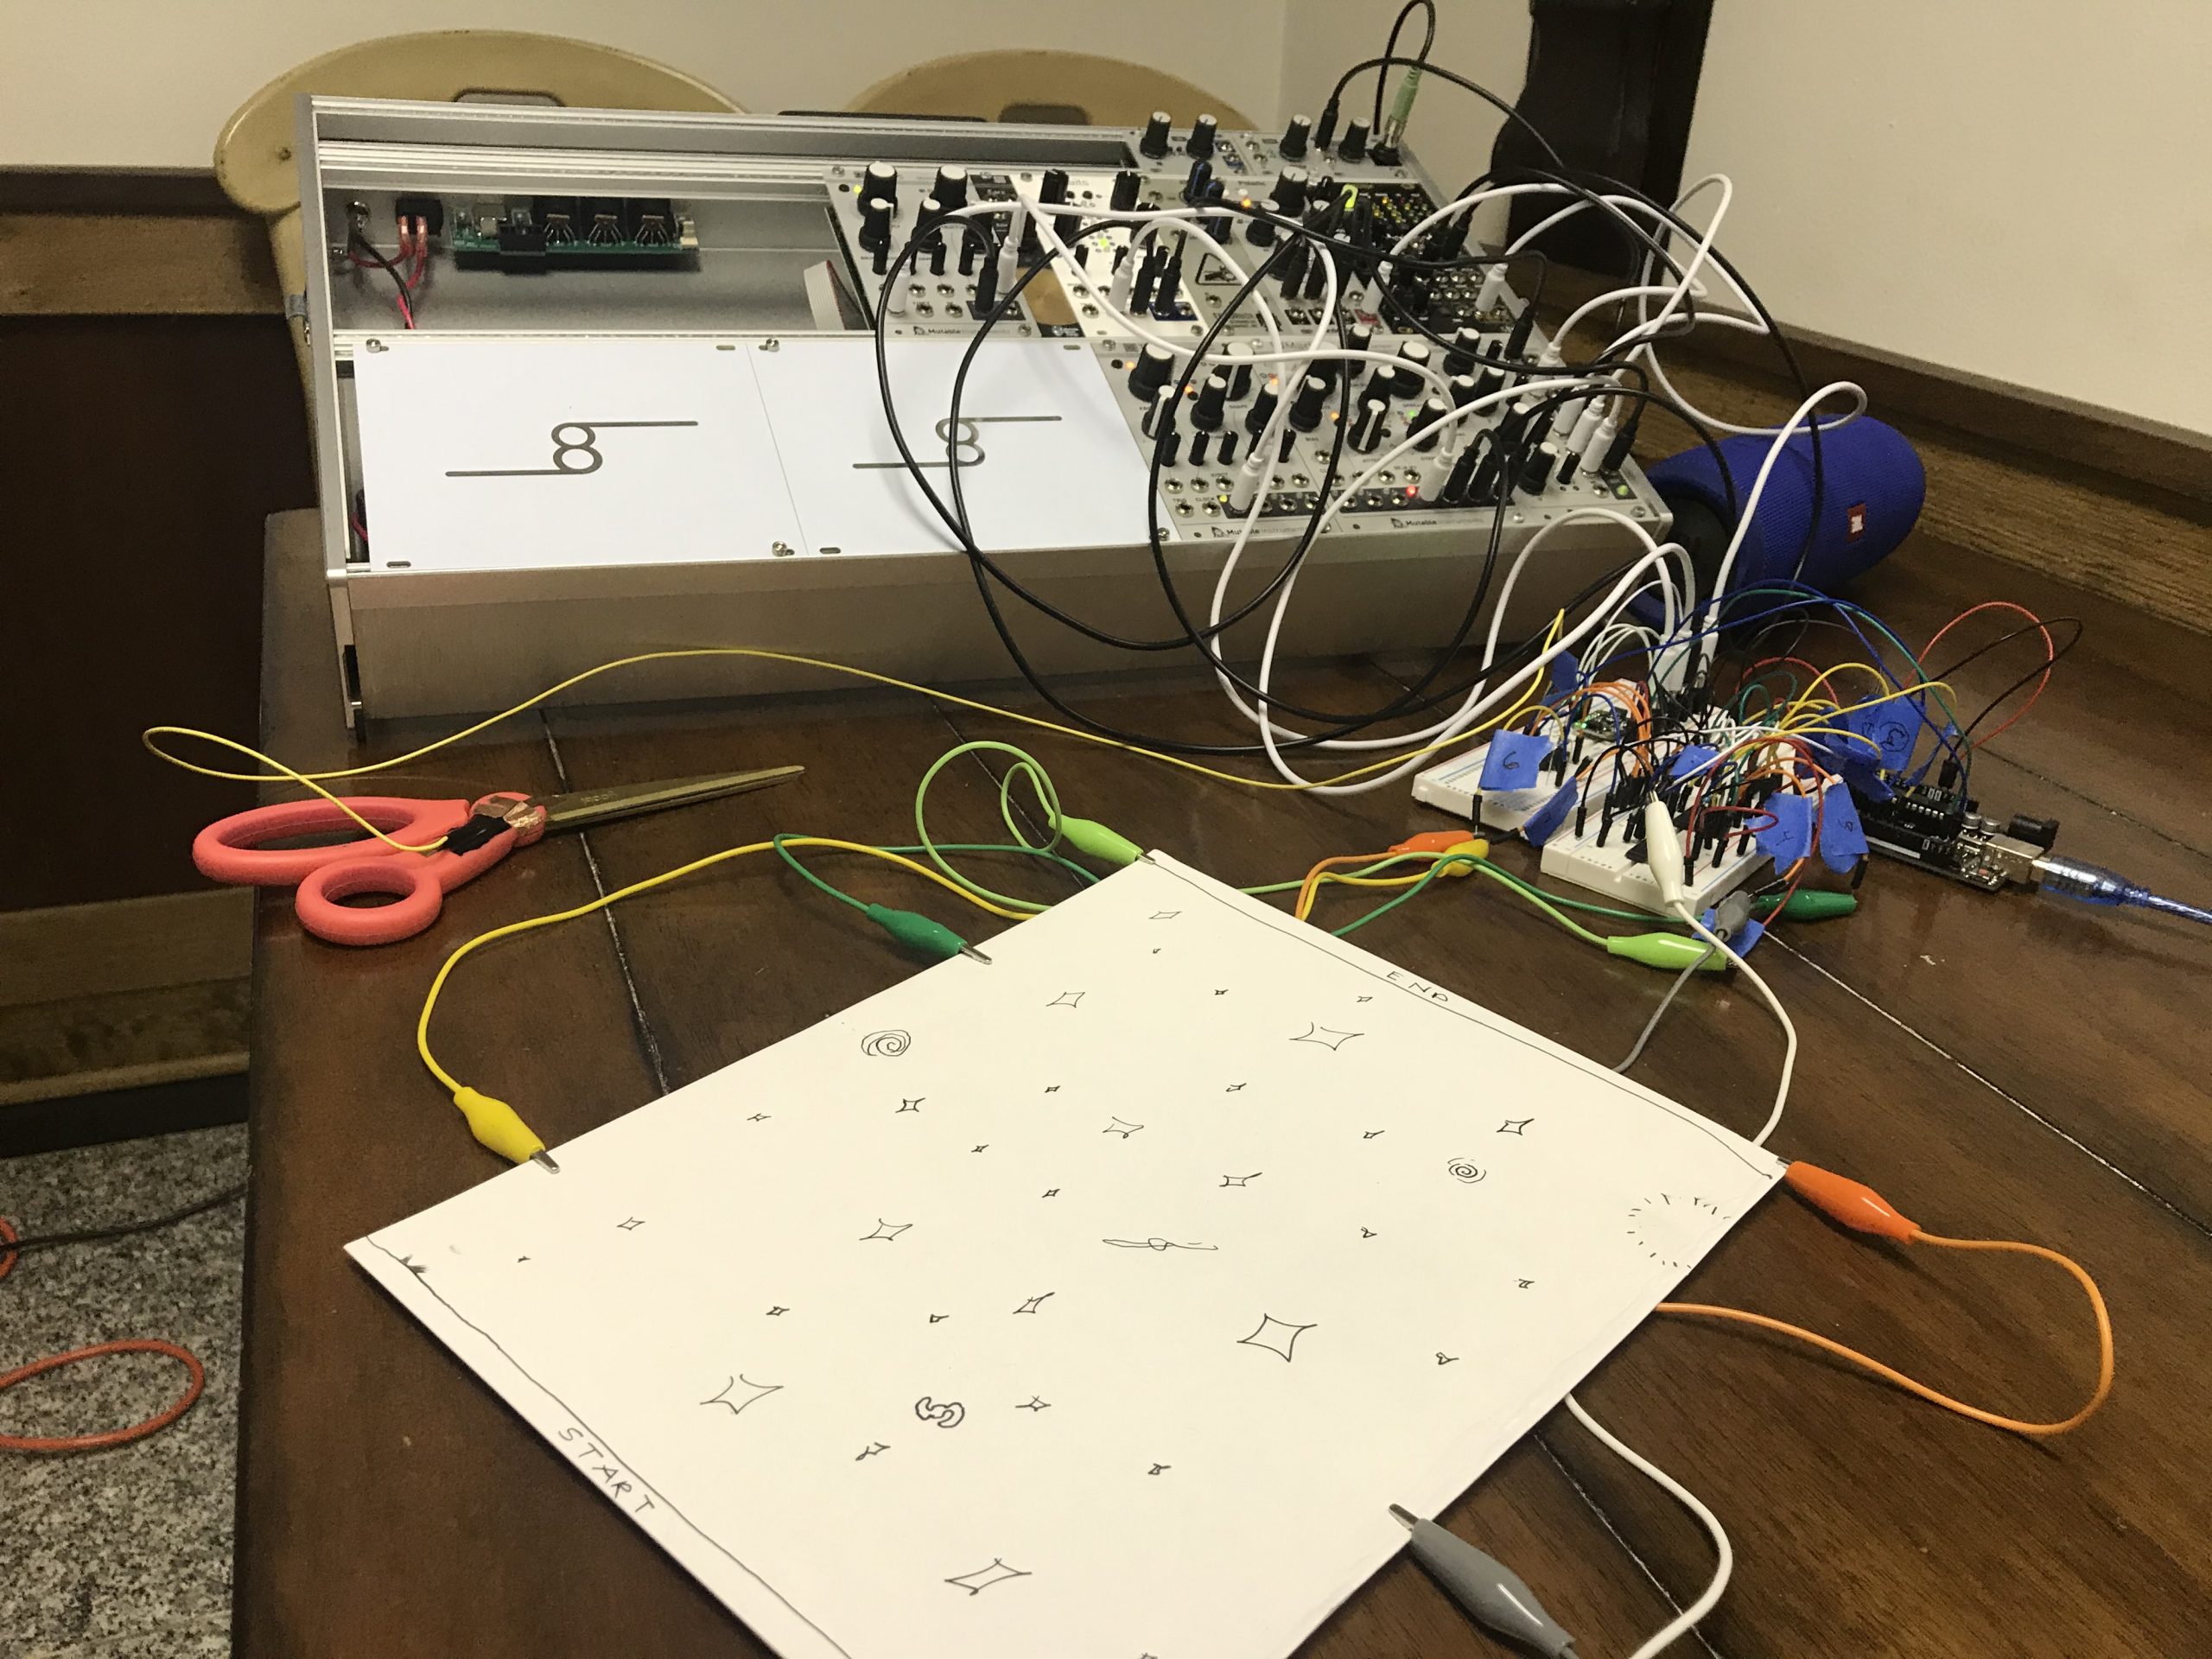
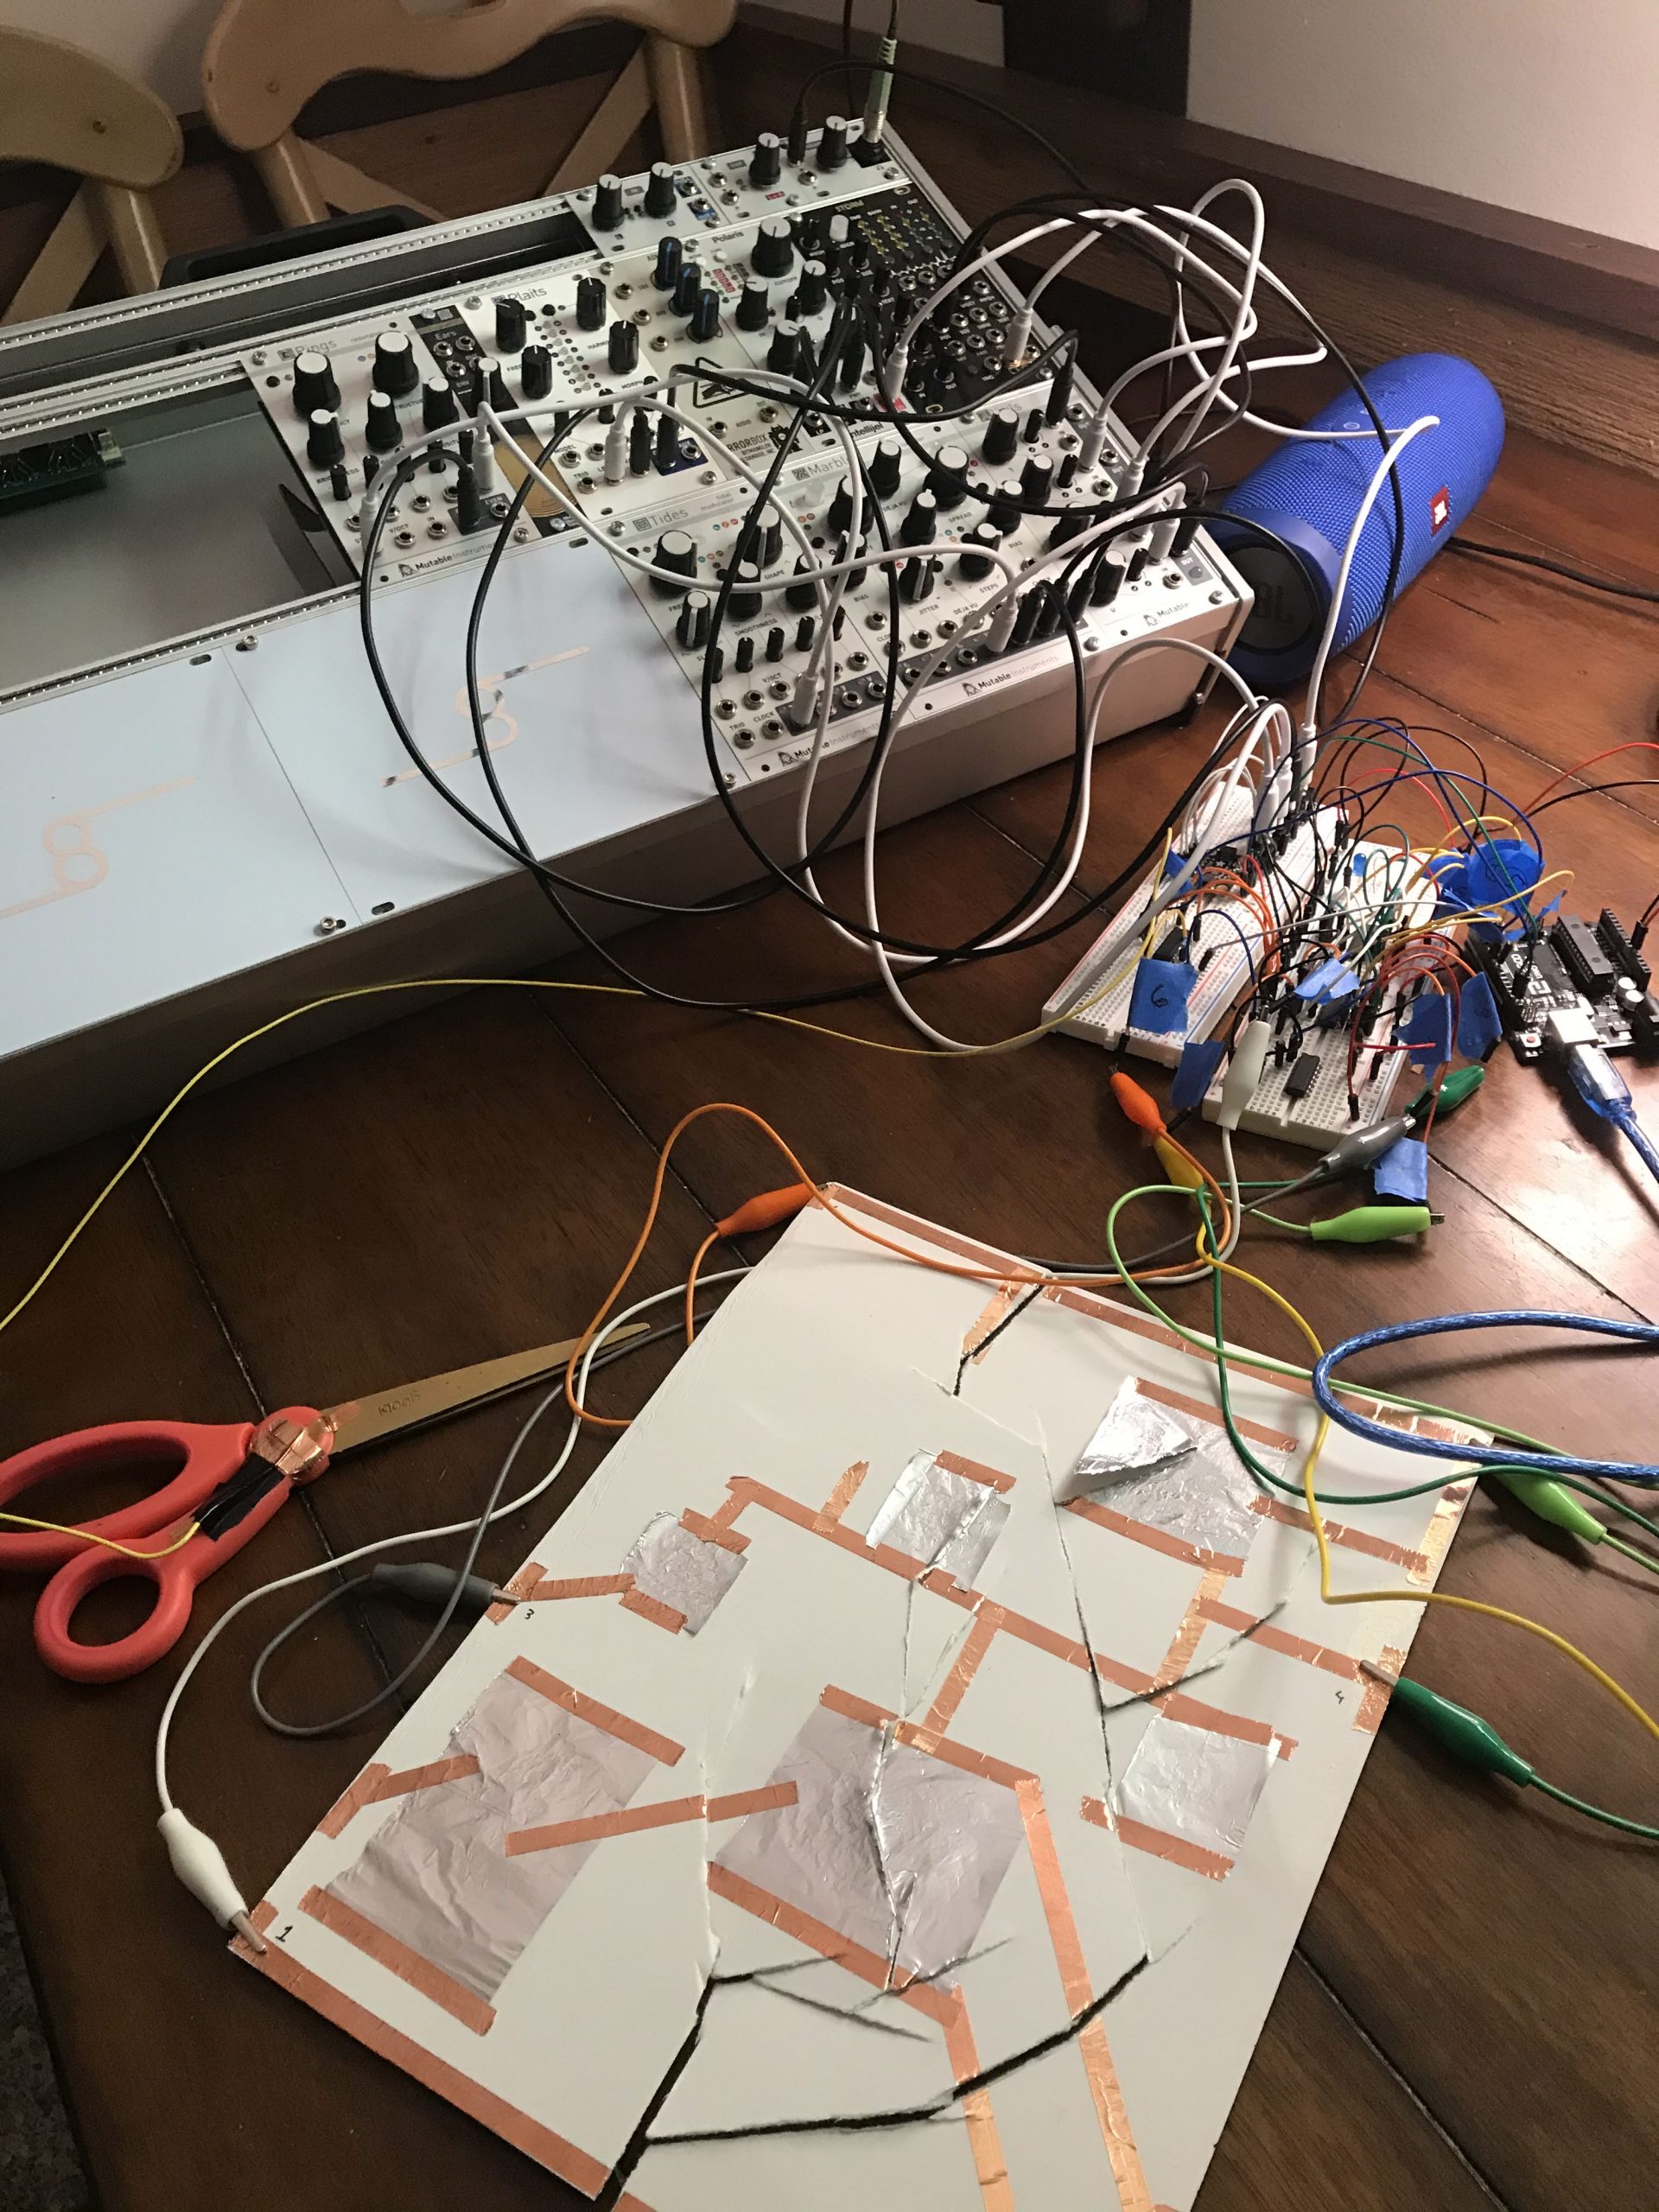
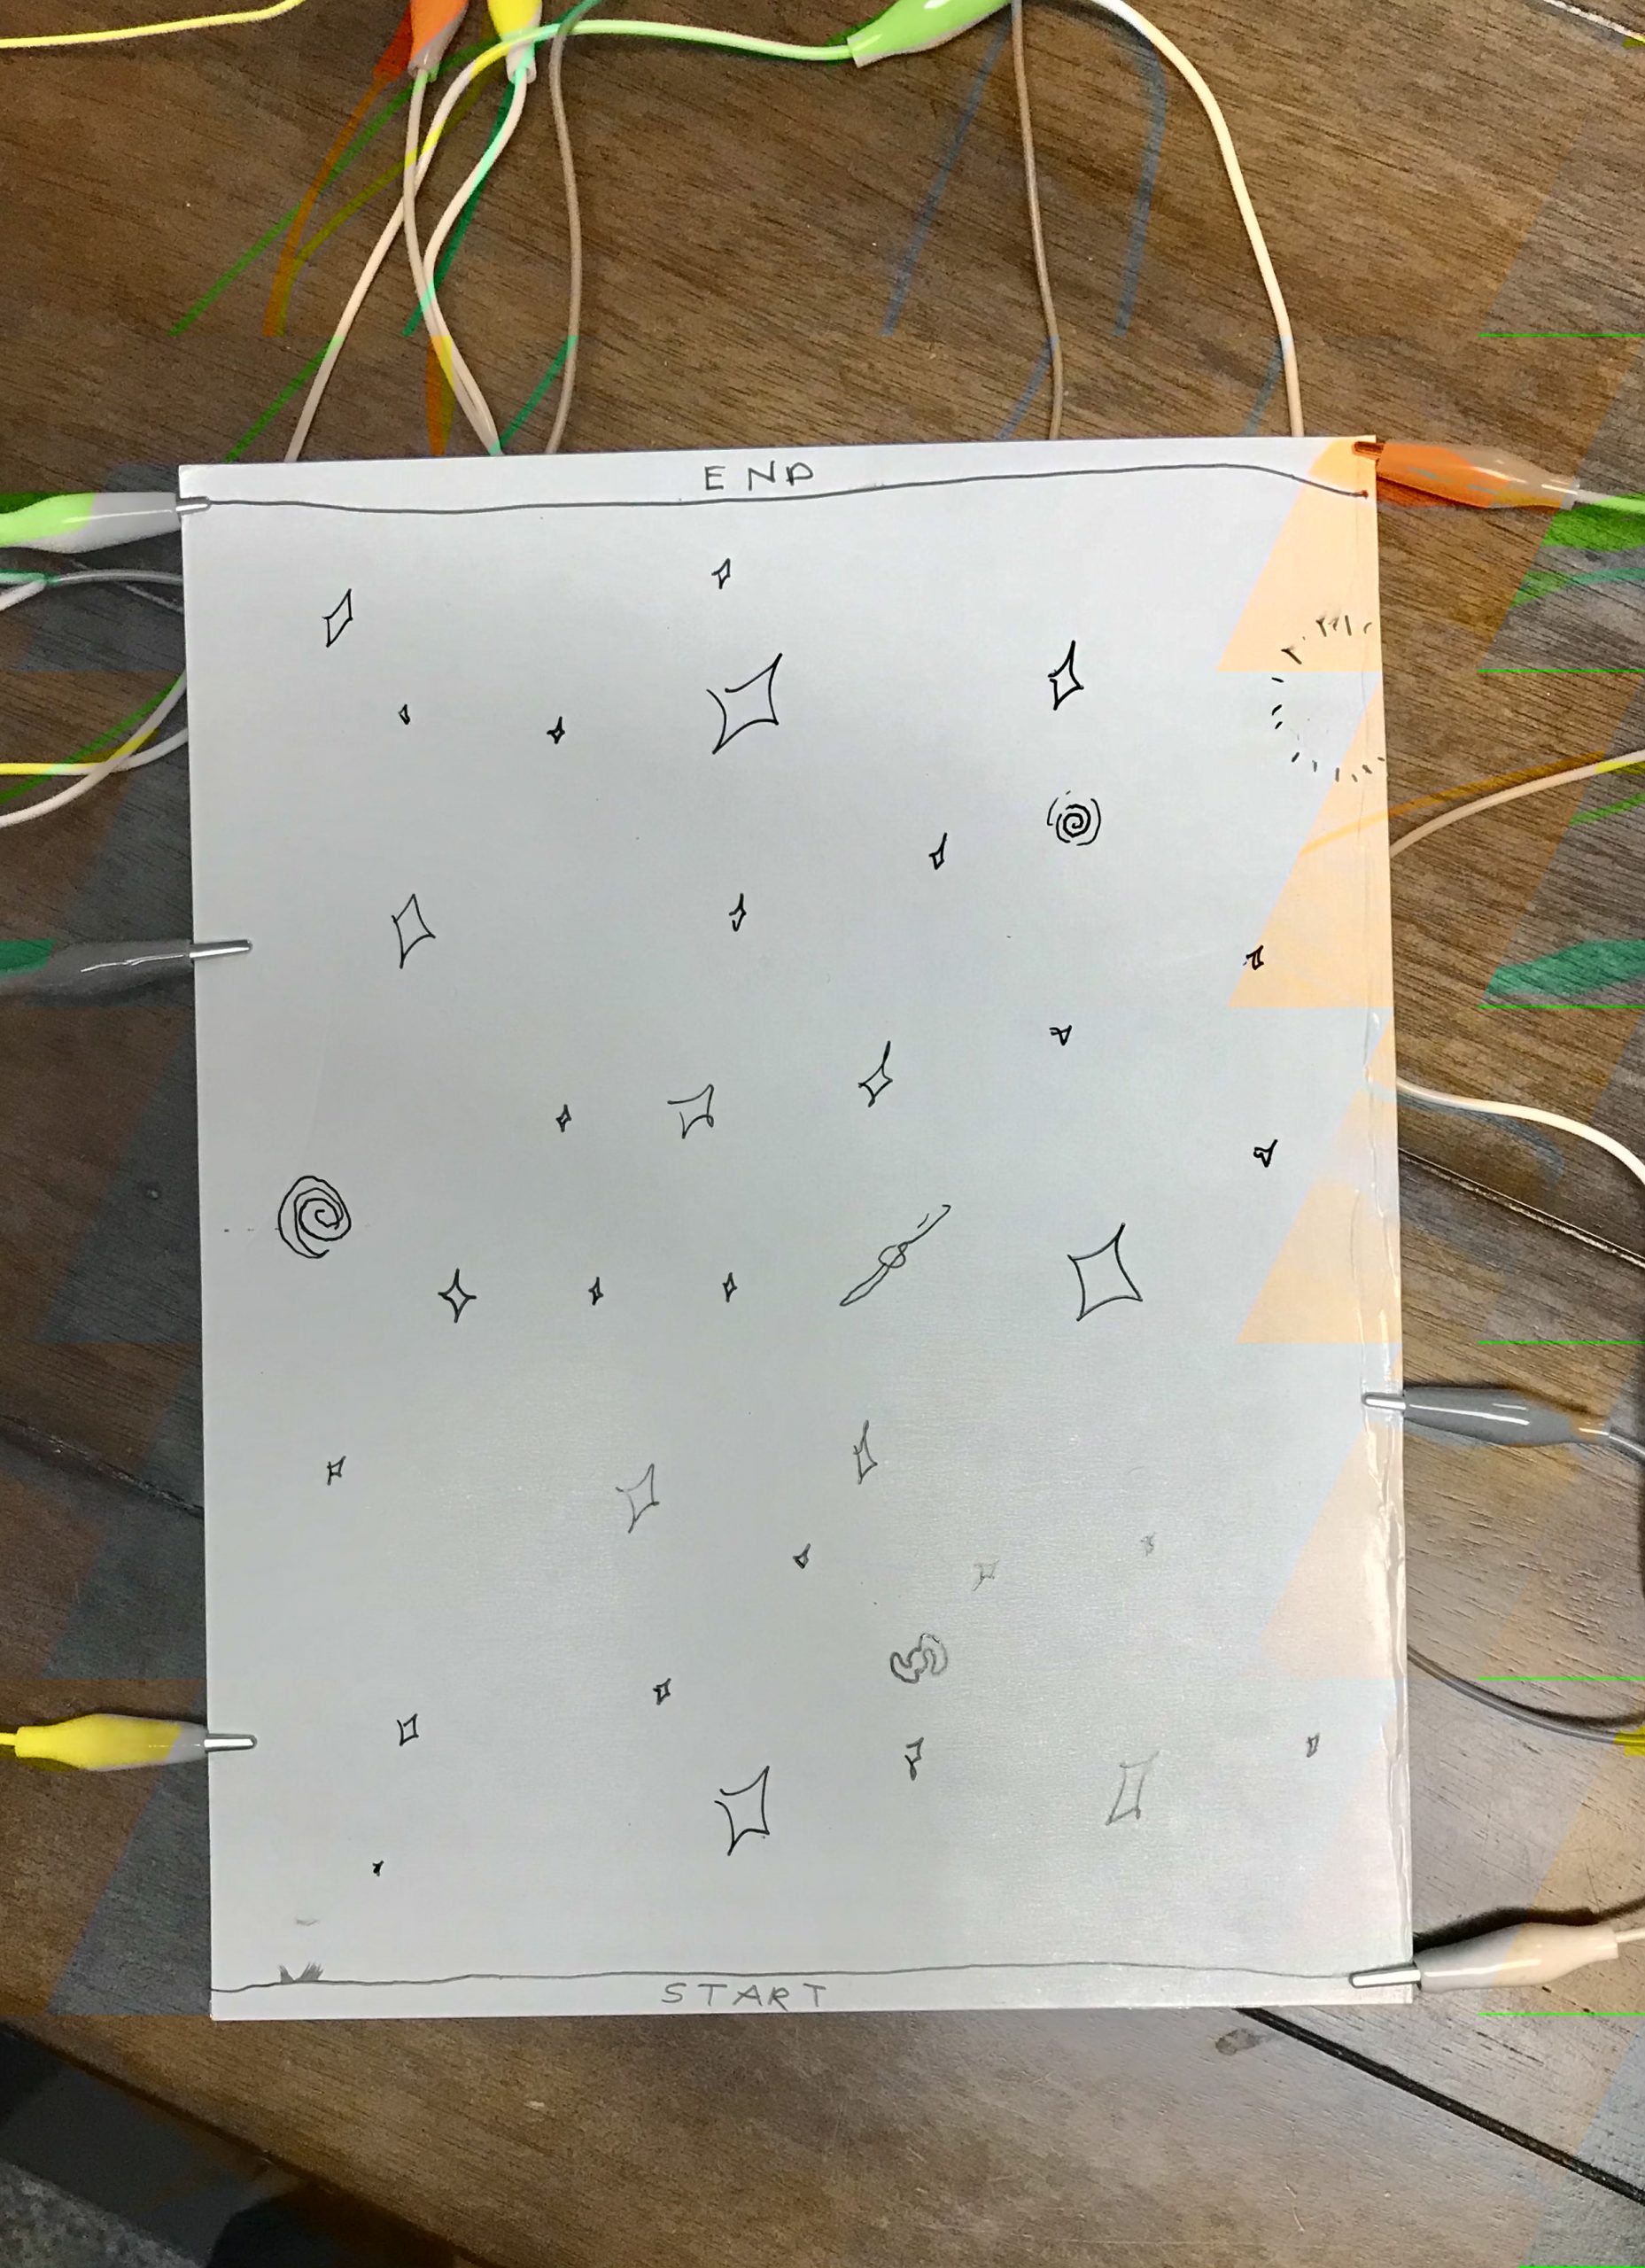
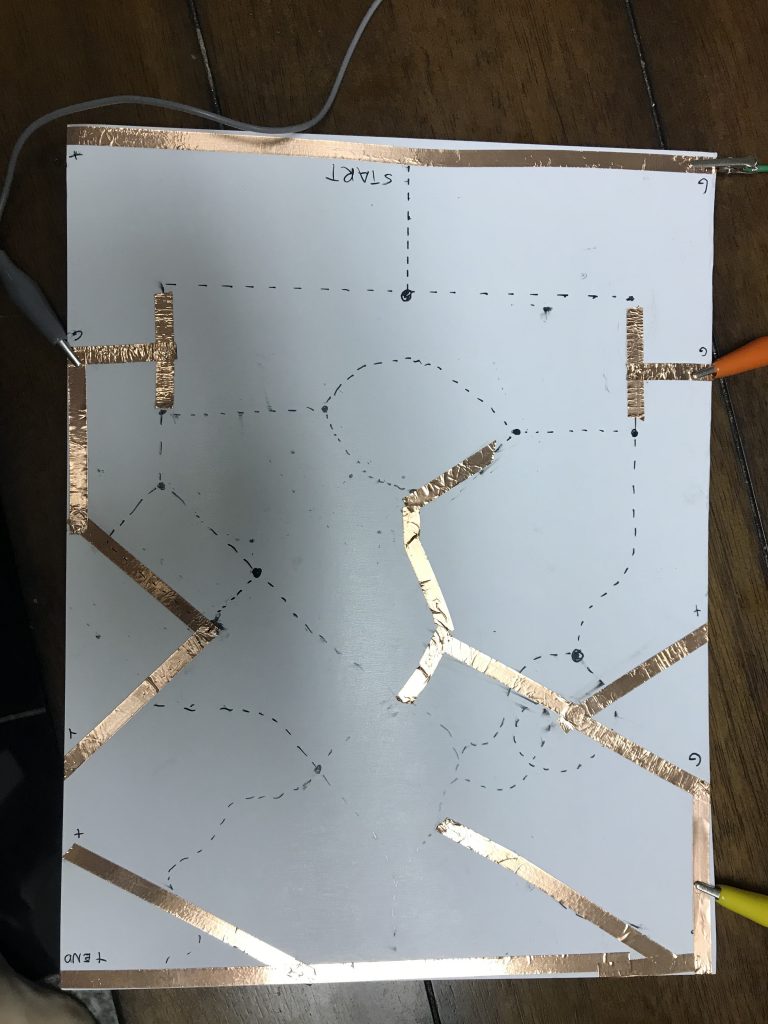
Draft version of Cut, made using cardstock and conductive tape to create circuits. In essence, all circuits start ON (1), except one involving the scissors, and breaking them (0) triggers a reaction in ambient sound created from the experience interactively.
The side which starts the experience is labeled at the top “START”, and will be cut using specially created scissors to interact with it. Breaking the start circuit will begin the the output of music. Cutting along the dashed lines, at forks in the path, the player will be given prompts to choose a direction to go down cutting. Certain circuits are cut (turned off) to trigger an effect. Others are created through the act of cutting itself, because the scissors also have conductive tape on them that connects the blade of the scissors to the hand. The body is then used as a connection in itself to the other end of circuit. Therefore, circuits are actively created throughout the piece. Eventually the other end of the sheet is breached (labeled “END”) and this stops music playback.
Connections on scissors labeled below.
Multiple logic operations will be used through combinations of the different circuits. Here is one example of how one could work.
-
Cardstock/Cardboard (already have)
-
Aluminum Foil (already have)
-
Glue/Tape (already have
-
Scissors (already have this)
-
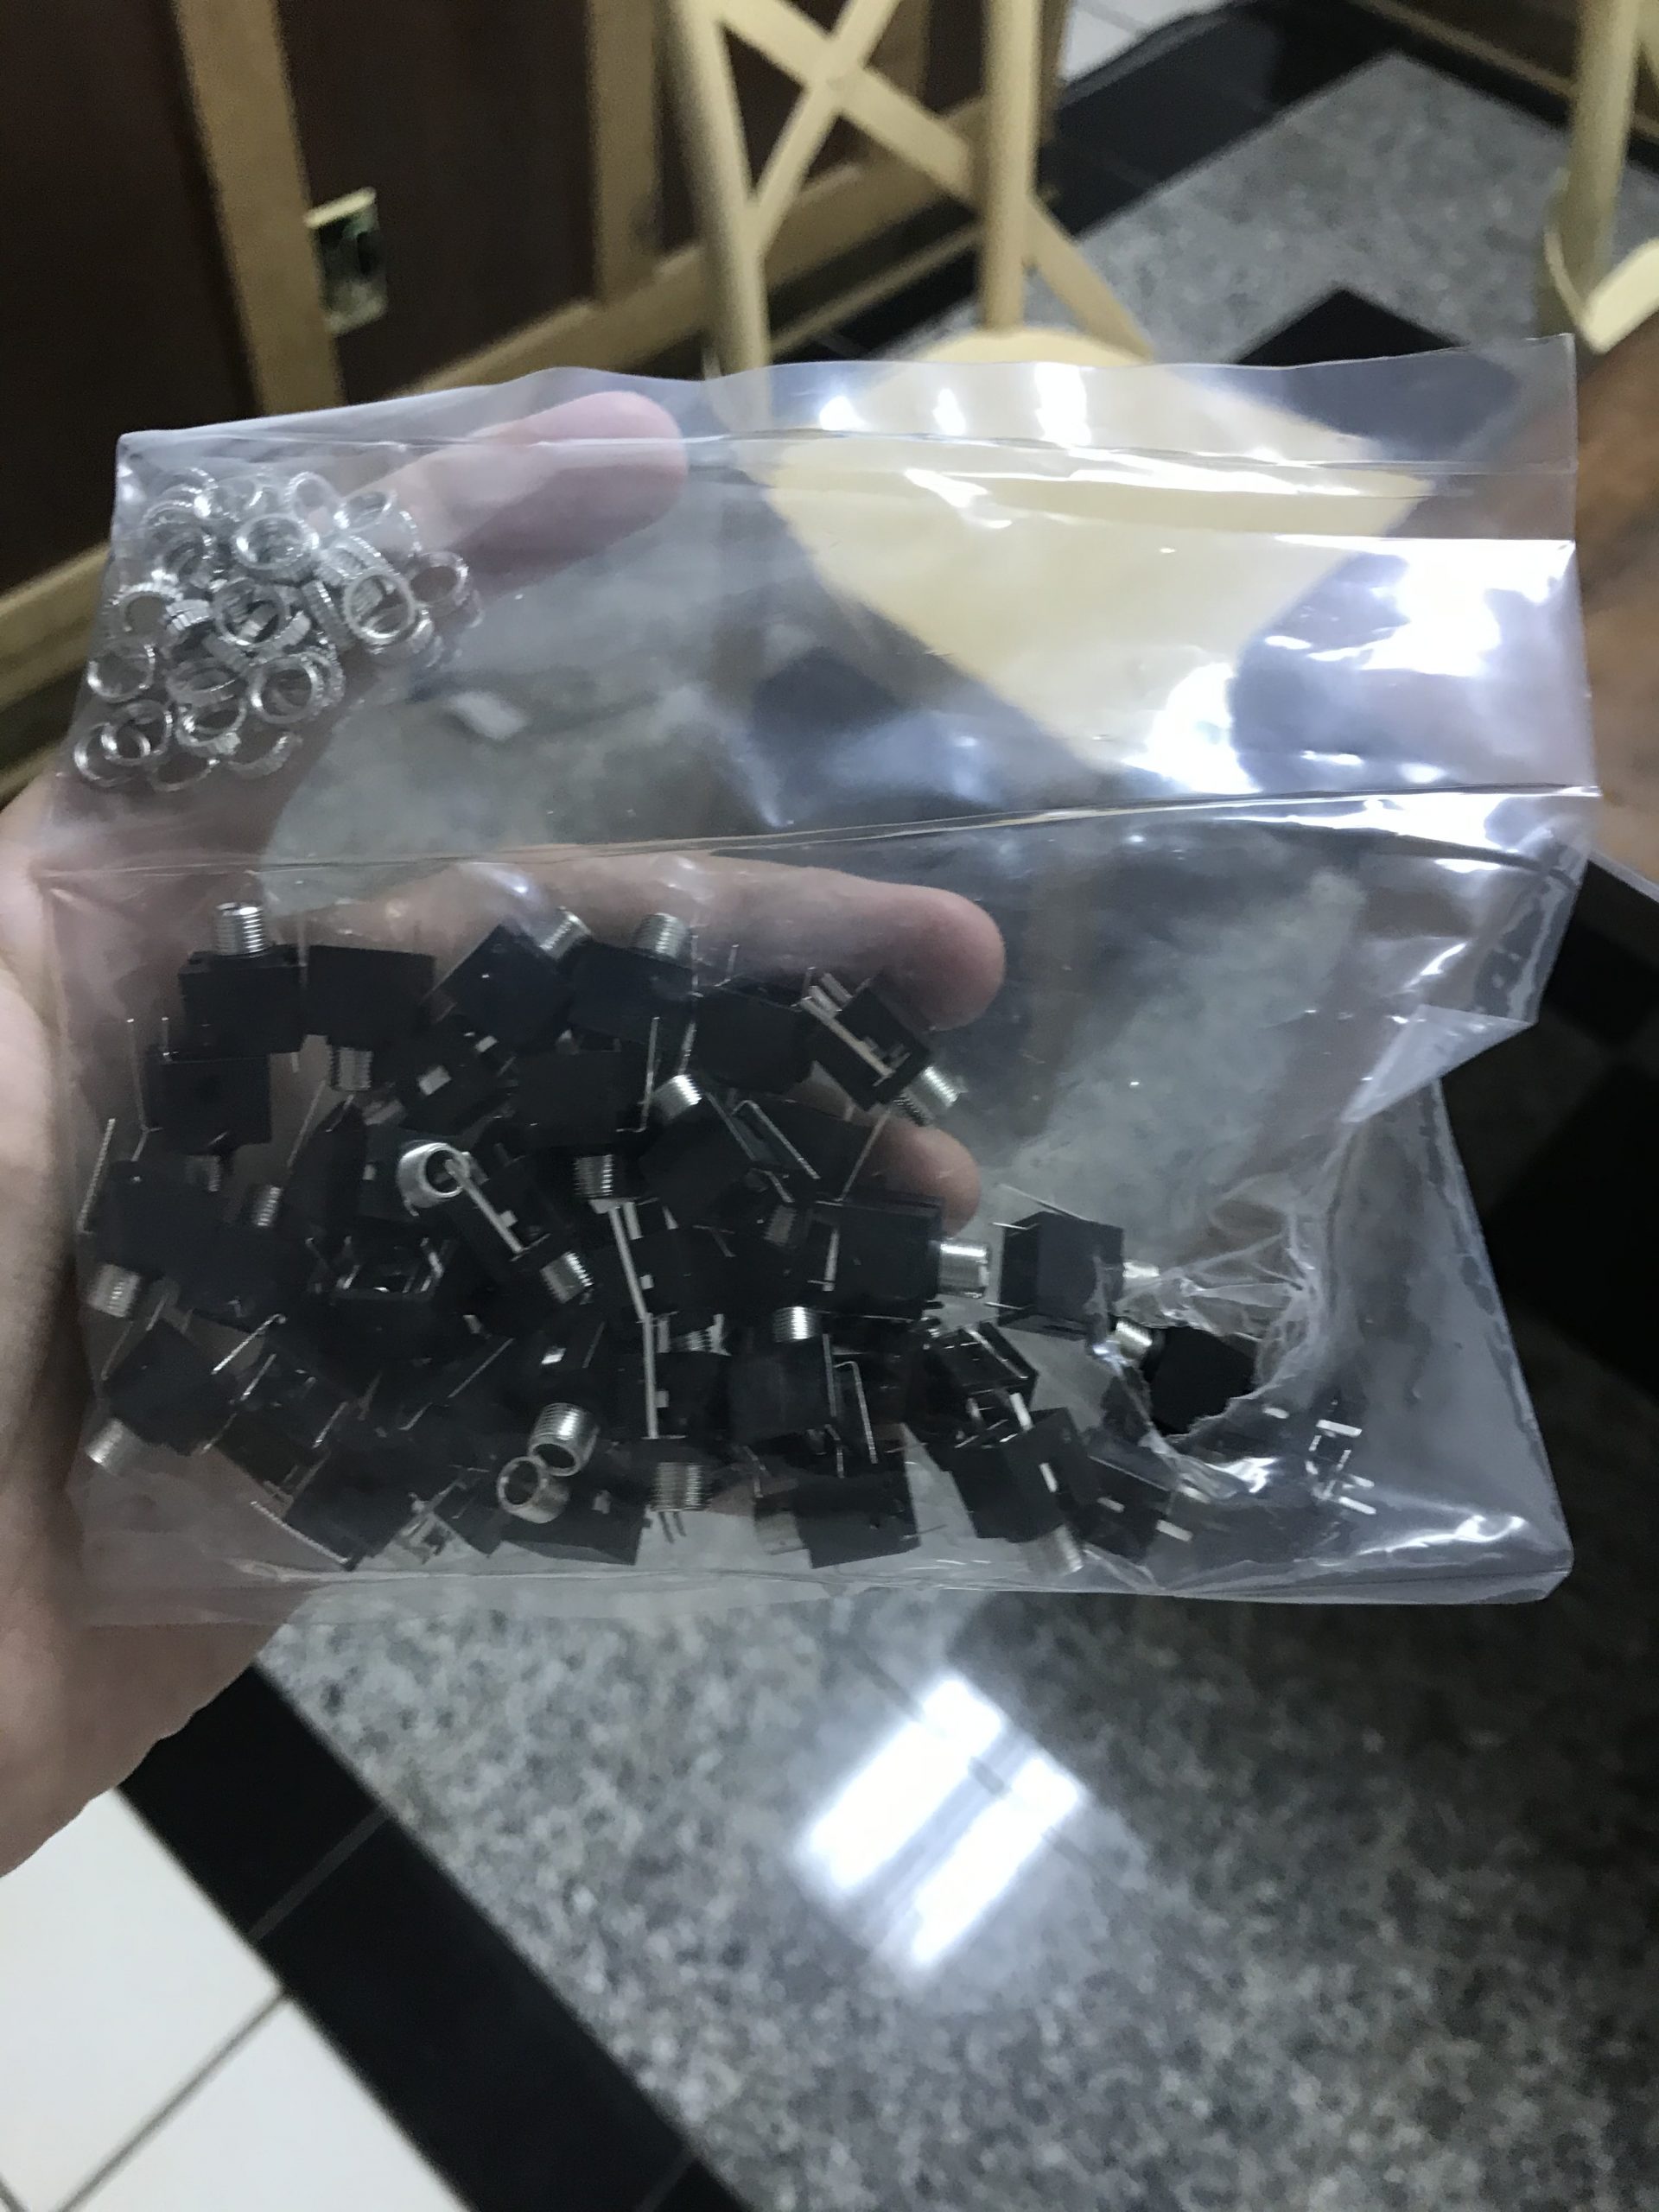
Logic chip(s) (part of take home kit)
-
Possibly Arduino/alligator clips (already have this)
-
small loudspeaker (already have)
-
mp3 playback chip https://wiki.dfrobot.com/DFPlayer_Mini_SKU_DFR0299
Comments are closed.