11/09/2020
What’s Your Level?
Artist Statement:
Where are we going? Where are we coming from? Being able to let go and lose control important, especially during times in which there is a lot of political and social pressure. The desire for control is a root cause to much of the power struggle in the world. Simplicity can be found in the smallest of tasks, processes which give us the illusion of control, little moments of victory. Keeping track of how much one has achieved isn’t healthy, scoring yourself only builds higher walls. As tempting as it is to yearn for the comfort of control, it is important to find that same comfort in being out of balance.
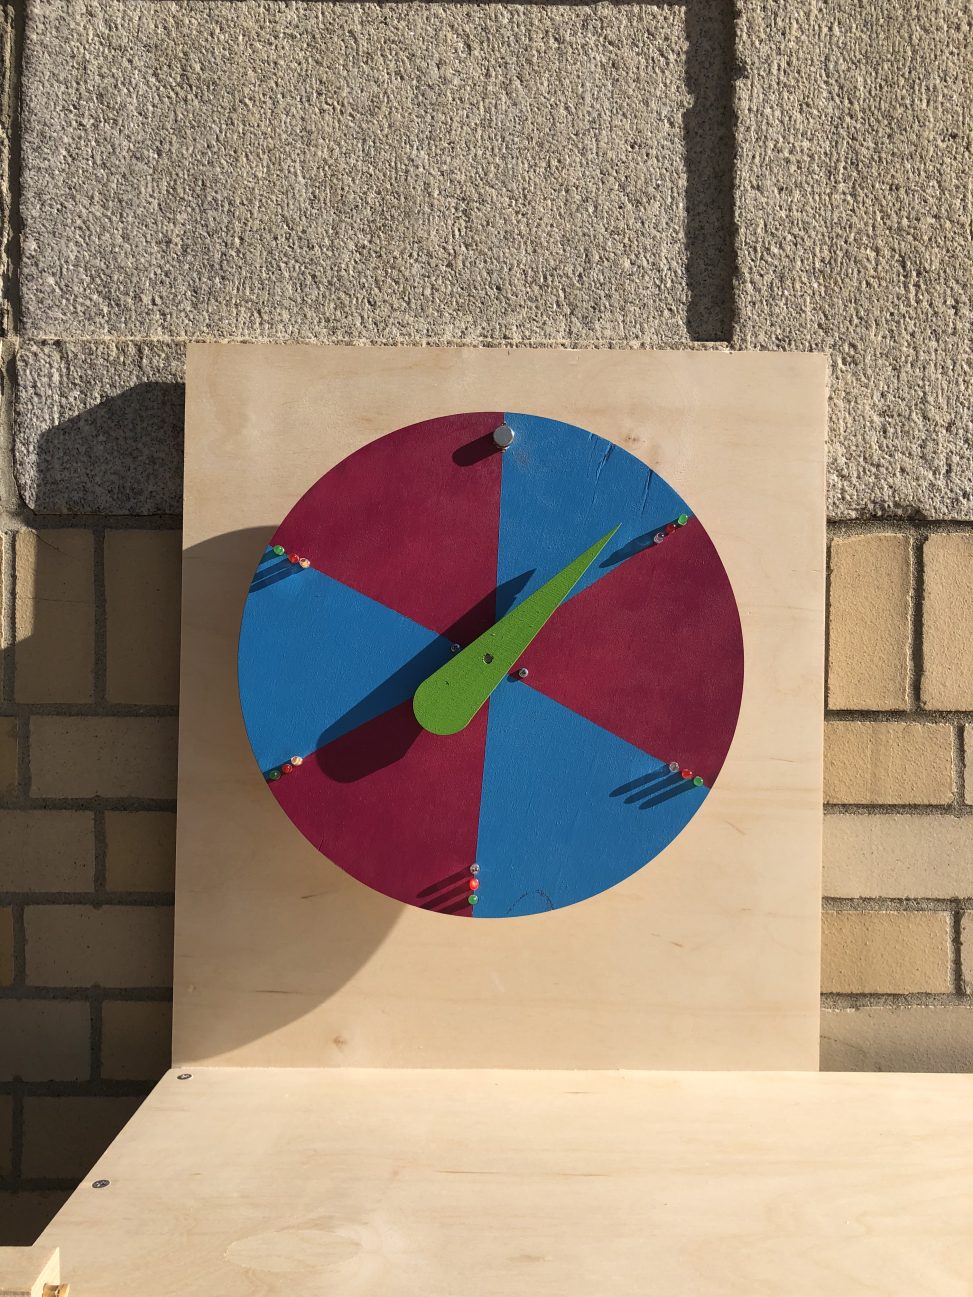
Final Piece:
Shown over zoom.
Code:
#include <AccelStepper.h>

const int STEP_PIN = 9; // A4988 "STEP" pin wired to Arduino pin 2 (you can change this)
const int DIR_PIN = 10; // A4988 "DIRECTION" pin wired to Arduino pin 3 (you can change this)

// make an AccelStepper motor object. "myMotor" can be any name you'd like.
AccelStepper myMotor(1, STEP_PIN, DIR_PIN);

int pos = 800; // variable to store motor position instruction
int stepMot = 0; // current stepper position

void setup()
{
  pinMode(A0, INPUT);
  pinMode(2, OUTPUT);

  Serial.begin(9600); // begin Serial communication

  // you can change the below values as you'd like
  myMotor.setMaxSpeed(1000); // measured in steps per second
  myMotor.setAcceleration(500); // measured in steps per second squared
}

void loop()
{
  if (analogRead(A0) < 500) {
    digitalWrite(13, HIGH);
  } else {
    digitalWrite(13, LOW);
  }
  delay(10); // Delay a little bit to improve simulation performance

  int button1 = digitalRead(3);
  int button2 = digitalRead(4);
  int button3 = digitalRead(5);
  int button4 = digitalRead(6);
  int button5 = digitalRead(7);
  int button6 = digitalRead(8);

  int sum = button1  + button2 + button3 + button4 + button5 + button6;

  if (sum >= 3){
    stepMot = stepMot + 1;
    if (stepMot <= 1600) {
      myMotor.moveTo(stepMot); // and tell the motor to go there
      Serial.print("current position: ");
      Serial.println(myMotor.currentPosition());
      }
  }
  delay(10);

  myMotor.run(); // remember, you must call this function as often as possible

}
Process:
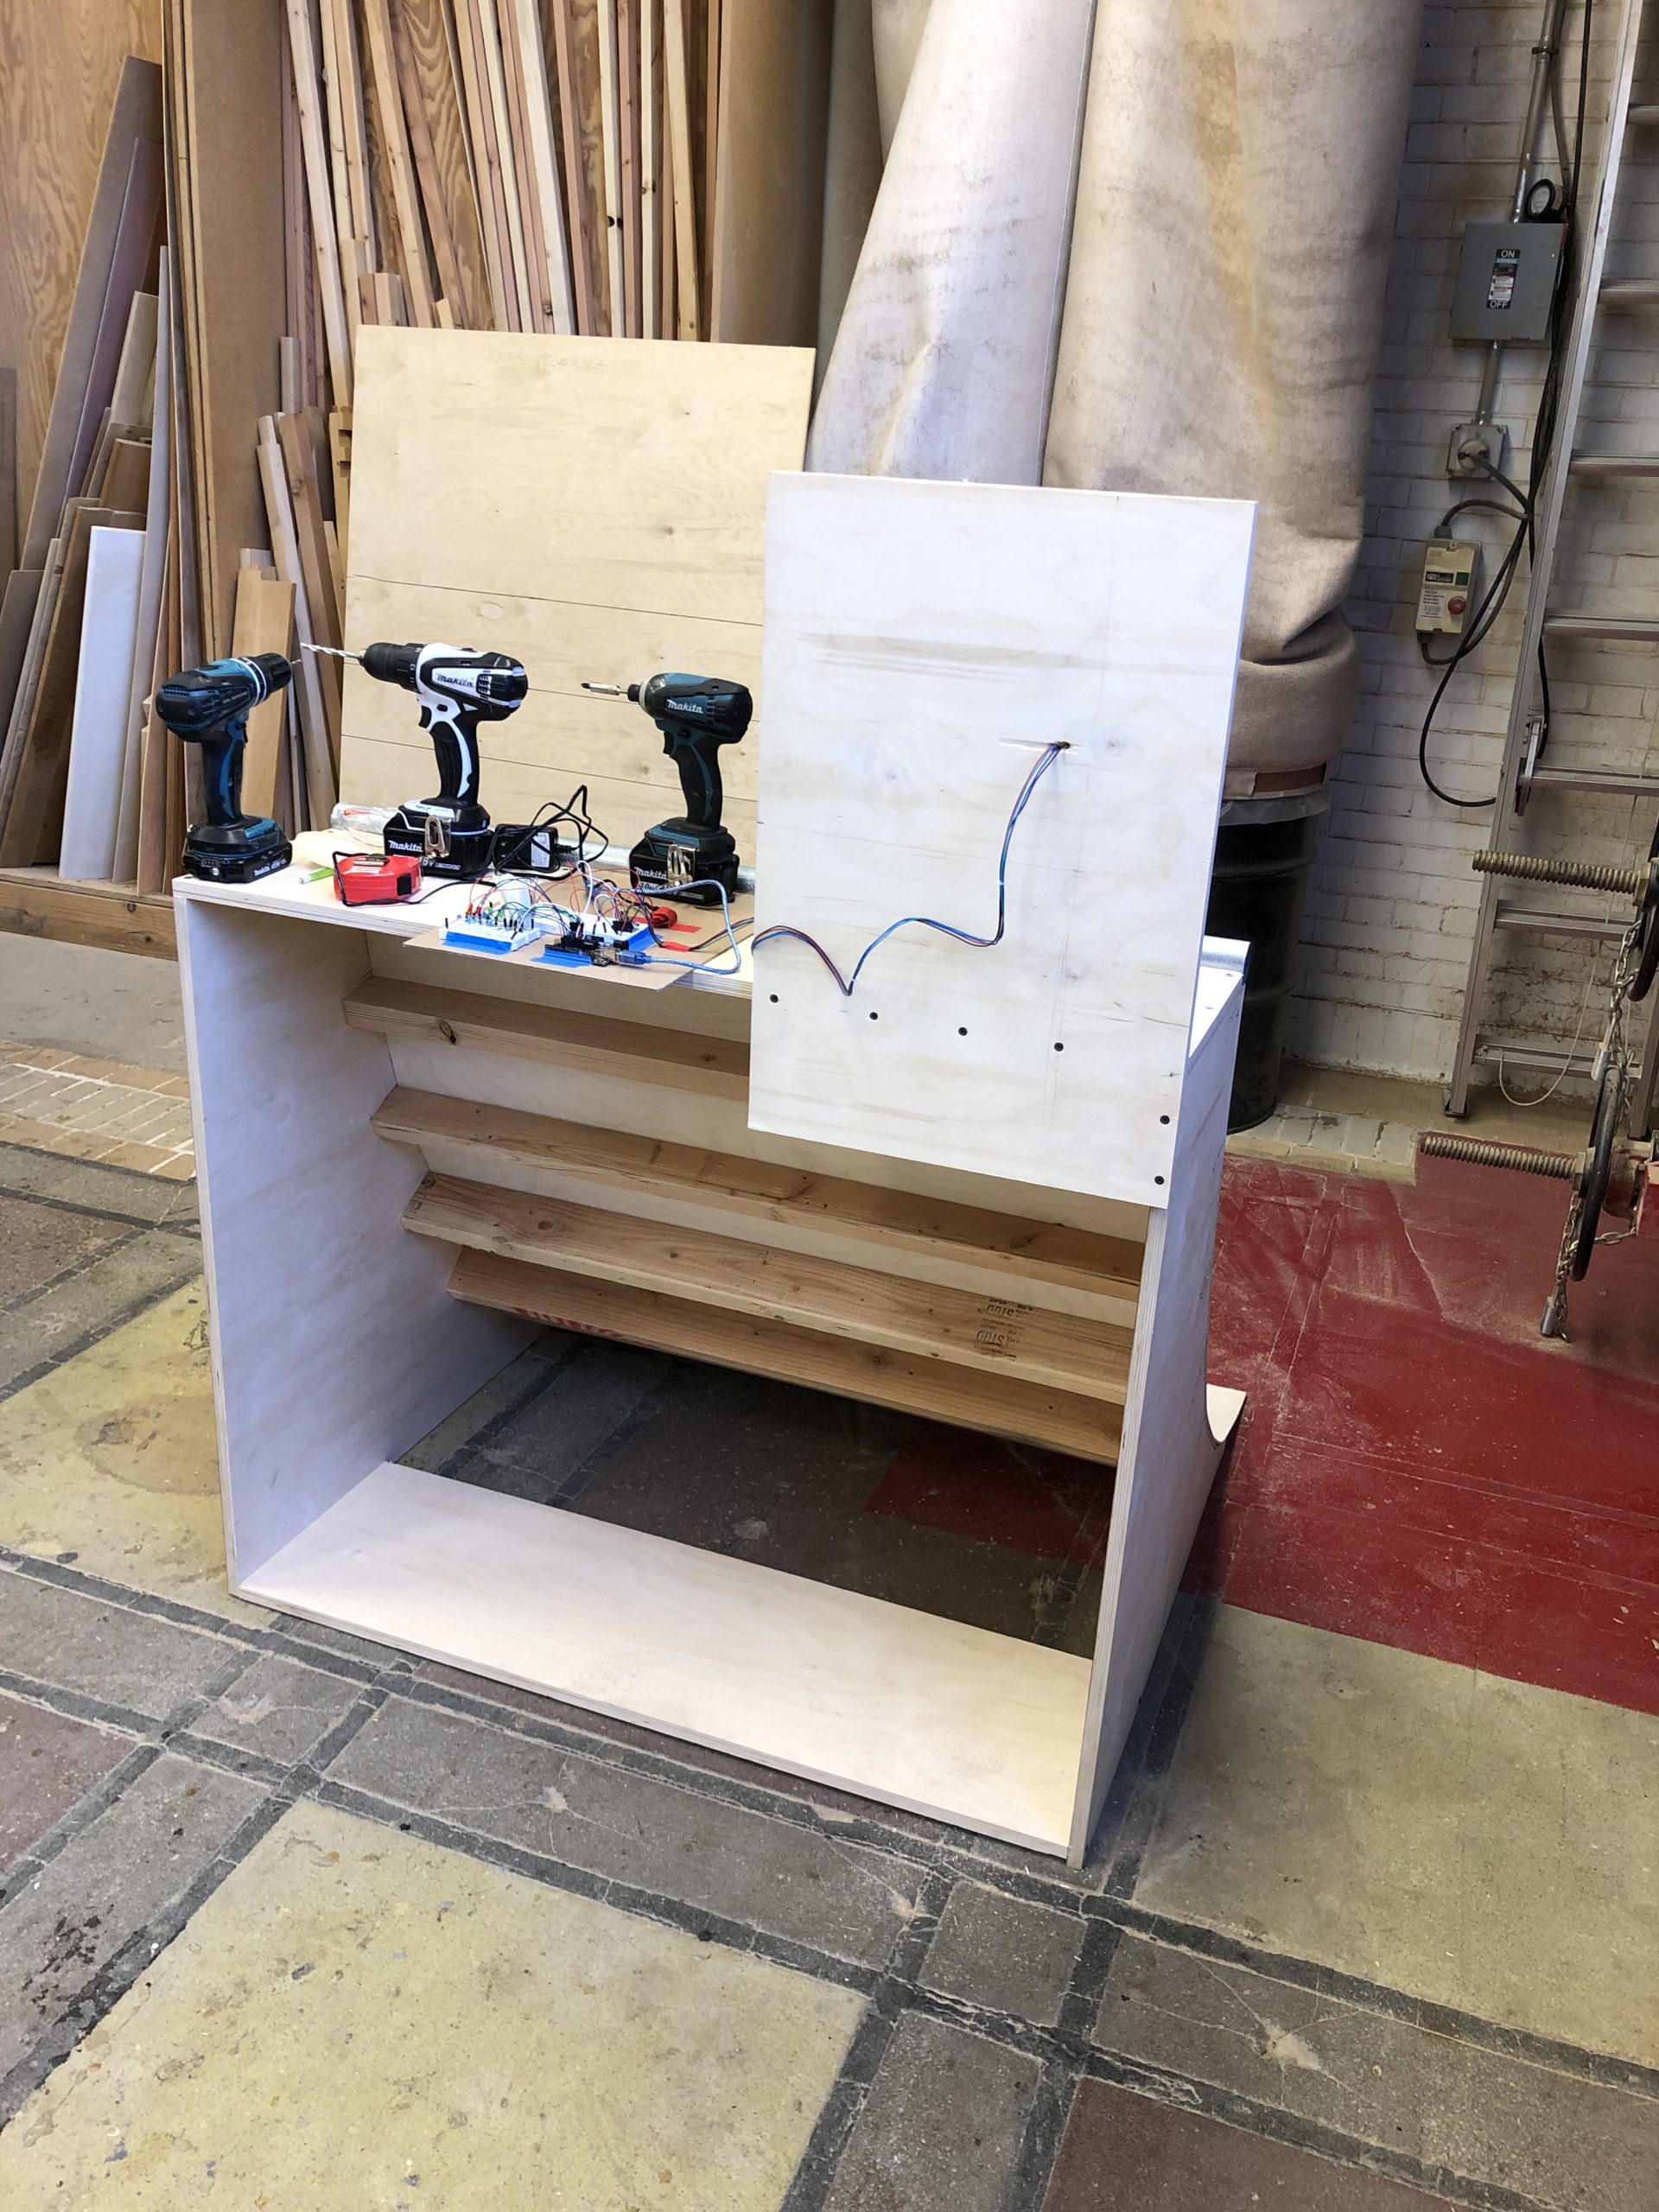
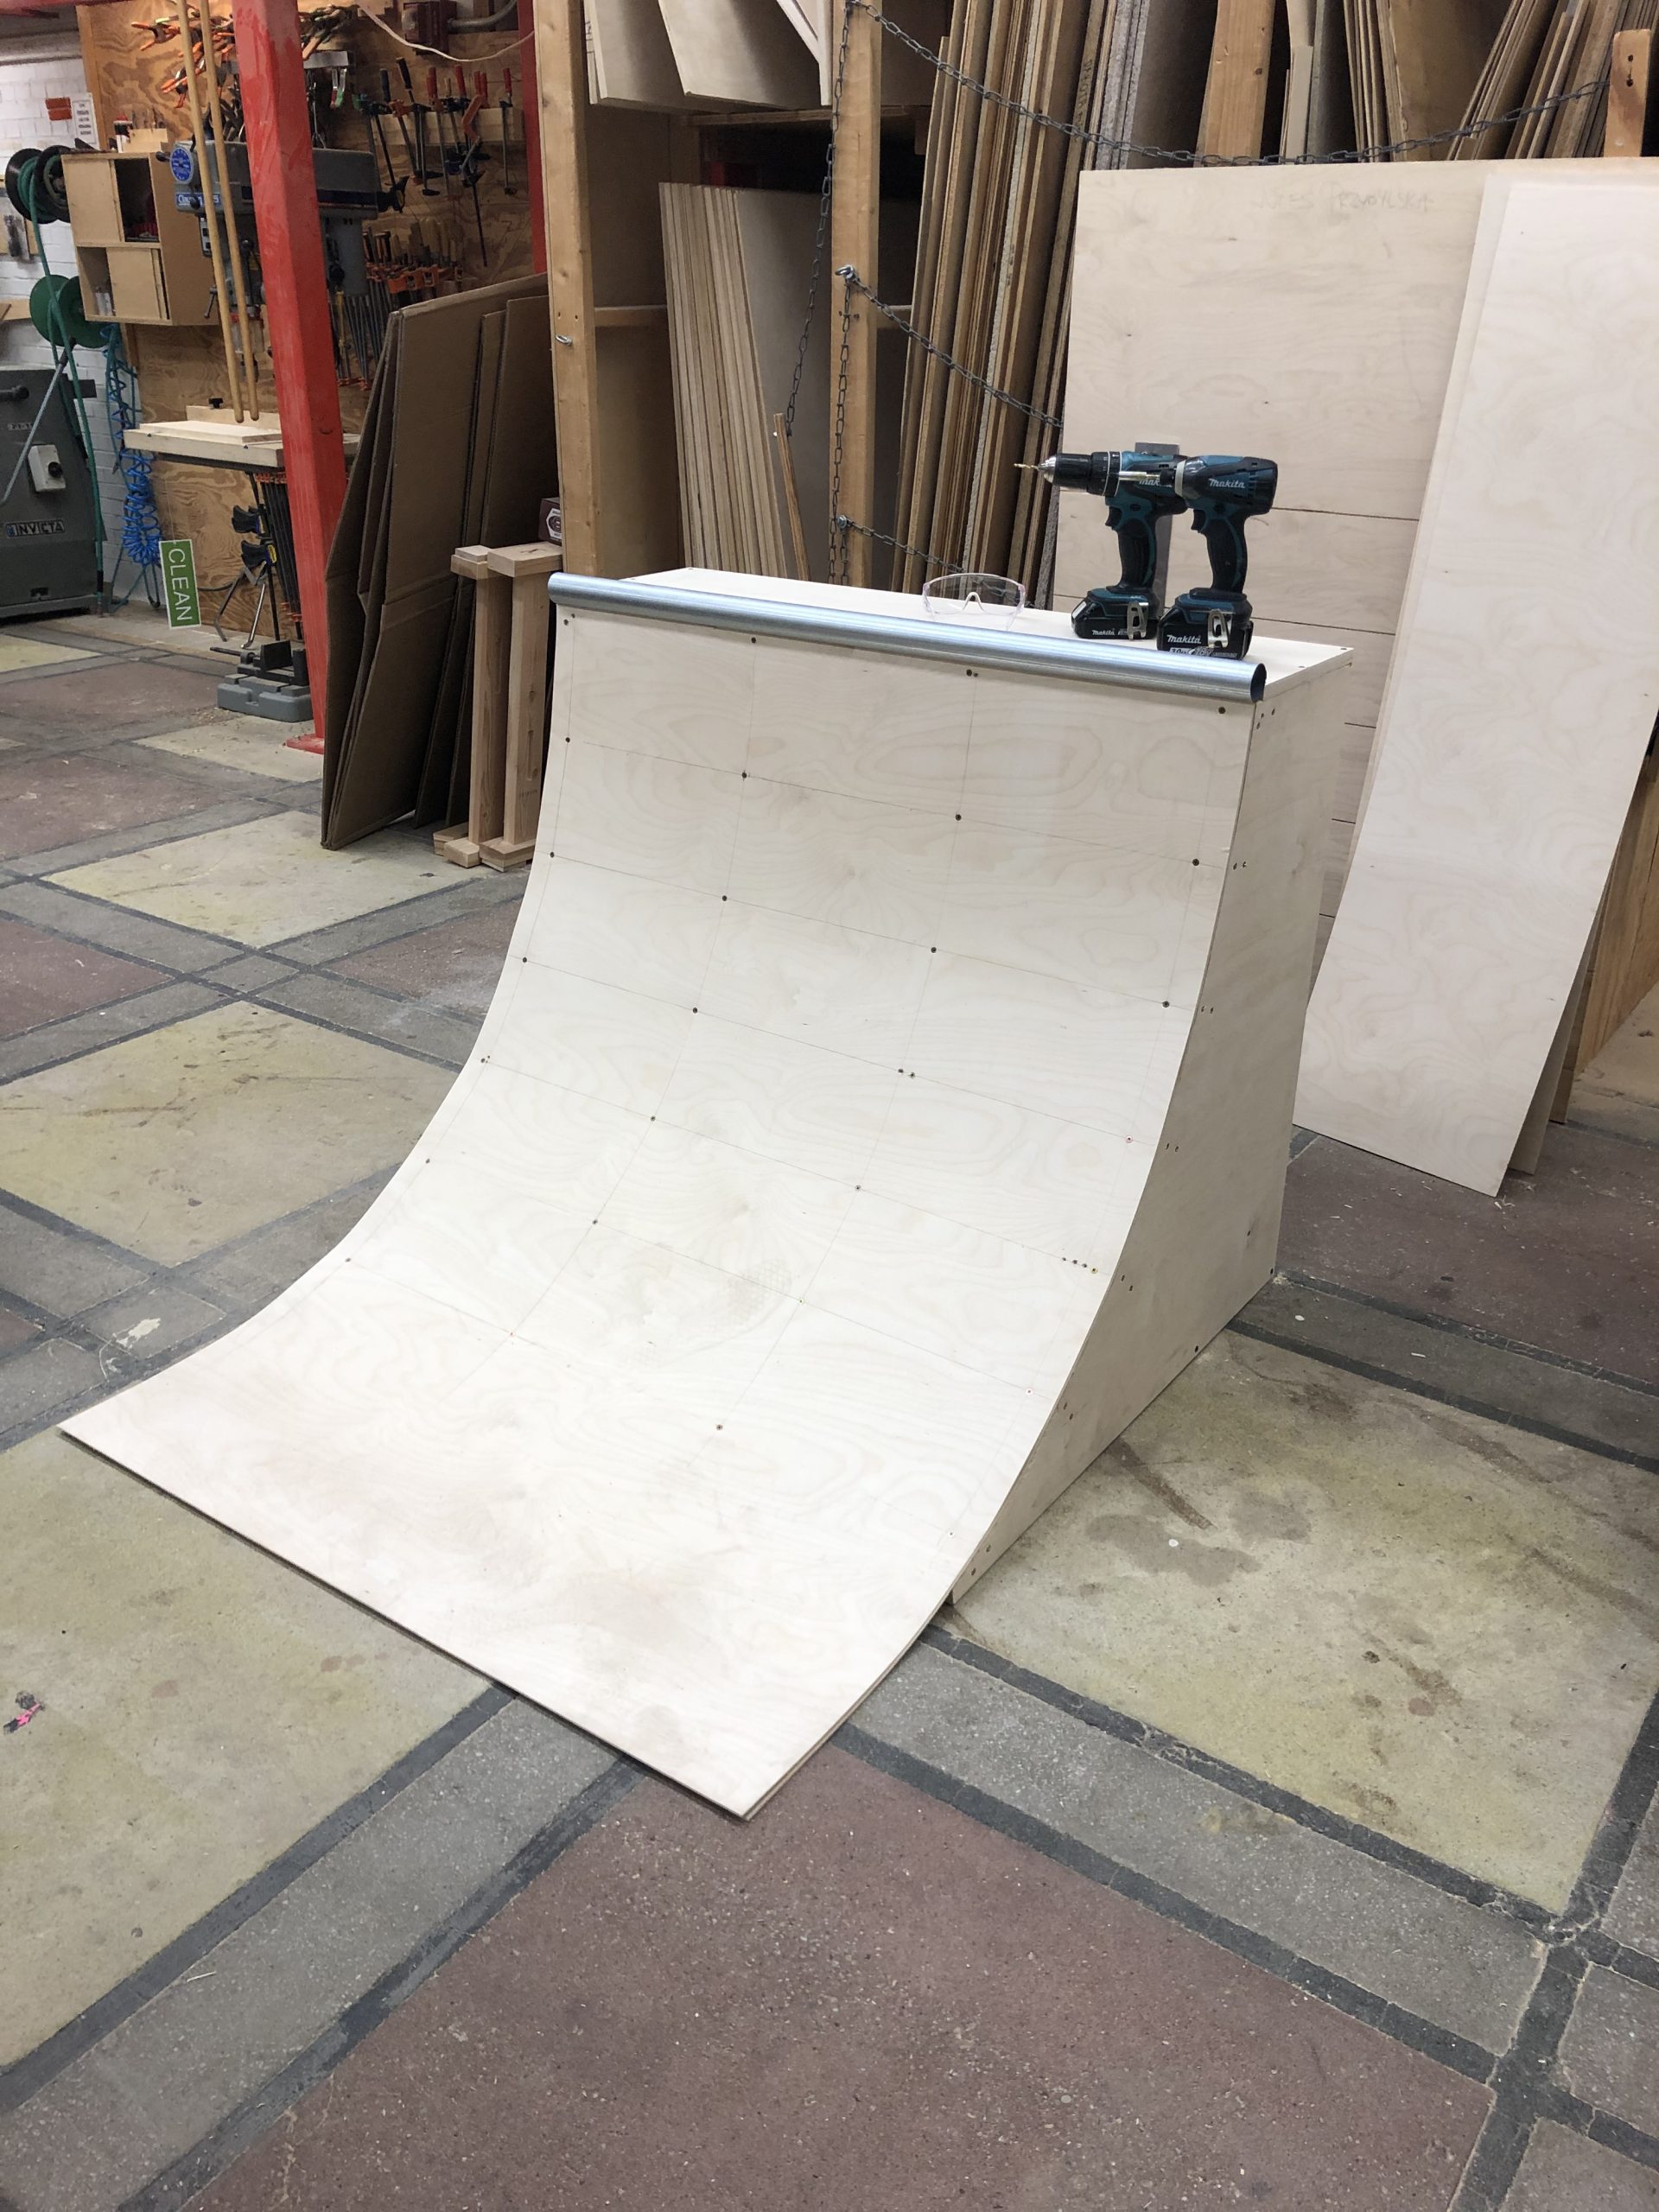
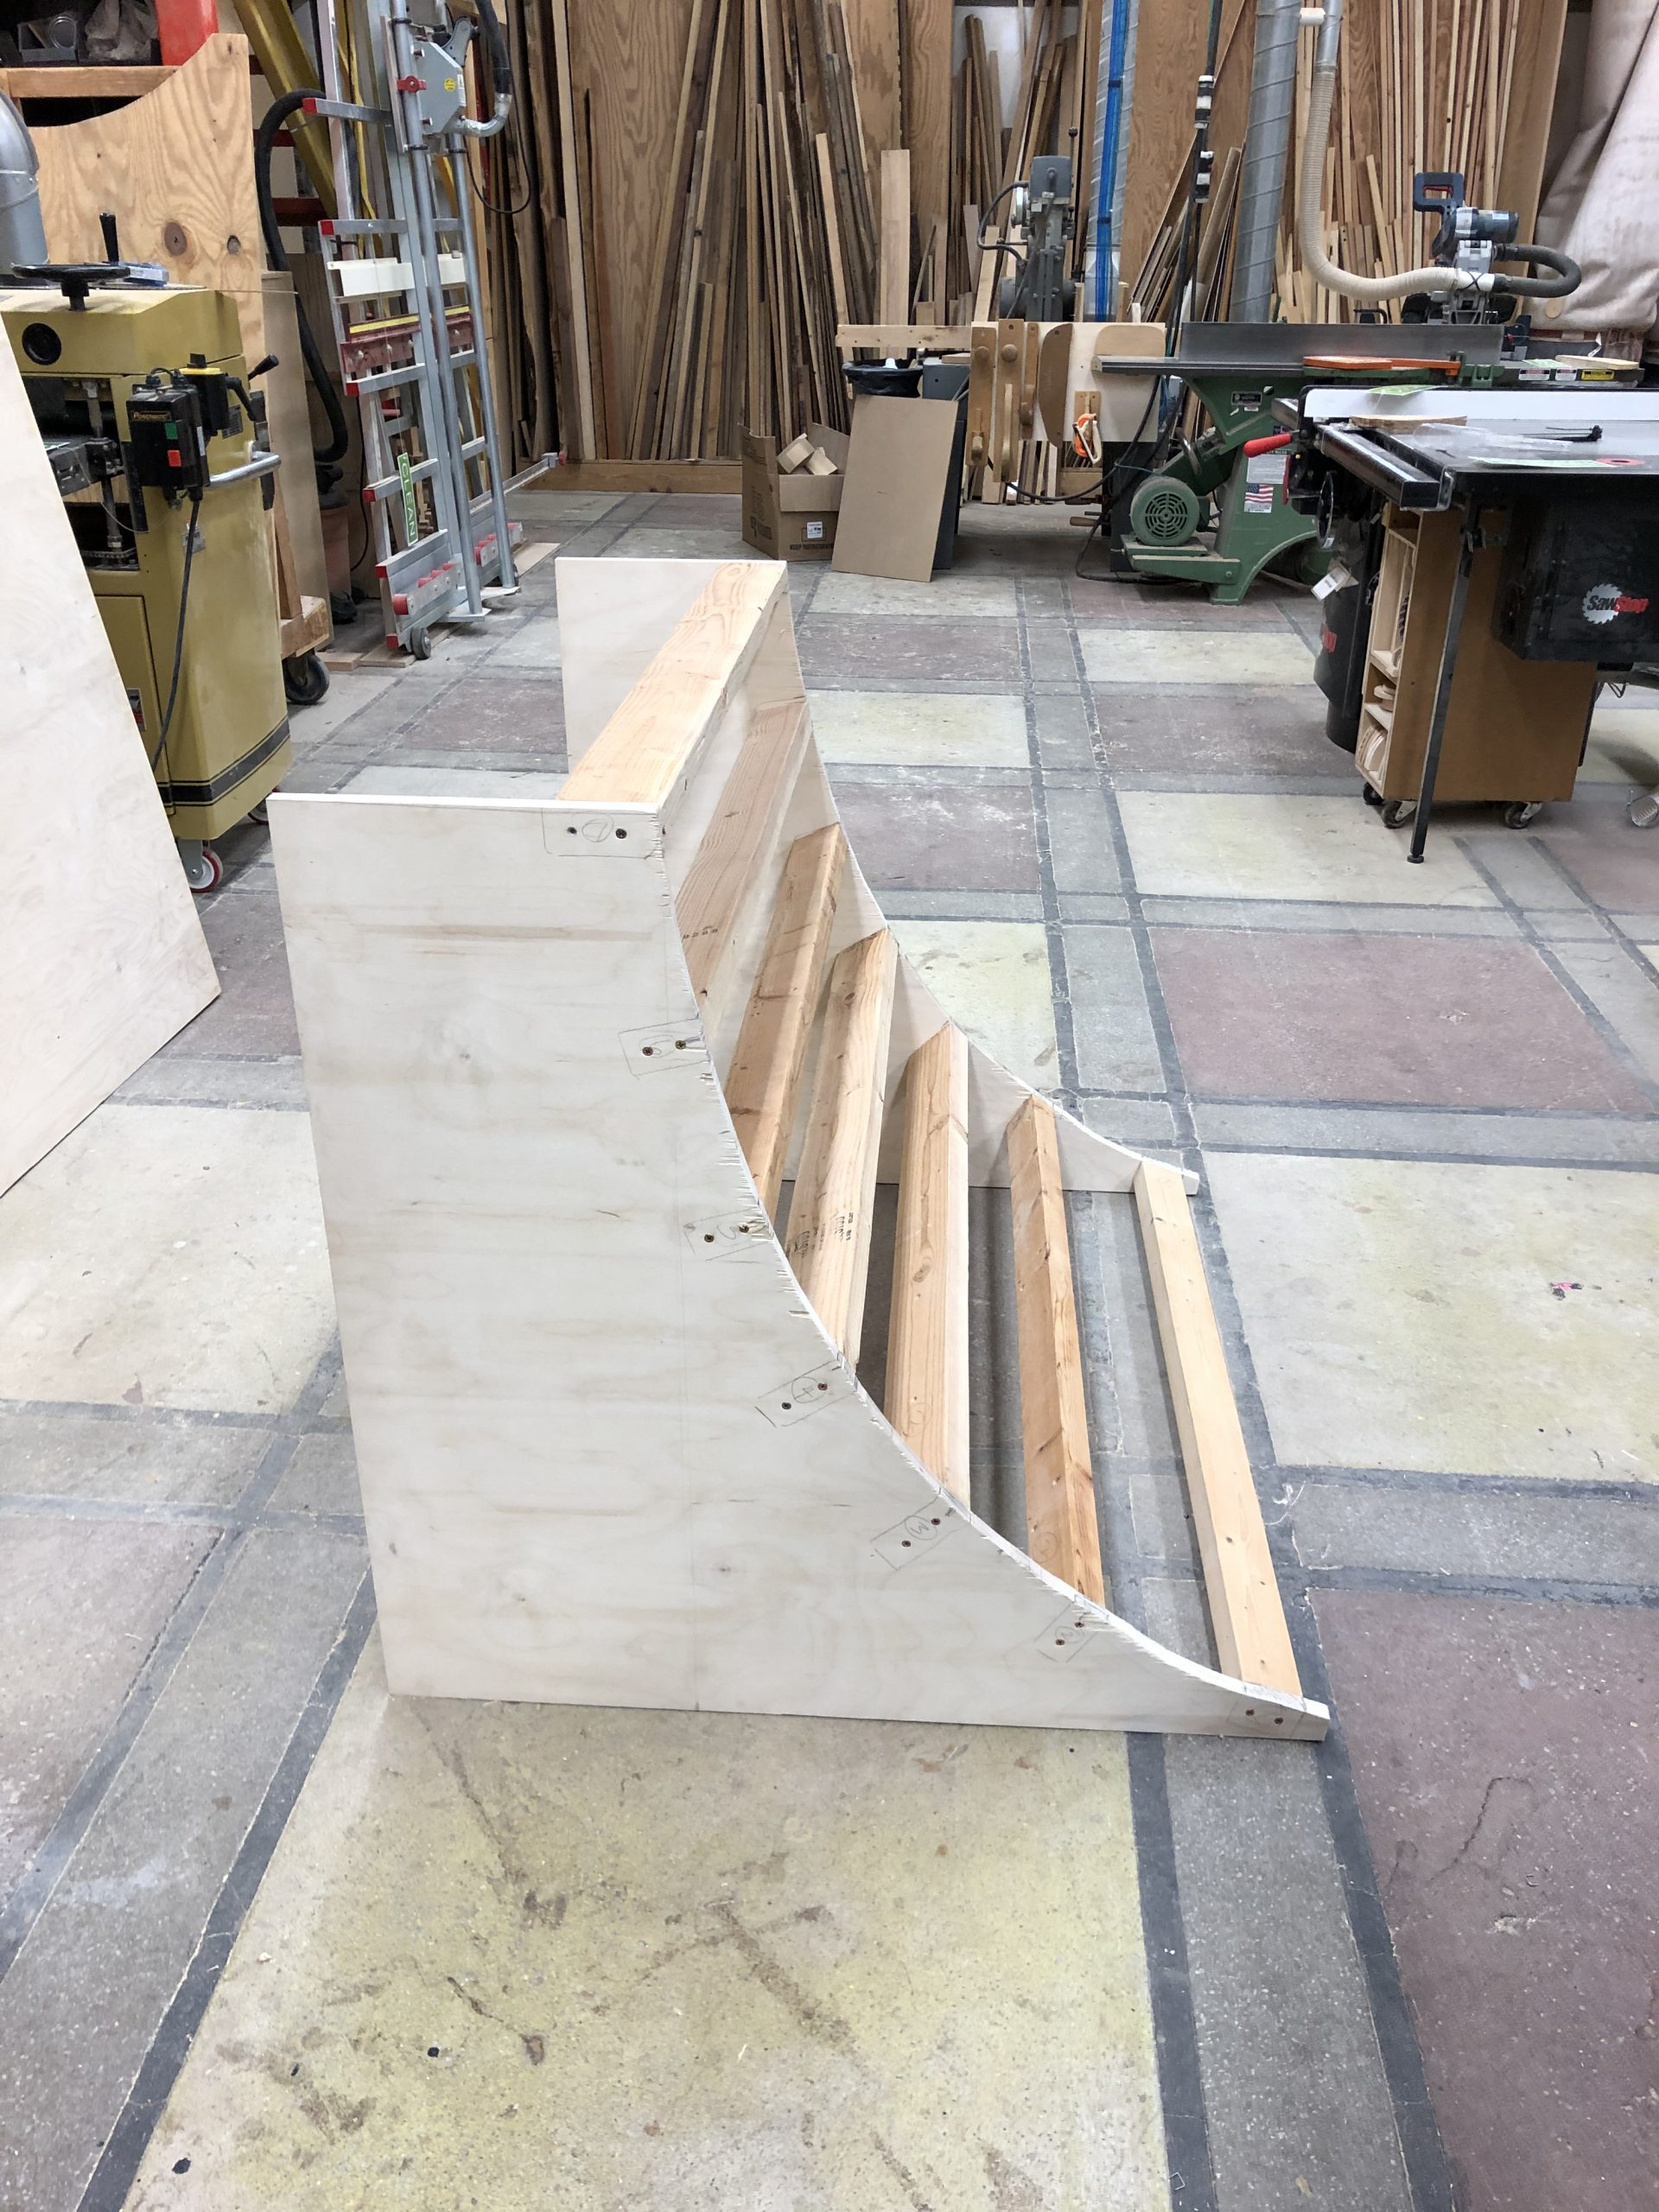
Challenges:
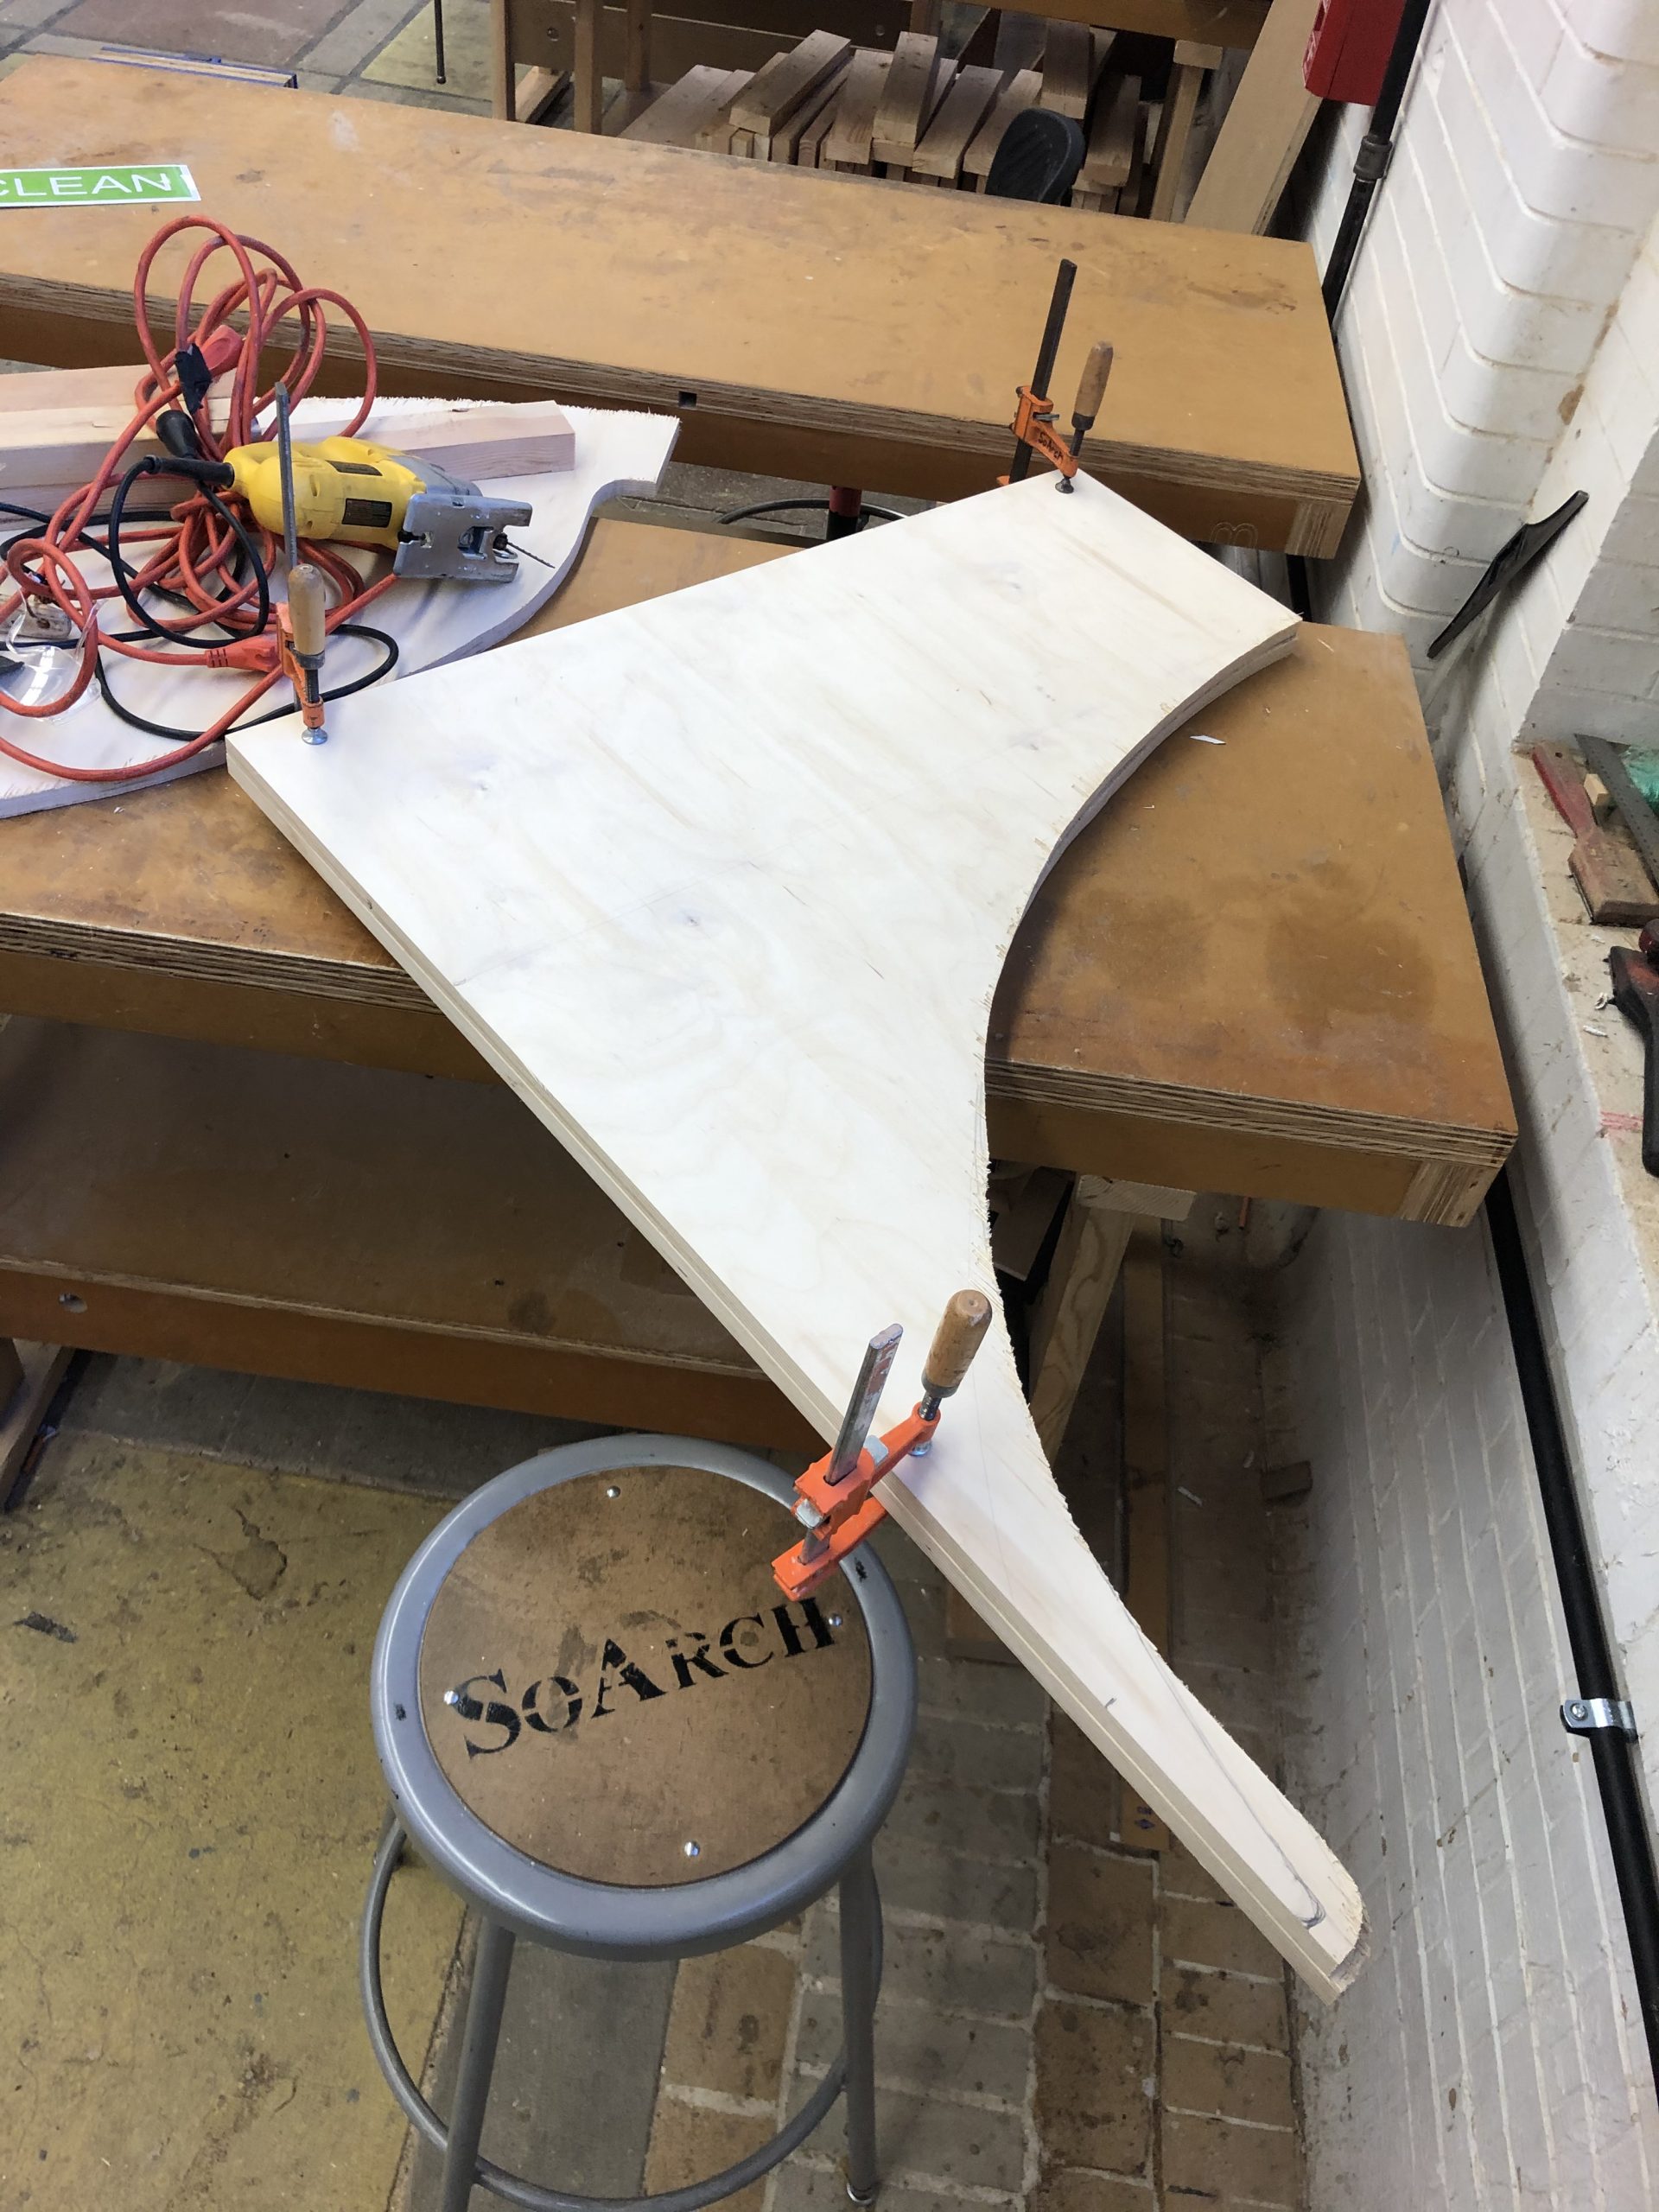
Most challenging part of all this was planning out the construction of the ramp as well as the combination of the electronics and the structure. The main worry I had was that the ramp would flex as someone was on it, causing the lasers to automatically move, no longer sending the beam straight to the sensors.
_______________________________________________________________________________________
10/28/2020 Check-In
I have created a laser cut file for the “score board” and piece that will be fit onto the motor. This will be cut out of 1/4″ birch plywood.
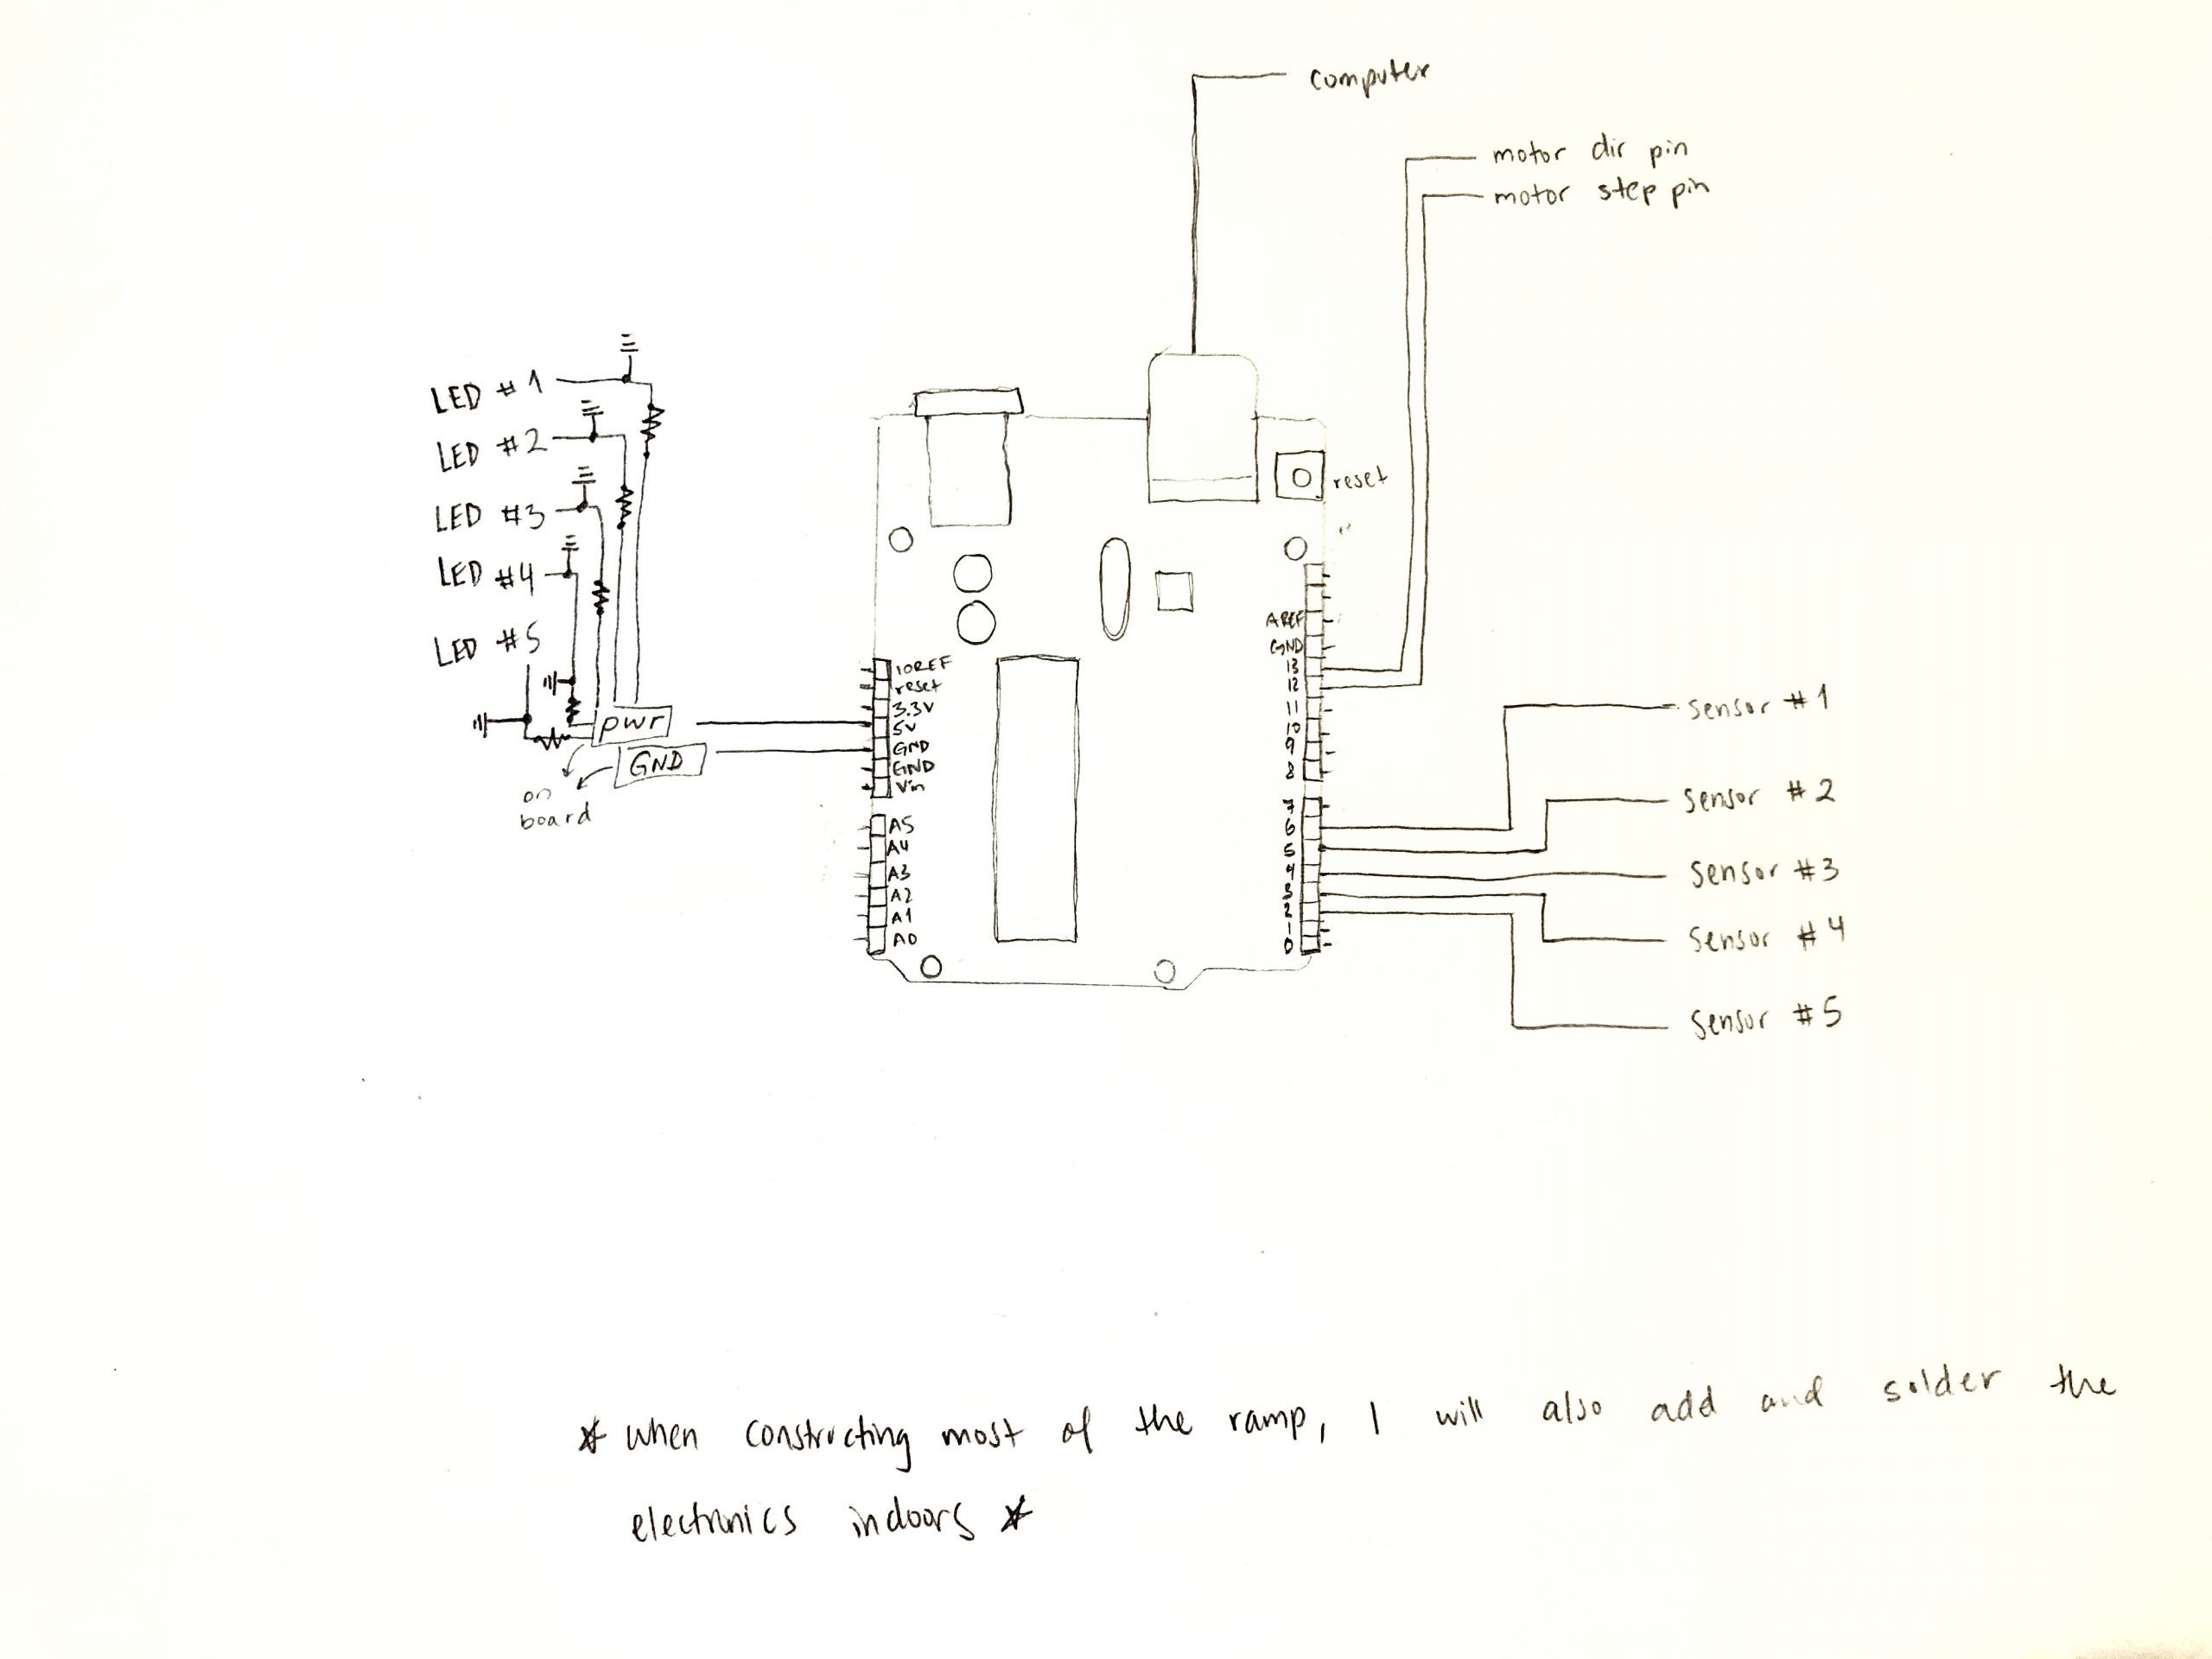
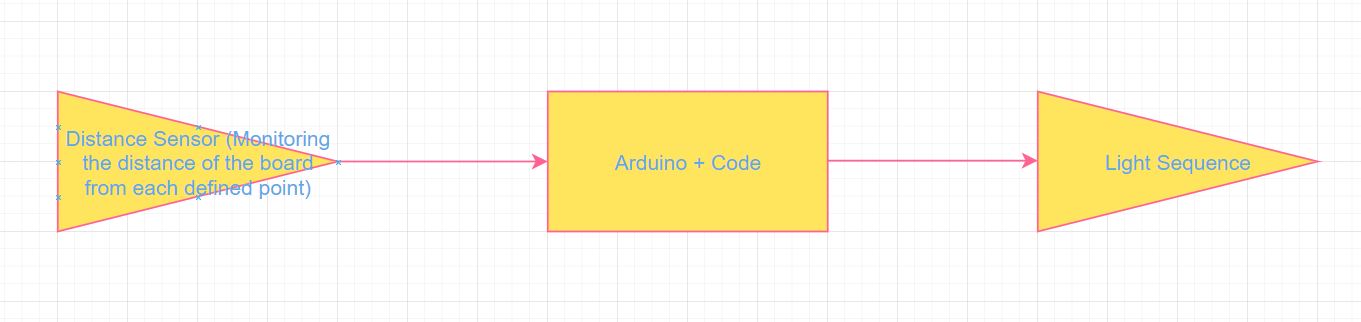
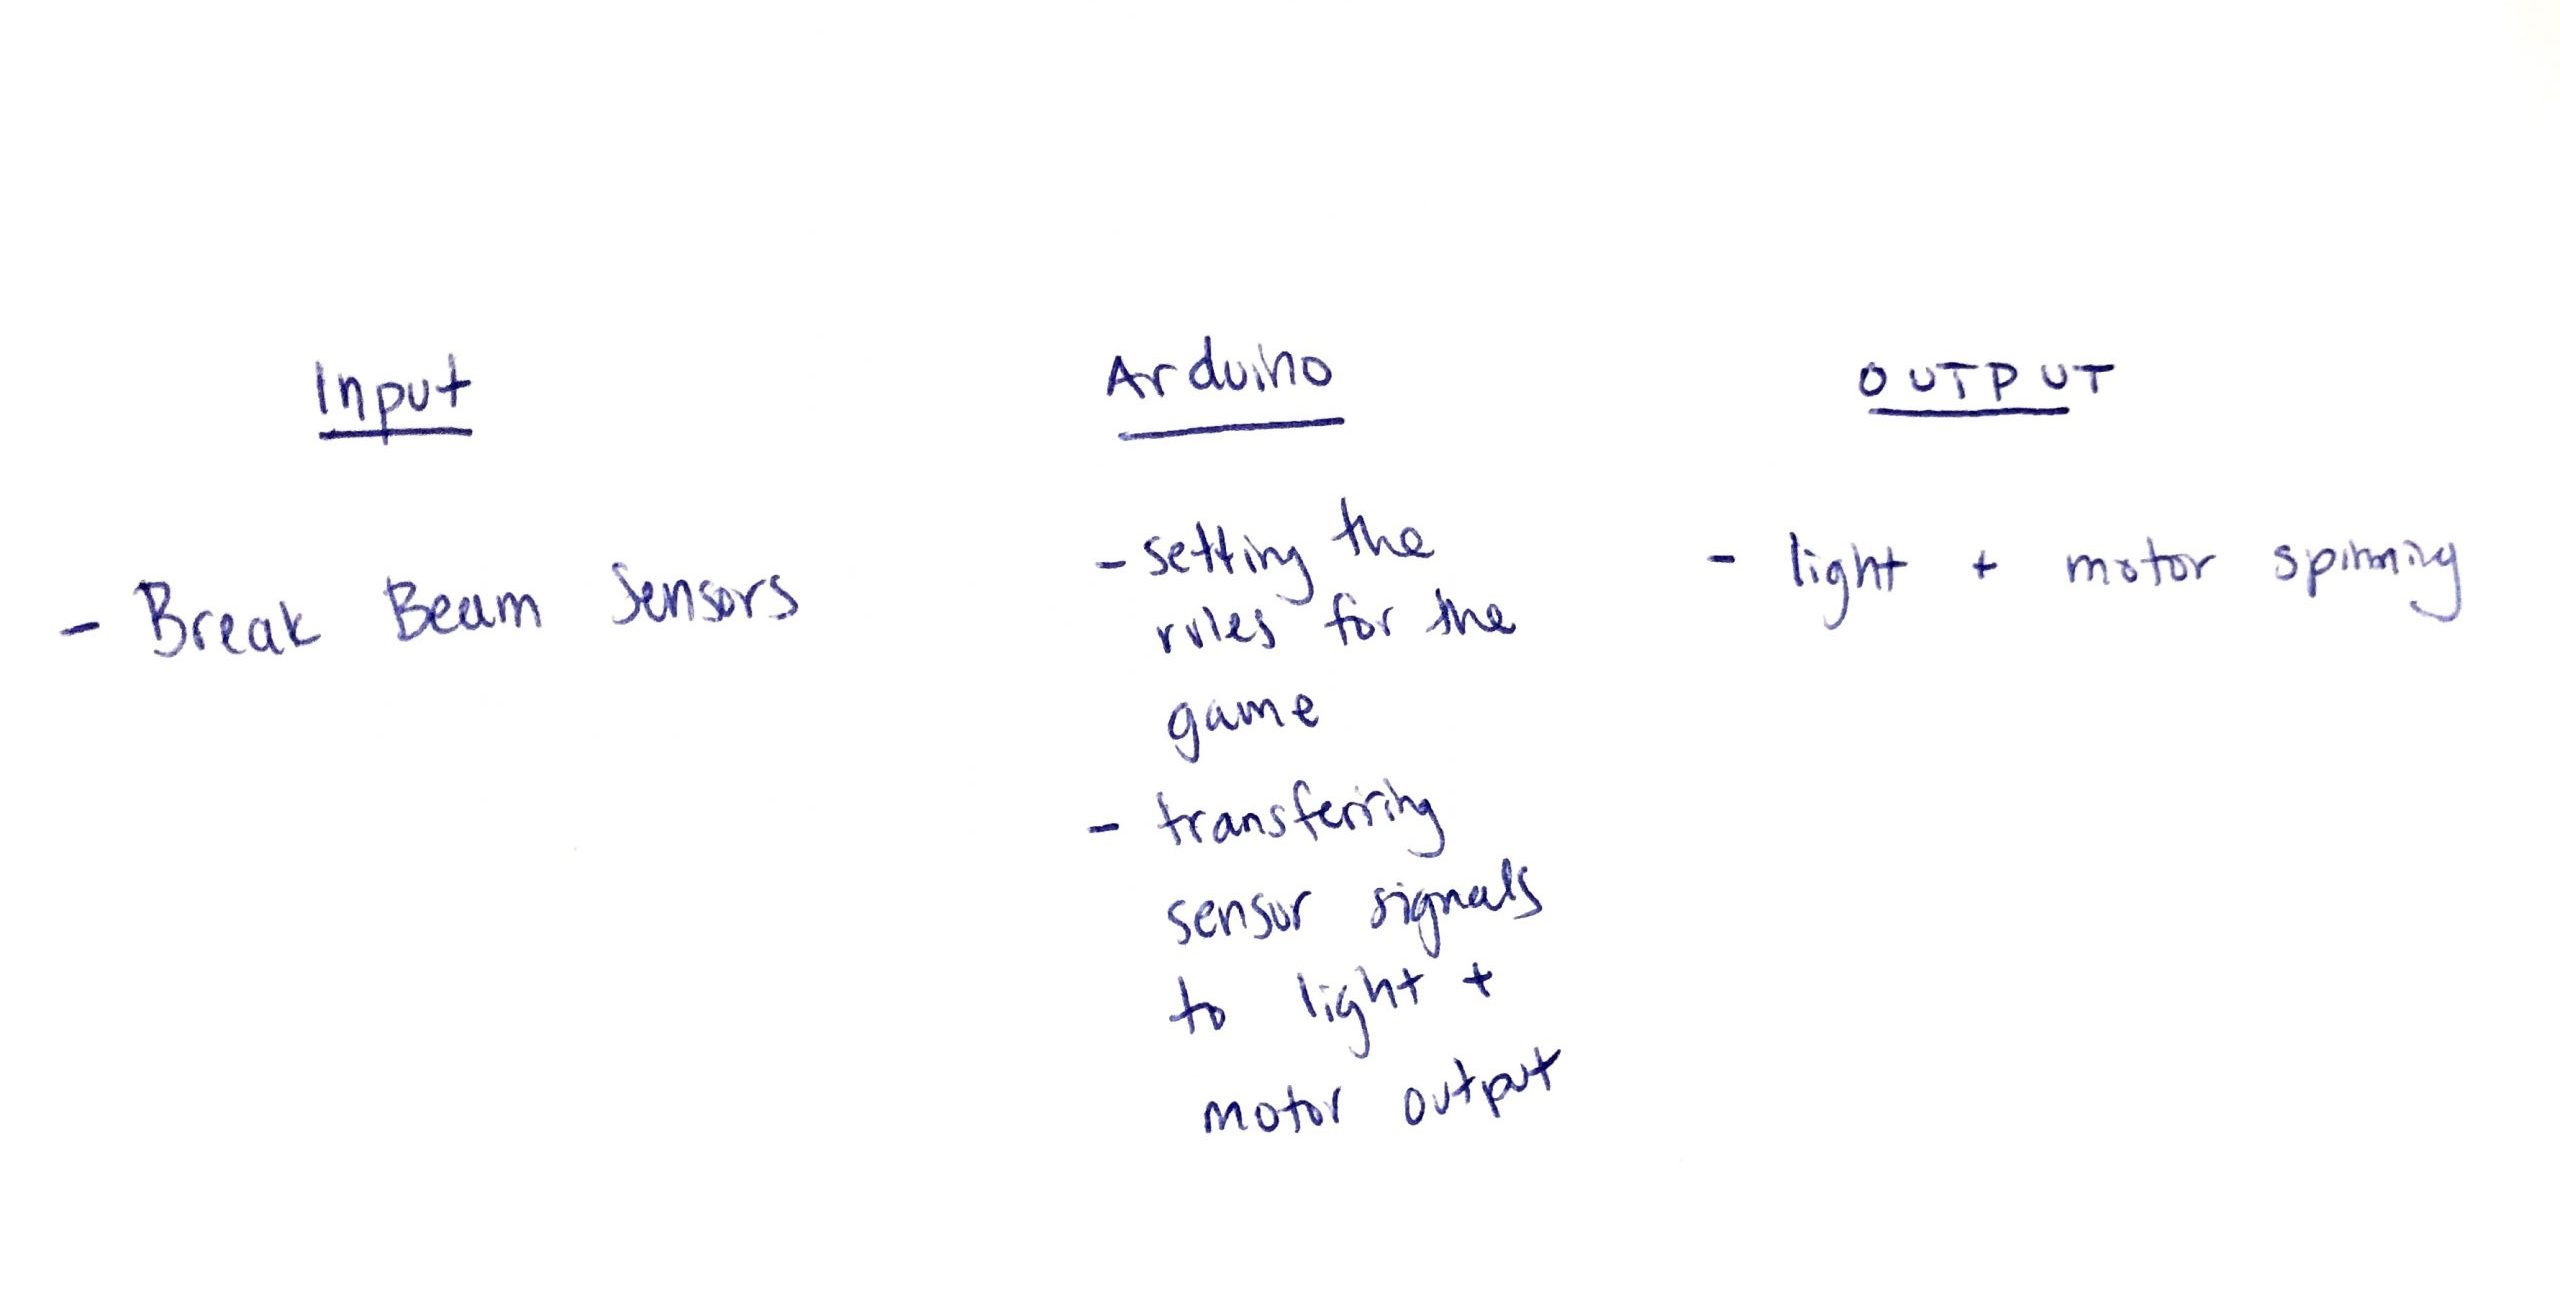
I have also created a circuit diagram, working out the details for the electronics portion of the project.
I did not quite get to complete the code but I plan to finish it by next class so that I can move onto the construction of the ramp and installation of the electronic hardware.
_______________________________________________________________________________________
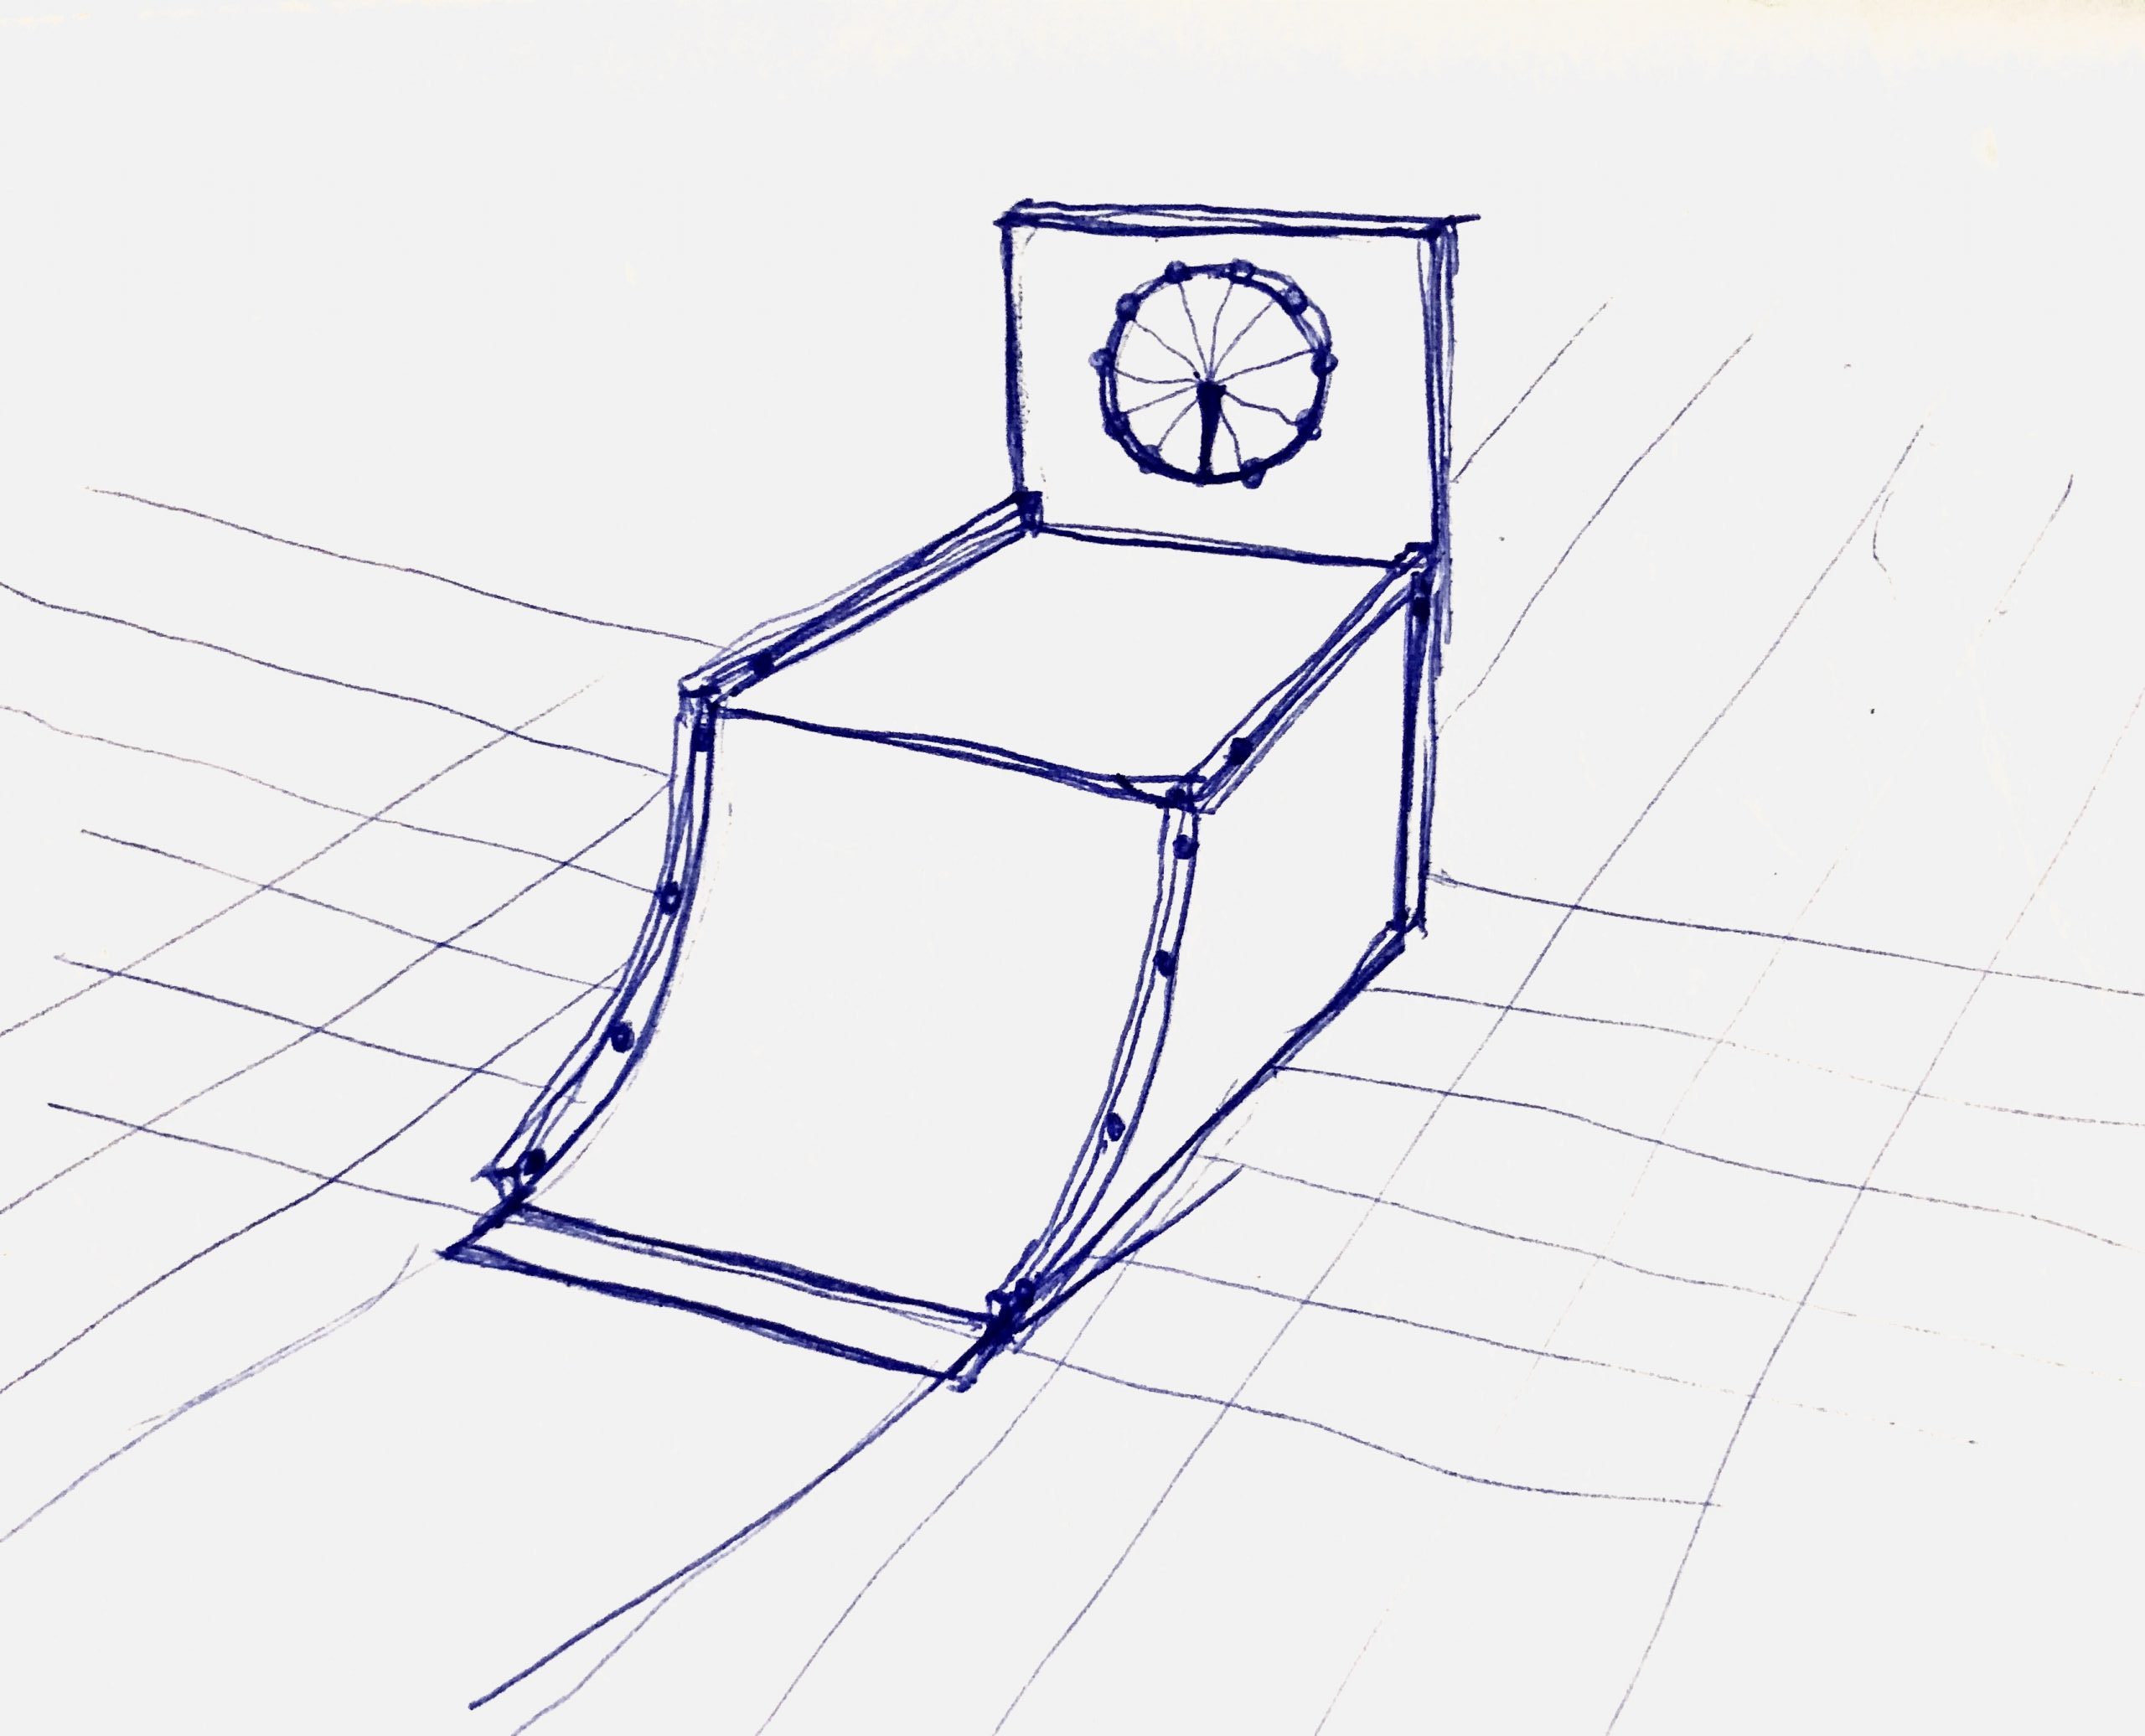
Proof of Concept + Maquette + Digital Model of Ramp
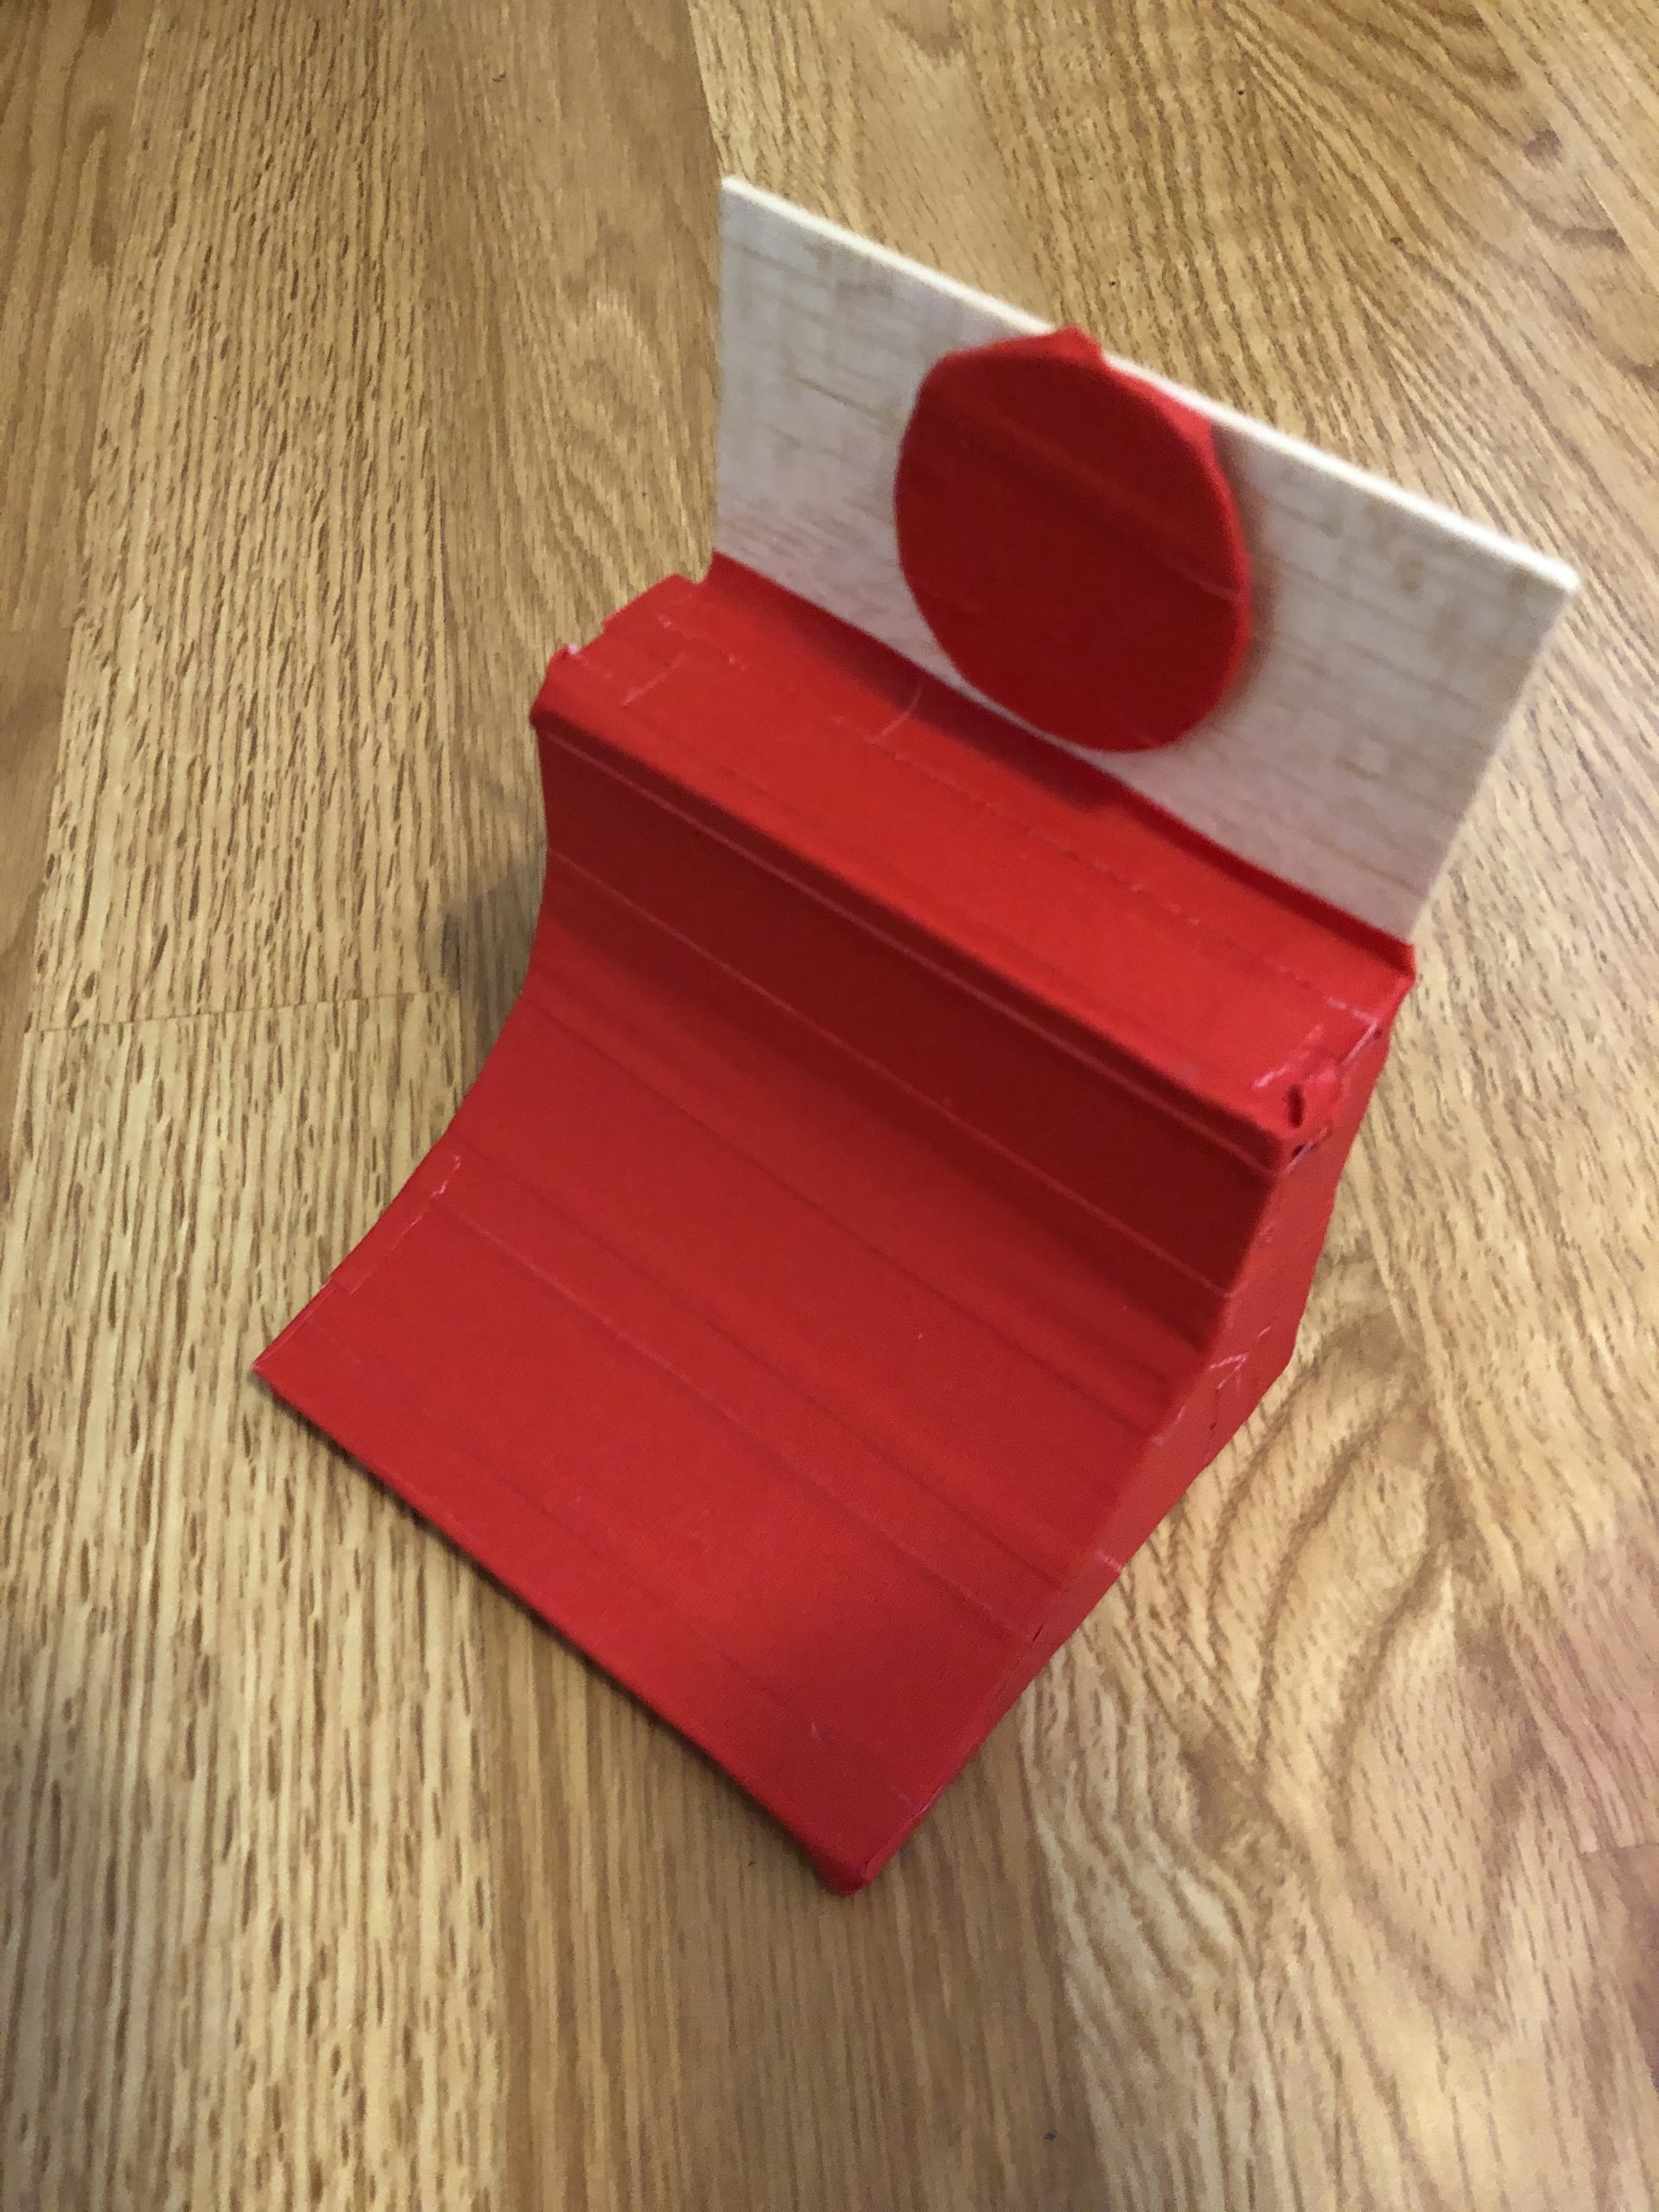
Maquette, top view.
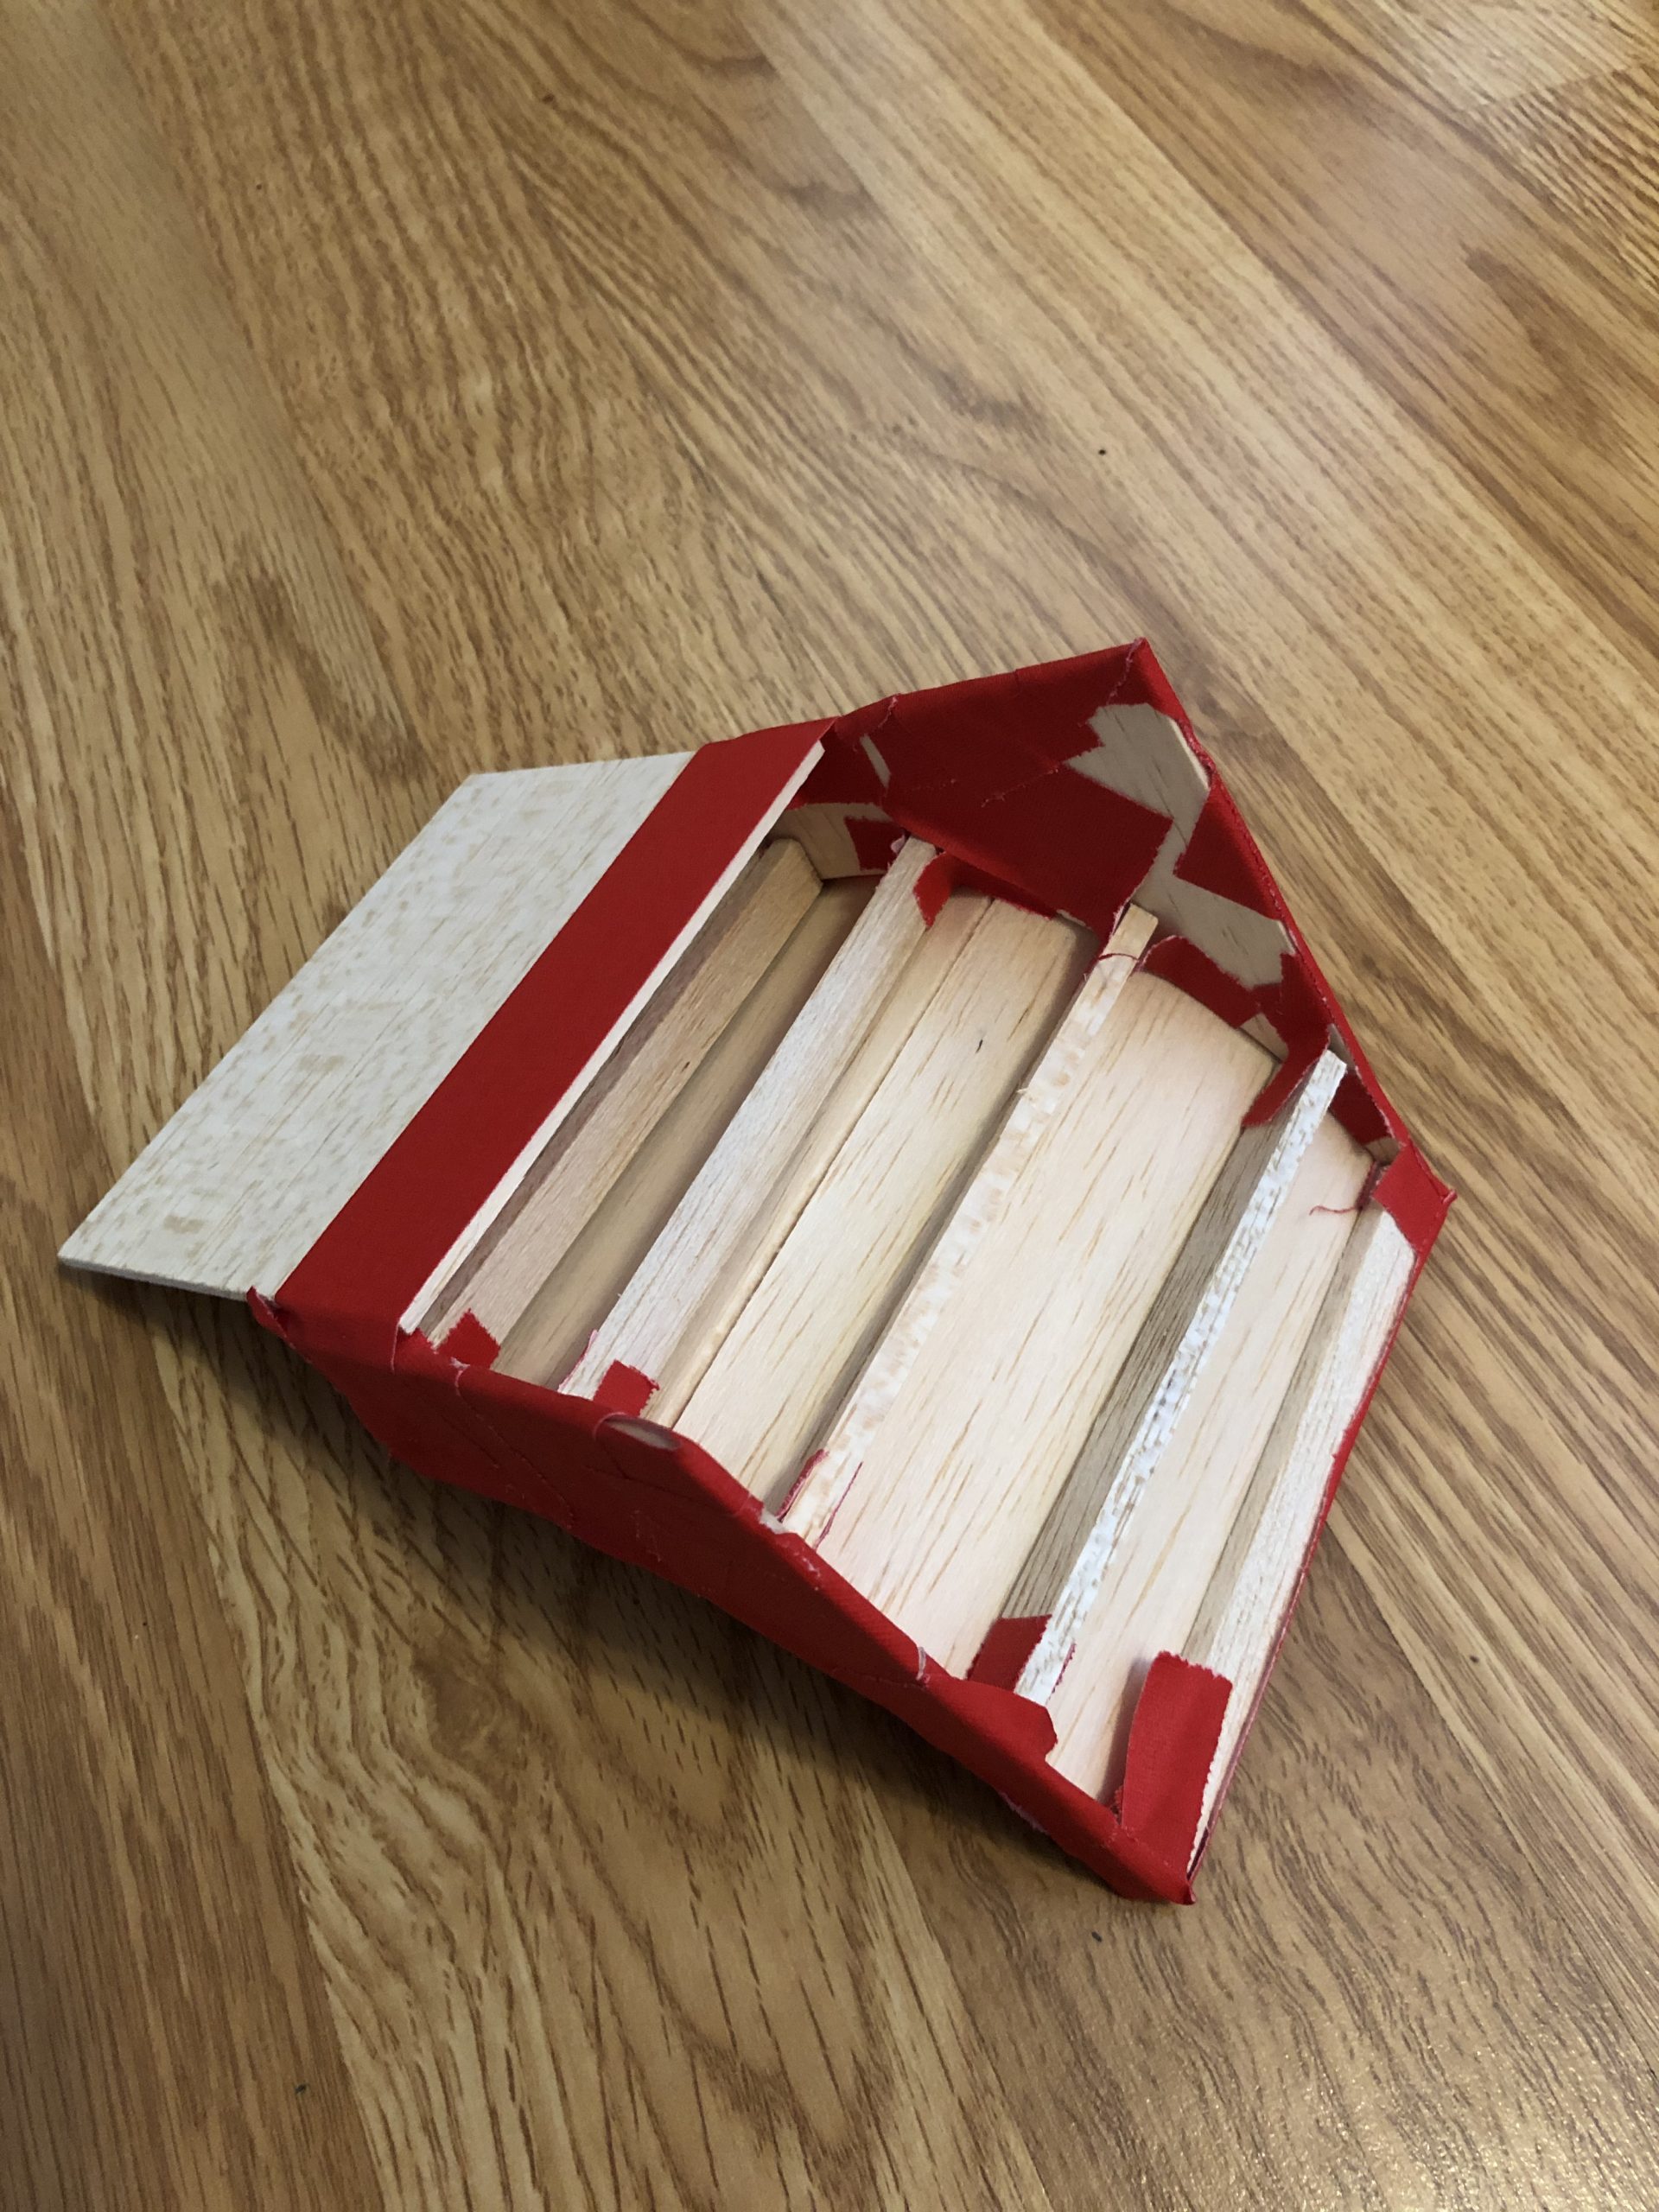
Maquette, bottom view.
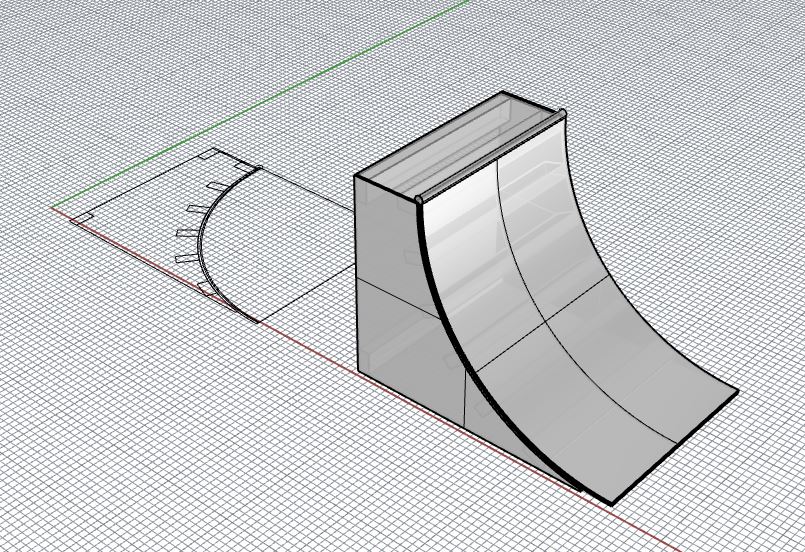
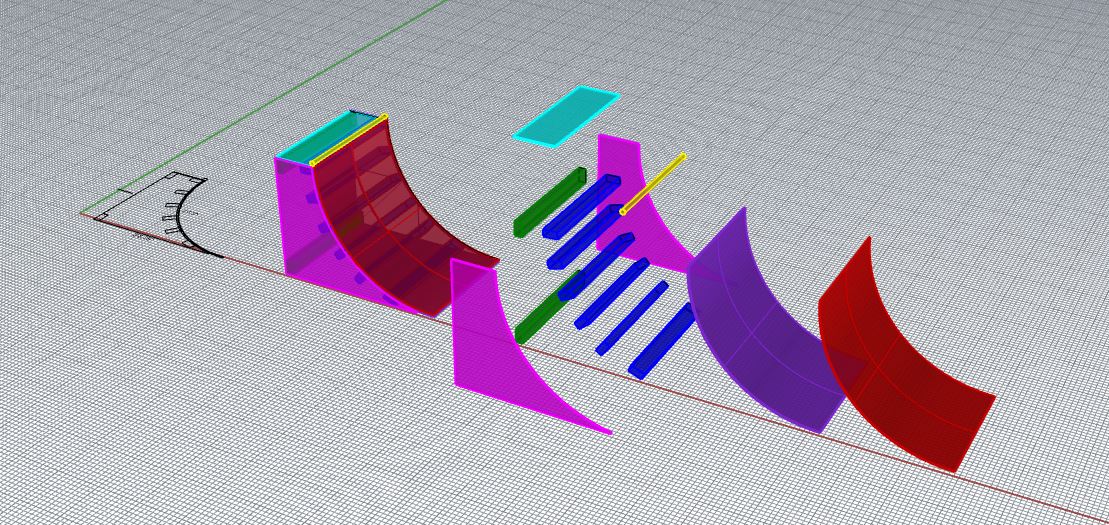
2D Section, Ramp Model, and exploded ramp model to understand how the ramp will be constructed.
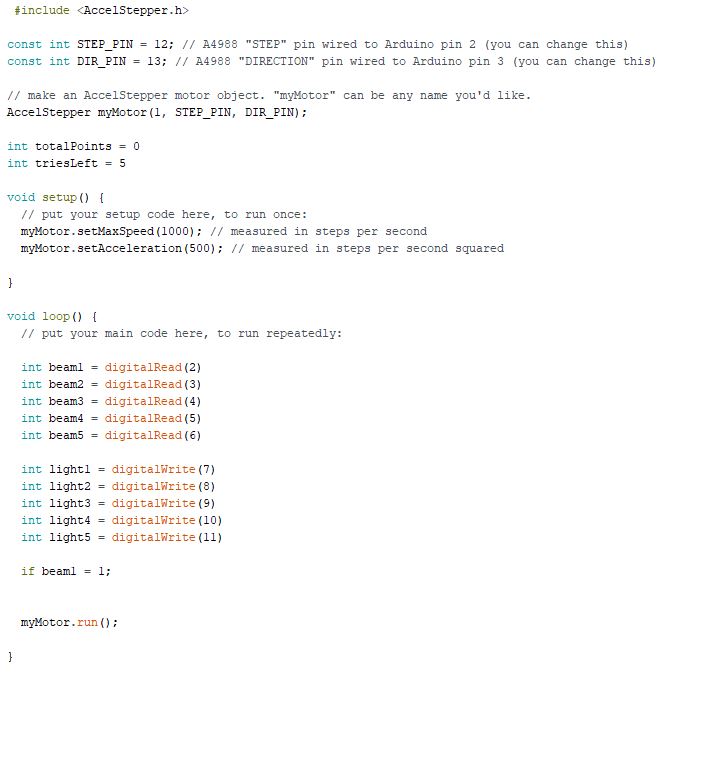
This was a quick start on the Arduino code, not yet completed.
_______________________________________________________________________________________
Ideation/Group Check-In:
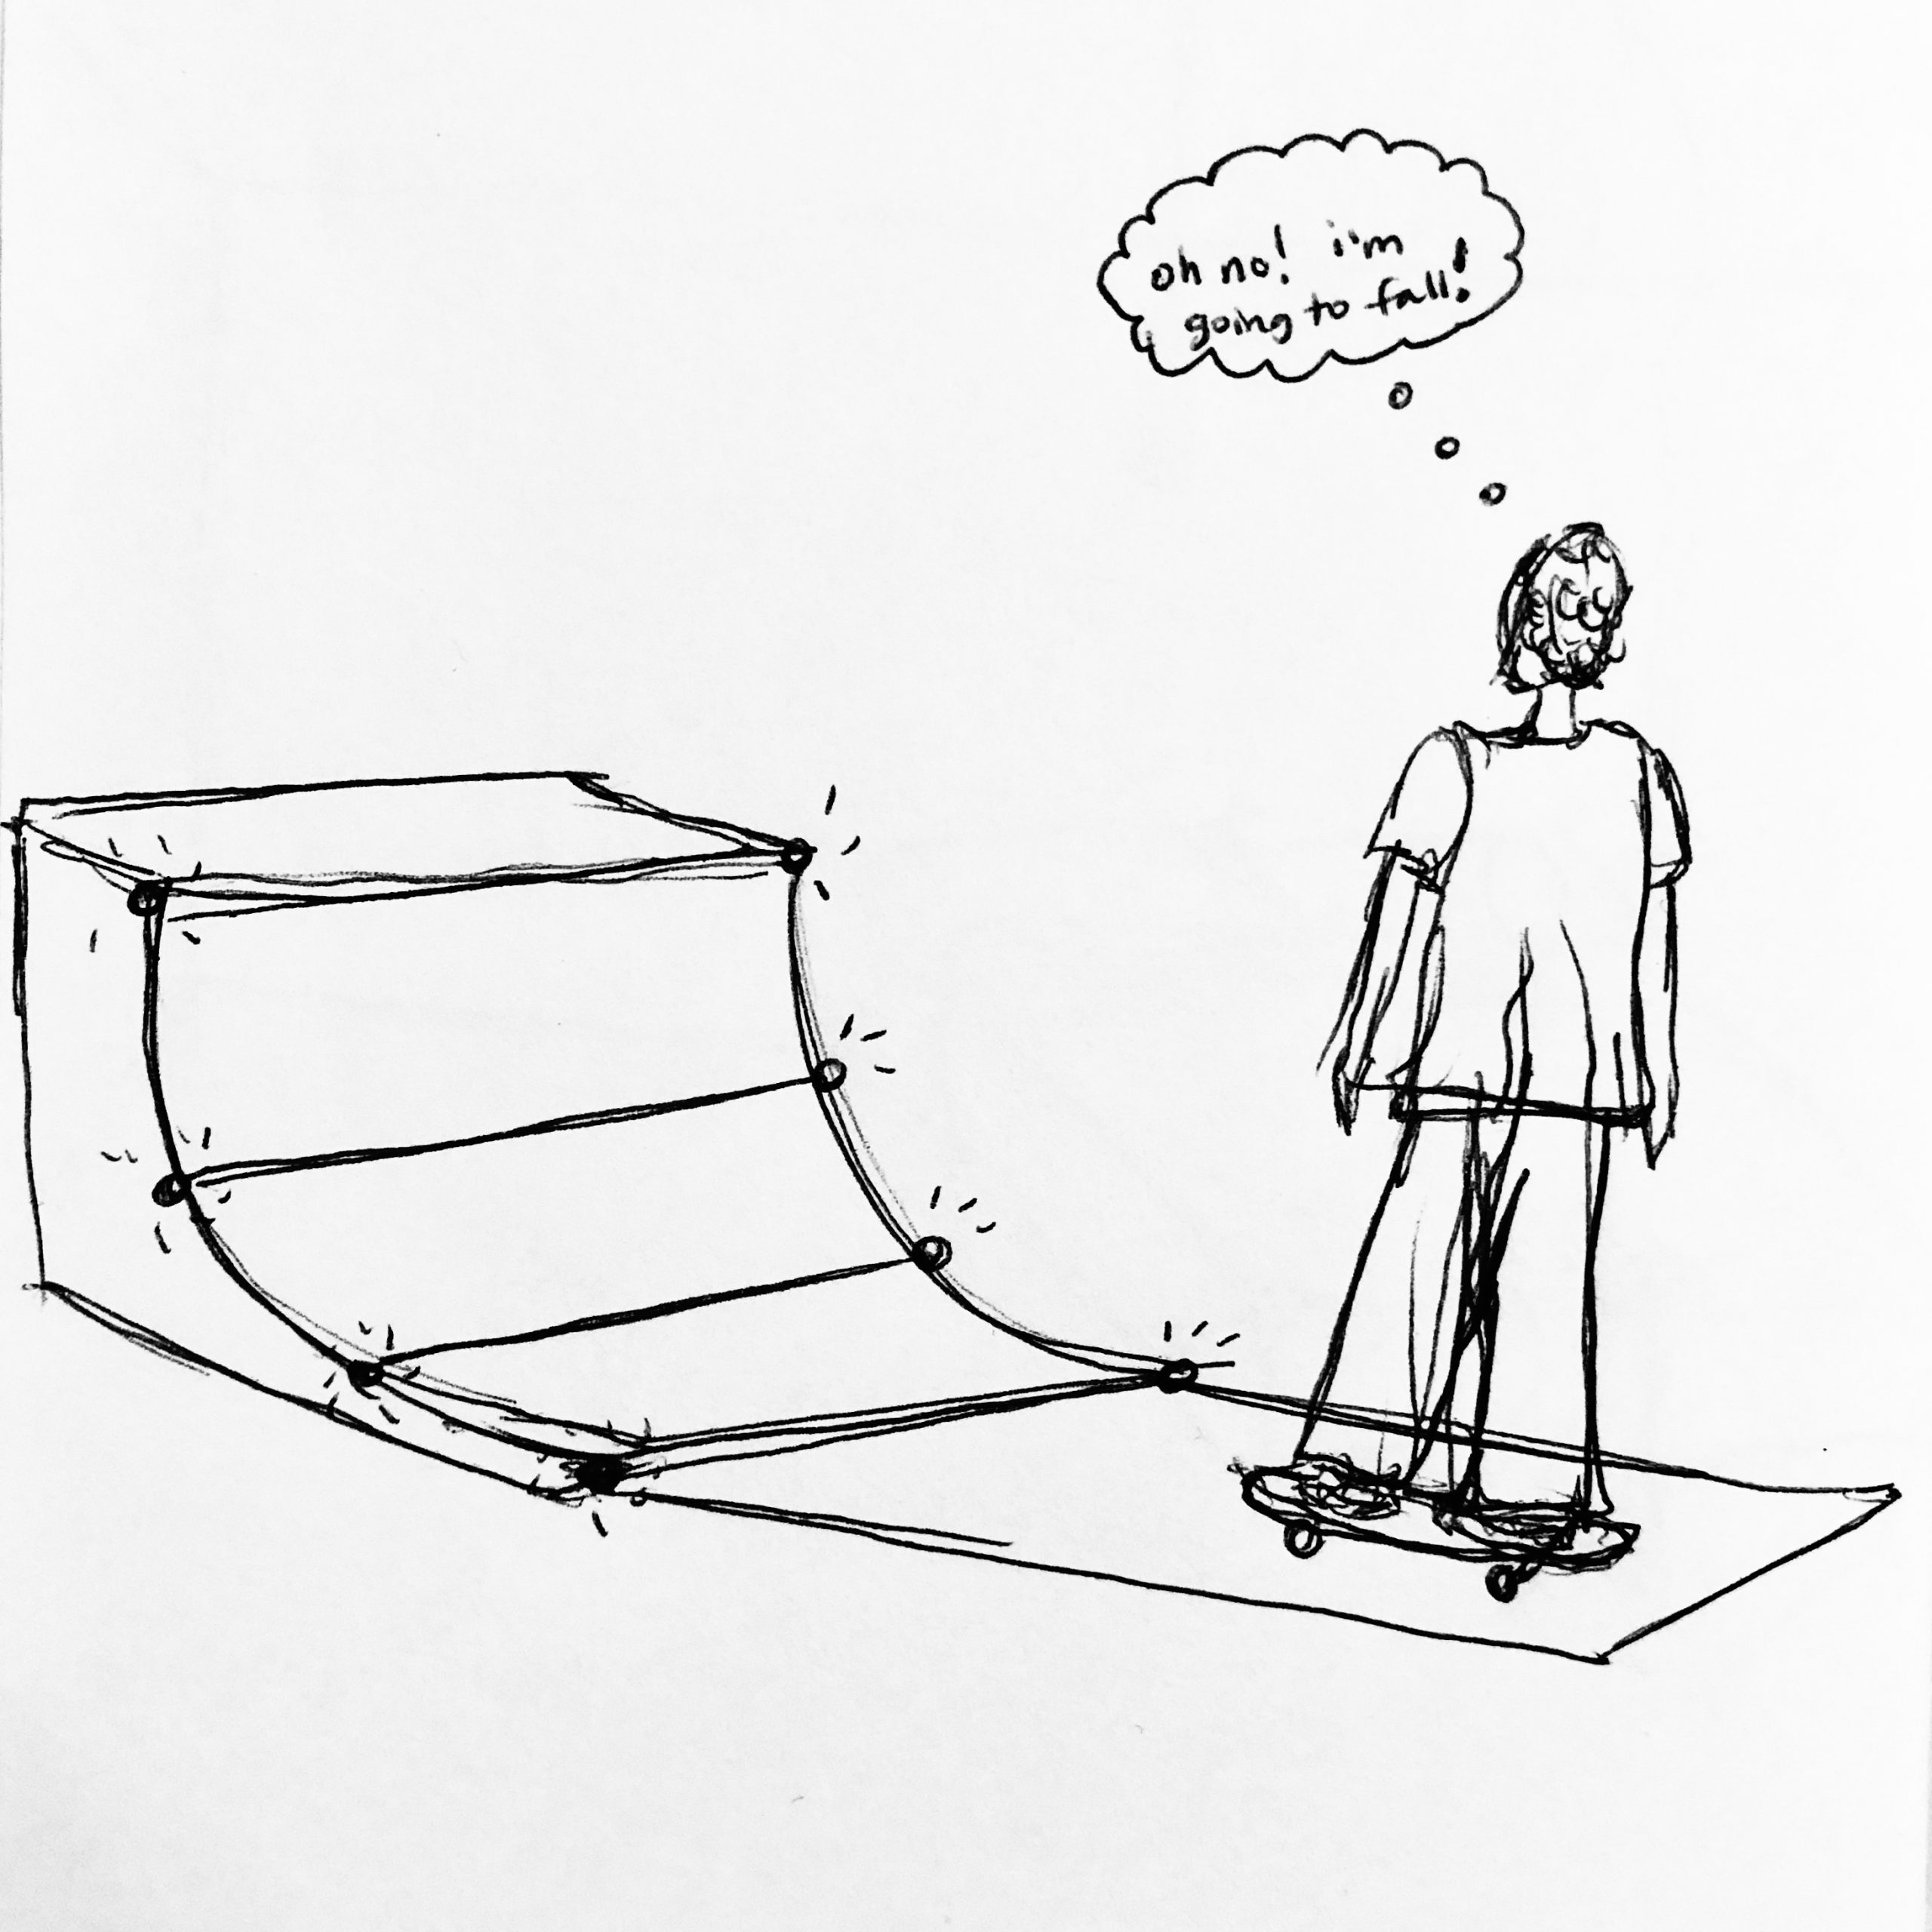
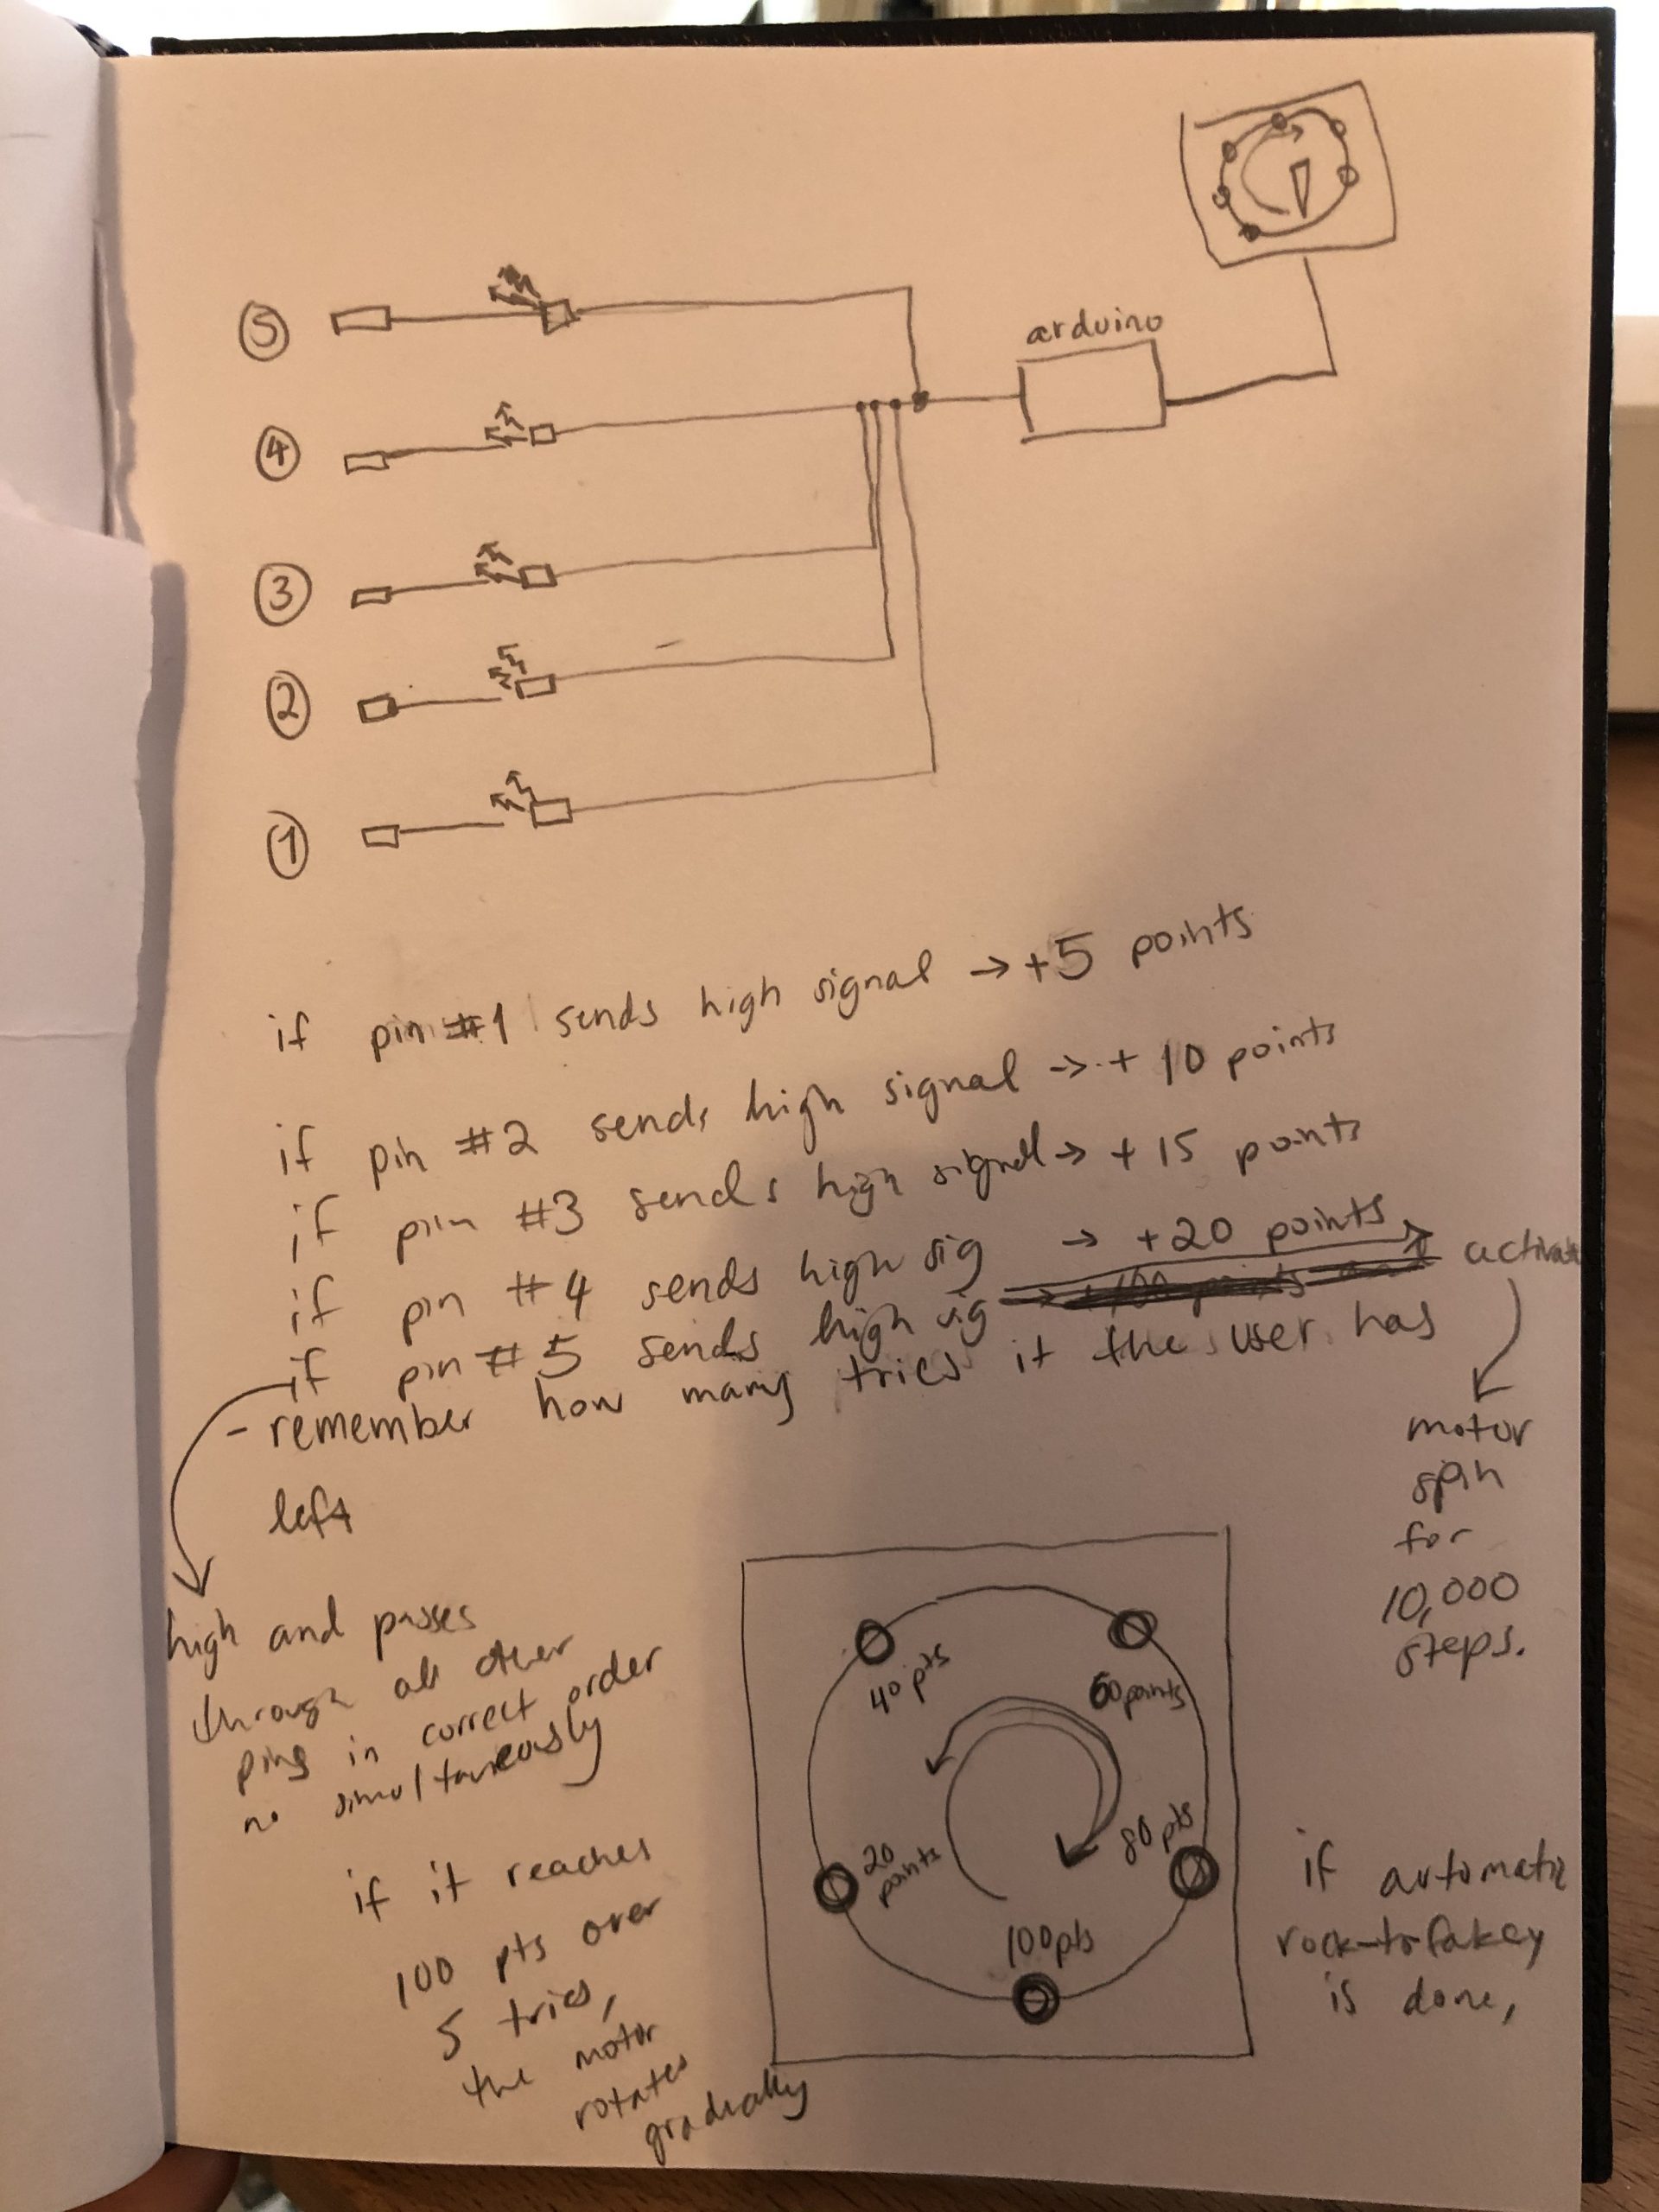
The idea here is to create a skateboarding carnival game that would text how high one could get up the ramp. There would be several checkpoints, with each point triggered the lighting would be affected depending on how far the skateboard got up the ramp. The first trigger would be at the base while the last would be all the way at the top, on the coping.
Ideally, this would be displayed at a carnival, however that is not currently possible. Instead, this would be installed at a skatepark, one that has some sort of incline or ramp.
The interaction with the Arduino would allow for a point system. Perhaps the user would be given several tries, each checkpoint would give the user a certain number of points. Once all the tries are up, the score would be added and the lights would flicker in a specific pattern corresponding to how well the user did.
Skateboarding requires a lot of practice to achieve any level of skill. It’s hard enough to learn how to stay on the board! However, it is important to remember that skateboarding should be fun. This carnival game would provide a good balance between practice and fun.
I think interactive learning is important, it keeps people engaged. I started skateboarding over the summer and I have realized that I learn the most when I’m around others. To me, skateboarding is mostly about the release of energy, learning comes naturally. Creating an interactive skating game would merge my interest in interactive learning environments and skating itself.
Materials + Sources:
- Skateboard (Have)
- Ramp (At almost any skatepark, issue would be other people getting in the way or me getting into peoples’ way as they try to skate)
- Conductive strips (to connect the two wheels as they reach a certain point)
- LEDs or light strip
Comments are closed.