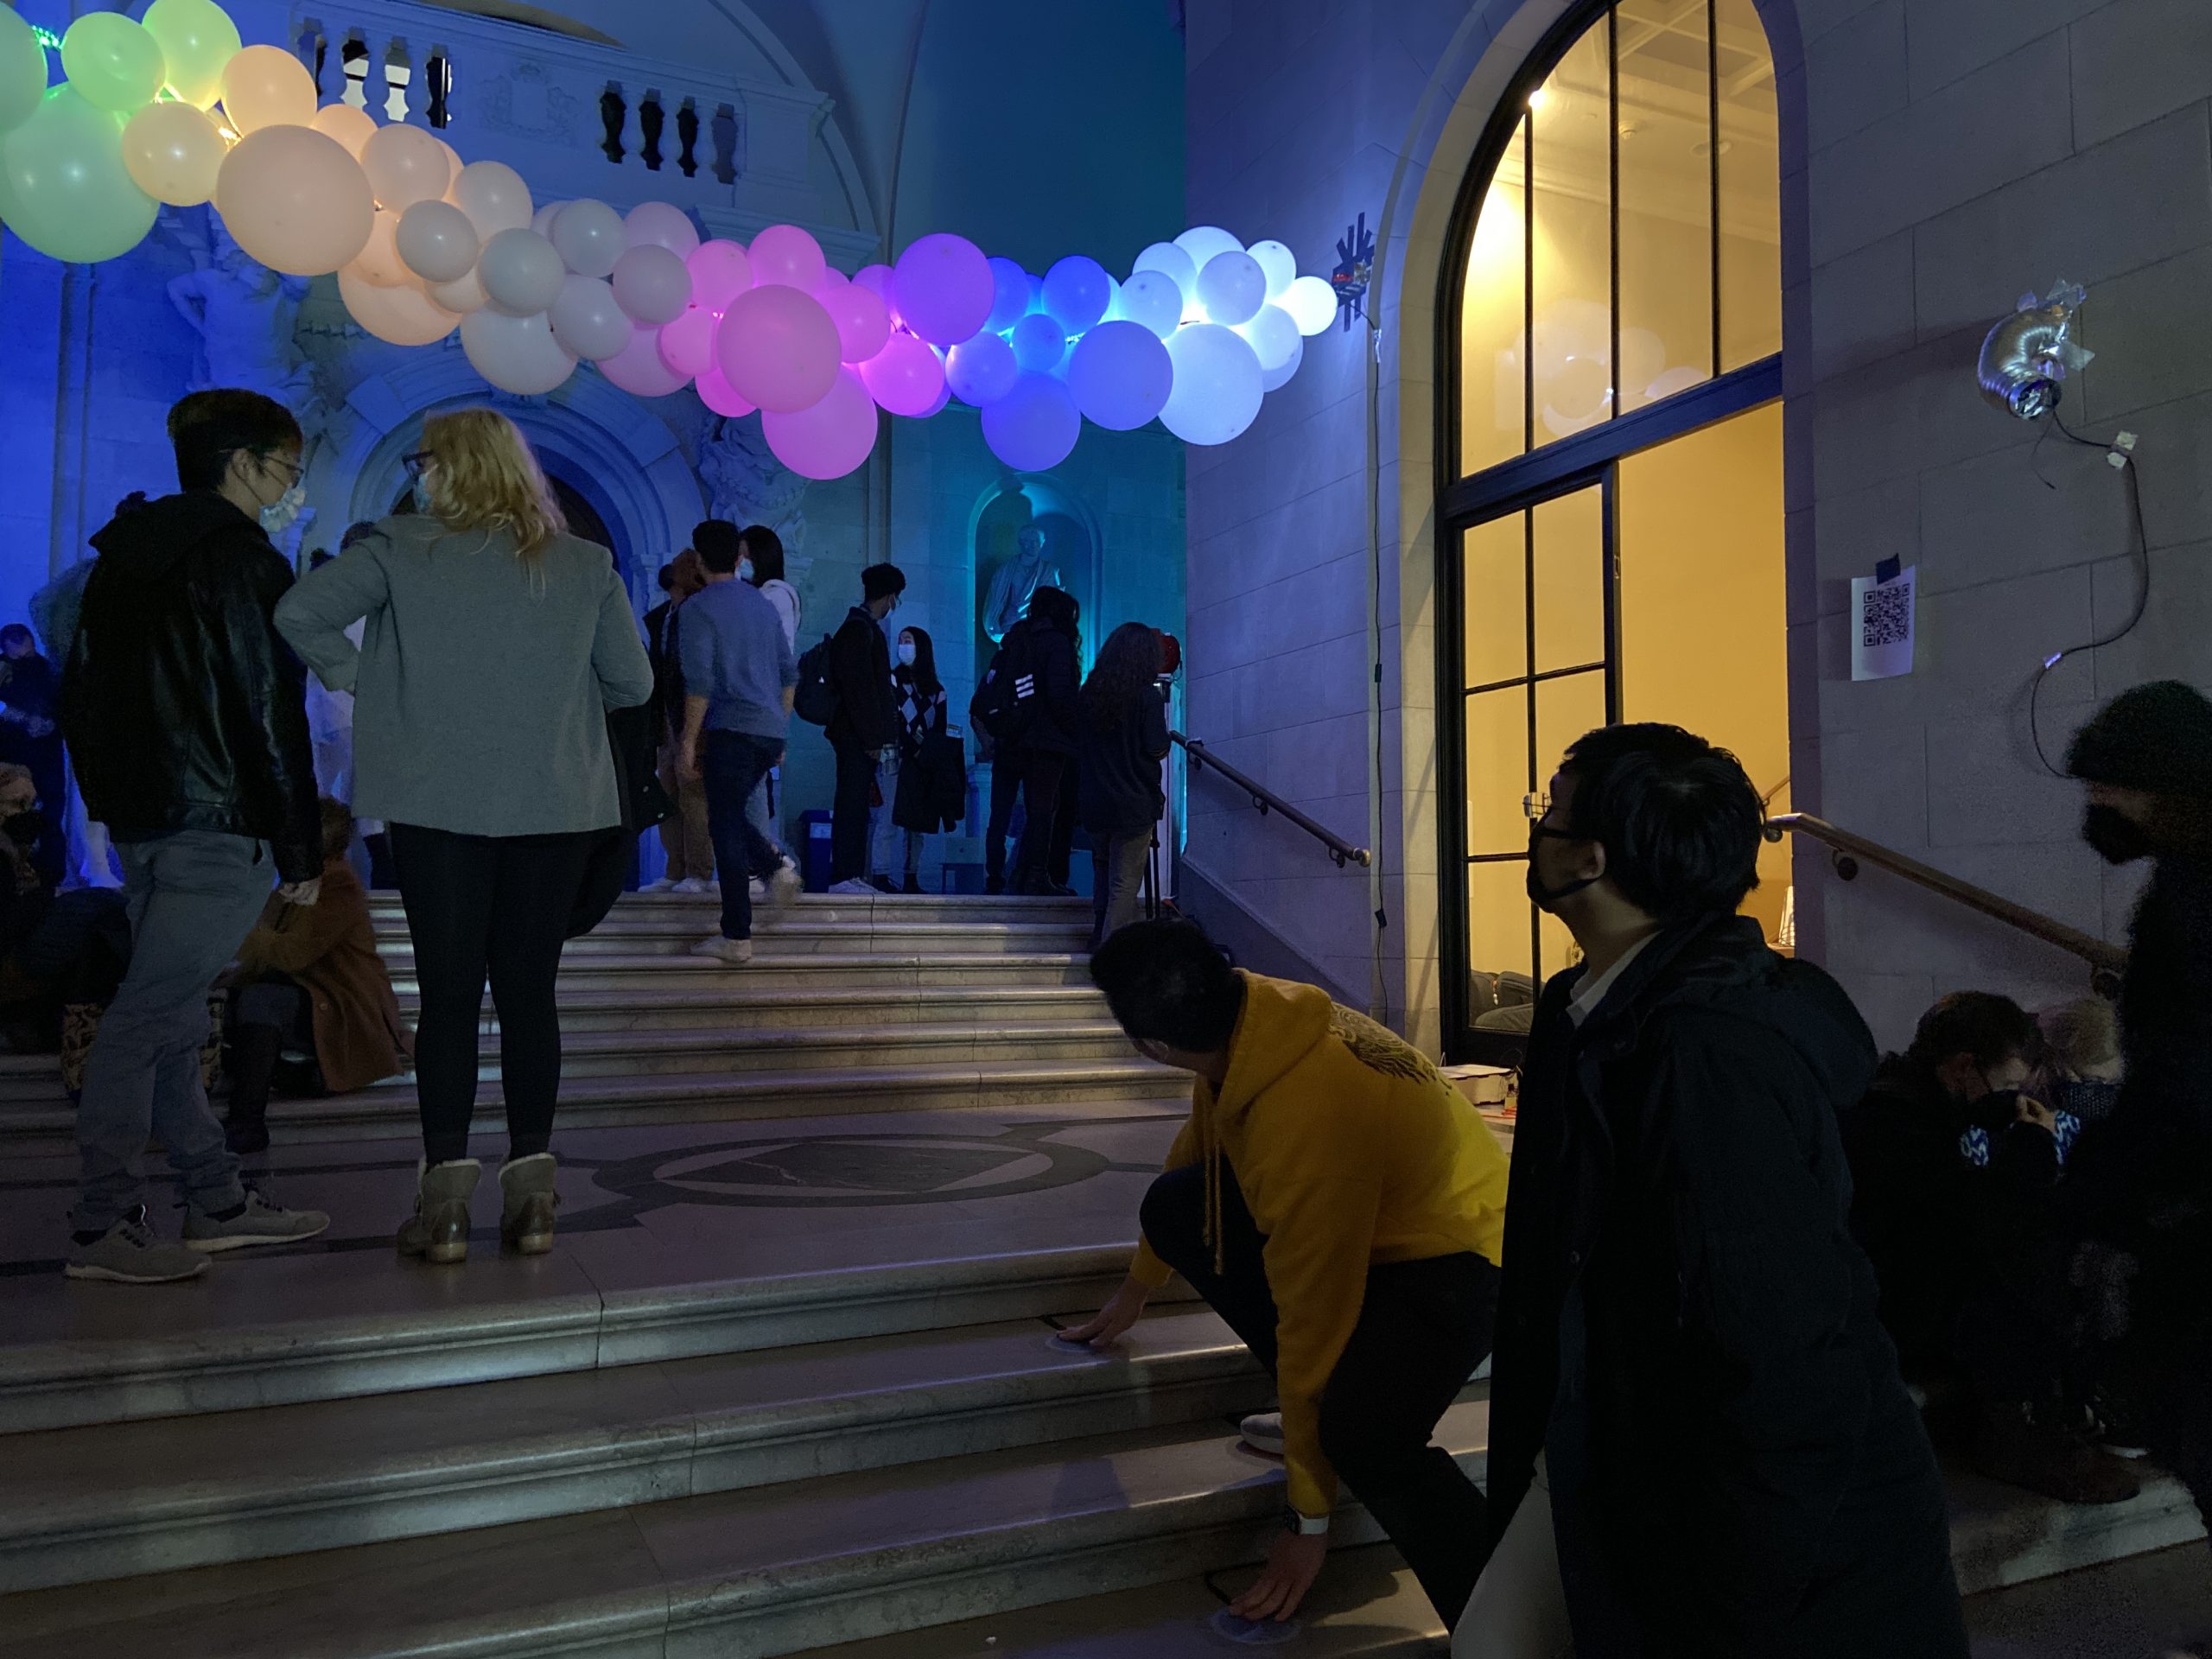
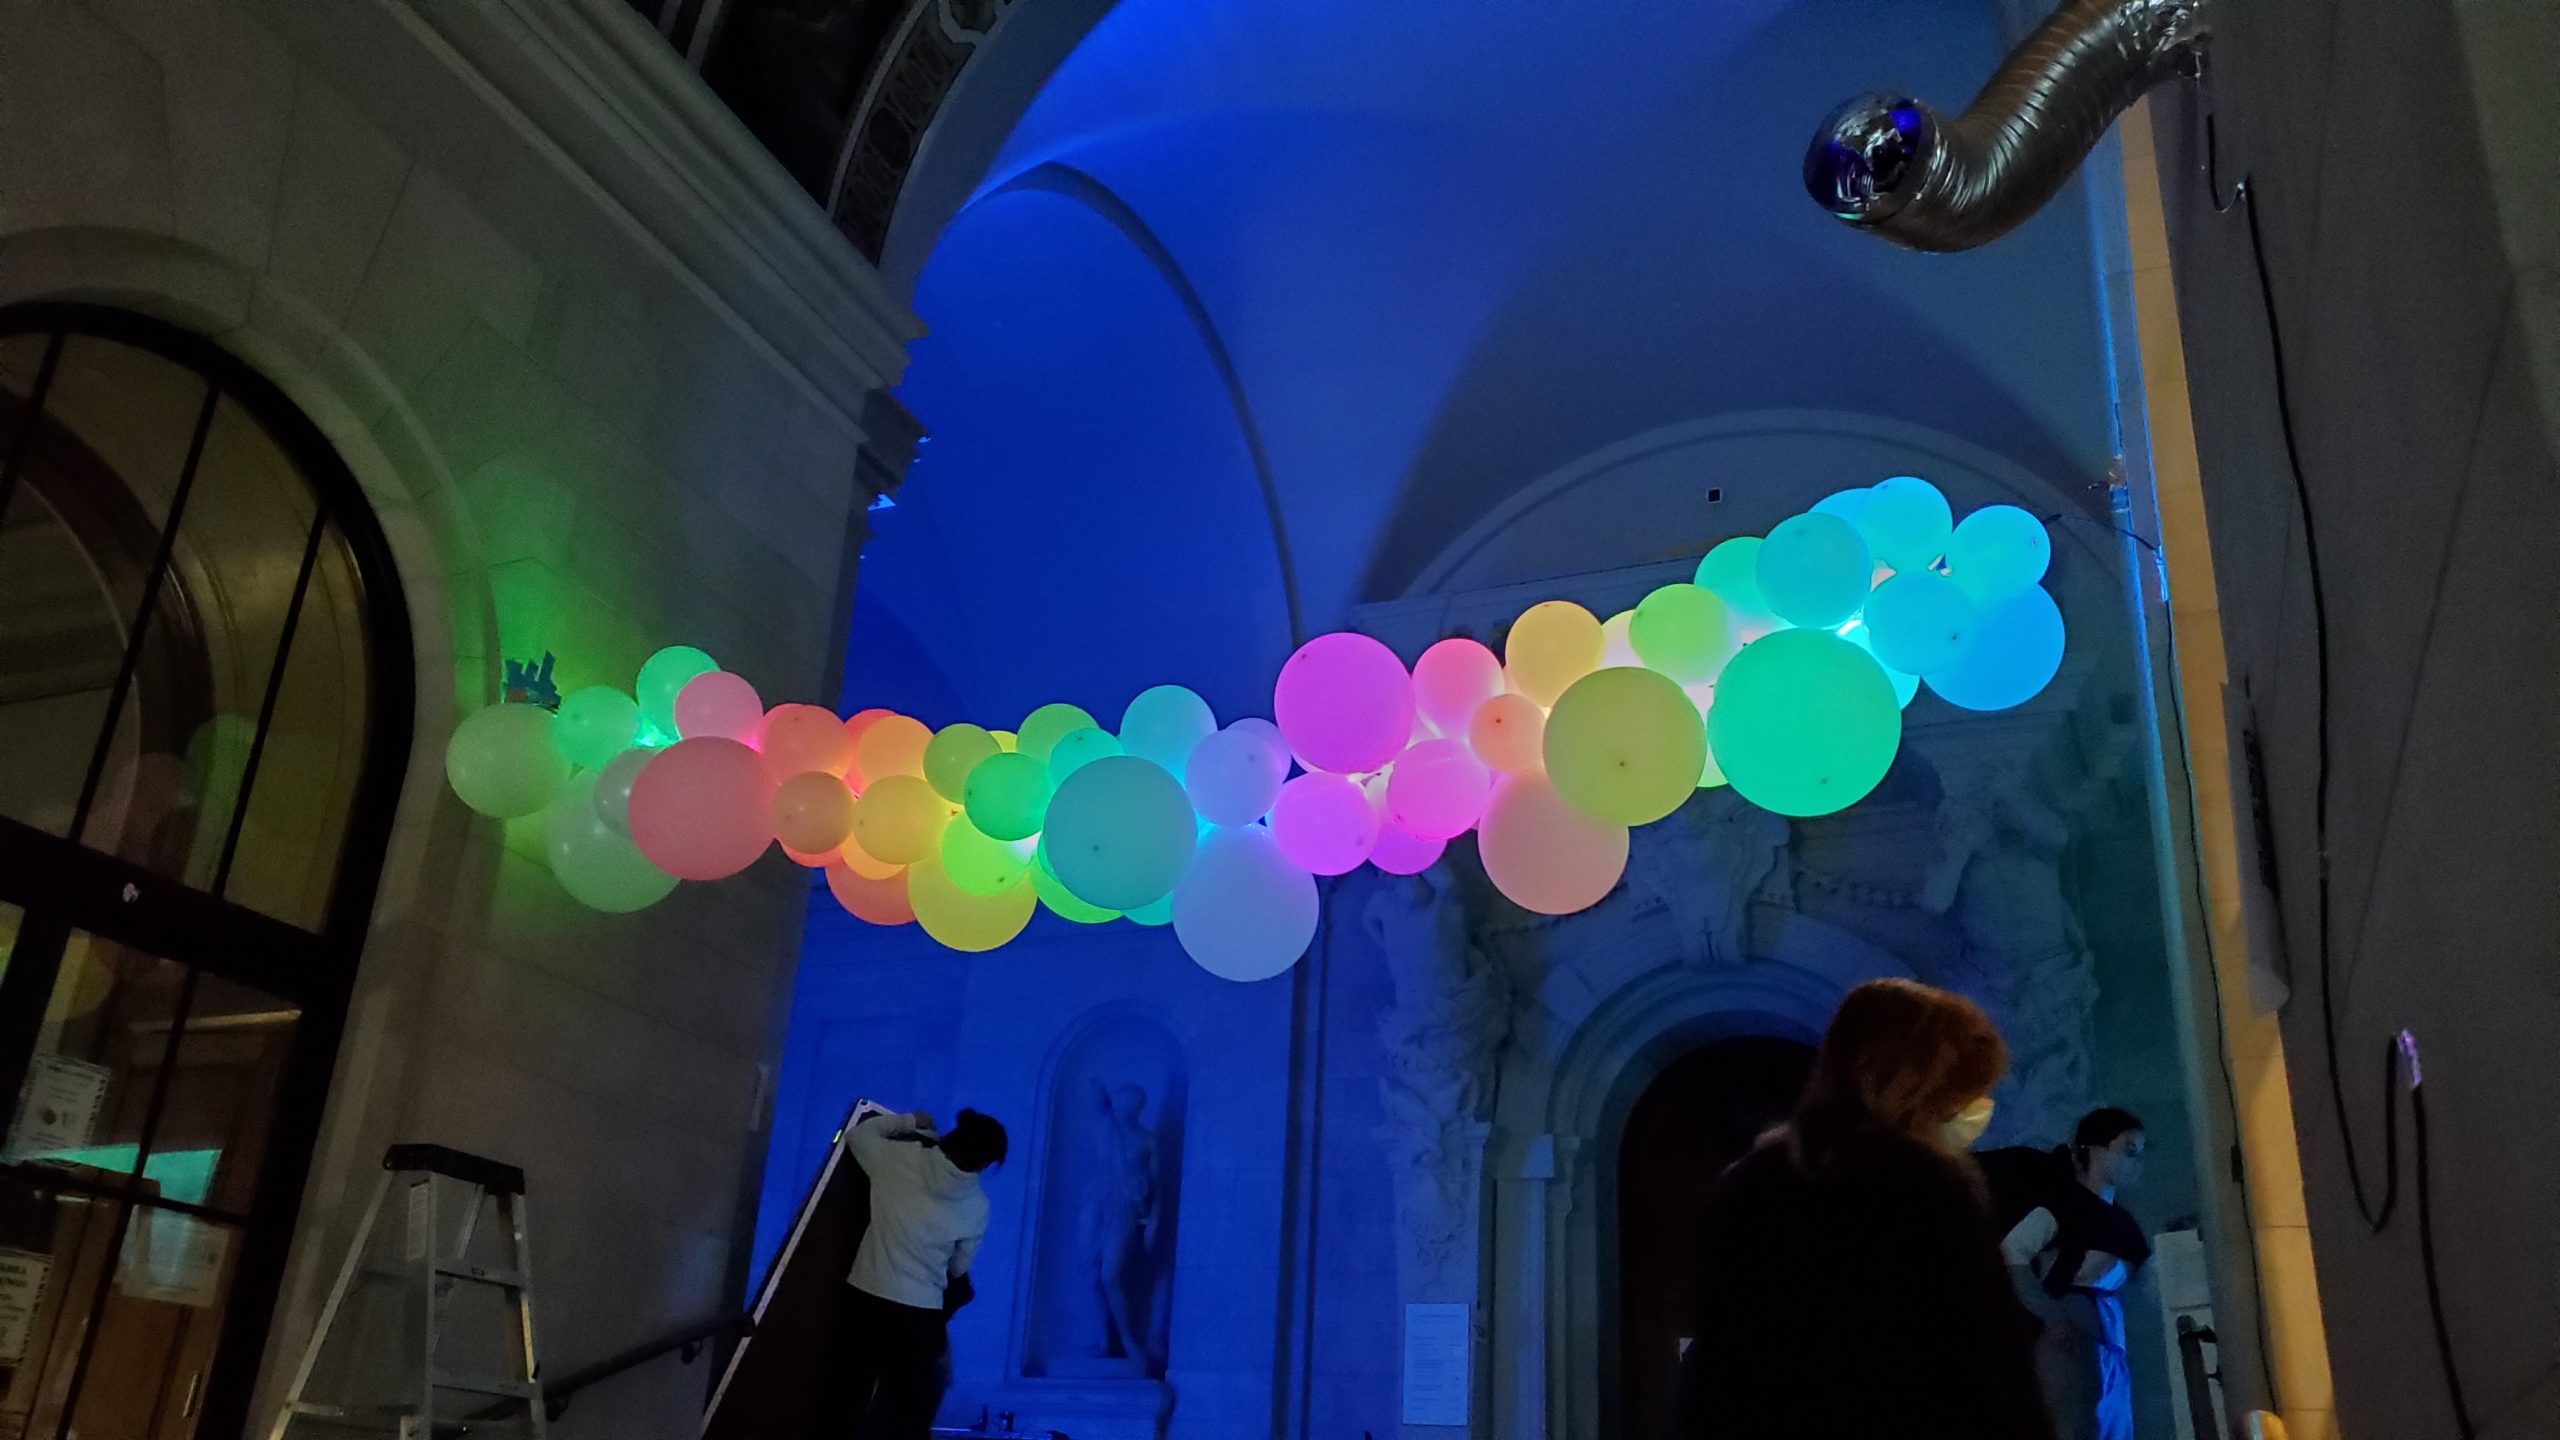
A group of friends tries to activate all the sections of the balloons at once
In-Progress Media
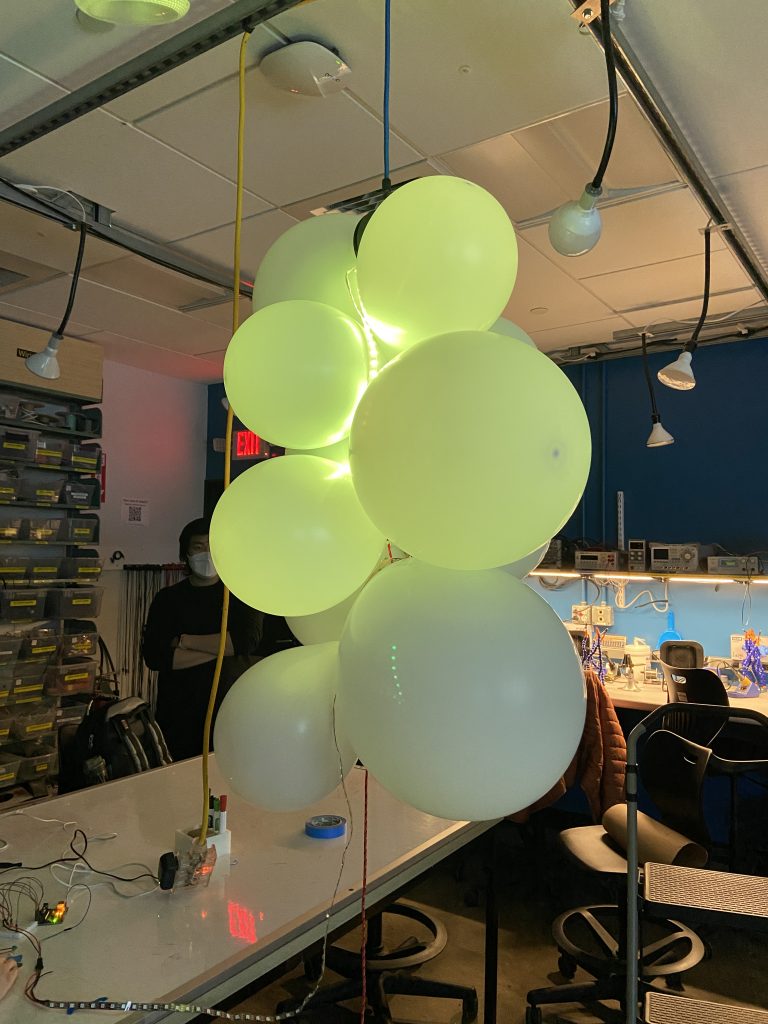
This image shows us testing colors on our maquette. We decided to get rid of the red and green colors and mostly keep yellow, white, purple and blue to symbolize the colors of a thunderstorm.
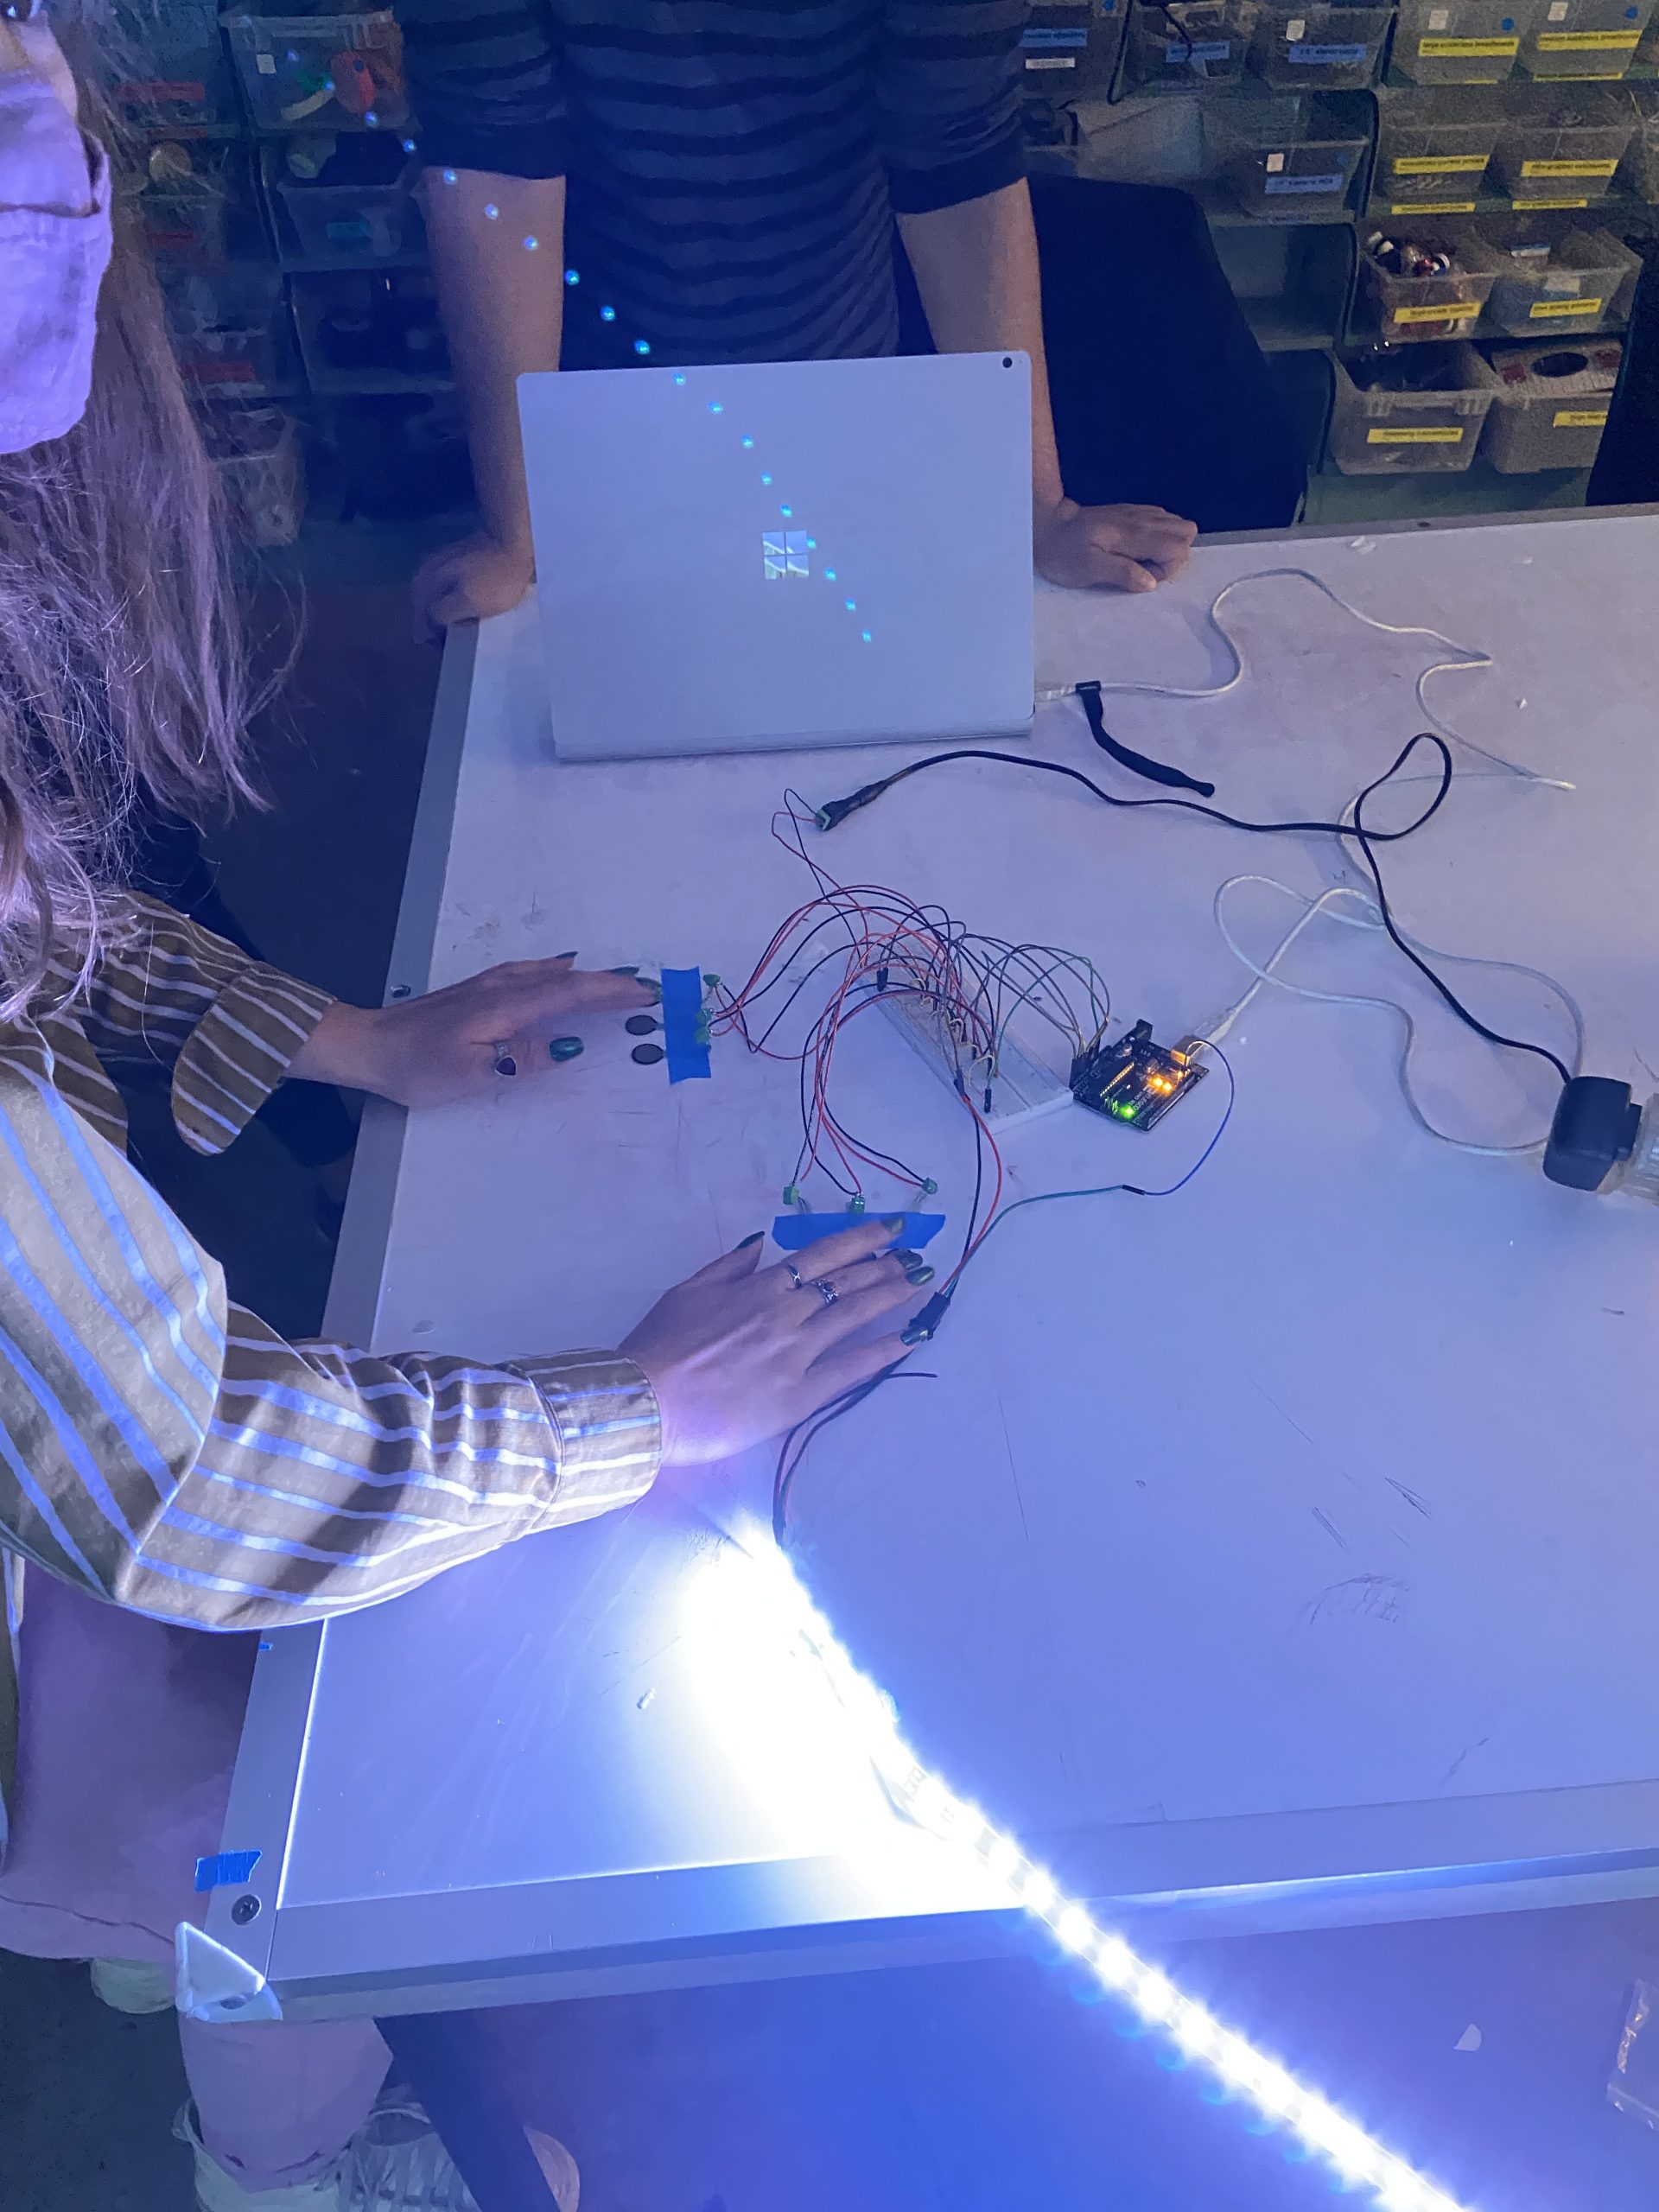
Testing out the sensitivity of the force sensitive resistors.
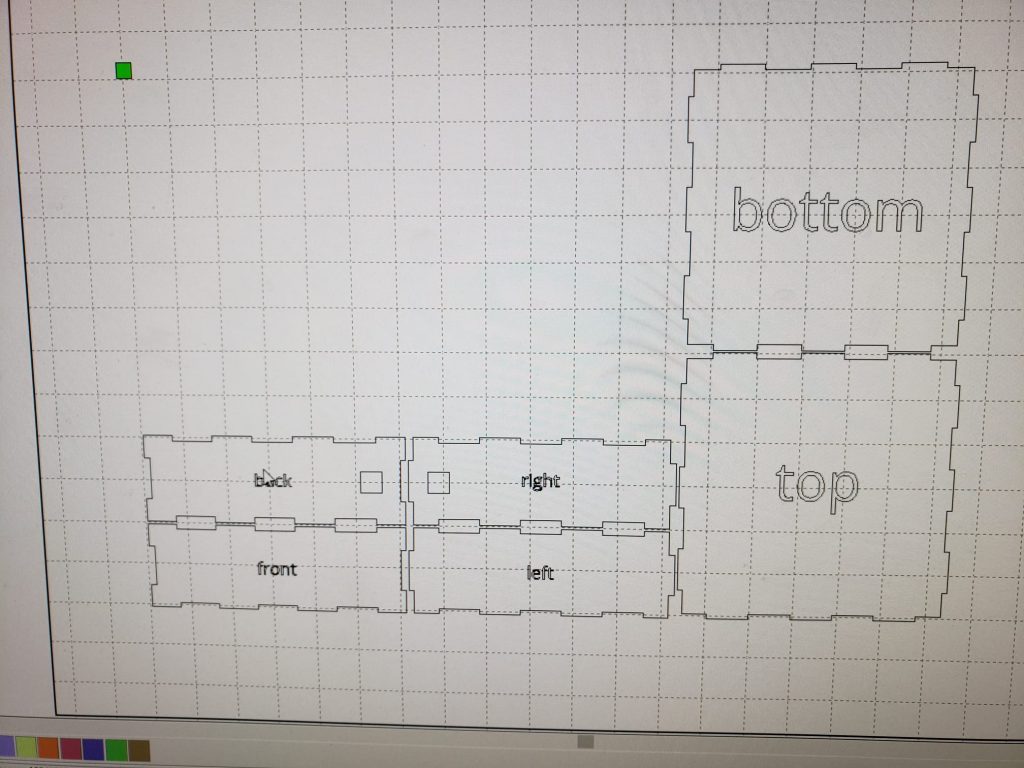
Here we were laser cutting the box to hold our Arduino, breadboard and wires.
Judenique setting up connections inside the laser cut box.
All the wires from the sensors leading to the main box

Olivia working on putting the sensors under the stickers on the steps
The decals on the stairs installed
Here is after we realized that our plan to use velcro to attach the eye hooks to the wall was not going to work and we needed to use aluminum tape to secure the balloons to the walls.
Experimenting with different colors before the event
Dancing Clouds in Action
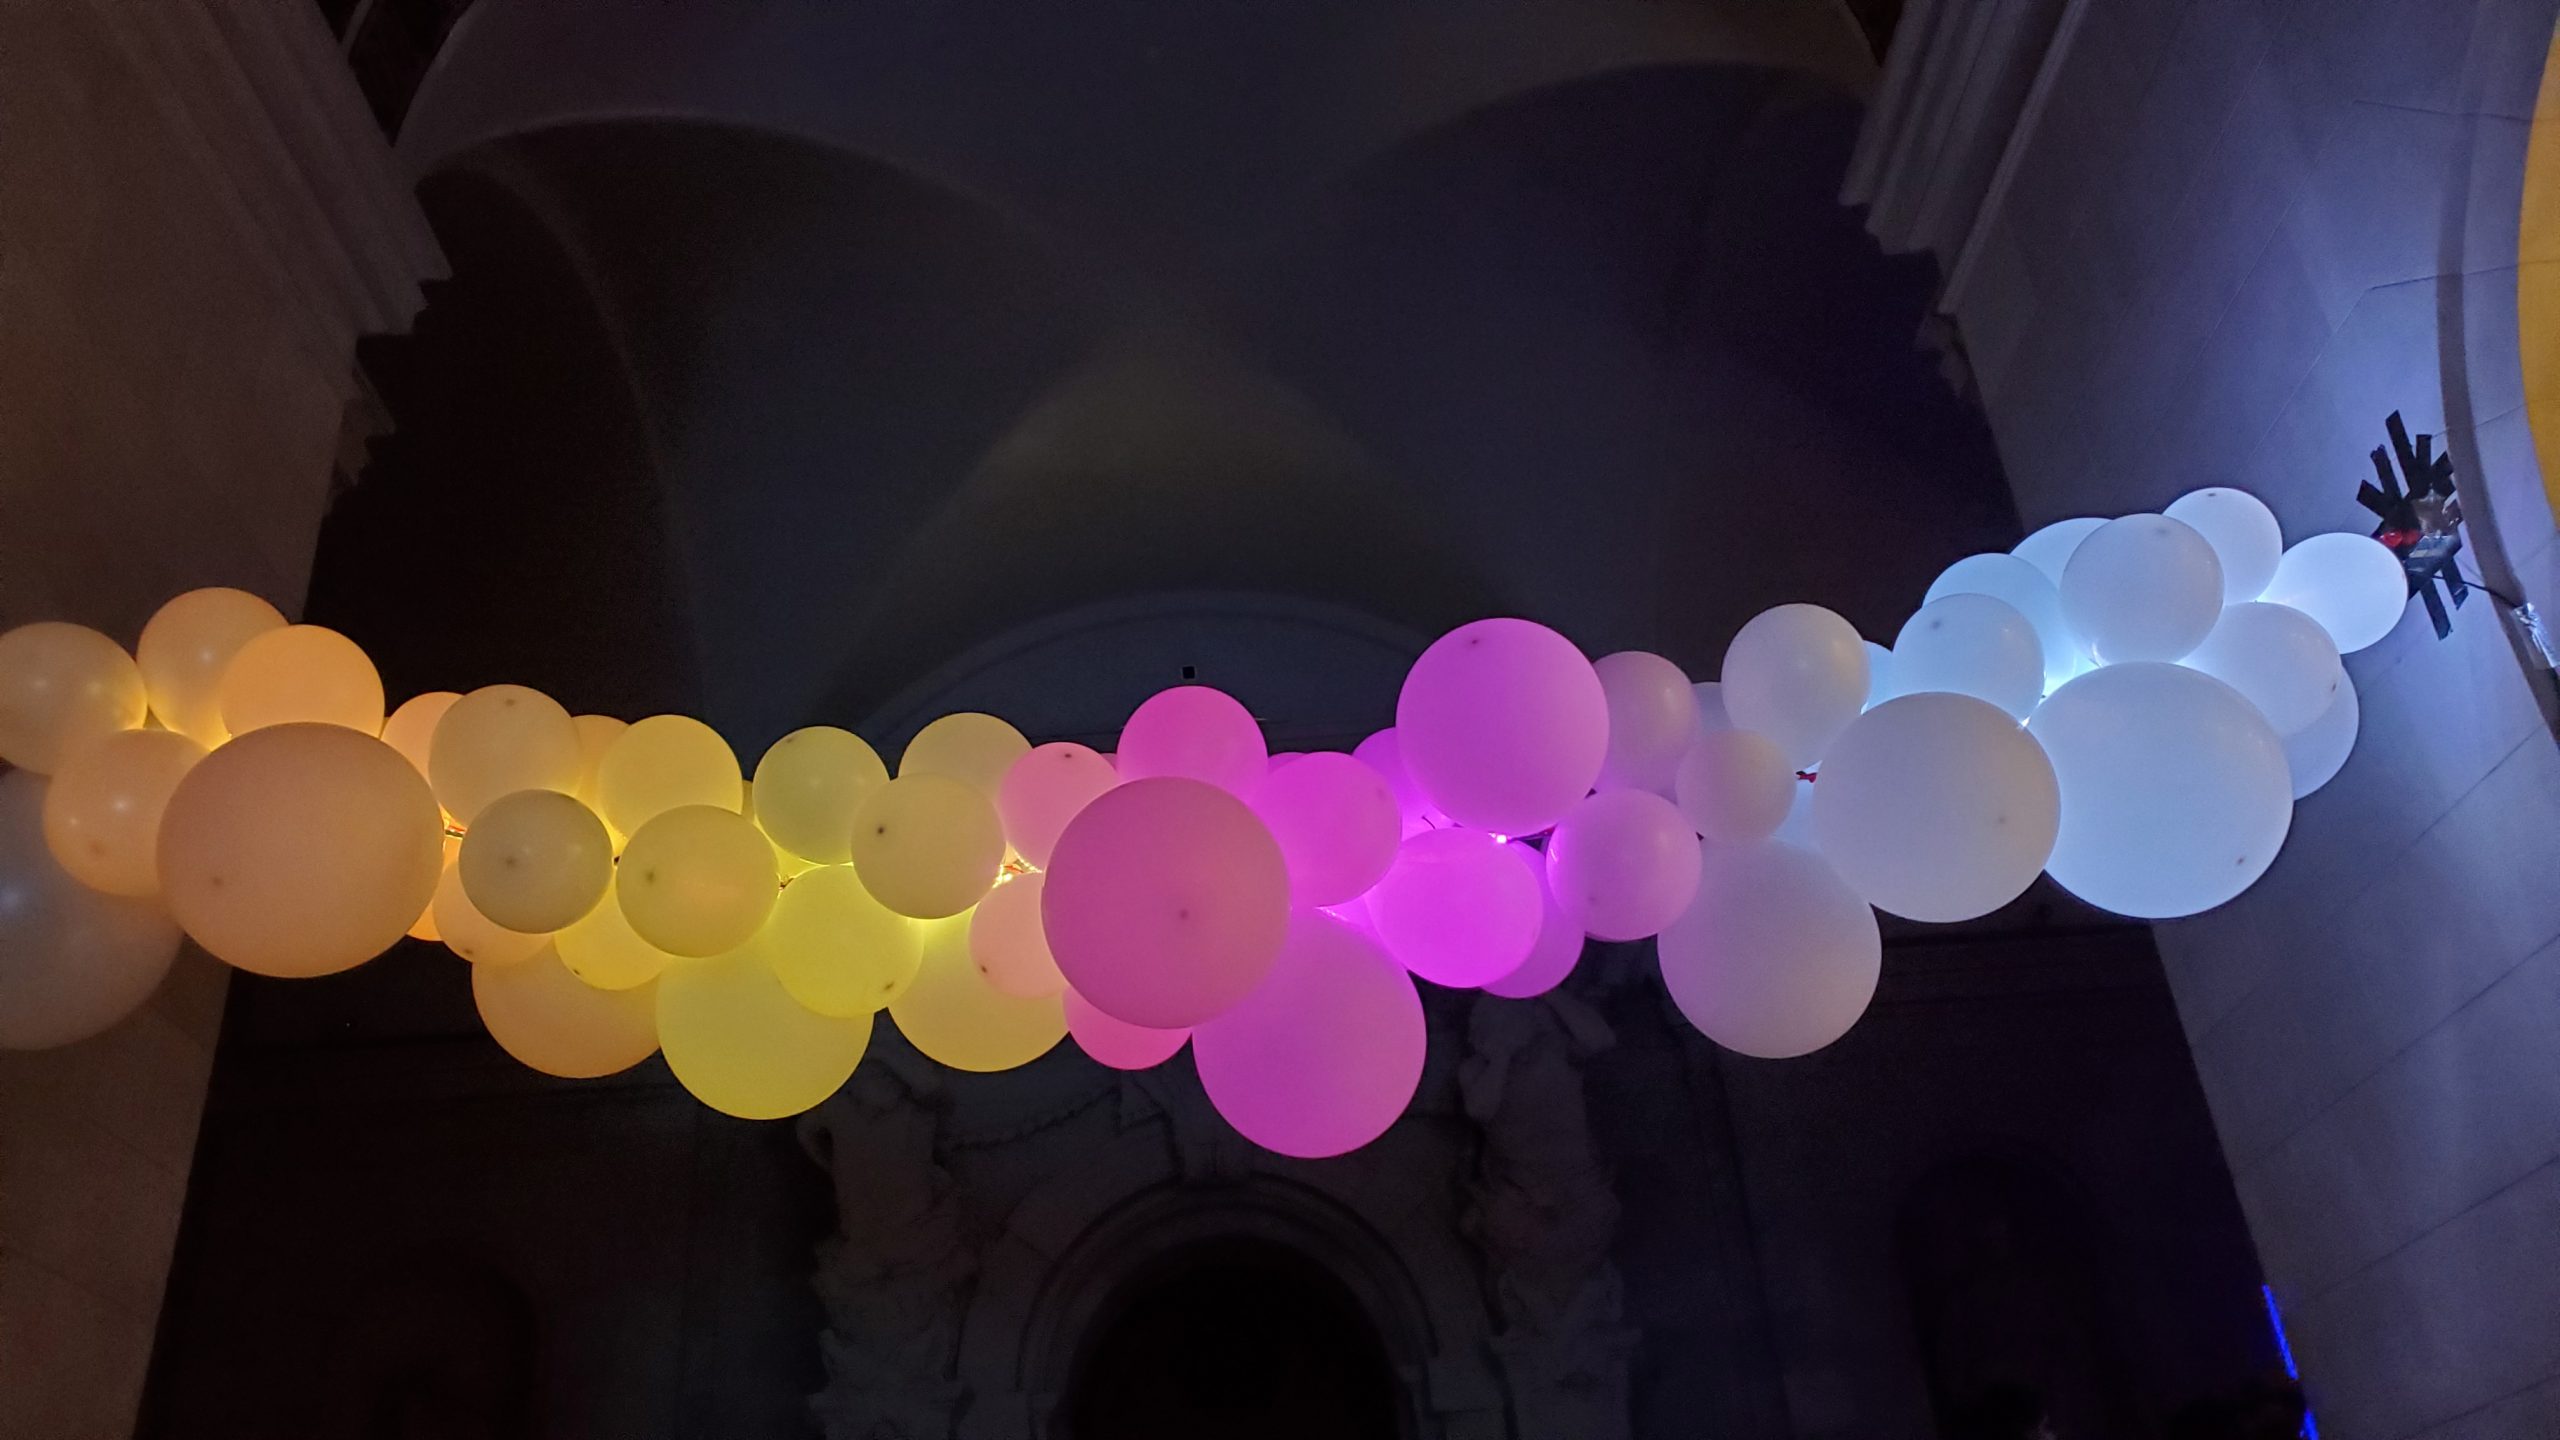
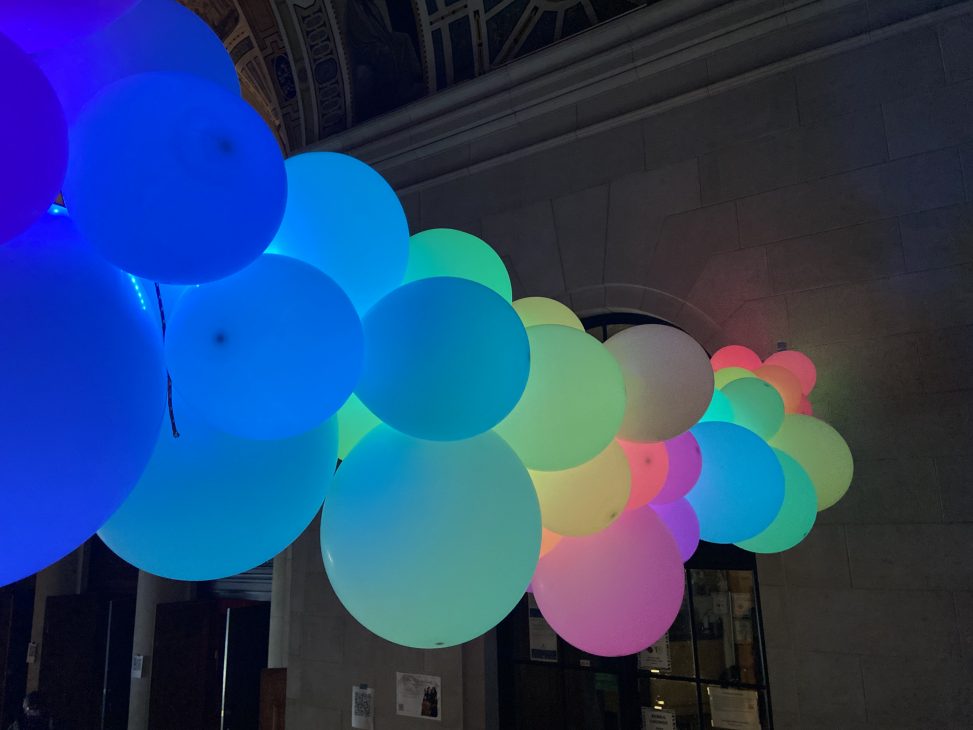
Close up of the balloons: the leds are controlled by the pressure-sensitive resistors

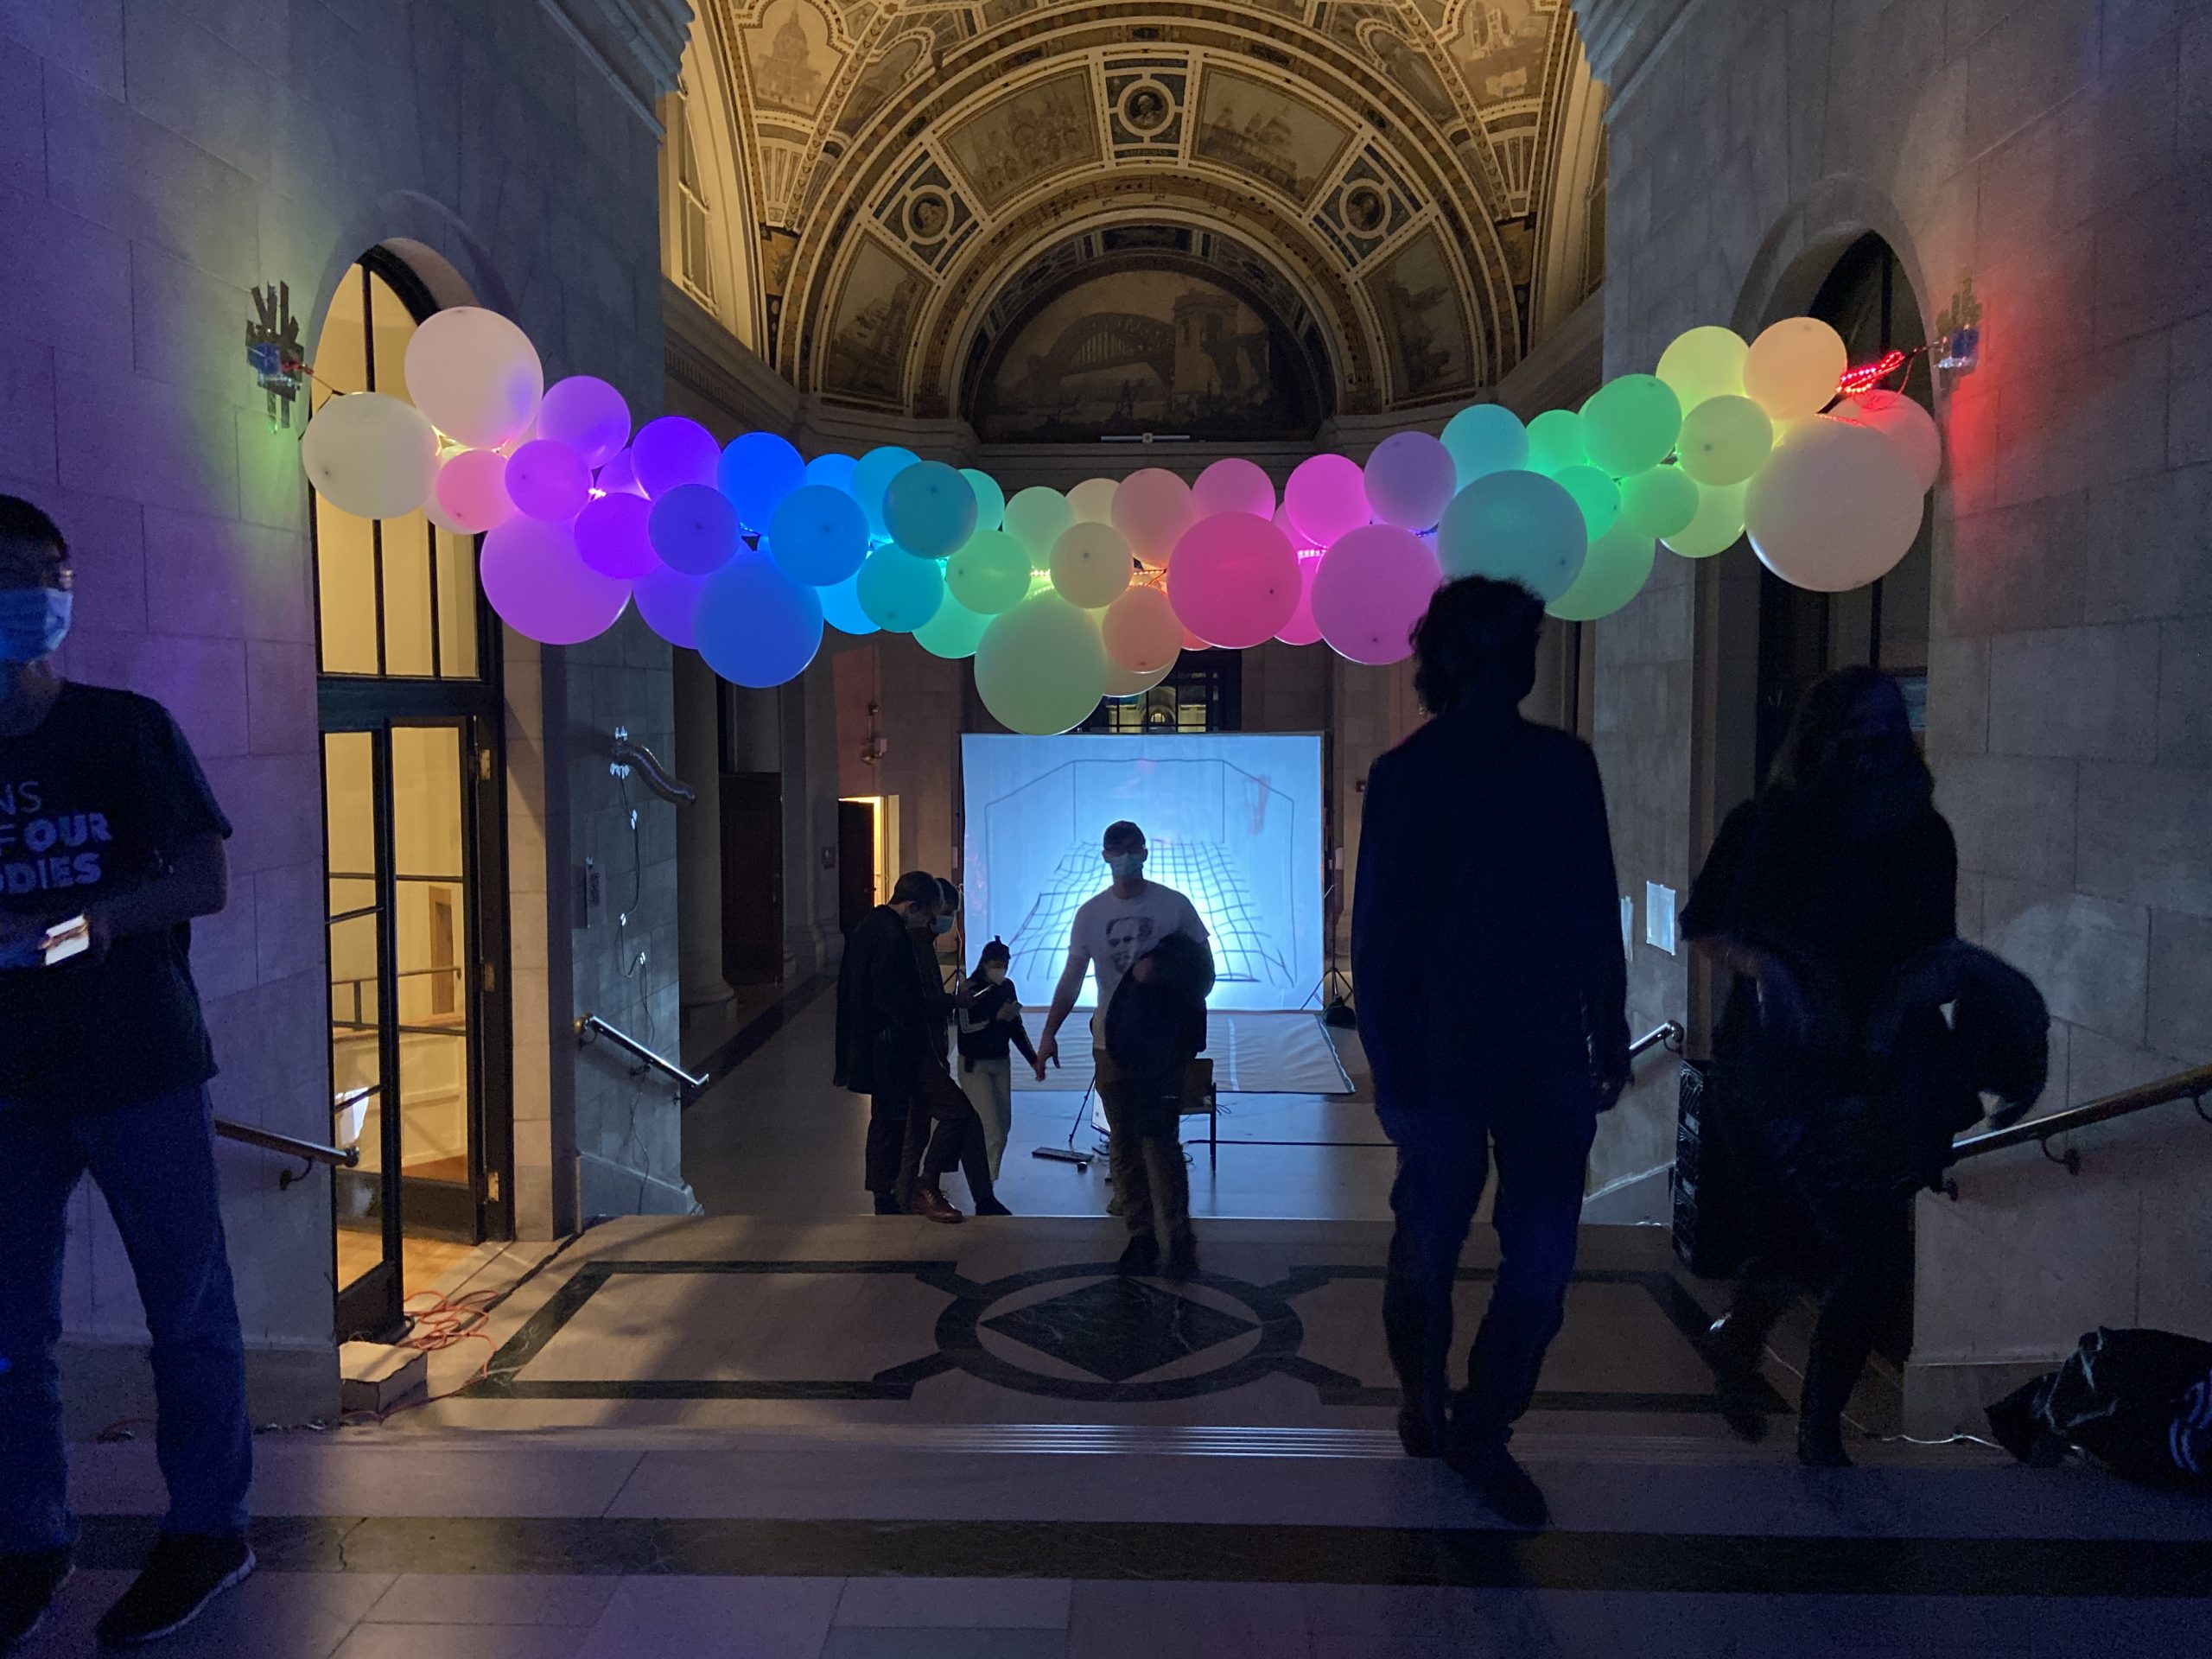
Balloons are up and installed, currently there is no power running

The aftermath of the project: only the LEDs and string remain
Description
The Dancing Cloud is an installation made up of balloons illuminated by a colored LED strip. The colors of these balloons is controlled by people stepping on force-sensitive resistors placed along the stairs in the CFA Great Hall. When there are no people stepping on these steps, the colors react to sounds in the environment.
The LED strip is wrapped along a 16 feet rope spanning from the Zebra lounge to the other side of the wall along the main entrance of CFA. The balloons are wrapped and tied around this long piece of rope. The rope is held up by hooks screwed into 2 wooden blocks which we attached to the walls around 9 feet high. The force-sensitive resistors are placed on the stairs covered by colorful decals, so that people know where to step to trigger a change in color. We have wires attached along the wall and floors coming from the string of balloons, the force sensitive resistors, the microphone and the power supplies to the laser cut box where everything is connected together with the Arduino and breadboard.
Process Reflection
What worked well?
The waterproof LEDs were blunt and worked well to not cause any balloons to pop throughout the time installation was running. The entire circuit also ran for a long time without running into issues. Furthermore, the balloons retained their size over 2 days allowing us to get started with the installation process before the day of the show.
Selecting specific white balloons that weren’t fully opaque, and testing them with the maquette helped us figure out how well the LED lights shone through the balloons. Our choices were well made because the balloons appropriately replicated the colors of the LEDs. The dark atmosphere in the CFA further helped our balloons stand out.
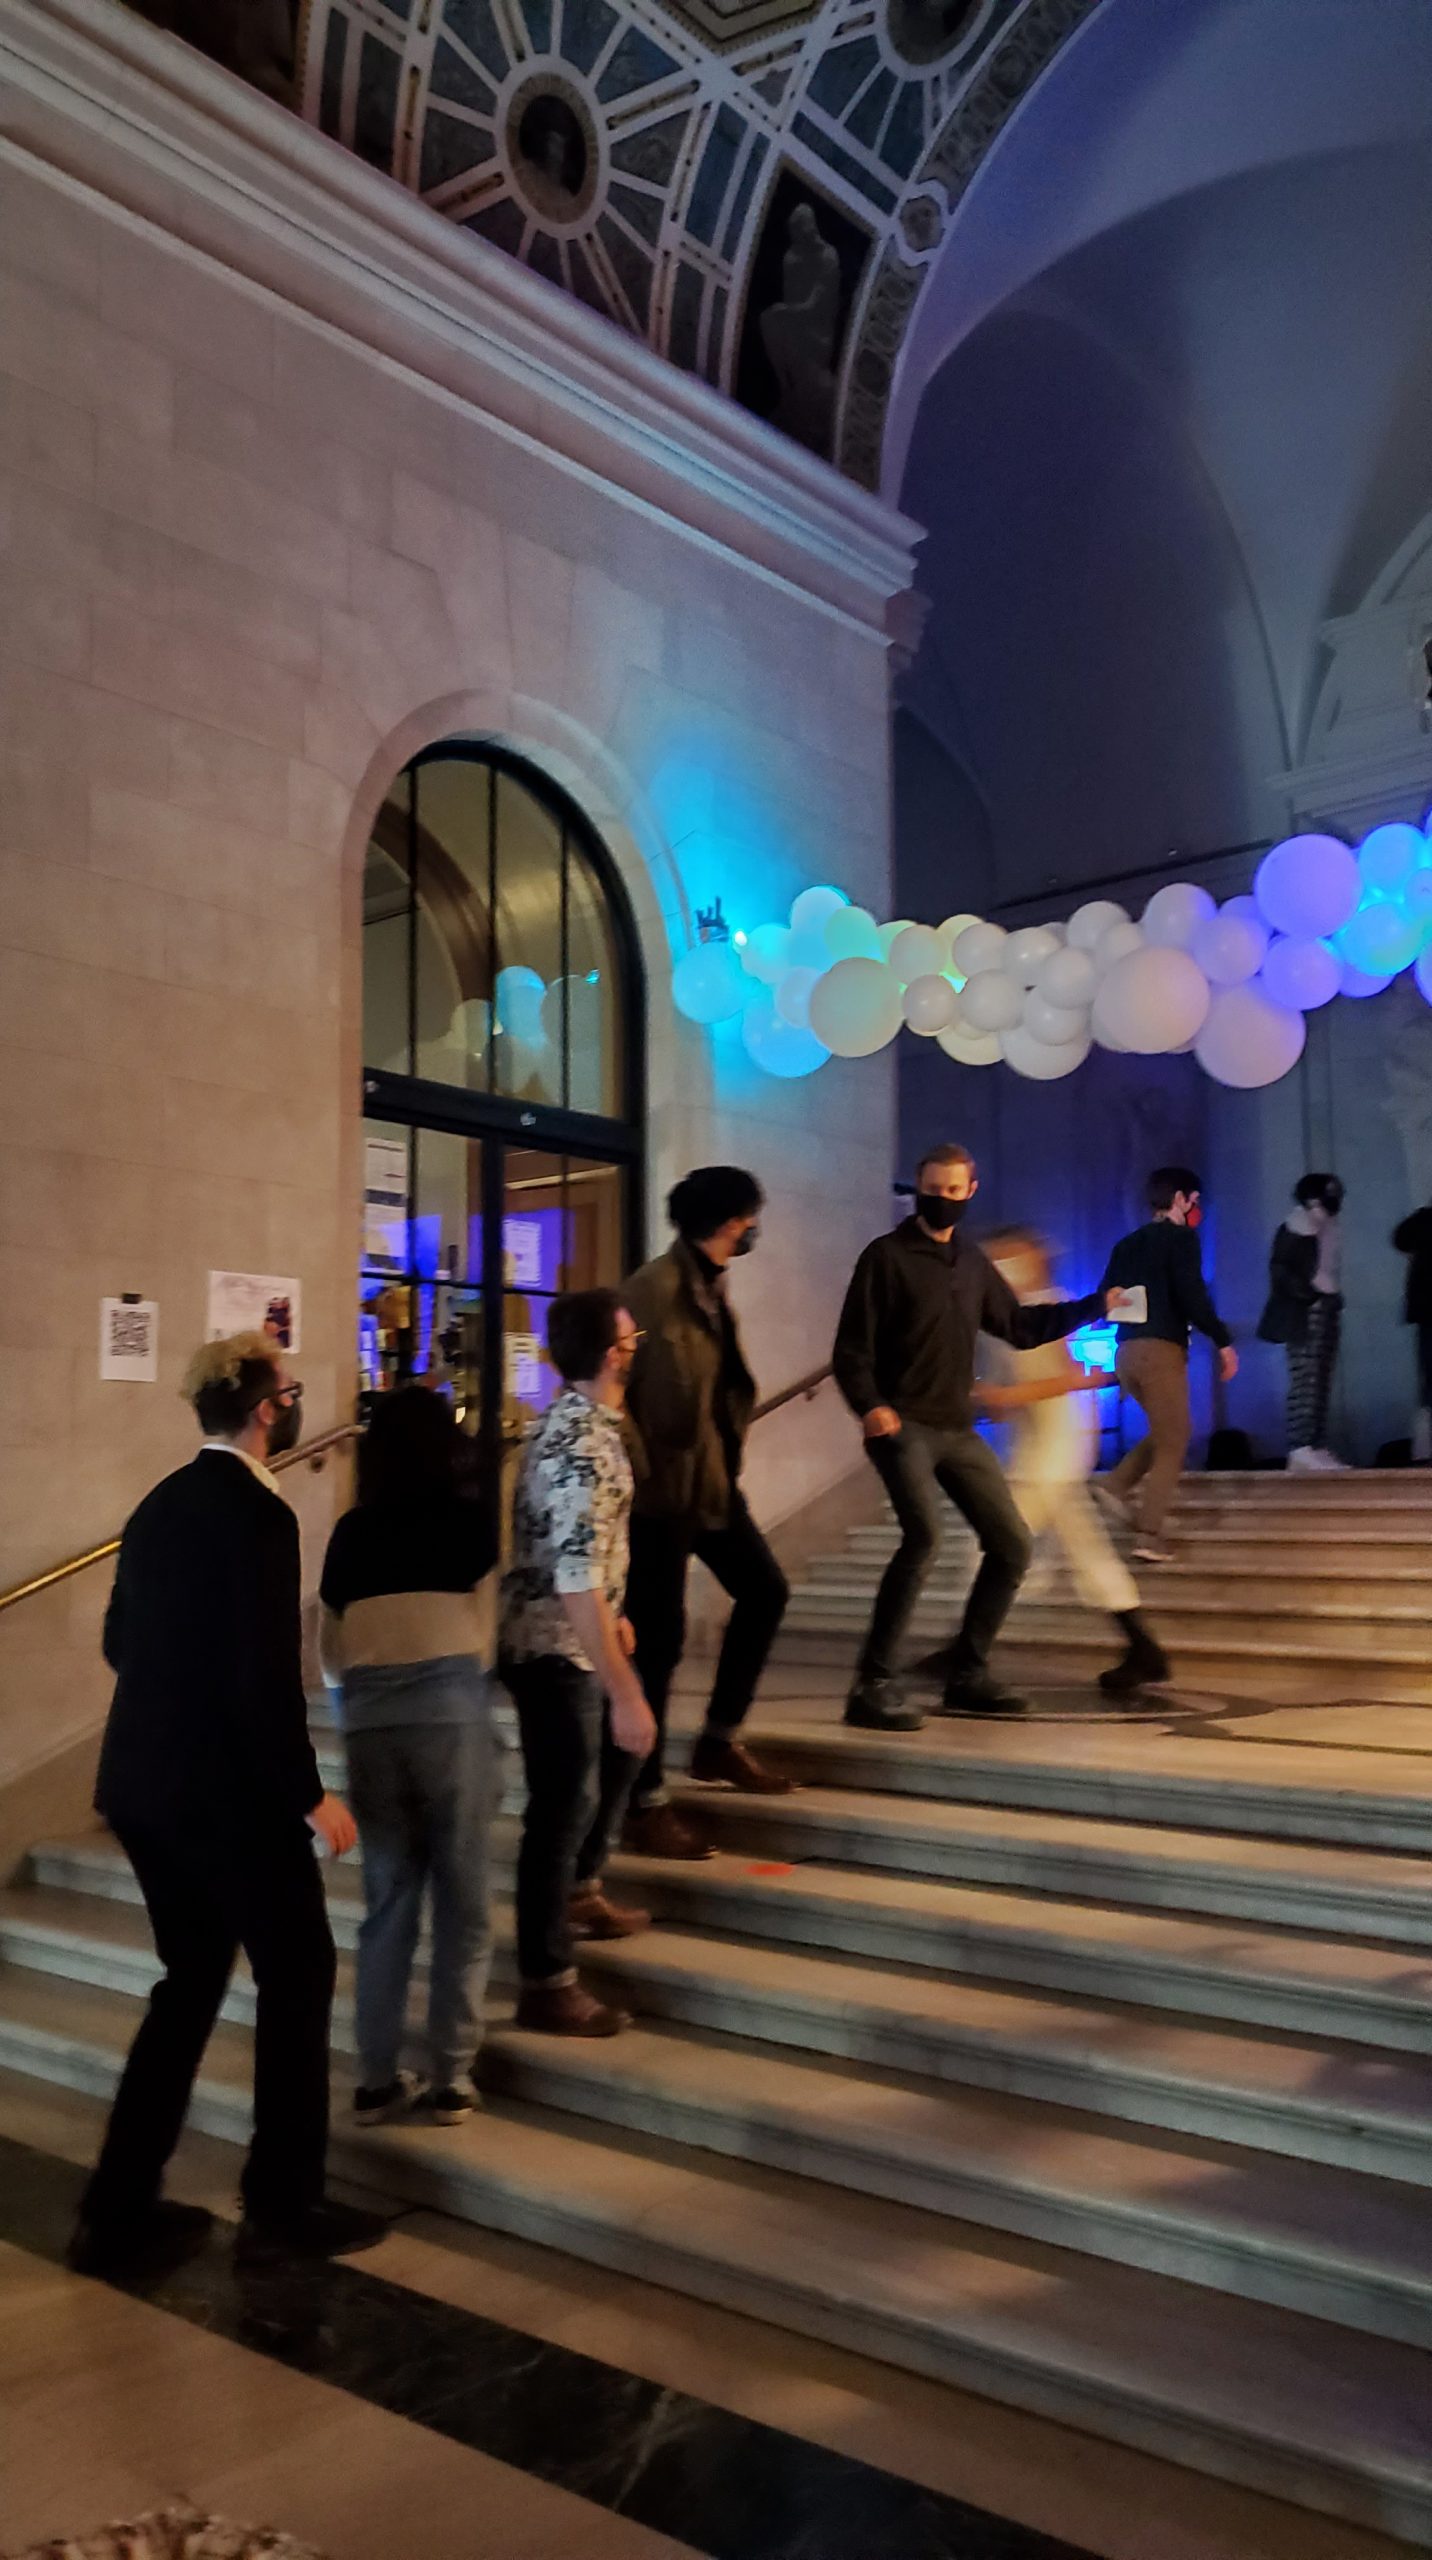
Our installation also looked mostly clean and very presentable. We were able to restrict the wires from the decals to the stairs to the edges such that it didn’t interfere with people climbing up the steps. We also tied the string of balloons high enough so that people did not crash into it. It ended up being at a good height where it was very noticeable as well.
Challenges faced and what we could have done better?
We encountered issues working with the command strips to attach the blocks to the wall. Specifically, it was an issue trying to get it working high up on the wall where we could not apply enough force in the right way. We had to resort to using aluminum tape. On one hand, this tape was quite strong and held up the blocks well. On the other hand, it did not look very pretty. In hindsight, it would have been a much better idea to test the command strips ahead of time to make sure they worked on the day of installation.
One of the other issues we noticed while the installation was in place was that the force sensitive resistors under the decals did not work as well as we hoped. With shoes like heels and even some regular shoes, the sensors did not always sense something unless stepped on in a certain way. However, when it worked, it did keep people occupied to watch themselves influence the colors of the balloons. We even had groups of people who tried to light up all sections of the balloons by stepping on all of the decals. If we had more time, we could have tried to test several decals and materials used before we installed them.
We also received some feedback suggesting some way to let people know what our installation was. We realized it may have been difficult for people walking downstairs to realize what the decals they stepped on did. People also may not have known that the balloons were reacting to sound from the environment. Since the sound from the environment was random, the balloons changing colors might have also seemed random unless there was a large spike in sound. Furthermore, the presence of so many other installations may have resulted in people not realizing if it was connected to something else like the decals. Having some sort of a sign near the stairs explaining our installation may have resulted in more people interacting with it.
What change could we have made to take our project in a different direction?
We could have decided to implement the LEDs and force sensitive resistors in many different ways to create a similar effect to our project. We could have designed a smaller scale installation that looked more like an object rather than a large mass hanging above our heads. We considered the idea of using fabric for our project so perhaps we could have covered the LEDs in fabric and created a similar glowing effect that the balloons had. The way that people experience our project would have been very different if we had made something as a smaller scale but overall we are happy with the success we had with the Dancing Cloud.
Code
  // Group Judge My Vow
  // Dancing Clouds
  // Creats an instance of the Pololu LED strip
  // Uses 6 force sensitive resistors and 1 Adafruit mic
  // The force sensitive resistors and mic are inputs for the led strip
  // where the sound received is a countinuous change and the
  // force sensitive resistors change sections of the strip to


#include <PololuLedStrip.h>

// Create an ledStrip object and specify the pin it will use.
PololuLedStrip<12> ledStrip;

// Create a buffer for holding the colors (3 bytes per color).
#define LED_COUNT 300
rgb_color colors[LED_COUNT];

const int FCR0 = A0; //defining analog sensors
const int FCR1 = A1;
const int FCR2 = A2;
const int FCR3 = A3;
const int FCR4 = A4;
const int MIC = A5;
const int FCR5 = 5;
bool priority = true;

int forceVal0, forceVal1, forceVal2, forceVal3, forceVal4, forceVal5;

const int sampleWindow = 50; // Sample window width in mS (50 mS = 20Hz)
unsigned int sample;

void setup() {
  pinMode(FCR0, INPUT);
  pinMode(FCR1, INPUT);
  pinMode(FCR2, INPUT);
  pinMode(FCR3, INPUT);
  pinMode(FCR4, INPUT);
  pinMode(FCR5, INPUT);
  Serial.begin(9600);
}

void loop() {

  // setting all the values of the force sensitive resistors
  forceVal0 = analogRead(FCR0);
  forceVal0 = map(forceVal0, 0, 1023, 0, 255);
  delay(10);

  forceVal1 = analogRead(FCR1);
  forceVal1 = map(forceVal1, 0, 1023, 0, 255);
  delay(10);

  forceVal2 = analogRead(FCR2);
  forceVal2 = map(forceVal2, 0, 1023, 0, 255);
  delay(10);

  forceVal3 = analogRead(FCR3);
  forceVal3 = map(forceVal3, 0, 1023, 0, 255);
  delay(10);

  forceVal4 = analogRead(FCR4);
  forceVal4 = map(forceVal4, 0, 1023, 0, 255);
  delay(10);

  forceVal5 = digitalRead(FCR5);


  // Sensors take priority
  // If they are not pressed, sound input is received
  if (!priority) {
    unsigned long startMillis = millis(); // Start of sample window
    unsigned int peakToPeak = 0;   // peak-to-peak level

    unsigned int signalMax = 0;
    unsigned int signalMin = 1024;

    // collect data for 50 mS
    while (millis() - startMillis < sampleWindow) {
      sample = analogRead(MIC);
      if (sample < 1024) { // toss out spurious readings
        if (sample > signalMax) {
          signalMax = sample;  // save just the max levels
        }
        else if (sample < signalMin) {
          signalMin = sample;  // save just the min levels
        }
      }
    }
    peakToPeak = signalMax - signalMin;  // max - min = peak-peak amplitude
    double volts = ((peakToPeak * 5.0) / 1024) * 10;  // convert to volts

    // map the sound input
    int soundc = map(volts, 0, 20, 0, 255);

    // when the sound input is above a certain threshold, the led string flashes white
    if (soundc > 340) {
      for (int i = 0; i < LED_COUNT; i++) {
        colors[i] = rgb_color(255, 255, 255);
      }
      ledStrip.write(colors, LED_COUNT);
      delay(100);

      for (int i = 0; i < LED_COUNT; i++) {
        colors[i] = rgb_color(0, 0, 0);
      }
      ledStrip.write(colors, LED_COUNT);
      delay(100);
    }

    // the colors are defined by the input sound converted to rgb
    else {
      for (uint16_t i = 0; i < 300; i++) {
        byte x = (soundc >> 1) - (i << 3);
        colors[i] = hsvToRgb(soundc * 5 - (i * 3), 255, 255);
      }
    }

    // Write the colors to the LED strip.
    ledStrip.write(colors, LED_COUNT);
    delay(10);
  }

  // Chack if the pressor sensors are activated
  // Light up sections of the balloon based on a specific resistor
  else {
    //FSR0
    if (forceVal0 > 10) {
      for (uint16_t i = 0; i < 50; i++) {
        colors[i] = rgb_color(255, 255, 255);
      }
      for (uint16_t i = 200; i < 250; i++) {
        colors[i] = rgb_color(255, 218, 0);
      }
    }
    else {
      for (uint16_t i = 0; i < 50; i++) {
        colors[i] = rgb_color(0, 0, 0);
      }
      for (uint16_t i = 200; i < 250; i++) {
        colors[i] = rgb_color(0, 0, 0);
      }
    }

    //FSR1
    for (uint16_t i = 50; i < 100; i++) {
      if (forceVal1 > 10) {
        colors[i] = rgb_color(0, 0, 255);

      } else {
        colors[i] = rgb_color(0, 0, 0);
      }
    }
    for (uint16_t i = 250; i < 300; i++) {
      if (forceVal1) {
        colors[i] = rgb_color(0, 255, 255);

      } else {
        colors[i] = rgb_color(0, 0, 0);
      }
    }

    //FSR2
    for (uint16_t i = 100; i < 150; i++) {
      if (forceVal2 > 10) {
        colors[i] = rgb_color(75, 0, 103);

      } else {
        colors[i] = rgb_color(0, 0, 0);
      }
    }
    for (uint16_t i = 250; i < 300; i++) {
      if (forceVal2) {
        colors[i] = rgb_color(0, 255, 255);
      }
    }

    //FSR3
    for (uint16_t i = 0; i < 50; i++) {
      if (forceVal3 > 10) {
        colors[i] = rgb_color(255, 255, 255);
      }
    }
    for (uint16_t i = 150; i < 200; i++) {
      if (forceVal3 > 10) {
        colors[i] = rgb_color(255, 200, 0);

      } else {
        colors[i] = rgb_color(0, 0, 0);
      }
    }

    //FSR4
    for (uint16_t i = 200; i < 250; i++) {
      if (forceVal4 > 10) {
        colors[i] = rgb_color(255, 140, 0);
      }
    }
    for (uint16_t i = 100; i < 150; i++) {
      if (forceVal4 > 10) {
        colors[i] = rgb_color(255, 0, 255);
      }
    }

    //FSR5
    for (uint16_t i = 250; i < 300; i++) {
      if (forceVal5) {
        colors[i] = rgb_color(0, 255, 255);
      }
    }
    for (uint16_t i = 100; i < 150; i++) {
      if (forceVal5) {
        colors[i] = rgb_color(75, 0, 130);
      }
    }
    for (uint16_t i = 0; i < 50; i++) {
      if (forceVal5) {
        colors[i] = rgb_color(30, 144, 225);
      }
    }

    // Write the colors to the LED strip.
    ledStrip.write(colors, LED_COUNT);

    delay(10);

  }

  // determines which input is currently being received
  bool f0 = (forceVal0 > 10);
  bool f1 = (forceVal1 > 10);
  bool f2 = (forceVal2 > 10);
  bool f3 = (forceVal3 > 10);
  bool f4 = (forceVal4 > 10);
  bool f5 = forceVal5;

  priority = (f0 || f1 || f2 || f3 || f4 || f5);
}

// code from example library for neopixels
rgb_color hsvToRgb(uint16_t h, uint8_t s, uint8_t v)
{
  uint8_t f = (h % 60) * 255 / 60;
  uint8_t p = (255 - s) * (uint16_t)v / 255;
  uint8_t q = (255 - f * (uint16_t)s / 255) * (uint16_t)v / 255;
  uint8_t t = (255 - (255 - f) * (uint16_t)s / 255) * (uint16_t)v / 255;
  uint8_t r = 0, g = 0, b = 0;
  switch ((h / 60) % 6) {
    case 0: r = v; g = t; b = p; break;
    case 1: r = q; g = v; b = p; break;
    case 2: r = p; g = v; b = t; break;
    case 3: r = p; g = q; b = v; break;
    case 4: r = t; g = p; b = v; break;
    case 5: r = v; g = p; b = q; break;
  }
  return rgb_color(r, g, b);
}