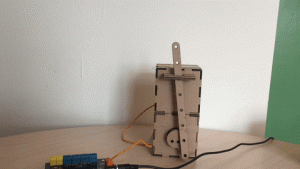
This lab is adapted from the Hummingbird Robotics Kit web pages https://www.hummingbirdkit.com/teaching/sketches/laser-cut-mechanisms.
In this lab, we will cut and assemble two subassemblies to create a motor and crank. Unlike the picture below, we will use a human motor (aka turning force) rather than an electrical motor so that we can focus on the mechanisms and their motion.

To start the lab, download the motor.dxf and the crank.rld files. They should appear here as links, but wordpress won’t let me upload them. I will send them in email and figure out how to get them on the class website.
Part A: Open the tutorial called Motor and Crank Units. The lab will guide you through personalizing, laser cutting and assembling your motor and crank unit.
Part B: Play with linkages, motion and characters
Part C: Do a little math so you understand how to change the parameters to get the motion that you want. Open Crank Computation