Project 3: Sound of Go

Due: Wed, March 22

In this project you will sonify the ancient game of Go (a/k/a “Weiqi” a/k/a “Baduk”). You may use any type of input you like from the board and stones. For example, you could use a webcam and computer vision to track the black and white stones and use their positions to control musical parameters such as pitch, timbre, tempo, etc. You could add sensors to the board or stones and use the sensor values to control sounds. You could also use the sound of the game itself as the input to your musical system. Whatever route you choose your goal is to make a compelling listening/viewing experience that demonstrates insight to the game.

Some example starter patches for a computer-vision route have been added to the course Github repo. Have a good game!

Sound Squad

Arcade Jungle


Dry song:

Steven: For the section of our project where we generated the music Luigi and I used Ableton Link to tempo sync our real-time performances together. Luigi used Propellerheads Reason to create his sounds, while I used Ableton Live 9/Max for Live and a hardware synthesizer. Ty then used our separate mixes through his grain system. My specific sound generation system was tempo locked via Ableton Link with Luigi, in my session I had some subtle drum loops alongside a cowbell playing in tempo with Luigi’s tracks. I was also using a hardware synthesizer called the Pocket Operator Arcade (PO-20). https://www.teenageengineering.com/guides/po-20/en In order to tempo lock the hardware synthesizer with my Live set and Luigi’s instruments, I created a second CV clock sync system. The secondary analog sync system I used started with a second USB audio interface for more I/O on my machine. I then created an aggregate device using both my built-in sound card, and the USB sound card. The output of the USB interface was sending the analog pulse to my pocket operator. Then the input of the USB interface was receiving the output from the pocket operator that was being monitored as an audio track in Live. The pocket operator has a sync setting that once it receives the analog pulse it immediately starts playing it’s patterns in time with the sync (this setting is called sync mode 2). While sync mode 2 was active the analog sync system played perfectly in time with Ableton Link. Also, to keep all of my audio in time I lowered sample buffer size to only 64 samples. That way the audio from the pocket operator had only ~5 milliseconds round trip latency. I also created a drunk algorithmic pitch shifter that was used in the second half of the piece. The pitch shifter used the drunk object in Max for Live. The pitch shifter would raise or lower the pitch by randomly selecting a new random pitch close to it’s previous step. Here is the code to my Max for Live in just normal max patch form:

----------begin_max5_patcher----------
1163.3oc0ZssjiZCD8Y6uBJpJurw1AIPbYeZ+ORkZJYPqs1fEt.gyrYqc91C
RBlwdCCtqAJA9ggAKIKNmta08QB+i0qb2W7Lqx04yN+oypU+X8pU5lTMrp8y
qbOQeNMmVoGlqn9zdVo6FSWmoxzibwgmJYoRyz3Sh24swIRek3othw67b9q1
uRQsLmIke+LyLdW2MNt6ohCtuNjyzR5IljU9DSP2mqGnWae7LMLJ1+ssXTGL
Z.EWzLqZHhZarR9cyW08pgYd55wgUM9y0qUW1.j8mXUUzCrtITxdVyZ2snAr
HDOekU.gh.aRdsqqnKoe5hARWzGftB1+z7j+ersJklybPNXOmsHOGj2.jOvv
2X8UjwR7AHePRujOz9juIvrrngIddNeglJ4WZrDCveDRSYRfl+336y+aWKbs
MH15A.6qkxBw.zCSHJFEX3UP20OB6HiZ07D5gyJqE+sJ31a2PdV+PyJY8p5n
n66X4BY+Lu+E191m4e5kgb0IZWsengpI6H2ivU7CBZdub1OdojLKsnZHVG3q
8x9lkw9g22MODq8VJw3+wKN3c2m13X8RZ+fwQ6ESkqsuzrnl.f2jDcZM733M
dov6e6EGD.2MJIbJns+Rg1+9cc2F0In1pXjww6fkBu+zKJAJ.pcQzY0BFYVM
xRg2R54lIFRQrVUYnwQ7vkR57FhyE.3M1HTK.P97loLsPHzyPebOZov8AEsP
hLksQSflEbxChlETBd5zrfieTzrzR6oQyBN5gQyRGumDMK3vGEMKszdZzrfI
KJMKCkIGguRxhe73ns8krv92LZ5fYuh04rCCCeSSl5Zu3ebRM89.3Omegs6.
8pxsWnkB5I16zaOLrIAElroS7oojLRkl9t9vMWem5uulWPkpax4UxgOAUTOl
ug2fxsFKRmQkdgk8DUJK46qkr2tqp0p0Z1TFl7ZVwW6Ztq8qgWdg3v6a7tYn
UGKJk.Gamkyqm9N0vTUeaiTl+95mp8+g81KWvkb0pIkaw6MW1MCptYPuF6EX
5WGl08OKIyGgwSmL+Ei5myGoUEk.T61ch6iSIP7iytaZU6NIat4wYuMFVOca
sYwbPzzrAKThuJ51OBrydyft8o6cpom8l7zhe8ELpohp8asHUE0kocXsMgiy
azIiUI4BpjWHtZLg2Lli7rLl35WWXFuRU+K68q1CEMw.Pi5DffCmN+TYFqzN
3COJ7gFE9BgfuDq4NIKpfq.Hw5wymyCD9TufZGz7D8G.I7OfXOGJj3K0K9yV
3AAAO1a4mOnzU34KhGN.moHd0Avd+BR1KElOjD79w1COjEl8I.Bd7sGd7gfG
xLtBDD.wymhqe4Y+N.zd438gjiW8SPvV3wCZFAjUvCNYgWyAN.moZN3Xnh3s
jGERMPr8p4fAsImH6gGH0.Slw.dH3CGNeo3wPJZis21JvPJ4f8sKdPPvikRH
fl58QOJ3.AMynBKP5EhlpUelyCjd97EVYU6CQCM2SzuUnGdzF8G4ByG0+BXc
KYW3ciWep6tzxzibIKUVWZNLxmiMmVs6ohlGrnl2ZaZdx+b8+AncbLzI
-----------end_max5_patcher-----------

In short, I had a great time creating music with Luigi and Ty and learning about how Ableton Link works across DAW’s to make real time music.

Luigi: My contribution came in the form of a couple of synthesizers meant to be played by a person but whose output was heavily algorithmically influenced. The two most prominently featured in the piece were a modified dulcimer sampler that was triggered using key locked chord arpeggiation, and a graintable synth with as much movement as I could pull out of one synth short of generating white noise.

The first made use of Reason’s Scales and Chords rack extension paired with a velocity arpeggiator, allowing me to input the root note of a chord in the key of a minor and get random velocity arpeggiation of that chord, as played by the dulcimer sampler.

The second main synthesized started with two digeridoo grain oscillators with 4 beat repeating oscillation on the sample index. This was routed through a saturation shaper unit followed by a keyboard tracked resonant comb filter, which in addition to the final volume of the synth was partially controlled by a random square type LFO. The overall pitch of the synth was modulated over a range of two octaves in a triangle wave pattern at .22Hz. The output of this synthesizer was run through a delay module whose delay time and right channel offset were inversely controlled by a triangle type LFO at .53Hz. All of this was passed through a reverb, the output of which was EQ’d to accentuate high end and the harmonics of the root note of our key A minor.

A third bass synth was formed by compressing the 50/50 dry wet reverb signal from two sawtooth multi-oscillators with a long reverb tail and gating the resulting sound using reason’s alligator triple filtered gate. All of these were played over a set of percussion loops pulled from the reason factory library including bongos, congas, and timbales, and club beat loops, which were brought into the mix using midi controlled volume sliders during the live performance.

Ty: The output streams from Luigi and Steven flowed through a midi-controlled grainstretch patch. The midi board was a Launchpad using Automap to control Max. Each column of buttons was used to control the amount of pitch shift, stretch, and grain size. Using buttons to apply the effects, vs. a slider was not ideal. When jamming, the quick application of the effect sounded fine, but when listening to a recorded playback, it was easy to tell the effects came in off-beat.

My original patch uses grainstretch~ to affect each of the other team members’ outputs. In addition to setting effect levels for the two, the patch had an effect crossfader. This crossfader applied effects to one person’s track, but not the other. I was able to juggle back and forth with effects and dry signals, quickly. This inverse dry/wet crossfader added an interesting dynamic to the sound, but was one of the causes for the disturbing performance.

Our in-class performance was a giant learning curve for me. The main thought going through my head was “I really hope this wont break Jesse’s speakers.”

For the performance, I did not compare the levels while each of my teammates were playing together. There were level meters inside the maxpatch, but I only checked to see if sound was coming in. The previous day we had issues with routing the sound to the speakers at an audible volume, so that became my focus (instead of seeing if it was too loud).

The group decided to re-record the performance with corrected errors. As I mentioned above, my my effect patch was not working well, and it felt jumpy. To correct this, we recorded dry signals of Luigi and Steven playing together, then I re-recorded applying effects. I tried adding a ramp to my patch to ease the jumpiness, but could not figure out the implementation, so I used a knobbed midi-controller and used Serato Scratchlive’s built in effects.

----------begin_max5_patcher----------
5829.3oc6c00iqZjl95t+UfrhVsyn9XQ8cwpIizd2dQztRS1U6EYiZQaS2MI
1fEf6bNSzje6aUTfMz1FdwiAWXStnyAi+3sdp2uqpd32e7gYuD+0fzYN+aN+
jyCO76O9vC4uj9Edn35Gls1+qKV4ml+1lsNHM0+sfYOYtWVvWyxe8uC47cXG
lqa4ch1tNda1pfr7OGp3UMuT121DX9QmMy4mKt0F+rEuGF81yIAKxL2ky7lS
T+Gh7jCx0ct6SNbp9uX7b2cevvk4RP7K+xWHrxe9zrusJ+2XVEAJLpTdv5W6
e73i5+7DvgdTvuo9MNXjuJLJ33CZ7IGzO05.msefK45gL0soANV.bfStrCbG
24Nn4mdd+7g.AEoGvES6BulF8HzfM5uDp0XpTOZHDbkQ3oFaP0nQmwPaUvGA
qVGjEj7Gcb7EFk03PziimKUCPF9IGOBcNW8eRgZvhkkVwGchbmZzZ+jeMHov
0zW3pOyWnR0eHb0evT0ePpu5untR+0s665PPp3KZaZP9Oiz9wNgmPiQc.17F
Mn1Ibk3ubwe3fYNXdGcijF9Vj+Jsyjh+US.qDk6IUZbkJZzriOJM63d4tT3d
4tKaQqgxmL1bHRl1QUdjVcTW.vlXrassJ1e4K9Qu0QnL+izDVxToqUhkTAIG
DazHiJ6QqrSkoJ5RFJu5PlgxGxXu4rFFxdCeFpe4BayTaParYZdPyP83f90U
wpuilia7ZbxZ+bom2TBospgyo6yKuXjyZN6M7rceaI94dvdNHx+ECH31eZ+m
PUHw4E5EsBMLeGfPM4sPPMBHDfpBtWtA8etqAM.jKAGg1aC3QAXCPuQrAjX5
da.iW9VrAX211.RWxd.g.wFfeaXCHjncCbNBhMf3FwFf4J22eFSNNsXC3ckr
AdyOL5ON6hpZsTUUoTk3.gvKQ.Ennqw5n0U4dsbFrc8KAImQWpZUYPfvcSYf
itIUFp1sVfJCVW1Q+vEMxfvsRnRSPBBtsnC7qPFRpAN9RNvod6qpFgcaOjHm
1iC59q6AnJp7LSakZo6Ab9Tu5fjaA10Ung17NHS.0wNwnrkcUUgnXNDUnQe6
d+yNjKLJV0gC1k2dpnBzv2GlMNuknh.6jpFZJwOc1trRixRC+64BARGw7x4H
l3su1DLKOEcSKhOItfqJUQpfx425eOITa5Ztyh3UwIlue24Rp5KWnzvlKnHj
PqqMO+kzt9q7azlQY0wPPRA3VftJgITaAljFFGU4c+vL+Map7xOT4inmR9Ei
XJdZ2KEFYdIxtWJI3ivO+0p9dSTHYlBF2lXD5uJKc2o+ZhWFjDsMbmYQtxwi
kegUqTVaNKxQbAKuo7TJeOpnTjdaU7he0X14V9hwaBhBi1jDjFDk4mUHc6t8
xfW82tJ64iq2T+9u5uH3je3iN89vr2RBWFGoEhZXs9kK+4z9sxGarpCl72Qj
+li7gU5VJb4D2LUMH2l9hehdpnH6Ob4MyhiWU+V69bqBdMq31aBih9DJlEu4
z2LI7s2a3y9Rr5lqa56N+NoOuMxb2mUF+YOm5+QczNye0pBuA0+5+peTnpTz
frPyTfJdW4MMY.+d5hj3UqpMdM24iibmkJs3EA+V3xr2y+gppLnd6gaJUhls
aVdY3aAoY0esL+2Rq+JGX1pdosuTXk9bVv5MqTih5ugZapjpljU8aV60+j+y
b2B6L2NkqvVbGd5jxySGEmq+RbK+asO1wVR5S.GGlgZkarHd85fnBPt7kyCl
T3y3LAnZEyd5bv.VT6ISMw33hPEGul1ChcLq122IqnCJRhtfHV8UCpdb4WB7
0wiU9a+PMYoLTb9NT023I7ydwULMQKPTcdKHLoM316yx3wcmCDrwCDX+p+xf
qI9JPZ3kgZCckiRzMOASMVdMgXkqUlNem1fXt0Bwk9sOFD+e+tJsLmct2RcV
6+qANYuG3nxWSkYkSZ71nkNqTyRNQp7ZR7W47x1L0a6aNuD3npjIP8F0Nbbd
MNwY81zvEp2xlsIahSCRmW8GUuE6Vn95x+komy7oaySXTQdolHubqBj4JdCg
CovmyzHVsREXtHON5oi9uPe5mDR3gOIIko5NTJB+uwI+ZpSbzpuYlH0I19db
T3Bm28SVm+OzY3ogEGekFQXlSlRUIUofrVovDp+SrVoQkR7xmbRWqxULHwYm
IbZ48bdUkaYPxbGkBRnN9Th5qKdcjVCK883sqVpUrbmmKFKhSzSuEJiCs5DW
Xhggyq8V51l5DYRcpTc5+PUQhZ5OO9n52NKNIsvUxKJmv56jqjkD3n9DIAJs
mz2CeMKW0JU8BpICGk5w175EaXdG2Gy6D19XqE8YfPN8zNdZZubZ+u892xde
cUeEuDDE7ZXVpyqIwqMtEp3T3Im0AqhWp9.429ciVy96OvS7t38Q7ALwitul
3qslzcC3qOa8oks9e1B6L0VPxqz.PcccXV67J6SAZgqU.kFTpgIp4qxa39Yv
Z3KTLUUhn+xqZp0l4rCOELGLm4ZsIWa2FEtLXFEbud2nXv08s5YFjP.blge6
MyzjWoiTUv0zCkw.BQZu7e5nrEKaBUib6.qKLIPHuVwZxnrWK+OoppfyAbmk
A5kiS2b17hlWtcQfyl28S08QwOIKTWxTZdMRphghidSUUd9GLX4tLqm67+E8
eFmoaViupV72CSc1lVVOttnJemEa1ppx92p2a8ZYQS5grnwDY0xlwlEJTzvz
I5hNcd2DCon4usFBgQFvLdUUwbxXKngXJq11U3viJj1YnRVv.mSeOb4x5qu6
k142WPlSNKMeGdHwsNahsVqEHPuDMWk1O9Pcxq9DforeDt8YfI+UmW0H.KFg
JFzTdGDuRYwu81pfybW.Tc+hc5lVVY8VMaRUbSq7AyhWd6lRh5+5ifjU9aJZ
prS7qEcKz4mbmOWE74mm0CozTvZEEcD1rCBZBcI1qGhlv1eTuTqgQNqS03ZX
zxvOBWt0eUEHFMe9W9q8HDWz60hyeSSPr6nDh+a4kZ4rwOJRmq+lxtcmq9h5
EkWbgGWSy1PRRaPK1aTCsEMPv4Cekvl+uLpzZDtezcKQX2BkWbqHrbTiv4kv
tGd6cfsry.7V8JfEVKvZF0y5Xpstsk6J0zsjh8mxt+dxNoSlc9KrTaa.v86c
VcSFNwllLeTjSyTGEyRi2lrnLwmhMFlS8gyx7MbxtcR7Osej8o23wA35a3ar
fxxW7sC+WedY3VFlpSNZ4tStSqZFccrJuiFq50gC1f0sgAq6vJyt2QSPbnVd
5VeaISP5UKAlLSrGYldOoTQtmFr2QiUFzIVo0X3o6jJHQlcKL+.Mbqt6ai8A
6QFCmHLf0nLpaHGHQ1yZDYj6kPkpKxryO+X0im3L8ITa4ylSi2y9YYIgurMy
T3Q0yaYmN0XusJ9E+UEmIrcUO1zQHa+4L6w8x6EiJCtnL7V0SPawJczLUFHt
N72.4hRqch87aCE.8MHX83X9TD4WIeBz6GhZlbOMdfIFxdAKaibCE71OI08N
MHABUt3riTE7BwxaRMSzHTIZGpFXFh4TJclN4saO+zmpc03z.yNDgQZDFk2q
Zb0bRa1E5snw4co03N1dBr2HPCypKYNzG+gCtOIhEpPrOTfYS840neOoaOpq
0i7vBGi2Q3LbNDhXY2JBeOSfxHBaOtIvhJIK0L3gmnQ4SwHPD9NxymJosyix
DuwNOJWaLyv.3RRhb7Sjx0G0b.zVDgeivfl0b2VLzal0DI23ToLha3QVCh3J
aupKxMBWJiXR4Ny.tK.BEmbqPlxHoKZ+jtwWeKlAnaby.gzcOhPAXFf8tQLC
DL49LPw.LCvxaEy.pjsaniDn1MCv2lbnKRvY6bERLYP2BI5hD2bLpLhK85l5
.heapNv8n6UG1WDPSpCTaK9vOdgSSpptgIx.ow1hIuF8i+Gun7oLhJ1+7TCz
fVLN4SYjoCmv5+B41fJkEN6ii2GcvCgH78ToLG.UJSQiSpTt5.U22R.sviNZ
zgpcdX5EHCiL8LmV92ihXD6J9xkmKoq4rsDSZ9g5k6cAYRiHh8klg4L.rIMc
hMomXS5I1jdhMomXS5I1jdhMomXS5I1jdhMomXS5I1jdhMomXS5I1jdhMomX
S5I1jdhMomXS5I1jdhMomXS5I1jdhMomXS5I1jdhMomXS5I1jdhMomXS5I1j
dhMomXS5I1jdhMomXS5I1jdhMomXS5I1jdhMomXS5I1jdhMomXS5I1jdhMom
XS5I1jdhMomXS5I1jdhMomXS5I1jdhMounrI8OdY44tpGgVjgBGZlHGvrqB8
UPtrr6GG0MN6.SuFDJ8lffkCC29VGQLGh5l43Ql68J49VGqLmIflY2WtbhOo
aiWCL8spYBklc2Rnz08San5fl04vjQMiRuzewIniE2lPIWxbpmmTHexQ5kqQ
QZDknCOQYLfbkMhxn6IfFJucxxFeMHNj0gKC69bMxc+XCYVBVZidOfRhPt2f
j0AxybDlx2IdRbtl.GMwUGSb0wDWcbl6fsz8DM6Yr6F3lM1GQdhhONH0GuY1
I8RPD8EUlf3EquKxEFCcvcuhaz6W1prSiNSr.1llq.OJR+6PZQ6.7.ao5Lty
QTrjI.cXNurpTBSKNbApRIYWQUplb9rveUfiGxwSpOZ7n48tQnAq7Z8rXH4c
Dw32.NpLDthfCToRXmJUgu57u9cgHm+hZZ9O47uXt3uppX3OoI.jHmJObQFR
S1BudE7LroeKjF1RKRos51q2T.ols6CybRaNjbHO.hvVqFnVm66+dU06GWmq
OfMpm4.JgEsZ4RrySSQTbVPXCIePZa2j+Ts+GXfyzRAZqYuJo2cljXiaKvlj
BOa2jTLDljEvVGLIcmLIqBbfMIQ2cljtDutYRxscSR9PXRV.avMIEhISxp.G
TSRwcWhqRjg0K.aQRrcKR1.XQVfZcvfjNYPVA2.aOxt2rG0Ox+5TDRWa2djN
.1iEnVGrGQS1iUvMv1i36M6QhYmXA1djKrc6Qx.XOVfZvsG4xI6wJ3FT6Qt2
cWIjlMPAb6QpsaOhGhJHMnVGrGYS1iUvMv1i76t3icKcUt0W9HZHBO1wrU4S
YqVA1fZLxrzbJR2+7O8L11REK7S41VpUVvjwsVTfb9n.1C2MTPXsn.97QAWR
GQAp0hBnyFEjFlIBNHvrUP3GNe2BEExSLT1DfMynq0BBmuWARoSAnf.1ZAg+
IbJXRYELHPsVOi+v46SfzMqAJ49aq8RKN7RP2ZuD1s8V6s.O.u0dI1Zodn5y
TWVkFySgcvadWhvl27tRjiTpFENHlauamUvaZnV4xVh28212kRocY66RQ191
2UVc66Jutae2ROaf29tT78W3PLU1ovgXua6vgE3A7vgt16Ico+TZLVVvCGhr
4vgBjiPeVVPN348tcVQ3P2VKWmfu+BGhKdbGBLbHgX6gCEUCGJNU3v9PQqLp
mWqEARn2eQ8bKdJfCNpG41NpWAd.NpG1V0Y5QO3kMcFZPOrUe.N4HGduGzqz
LCbPO7c3Q3z03DBZPOr0eDN4UC5wGjfdk9u.GzCKu6B5IKL+fFyCca23yB3.
bHOD+tKjW4JLVMhWS8OAY0c8jgbX8cDuRaLvA7P2eM8TXVsRvw6r9ddxpFui
MDw6J8cAOb28WmMYdciBets6qYAZ.OZms1VydbIqJ2KIPKvCY0c0jhbn88h7
UZiAdM9P2eM0jI6DC8fr9dZRqFtiNDg6JcdANbG59qklDY25nI5lNbWAZ.eU
7r0ncyEZ1pCM3Kdd4VJDZrPpMGJjfTJD8bkek1efq7ic2EITSj3cHRH21CDR
pFHjLDABKcqANP38WWNwcqImrqY5VWKNizqaPD5Fmaa85TpBT9c3F9oXu0Cs
QvToMmN.VkGPuuzmEFYfSGfdGt6WY7Ns4WusWOJb2VNJJ8NMzNX0EKkffF3y
Nr.YdnbC6nCSjVagvTUYv0OuRCRgvFkNhKEVjOrqMG4CgbP8cjOb8U.k1Zin
jWw.efpyCWsNO7freVJxIE956YmmkwB1k3u78Z0tdG0v0VTT.bg1E.z1+b+Q
6M5DOvW55SyTnOsyQXq4AvpTB8wbqEIyPez7JkiOYV+DowAAPlWGtbSrJShz
cOzCb0jYCxs3bvvKbjW+RSp6Hgx+Nq3xA9AqrD5izb8CREPHgEIyL64Qqrl.
8ggyD6QlA+Df2h7FA9Q.u87jBWB8I4tz0djYnOpvEVjMHPQ1dr.EPyggIrGY
FJLKrHYFZ9.B6wqg.bTPp8HyLn3rEIyPibKrH+FPibyX1iLCMxs.YOxLzH2B
6Ixs.ZjalEIy.EYp831fCMzM2dJKlCt8C1SnaNTcCl8TjBGZnat83dlCMzM2
hrAgF5lZQ5yPCcSsmzM33tzNMKQlgF5laQ3LzP2R6oLEv8WbzIwnyq0vDgWk
NCqux8fqL8ElhIWq1By.mIf8jLNCpmSj8nqwf5EhZOsQiM9R3BpHSsl03fBs
7A8lDbzIy1S5VTvcQydbzQYcQlOqUujUawKY0V6RVkPTXWuqUHJvnf83FhBs
dDl8jyIEZt8D6ImSJ3np3wmLSXmoQMkQpZUquz8vKK1RBTOwUyvF7RKZOSdt
cwv1NhVS7FeqTNXYVu8osEbFZoTR6Qetax7HCm4iOXlO9PYJa7AyT1HDmQiP
bFMBwY2QHN6N9vYBY7gyDx3CmwivrMvivrMviP+y3Qn+YzHzuAxh7av6R6Gr
DbFZG.I1yhmPf1BPhEkuAzEViPGexr9IwyY0NMLkVscZXyyfpOeYQ6zvR40p
cZD73aOjCVlIVTjJ2tnwYI3bG1pC1gDiA2AP6o09Xv4cYO9OwP2VkX4HTlIm
oOeWT08tS9ktGdYgOeW9Ua66fGgmMDvxL1d5RGl1EMNKAmAmYj8znbLz7APV
jLCcAcw3wmLiNyEgV5hp3.Uek6AWYbeJorql2SnsW0dT1PdiuC7EXYFYOs8C
IGe6NevxL1dVt.DuKNhrDbFZ6nP1SAfHnIvfrm1Qgfl.yY1YGlWUpaQek6AW
YhQwIWMdaALHfrmL7Q3w2IOErLirmNQgb6fAhk.yP0LtPRryO+Xgn+nQf7+H
X4ypegfEYO6mkkD9x1LCQjUQz0B0hjvMkB0NRNS868lRdq+ZusJ9E+U4HQPR
j+557h1QnJsYY9uYHCtYOtWdy+aAEoUmdzxkpCf5e+wiCw0YrkSsQipE28Pv
8PfsP7d57jGjkIOshOtVF9LfxC.3AMbSW0oFmSsCgwCm7.AejC2zUcJsADc1
zuxC2xvGFD7QLbxCEf7LfpyDHvi2vIOXKS8AAAejCm7.PbntVk3TuYi8p3vg
3blMbvCWXWZybAfbMjVF9v8rK7YnkmVwGrkgOCn9CjfoBjcIOrAT+ARzcz.h
OPhtyFtjw3HKy9BYW0lxgTqb88VP+JO.DGuAUZZyYHZ3lrXRqpxBFnTU4Vl7
LbhCGpqPjEIOrgCefDJkJrL4Y3DGHQ1qyKHWe4gNb9lYXnQtFH7ARjc1.5c1
0pBVP8fpNOPxiztTmoPTenzgUdPVl7XQpyPfGKSbPB6Z1BMfZOfJyY3ZxKAh
2Px.JOP7FRFtT4IPxUkLb1WDHqwDd3ruHfxUEaYxyfkKFgXYlWDnlWCD9.I2
YxvMegA4Nb3RNDj7fkCG9.JY0gqzcXxyvAOf7NSFN3Ah2P9v49ACZK.LbYiA
x6yfJMHqRZbsmD4w1UcEHATGyCj7vsqoKXxyvYoinPSzXfjGPK+14lngYm85
uYyGAIoEem4hxr09+Rbh9RwS4WFFYtL+ga+rjfOBKe+4Oxmm4mr38vrfEYaS
L6r3upePPj+QiWFjDsMr3Avr5W9e73++OPo3q
-----------end_max5_patcher-----------

Live Performance Project

Overview:
A live audience participation based rhythmic composition which evolves in real-time via filtering and effects done in Ableton Live.

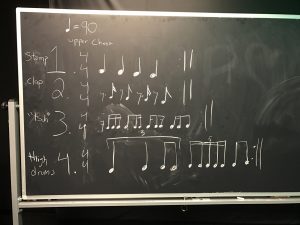
As we were conceiving our idea for the project we knew two things. We wanted to involved people to allow them the chance to familiarize themselves with our project on a deeper level and we also wanted to incorporate different rhythms. For our project we had four different rhythms that can all be combined to sound symmetrical with each other. The rhythms increased in difficulty from number one to number four. We chose to do this because the knowledge and performance ability for rhythm is very diverse between people. Some are very good at reading and performing difficult rhythms but also some are not the most adept at it. We knew that adding these different rhythms would challenge the participants and further enhance their engagement through the performance.

Our main objective for the piece was to get people to have fun. We accepted the risk of human error and imperfection before hand and wanted to focus on how to get people involved as much as possible. After organizing people into four groups we recorded everyone through Ableton live. We then edited the recording and sent it to specific speakers around the room.

Inception:
As we were conceiving the idea for our project we knew two things. We firstly wanted to involve people and allow them the chance to familiarize themselves with our project on a deeper level and secondly we wanted to incorporate different rhythms. For our project we had four different rhythms that can all be combined to sound symmetrical with each other. The rhythms increased in difficulty from number one to number four. We chose to do this because the knowledge and performance ability for rhythm is very diverse between people. Some are very good at reading and performing difficult rhythms but also some are not the most adept at it. We knew that adding these different rhythms would challenge the participants and further enhance their engagement through the performance.

Setup:
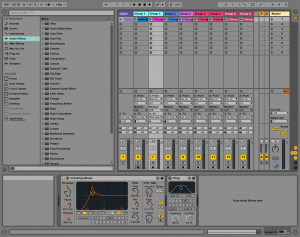
The DAW of choice for this project was Ableton live.
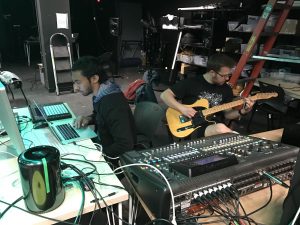
The microphone as routed from input #10 of the UTRACK32.
Pre-amp on and gain sufficiently turned up.

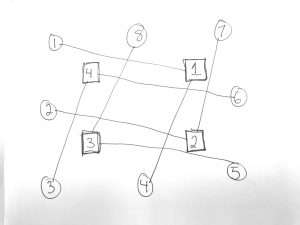
Ambisonic Speaker Spread:

Technical Details:
The goal was to record the group after a 4 beat click and continuously build the rhythmic layers as we progressed through the groups. As this was happens live effects such as ping-pong delay, reverb, and various equalizations were applied to the recorded clips.

Bottoming out the piece was to be a guitar improvisation.

The original recording can be listened to here:
https://soundcloud.com/user-233892197/ess-project2

During our actual performance we ran into issues with the equipment. The main problem was the sound console settings. Gains were too low, it was set to ‘surround’ instead of ‘ambisonic’ and certain inputs were in the wrong spot. We were able to set and test all other equipment, but because every group used the console differently we were forced to set it during the performance. This lead to delays in the performance and a lot of waiting around time. We didn’t realize how much we relied on the console for our performance, and now realize for next time we should save our settings to a thumb drive. Our performance can be found here:

or Here:

A zip file of the project and the recordings can be accessed here:
[hyperlink zip file download]

Dan – Musician, Music Writer,

Nick – Ableton Engineer, Guitarist, Sound Editor

Kayla – Board Operator, Recording Engineer, Documenter, MC

Project 2: Real Time is Real

Project 2 will be a performance-based project that combines real-time human performance with real-time computer performance.

The human performance aspect may be using a traditional music instrument or any other kind of sound-making object. It may also be a human performance of an electronic instrument or system.

The computer performance aspect should use some kind of generative/algorithmic/stochastic process to generate or process sound in realtime. This may be processing the sounds of the human performer, or producing some kind of accompaniment.

Project 2 will be presented in class on Monday, Feb 27. Each group should be completely ready to present at the start of class so make sure you are well-rehearsed before then. Your performance can be anywhere from 3 to 15 minutes in duration, whatever is appropriate for your work. As always, carefully consider every aspect of how the work is experienced including the placement of the audience relative to performers/gear, lighting, entrances/exits, etc.

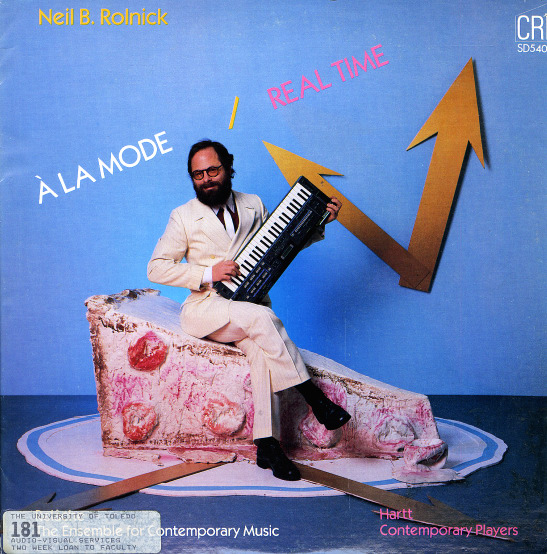
For inspiration I include here art for an album by one of my former teachers in which the artist is seated up a very large cake and holding a synthesizer with a giant clock on the wall behind him. There also seems to be another giant clock underneath the cake. The title of the album is “Real Time” so this is definitely #relevant.

Sound Squad 5 Group Project

The ambisonic Squad Five project focuses on letting a user control the sounds he/she experiences. We accomplished this by linking TouchOSC to a Max Patch running sounds each group member recorded. An iPhone, running TouchOSC, was passed around the class allowing other students to control the location of pre-recorded sounds. Each group member created sounds to play using a technique that interests each of us. We decided on a fundamental structure for each of us to follow, tempo, key, and meter.

Abby’s Section, Violin loops:
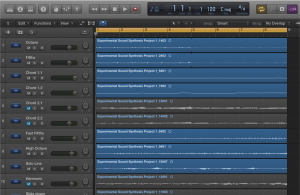
For the violin Section of the controller, I created a set of 7 loops. Using Logic and a studio projects microphone, I set the tempo at 120 bpm and played a repeating G octave rhythm. I then recorded melodic lines, percussive lines, and different chord progressions over an 8 bar period. I originally recorded 14 separate tracks, but we were only able to fit 7 on a page. I also recorded odd violin noises that I meant to edit together making a melodic line out of it, but it was a little tricky because of all the other variables in all of our other loops. If we were able to continue this project, I would think about the length of the loops because if you play them too many times it can get a bit repetitive. While the diversity of loops available helps, there could be parameters set so after a certain amount of loops are triggered you can’t add more, or if you trigger certain loops, you can’t trigger others. I also think designing loops with basic parameters makes working on each of our sections easier, but has limitations in making the piece a whole unit.

Ty’s section, percussion:
For the percussion page of the TouchOSC controller, I created a Max Patch that reads two photoshop files then uses the images to sequence sounds. The first file is an RGB image, and each color value determines the volume level of a pre-recorded percussive sound. The second image file is a black & white bitmap; this image triggers the sounds to play on black pixels. Originally, I used a drum synth, rather than pre-recorded files, but found using RGB to control the synths difficult because of my limited synth knowledge. For a next step in this project, I would use my TouchOSC page to let the user build their own sequencer. Additionally, I would change the sounds I recorded. It would be interesting to find four sounds that fit well with the other two musician’s pages, and let user control the sequence and ambisonic location of those sounds.

image2beatSequencer:

For the section by Steven:

I made seven other recordings following Abby’s lead. We wanted to make these recording harmonic with each other and all stayed in G minor. We also wanted to stay in time so we all recorded at 120 BPM. For my recordings I played my electric guitar using my AC30 guitar amp. The electric guitar recordings were chords, the first one was just Gm repeated, and the second one was Gm and Dm repeated. Then I also did a Gm arpeggio on the electric guitar as well. I also did one recording using the acoustic guitar. The other three recordings were done using the Korg Monologue synthesizer. The first one was a Gm arpeggio. The second one was an analog drum patch I made. The final recording was a bass Gm patch.
On the Max side, I used the HOA library, and I did all of my panning in polar form. Doing everything in polar made everything very straightforward, and easy to visualize. From the UDPreceive object I routed the magnitude and phase information into the HOA map message. The magnitude information was very straight forward 0 to 1 in float decimal format mapping directly to the HOA map message. The phase information however had to be converted from a 0 to 1 float to a 0 to 1 float times 2*Pi. That would give the output to the HOA map of 0 to ~6.3 in float decimal format. I had to repeat these steps for all 21 recordings, so I created an encapsulation called “pie_n_pak” that does the magnitude and phase calculation, and packs all of the proper outputs together. All of the recordings are triggered from one toggle box. The UDPreceive object also gets the state of the recording being triggered from TouchOSC. The state is a toggle box from TouchOSC, if it is active it sends a 1, and if it is not toggled is it a 0. The fader encapsulation sub-patch fades the audio track in or out depending on the toggle present. It is important to note that all of the audio files are always playing in the background, and are just faded in and out depending on the current state being sent from TouchOSC.
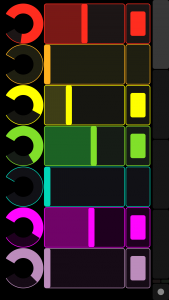
In TouchOSC, I made three different pages for each of our recordings. The top gray bar is each of our pages. The toggle buttons on the top fade in (or out) for each recording. The long fader is the magnitude of the panning in the HOA panner. The encoder underneath is the phase information being sent to the HOA panner.

Here is a link to the code:

Here is a link to all the supporting audio files:
https://drive.google.com/open?id=0B6W0i2iSS2nVZ1RobkRQUzA0RlU

Project 1: Leap Motion Controlled Ambisonics

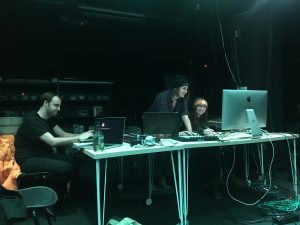
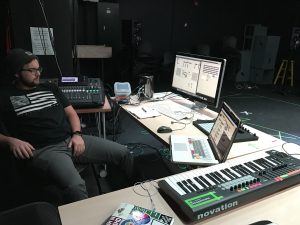
Presentation setup in Media Lab

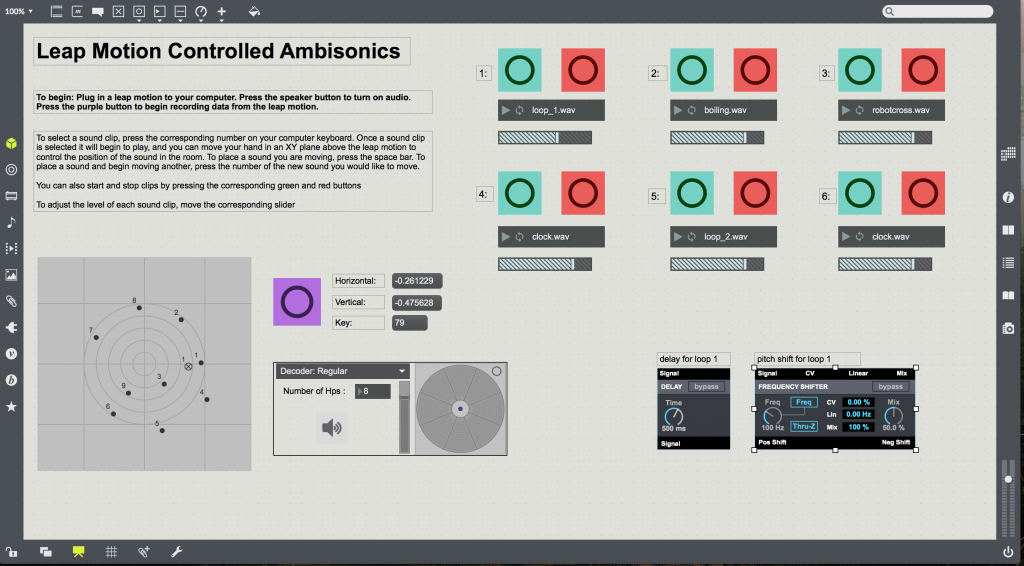
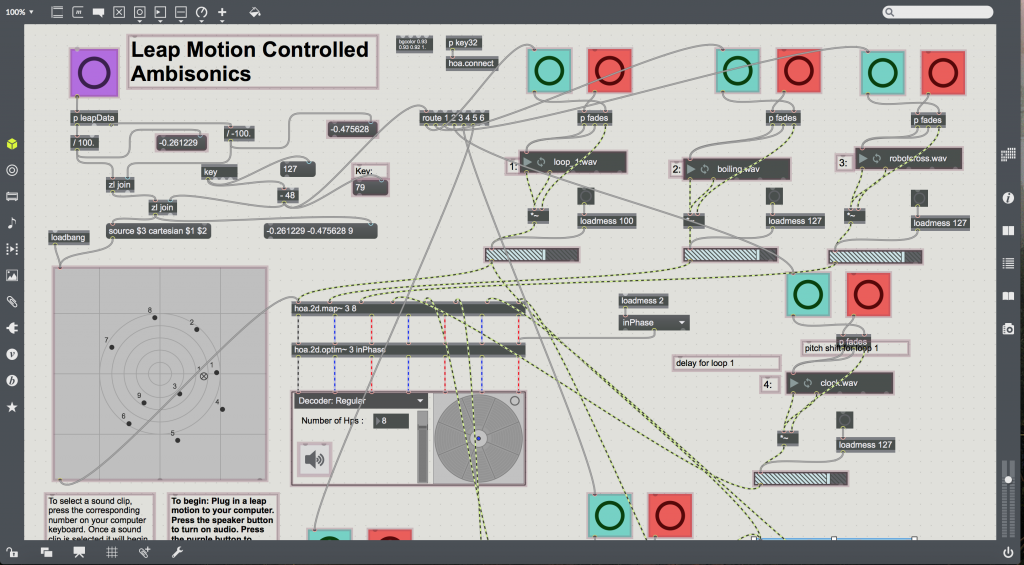
For our project, we incorporated a leap motion into a field recording soundscape composition in order to create an effect of organic control of spatial motion. Our project was created in Max MSP using the Higher Order Ambisonics Library to place sounds in space using an 8 speaker setup. We also used the aka.leapmotion library to capture palm position data in the X and Y plane. In the patch, the user can dynamically move the source of each sound clip in the room by moving their hand over the leap motion.

The sound clips featured in our project include field recordings from moving robots, ticking clocks, and cooking sounds such as boiling, sizzling, chopping and pouring. In our sound design we sought to take these everyday sounds and manipulate them into something that sounds alien and sci-fy to create an ambient soundscape.

Compressed stereo mix of our composition:

Max Patch in Presentation Mode
Full Max Patch

Instructions for Use To begin recording palm data, simply connect a leap motion to your computer and press the purple button on the Max Patch. To select a sound clip, press the corresponding number on your computer keyboard. Once a sound clip is selected it will begin to play, and you can move your hand in the XY plane above the leap motion to control the position of the sound in the room. To lock a sound you are moving in place, press the space bar. To lock a sound in place and begin moving another, press the number of the new sound you would like to move. You can start and stop clips by pressing the corresponding green and red buttons(fade in and fade out is built in), and adjust the level of each sound clip by moving the corresponding slider.

Screenshot recording of leap motion moving sound clips(Silent)

Click here for Max patcher code and supporting sound clips

Contributions
Sara Adkins: Recording, assisting sound design, main max patch development, documentation
Dan Moore: Recording, main sound design, assisting max patch development, performance
Estella Wang: Recording

Ambisonic Sound Installation

For the field recordings assignment, our group chose to first focus in on the little sounds of everyday life. We recorded small moments which might ordinarily fade into the background, but when focused in on, revealed satisfying textural experiences. Some of these were the babbling of the stream in a park, the snap of a camera, the squeak of a hand on a rail, and the droning hums of a refrigerator and stove top. Though our chosen sounds all came from very different environments, we sought to combine them into a single immersive space, leveraging the possibilities of the 8.1 system to create a soundscape that was both familiar and yet surprising. An important aspect of our approach was in changing the “scale” of the sounds as we heard them. We quickly realized that the ambisonics system would allow us to make these tiny sounds feel absolutely enormous— this would place these familiar sounds into a sonically unfamiliar space, and even make the listener feel improbably small.

We used to HOA library to create an ambisonic experience in an 8.1 speaker system. Using 8 sounds:

Fridge Hum Coin Drop A Burner Click A small Brook in Schenley
CFA Handrail A Camera Click A chip ‘CRUNCH’ Tape Ripping

We split them into two groups and ambi-sonically spun one group clockwise and one group counter-clockwise. We played the Fridge hum on all 8 speakers equally because it was such a low frequency that you were unable to pick up where it was coming from. The Video shows the way both groups rotated and changed throughout the course of the piece. video link:

The installation had a small amount of live-performance added to it. We kept the gain of each sound effect ‘Gooey’ and open to change as the piece went on based on reactions to the audience and the relative environment. The piece started by slowly increasing the gain for one sound effect, and then slowly adding more over time. The end of the piece was the slow manual fade of each sound. We did this because we wanted each experience of the installation to be unique and different.

We chose to present the piece with all of the lights (or as many as the room would allow for) turned off. This helped to further disengage the listeners from the Media Lab environment, removing nearly all visual input and thus heightening the sonic experience. Its interesting to note that the first cue of the sound piece was a lighting effect instead of an aural effect.

We uploaded our code so that anyone is able to use and open our max-patch. Max Code Link:

Group Contribution:

Kayla – Sound Recorder, Max-Patch Coder, Lighting Engineer, and Ambience Engineer.

Julian – Sound Recorder, Audio Editor, Audience Prompter, and Ambience Engineer.

Kaitlin – Sound Recorder, Performance Documenter, and Ambience Engineer.

Joey – Sound Recorder, Audio Editor, Lighting Engineer, and Ambience Engineer.

Golan Levin Response

Sound is complex, complicated, and convoluted. (And those are just the “C’s”). It’s pressure waves that travel through the air as vibrations, when they reach your ear it causes your ear drum to move, ‘knocking’ a small chain of bones together in order to make liquid in your inner ear (cochlea) move up and down. Your brain takes this tiny bit of moving liquid and interprets it as sound. THAT IS INSANE. No really, just think about how completely insane that is. When I first starting my interest in acoustics I constantly looking for little short cuts or rules about sound that are always a constant. But sound isn’t so simple. It is because the concept of sound is so extraordinary, that I am still interested in it.

In the beginning of Golan Levin’s lecture, he said that he hasn’t worked in the aural realm in over 9 years. Which is extremely surprising after hearing him speak. That class was an hour and a half of fast-paced exciting theory, experiments, toys, scientific research, and sound concepts. We jumped from youtube video to youtube video. There was barely enough time for questions in between his excitement to share other installations and experiments. and the best part, 80% of what he showed us I have seen before. But instead of getting bored or tired, my passion for sound grew as i remembered all of the different ways you could express sound.

Like I said in the beginning, sound is a complicated thing. And I think it takes a repetition of explaining from multiple points of view before you are truly able to grasp everything that sound is. As an architect I come from a different background and viewpoint than most people in the field. I can’t read music or think of sound in terms of tempo and pitch, I’m not an engineer who can calculate decibels or reverberation time, I am not a coder/Computer scientist who thinks in terms of scripts and numbers or a sound designer who programs with speakers, mixers, wires and hardware. But I have taken classes in each of these departments, and its only when the same idea begins to overlap that I truly understand how complex sound goes. Golan spoke to me from the point of view of an artist and a designer, and re-watching and re-thinking about old concepts brought me a greater understanding of sound.

Reflection: Golan Levin

I believe Golan Levin sought to flip our perception on how we can be creative as artists, not so much as pushing the boundaries of the obscure/avant-garde realm via technology but really delving into the origins of how we traditionally visualize sound to isolate what truly draws us in as humans towards the experience of nature, work, or a piece of sound art. I will discuss some of the ramifications of this overarching theme and present some examples to support my claim.

Golan first started off his presentation referencing a work of art which stunningly portrayed projected facial reactions of music critics to a live performance. One can strive for automation or robotic manipulation of sound but one of the most powerful mediums for enhancement of the emotional experience of music would be the human face. Witnessing facial expressions convey their myriad of emotions will always have a direct and profound impact on the viewer. Vis-versa, from an alternative perspective it has been proven that music shapes the way we perceive facial expressions. There exists a strong symbiotic relationship between the visual and auditory cortex. The illusion of what we think we see in a facial expression can override what we are hearing, this is has been proven via experiment and is called the McGurk effect.

Continue reading “Reflection: Golan Levin”

Project 1: A Pittsburgh Soundfield


The above was recorded in the Media Lab 8 speaker arrangement with a H1 Zoom to recreate the sense of space experienced when listening to the piece

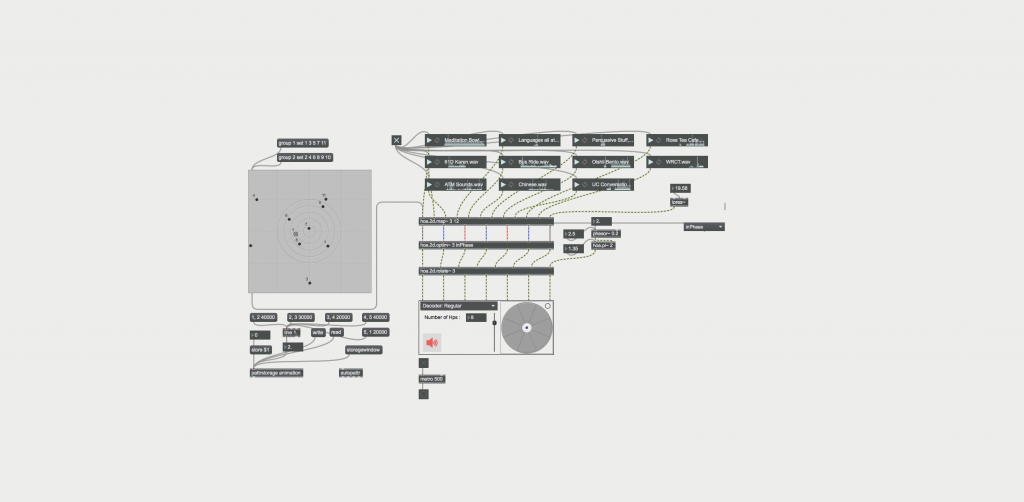
With our project, we created a narrative of different Pittsburgh residents performing different mundane tasks throughout their day, highlighting the certain beauty that can be overlooked during these events. Conversations in different languages or ATM sounds are something that the average person may experience, but there is a lack of attention given to them, something that we, as a group, wanted to highlight.
We further wanted to add a degree of movement and expressiveness with our recordings. Through spatialization, we were able to create a sense of motion by physically having the sound rotate around the audience utilizing the 8 speaker arrangement. This also forced the audience to pay particular attention to these sounds that might have otherwise become stationary. We also added a drone sound in the background of our piece in order to add a sense of cohesiveness between the range of sounds.

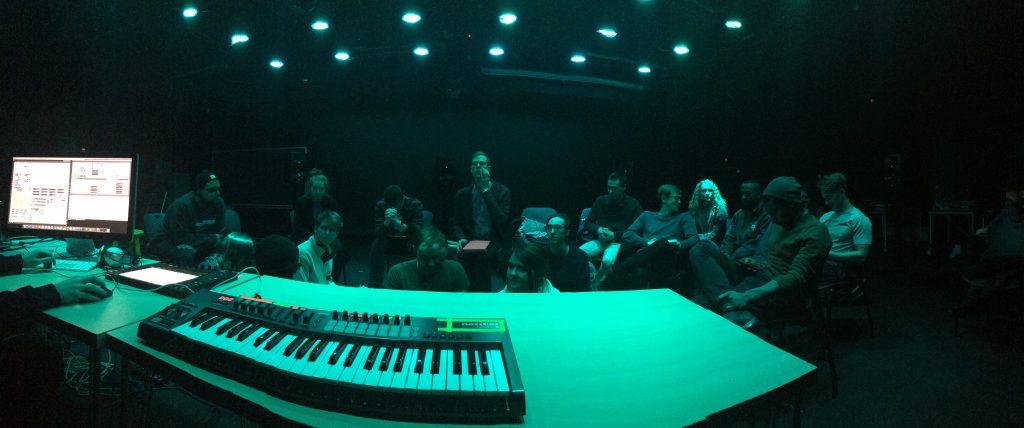
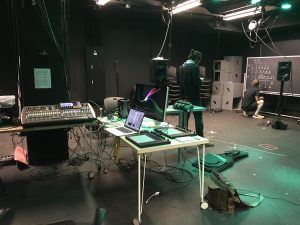
audience listening to piece in 8 speaker setting
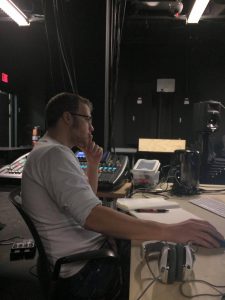
Daniel John editing recordings
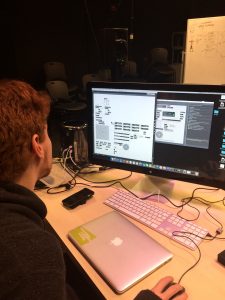
Josh Brown working on Max patch

screenshot of Max Patch
Max patch can be downloaded here.

Acknowledgements:

Daniel John – Recording, Sound Editing
Josh Brown – Recording, Max Patch Creation, Performance
Brooke Ley – Recording, Discussion Leader, Documentation

Higher Order Ambisonics – Multichannel Max Patch
Nick Ericson – Rotation Max Patch