
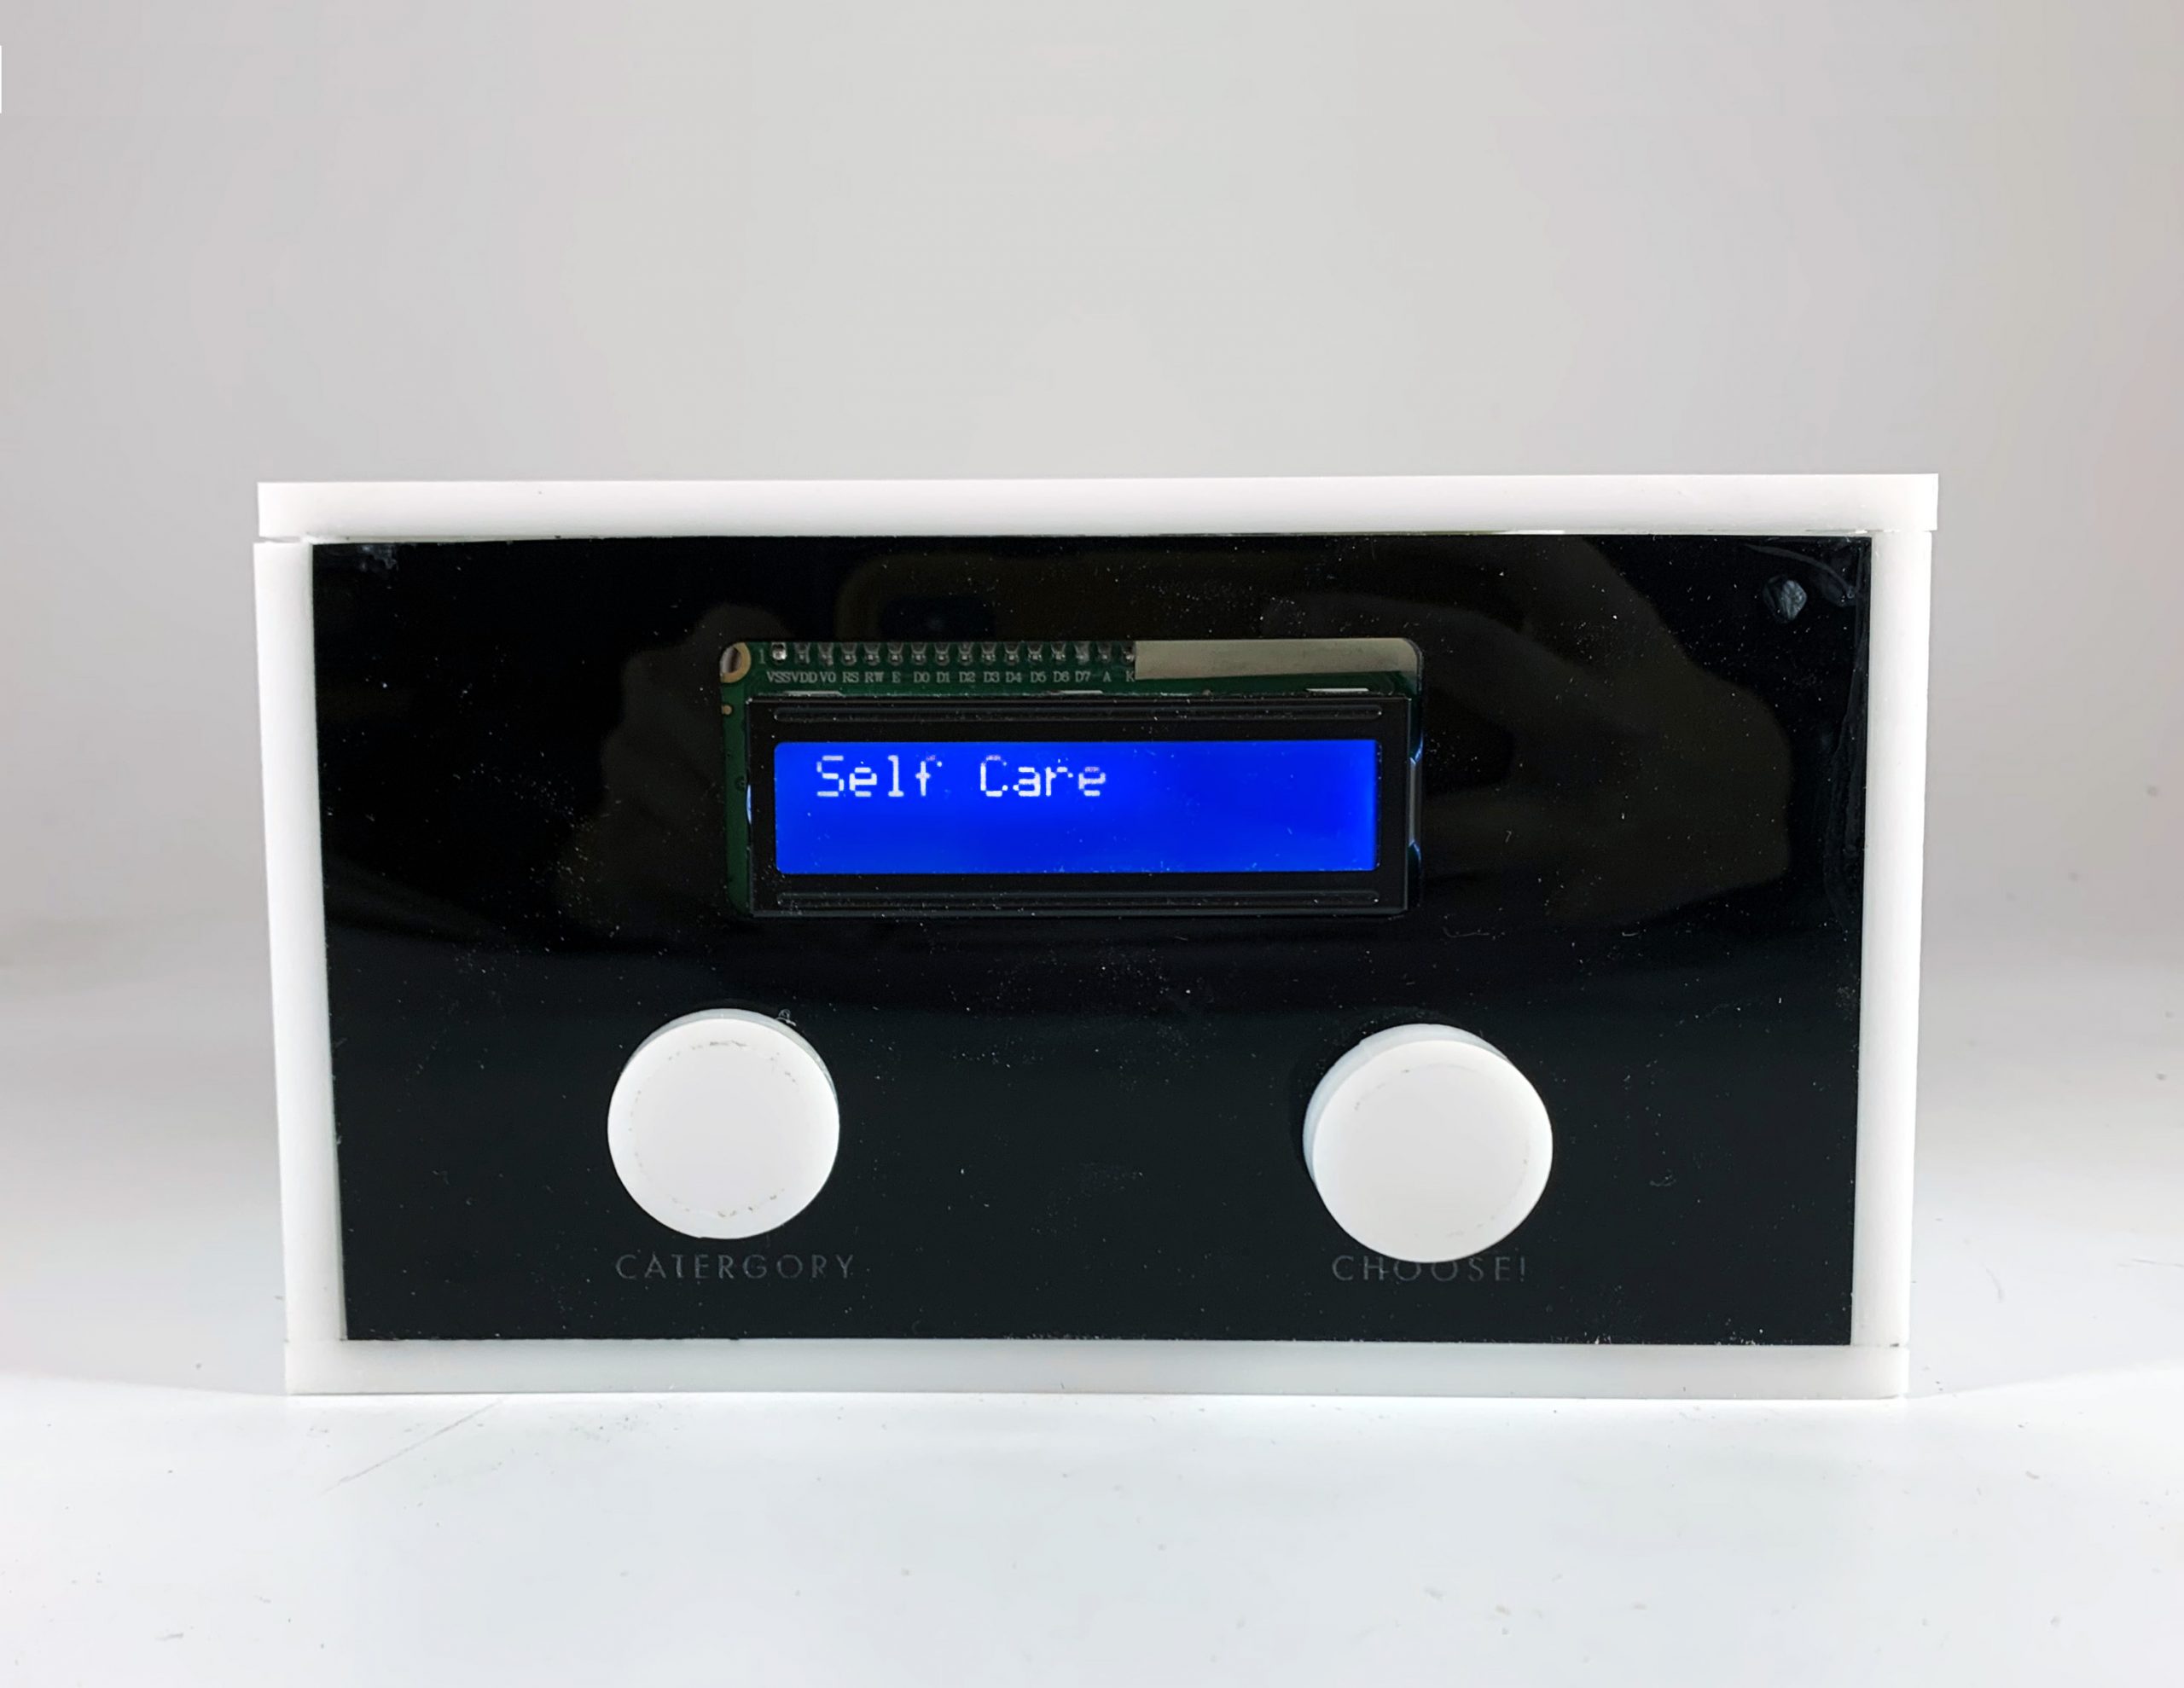
Final Bossy Box with a front-facing display featuring an LCD screen and two buttons to control the interior circuit
OVERVIEW
The Bossy Box is a personal assistive device that helps the user (in this case, me) to decide on what activities to do once work is done. The box allows you to choose between several categories of activity types by turning the knob on the left and then once you press the button on the right, the box will give you a random activity to do within that activity type!

Toggle through the Main Categories by turning the right knob
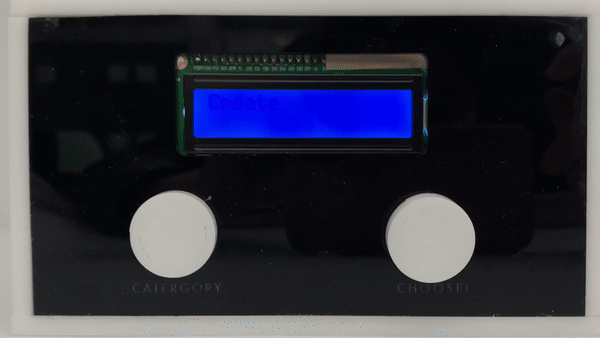
Get a random Activity from your selected category by pushing the left button
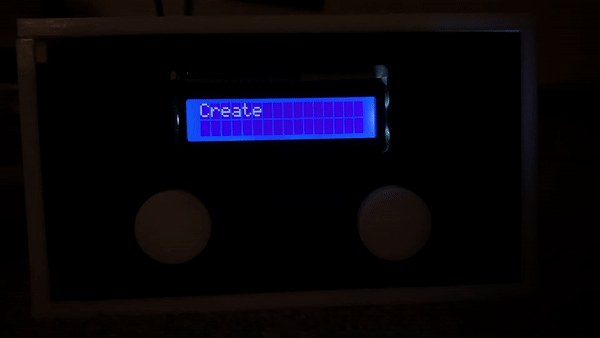
A more legible video of what happens on the LCD screen as you interact with the box
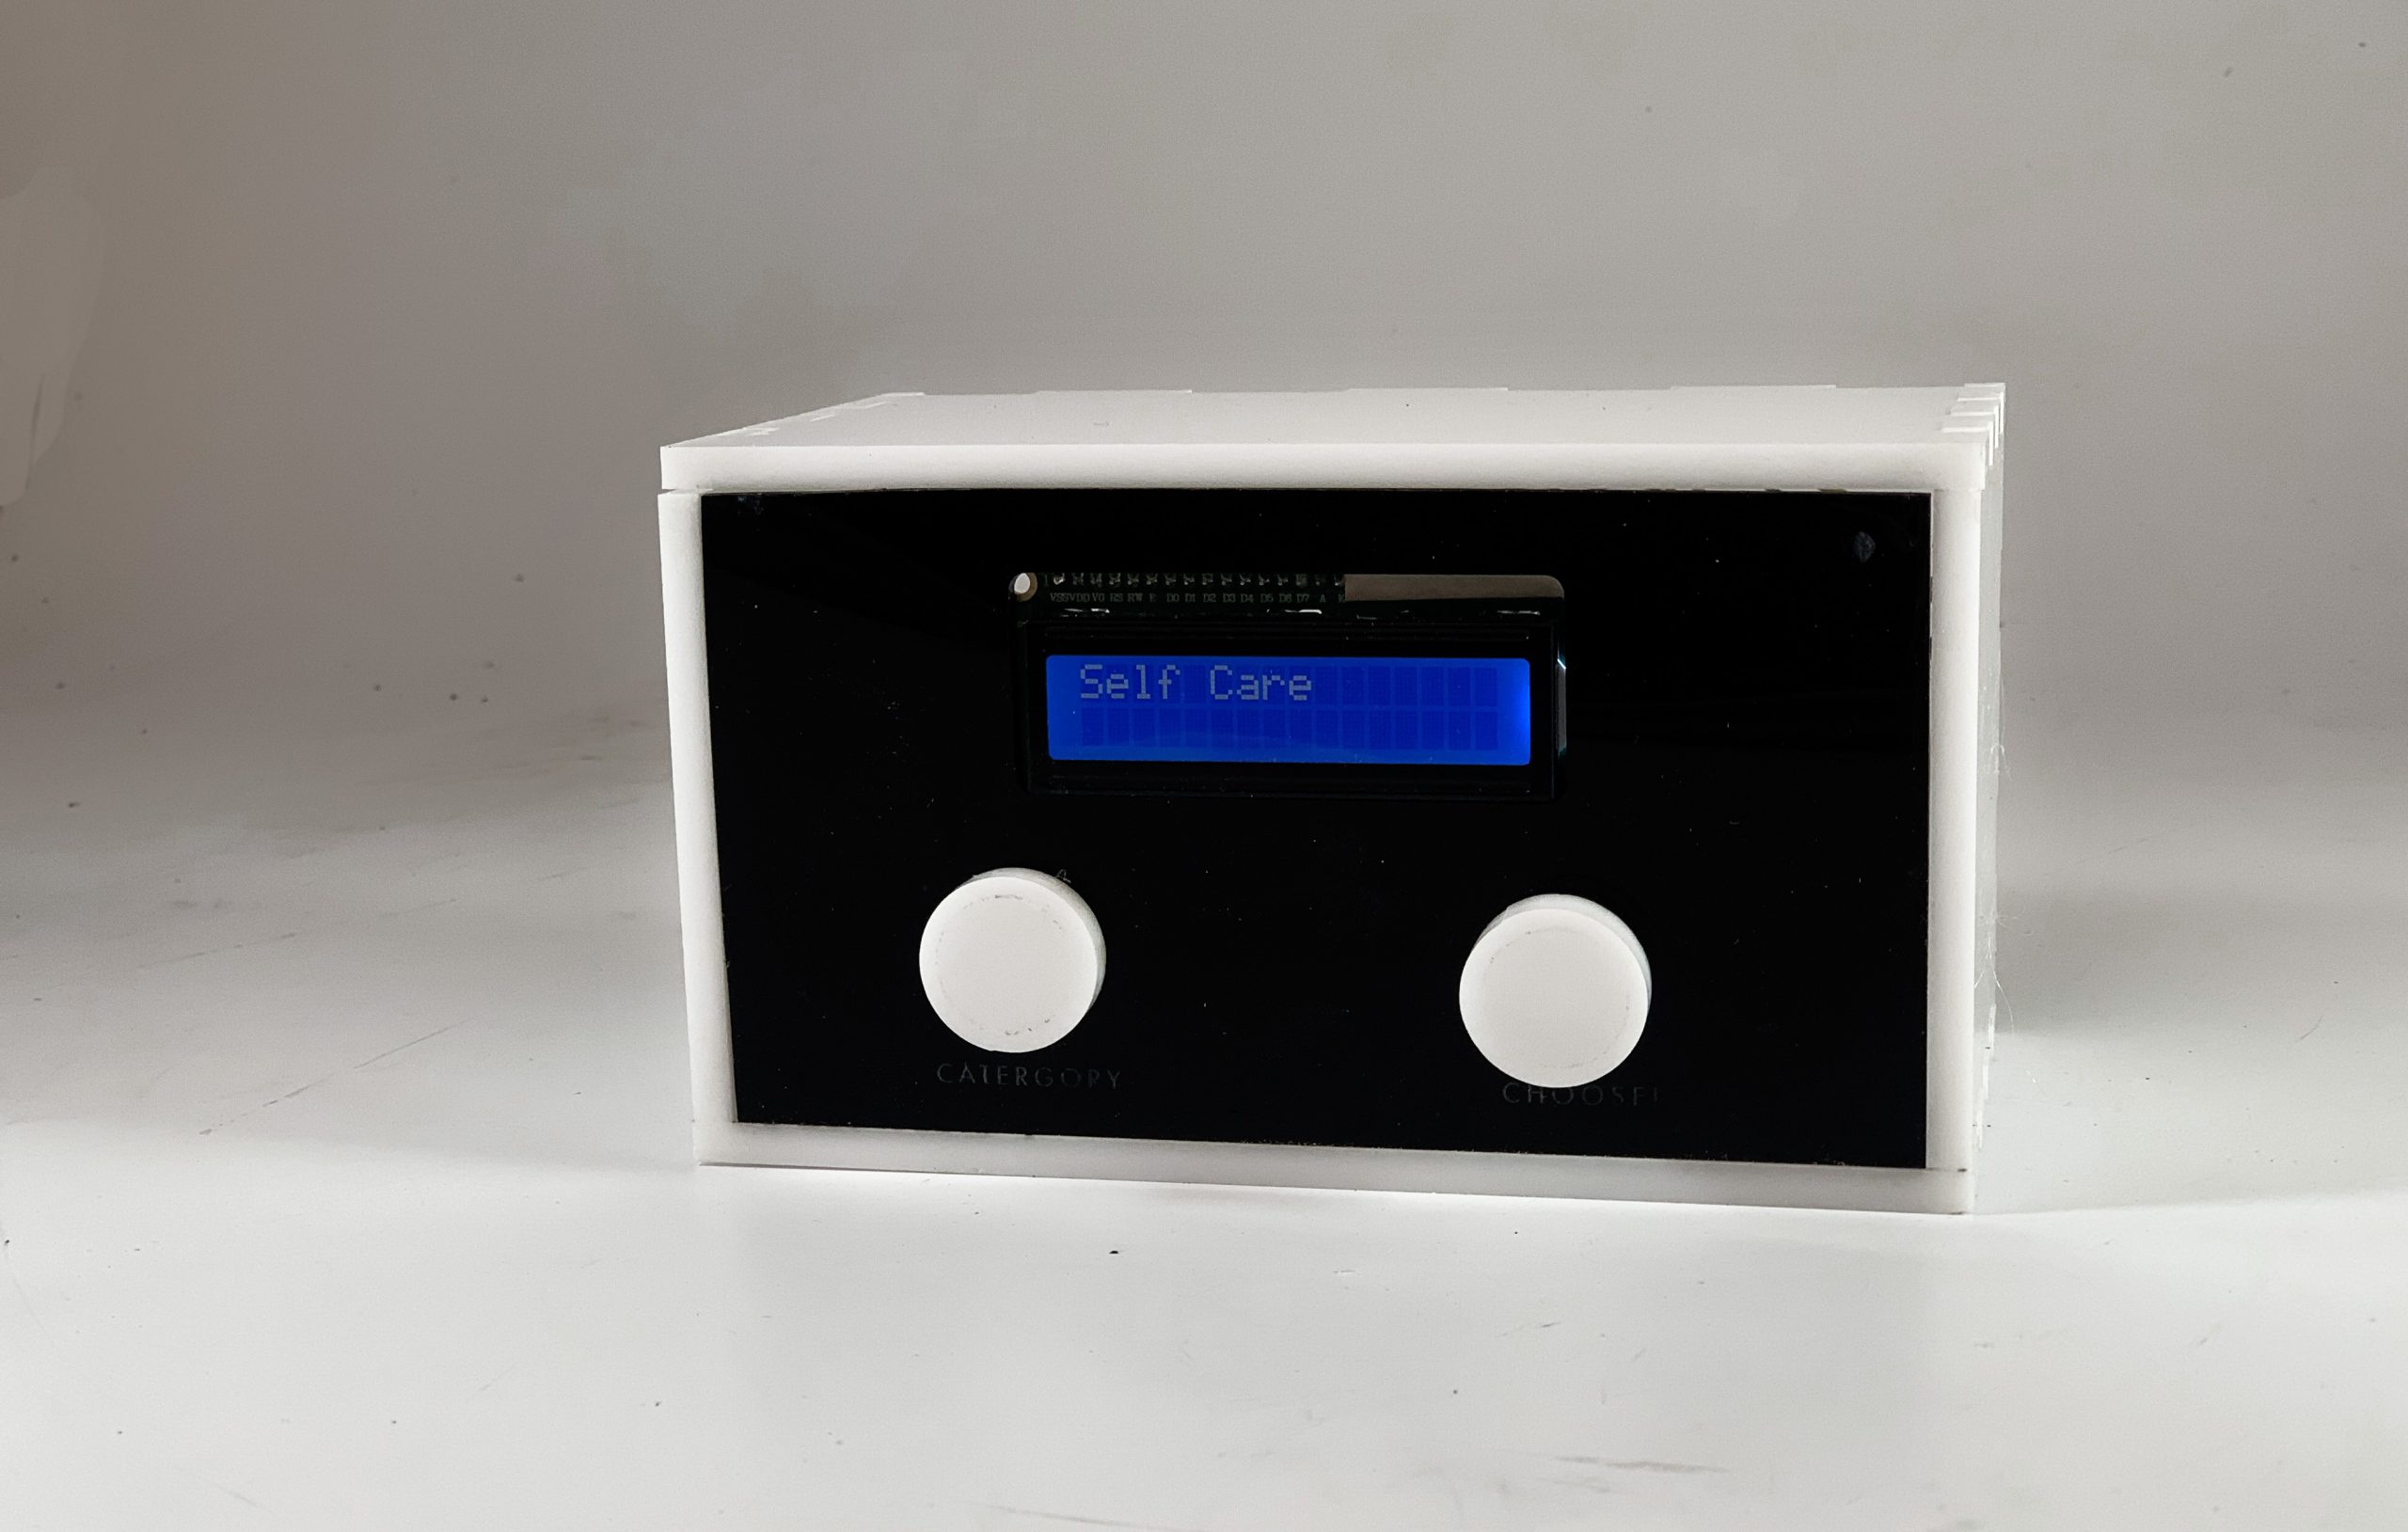
The final Bossy Box – its size is about 7×4 inches
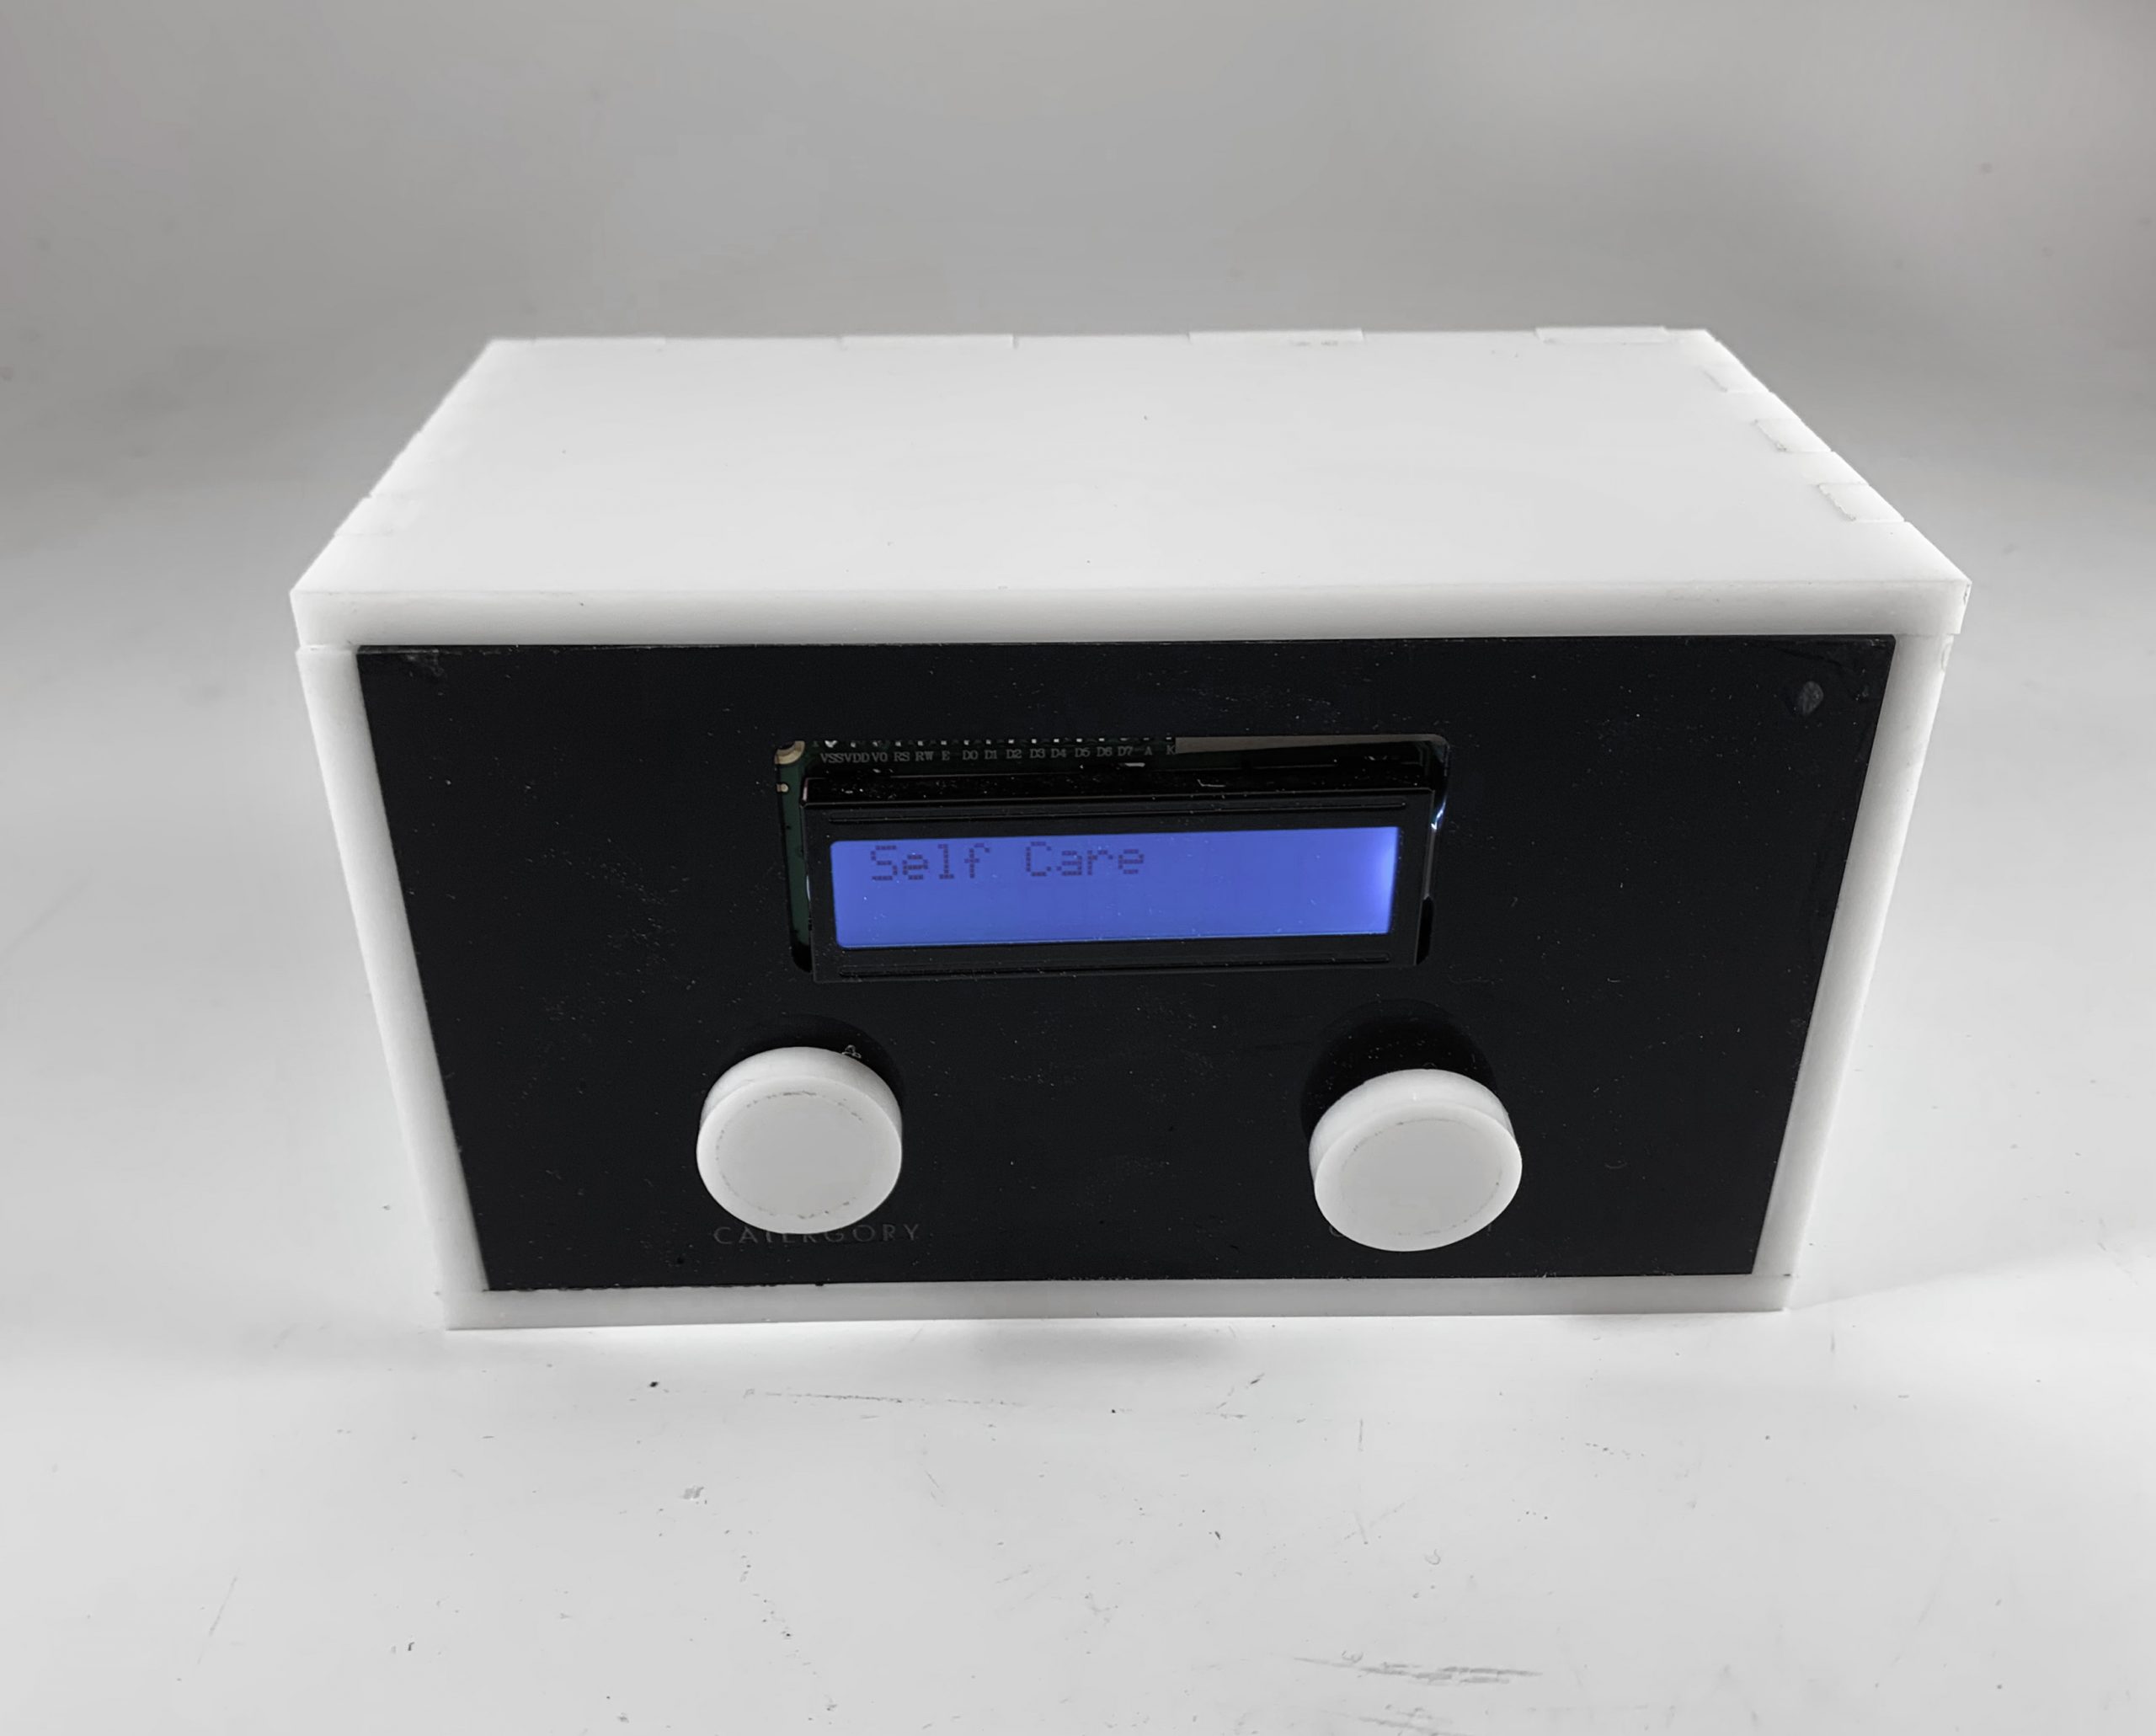
The Bossy Box was designed to take visual cues from classic arcade consoles, with their distinct color blocking and large buttons. I wanted to bring a more playful aesthetic into this device to drive home its more game-like nature
PROCESS
My work on this project began like most design projects do, with a brainstorm and sketch session meant to generate as many ideas as possible! At the end of this, I decided to go with an Activity Box concept for my final device, as I am indecisive and never know what to do with my free time once I have it.
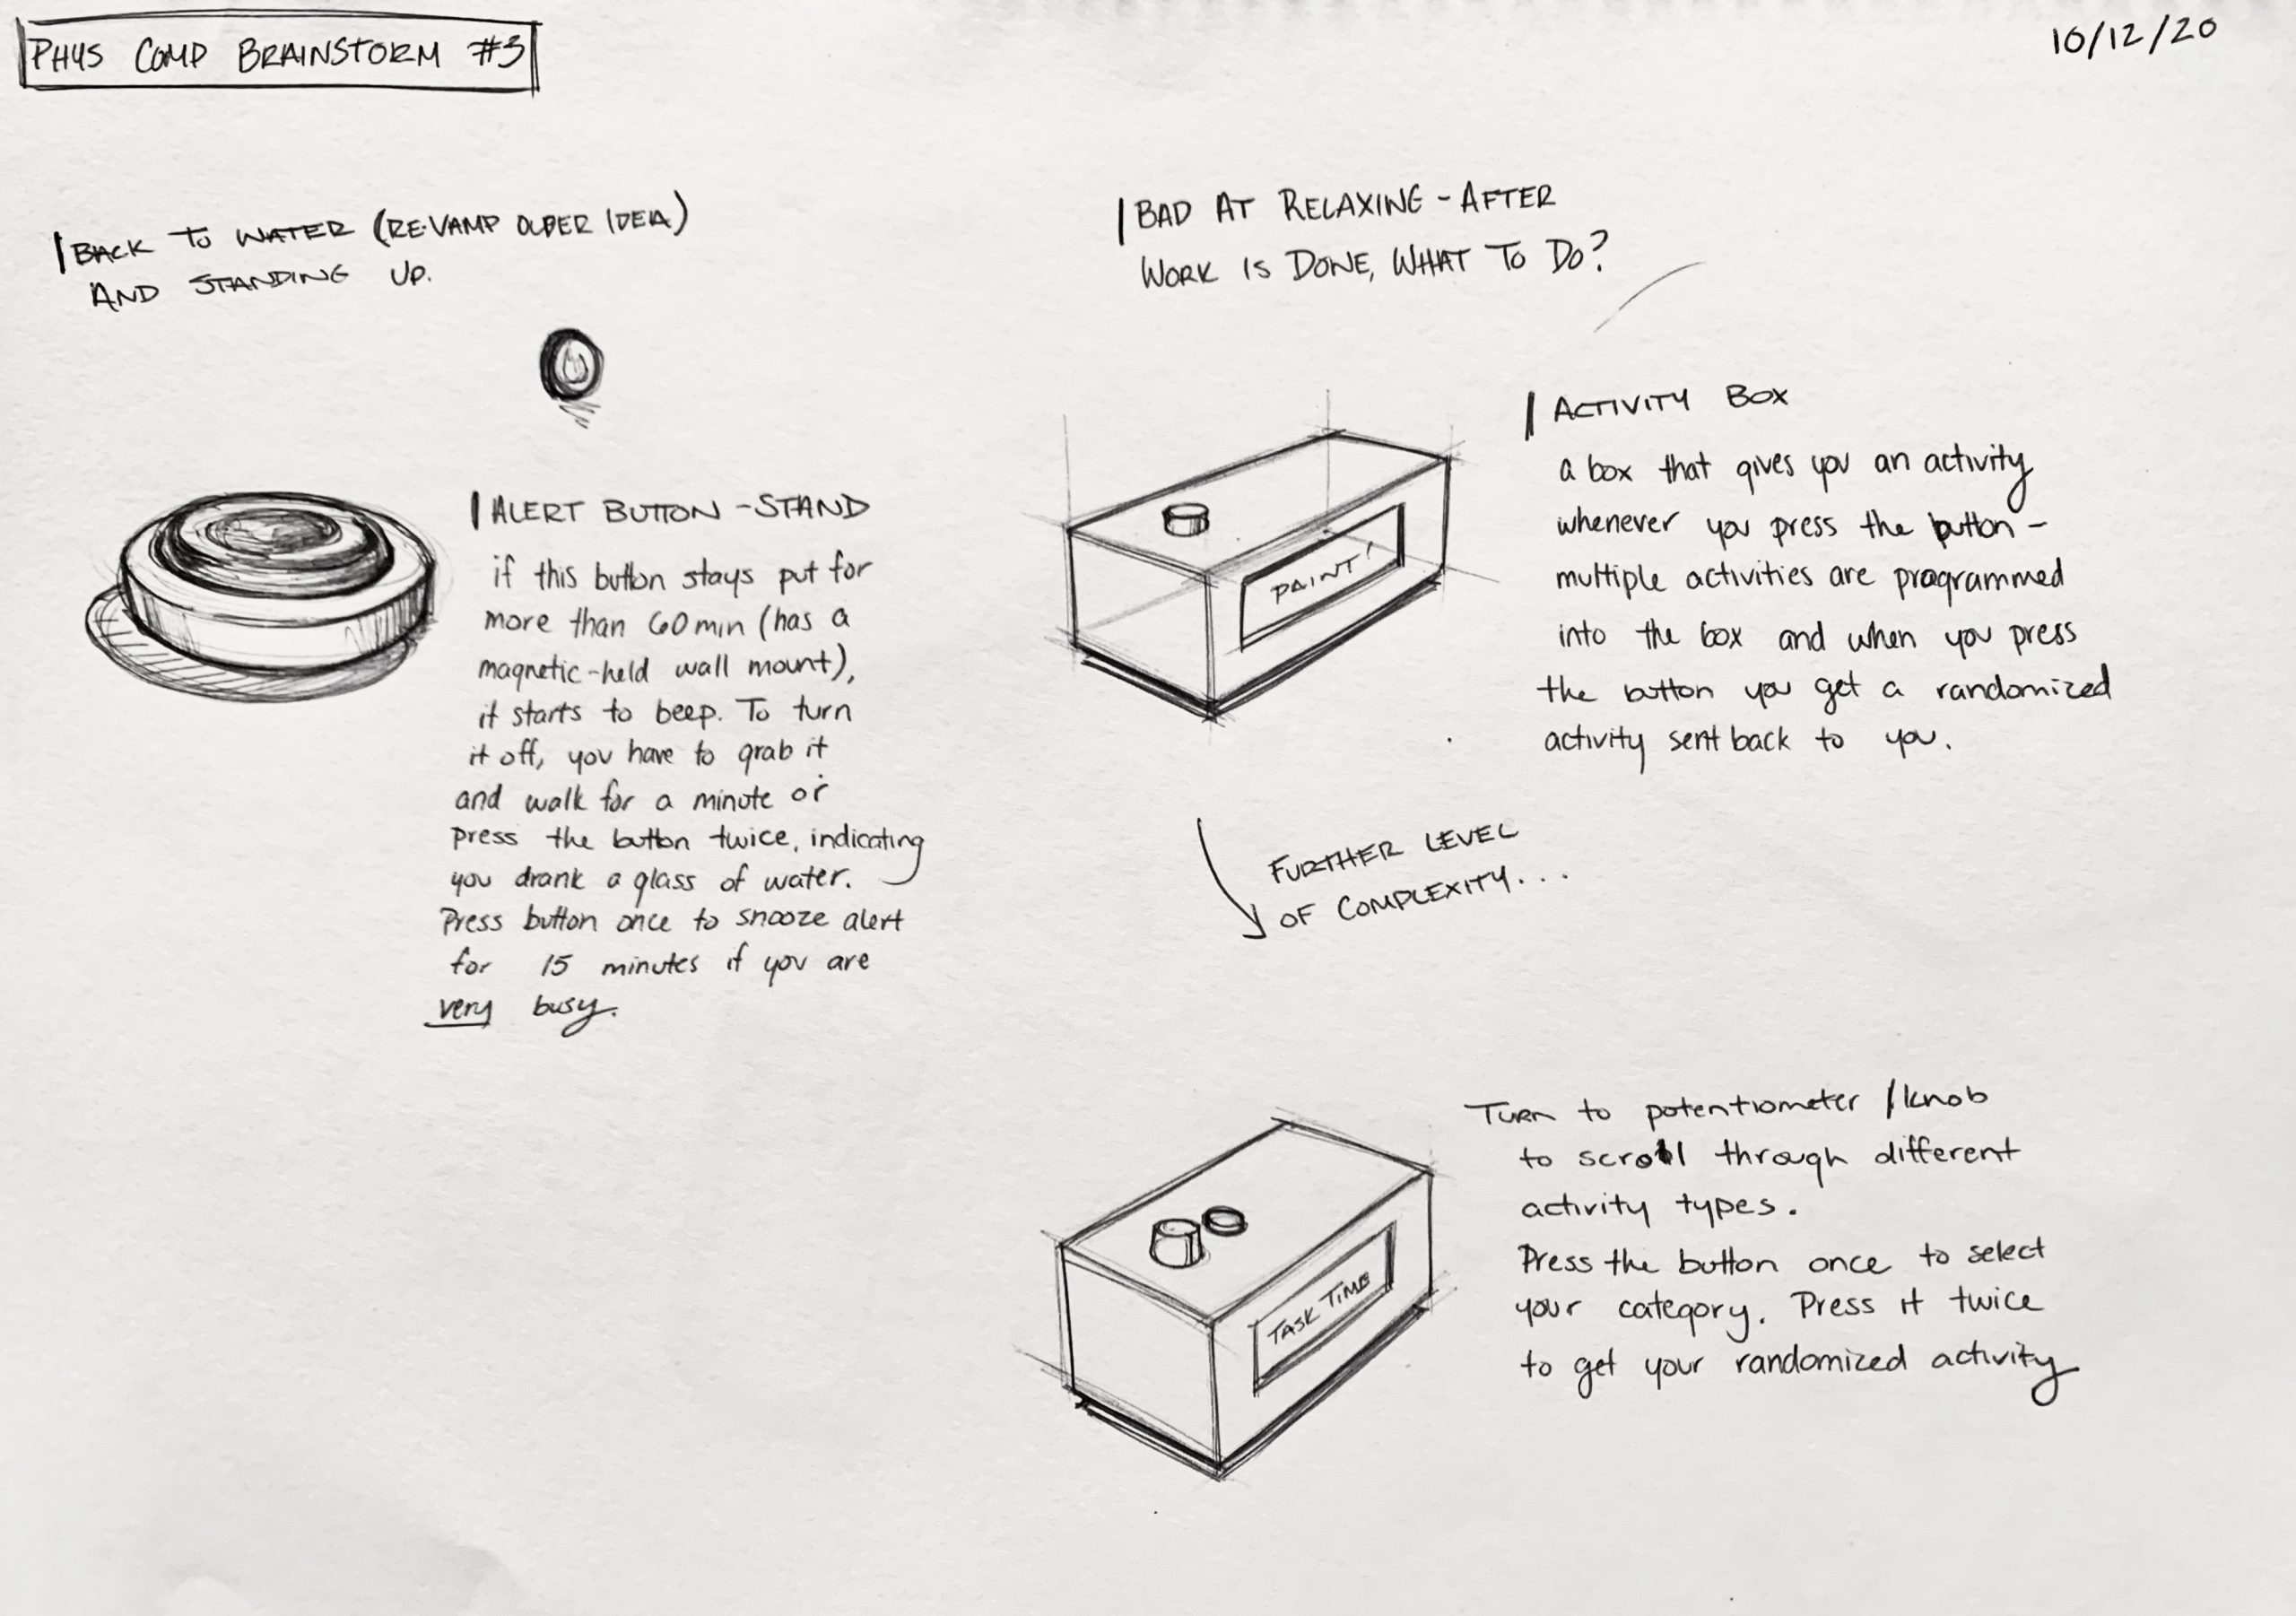
Concept sketches of my top two ideas – I went with the Activity Box option which then became the Bossy Box
From here, I started by trying to figure out the software needed to get this project to operate. This was because I have a background in physical fabrication and am fairly comfortable with hardware wiring, but writing the software is a skill that I need to improve upon a lot. As I expected, I encountered several challenges when trying to get my software to work in the way in which I wanted.
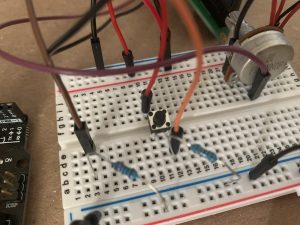
I started my process by putting together my circuit hardware to code. I opted to do this over just creating a TinkerCAD simulation and coding on there as it would at least give me a chance to get a bit more ahead with my project and wouldn’t put me that behind in terms of my timeframe to complete my software code by. I’ll touch upon this a bit more later, but this circuit was made to test the functionality of the software only, and so the placement of the wires and input components wasn’t taken into account and would have to be reworked later.
When I started the code, the first issue that I encountered was related to arrays. Because I wanted to print full phrases on the LCD screen I was using String Array types, however, these didn’t print the way I wanted to on the LCD screen. My serial feedback for debugging was showing that the Arduino was properly incrementing through the array with the potentiometer input, but the LCD wasn’t showing that. The video below shows one example of how the display was showing me the output.
After talking to our professor, Zach, I learned that String Array types are a bit tricky in C at times, and so many people opt for Character Arrays instead. With some collaboration with him and my own research into these arrays, I changed my code to use Char data types instead and this began to work fairly smoothly. At this point, I was able to toggle through the Main Arrays and retrieve a value from the Sub-Arrays by pressing the button. However, this value wasn’t a truly random one and I would retrieve the same output each time I pressed the button.

The working circuit at its prototype phase
My next challenge was to work through the randomSeed function, which enables the Arduino to actually give you a more random output. To get this to work properly, I worked with our professor who explained how you can get the Arduino to analogRead an inactive analog pin to get a generally random value between 0-1023 which would essentially provide a wide enough range of seed values to have my box output a different Sub-Array value each time I pressed the button. This had some issues at first, where my screen would just print multiple random array items at once making the output illegible. I had to code in a hard stop (which you can see as my last line of code in the code section of this documentation) which wasn’t the most elegant solution in the world, but with the way that I structured my code as an if-else sequence, it was the simplest solution. Looking forward, I want to work with Switch-cases or some other type of logic structure which will allow me to create a more clean code that doesn’t require this type of solution. Perhaps, as a next step, I will work on re-writing my code to follow such logic and then upload that into my box instead.
Moving onto my process of physical construction and circuit integration, I had a lot of fun creating the box and trying to get the circuit to work with the user interacting with non-circuit components! I began by refining my concept for how I wanted this device to look; opting for a color-blocked style reminiscent of the arcade consoles I played with as a kid. Part of why I wanted to make this activity box is to turn the action of selecting an activity into a game itself and bring some playful elements into an every-day device. Therefore, I thought that this semi-retro design direction was fitting of my intent.
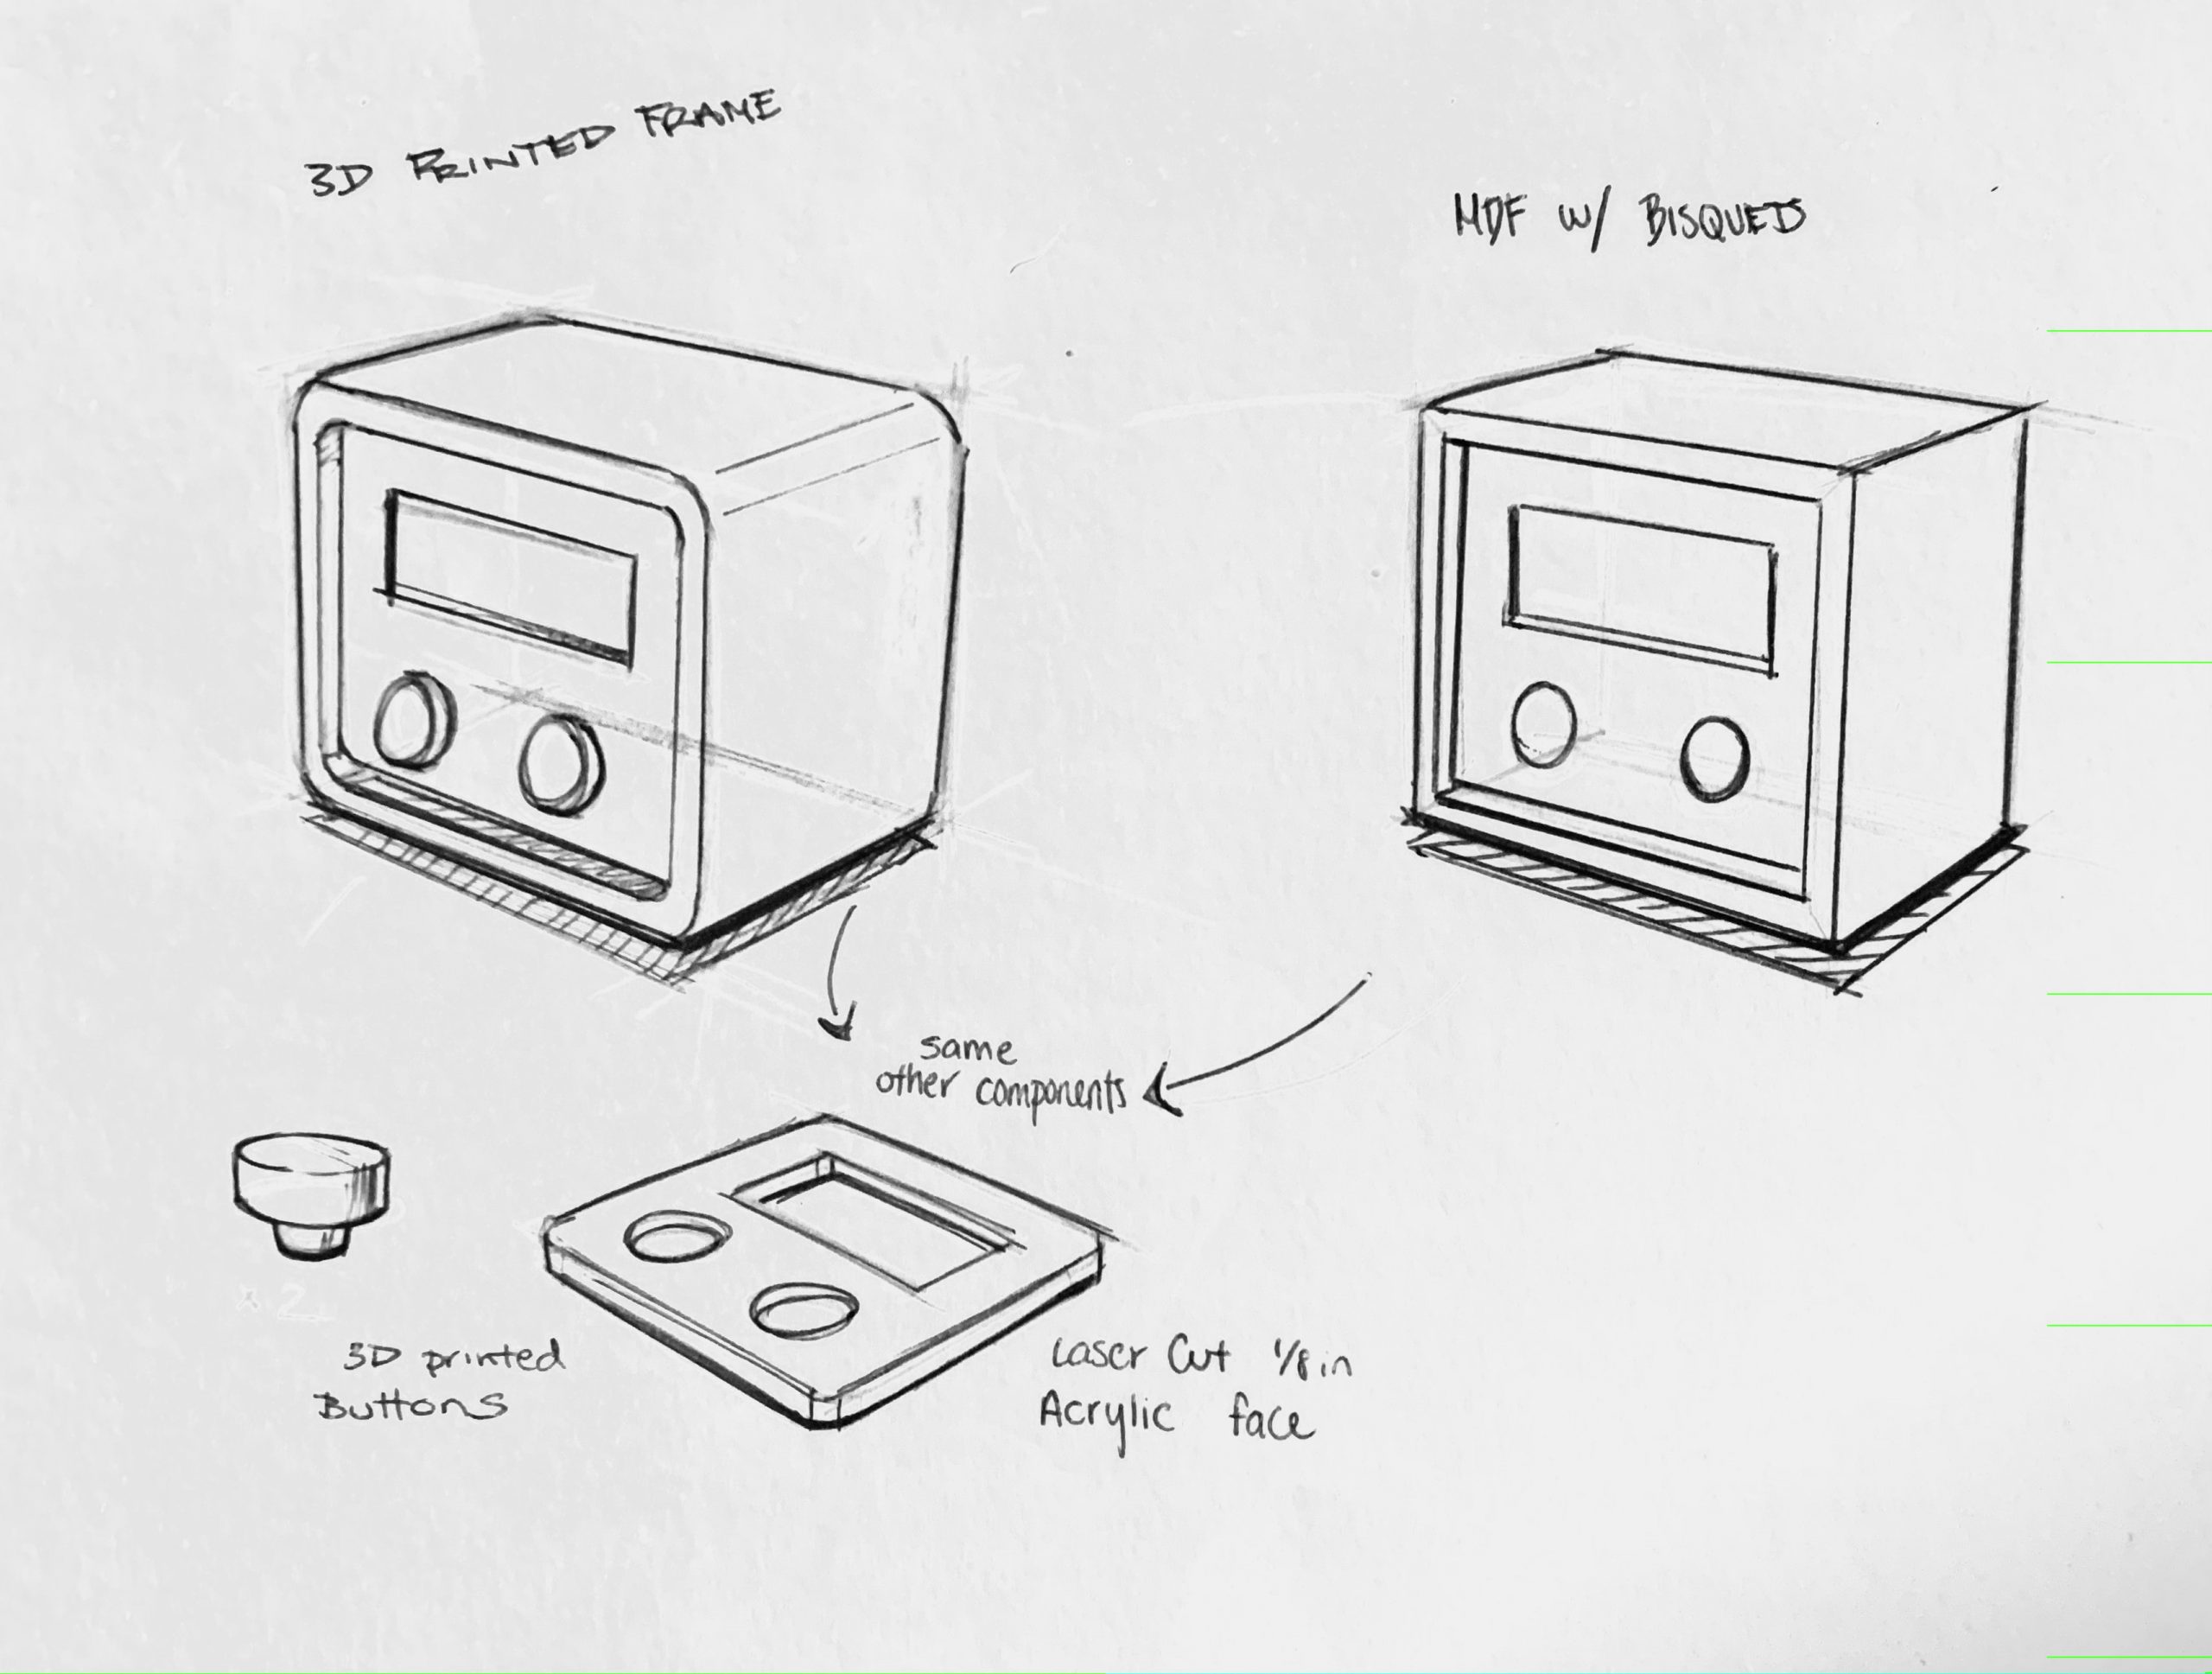
Sketches to further consider methods of physical construction and aesthetic style
Based on the materials I had access to, I decided to use two different types of acrylic to create my box. I implemented some box joints into each part, laser cut them, and began to construct!
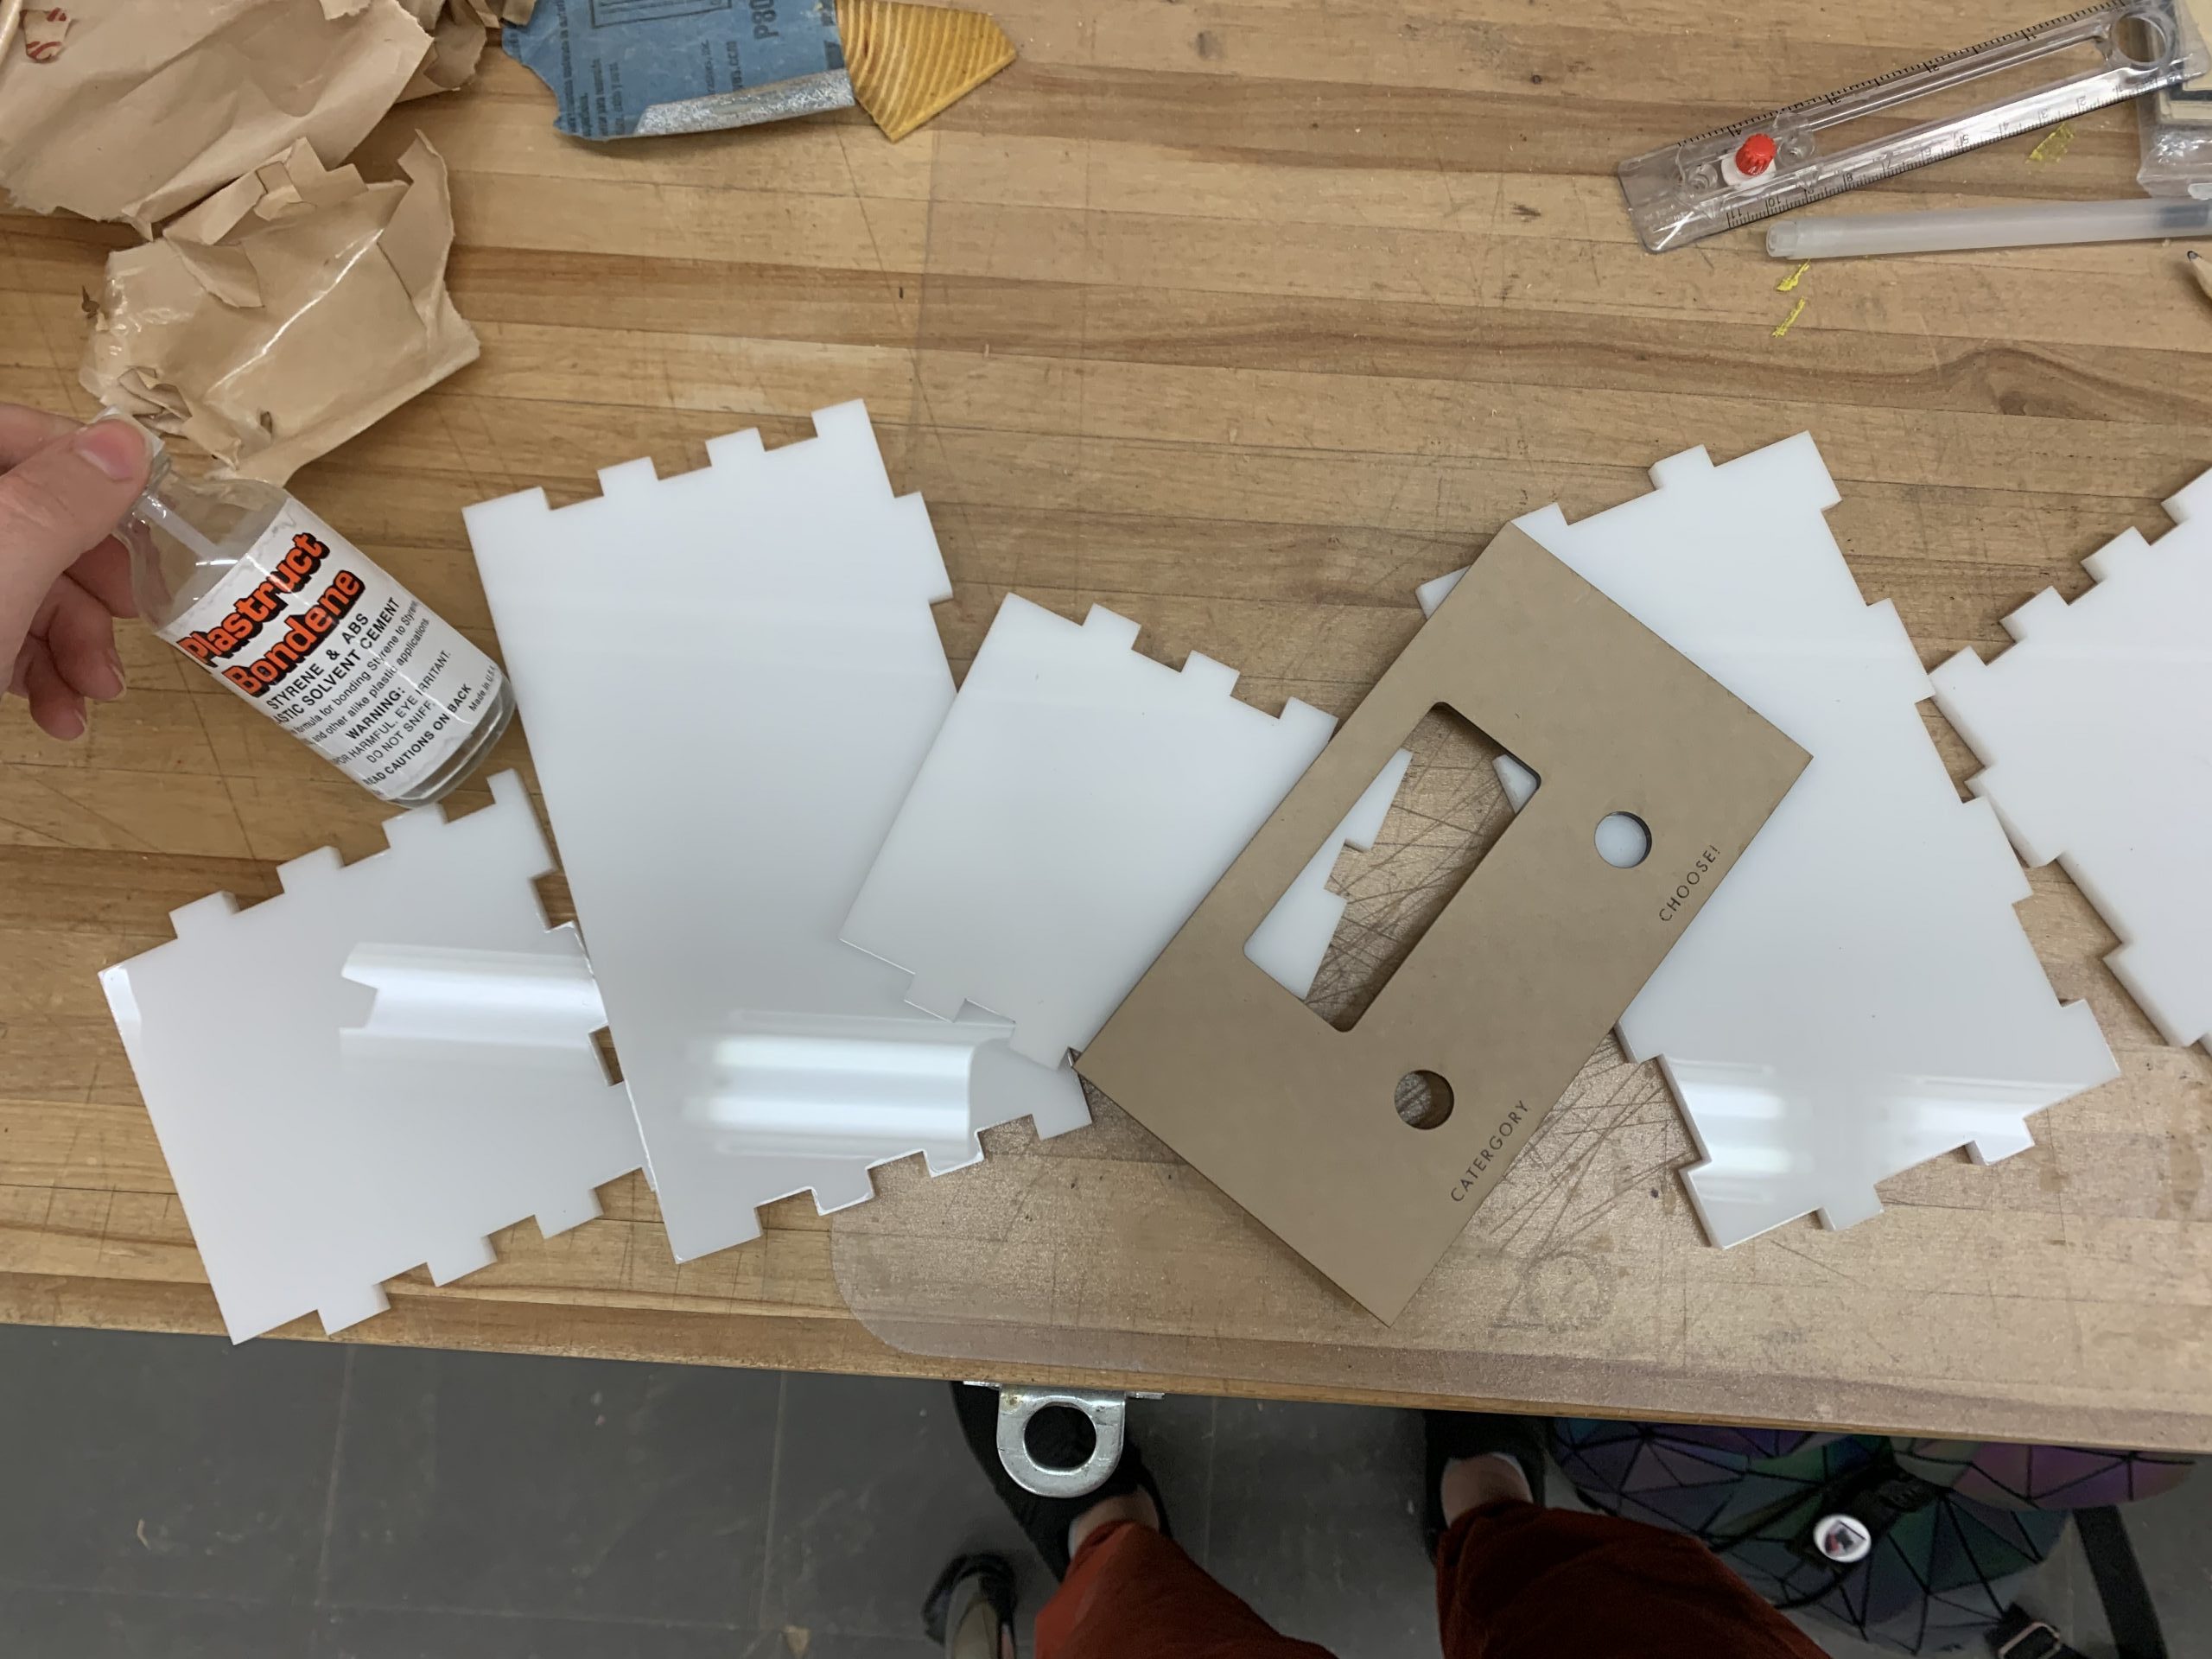
Begining construction of my laser-cut parts
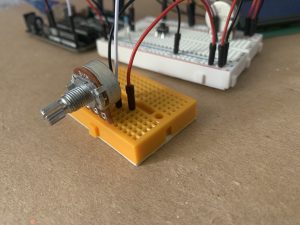
Once I began to implement my circuit into the physical box itself, I ran into a wiring issue. Not only was it proving difficult to fit all of the wires within the box dimensions that I had chosen, but the actual wiring of my still prototype circuit was not conducive to the interactions that I wanted to create (the button was still in the middle of a breadboard and all of the wires were tangled together making it harder to move the components around). At this point, I essentially took apart my circuit and rewired it so that each input component was on its own tiny breadboard and the wires were all neatly arranged in a way that allowed me to bend them into place without worrying too much about them getting unplugged or damaged.
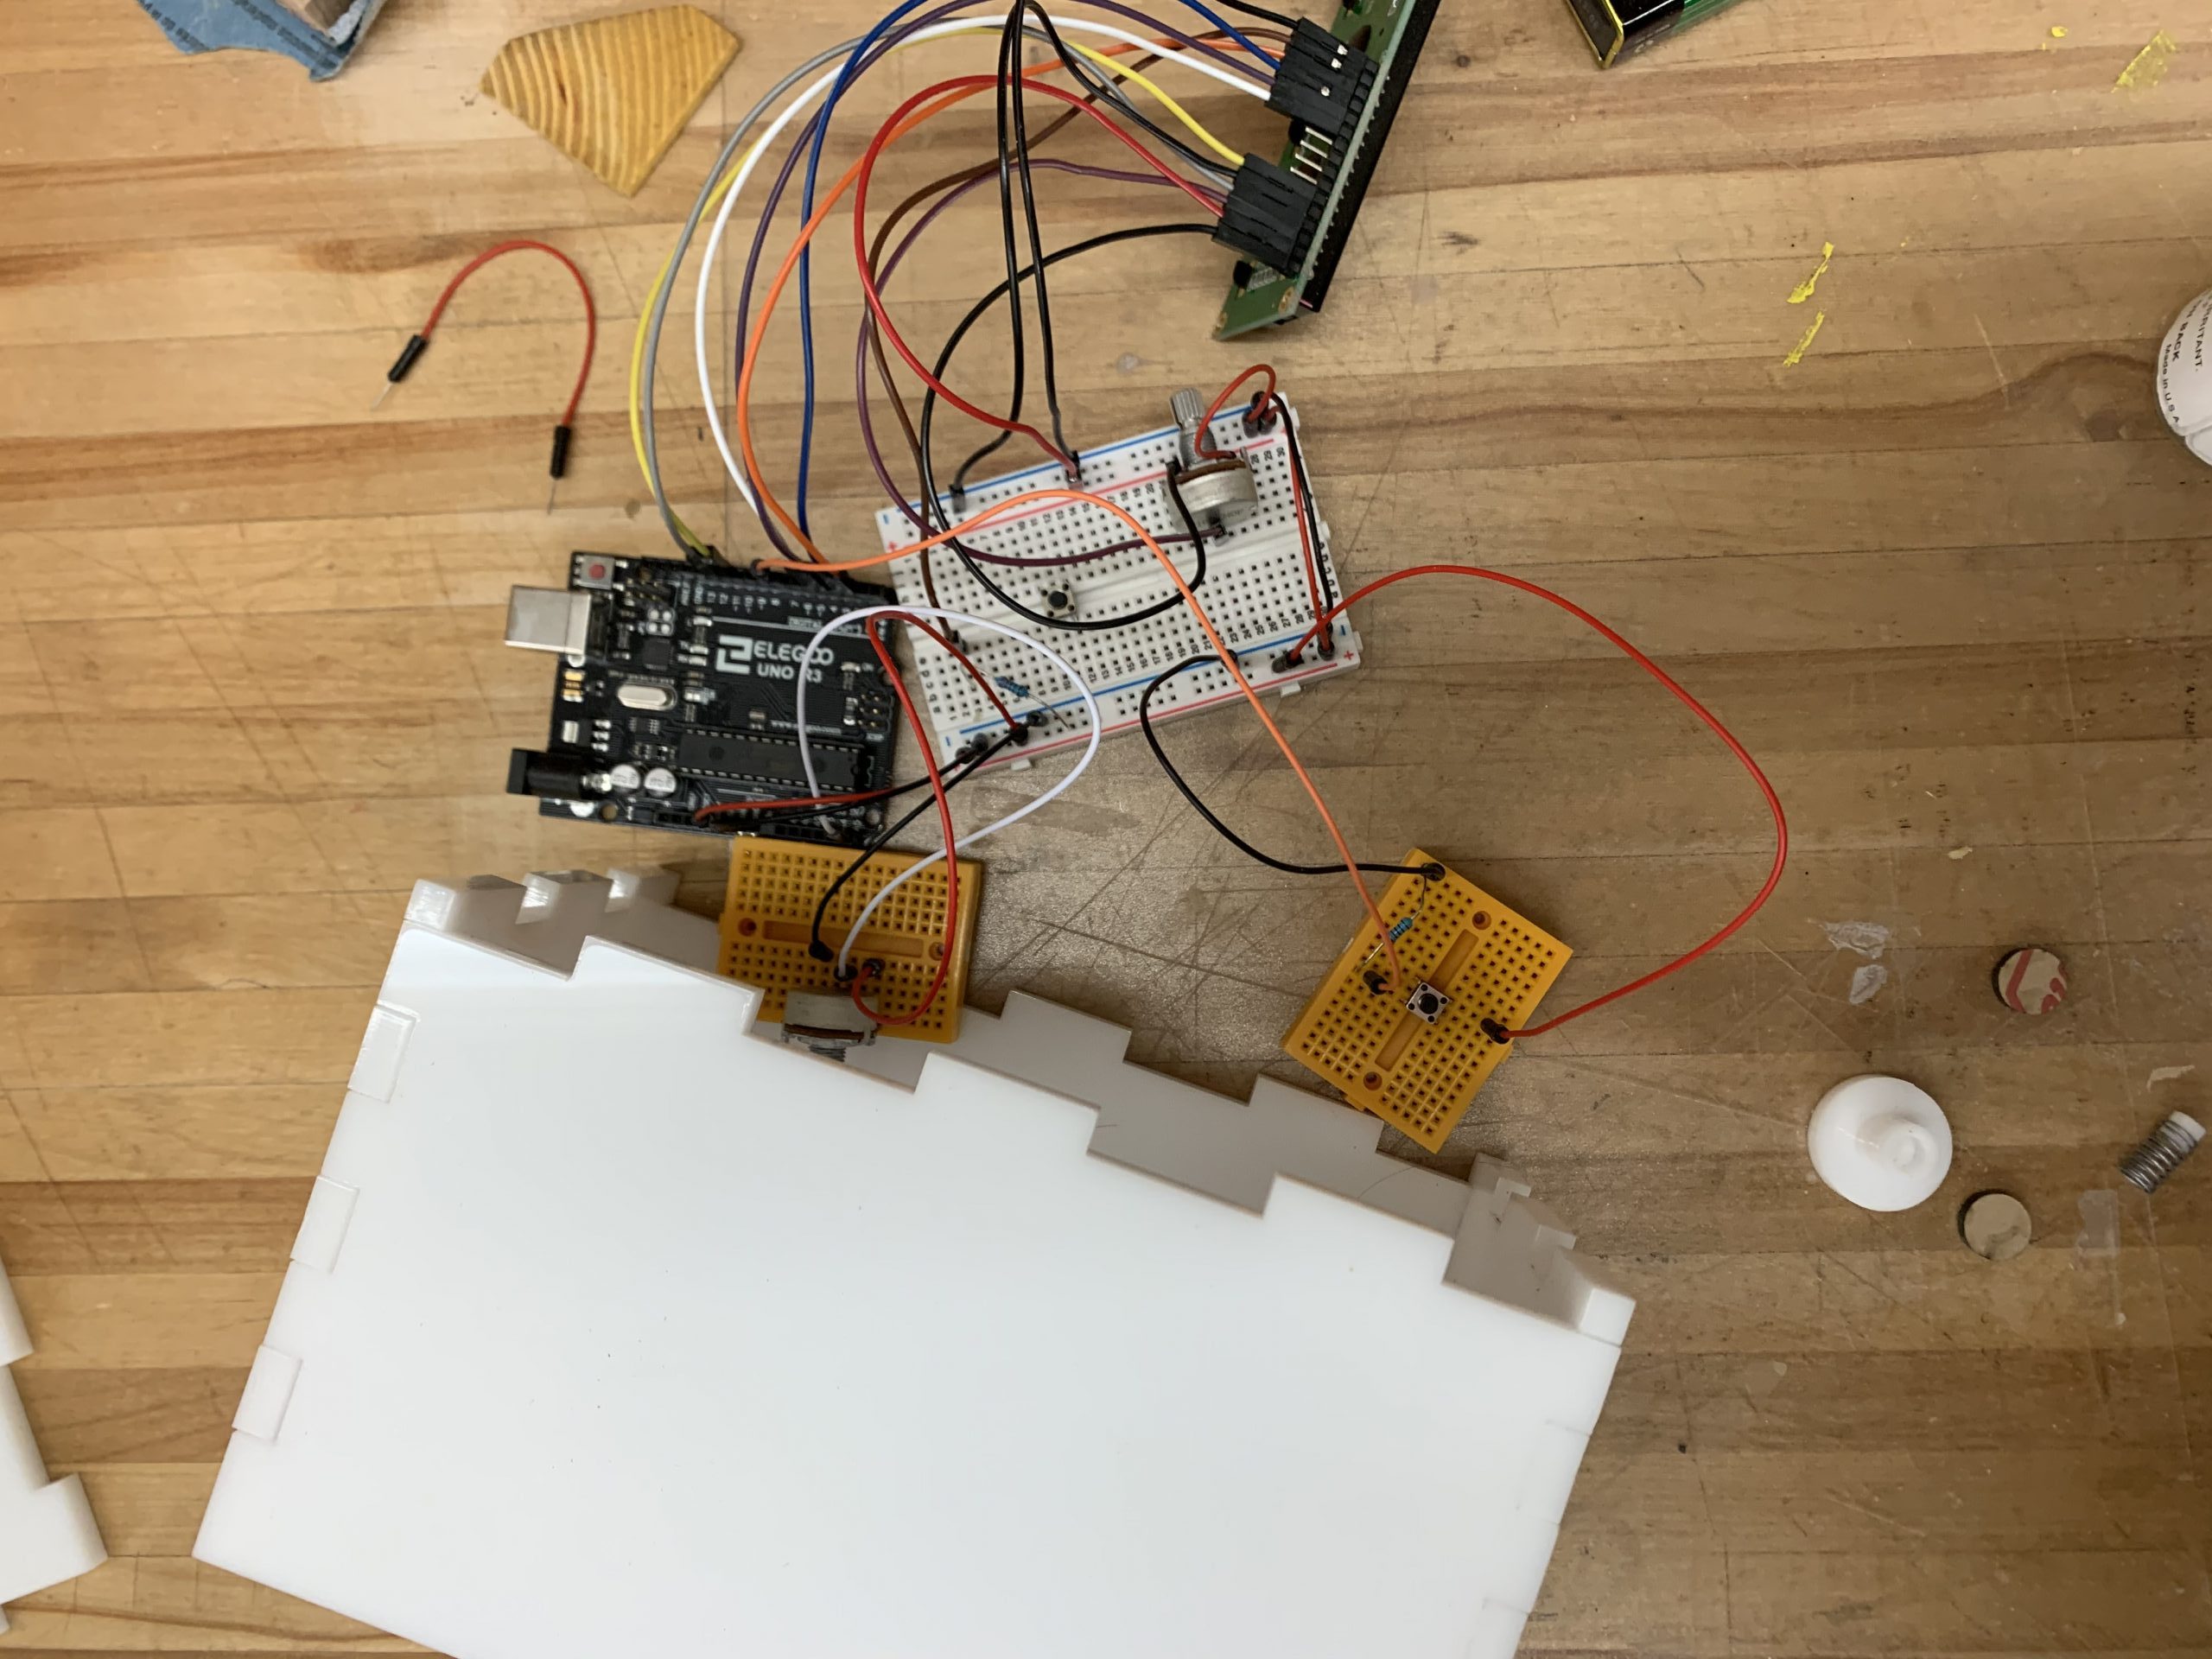
Begining to incorporate my circuit into my physical box. I had to attach two smaller breadboards to the circuit and rearrange all of the wires to allow for optimal interaction and fit.
Once I did that, it was just a matter of taping the electronics into place and then using a little bit of hot glue to attach the potentiometer to the acrylic knob (which had a measured hole in it to house the potentiometer’s included knob) and a spring to the circuit button so that the exterior acrylic button could successfully press this circuit component.
I kept the back panel unglued so that way I can reuse the Arduino or change the battery at my leisure (but the box joints fit snugly enough that this back panel doesn’t pop out of place without you wanting it to).
DISCUSSION
This project was a lot of fun to create overall, despite having some set-backs and snafus along the way. I believe that this project was, in many ways, successful; however, it was only so because I designed it within what I deemed to be my own capabilities without the need for too much assistance along the way. By this, I mean that I wanted to give myself a reasonable challenge, where I would learn some new software skills along with gaining more functional hardware knowledge along the way, but not create a challenge to the point of where I would be unsure if I would be able to complete the project/have it function totally properly. Therefore, ultimately, I do wish I pushed the concept a bit further and increased its complexity.
Some of the comments on this project that I received delved into that aspect of increasing the complexity a bit, which I appreciated. One student within my cohort noted that “…I can imagine this at a more complex scale with multiple sub-arrays that would make it feel even more random and fun!”. I think that this would be a great way of making selecting an activity into an activity in-and-of-itself (which was part of the purpose of creating this as a physical device rather than an app – being able to play with buttons and interact with an arcade-console-inspired device is part of the fun!) by making more subarrays under each category that you can explore. Perhaps there could be a series of subcategories that you can choose from underneath the main categories and then after a few levels of these category-based selections, you could then get your more specific random output (like a tree of arrays). This would certainly be more complex, but
Another student said that perhaps size could be another way to iterate upon this concept in the future “…I can definitely emphasize with not knowing what to do and having this device would help a lot. I am curious if it would be possible to have a smaller device for me to carry around during the day in my bag and using every day…”. I think that having this on multiple scales going as small as a keychain, or at least making it more portable than an acrylic box, could be an interesting concept for this device. Perhaps if it was portable and readily programmable, you could take it with you and set the types of activities to chose from to be more context-specific. For instance, if you were going on a camping trip, you could change the activities to be relevant to that trip rather than having them be the general, mostly indoor, activities that I currently have loaded into the device. I think that trying to get all of the components to fit within a keychain-sized piece might be a bit too complicated for my current capabilities, but I can see making a snap-fit 3D printed housing that’s about 4×4 inches with all of the components being feasible! If I have more time in the upcoming semester while I still have access to high-resolution 3D printers, I would like to see try this out as an iteration of my current project because I can see myself using this when doing outdoor activities with friends ( post-Covid, of course).
Looking back at my project process and final device, I am very happy with the overall look of it and am glad to say that I have used it a handful of times in the past week since it’s completion, which makes it a success in terms of it being useful. Throughout the project process, I learned a lot about different types of arrays and other forms of logic that I had not been exposed to, but am excited to implement into future projects! I think that despite this project perhaps not being the most ambitious out of the bunch, it was a great way for me to explore this realm of physical computing by myself and improve my problem-solving skills, as things didn’t go to plan quite a few times.
FURTHER TECHNICAL INFORMATION
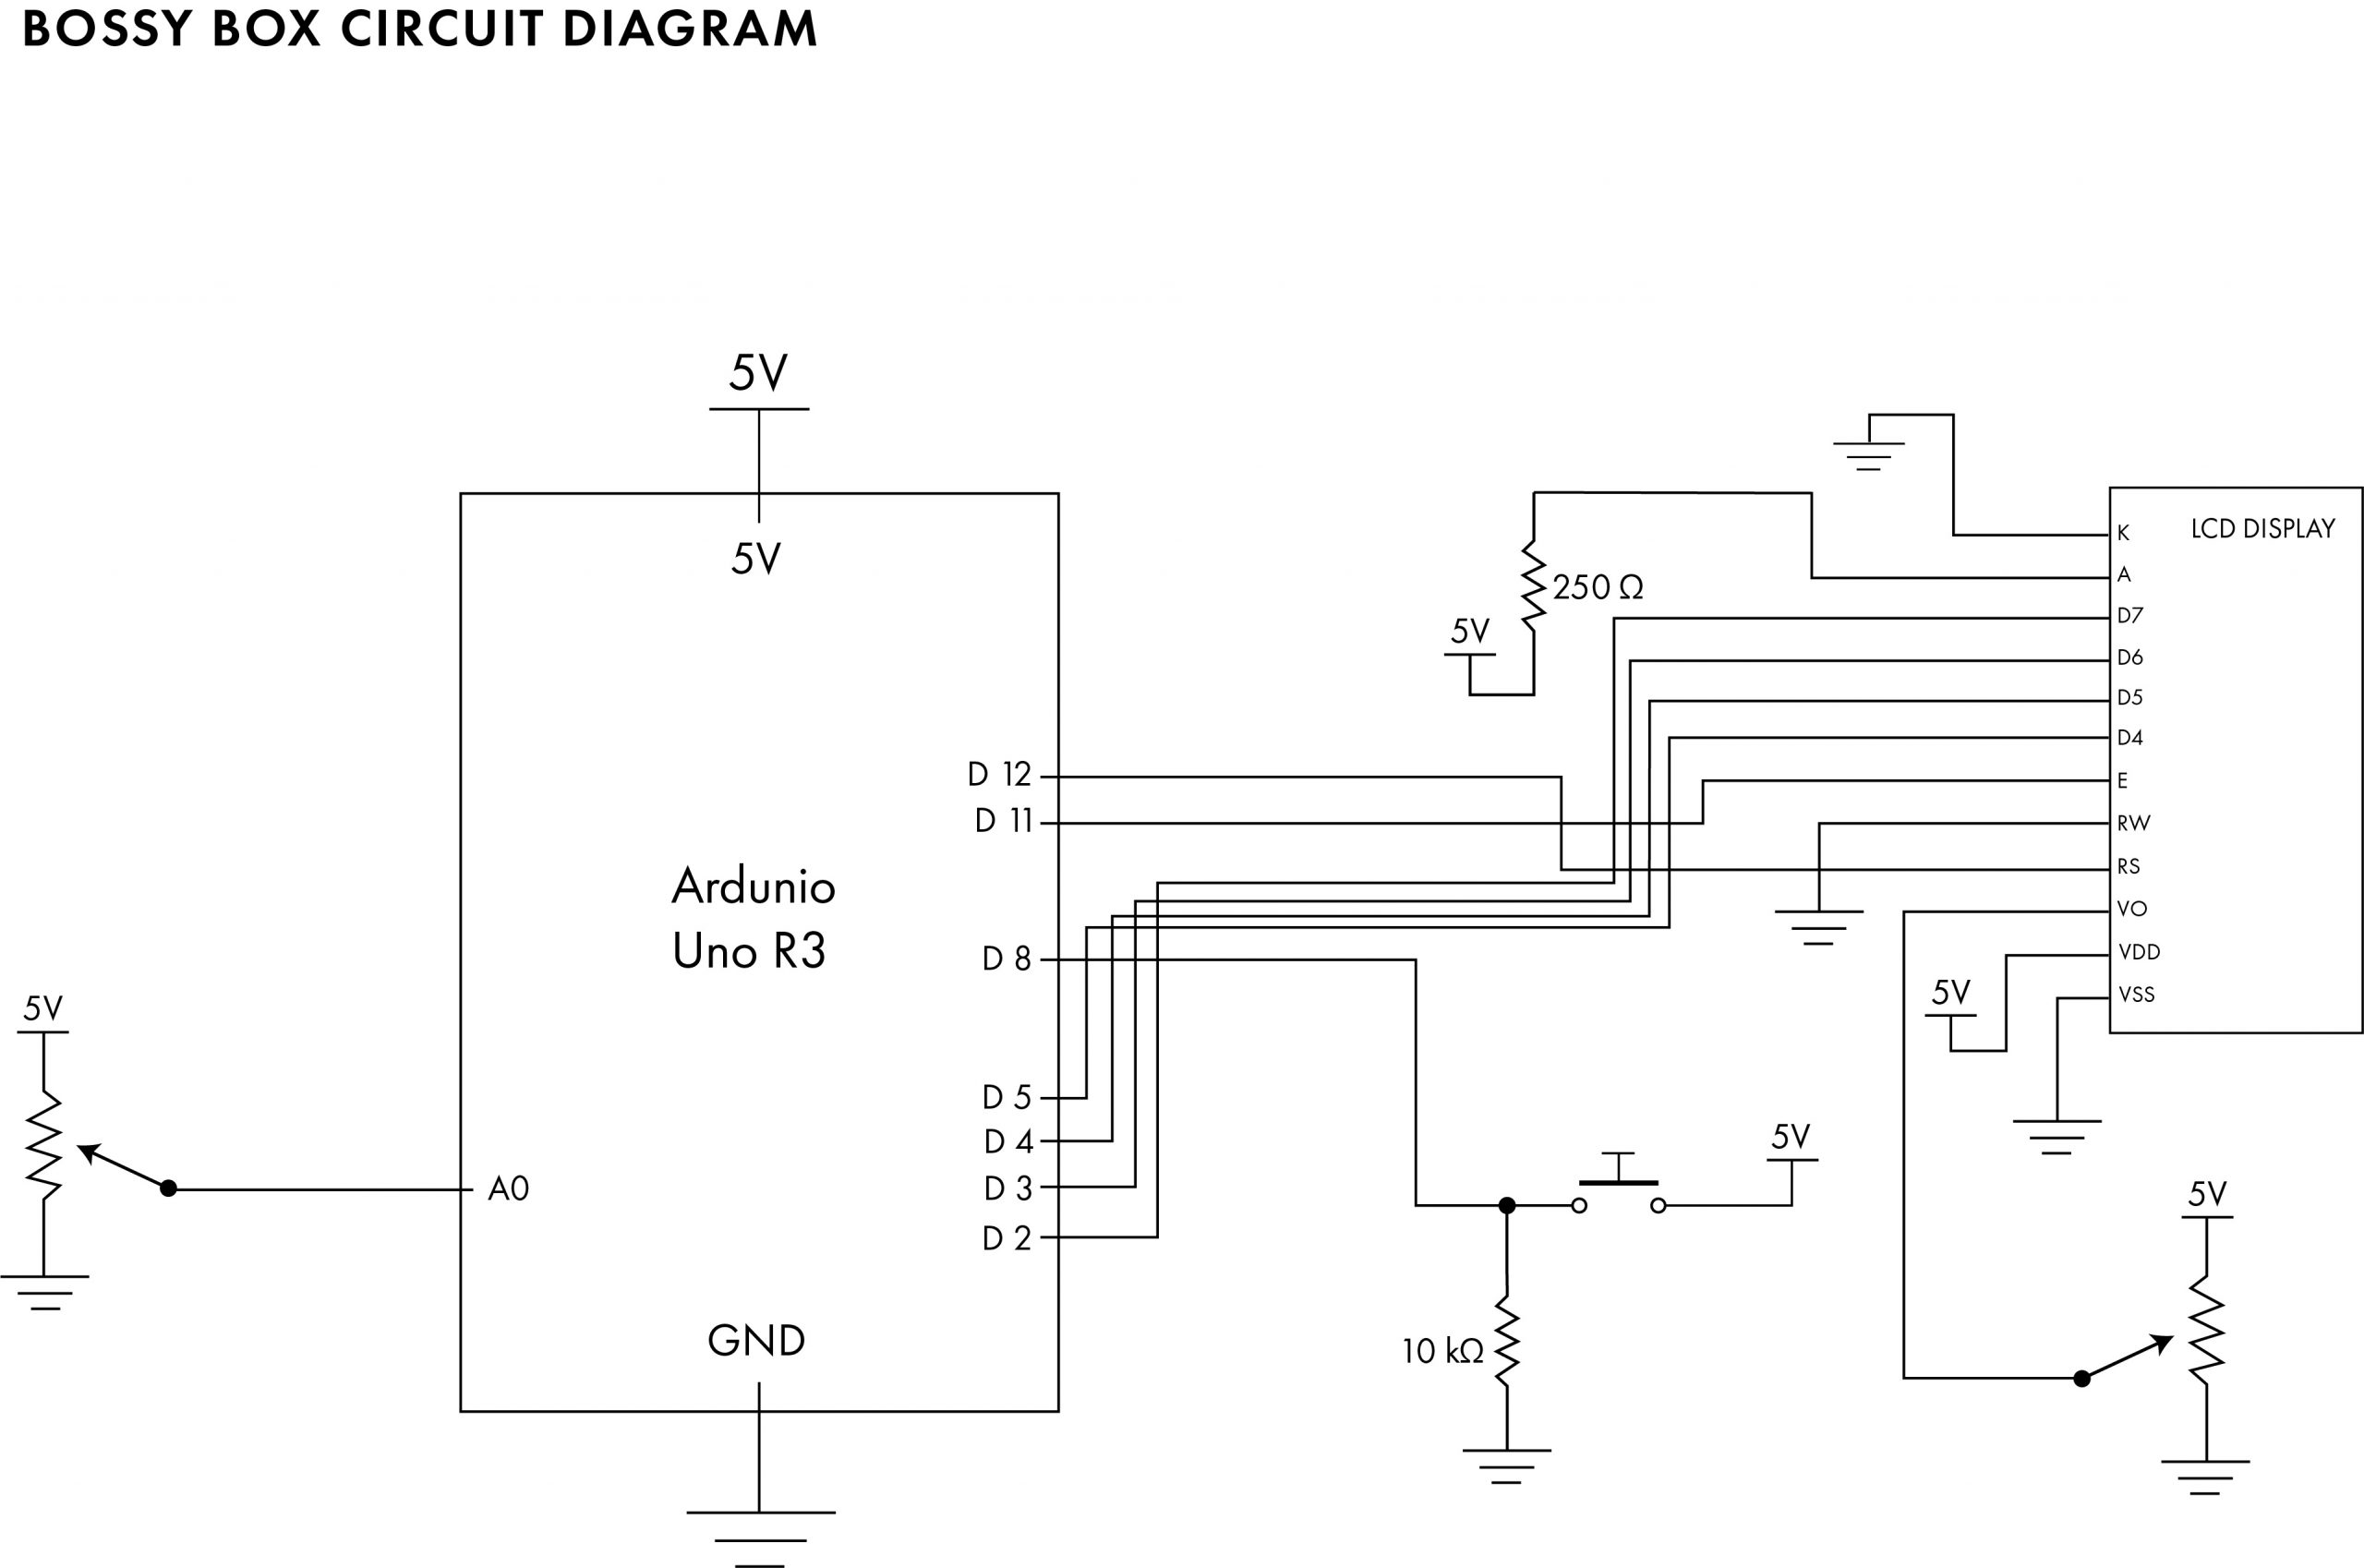
Circuit Schematic Diagram
PROJECT CODE
/*
 *Project 2: An Assistive Device for someone you know well
* Dani Delgado (ddelgad1)

* Collaboration: To complete this project, I had to collaborate closely with my professor Zach to gain a better understanding of
* character arrays and generating random outputs from these said arrays. Specifically, the random seed portion of generating these
* outputs. I also used online refrences in order to learn more about randomness in code and arrays on my own. These sources are:
* https://programmersheaven.com/discussion/57997/how-do-you-choose-a-random-item-from-an-array - For learning about randomness
* https://warwick.ac.uk/fac/cross_fac/complexity/newstudents/intro/introtocomputing3.pdf - For learning about randomness logic
* https://www.arduino.cc/reference/en/language/variables/data-types/array/ - For learning more about array syntax
*
* Description: The code below combines a potentiometer and button input to change a LCD display. The potentiometer input allows one to
* scroll through different array options by incrementing through the "main category" array and then having the LCD print each array item
* (which are strings of characters, for this project) as you do so. Then, you can get a random activity strings out of each of these larger categories
* if you press a button. These activity category arrays contain between 9 and 11 array items (strings) that are printed on the LCD at random when you press
* the button while on a category item from the "Main category" array.
*
*
*Pin mapping:
* pin | mode | description
* ----|------|------------
* A5  |INPUT | Potentiometer pin with an analog input
* 8   |INPUT | Button digital input
 */

#include <LiquidCrystal.h>
#include <stdlib.h>

// initialize the library with the numbers of the interface pins
LiquidCrystal lcd(12, 11, 5, 4, 3, 2);

//pin inputs
int POTPIN = A5;
int BUTTONPIN = 8;

//Create the overall category Array
char category[][17] =
{"Self Care", "Create", "Learn Something", "What's Cookin'?", "Qs Love to Watch", "Boolin"};

//Create arrays for the different categories
char selfCare[][17] =
{ "Yoga Flow", "Get ur face BEAT", "Go on a walk!", "Facemask + puff", "Pilates Calendar", "Make tea",
  "FM Sweat Sesh", "Paint nails", "strength workout"
}; //selfCare has 0-8 items

char create[][17] =
{ "Greeting Cards", "Fairy Garden", "Fingerpaint", "Draw a Comic", "BIG Painting", "Draw a Portrait", "Jounral", "FunProductDrawin",
  "Foam Carving"
}; //create has 0-8 items

char learnSomething[][17] =
{"Vocab Unit", "Read 4 pleasure", "Wiki rabbithole", "Play guitar", "Duolingo", "Math Speed Test!"}; // learnSomething has 0-5 items

char whatsCooking[][17] =
{ "Bake Cookies", "Banana Bread", "Vegan Muffins", "Make a Mug Cake", "Eloborate Pasta", "Bake Fish&Veg", "Bake a CrazyCake",
  "Scone Time!", "Quiche or fritta", "BROtien Smoothie"
}; //whatsCooking has 0-9 items

char watchQueen[][17] =
{ "Vine Comp", "Anime u weeb", "Phone List Movie", "Harry Potter", "Stand-up", "80s Spoof Movie", "Horror Movie", "Binge-Worthy TV", "Dani's HS faves",
  "Trixie Mattel", "Oscar Film ", "Unsolved Mystery", "TotalDramaIsland"
}; //watchQueen has 0-12 items

void setup() {

  pinMode(POTPIN, INPUT);
  pinMode(BUTTONPIN, INPUT);

  lcd.begin(16, 2);
  Serial.begin(9600);

  //generate the randomSeed
  //this is an analogRead value in order for the Arduino to use any number between 0-1023 as the seed value, creating a different random output with each button press

  long int randVal = analogRead(A1);
  randomSeed(randVal);
}


void loop() {

  int potVal = analogRead(POTPIN);
  int toggle = map(potVal, 0, 1023, 0, 6); //map the value of the potentiometer inputs to the total amount of array values within the Main Catergory arry

  String catVal = category[toggle]; //allow the Arduino to access the mapped value in order to increment through the array by turning the potentiometer

  //Serial feedback for debugging
  Serial.println(toggle);
  Serial.println(catVal);

  bool buttonState = digitalRead(BUTTONPIN); //when button is pressed, the code should give you a random string from the corresponding array

  if (buttonState != true) {
    // If the button has not been pressed, have the LCD print a value for the Main Category array
    lcd.setCursor(0, 0);
    lcd.clear();
    lcd.print(catVal);

    Serial.println("Button state is false"); // serial feedback for debugging
  }
  else if (toggle == 0) {
    //get a random number from the selfCare Subcateroy Array when the potentiometer is accessing the first Main Category array item
    int careSize = 9;
    int randCare = random(0, careSize);
    Serial.println(randCare);

    lcd.clear();
    lcd.print(selfCare[randCare]);

  }
  else if (toggle == 1) {
    //get a random item from the Create Subcategory Array when the potentiometer is accessing the second Main Category array item
    int createSize = 9;
    int randCreate = random(0, createSize);

    lcd.clear();
    lcd.print(create[randCreate]);

  }
  else if (toggle == 2) {
    //get a random item from the Learn Somethin' Subcategory Array when the potentiometer is accessing the third Main Category array item
    int learnSize = 6;
    int randLearn = random(0, learnSize);

    lcd.clear();
    lcd.print(learnSomething[randLearn]);

  }
  else if (toggle == 3) {
    //get a random item from the What's Cookin' Subcategory Array when the potentiometer is accessing the fourth Main Category array item
    int cookSize = 10;
    int randCook = random(0, cookSize);

    lcd.clear();
    lcd.print(whatsCooking[randCook]);

  }
  else if (toggle == 4) {
    //get a random item from the Queen's Who Love to Watch Subcategory Array when the potentiometer is accessing the fifth Main Category array item
    int queenSize = 13;
    int randQueen = random(0, queenSize);
    Serial.println(watchQueen[randQueen]);
    lcd.clear();
    lcd.print(watchQueen[randQueen]);
    }

  //Force stop the LCD printing from displaying multiple random items at once
  while (digitalRead(BUTTONPIN)) {
  }
}