Arleen Liu, Claire Koh
1. Brief overall introduction for context
Following the first interview with Brenda, the first week of prototyping development saw a slow progress in our efforts to develop an adequate mechanism for our initial design concept. The mechanical nature of the foldable foot-holder that we wished to develop at first presented us with a variety of problems that we were not familiar with, and so we decided to hold a second interview with Brenda to present her our current issues and possibly to discuss new design ideas for the project.
Upon completing the second interview with Brenda (full documentation on both the first and second interview could be found here), we now had a broader spectrum of ideas to choose from – some of which would require mostly electrical components than mechanical as we had hoped for. Among several different problems Brenda mentioned, the most addressable one seemed to be her inability to see behind the wheelchair – caused by the headrest that’s fixated on her chair as well as the lack of mobility in the left side of her body. She told us that she’s just learned to be careful when looking back or moving backwards.
To address this issue, we decided to make a device that would help her, to some degree, become better aware of what is behind her. Of the few possibilities for the device, we chose to incorporate a set of three ultrasonic sensors that would capture almost the entirety of her hindsight and a combination of speaker and LED lights as an output device that would provide a visual and auditory feedback for Brenda.
2. Prototype
Arleen:
This prototype was designed to help figure out the electrical composition of the device as well as experimenting with different control versions to find the most intuitive one.
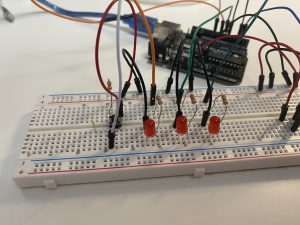
My prototype was essentially composed of purely the electrical components necessary for it to perform all its intended functionalities. More precisely, it consisted of 3 LEDs making up a visualizer corresponding to the detection device of the 3 ultrasonic sensors, a speaker for obstacle alerts, a push button for manipulating control settings, and the 3 ultrasonics for detection as mentioned earlier. While the full extent of the interaction could not be modelled by my purely electrical prototype (particularly the placement of the device parts for the most accurate results), the interactions of the different electrical parts were simulated well so interacting with one part could immediately have its impact seen on a different part (like the button control for the LEDs).
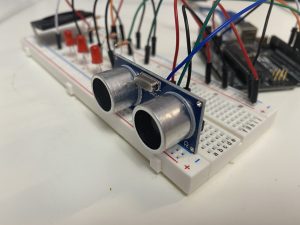
Close-up of the single ultrasonic sensor I had modeling the part of the device meant to have the arrangement of 3 ultrasonic sensors.
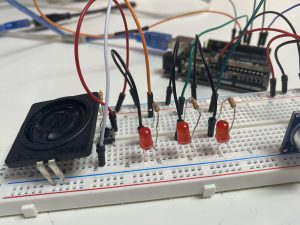
Close-up of the LED arrangements and speaker placed there modelling the alert/visualization system for the user depending on the ultrasonic sensor feedback.
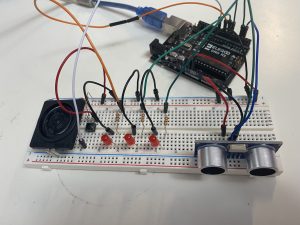
Overall scale of my prototype with all the essential electrical components mounted together.
The above is a video shot of the final button-LED visualizer mechanic based on my subject feedback for being the most intuitive version.
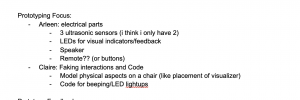
Screenshot from our planning google doc for what each of our prototypes would consist of. I built my prototype based off this initial plan.
Progress stage of my prototype with only the LED lights fully wired up with the push button as well.
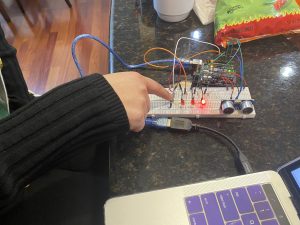
Picture from my feedback and testing stage with my completed prototype featuring my test subject, my mom, experimenting with different LED control mechanisms.
Before Claire and I split up the prototyping focuses, we were debating on the exact mechanism and purpose of the LED visualizer, which ended up being the highlighted focus of my prototype, as we couldn’t decide on whether having both auditory and visual feedback from the ultrasonic sensors was overkill or not. Therefore, we surmised to test whether having the visualizer indicate ultrasonic feedback or just show the active ultrasonic angle would be better. That led to my main prototype focus being on the controls of the LED visualizer, which I had my mom experiment and test for me, and she ended up giving feedback that separating out the auditory and visual feedback into different purposes (so auditory feedback would be specifically for proximity detected by the ultrasonics and the visualizer being for which ultrasonic view was active) rather than having both serve the same purpose just displaying data in different forms. While I did receive an answer that made sense in regards to my mom’s reasoning, it was rather surprising when I received the opposite feedback from Brenda in which she preferred the visual feedback from the ultrasonics, leading me to realize just how different viewpoints could be given each person’s circumstances.
Based on the feedback I received, for our end product, I chose to incorporate Brenda’s feedback as she is our client who will use this device (ideally). This meant that moving forward, my prototype did not quite end up capturing the device behavior accurately and revisions will need to be made to change the purpose and functionality of the LED visualizer feedback, in addition to the other overall feedback to improve our device design and make it even more useful and effective.
Claire:
This prototype was designed to illustrate the interaction between the person and the device as well as the general appearance and placement of the system. I focused on creating the prototype for the visual and auditory feedback-system and how it could interact with the person.
The visual + auditory feedback system (visualizer) will consist of an LED screen and a speaker. The LED screen (shown as a semicircle divided into three) in the prototype represents three distinct LED lights that will be connected to each of the three ultrasonic sensors. The speaker will be connected to the whole set of all three ultrasonic sensors. The LED will have three states: off (white), low on (pink), high on(red) – and they correspond to the proximity of the wheelchair to object(s) behind. If it’s far enough, the screen will be white; closing in, pink; very close, then red. The speaker will follow the same logic. If far, the sound will be off, closing in then slow beeping and if very close, then faster beeping.

Three ultrasonic sensors will be attached on the back of the chair
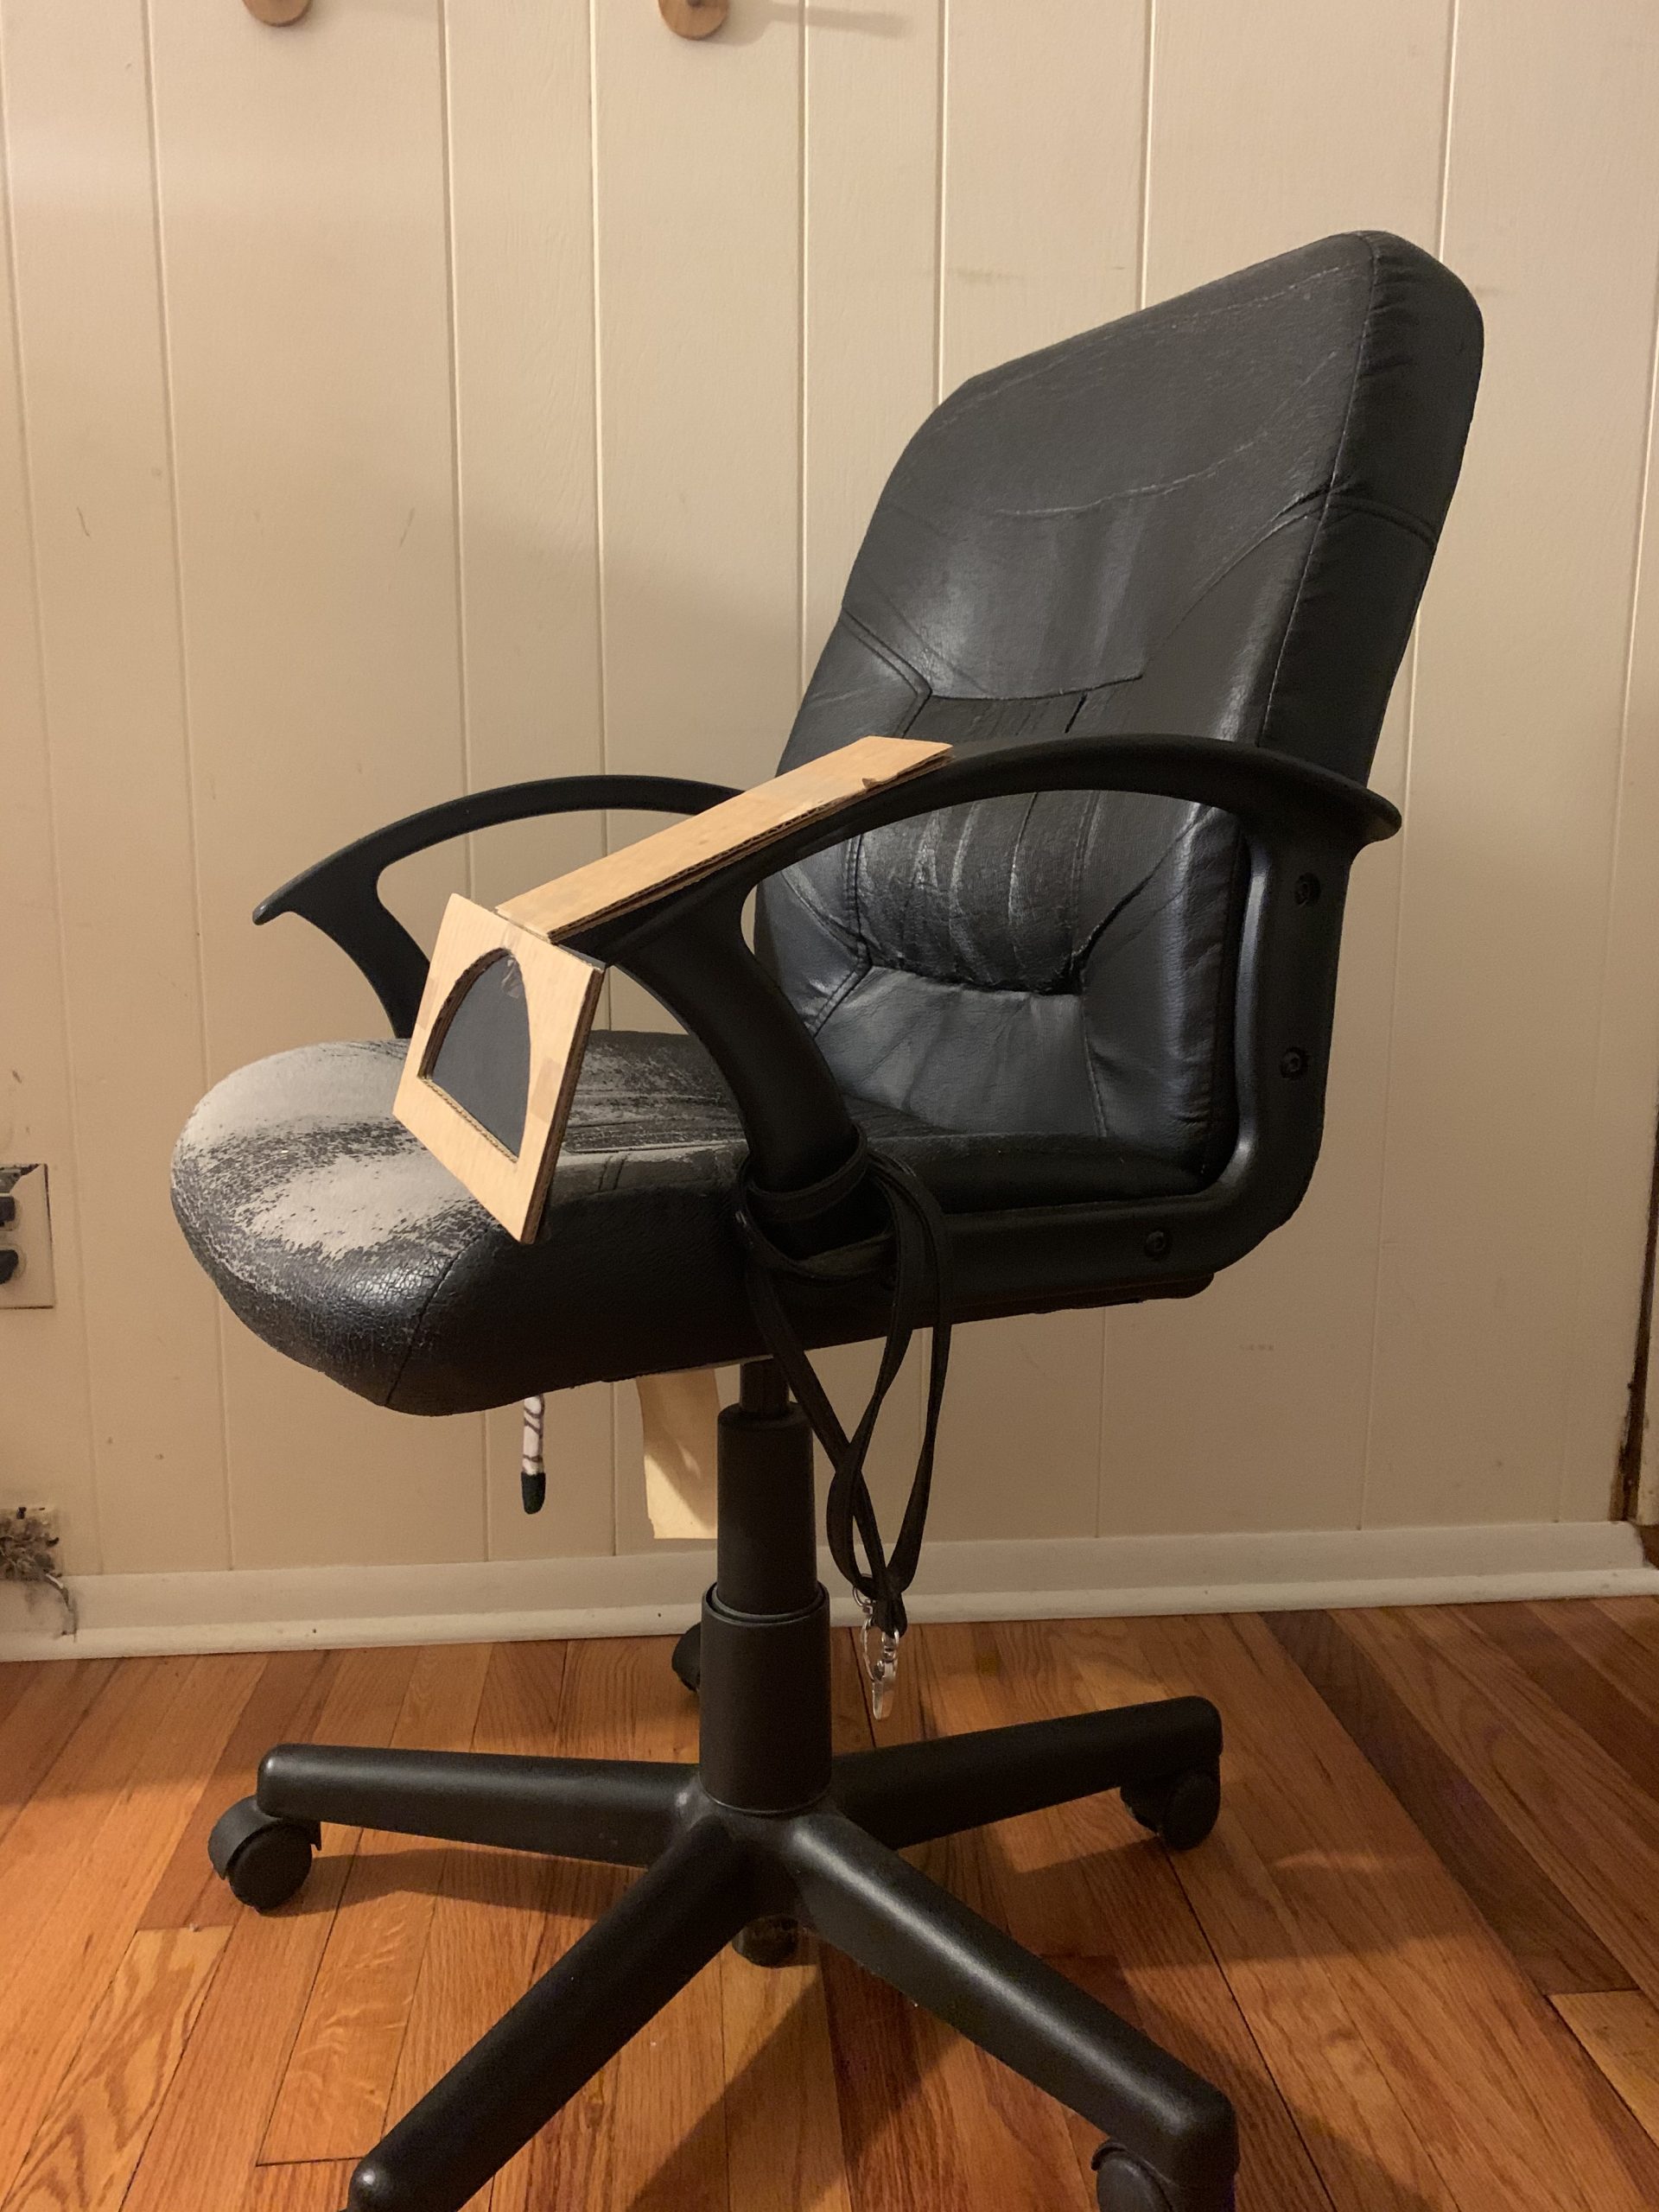
The system is at rest when the visualizer is laid off
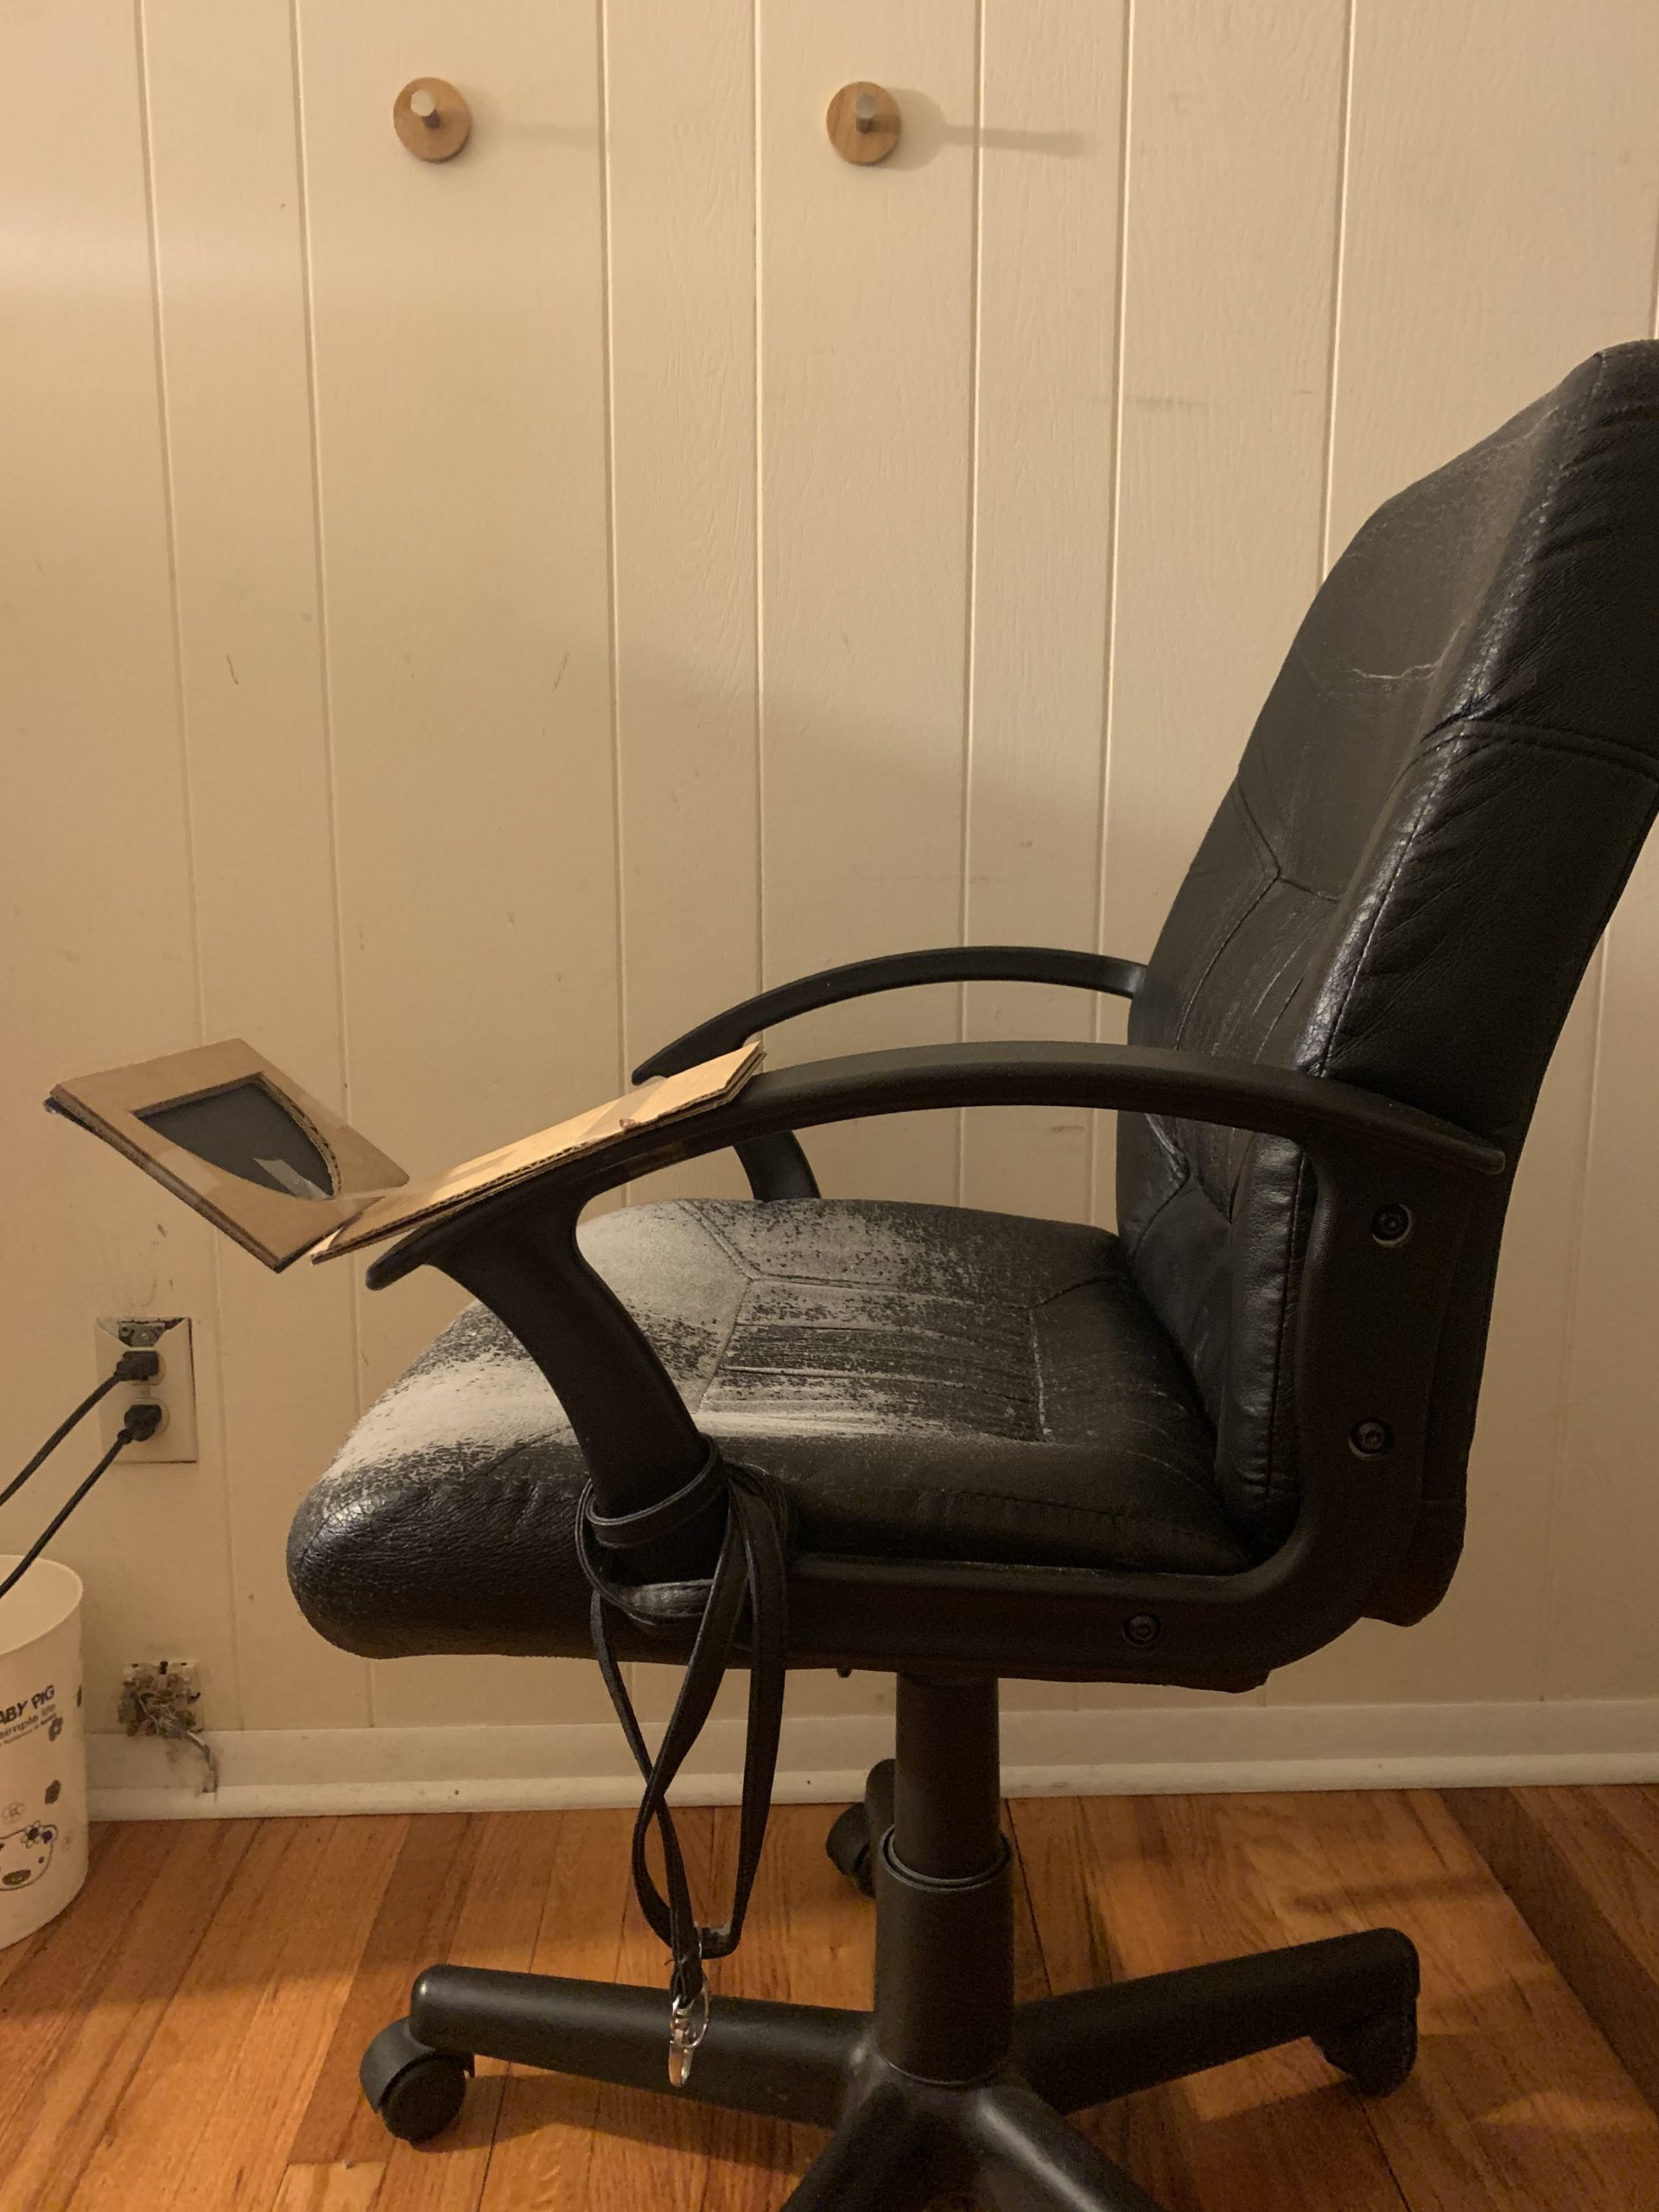
The system is activated when the visualizer is lifted
Below: process photos
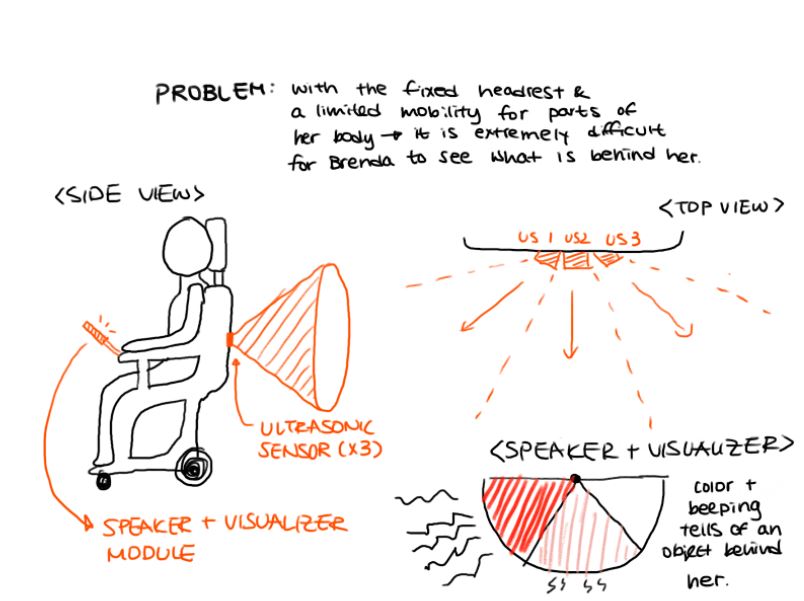
Initial sketch for the device

GIF I made for the screen
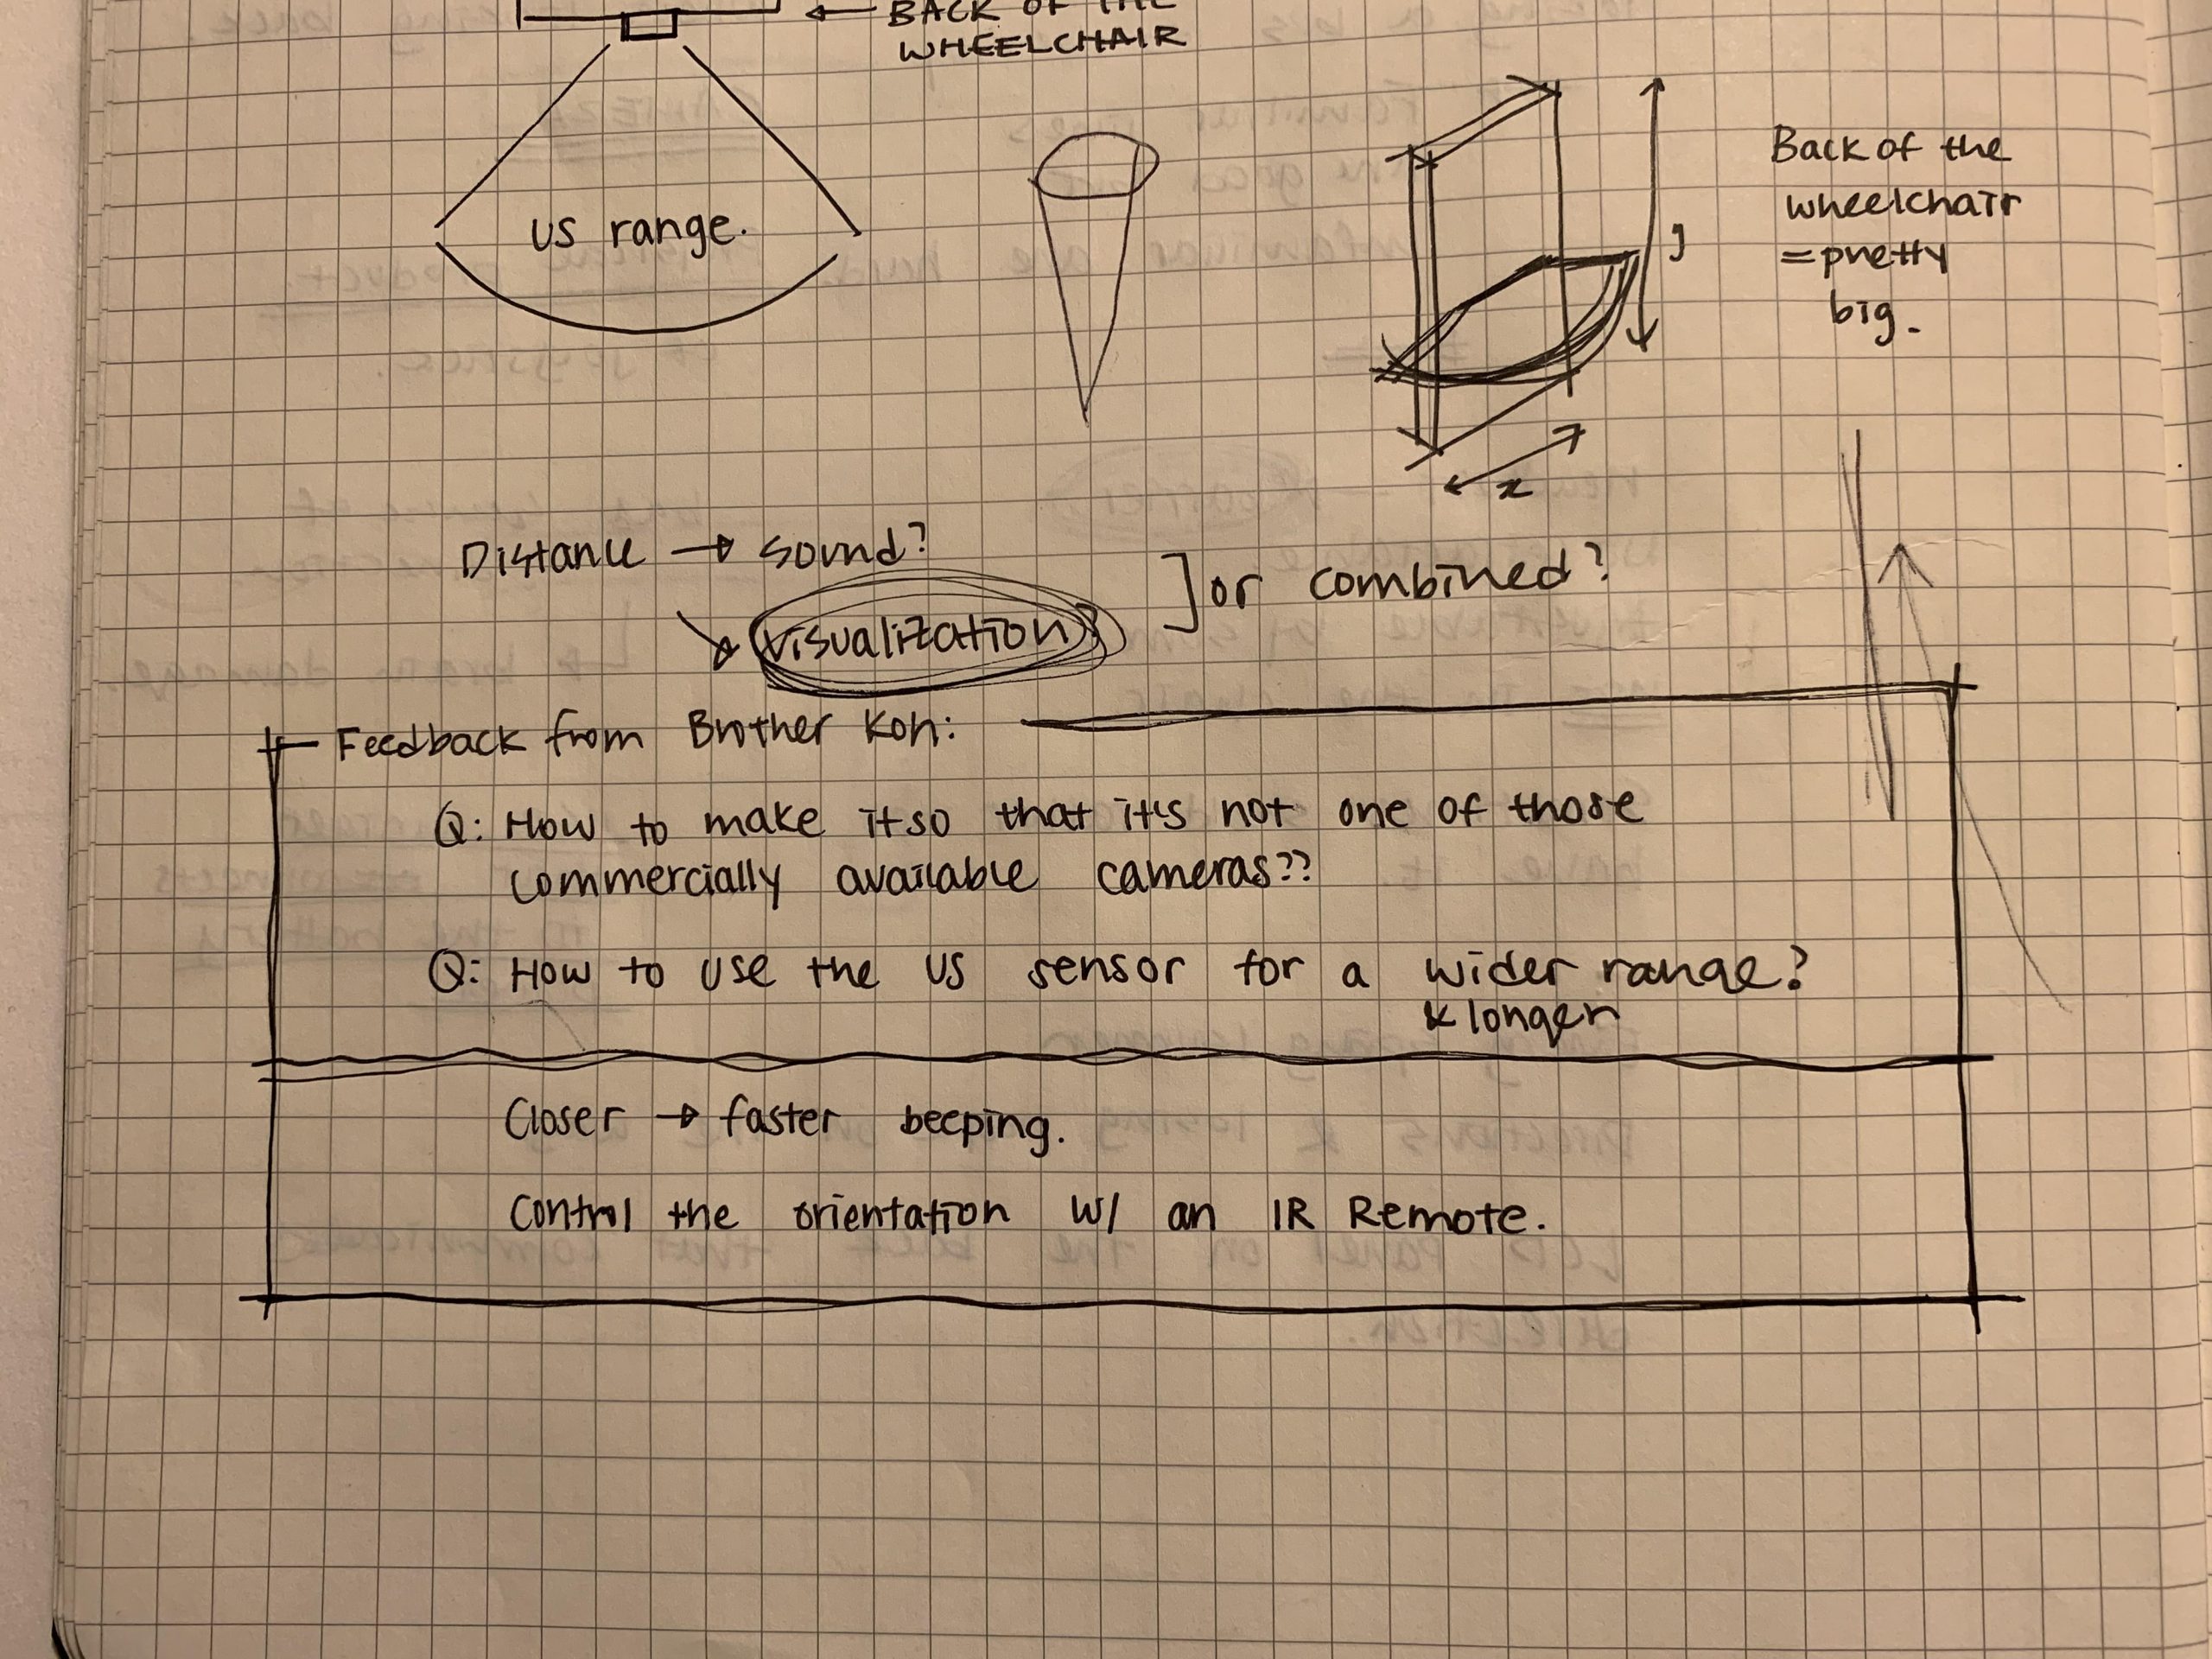
Feedback from Brother Koh
Some of the things I found while working on the physical prototype was a slight issue of an user interface. I realized that sometimes you would want to turn the device off in case you’re backing into something on purpose or if you NEED something/someone behind your wheelchair and you don’t want the device to be constantly beeping. That is why I made the system where if you lay down the visualizer, the system is deactivated and when you lift it up, it is activated. I thought about making a button for it but then realized the position of the visualizer is more recognizable and intuitive (once the visualizer is down, you won’t be able to see it so you’d know that the system has been deactivated) than a small LED light describing the on/off state or the position of the button (pressed/not pressed).
When I showed the prototype and explained it to my brother: the one thing that he kept insisting was that there is already a camera commercially available for this kind of issue. This is what inspired me to start thinking about what could be done to make the device more specific to Brenda’s problems as it will be explained later in part 3: Moving Forward.
3. Moving Forward
The prototyping process was a good way for us to discover the strengths and weaknesses of our concept as well as the drawbacks of the initial interaction design that we missed when only thinking about it theoretically. It was not until after we built the physical working prototype that we realized we need to focus more on the designing of a better user interface – make sure that the design and arrangement of parts is as intuitive as possible. Consequently, some of the future considerations include: what would be the best way to arrange the controls for easiest use? How to make the device more practical (there are already back video cameras for cars, etc. – so how to develop it more so it’s unique, and much more customized to Brenda herself?) and does more than what the commercial video cameras can already do?
Upon completing our prototype presentation and critique, we were also able to analyze the feedback we got and outline the general direction that we want to head for the next step in the project. We received more photos from Brenda that show blind spots for her wheelchair that we could address using our new device. Following are the changes we decided to implement on our design moving forward.
- Change to vibration instead of auditory beeping feedback
- Lower detection range of ultrasonic sensors to detect pets & fallen objects
- Keep version with ultrasonic sensors all active, visualizer will show which direction detects closest thing corresponding to light intensity
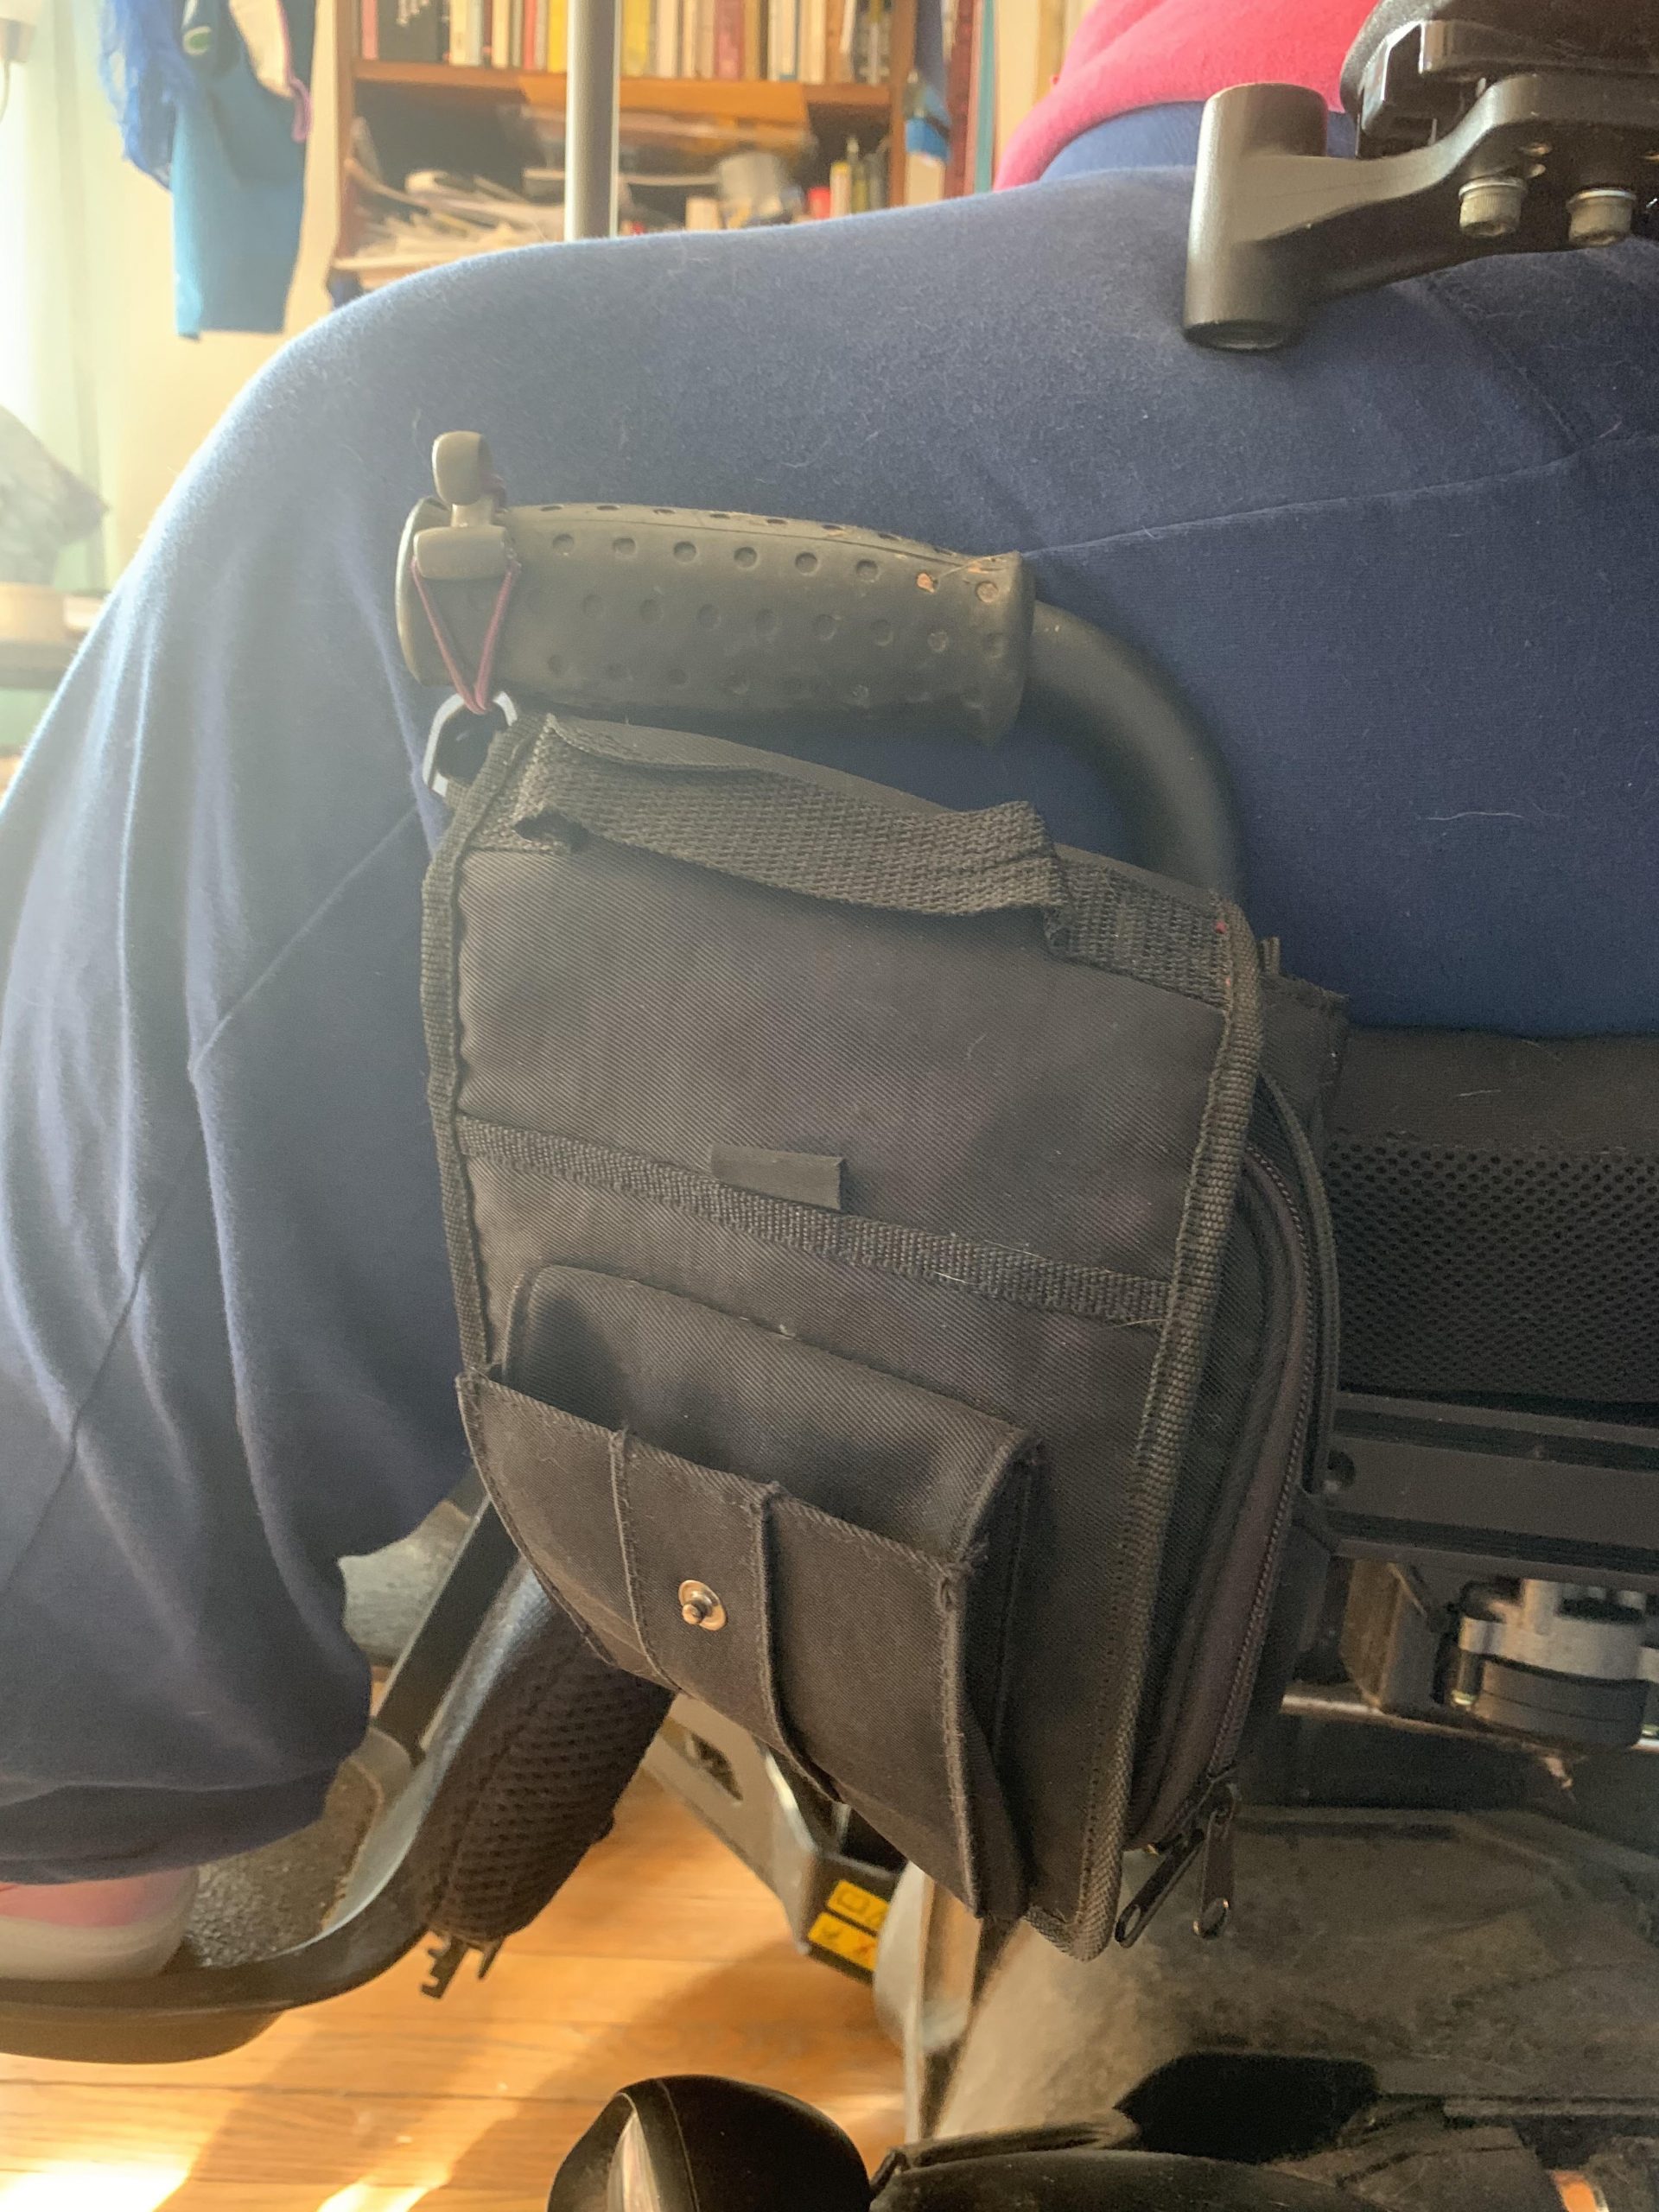
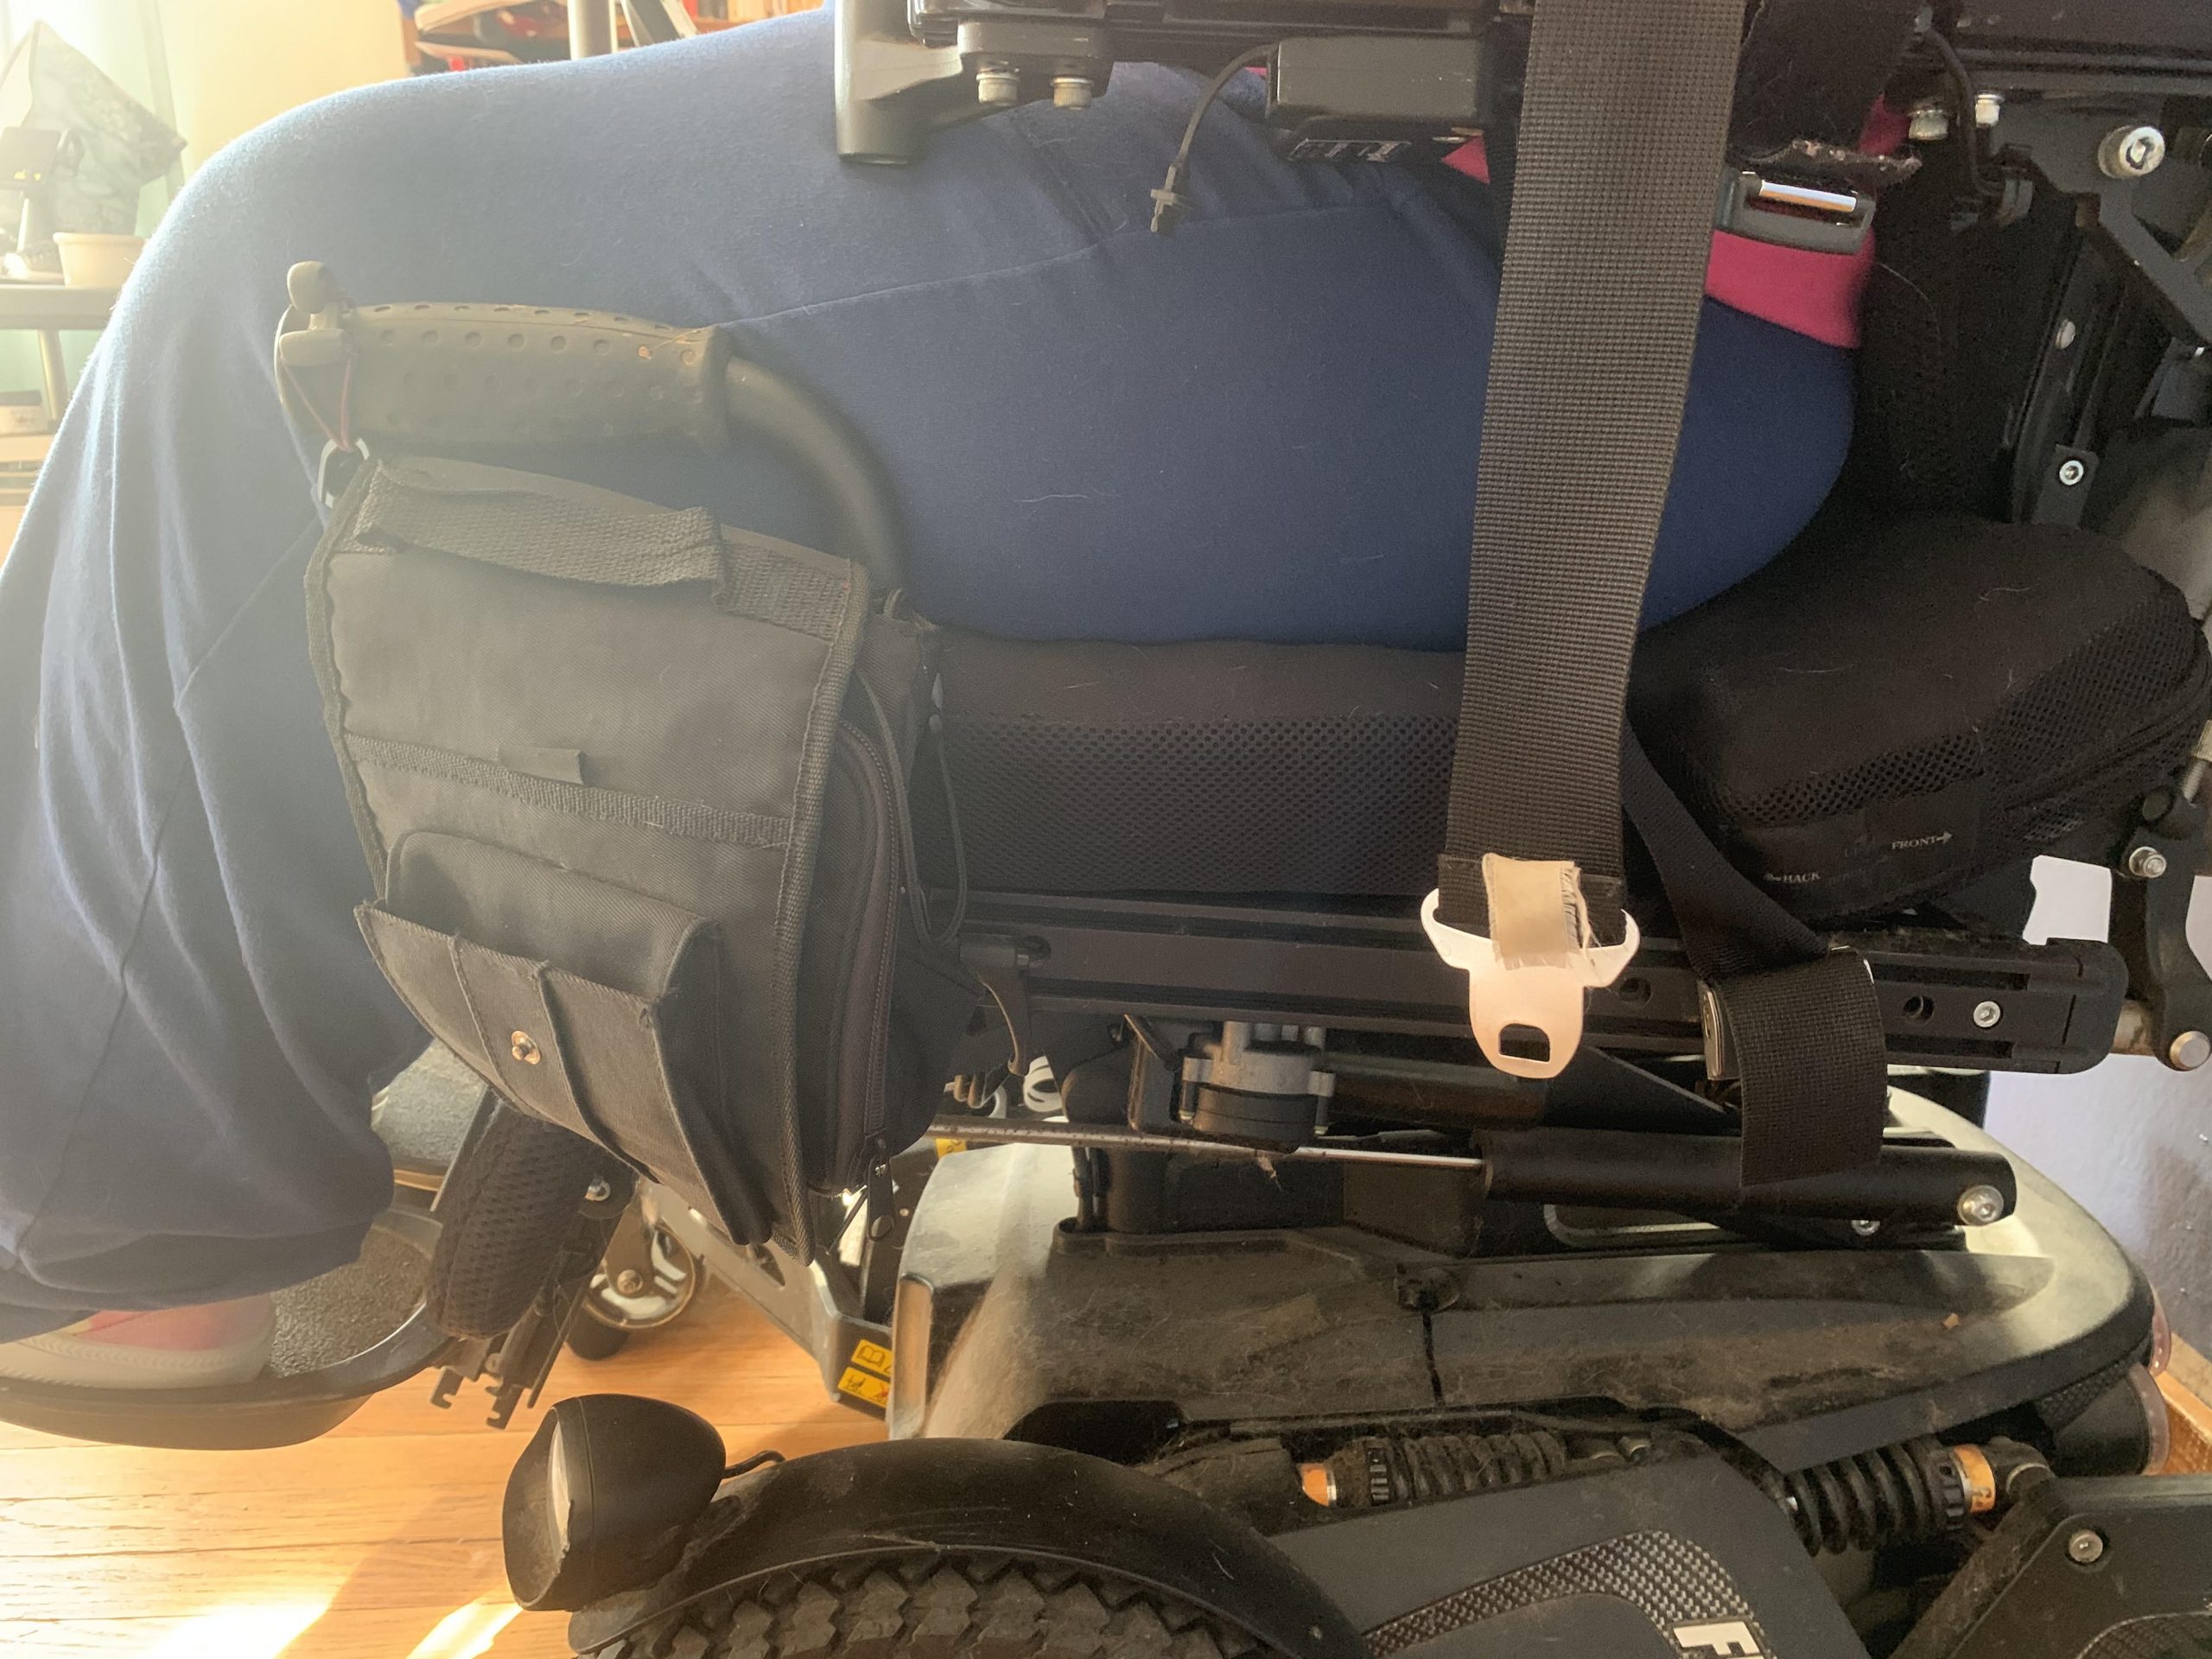
- Keep awareness about armrest prone to easy damage, add to inside of pocket attached to armrest instead
- Will get image of armrest area and blind spot on back of chair
- Dogs might be able to hear the ultrasonic ping and not like it – find a higher-frequency ultrasonic device.
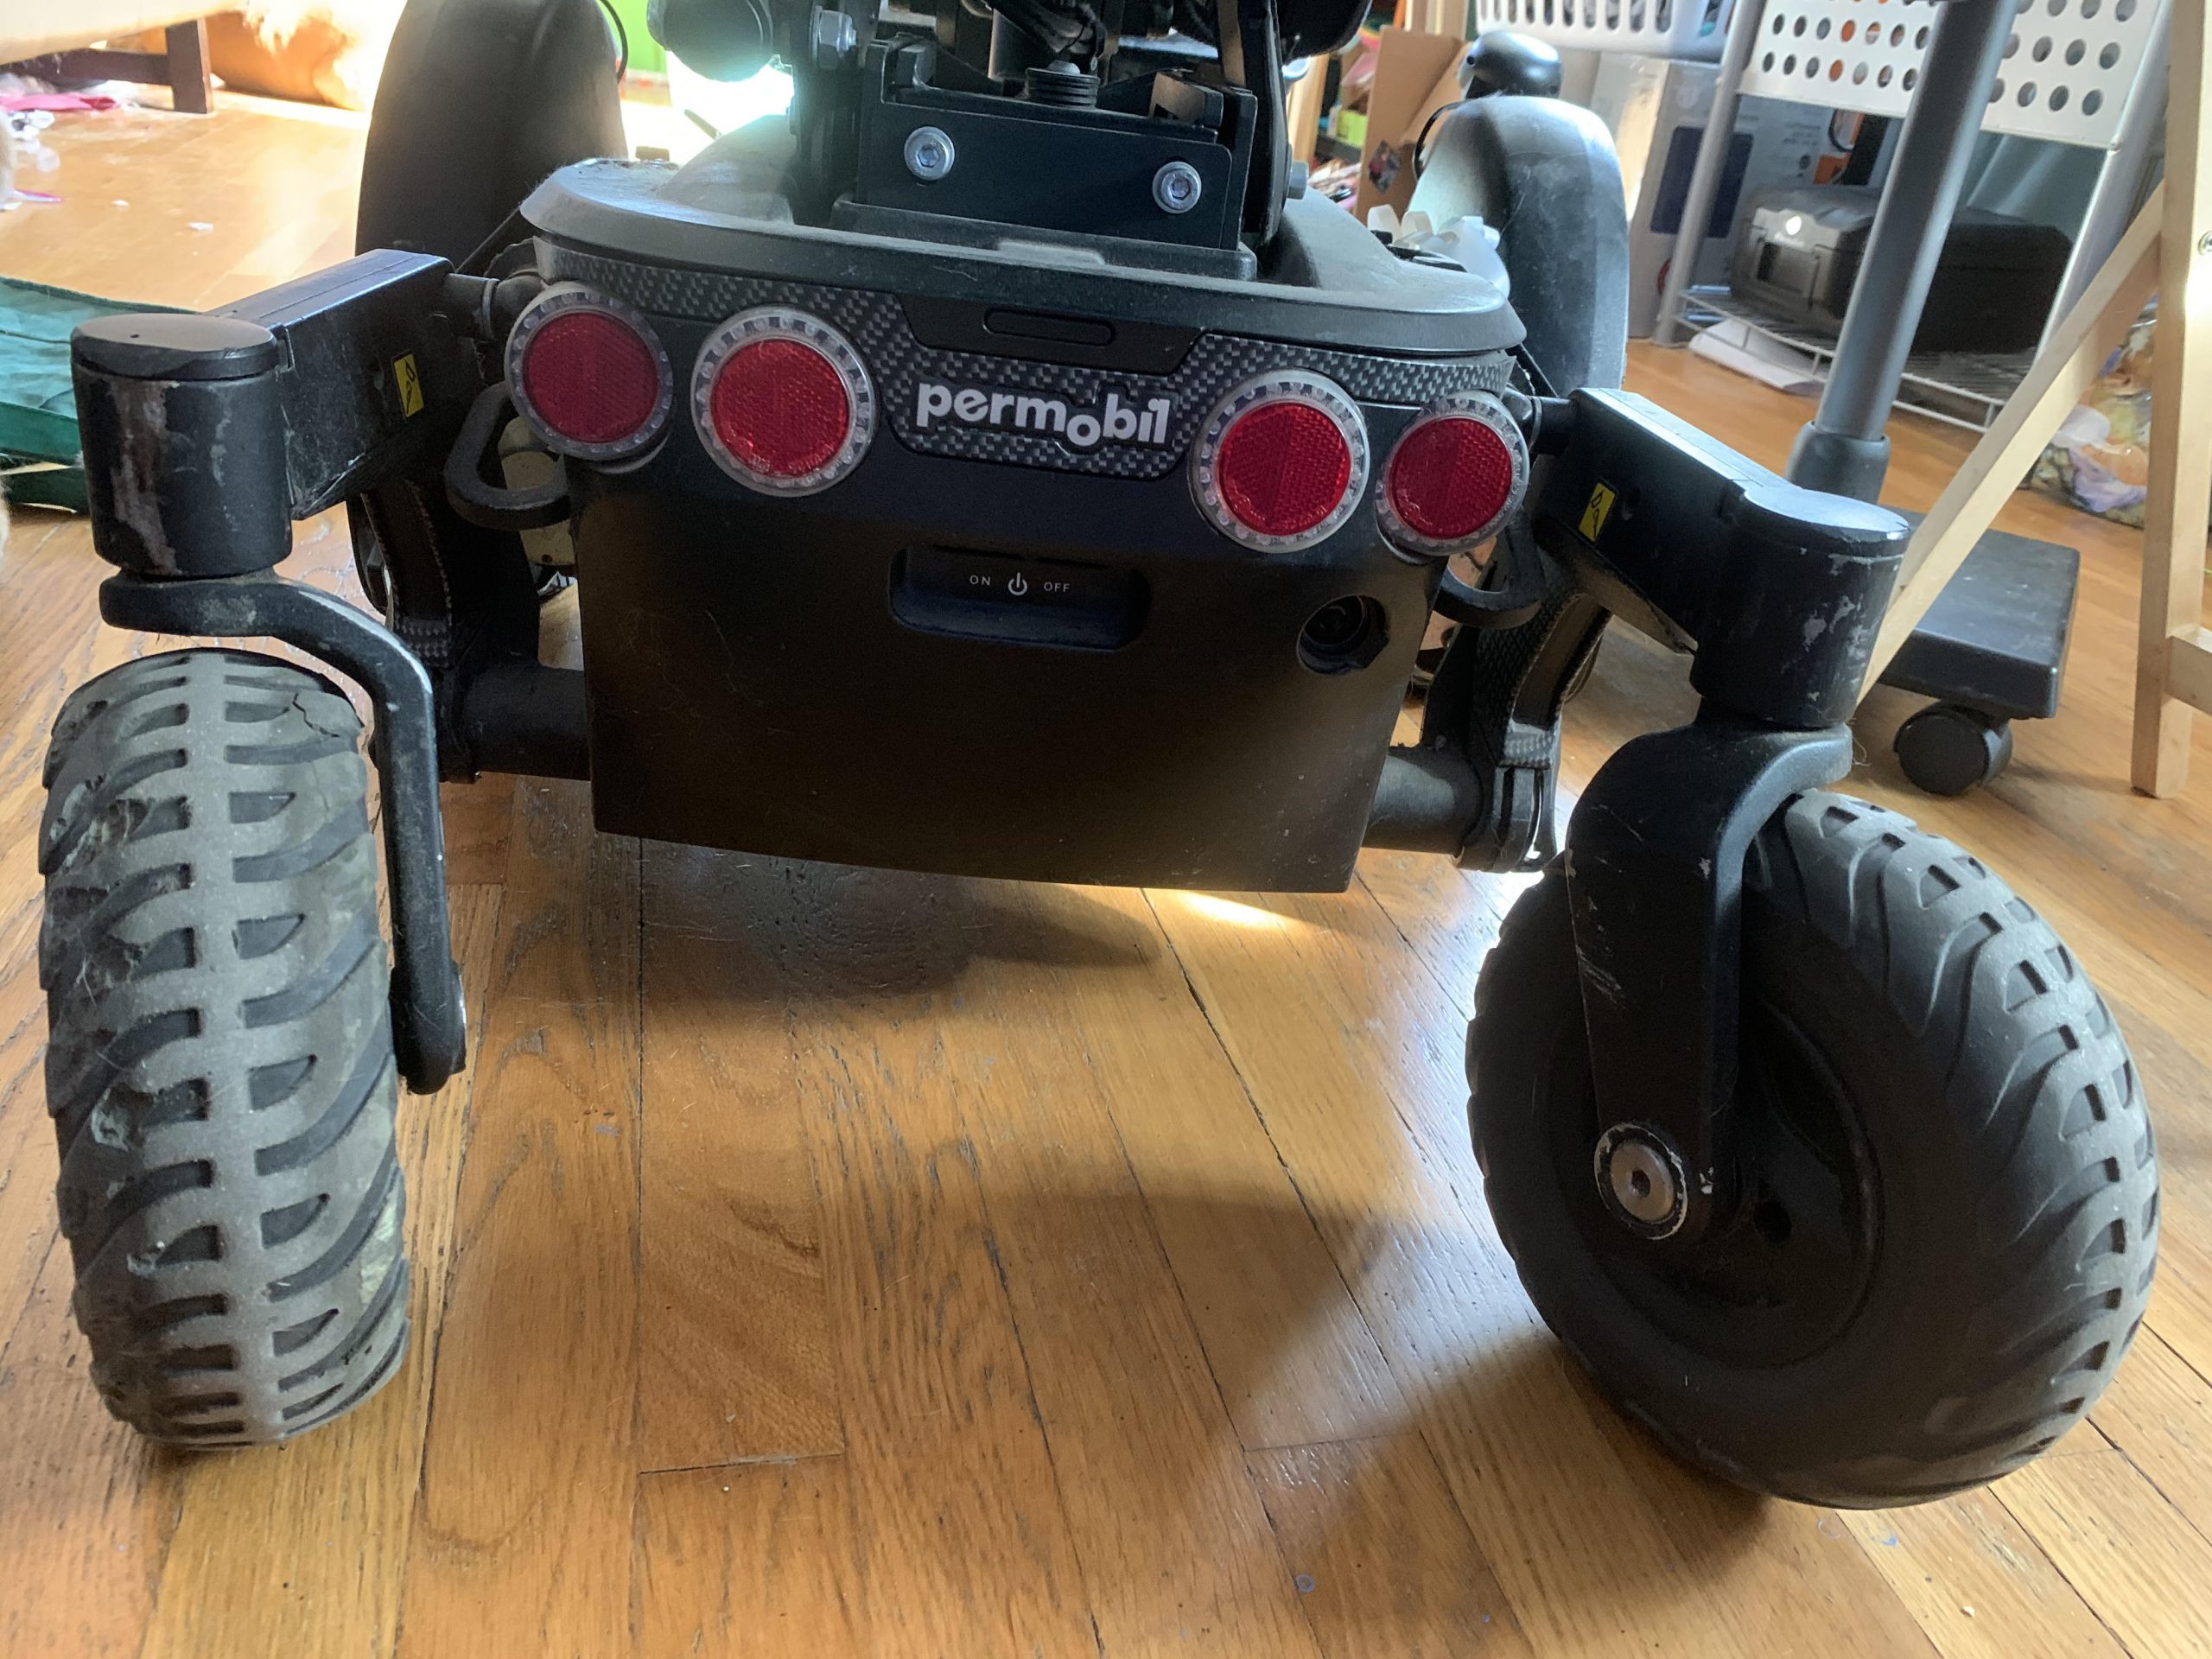
Picture from Brenda (back of her wheelchair)
Picture from Brenda 2 (back of her wheelchair)
Picture from Brenda (the blind spot under her wheelchair where things/pets can get stuck
We feel hopeful about the feedback we got, the changes we decided to make and the direction we are heading towards about finalizing our concept. We believe that repurposing our concept and making a new low-range ultrasonic device that could detect pets and fallen objects will be more specific and helpful to Brenda – and it wouldn’t require us to change too much of our initial concept and is perfectly within our ability to produce.