
An handy set of programmable keys to keep your most used functions within reach.
Photos:
Standard use, first four keys 1-4, 5th key mapped to long message
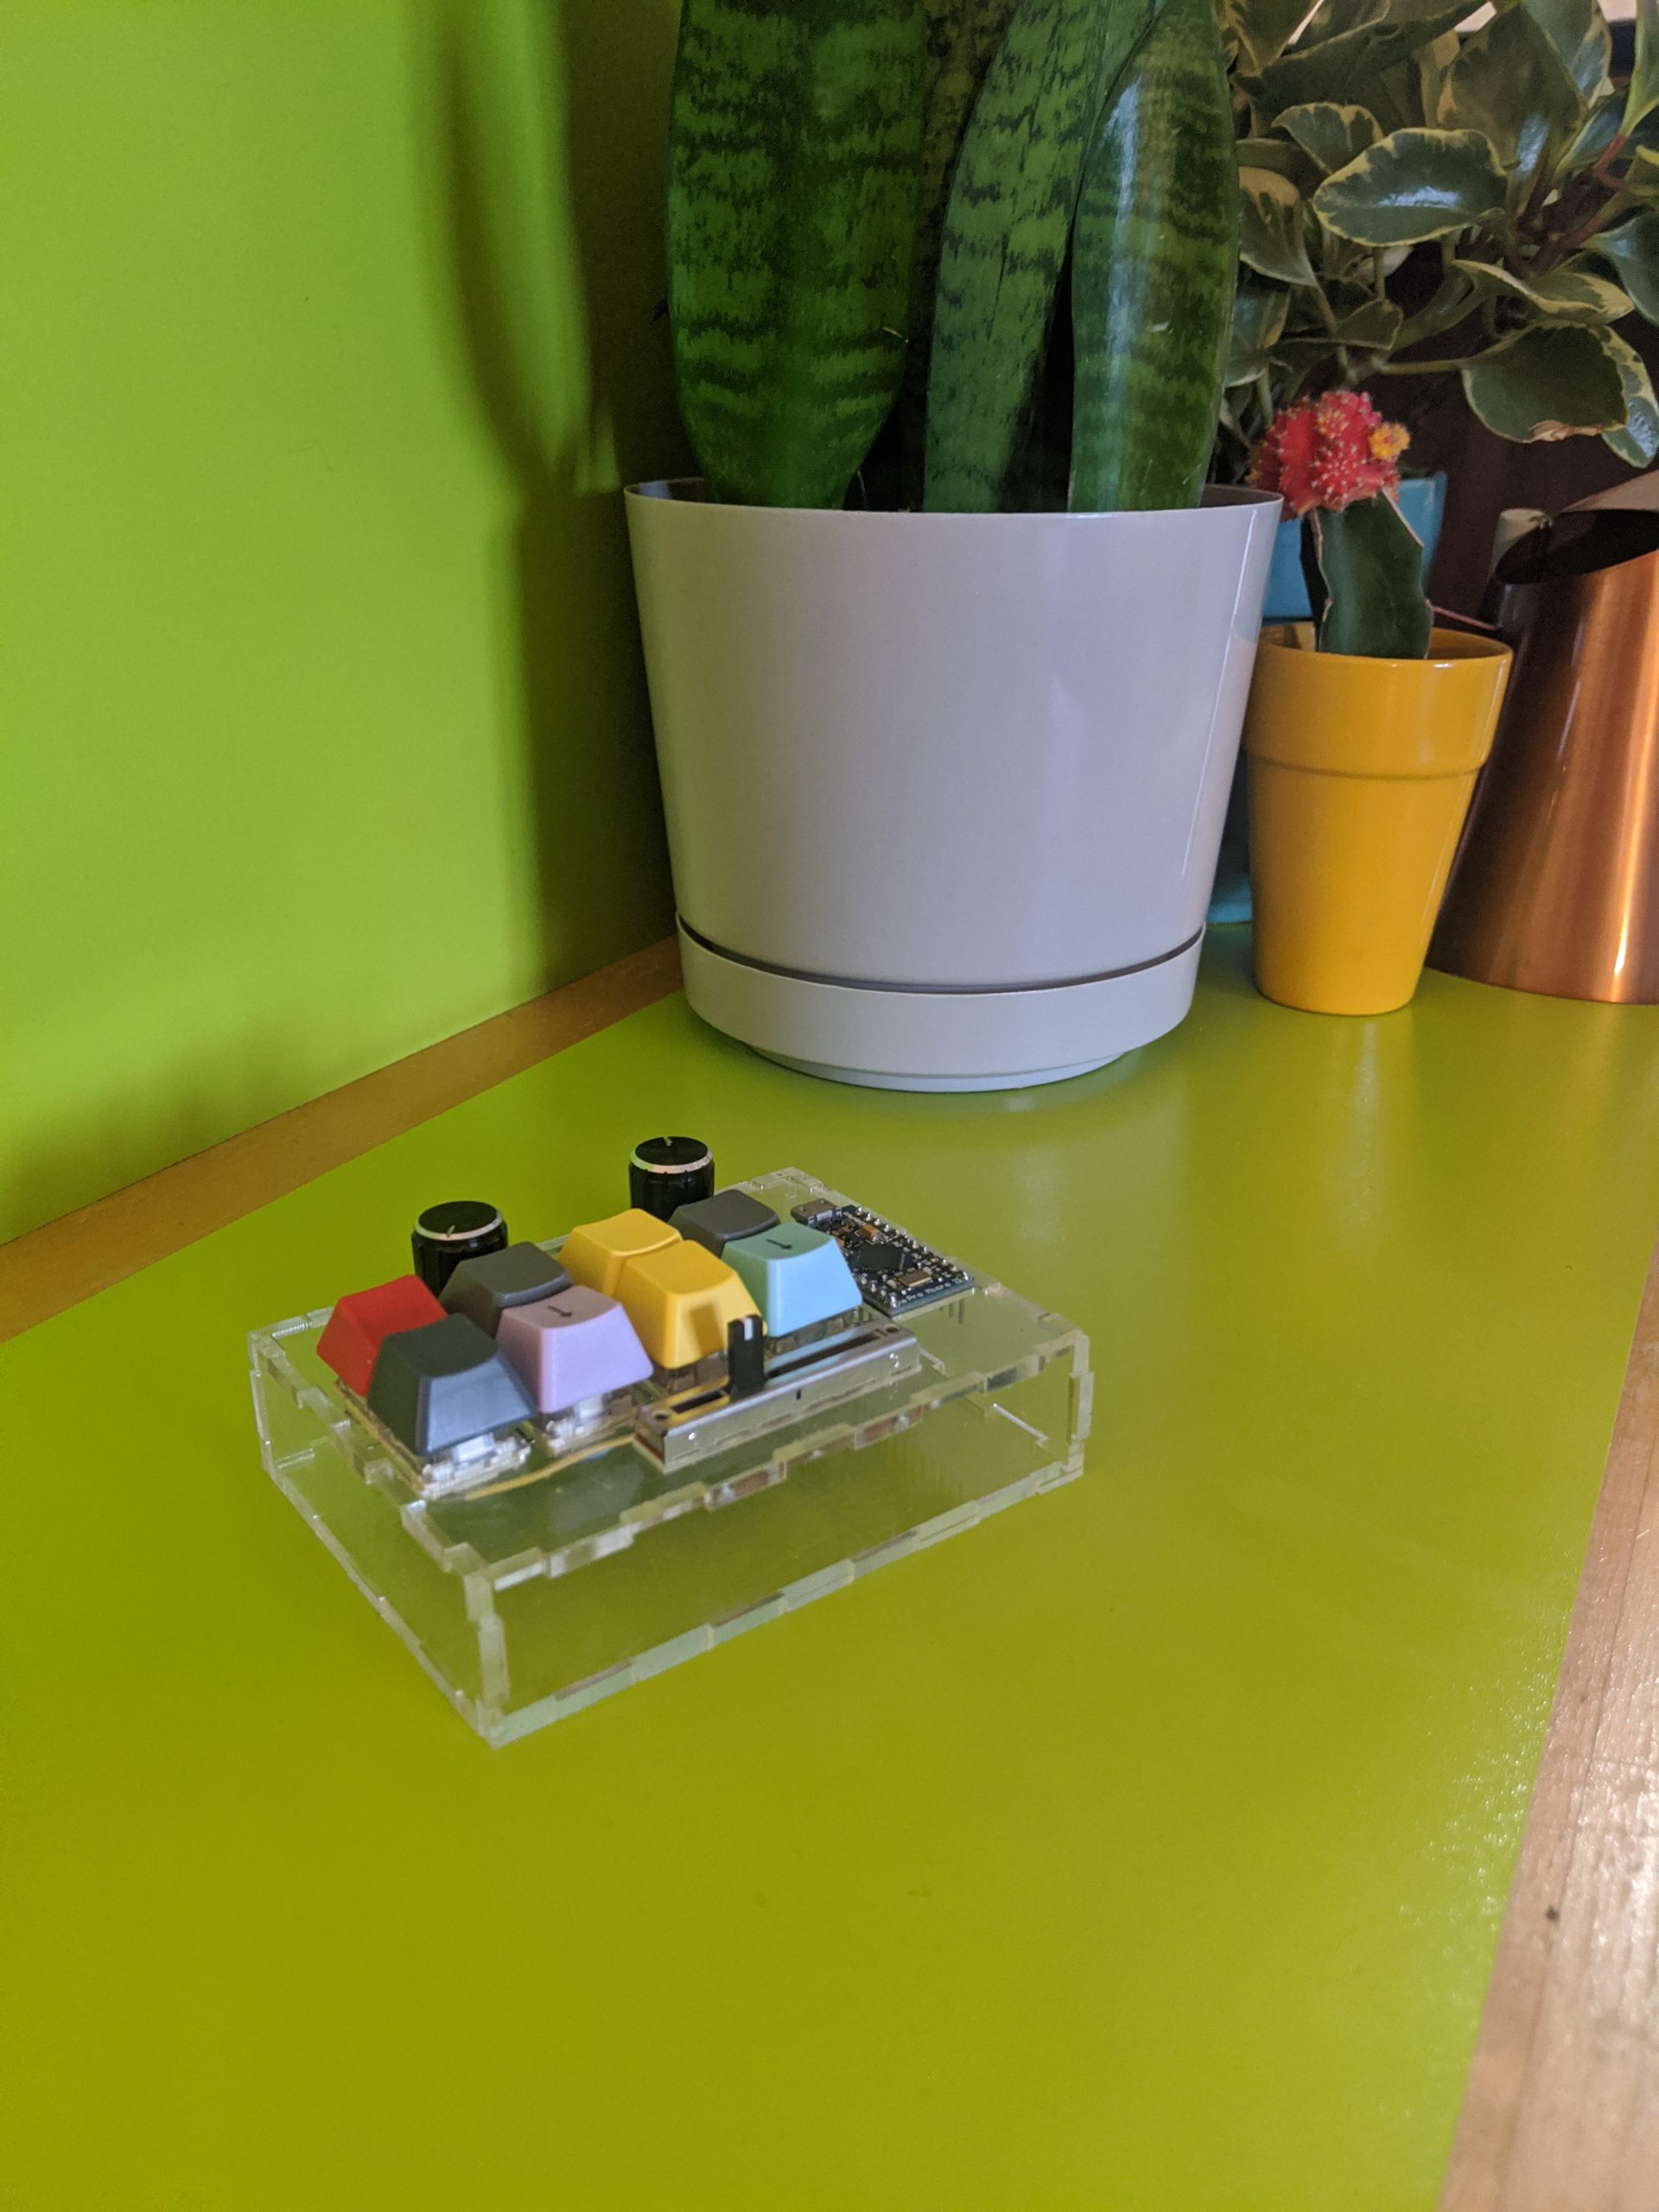
A cinematic view with plants!
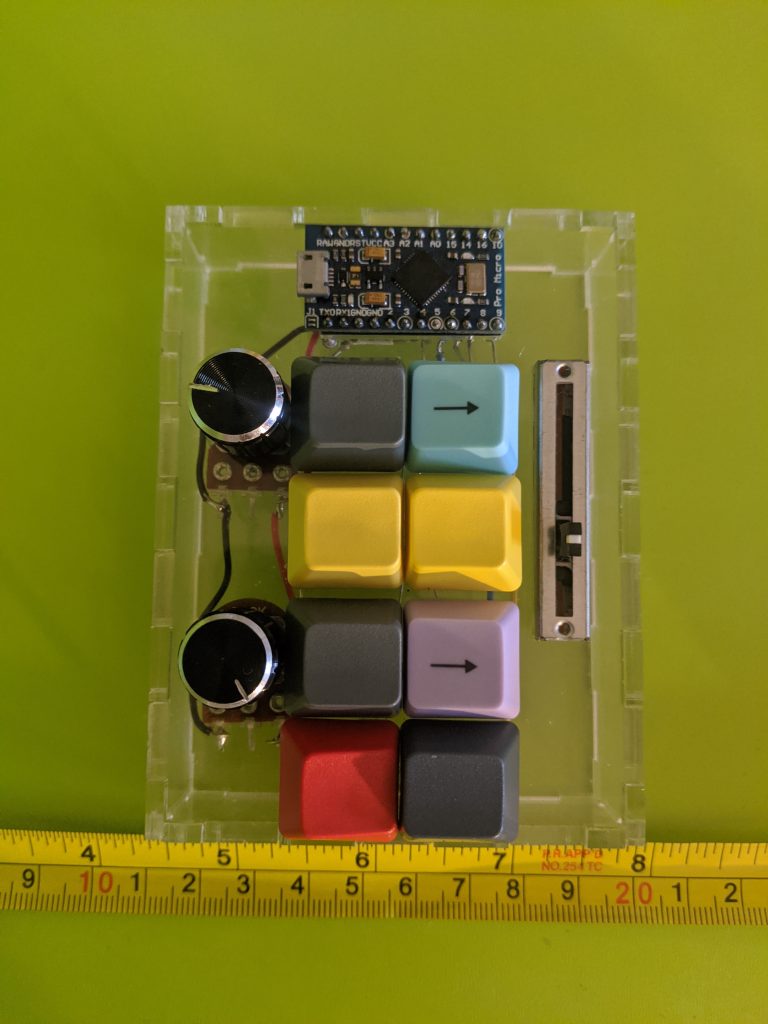
Next to a tape measure for scale
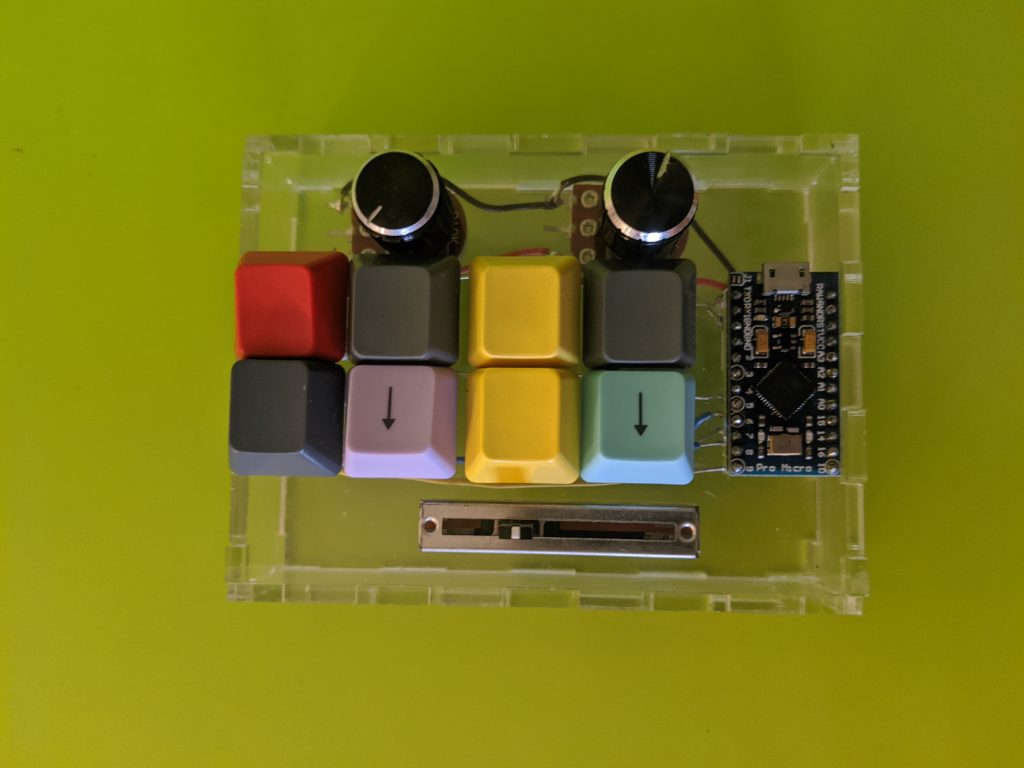
A top down view of the layout
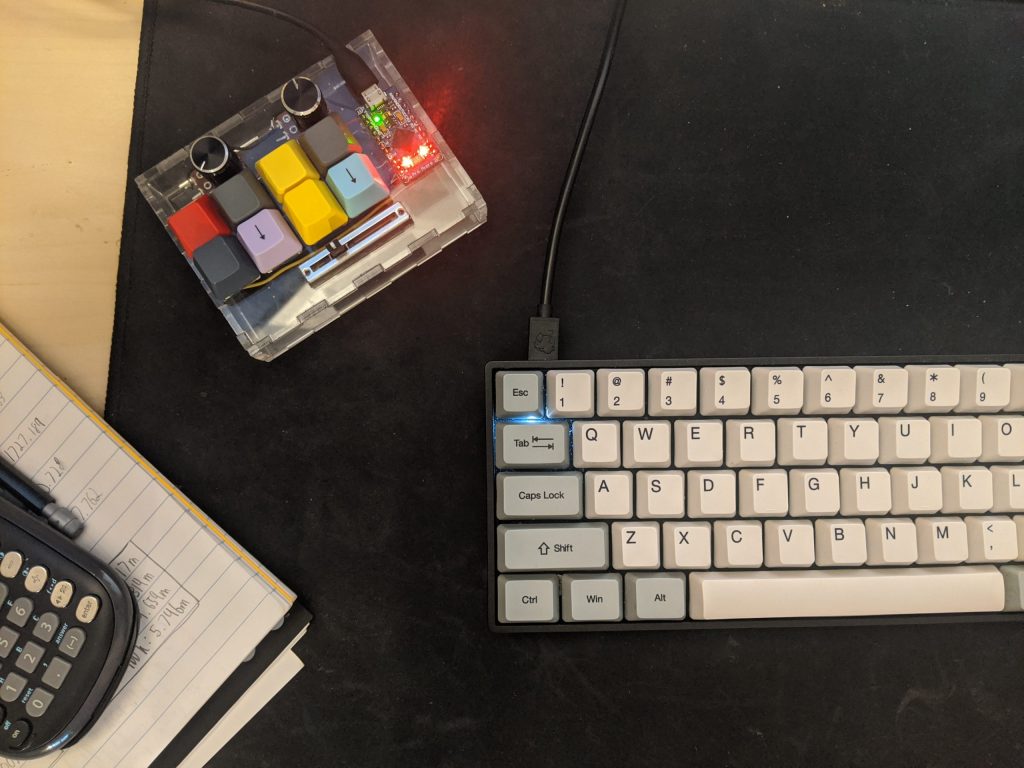
A use case example. On a desktop as shortcut keys.
Process Photos:
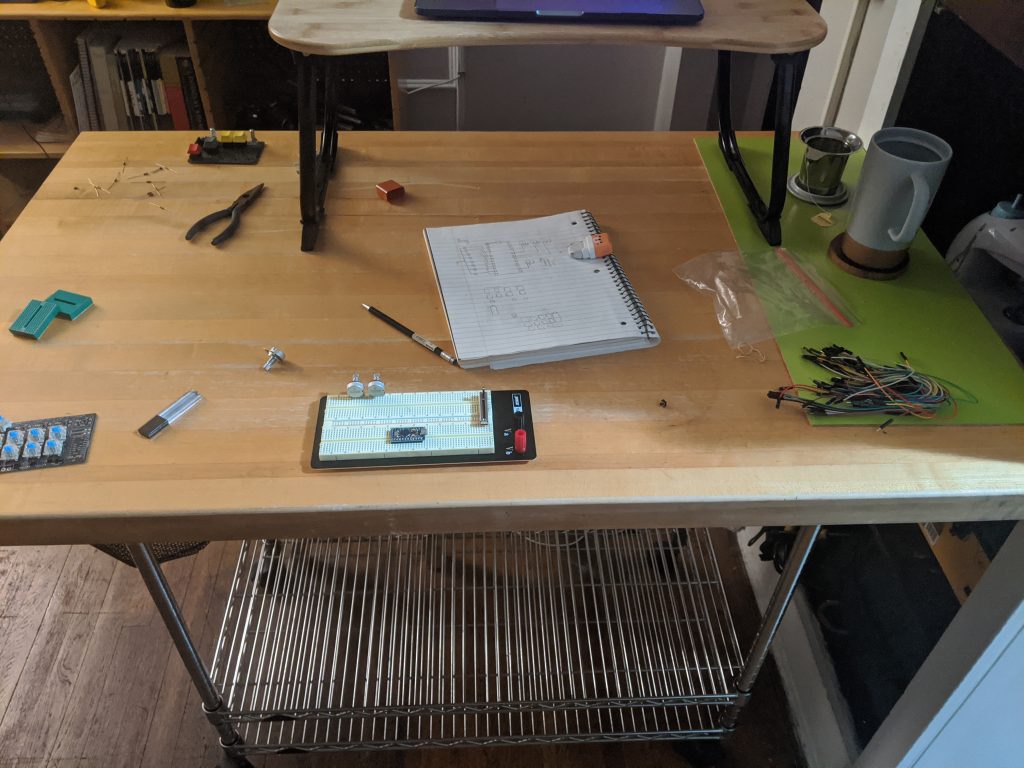
early component testing, including a mess of wires, resistors, and eraser shavings
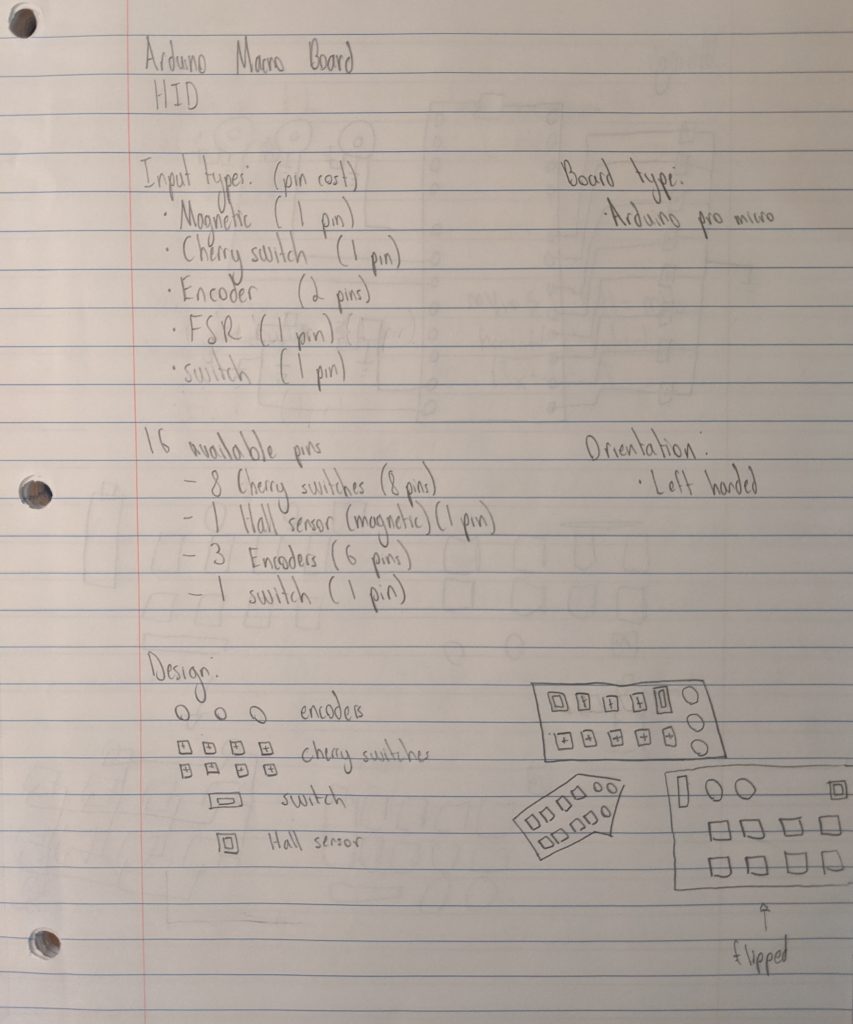
Initial ideation, input and format brainstorming
struggling to portion out inputs and understanding requirements
Decision Points:
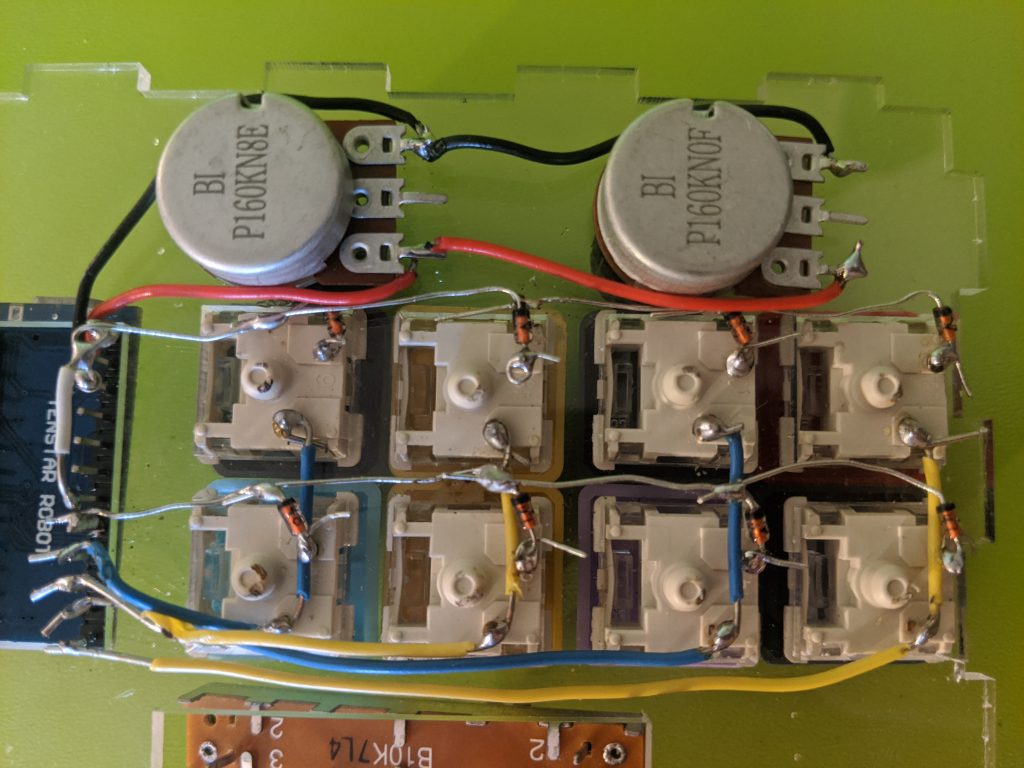
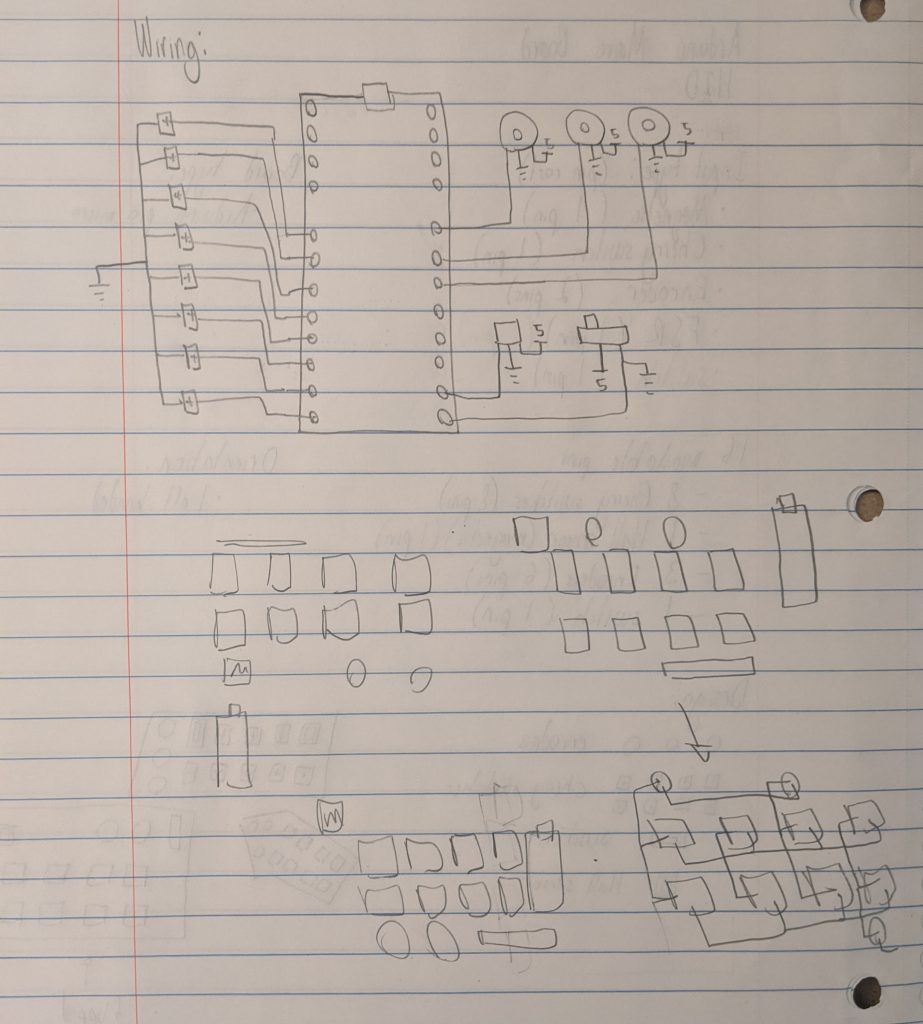
A clear view of the wiring matrix and efficiently used potentiometer power and ground
Wiring Strategy
A critical consideration when designing a custom keyboard is wiring. This was an unexpected step which affected far more than I thought it could. The Arduino pro micro is an exceptional piece of technology, but is only built to handle so many inputs. This has led enthusiasts the apply creative workarounds and allowed them to achieve exceptional results. The critical option for me was individually wiring each switch or forming them in an array and addressing the problem of ghosting with diodes. Individual wiring would be far more messy and setting up buttons in a matrix was generally the practice in most custom boards. I decided to hand wire a neat matrix and follow the steps someone might use for a much larger keyboard to further immerse myself in the learning process. With careful wire stripping and many soldering attempts, I was able to neatly lay out the matrix for eight switch inputs.
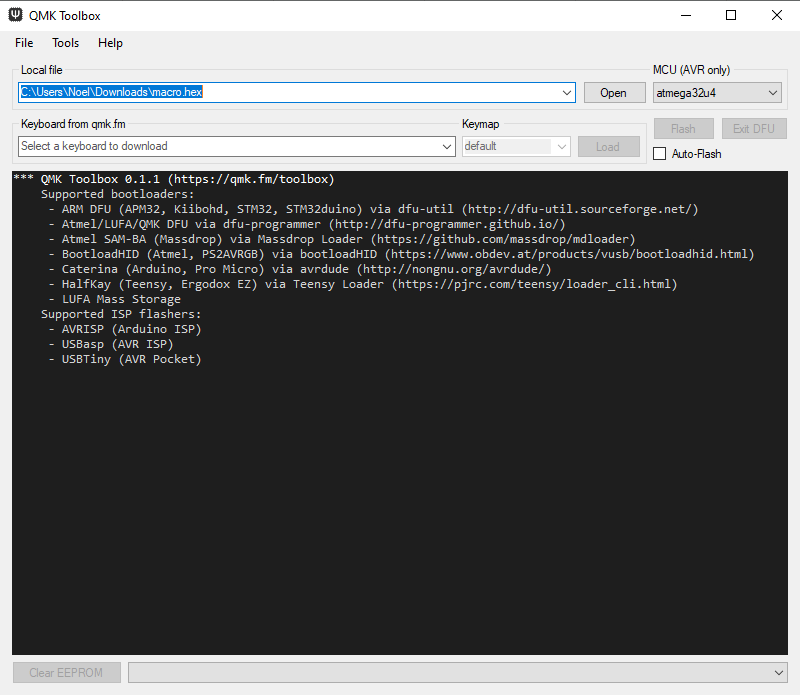
notoriously buggy flashing software
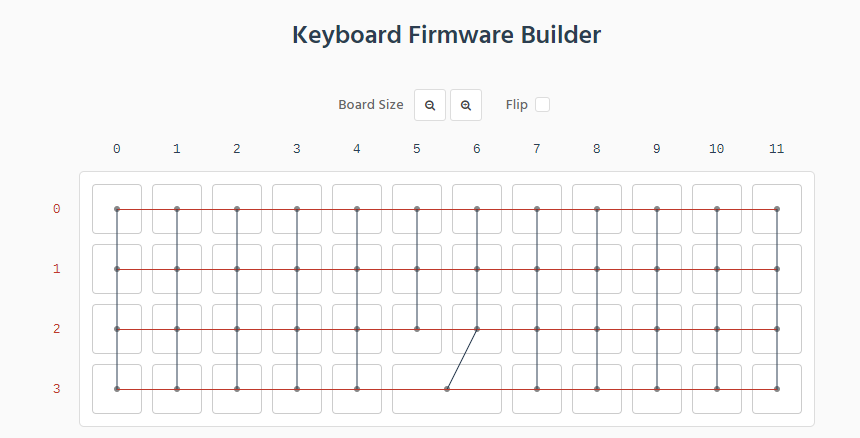
guide for wiring, showing example of for a ‘plank’ layout
HID vs Arduino
When sending signals from the Arduino to the computer there are two ways the computer can read them; as input from an Arduino device that needs to be translated, or as native keyboard inputs from an HID. Following the spirit of a fully native keyboard, I attempted to flash my Arduino pro micro using community developed tools. The process of flashing skips over the step where a computer has to read a device as an Arduino before receiving simulated keyboard inputs and would hopefully lead to a more robust tool. This option included several external programs to feed matrix diagrams into very abstract code. Ultimately, despite investing my efforts into this step in order to make a native keyboard device very specific issues, such as a missing .dll file that affected how my computer’s USB port communication left me with software issues I could not understand well enough to fix. I was forced to keep the traditional Arduino input
Discussion:
The construction of a macro keyboard was an insightful and difficult experience in developing a useful tool tailored for myself. By diving into a expansive hobby I learned from a massive array of disciplines and got to understand, first hand, the potentials and difficulties of building and programming a custom keyboard. Fundamentally, the project can be split into hardware and software.
The hardware component of the experience was significantly more creative and forgiving. Classmate responses noted “…the physical customization of a keyboard… shows how creative you can be with something that seems really standard.” I felt this was a perfect interpretation of my ideation stage, which saw me find all the possible inputs I could use without writing new fundamental components, like libraries. Unfortunately, my inexperience led to some hardware choices which, in retrospect, were not ideal. This is exemplified by my choice of a potentiometer instead of a rotary encoder. While the potentiometer worked well for volume control, a hardware item with a physical upper and lower limit was not as easy to apply to common computer programs as would have been a simple increase-decrease input (rotary encoder). This taught me that when designing a versatile tool, the more open ended and simple the inputs, the more use it will be.
A less functional, but still incredibly important aspect of the project is the design. A big motivation between custom keyboards is personalization. One classmate wrote “I like how clean the keypad looks with the acrylic base and it’s really nice how you hand-wired everything.” This comment made me very excited to see other people finding joy in customizing something so mundane. Through the project I learned about popular styles and where enthusiasts found beauty in electrical tools like keyboards. Hand-wiring and efficiency were popular themes that I subscribed to. Gridded geometric wiring, clear casing, and colorful keycaps were my adoption of the popular design principles in custom keyboards.
The software portion of the project was much more rigid and problematic. Here, roadblocks presented themselves left and right, from out of date tools to nuanced device issues. While there was a breadth of experience available, the lack of a single popular resource meant many uncommon issues remained unsolved. Other project documentation often warned of numerous attempts to get fundamental functionality.
Future iterations are all but set in stone. The giant variety of formats and the fact that I will probably use a keyboard every day for the rest of my life assures me this is not a learning experience I am done with. Layered cases, greater quantity of inputs, more complex inputs, even designing a marketable product are within the range of possibility.
Block Diagram:

Schematic Diagram:

Code:
//Accessory Keyboard
//The code maps the matrix wired into columns and rows to output keys or packets of information. It also attempts to create layers by taking advantage of arduino's capabilities over a traditional keyboard. Unforunately, this portion was not properly impletmented.
//The matrix assigns columns to pins 6, 7, 8, and 9. Rows are assigned to pins 4 and 5.
//The code borrows heavily from creators who have tried to execute similar projects and smaller projects that do fewer functions.
//https://create.arduino.cc/projecthub/Arnov_Sharma_makes/hid-volume-knob-with-pro-micro-db0bf8 by Arnov Sharma
//https://www.instructables.com/Programmable-Macropad-V2/ by tinyboatproductions

#include <Keypad.h>
#include <Encoder.h>
#include <Bounce2.h>
#include "HID-Project.h"
//The required libraries that simulate keyboard inputs
//Keypad buttons
int R1 = 4;
int R2 = 5;
int C1 = 6;
int C2 = 7;
int C3 = 8;
int C4 = 9;
//Necessary arrangement to help orient ourselves when receiving input
const byte ROWS = 2;
const byte COLS = 4;
char keys[COLS][ROWS] = {
  {'4','8'},
  {'3','7'},
  {'2','6'},
  {'1','5'}
};
byte rowPins[ROWS] = {R1, R2};
byte colPins[COLS] = {C1, C2, C3, C4};
Keypad kpd = Keypad( makeKeymap(keys), colPins, rowPins, COLS, ROWS);

// Unused code to allow for variable inputs based on unintegrated magnet switch
int S1 = 15;
int S2 = 14;
const int numStates = 2;
const int States[numStates] = {S1, S2};
int currentState = 0;

int lastDebounceTime = 0;
const int debounceTime = 50;

void setup() {
  Serial.begin(9600);

  for (int i = 0; i < numStates; i++){
    pinMode(States[i], OUTPUT);
    digitalWrite(States[i], LOW);
  }

  Keyboard.begin();
}

//Borrowed code that helps tell the arduino which state it is in. Also unused as only one state stays active.
void ChangeState(){
  digitalWrite(States[currentState], LOW);
  currentState++;
  if (currentState == numStates){
    currentState = 0;
  }
  digitalWrite(States[currentState], HIGH);
  delay(100);
  return;
}

// The first layout that can assign the 8 switch buttons to any keyboard output, or combination thereof. Note key 5 outputs a text packet.
void Layout1(char button){
  switch(button){
    case '1':
      Keyboard.print("1");
      break;
    case '2':
      Keyboard.print('2');
      break;
    case '3':
      Keyboard.print('3');
      break;
    case '4':
      Keyboard.print('4');
      break;
    case '5':
      Keyboard.print("Did you ever hear the tragedy of Darth Plagueis The Wise? I thought not. It’s not a story the Jedi would tell you. It’s a Sith legend. Darth Plagueis was a Dark Lord of the Sith, so powerful and so wise he could use the Force to influence the midichlorians to create life… He had such a knowledge of the dark side that he could even keep the ones he cared about from dying. The dark side of the Force is a pathway to many abilities some consider to be unnatural. He became so powerful… the only thing he was afraid of was losing his power, which eventually, of course, he did. Unfortunately, he taught his apprentice everything he knew, then his apprentice killed him in his sleep. Ironic. He could save others from death, but not himself.");
      break;
    case '6':
      Keyboard.print('6');
      break;
    case '7':
      Keyboard.print('7');
      break;
    case '8':
      Keyboard.print('8');
      break;
    case '9':
      Keyboard.print('9');
      break;
  };
}
void Layout2(char button){
  switch(button){
    case '1'://
      break;
    case '2'://
      break;
    case '3'://
      break;
    case '4'://
      break;
    case '5'://
      break;
    case '6'://Return
      Keyboard.press(KEY_RETURN);
      Keyboard.releaseAll();
      break;
    case '7'://Escape
      Keyboard.press(KEY_ESC);
      Keyboard.releaseAll();
      break;
    case '8'://
      break;
    case '9'://
      break;
  };
}
void loop() {
  //check the key matrix first
  char key = kpd.getKey();
  if(key) {
    switch(key){
      case '*':
        ChangeState();
        break;
      case '-':
        Keyboard.press(KEY_RIGHT_CTRL);
        Keyboard.press('s');
        delay(10);
        Keyboard.releaseAll();
        break;
      default:
        switch(currentState){
          case 0:
            Layout1(key);
            break;
          case 1:
            Layout2(key);
            break;
        }
    }
  }