Description
This “Out the Door Cabinet” is a cabinet that reminds me to take all the items inside the cabinet with me every time I leave my apartment, and also reminds me to put these items back to the cabinet when I enter. When I am in a hurry, I often times leave an important item, such as my keys, mask, umbrella, and etc., when I leave my apartment room, and when I come back home I tend to leave these items all over the place at random places. For my self-assisting device, I wanted to make a device that would help me fix these bad habits and remind me to take and put back these items from the cabinet when I leave and enter the door.
Images

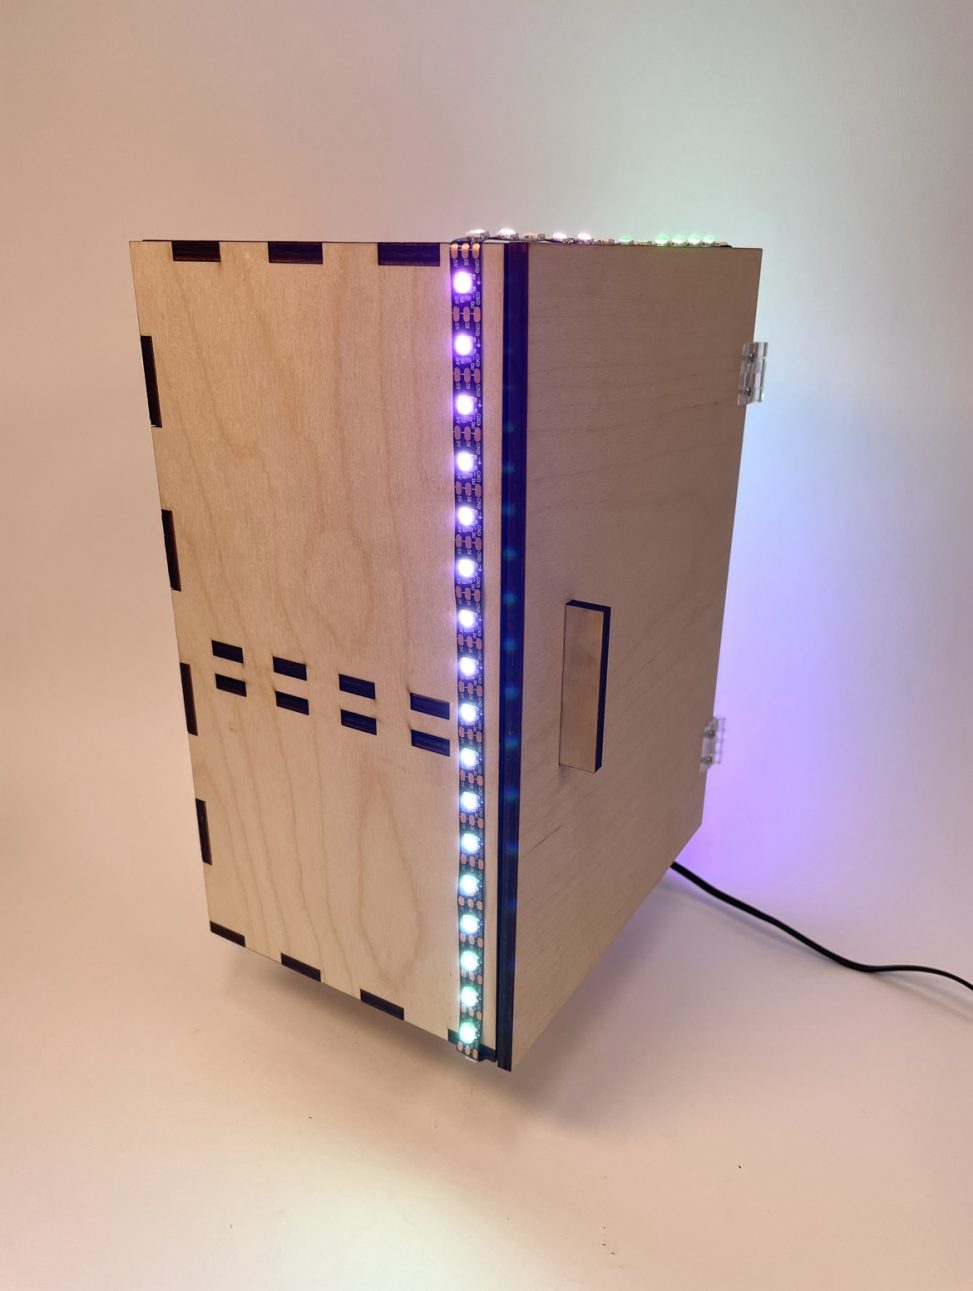
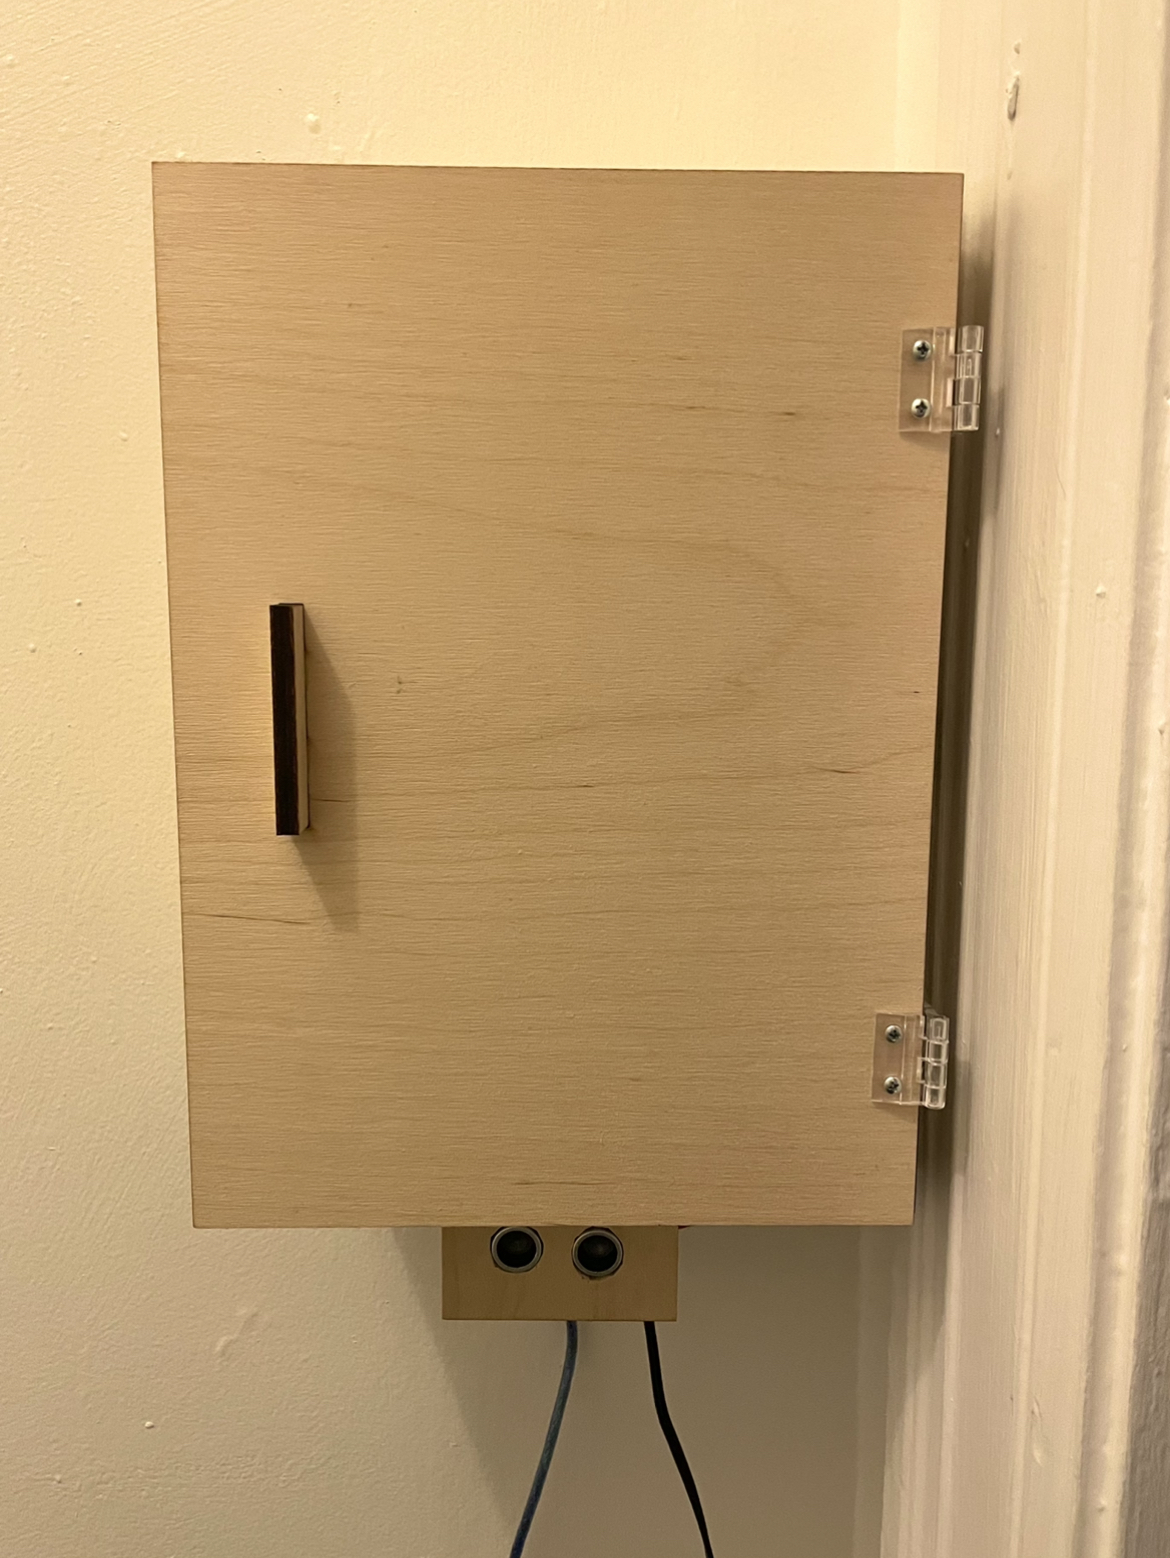
Out the Door Cabinet
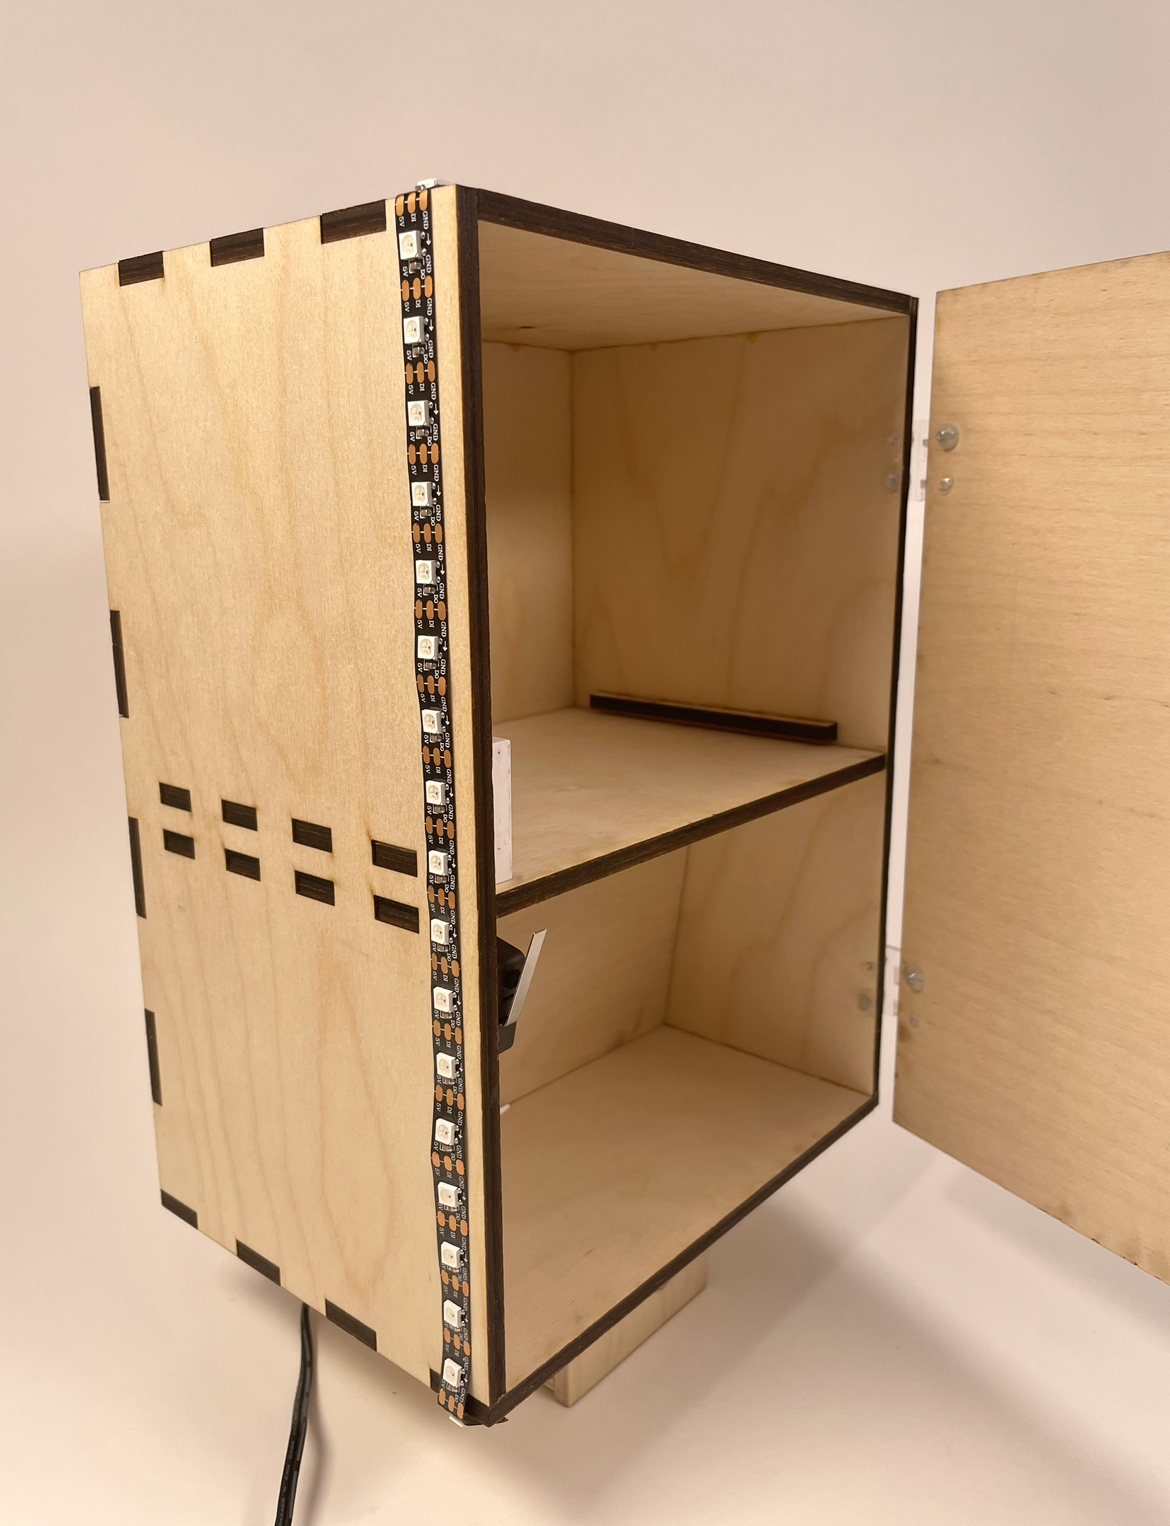
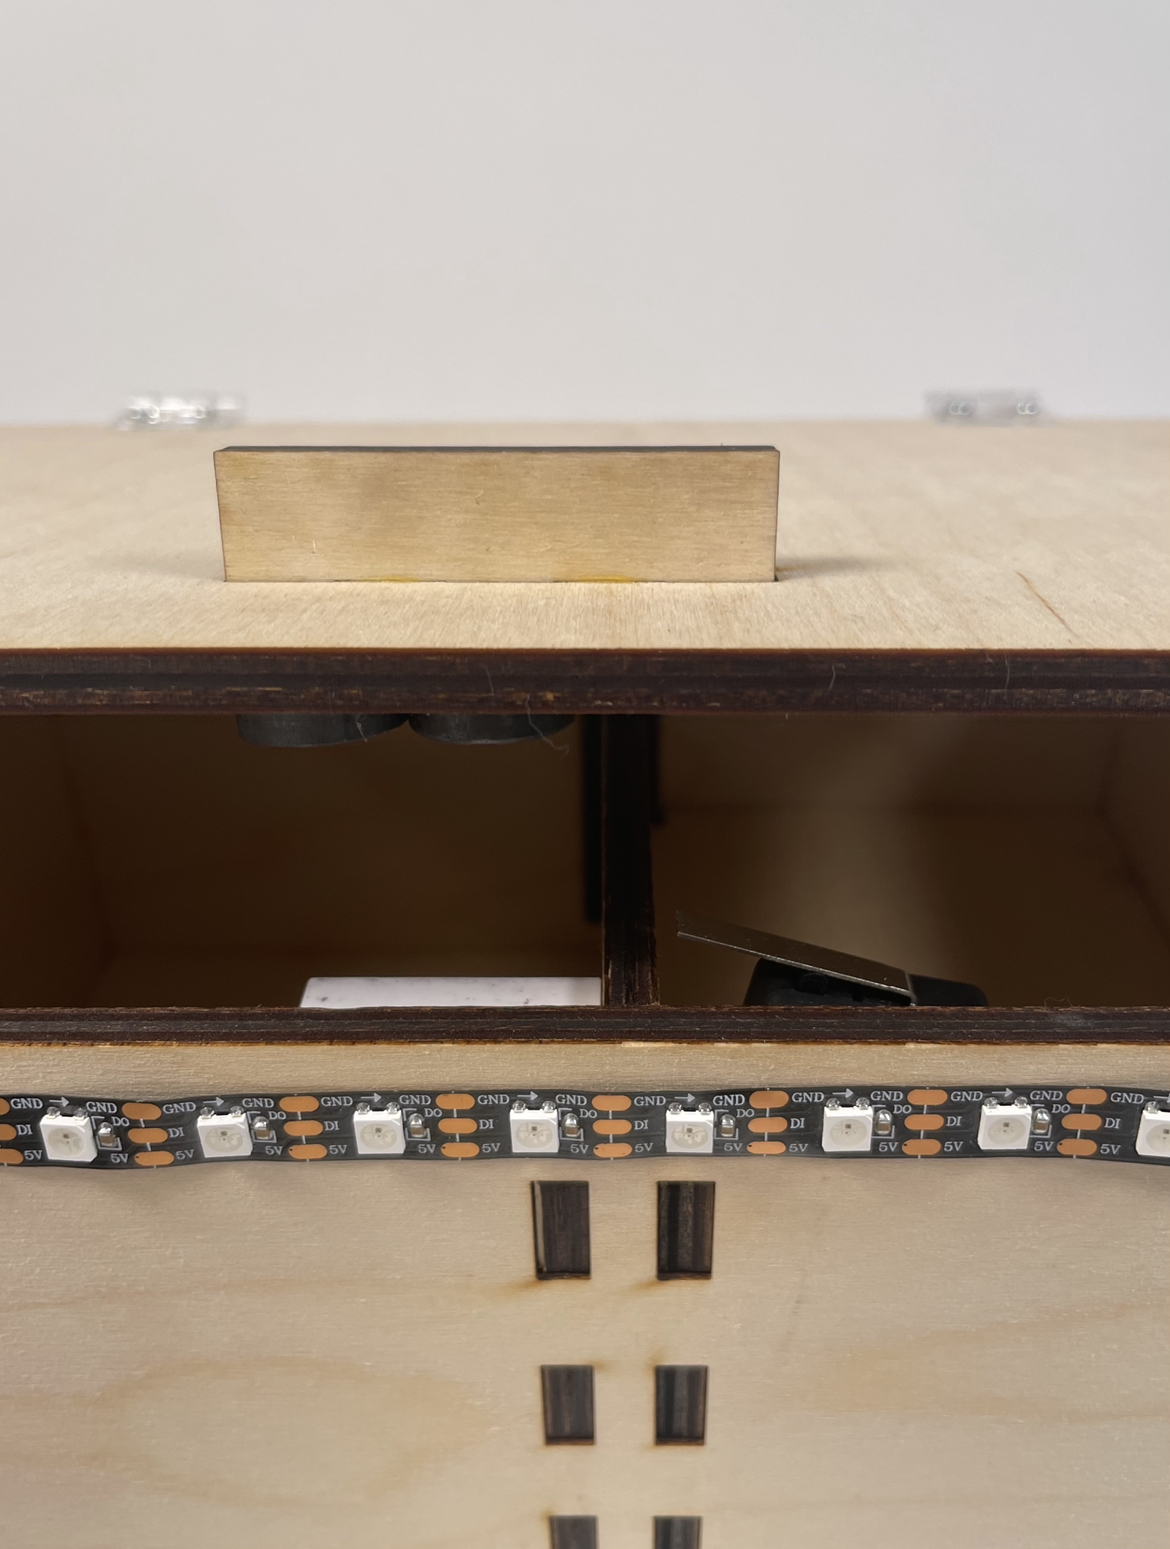
Inside of the cabinet: a removable middle shelf
Close-up of the lever switch and magnet that keeps the door closed when it is shut.
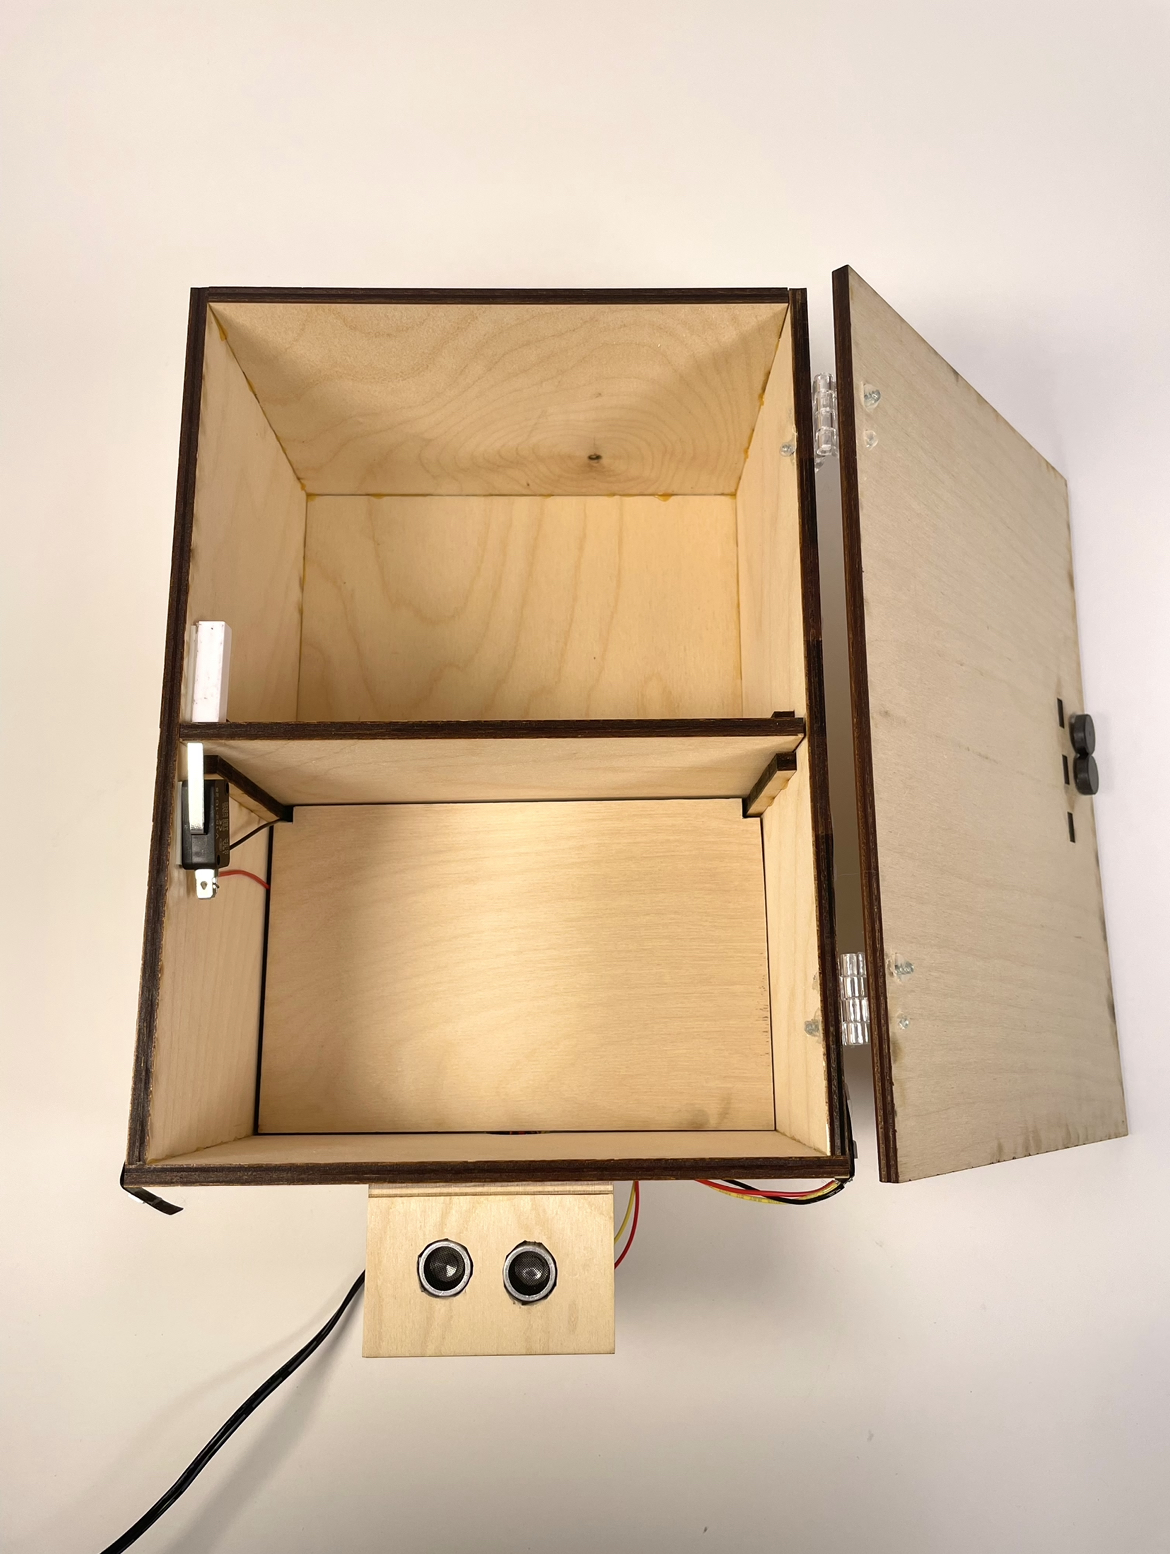
An ultrasonic ranger, a lever switch, a magnet that keeps the door closed, a removable middle shelf, and door hinges that allows the door to open and close.
Cabinet installed at home near the front door
Videos
Process Images
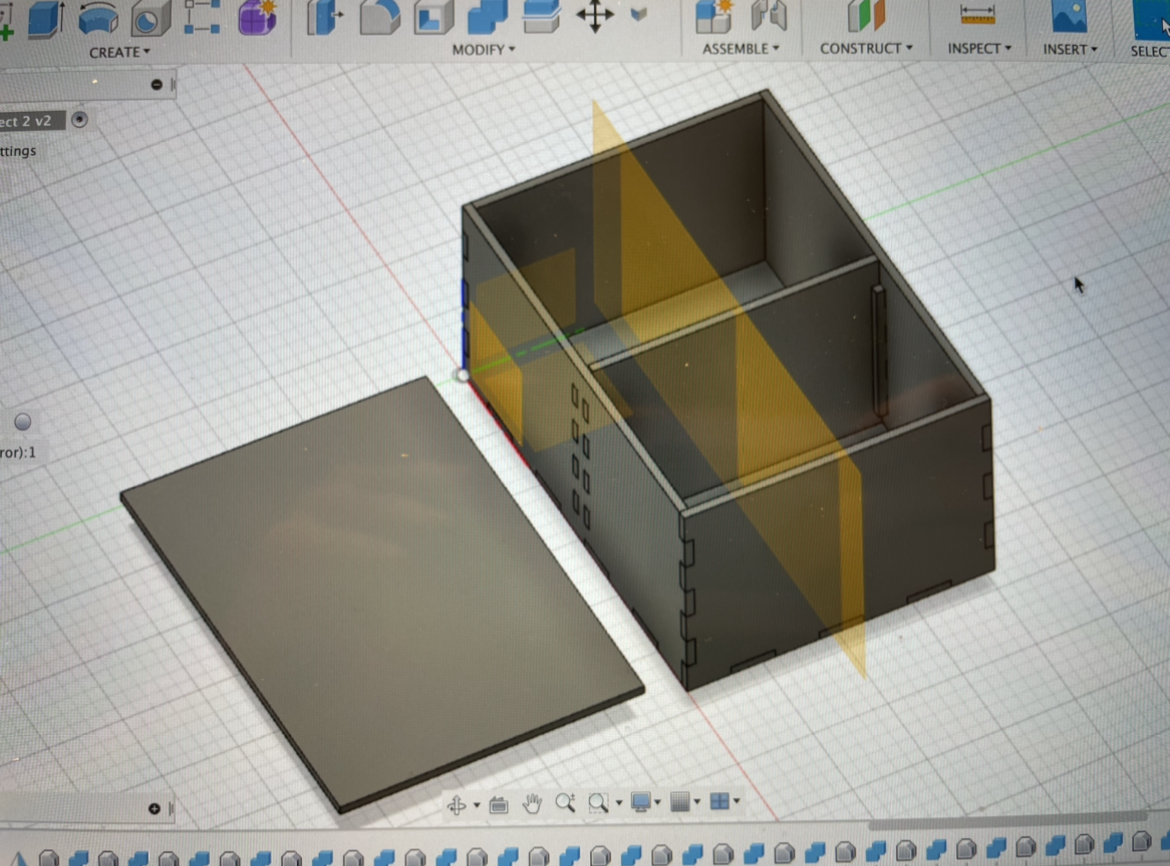
Cabinet design in Fusion 360
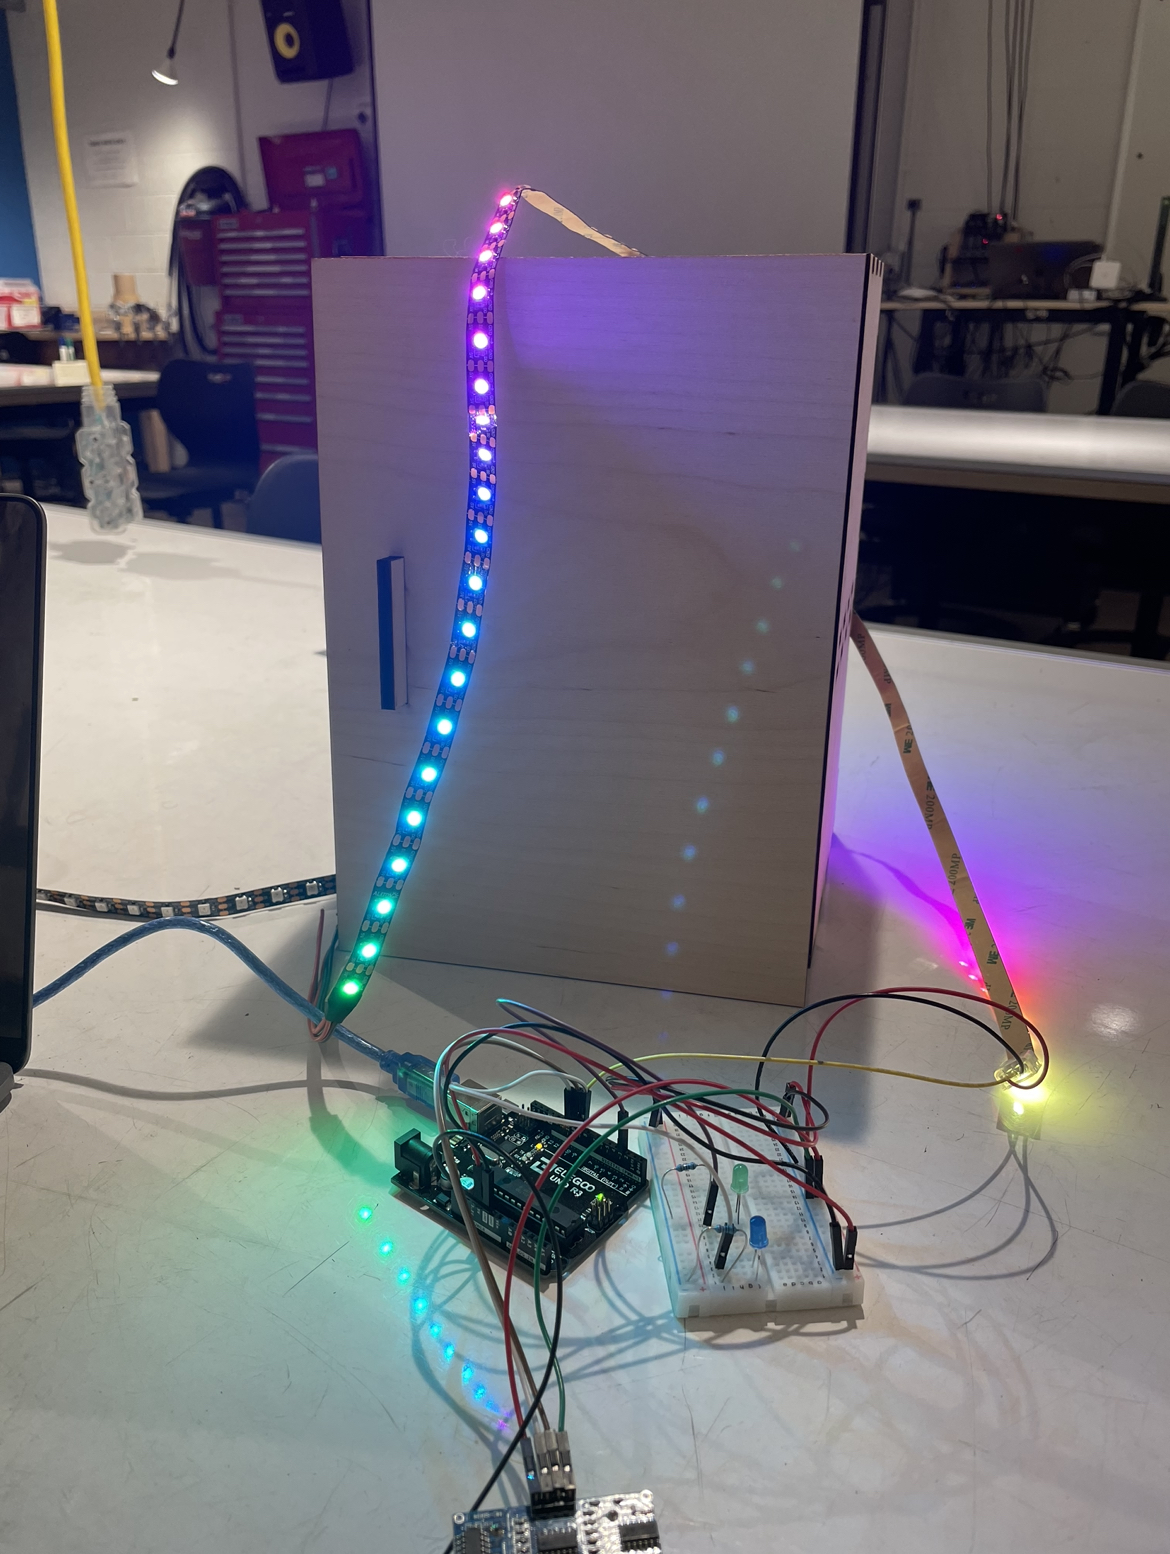
Testing LED Strip lights.
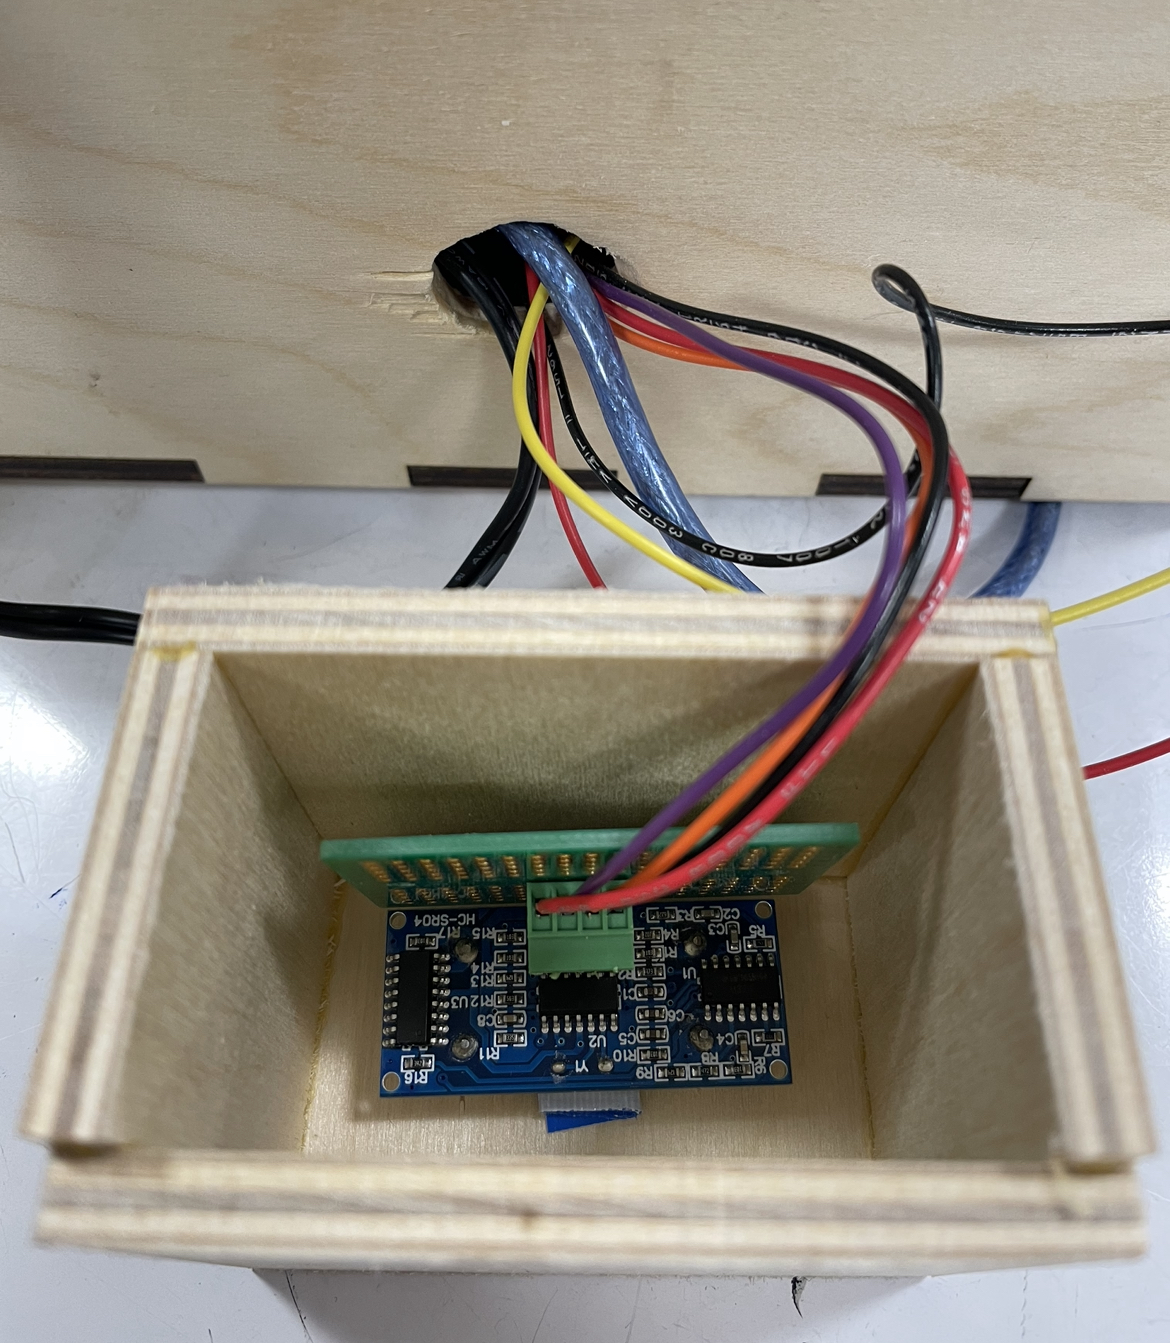
Hand-cut wooden case for the ultrasonic ranger. Cut a hole in the bottom of the cabinet to hide all the wires inside the back of the cabinet.
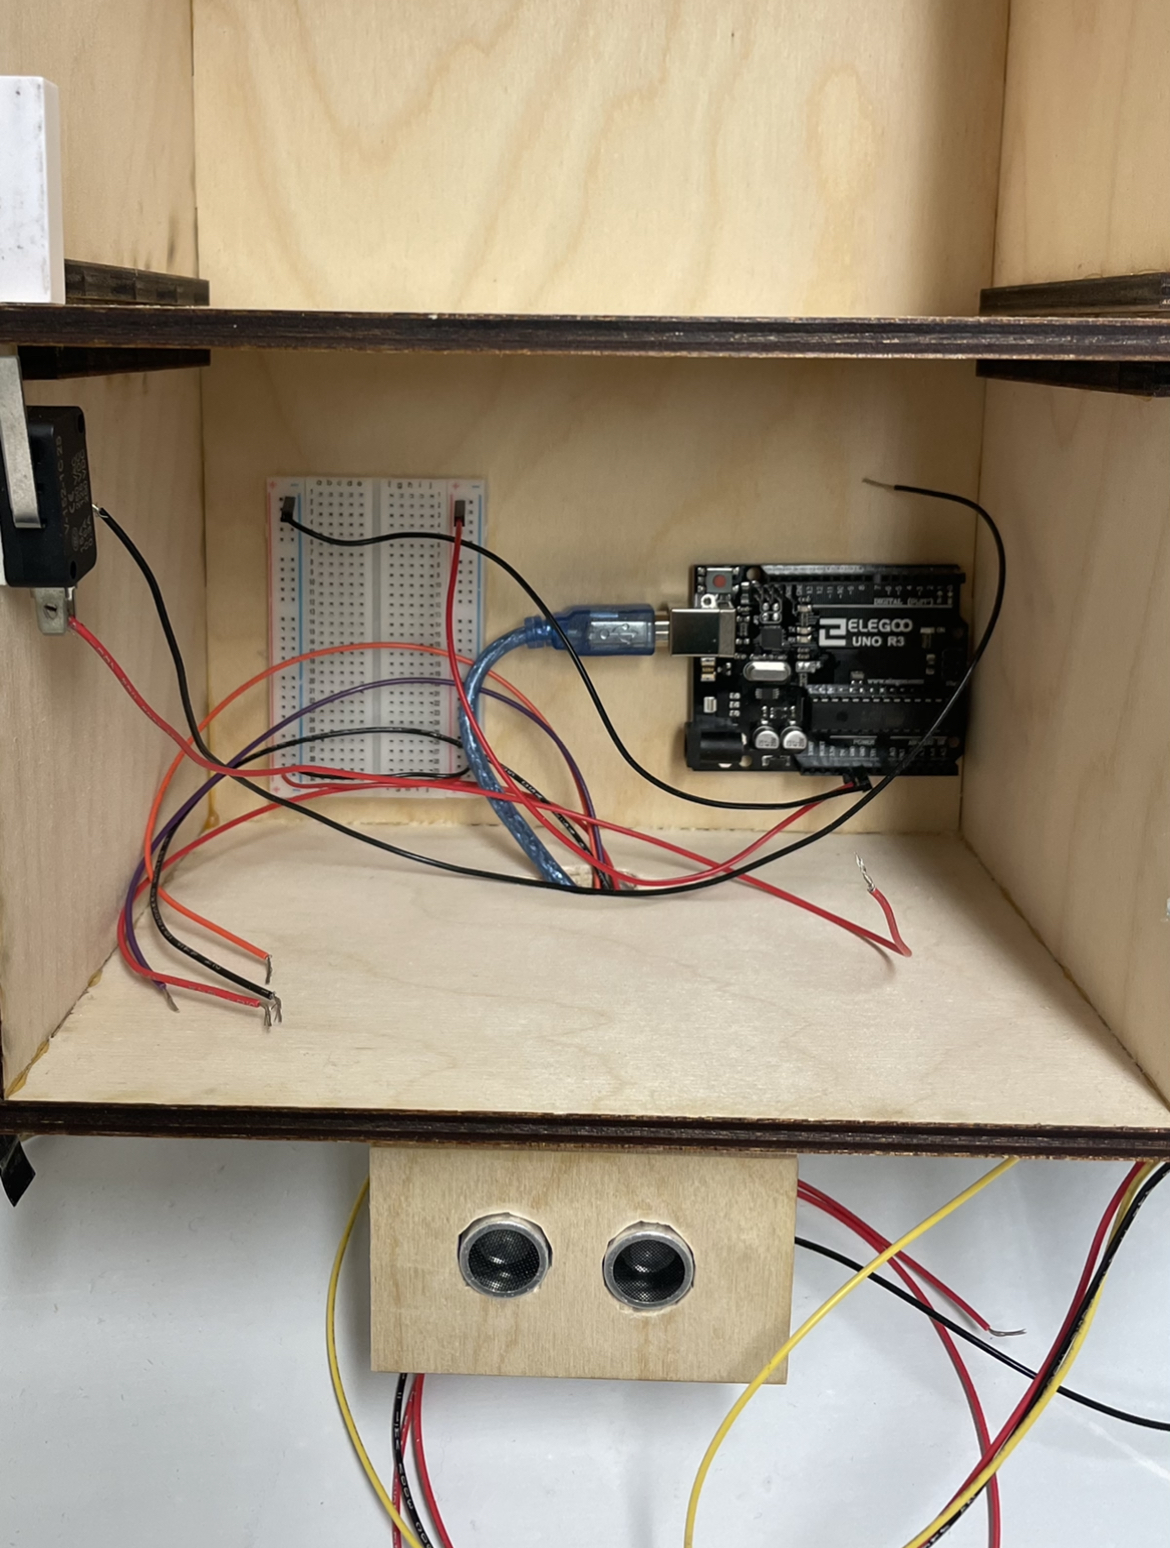
The arduino, breadboard, and all the wires are hidden inside the back of the cabinet, and there is another shelf that hides all these parts so that they are not visible.
Review
The way I worked on this project was, I worked on the wiring and computing part of the project and the fabrication part of the project separately. Therefore, after I was nearly completed with both parts I ran into the problem of how I put these together aesthetically, without ruining the design. Some of the solutions I came up with is first, I attached door hinges to the cabinet door so that I can easily open and close the cabinet. I also realized when I close the door, the door did not want to stay shut, so I decided to add a magnet so that the door will stay closed. Another problem was that I did not know where I should put the ultrasonic ranger, so I made a quickly made a case and attached it to the bottom of the cabinet, so that it can easily detect motion when I go near the cabinet. To hide all the wires I created a shelf to cover the back of the inside cabinet so that they are not visible.
Discussion
At first, I was not so enthusiastic about this idea of making a key reminder self assisting device. My concern was that the project would turn out to be either too simple and easy, or too complicated. I was sure that I wanted to use the ultrasonic ranger to detect motion when I am near my front door, and when it does, the LED strip lights would turn on. But this is a simple input and output therefore I wanted to add an extra component that would advance my idea. I thought about playing with the ultrasonic ranger so that it can tell whether I am leaving or entering the apartment, however I thought that it would be too complicated and not really necessary. I struggled to find the middle between too simple and too complicated, however during my prototype critique, some of the feedbacks I received from my classmates were really helpful. After hours of brainstorming, the solution that I came up with was to add a lever switch that detects whether the door is open or closed, and when the switch is closed, the blinking LED lights would turn off. Another problem I ran into was the wiring of the lever switch. I made a stupid mistake and didn’t remember to add a pull-down resistor. Because of this mistake, the switch was not functioning properly. Fabrication wise, I struggled to cut out a case for the ultrasonic ranger last minute since I did not have access to the laser cutter, however I went to the woodshop to cut it out by hand. It took me a while to figure out how to hide all the wires so that it does not look messy. I decided that I can use the back half part of my cabinet and hide it inside of the cabinet so that they are not visible. I cut a hole on the bottom of the cabinet so that the wires of the LED strip lights and the ultrasonic ranger are still connected, and I hand cut a shelf to hide all these components inside the cabinet.
During the final critique, I received some great feedbacks from my fellow students. First, I really appreciated their comments on the fabrication part of my project. It is definitely something I spent a lot of time on so I felt very relieved that people seemed to like it. Another comment that I really appreciated was, “Nice use of switch for detecting open/close state of the door”. It was really great to hear that people liked this component of my cabinet because it was a solution I came up with to a problem that I ran into in the beginning state of my project ideation. Another comment I would like to address is “Ultrasonic ranger seems finicky”. I would have to agree that the ultrasonic ranger was not working properly during the time of the critique. There was a small accident right before the critique and there were some wires that got disconnected that caused parts of my project to not work properly. However, they were all quickly fixed.
Overall, I am satisfied with how my project turned out. This project was definitely a challenge for me, however I learned a lot from this experience. What I found the most enjoyable was the fabrication and design portion of this project. Fusion 360 is definitely something I would use again in the future so learning this program was very useful and valuable, and the same applies for learning how to use the laser cutter. As someone without any coding experience and background in engineering, I would say the most difficult part was the coding portion of the project. I tried to teach myself by searching up examples and watching several video tutorials and I would say it was a difficult and a frustrating process for me. However, through this experience, I definitely learned a lot.
I definitely am open to build another iteration of this project. This device is something that I needed and is something that will help me not only as a reminder, but as a product to help me fix my bad habits, such as leaving things at random places in the house. Some things I would do different is maybe add a speaker system that will remind me upcoming important events that will happen throughout the day. I think that would be a cool device, working as both a reminder to take/return items from cabinet and an agenda for the day.
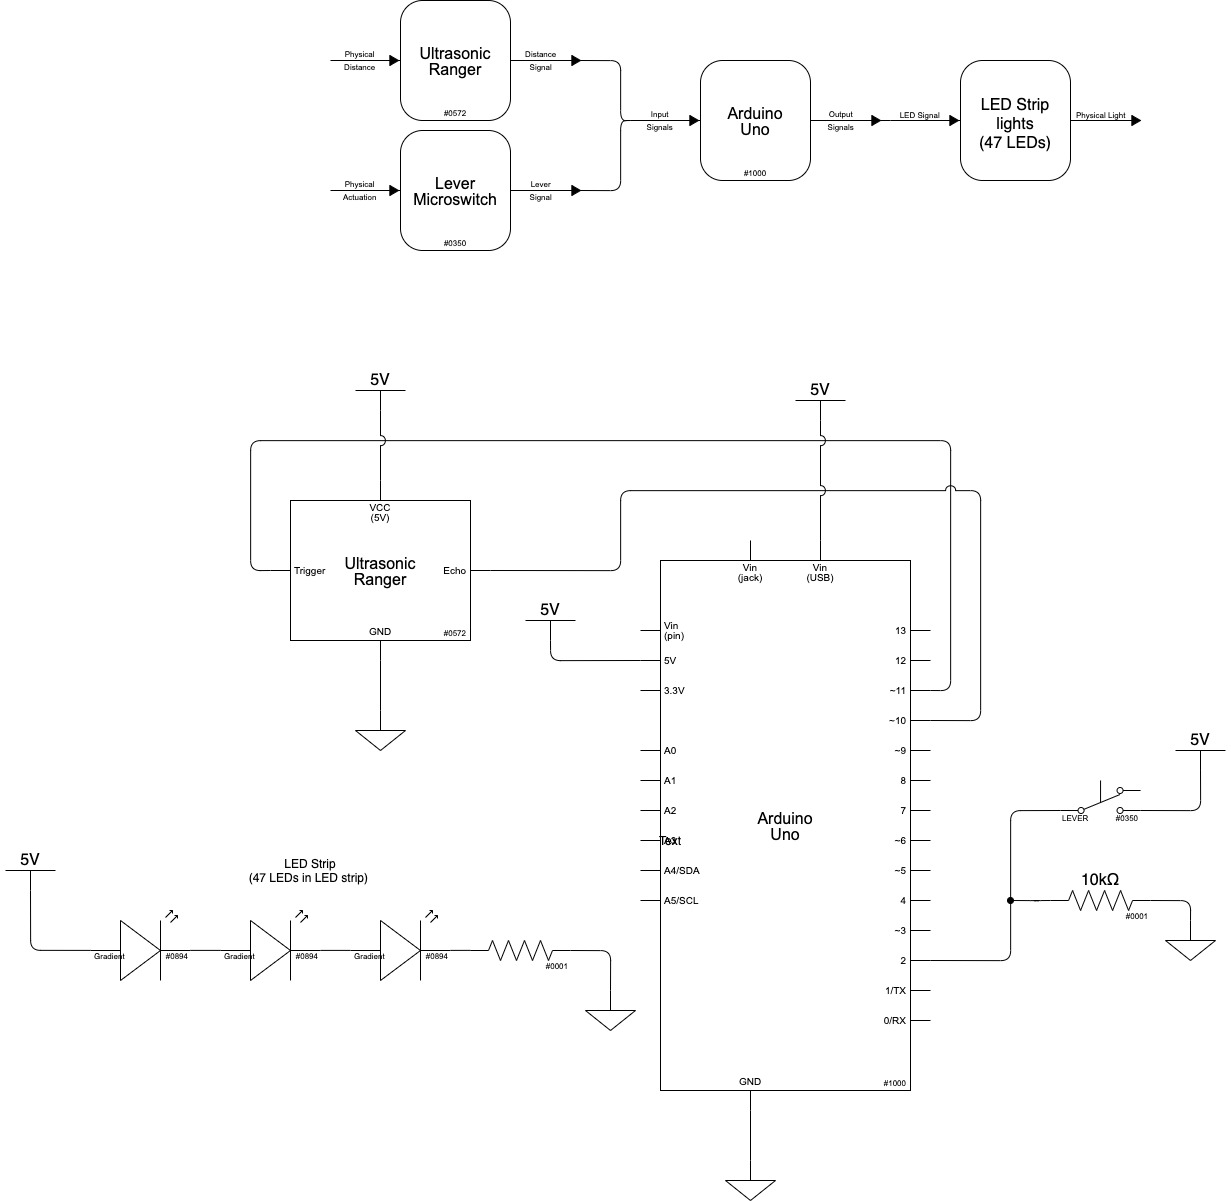
Block Diagram & Schematics
Code
//Out the Door Reminder
//A cabinet that reminds me to take the itmes inside the cabinet when I leave the door, and put back the items into the cabinet when I enter the door.
//The Ultrasonic Ranger detects motion when I am near the door and when it detects motion, the LED strip lights up.
//When the cabinet door is open, the lights turn off.
//Credit: LED Strip code borrowed from PololuLedStrip library example: LedStripGradient.
//Credit: Some code borrowed from class website and arduino project hub
//https://courses.ideate.cmu.edu/60-223/f2021/tutorials/button-and-switch
//https://create.arduino.cc/projecthub/abdularbi17/ultrasonic-sensor-hc-sr04-with-arduino-tutorial-327ff6


#include <PololuLedStrip.h>

// ULTRASONIC RANGER
const int TRIG_PIN = 11; // Arduino pin connected to Ultrasonic Sensor's TRIG pin
const int ECHO_PIN = 10; // Arduino pin connected to Ultrasonic Sensor's ECHO pin
const int DISTANCE_THRESHOLD = 50 ; // centimeters

long duration;
int distance;


//LEVER MICROSWITCH
const int lswitch = 2;


//LED STRIP
PololuLedStrip<12> ledStrip;

//buffer for holding the colors (3 bytes per color).
#define LED_COUNT 47
rgb_color colors[LED_COUNT];


void setup()
{
  Serial.begin (9600);       // initialize serial port

  //Ultrasongic Ranger
  pinMode(TRIG_PIN, OUTPUT); // set arduino pin to output mode
  pinMode(ECHO_PIN, INPUT);  // set arduino pin to input mode

  //Lever Micro Switch
  pinMode(lswitch, INPUT);  //set arduino pin to input mode

}

void loop()
{
  //generate pulse to TRIG pin
  digitalWrite(TRIG_PIN, LOW);
  delayMicroseconds(5);
  digitalWrite(TRIG_PIN, HIGH);
  delayMicroseconds(10);
  digitalWrite(TRIG_PIN, LOW);


  //measure duration of pulse from ECHO pin
  duration = pulseIn(ECHO_PIN, HIGH);
  // calculate the distance
  distance = (duration / 2) * 0.0344;


  //if the ultrasonic ranger detects motion/distance, then the LED strips light up

  if (distance < DISTANCE_THRESHOLD)

  {
    // Update the colors.
    byte time = millis() >> 2;
    for (uint16_t i = 0; i < LED_COUNT; i++)
    {
      byte x = time - 8 * i;
      colors[i] = rgb_color(x, 255 - x, x);
    }

    delay(10);
  }

  // if the ultrasonic ranger does not detect any motion/distance, the the LED strips do not light up

  else {
    for (uint16_t i = 0; i < LED_COUNT; i++)
    {
      colors[i] = rgb_color(0, 0, 0);
    }
  }


  //if door is open, it turns off the LED light that was turned on due to the detection of motion/distance
  if ( digitalRead(lswitch) == HIGH )
  {
    for (uint16_t i = 0; i < LED_COUNT; i++)
    {
      colors[i] = rgb_color(0, 0, 0);
    }
  }


  //  //if the door is closed it prints "door is closed"
  //    if ( digitalRead(lswitch) == LOW)
  //    {
  //      Serial.println("door is closed");
  //      //      delay(20);
  //    }
  //
  //    //if the door is open it prints "door is opened"
  //    if ( digitalRead(lswitch) == HIGH )
  //    {
  //      Serial.println("door is opened");
  //      //      delay(20);
  //    }


  //  //     print the value to Serial Monitor
  //  Serial.print("distance: ");
  //  Serial.print(distance);
  //  Serial.println(" cm");
  //  delay(250);


  // Write the colors to the LED strip.
  ledStrip.write(colors, LED_COUNT);
}