
Overview
My project explores developing a garment that helps mountaineers understand how climbing load is distributed across their back as they train.

Top view of the garment
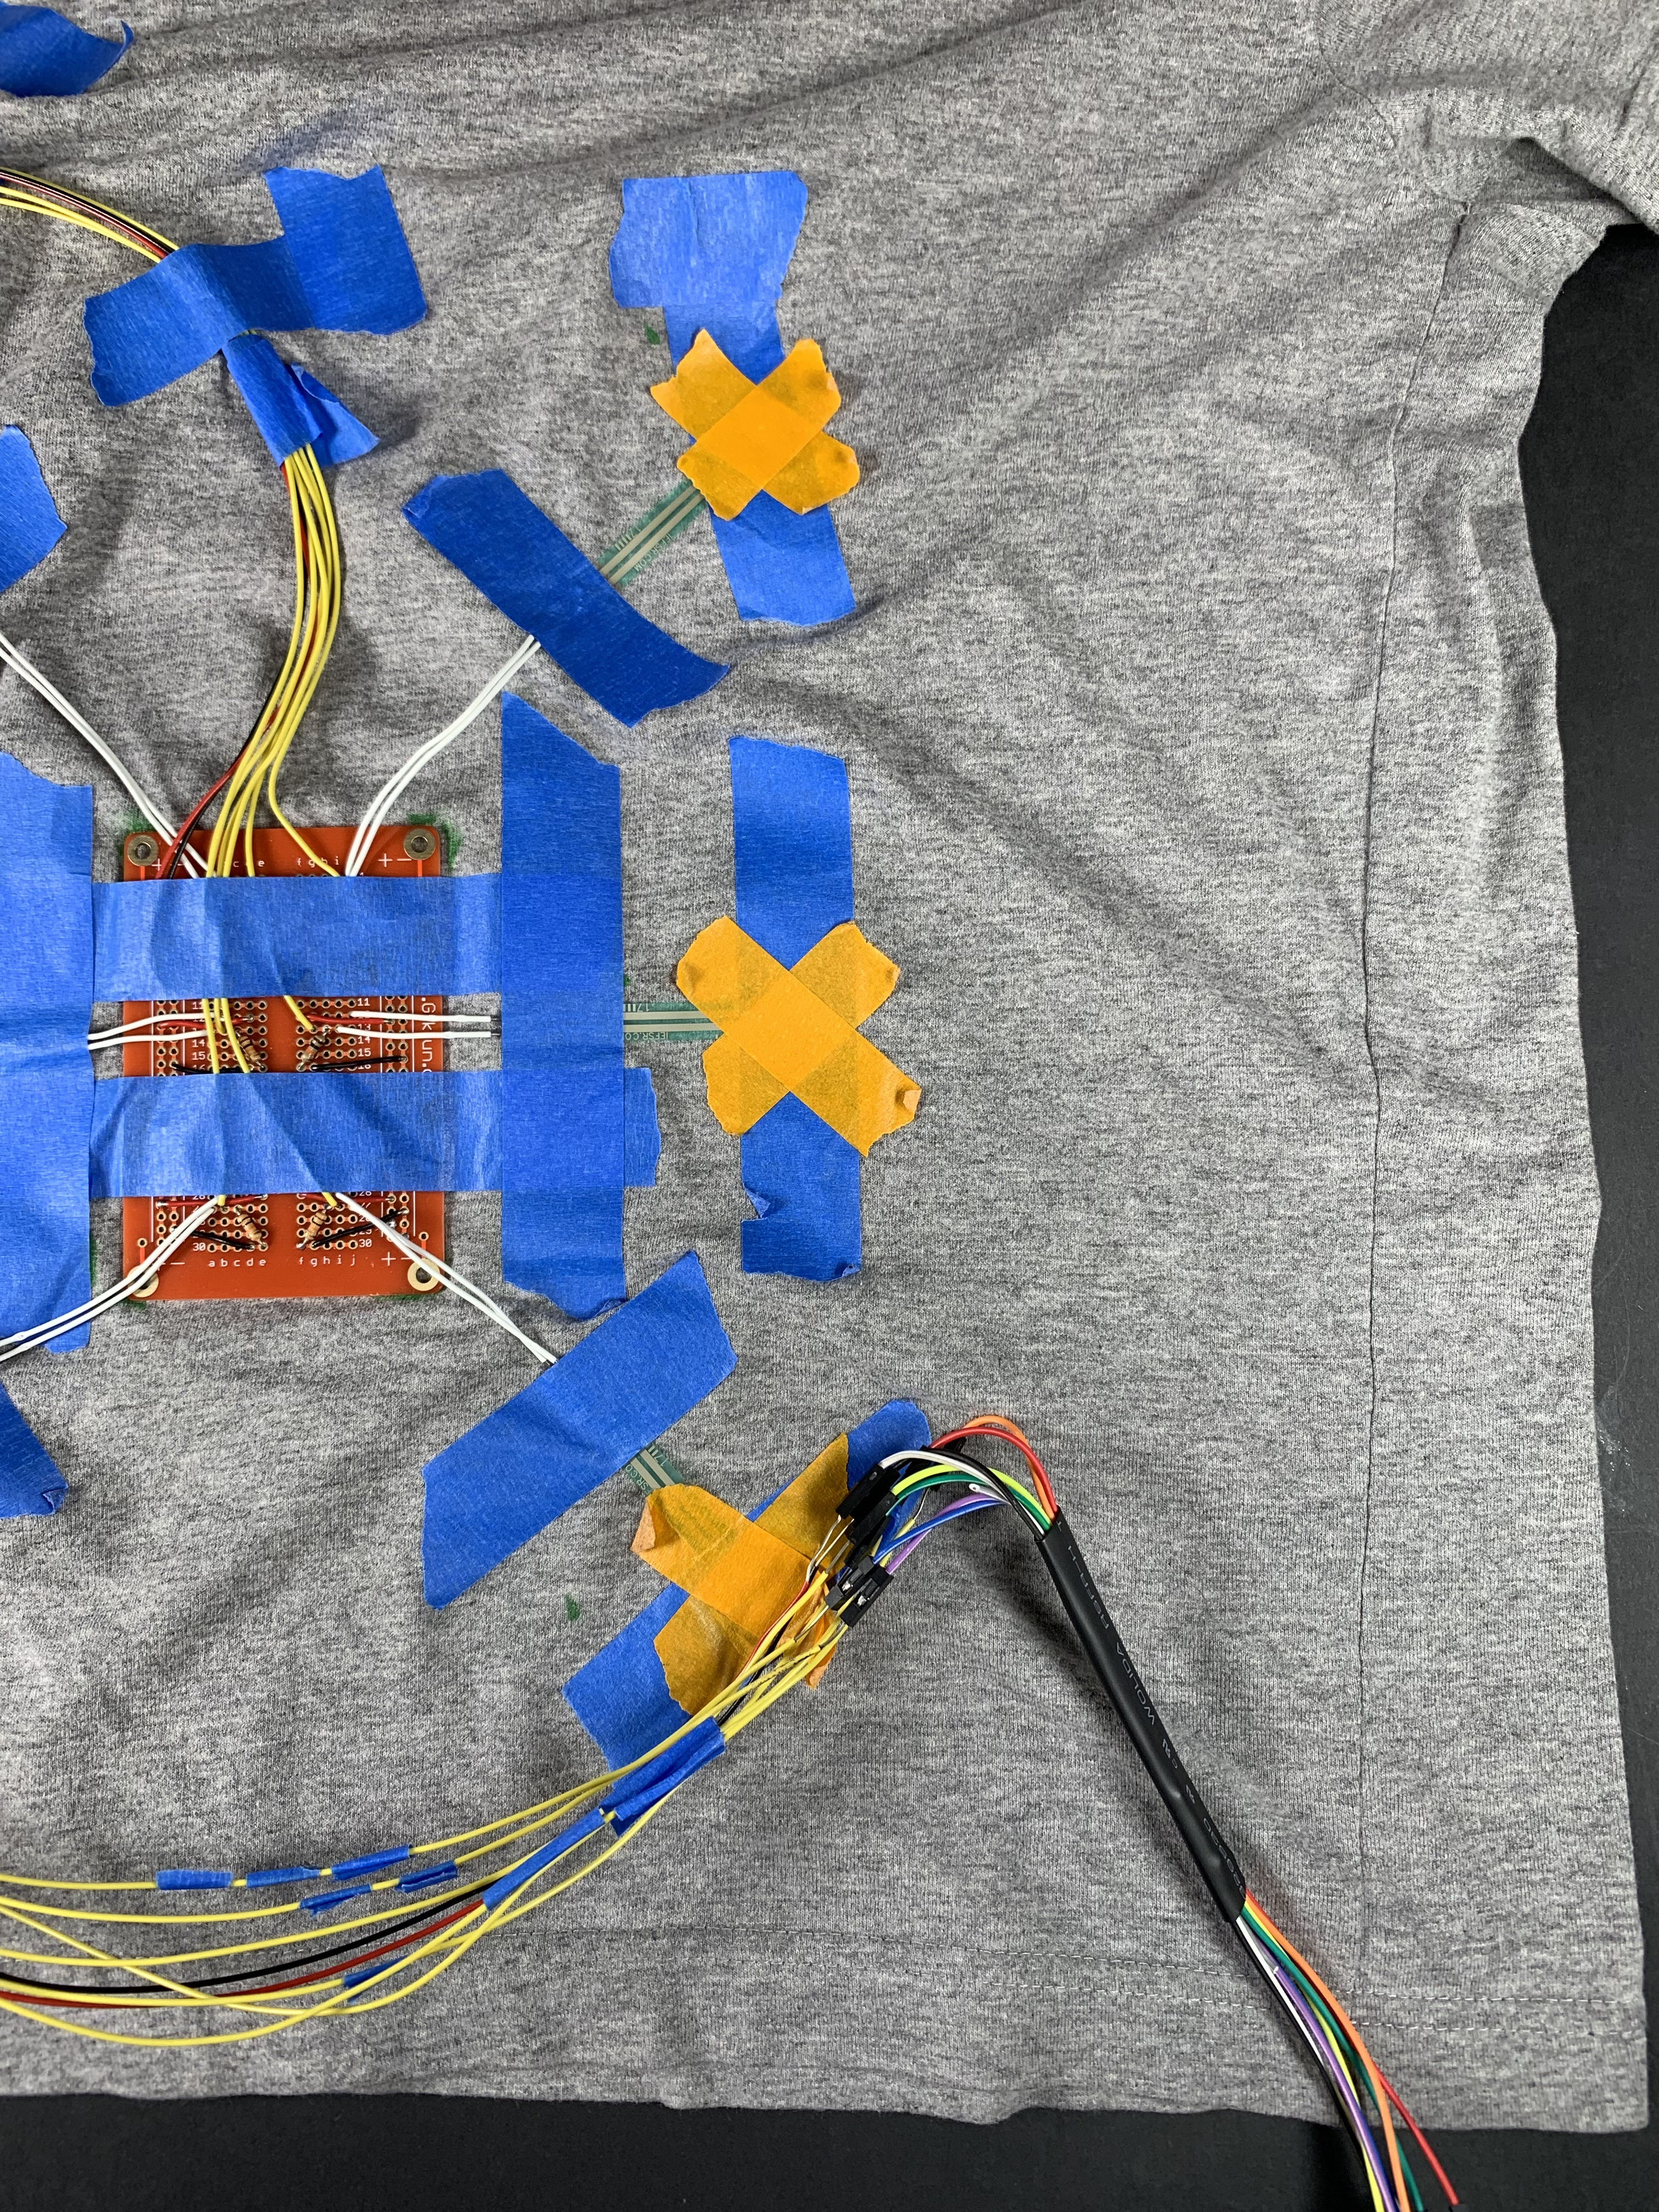
Detailed view of the protoboard and wires
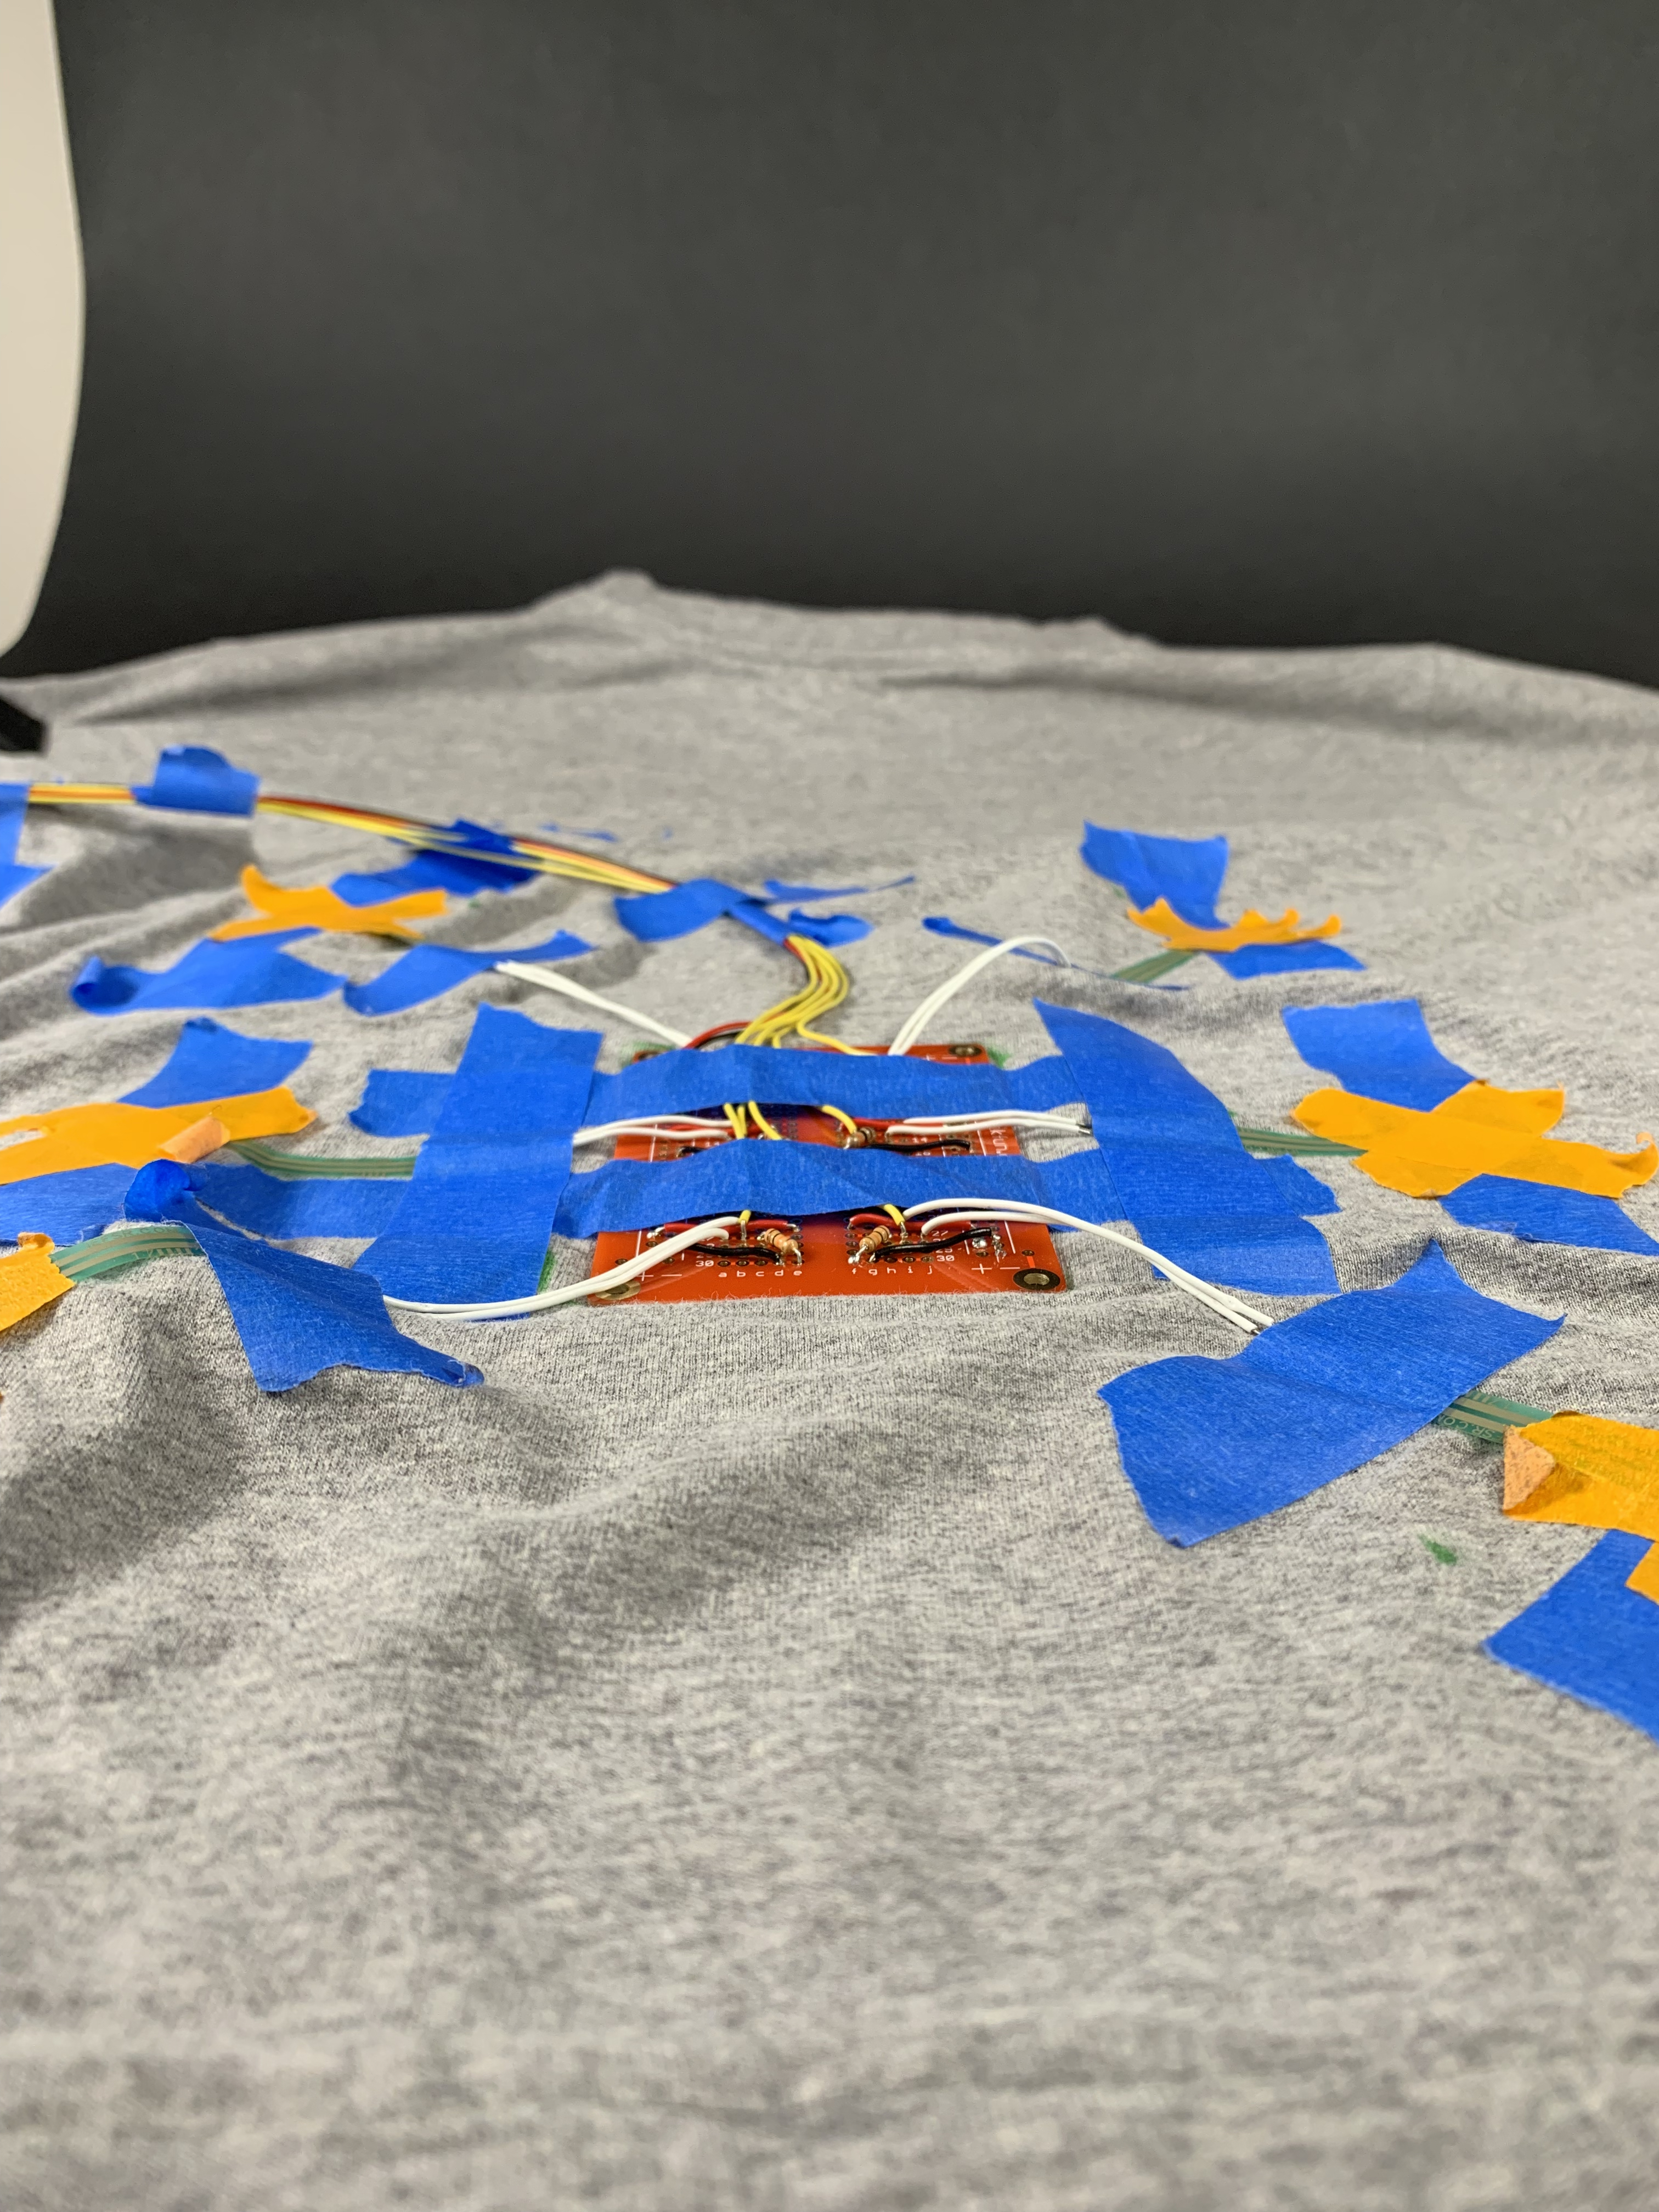
Side view to show levels of sensor protrusion
Since the device prints serial output, a GIF / video would not help describe the garment and thus was not shown.
Process Images and Review
I’m currently training to climb a mountain in July, which involves doing Stairmaster for extended periods of time with a loaded backpack. All mountaineers use internal frame packs, which have flat, metal bars located against your back inside the pack that provide rigidity and support. These bars, combined with a hip belt that locks tightly around your midsection, distributes the bulk of the load to your legs rather than your back. Not only is this more comfortable for the climber, but it prevents back injuries and reduces stress.
I found that bad backpack adjustments and the way I walked led to injuries on my shoulder and lower back, which meant that during my training sessions, the pack wasn’t placed properly on my back and tended to move around. I researched exactly how the pack is supposed to be placed on a person and identified areas where the frame must touch the human’s back at all times.
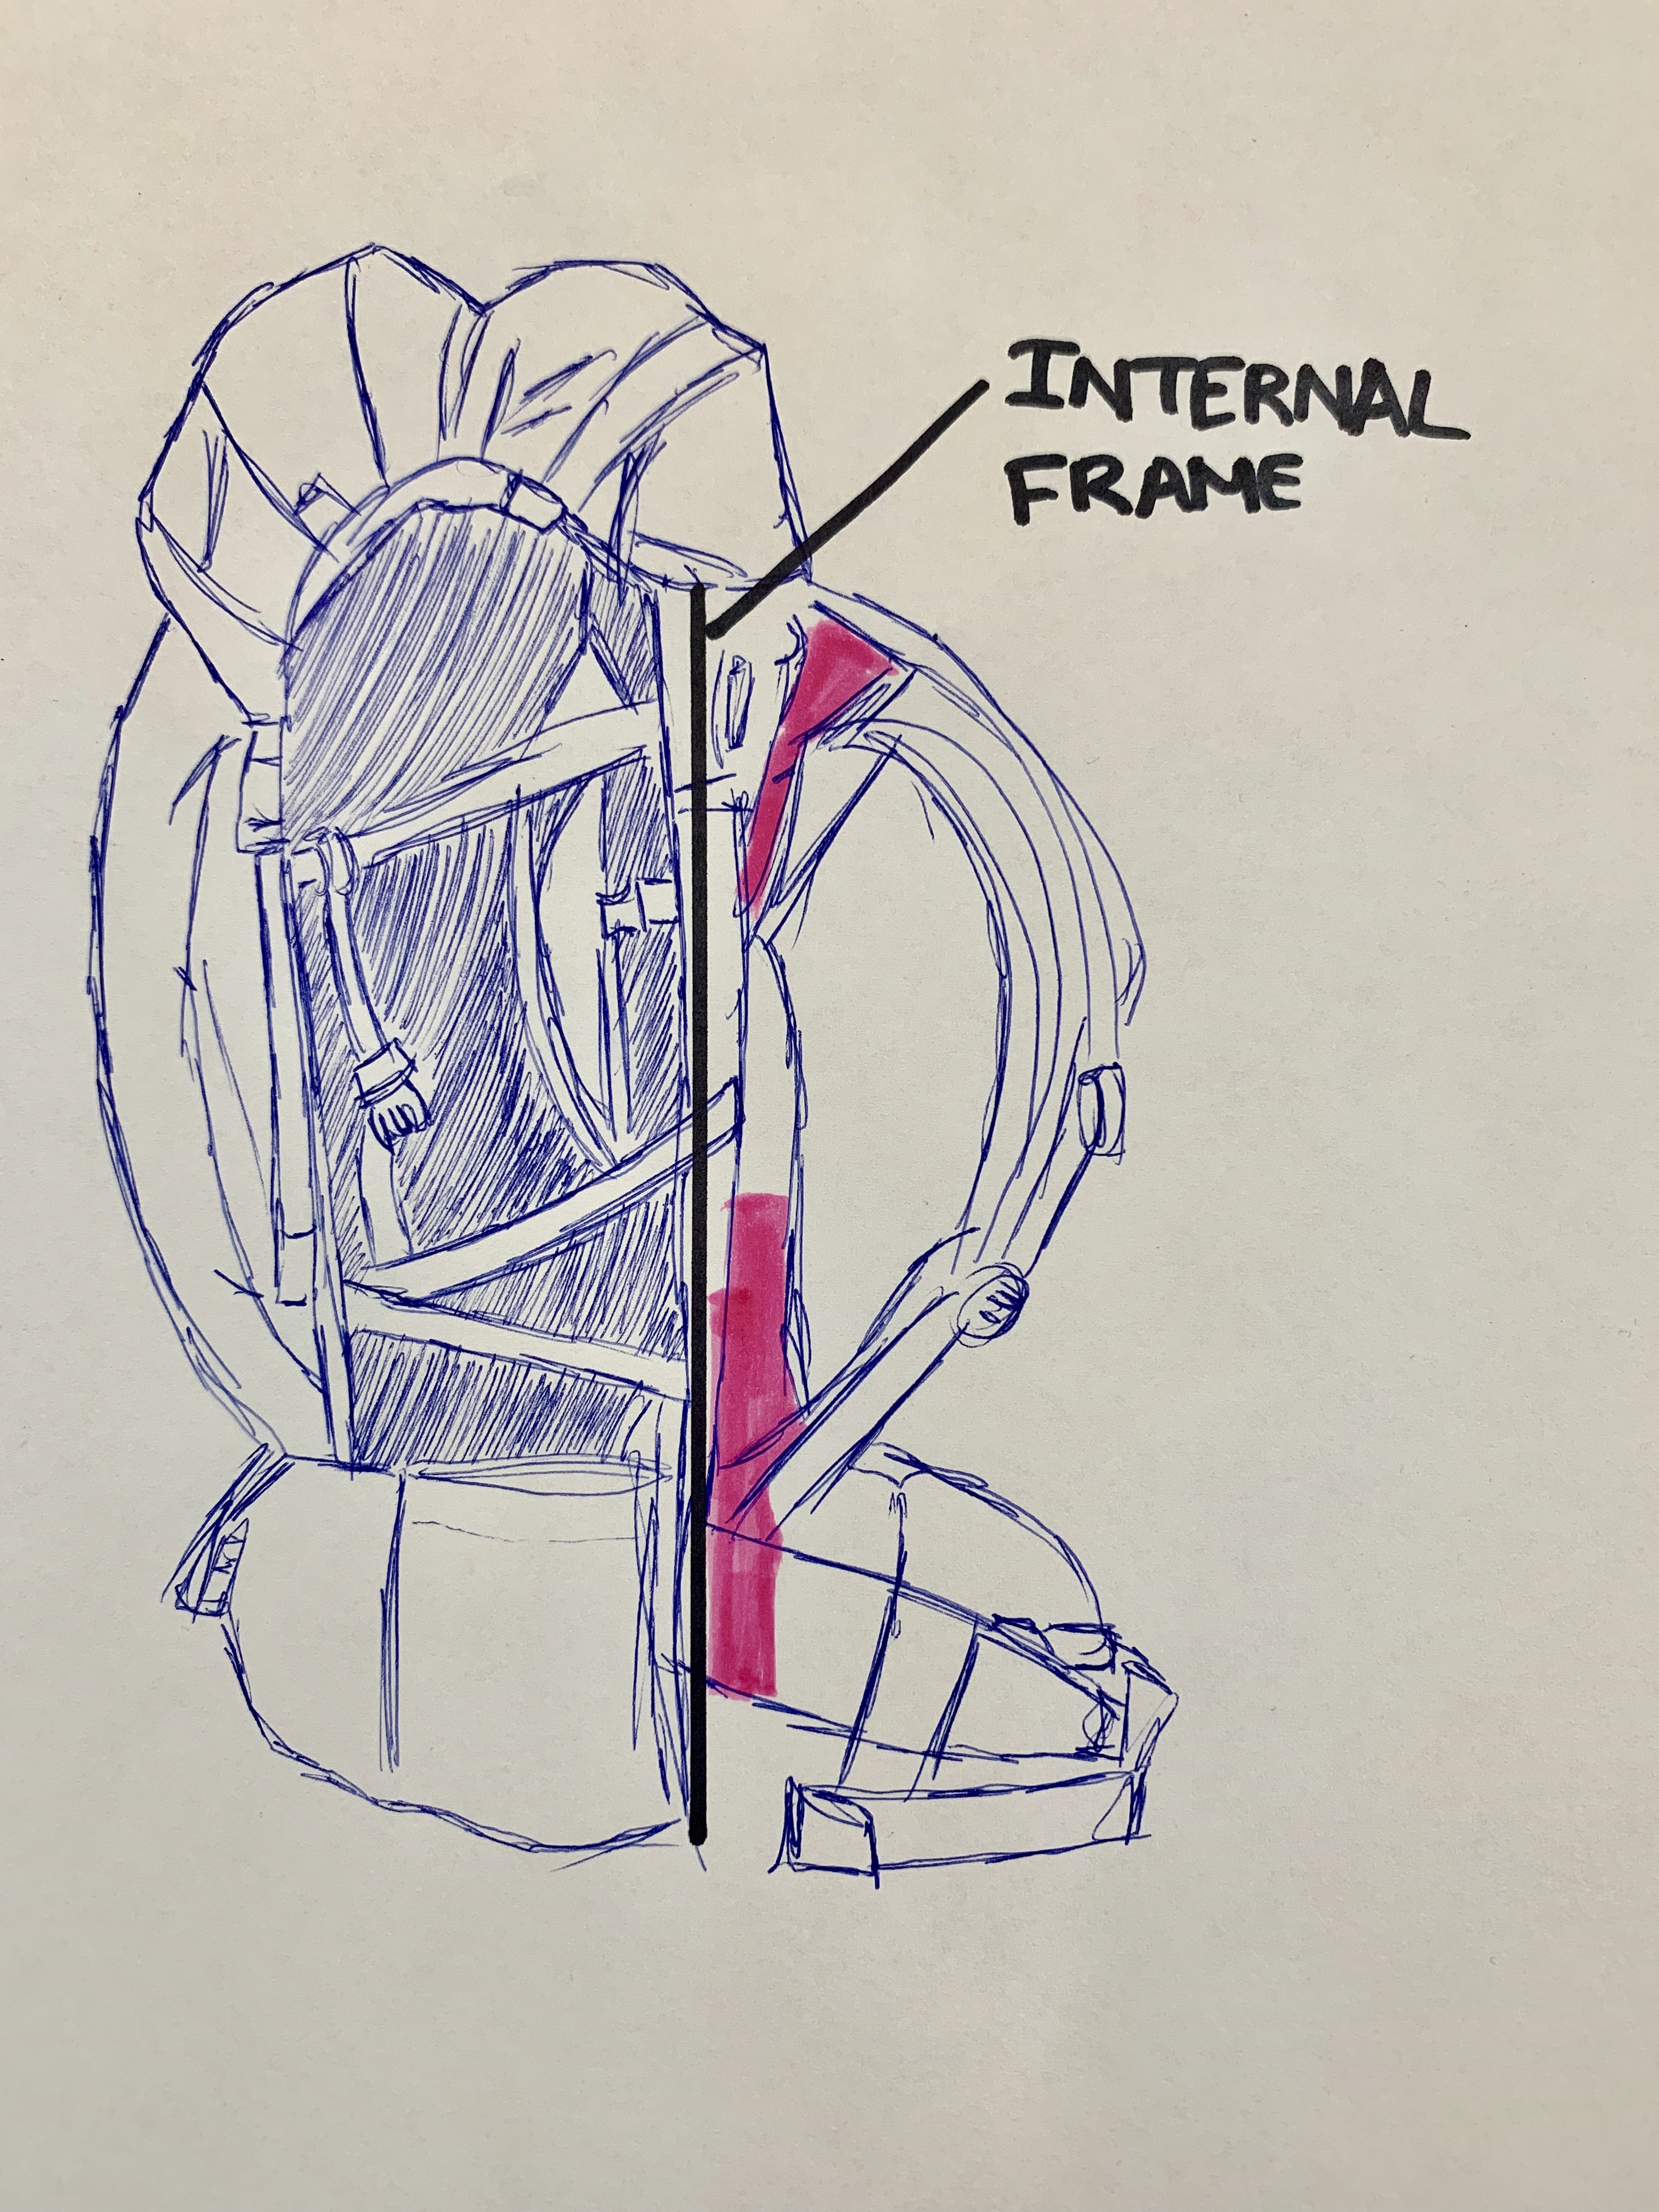
Drawing of an internal frame pack
The pink regions are the parts of the backpack that must always be connected to the climbers back. I knew my injuries were coming from not connecting with these areas due to poor pack adjustment and bad walking posture, but I needed to figure how to measure which areas of my backpack were in the right place and which ones were not.
I decided to use force sensitive resistors (FSR) to measure if a certain area of the climbers back was being touched. I initially thought about attaching these sensors to the pack itself, but a garment made more sense, since it could be used with different packs for different situations.
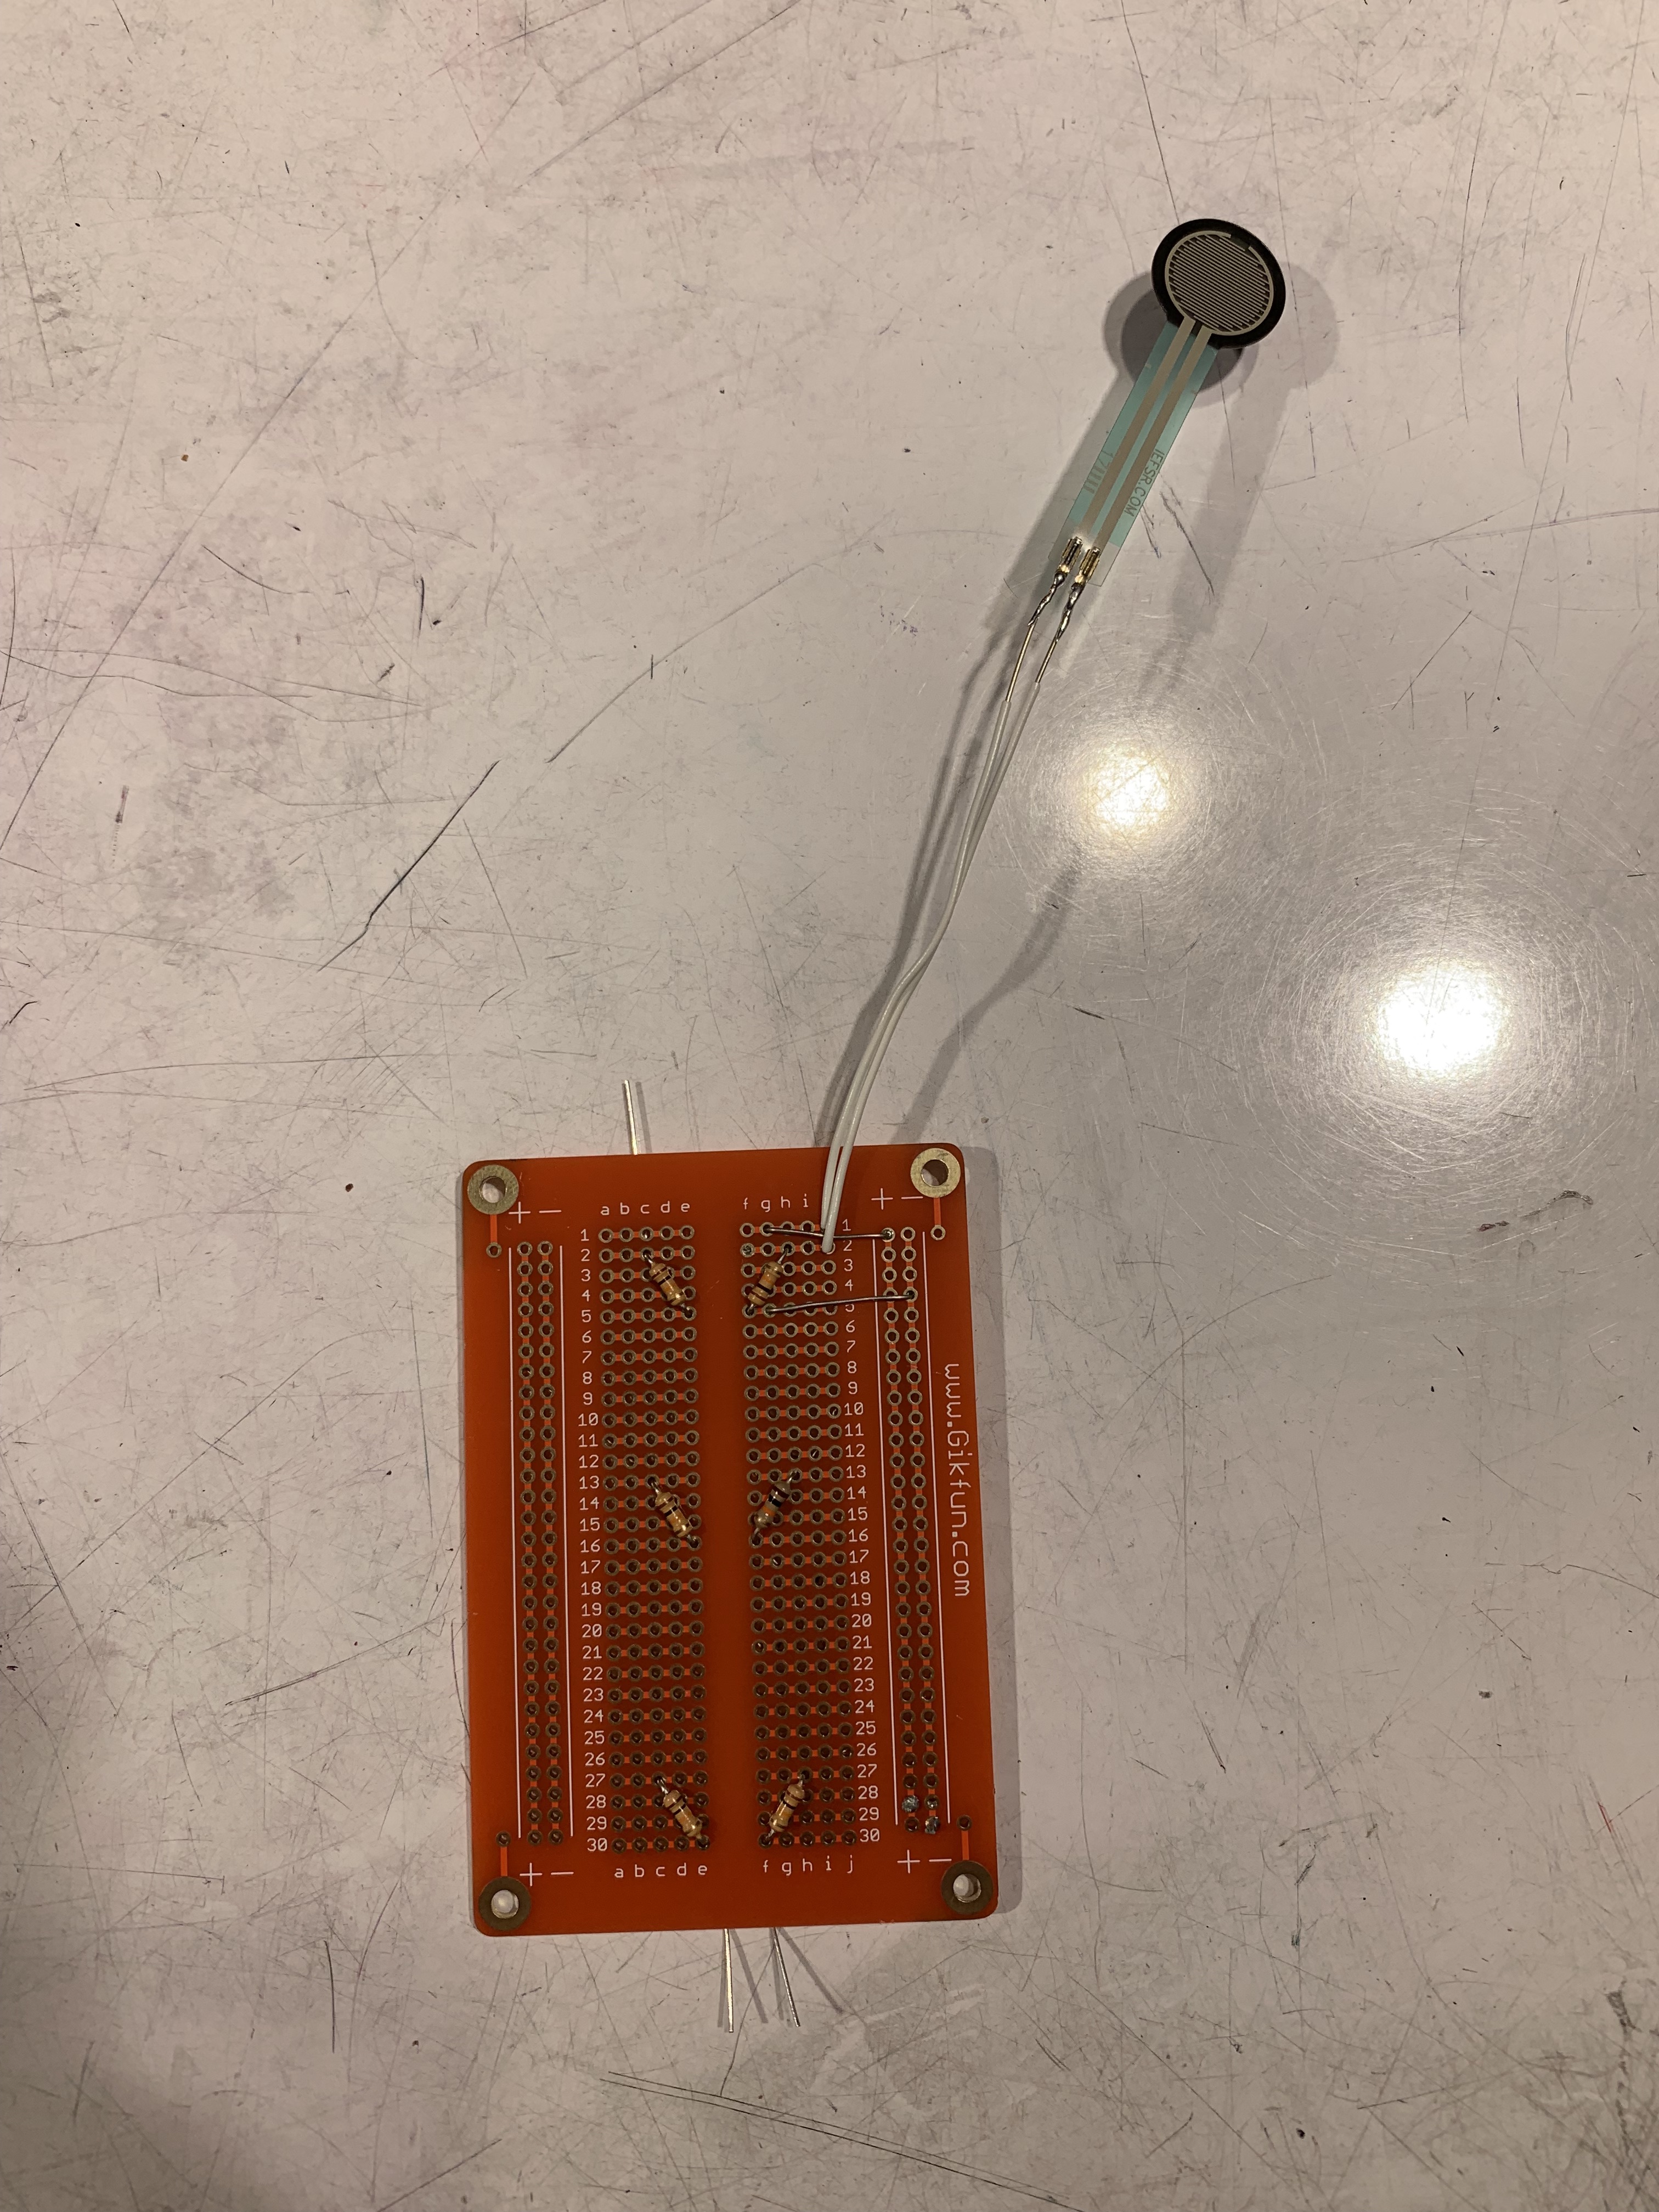
A single FSR attached to a protoboard
I used the first sensor I connected to test out how the values would change based on a connection between the pack and the climber’s back. I tried attaching thinly cut dowel slices to the back end of the FSR to create a flatter surface to more accurately measure force, but these ended up obfuscating the measurements due to their changing position when every step was taken. So I decided to tape the FSR’s directly on to the garment to create the best surface for measurement.
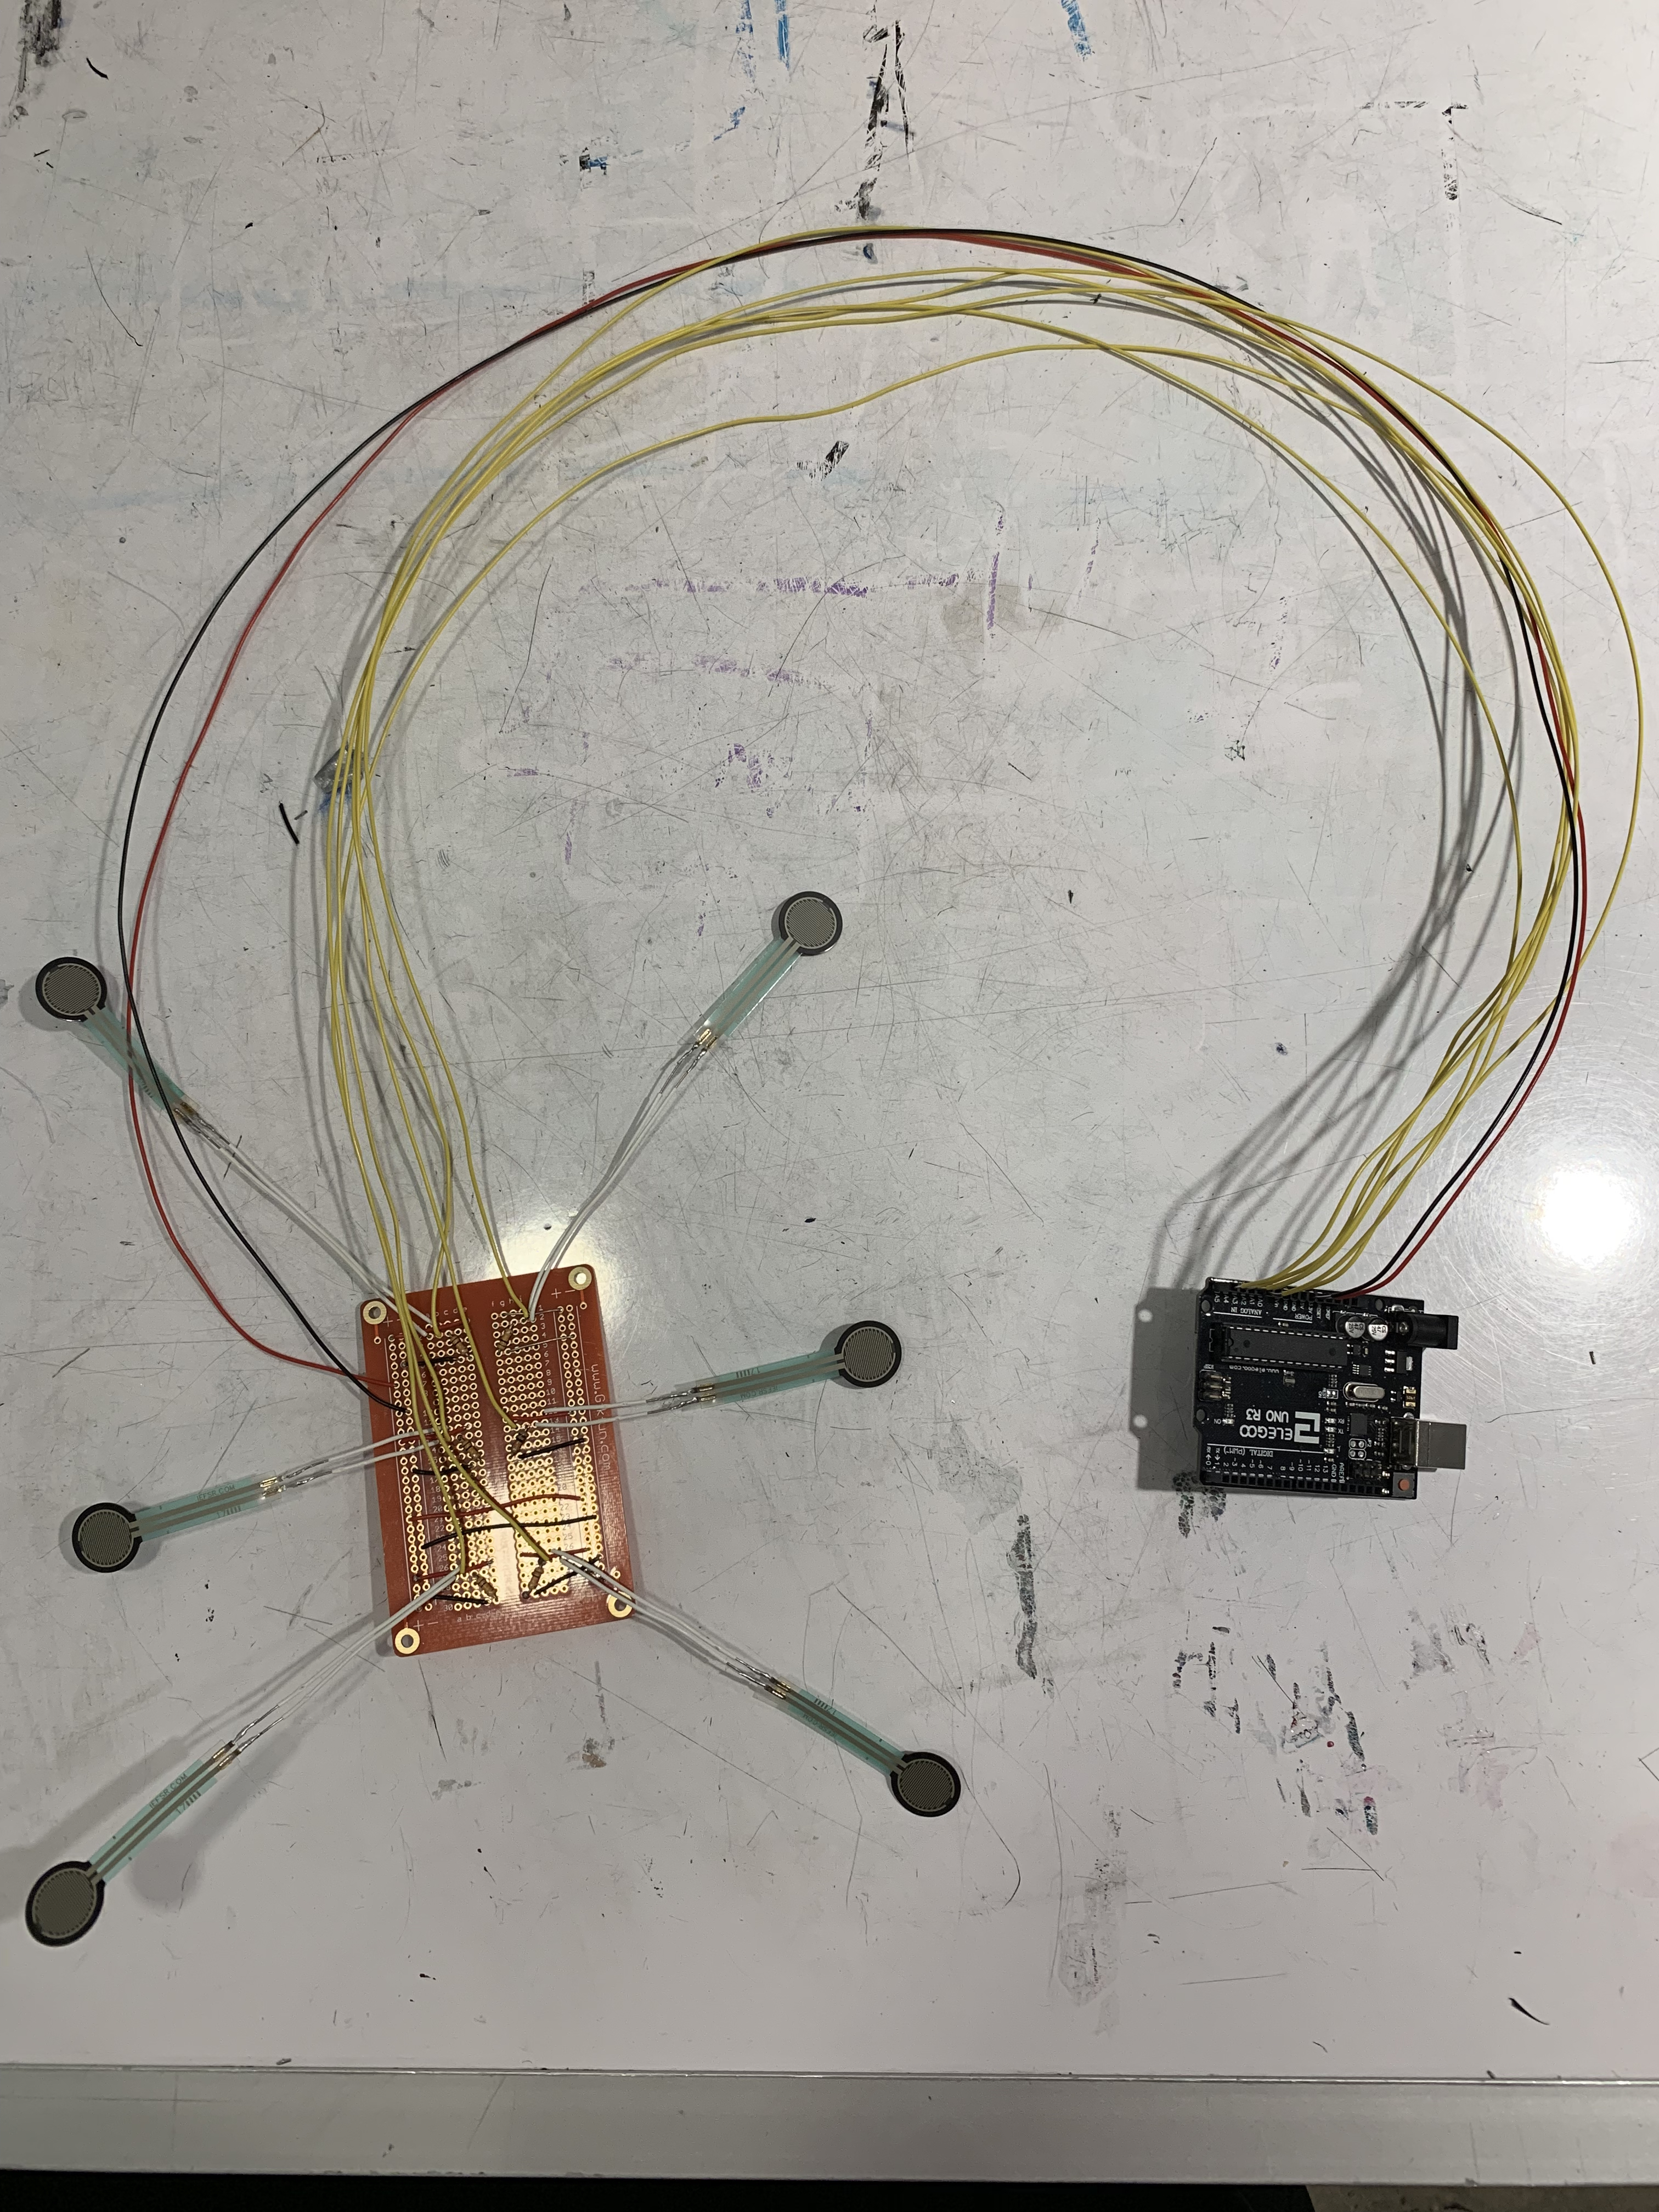
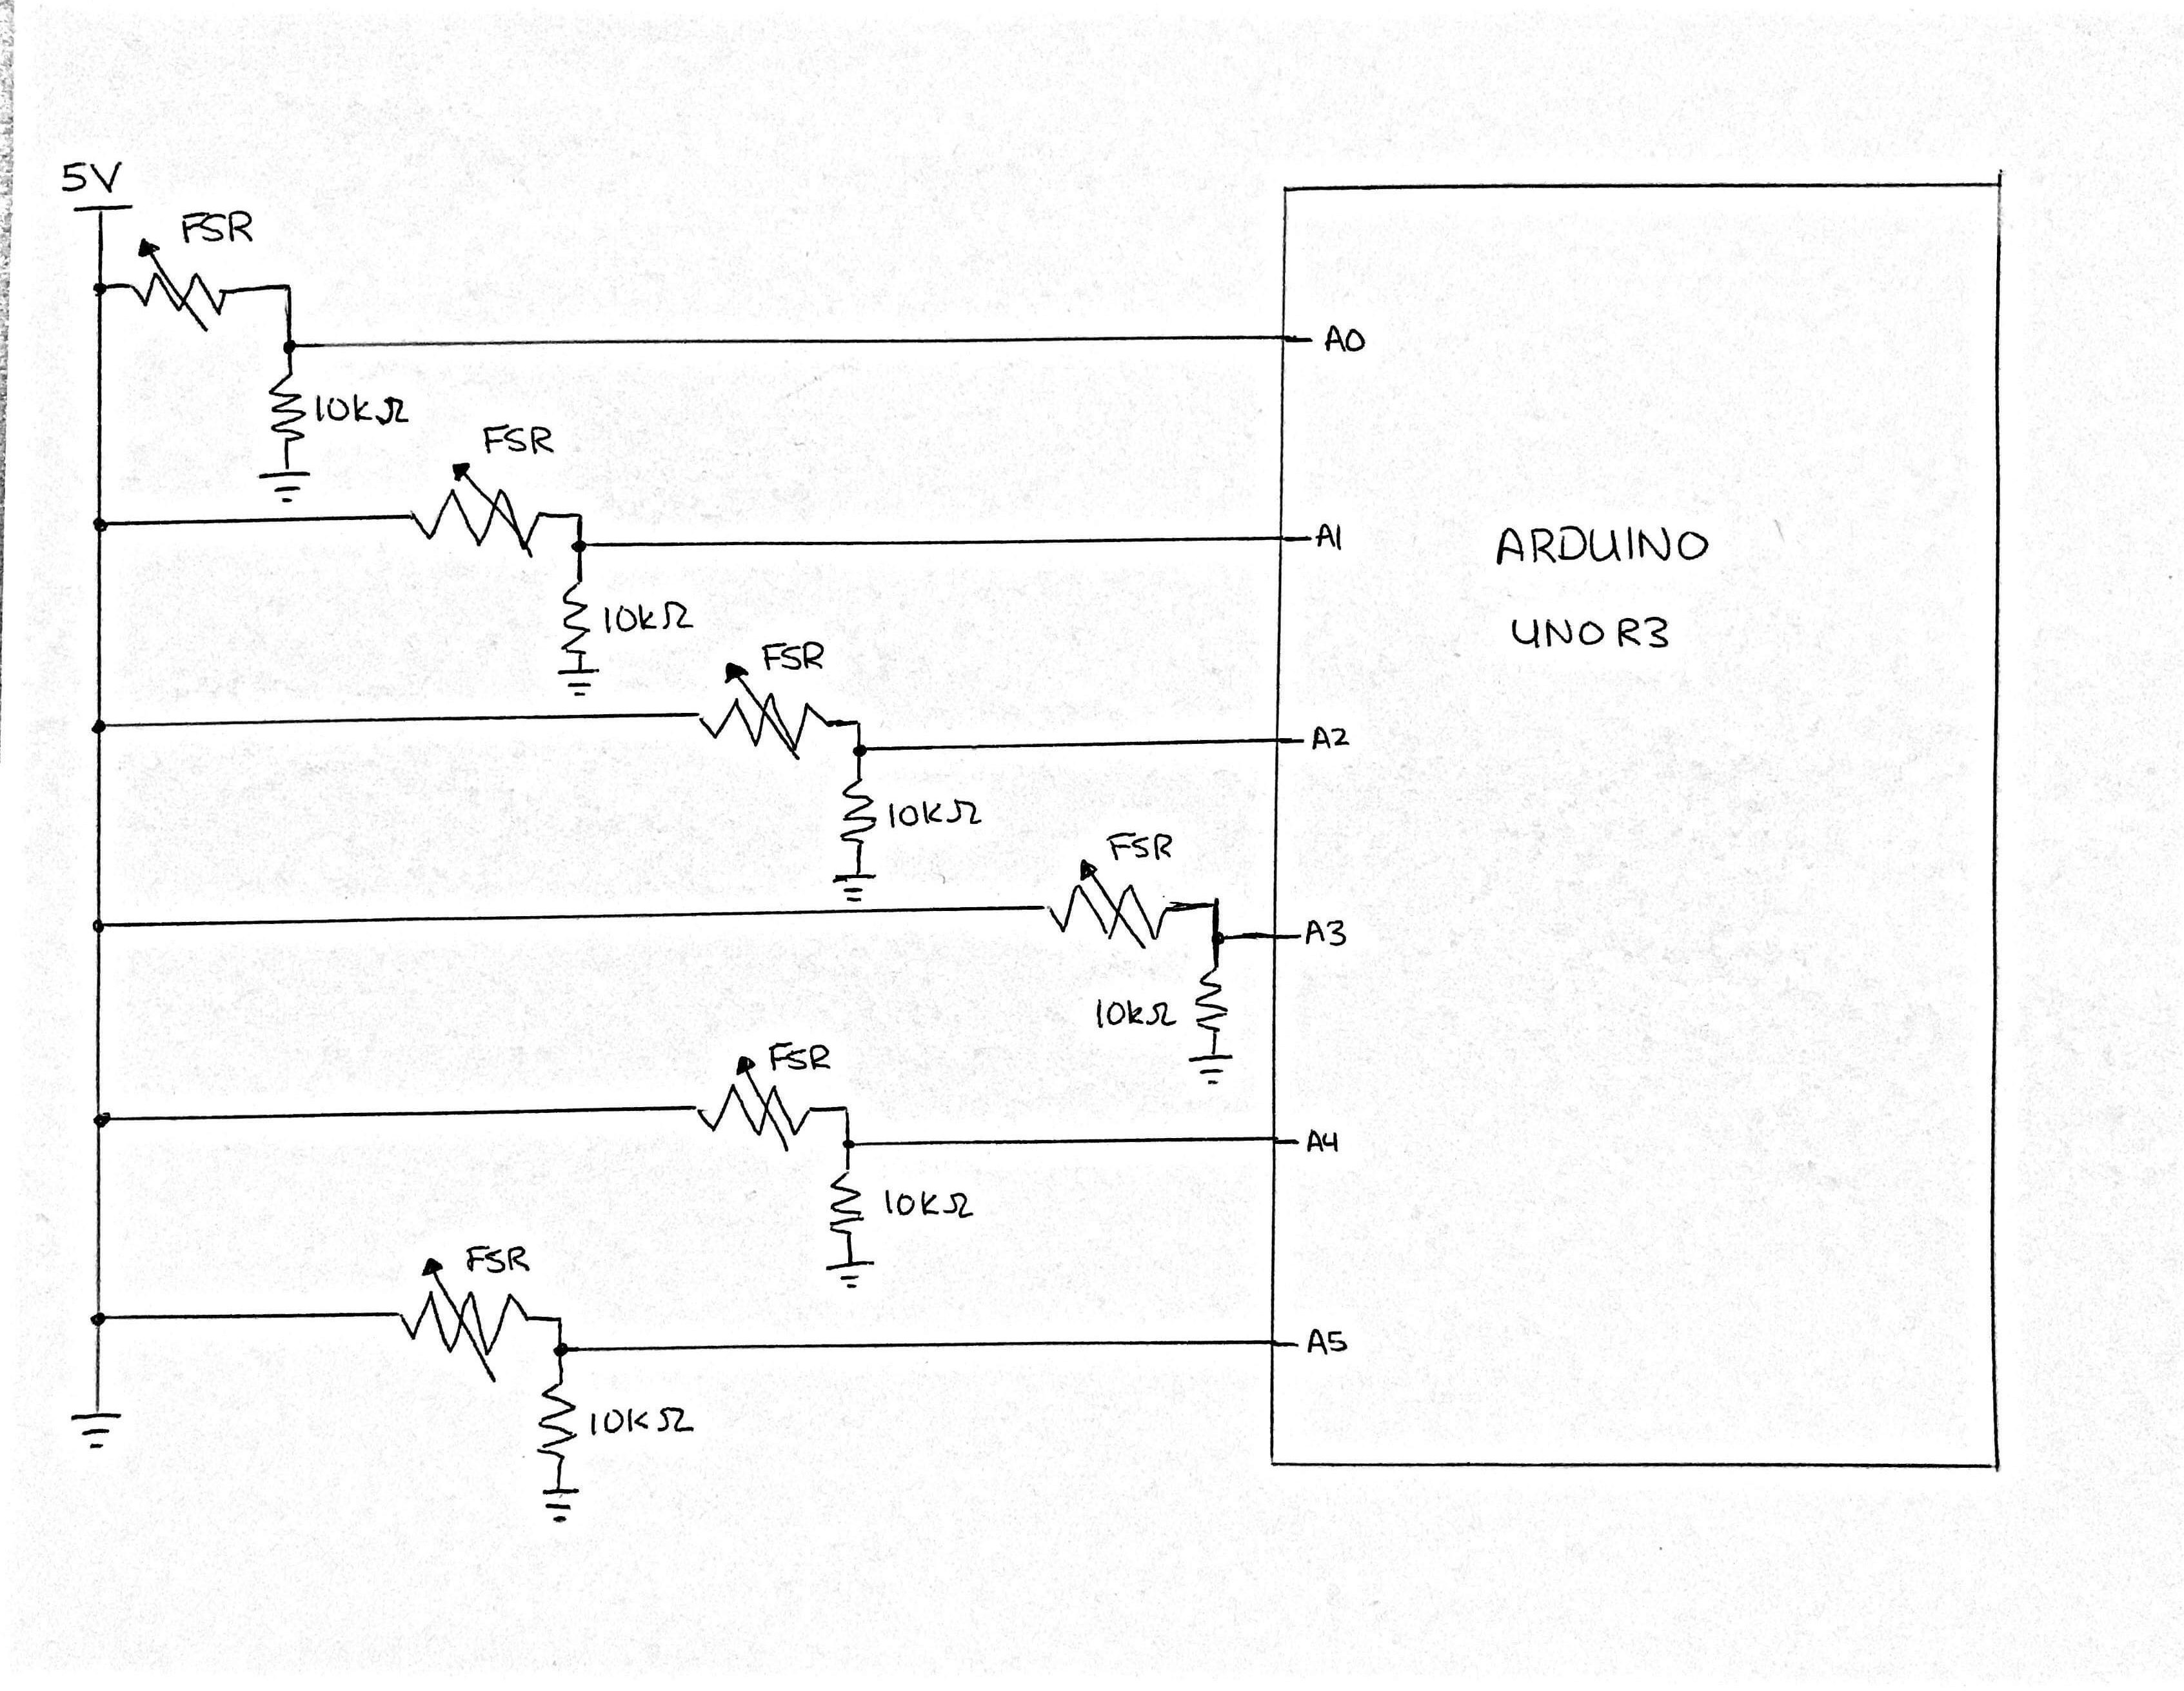
Fully connected sensor and Arduino system
After adding sensors (4 for the lower back and 2 for the mid-back) and soldering them to the protoboard, the hardware aspect of the project was complete. I had some trouble soldering at the beginning, but my skills were significantly better by the end.
Discussion
I received plenty of good feedback from my table group. One student said “I like that speaker that would tell you if you’re off balance or tilted” which was in reference to an original plan I had of integrating a speaker to let the climber know which way they were tilting based on the tone emitted. I agree that there needs to be some sort of sensory feedback, butt disagree with the method. Haptic feedback would be more useful since these training sessions are usually done at the gym and hearing a loud noise while doing strenuous exercise would not be pleasant. Another student said “Creative idea! Nice choice doing a wearable. I would be excited to see the next iteration of this.” I think if I were to develop this as a product, I would think of a better way to integrate the sensors into the fabric, or to connect them wirelessly to a wearable like an Apple Watch.
I spent a lot of time figuring out sensor placement and soldering the sensors onto the protoboard, so I wasn’t able to build out some of the GUI functionality I wanted to. I tried out the speaker idea very initially and didn’t like the constant noise, but I wish I had created haptic feedback for the user. I was happy about the new skills I learned and how useful the project is to me, but i wish I had done more to package it and build out auxiliary features.
I found that I lack some creativity when it comes to creating a polished product. Coding isn’t too difficult and the hardware works in the end but having a fully-fleshed out project that is nice to look at has been a struggle. Seeing the projects of the design students has given me a good direction to start with for the final project, and I hope it turns out both functional and beautiful.
I would take a table members advice and integrate the sensors into the fabric of the shirt. I would also create a sensor array all along the back rather than 6 individual sensors and then handle the data from all of them at once. I’d also make all the connections to the sensor over Bluetooth so it could be integrated with an Apple Watch or Fitbit.
Technical Information
Code
// Project 2: Backpack Feedback T-Shirt
// This code reads data from 6 FSR's and prints out computed statistics
// timing code from http://forum.arduino.cc/index.php?topic=503368.0

const int TOP_LEFT = A0; // FSR is connected to analog 0
const int TOP_RIGHT = A1; // FSR is connected to analog 1
const int MIDDLE_LEFT = A2; // FSR is connected to analog 2
const int MIDDLE_RIGHT = A3; // FSR is connected to analog 3
const int BOTTOM_LEFT = A4; // FSR is connected to analog 4
const int BOTTOM_RIGHT = A5; // FSR is connected to analog 5
int TL_Reading;
int TR_Reading;
int ML_Reading;
int MR_Reading;
int BL_Reading;
int BR_Reading;

// timing code from http://forum.arduino.cc/index.php?topic=503368.0
unsigned long startMillis;  //some global variables available anywhere in the program
unsigned long currentMillis;
const unsigned long period = 5000;  //the value is a number of milliseconds
int topCount;
int baseCount;
int totalPeriods;

void setup(void) {
  Serial.begin(9600);
  startMillis = millis();  //initial start time
  topCount = 0;
  baseCount = 0;
}

void loop(void) {
  TL_Reading= analogRead(TOP_LEFT);
  TR_Reading = analogRead(TOP_RIGHT);
  ML_Reading = analogRead(MIDDLE_LEFT);
  MR_Reading = analogRead(MIDDLE_RIGHT);
  BL_Reading = analogRead(BOTTOM_LEFT);
  BR_Reading = analogRead(BOTTOM_RIGHT);

  Serial.print("TL = ");
  Serial.print(TL_Reading);
  Serial.print(" - ");
  Serial.print("TR = ");
  Serial.print(TR_Reading);
  Serial.print(" - ");
  Serial.print("ML = ");
  Serial.print(ML_Reading);
  Serial.print(" - ");
  Serial.print("MR = ");
  Serial.print(MR_Reading);
  Serial.print(" - ");
  Serial.print("BL = ");
  Serial.print(BL_Reading);
  Serial.print(" - ");
  Serial.print("BR = ");
  Serial.print(BR_Reading);
  Serial.println(" - ");

  if (abs(TL_Reading - TR_Reading) > 20)
  {
    topCount += 1;
  }
  if (abs((ML_Reading + BL_Reading) - (MR_Reading + BR_Reading)) > 400 )
  //|| ((ML_Reading <= 10 || BL_Reading <= 10) && (MR_Reading <= 10 || BR_Reading <= 10))
  {
    if((ML_Reading + BL_Reading) > (MR_Reading + BR_Reading))
    {
      Serial.println("Tilting left...");
    }
    else {
      Serial.println("Tilting right...");
    }
    baseCount += 1;
  }
  currentMillis = millis();  //get the current "time" (actually the number of milliseconds since the program started)
  if (currentMillis - startMillis >= period)  //test whether the period has elapsed
  {
    totalPeriods += 1;
    startMillis = currentMillis;  //IMPORTANT to save the start time
    Serial.print("Pack wrong on top: ");
    Serial.print(100 * (topCount/(totalPeriods * 100.0)));
    Serial.print("%, Pack wrong on base: ");
    Serial.print(100 * (baseCount/(totalPeriods * 100.0)));
    Serial.println("%");
  }
  delay(period / 100);
}
Comments are closed.