
by Karen Kim and Enock Maburi
Description
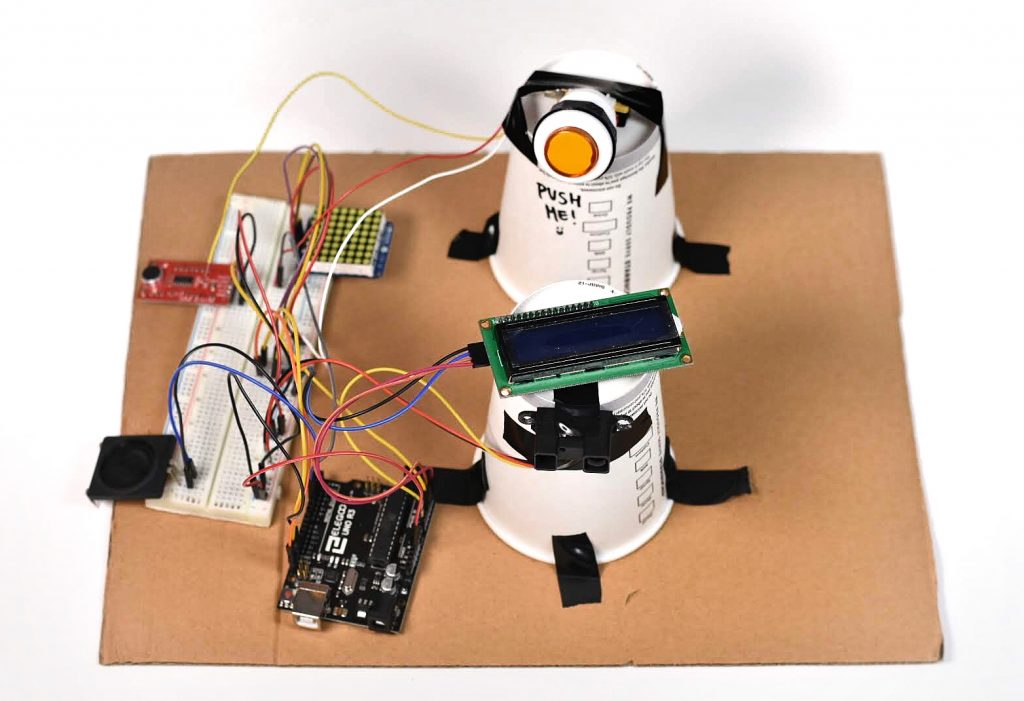
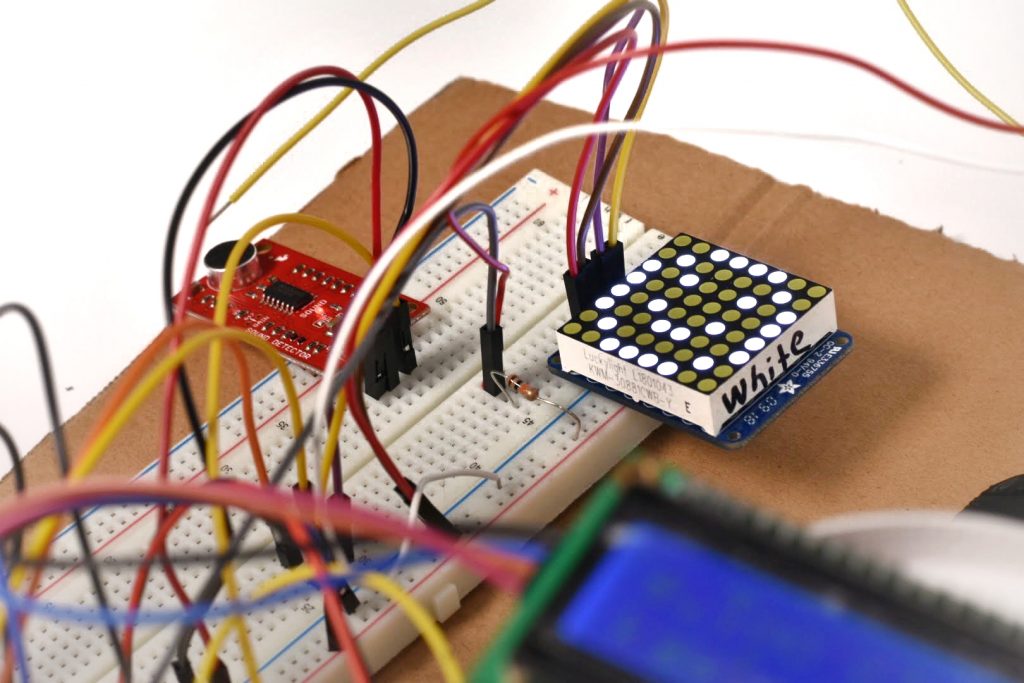
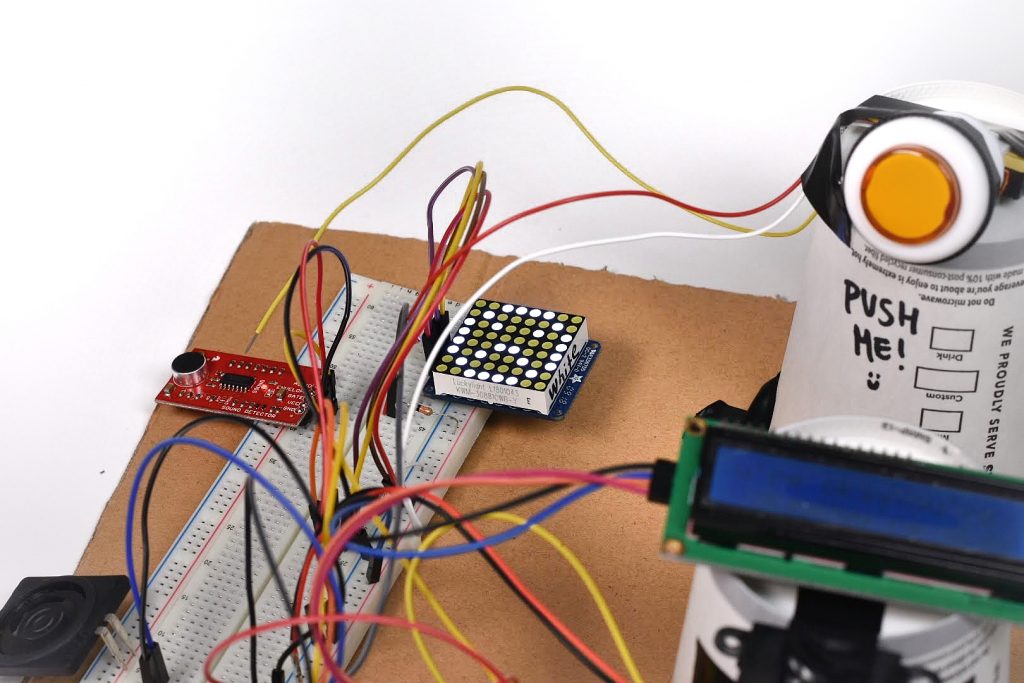
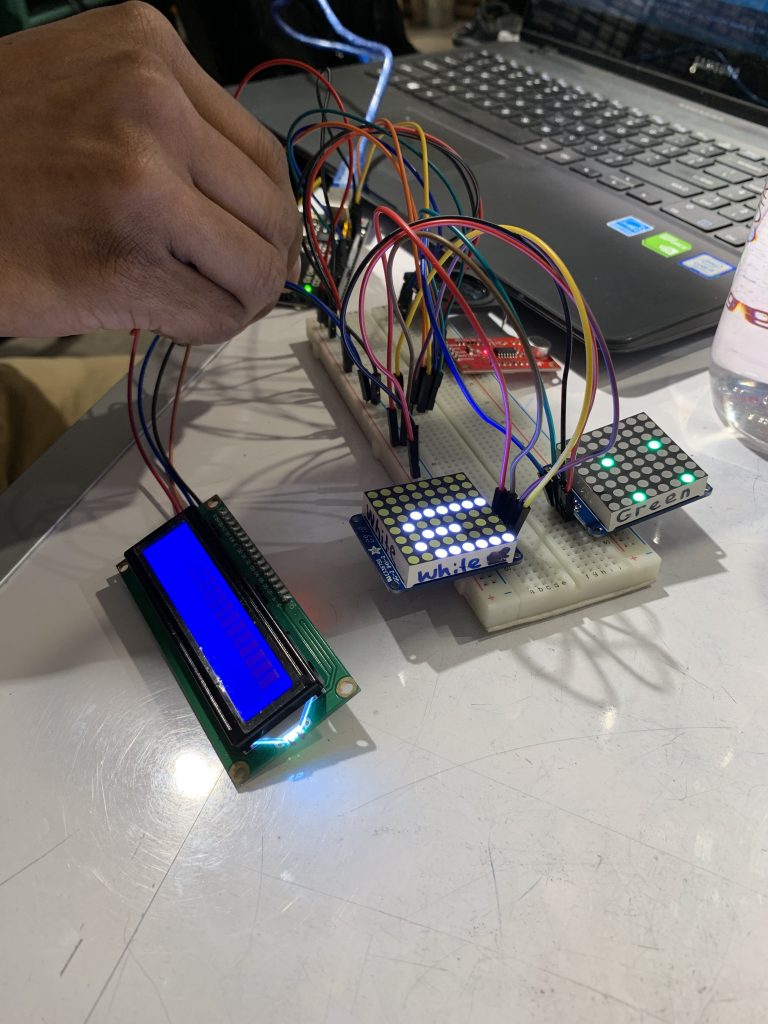
Responsive Proximity Sensor is a double transducer that uses proximity and sound levels as inputs to display facial expressions on an LED matrix and different messages on an LCD display. The first parts of our machine are the proximity IR sensor and a speaker. Depending on your detected proximity from the sensor, the volume of the sound emitted from the speaker will increase or decrease. When you are further from the sensor, the sound will be the loudest. Next, the sound level is detected by a microphone and there are three different sound levels, and each threshold triggers a specific response on the LED matrix and the LCD display as follows:
| volume level | LED matrix response | LCD display phrase |
| loud | smiley face 🙂 | Too close. |
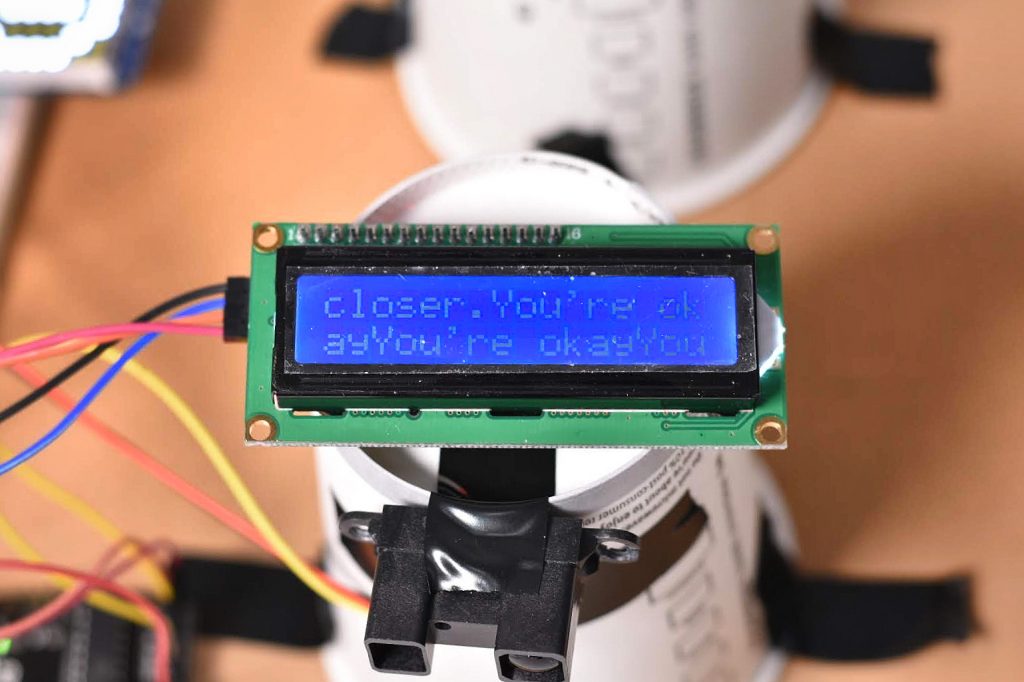
| moderate | neutral face 😐 | You’re okay. |
| quiet | frowning face 🙁 | Come closer. |
Process
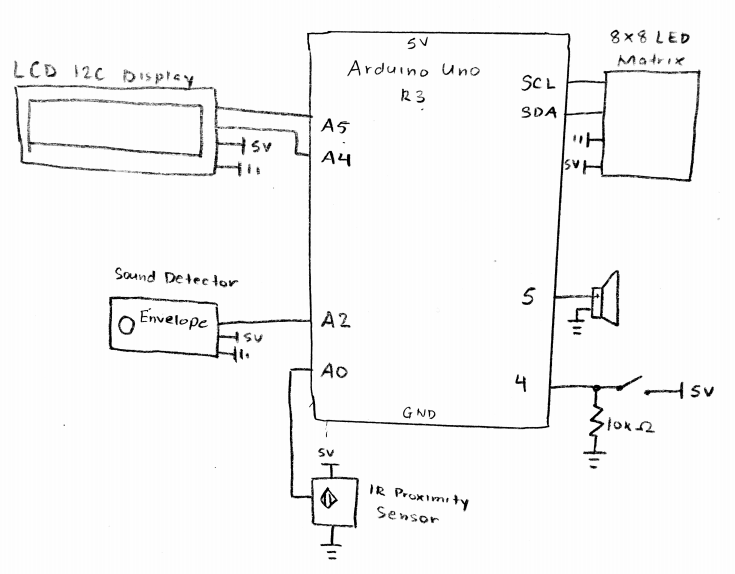
Schematic
Code
/*
Project: Double Transducer: Responsive Proximity Sensor ( Annoying Tamagotchi )
 *
 * Names: Karen Kim, Enock Maburi
 *
 * Description: This code takes the input of distance from an IR Proximity Sensor and converts the distance to a volume in range [0, 255] which will be played on a speaker and that volume level will be picked up by a microphone which will display certain messages and images based on which range the volume is in.
 *
 * Credit: https://learn.sparkfun.com/tutorials/sound-detector-hookup-guide
 *         I2C LED Backpack 8x8 Matrix Example
 *         Volume Test Sounds example
 *
 */


// Libraries
#include <LiquidCrystal_I2C.h>
#include <Wire.h>
#include <Adafruit_GFX.h>
#include "Adafruit_LEDBackpack.h"
#include "Volume.h"

// Pin Mapping
#define IR_SENSOR A0 // refer to proximity sensor
#define SPEAKERPIN 5 // refer to speaker
#define PIN_ANALOG_IN 2 // refer to button
#define BUTTONPIN 4 // refer to on button
#define MICANALOG A2 // refer to sound detecting sensor

// Variable Instantiation
int intSensorResult; // sensor result
int status = 0;
int value;
int volume;
int buttonState;

// Object Instantiation
LiquidCrystal_I2C screen(0x27, 16, 2);
Adafruit_8x8matrix matrix1 = Adafruit_8x8matrix();
Volume vol;
static const uint8_t PROGMEM
smile_bmp[] =
{ B00111100,
  B01000010,
  B10100101,
  B10000001,
  B10100101,
  B10011001,
  B01000010,
  B00111100
},
neutral_bmp[] =
{ B00111100,
  B01000010,
  B10100101,
  B10000001,
  B10111101,
  B10000001,
  B01000010,
  B00111100
},

frown_bmp[] =
{ B00111100,
  B01000010,
  B10100101,
  B10000001,
  B10011001,
  B10100101,
  B01000010,
  B00111100
},

hi_bmp[] =
{ B00000000,
  B01001010,
  B01001010,
  B01001010,
  B01111010,
  B01001010,
  B01001010,
  B00000000
};

void setup()
{
  Serial.begin(9600); // Setup communication with computer to present results serial monitor

  // LCD Initialization
  screen.init();
  screen.backlight();
  screen.home();

  // LED Matrix Initial Face
  matrix1.begin(0x70);
  matrix1.clear();
  matrix1.drawBitmap(0, 0, hi_bmp, 8, 8, LED_ON);
  matrix1.writeDisplay();

  vol.begin();
  vol.setMasterVolume(1.00);

  pinMode(MICANALOG, INPUT);
  pinMode(BUTTONPIN, INPUT);
  pinMode(IR_SENSOR, INPUT);
  pinMode(SPEAKERPIN, OUTPUT);
  pinMode(PIN_ANALOG_IN, INPUT);
}

void loop()
{
  // Reading Inputs
  intSensorResult = analogRead(IR_SENSOR);
  value = analogRead(MICANALOG);

  buttonState = digitalRead(BUTTONPIN);

  // Mapping the distance to a volume
  volume = map(intSensorResult, 20, 600, 0, 255);

  // Press button to start
  if (buttonState == LOW) {
    if (status) status = 0;
    else status = 1;
  }

  if (status) {
    screen.display();

    vol.tone(880, volume);
    vol.delay(300);

    // Displaying messages and Faces based on volume picked up from mic
    if (value >= 345)
    {
      screen.print("Too close.");
      matrix1.clear();
      matrix1.drawBitmap(0, 0, smile_bmp, 8, 8, LED_ON);
      matrix1.writeDisplay();
    }
    else if ( (value > 295) && ( value < 345) )
    {
      screen.print("You're okay");
      matrix1.clear();
      matrix1.drawBitmap(0, 0, neutral_bmp, 8, 8, LED_ON);
      matrix1.writeDisplay();
    }
    else
    {
      screen.print("Come closer.");
      matrix1.clear();
      matrix1.drawBitmap(0, 0, frown_bmp, 8, 8, LED_ON);
      matrix1.writeDisplay();
    }

Serial.println(value);
delay(200);
  }
  else {
    screen.clear();
  }
}
Discussion
The process of building our double transducer was definitely a learning process, and a lot of trial and error. During the initial ideation process, it was interesting to learn a bit about our working styles. While Enock’s strengths lie more in coding and understanding what would be feasible to carry out, I (Karen) was more fixated on what kind of machine we should build and how we could build a story around it. This ended up working out really well throughout the process, as I would do research about our parts and try to focus on how everything would come together, and Enock was able to put our parts and wires together in a technical way.
When we were deciding which parts to use, we found that there were a lot of options that would work for our machine. It took us several different proximity sensors, speakers, and mics/sound detectors until we decided on which parts to use. We ran into problems with the proximity sensors having really unusual readings and some just not working at all. It took us some time until we figured out how to work with it and implement changes to adapt, such as reading the measurements in an inverse way so that it would make more sense in terms of the display. Additionally, we had planned on using a mic as a sound detector at first, but had trouble finding information about some of the parts and the small mic we intended to use wasn’t picking up the sound as well as we had hoped. However, we were able to mitigate these problems pretty easily by borrowing some items from lending and doing some deep google searches.
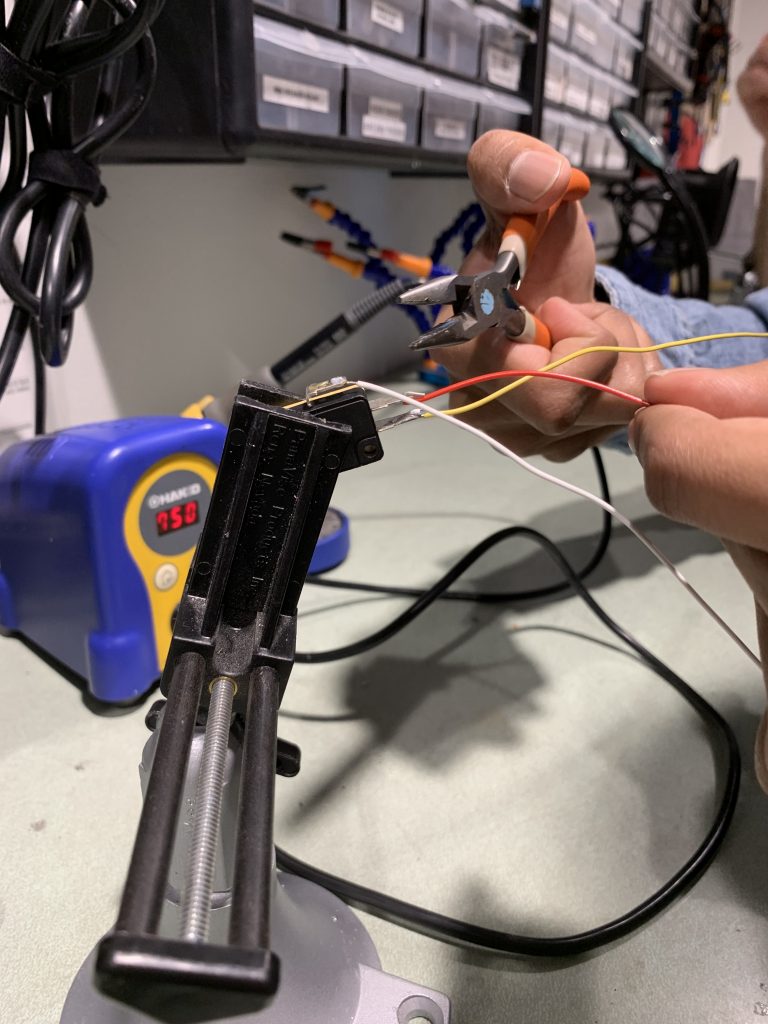
As a non-technical major, I had a lot of fun learning skills such as soldering and just building a more technological product. For example, we decided to connect a large button to our machine as an on button, and needed to solder the wires onto the plug of the button. Enock and I were able to both able to learn about little skills like how to connect/wire/code a button like that to our arduino that we hadn’t expected to, which was really cool.
Although knowing the usage of sound as an input would be difficult, we still decided to use it. Depending on whether we used it as an input or an output would have changed the project completely and would have probably made the process much easier. Sound detection is difficult on the arduino and is very noisy and thus we could have replaced it as the intermediate step and just used it as another output in addition to the LED matrix and LCD. This project was definitely a learning experience especially just about the need to adapt quickly, which will be really helpful moving onto projects that have even more moving parts involved!
Comments are closed.