
A three-in-one notebook, reading light, and timer that helps the user stay on task in a meeting or while working independently.
By Katie McTigue
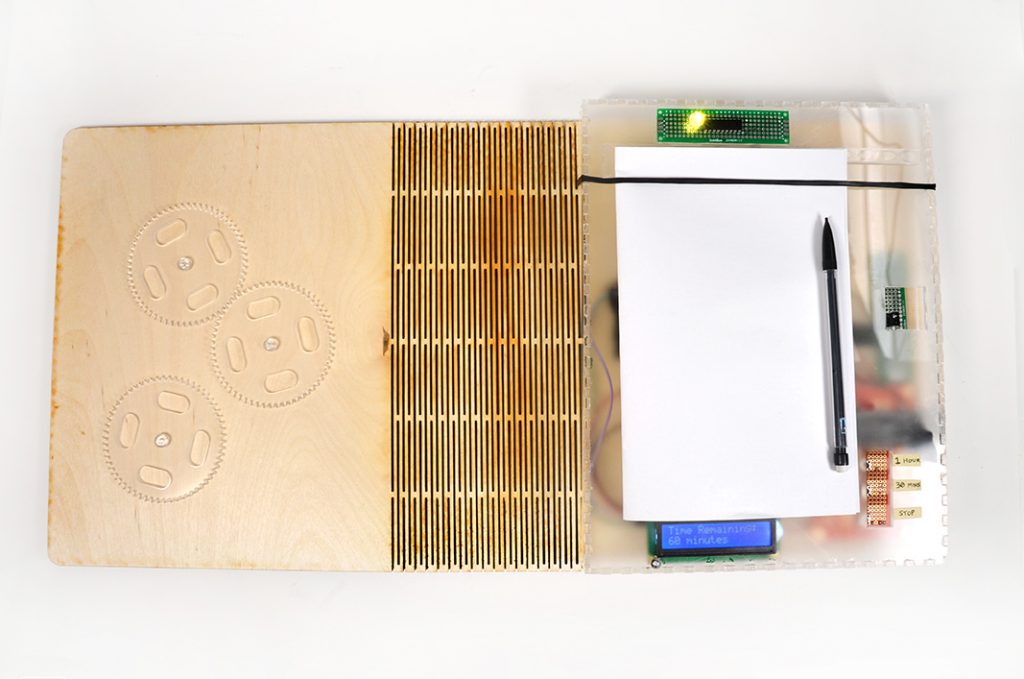
The custom laser-cut notebook cover contains an acrylic holder that fits any A7 sized notebook. Laser-cut gears are mounted to the front cover as a fidget toy for the user (me!) to occupy their hands as they think and listen.
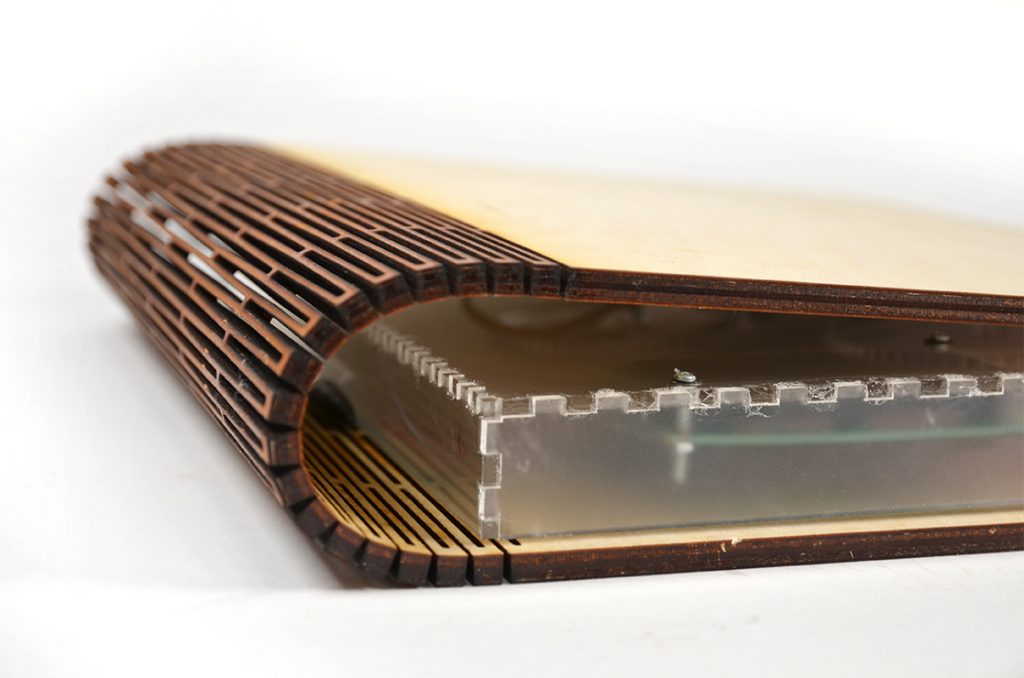
The spine of the book is a (surprisingly durable) living hinge.
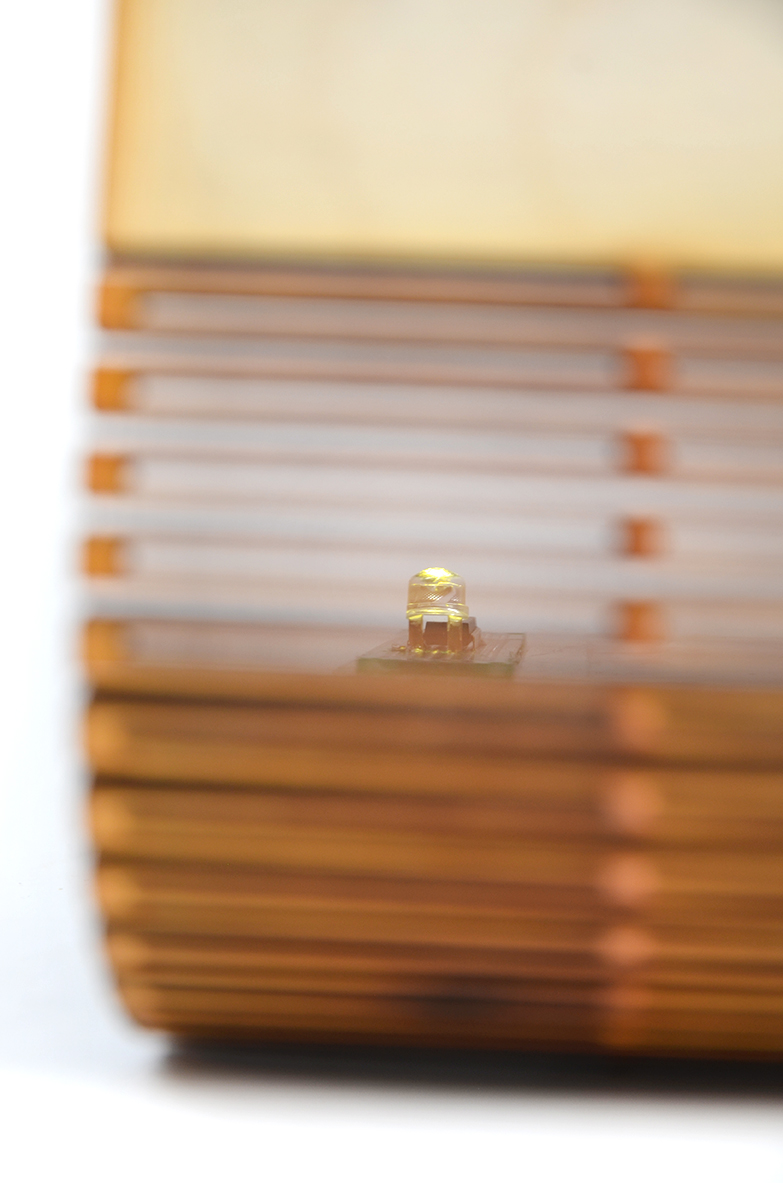
When the notebook is open, the LED reading light is always on.
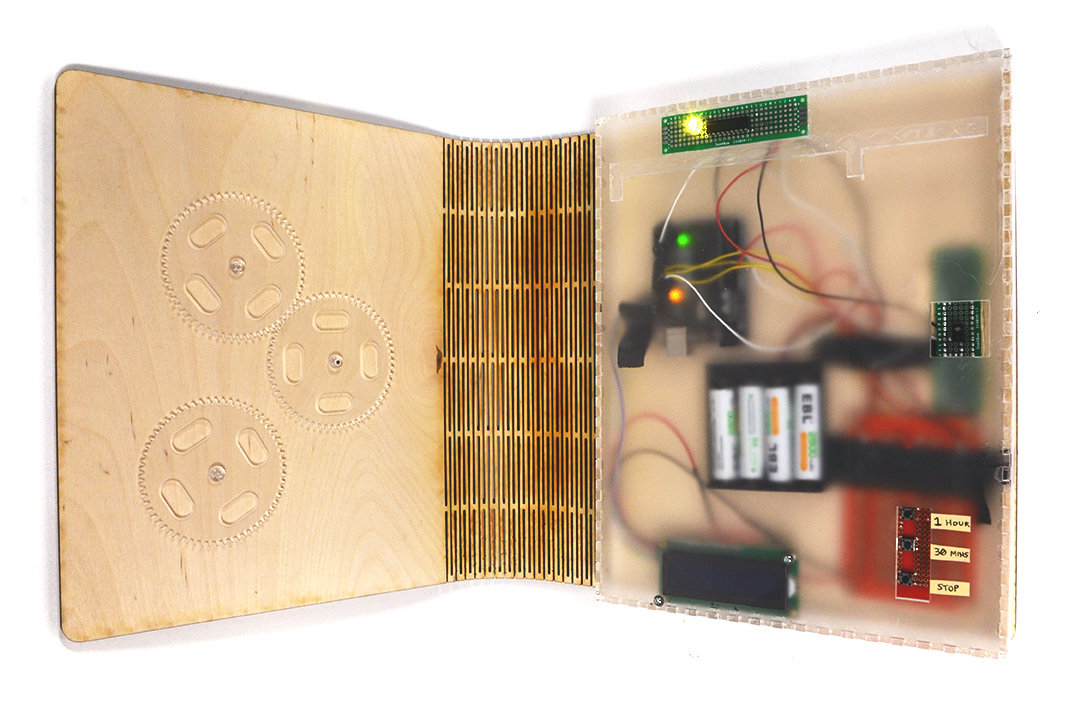
All the messy behind-the-scenes electronics of the device, including its battery pack, fit neatly under an acrylic base.
How does it work?
Reading Light
The infrared proximity sensor mounted in the acrylic base detects if there is the top cover of the book is within close range. The book closing serves as an “OFF” switch for the whole device, powering off both the reading light and timer.
Meeting Timer
The timer was designed to help me stay on track when I am running a meeting at work. Quick-start buttons are provided for common meeting lengths: 30 minutes and one hour. The LED light will flash 15 times when 15 minutes remain, and flash 5 times when 5 minutes remain to remind me to discuss next steps and deliverables and then wrap things up. The timer could also be used to stay on task while working on a task individually.
My Process
Early Drafts
I began the brainstorming process by thinking about little problems I find myself facing on a daily basis. One of the first things that came to mind was that I have a hard time focusing when in meetings. When someone else is running the meeting, I often become distracted working on my computer or doodling in my notebook. When I am running the meeting, I sometimes end up on tangents and fail to complete the agenda I had outlined, or run out of time before discussing next steps and deliverables with the group.
I sketched out about 50 bad ideas before reaching this one that addressed this problem and also covered reasonable scope that would challenge me technically and could be accomplished within the timeframe.

Sketches exploring patterns for the laser-cut book jacket. I decided against the open-box approach illustrated here because of the bulkiness and weight. Side note: the Micron pen cameo here is a lie as this drawing was clearly done with an inferior pen.
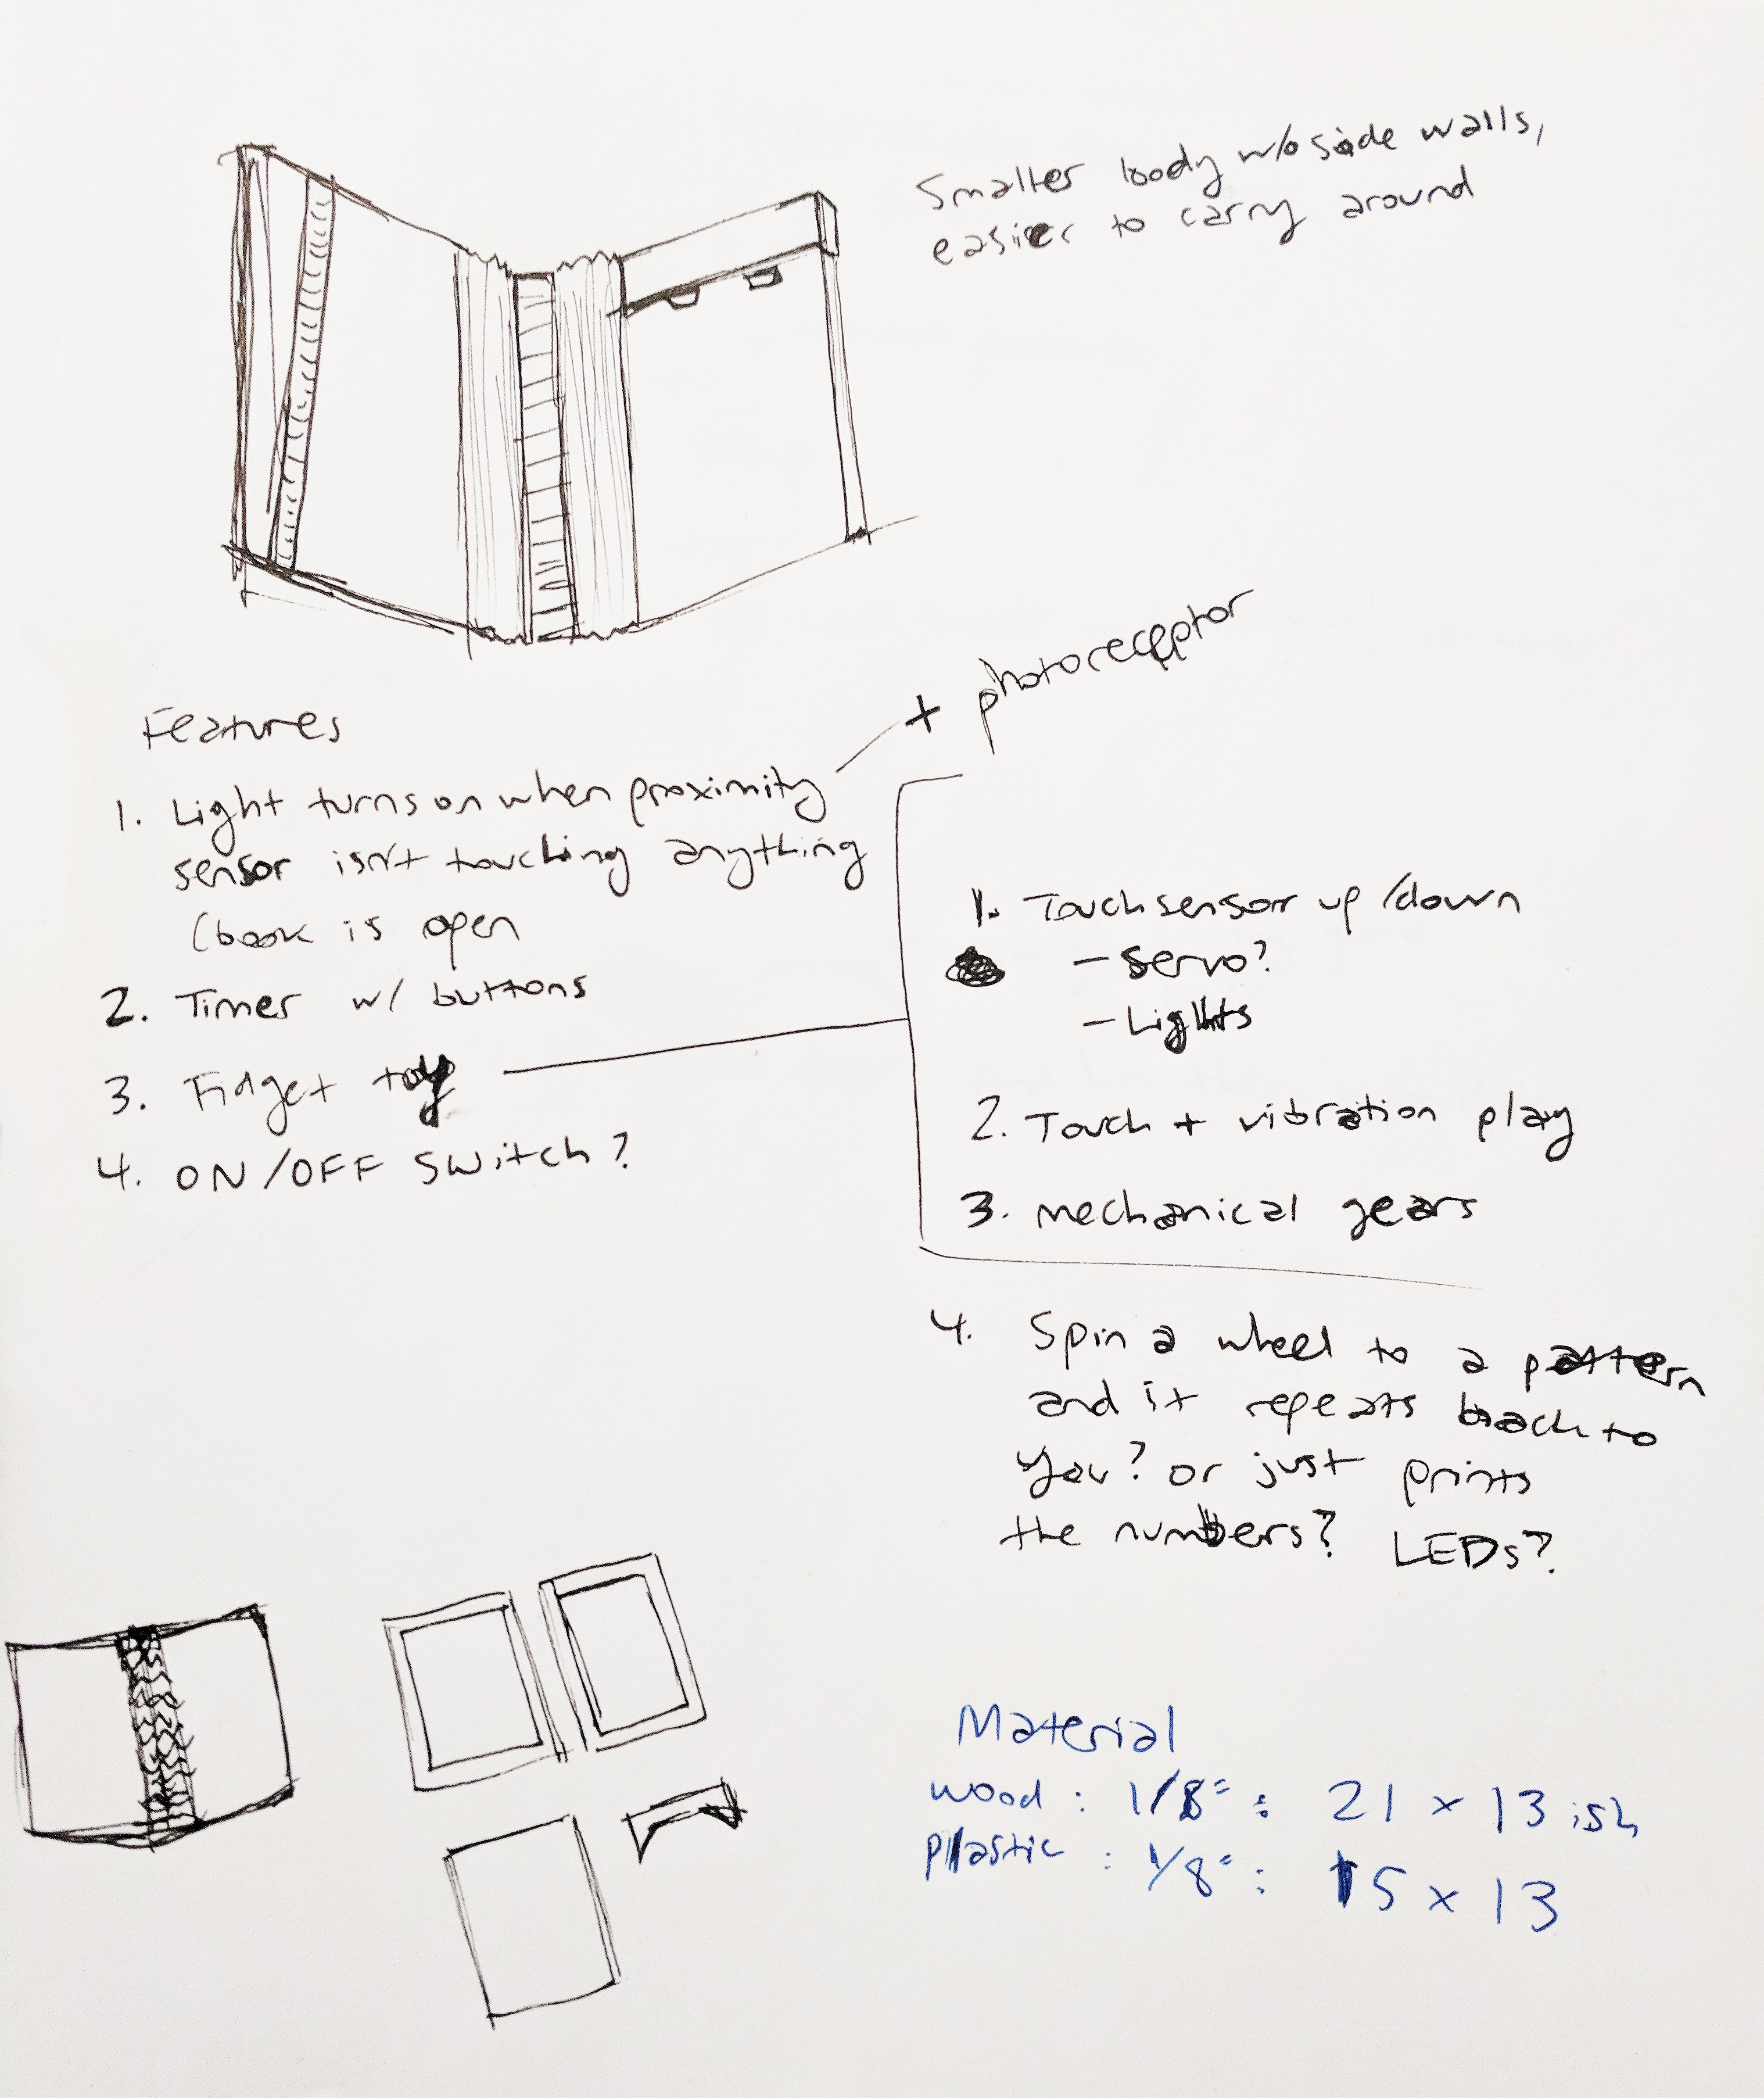
Sketches and notes I created just before jumping into Adobe Illustrator to finalize the patterns, and purchasing materials. Now that’s a Micron pen. Much better.
Missteps (I Mean, Learning Opportunities)
Misstep #1:
After I was set on the functionality I wanted to include in my device, I began prototyping on a breadboard. It quickly came to my attention that the wimpy LED light I was using was not going to cut is as a reading light, and in fact probably would not get the users attention even if it was flashing.
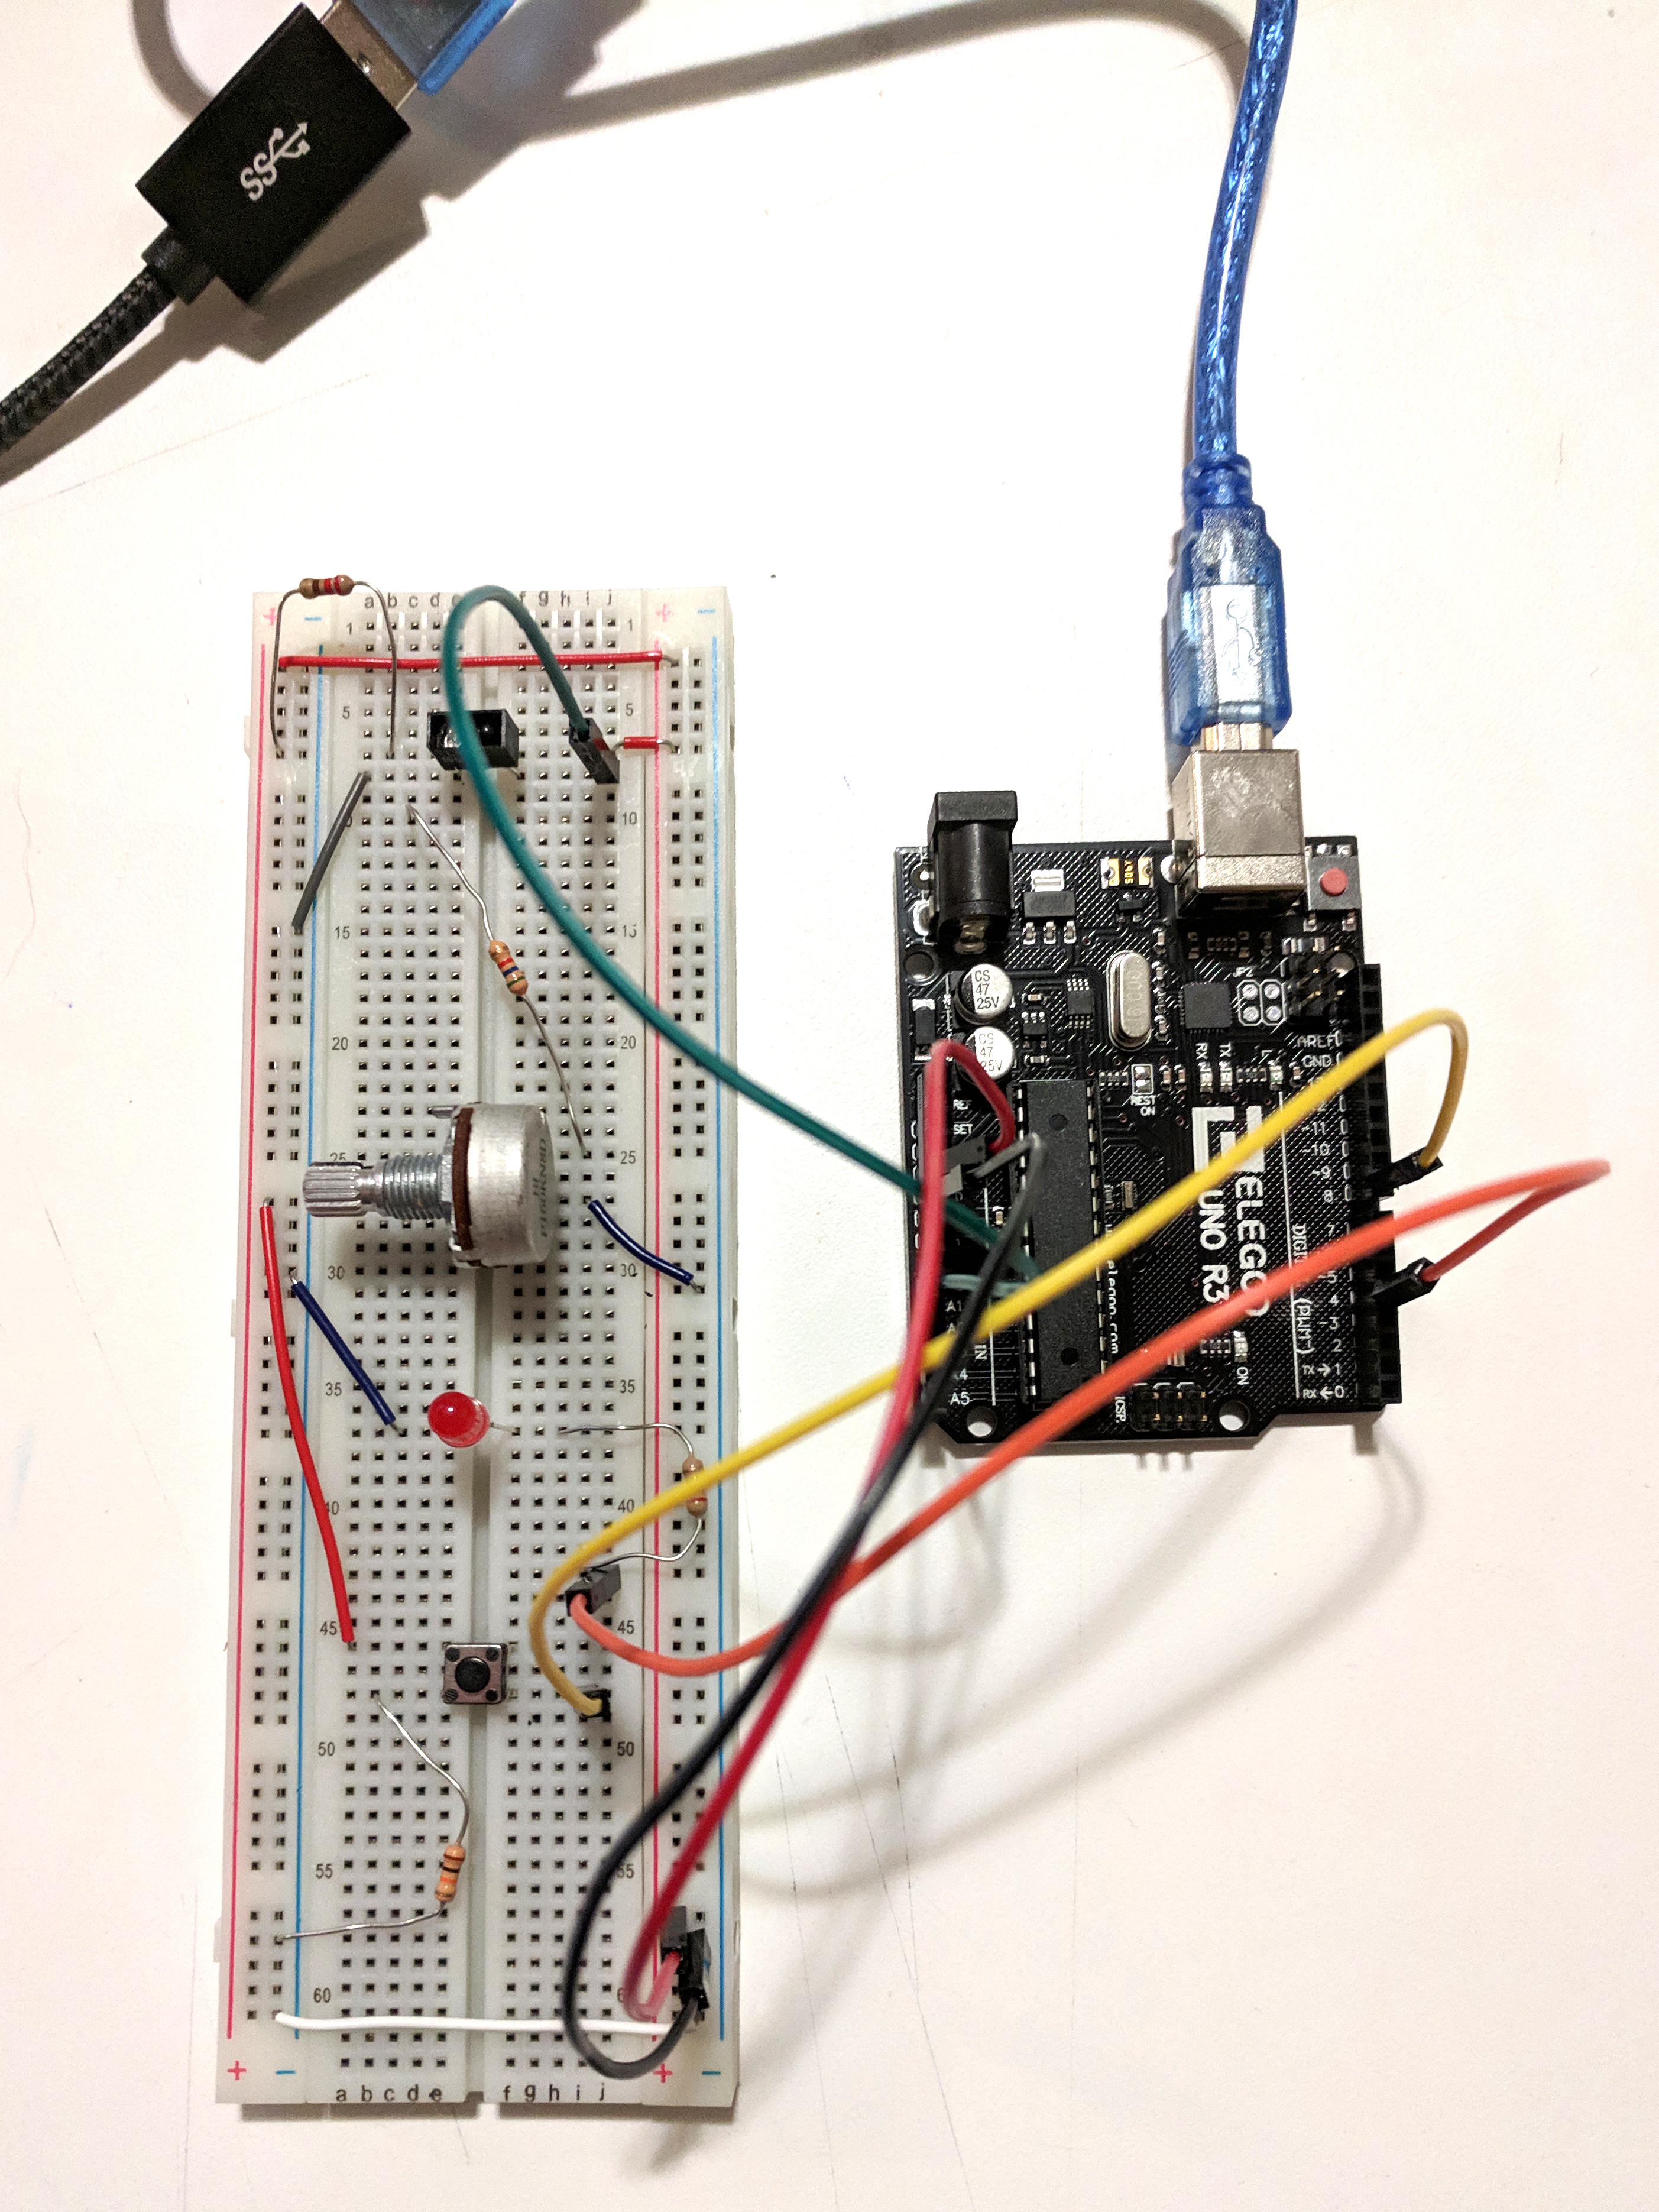
My wimpy-LED-prototype.
The Solution:
I learned to use a ULN2803 transistor to power a bigger, brighter LED!
Misstep #2:
In my original brainstorming session I had ambitiously thought I would build an electrical fidget toy of sorts into the notebook jacket. I thought it would be an interesting design challenge to imagine of simple fidget game that could be “played” absentmindedly with touch alone, no visuals or sound. I anticipated using pressure sensors and vibrations.
After putting some more thought into it (and stressing about the many moving parts I was already wrangling) I came to the conclusion that I was over-engineering a solution just for the sake of including more electrical components, when the “fidget problem” could be solved much more elegantly with mechanical components alone.
The Solution:
I put my extra acrylic to use laser-cutting three gears with fingertip-sized holes. They are very satisfying to spin, are silent, and are not visually distracting.
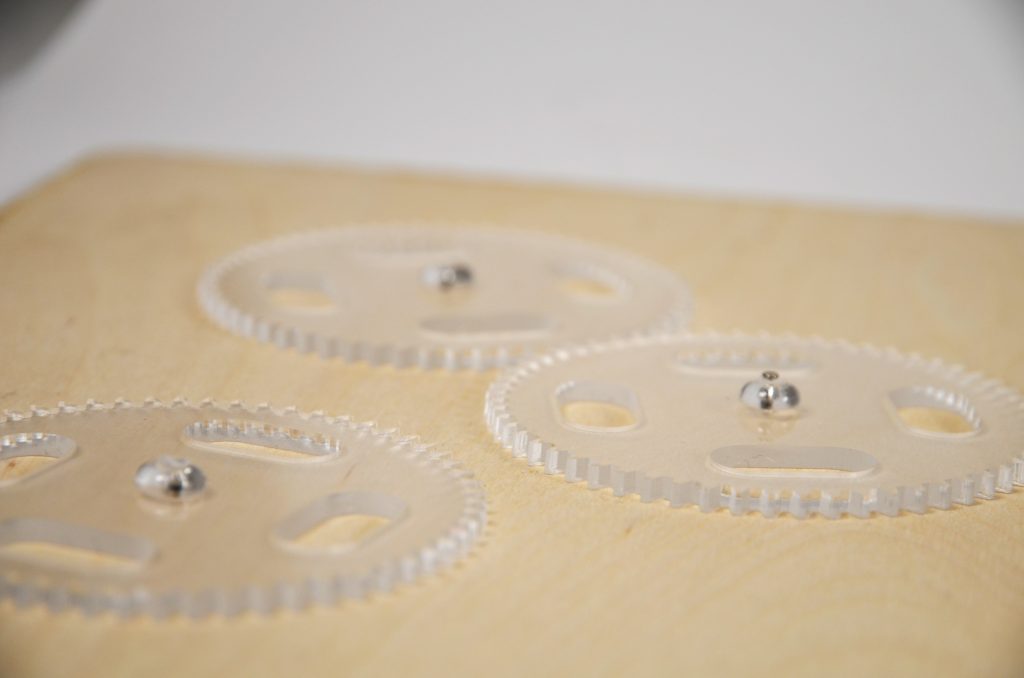
People seem very confused about why I left one gear disconnected from the other two. My reason was that it has less friction, and provides a slightly varied experience. Shrug.
Iteration
Mid-fidelity Prototyping
In addition to a “works-like” prototype (see the breadboard shenanigans above) I also created a “feels-like” prototype to test the size and weight of the product and see if it was something I would want to carry around.
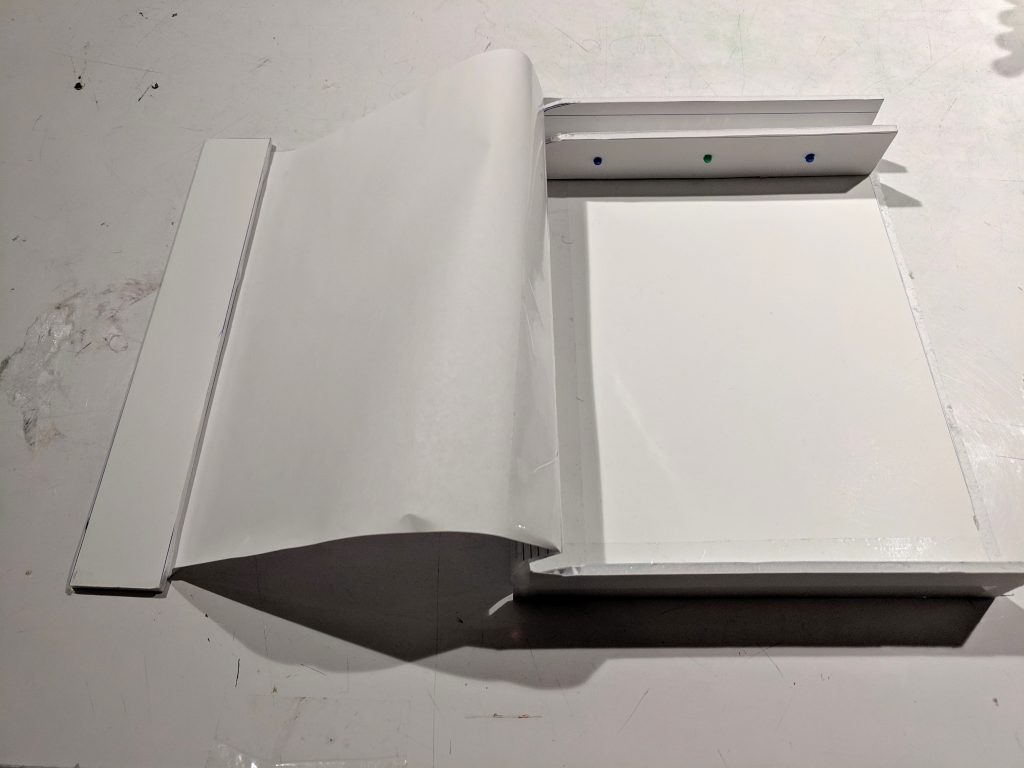
My foam-core prototype.
User Testing and Critique
I received positive feedback on my foam-core prototype from my instructors, and they indicated that I was on the right track.
However, I was not pleased. The 8.5 x 11 sketch notebook I currently carry around with me every day is a precious and personal object that fits perfectly in my bag. My bulky foam-core prototype felt more like a second laptop to carry around– and not like a sleek Macbook Air, like an old Dell monstrosity. The bottom flap that help the electronics blocked my wrist as I tried to draw in the notebook, and was pretty miserable, ergonomically. This was the pivot point for me deciding on the flat book jacket approach.
Final Product and Critique
Overall I was surprised at how smoothly this project went considering how many new things I challenged myself to try. (Smoothly: a word which in this case means there were only one or two 1am-in-the-lab moments in which I was certain I had cooked my Arduino, or melted my protoboard into an unusable fire hazard.) Before this project I had never soldered anything, never used a laser cutter, and more or less had never designed a physical product. I even audited a 3-weekend micro class in laser cutting that coincided with the timeline of this project.
Not pictured: my first attempt at soldering, which resulted in an LED that only worked if you held it very tightly at a specific angle. RIP.
I am satisfied with the device from a product design perspective. I believe I successfully addressed the problem I set out to solve, and also crafted an aesthetically satisfying and personalized object worthy of the same type of affection I attach to my good old “un-smart” sketchbook.
In my critique session with my peers, they had mostly positive things to say about the fabrication and experience of my device, and had some very helpful suggestions for how I might switch out some parts to make the it work more efficiently and be more exact.
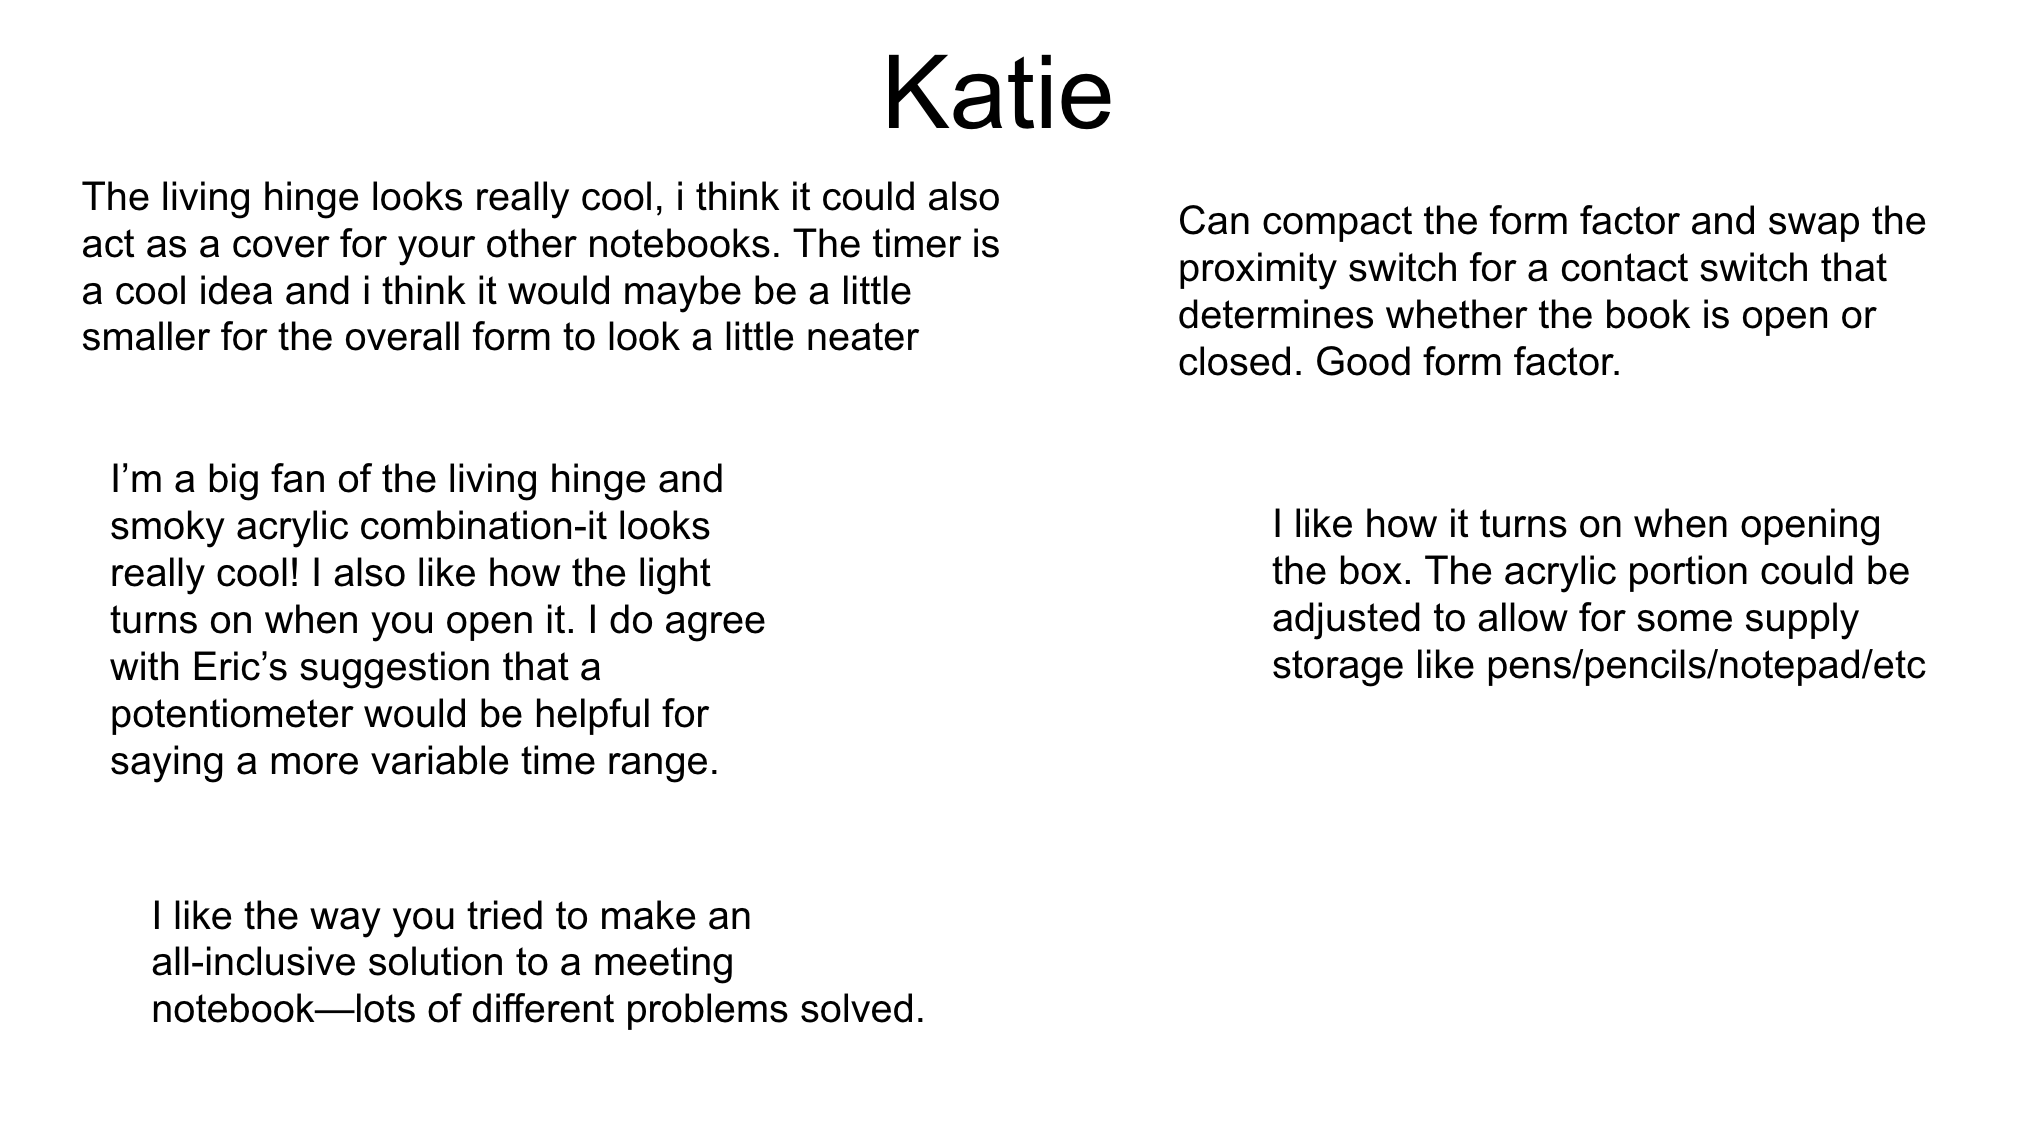
A screenshot of the google slide containing my classmates’ feedback on my demo.
Multiple students suggested that I use a smaller LCD or another solution altogether for communicating time data to the user, because the LCD screen takes up a lot of real estate considering its only real purpose is to display two digits. One student even (verbally) suggested I replace it with just the blinking light. I agree with the suggestion of using a smaller screen, but I don’t believe the blinking light alone would be as useful.
I appreciated the suggestion of using a contact switch in place of the IR sensor. In it’s current state, if the user accidentally sets their arm down on the IR sensor the whole device shuts off, which could be quite frustrating.
I have one big critique for myself that did not come up in the discussion. The battery pack is very hard to access because it is buried under the acrylic case surrounded by wires. If I were to improve on my device without completely rebuilding it, I would cut a hole in the back of the book and flip the battery pack upside down so that it could be opened without taking the whole device apart.
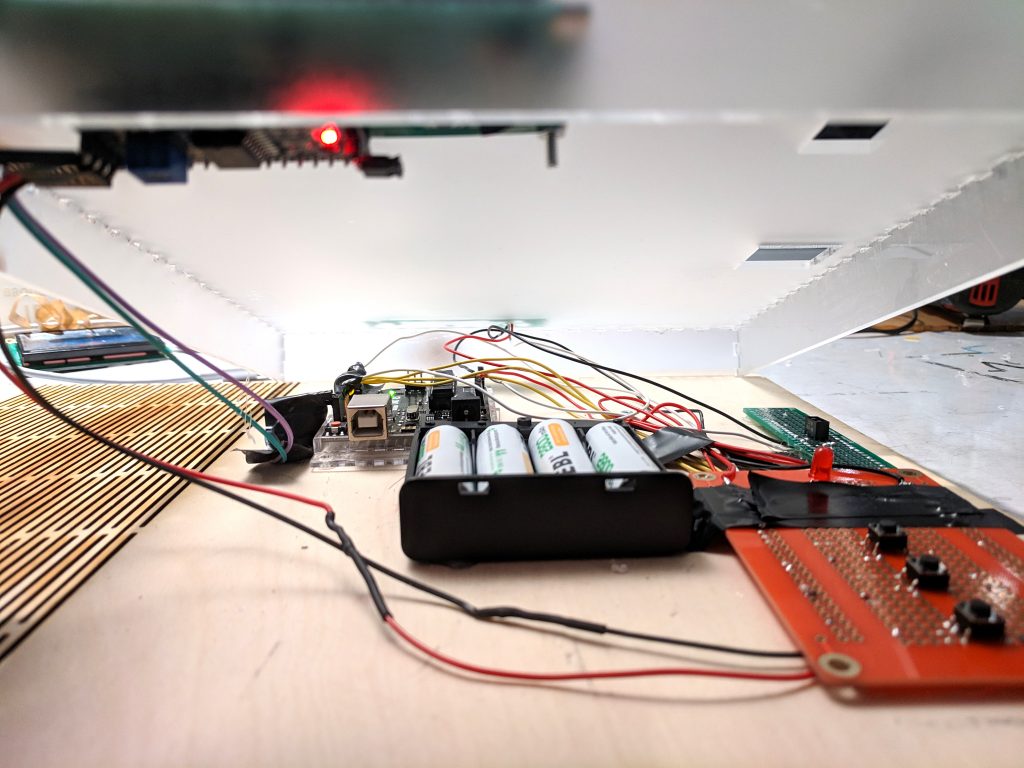
The inaccessible battery pack.
So now I am going to use this device every day and it will solve all my problems and make the world a better place, right? Not exactly. Despite all the nice self-flattering things I just said, this product is not something I will actually use. It is still too bulky and fragile, has poor battery life, and most importantly, at the end of the day solves problems that are better solved by a smart phone and a fidget spinner. For these reasons I am considering this an extremely successful learning experience, and a less-than-successful outcome.
In addition to the hard skills I learned from this process, I got a lot out of going through the motions of iterative, human-centered design with a physical product. I LOVE prototyping with foam-core, and definitely see myself using this technique again.
I have also once again learned the lesson I seem to learn with every project, but apparently need to keep re-learning: test every dang electrical component (and line of code) by itself (thoroughly) before you put them all together. Apparently this concept also applies to soldering. Prototyping on the breadboard and then copying the design onto a protoboard worked pretty well, but I still managed to make lots of missteps. I mean, learning opportunities.
Tech Specs
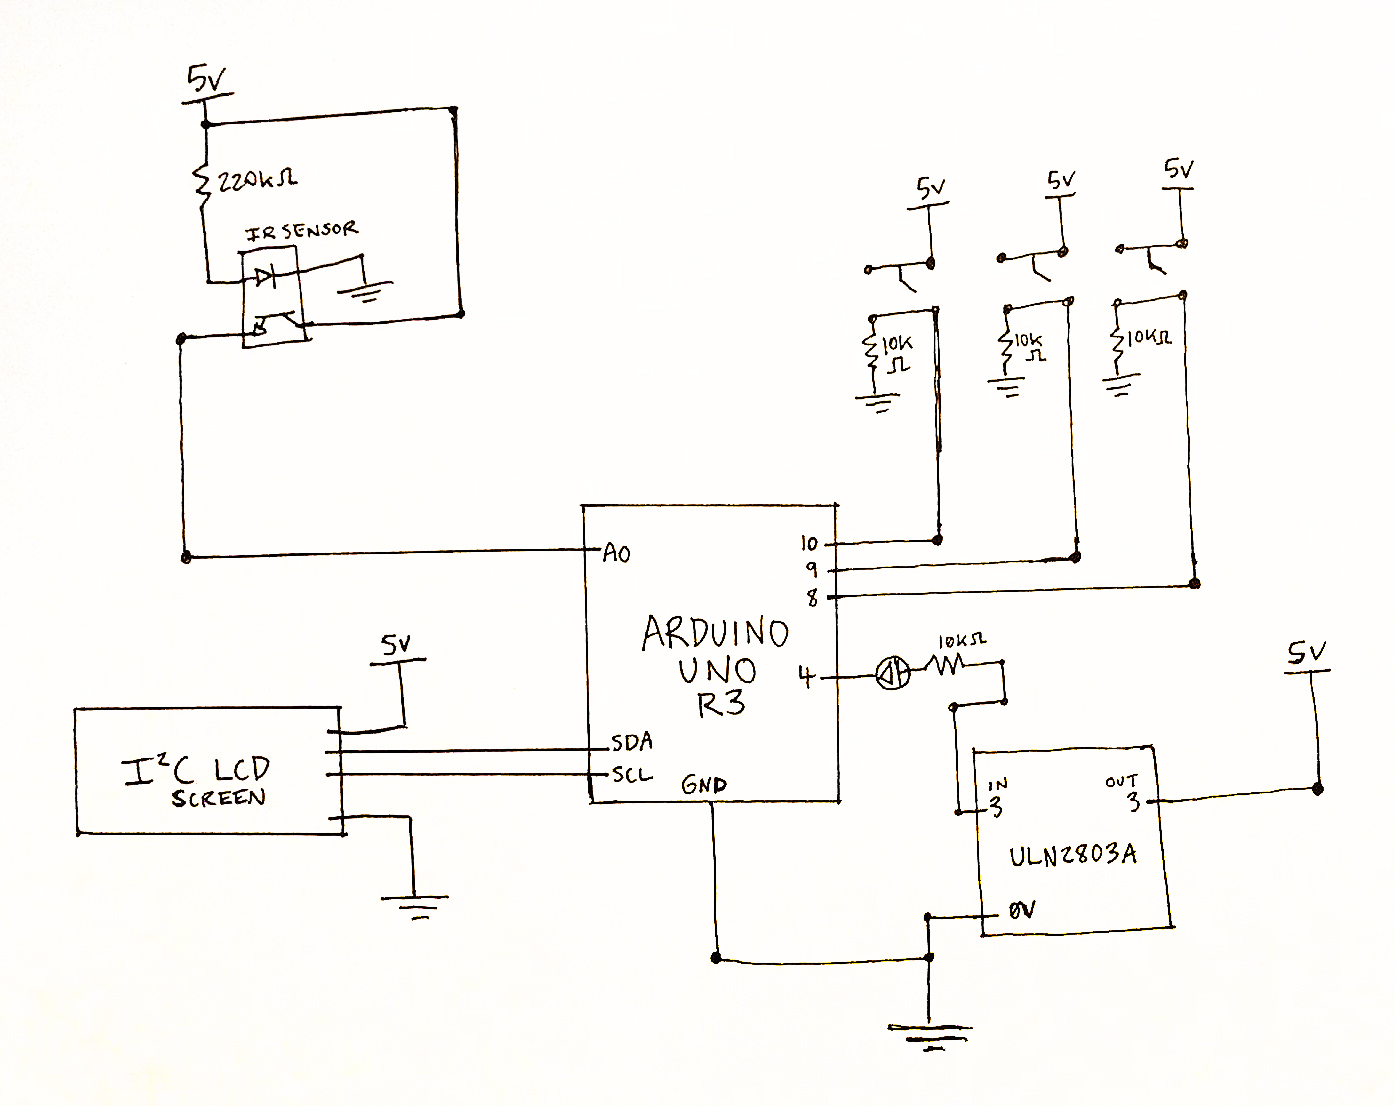
Schematic
Code
/*
   Project 2
   Katie McTigue

   Description:
   A timer is programmed to two default options: 30 minutes or 60 minutes.
   One pushbutton is used to start the timer for each option.
   One pushbutton "resets" the timer.
   When the timer reaches two designated "warning" points, an LED flashes the number of minutes remaining.
   An IR proximity sensor detects if any object is within a very close range.
   If there is nothing close, it turns on an LED.
   If at any point an object is close (meaning the device is closed) both the LED and the timer turn off.

   Inputs:
   1 IR proximity sensor
   3 pushbuttons

   Outputs:
   1 LED
   1 LCD display

   Misc:
   1 ULN2803 transistor
   Misc resistors

   Additional Libraries:
   TimeLib: Arduino's recommended timer library
   LiquidCrystal LCD screen library
*/

#include <Wire.h>
#include <LiquidCrystal_I2C.h>
LiquidCrystal_I2C screen(0x27, 16, 2);
#include <TimeLib.h>

const int IRPIN = A0; // green
const int TIMER30BUTTONPIN = 9; // yellow wire
const int TIMER60BUTTONPIN = 8; // yellow wire
const int RESETBUTTONPIN = 10; // yellow wire
const int LEDPIN = 4; //orange
const int READINGLIGHT1PIN = 11;

time_t currentMinute;
const int ledFlashLength = 200;
const unsigned long warning1At = 15; //warn at 15 mins
const unsigned long warning2At = 5; //warn at 5 mins
boolean warning1Given = false;
boolean warning2Given = false;
boolean timerMode = false;
int initialTimerVal = 60; //default timer val of 60
int timerVal = initialTimerVal;

void setup() {
  pinMode(IRPIN, INPUT); // green wire
  pinMode(TIMER30BUTTONPIN, INPUT); //yellow wire
  pinMode(LEDPIN, INPUT); //orange wire
  Serial.begin(9600);
  Serial.println("Power on");
  screen.init(); //initialize lcd screen
//  digitalWrite(LEDPIN, HIGH);
}

void loop() {
  //TODO: Read IR sensor
  int readVal;
  readVal = analogRead(IRPIN); // do the analog read and store the value
  //Serial.println(readVal); // push the most recent value to the computer

  //  Check if book is closed. If IR senses the cover, turn light off and reset timer
  if (readVal < 30) {
    digitalWrite(READINGLIGHT1PIN, HIGH);
    Serial.println("Reading light on");
  } else {
    digitalWrite(READINGLIGHT1PIN, LOW);
    Serial.println("Reading light off");
    screen.noBacklight();

    if (timerMode) {
      resetTimer();
    }
  }

  int button30State;
  button30State = digitalRead(TIMER30BUTTONPIN);
  int button60State;
  button60State = digitalRead(TIMER60BUTTONPIN);
  int resetButtonState;
  resetButtonState = digitalRead(RESETBUTTONPIN);

  //check all button states

  //if either timer button is pressed
  if ((button60State == HIGH) || (button30State == HIGH)) {
    //if not already in timer mode (only want to happen once)
    if (timerMode == false) {
      //start timer mode!
      Serial.println("Start timer!");
      screen.init();
      screen.backlight();
      screen.print("Start timer!");
      timerMode = true;
      delay(1000);

      if (button60State == HIGH) {
        Serial.println("Button HIGH: 60 Minutes");
        initialTimerVal = 60;
      }

      if (button30State == HIGH) {
        Serial.println("Button HIGH: 30 Minutes");
        initialTimerVal = 30;
      }

      setTime(0);
      currentMinute = minute(now());
    }
  }


  //  Timer Reset
  if (resetButtonState == HIGH) {
    resetTimer();
  }

  if (timerMode == true) {

    //set time
    currentMinute = minute(now());
    Serial.print("Current Minute");
    Serial.println(currentMinute);
    timerVal = (initialTimerVal - currentMinute);

    //conditions
    if (timerVal == 0) {
      screen.clear();
      screen.home();
      screen.print("Time is up!");

      for (int i = 1; i <= 4; i++) {
        digitalWrite(READINGLIGHT1PIN, HIGH);
        delay(1000);
        digitalWrite(READINGLIGHT1PIN, LOW);
        delay(1000);
      }

      resetTimer();
    }

    //print results
    Serial.print("Time Remaining");
    Serial.println(timerVal);
    screen.home();
    screen.print("Time Remaining: ");
    screen.setCursor(0, 1);
    screen.print(timerVal);
    screen.print(" minutes");

    //time is warning minute, and warning has not already been given
    //flash the number of minutes remaining
    if ((timerVal == warning1At) && (warning1Given == false)) {
      int numberOfFlashes = warning1At;
      for (int i = 1; i <= numberOfFlashes; i++) {
        digitalWrite(READINGLIGHT1PIN, HIGH);
        delay(ledFlashLength);
        digitalWrite(READINGLIGHT1PIN, LOW);
        delay(ledFlashLength);
      }
      warning1Given = true;
    } else if ((timerVal == warning2At) && (warning2Given == false)) {
      int numberOfFlashes = warning2At;
      for (int i = 1; i <= numberOfFlashes; i++) {
        digitalWrite(READINGLIGHT1PIN, HIGH);
        delay(ledFlashLength);
        digitalWrite(READINGLIGHT1PIN, LOW);
        delay(ledFlashLength);
      }
      warning2Given = true;
    }
  }
}

//reset timer and turn off screen
void resetTimer() {
  Serial.println("Button HIGH: Reset Button");
  timerMode = false;
  screen.clear();
  screen.home();
  screen.print("Timer Stopped");
  screen.noDisplay();
  screen.noBacklight();
  warning1Given = false;
  warning1Given = true;
  initialTimerVal = 60;
  timerVal = initialTimerVal;
  setTime(0);
  delay(1000);
}
Comments are closed.