Overview
As a contact wearer, sometimes it’s hard to get around in the middle of the night when I can’t see, and I end up tripping over stuff. This device uses an LED strip and a sound detector to responsively turn on light when it registers a loud enough sound, so that I don’t need to physically press anything when I want to leave the room to get water or use the bathroom.
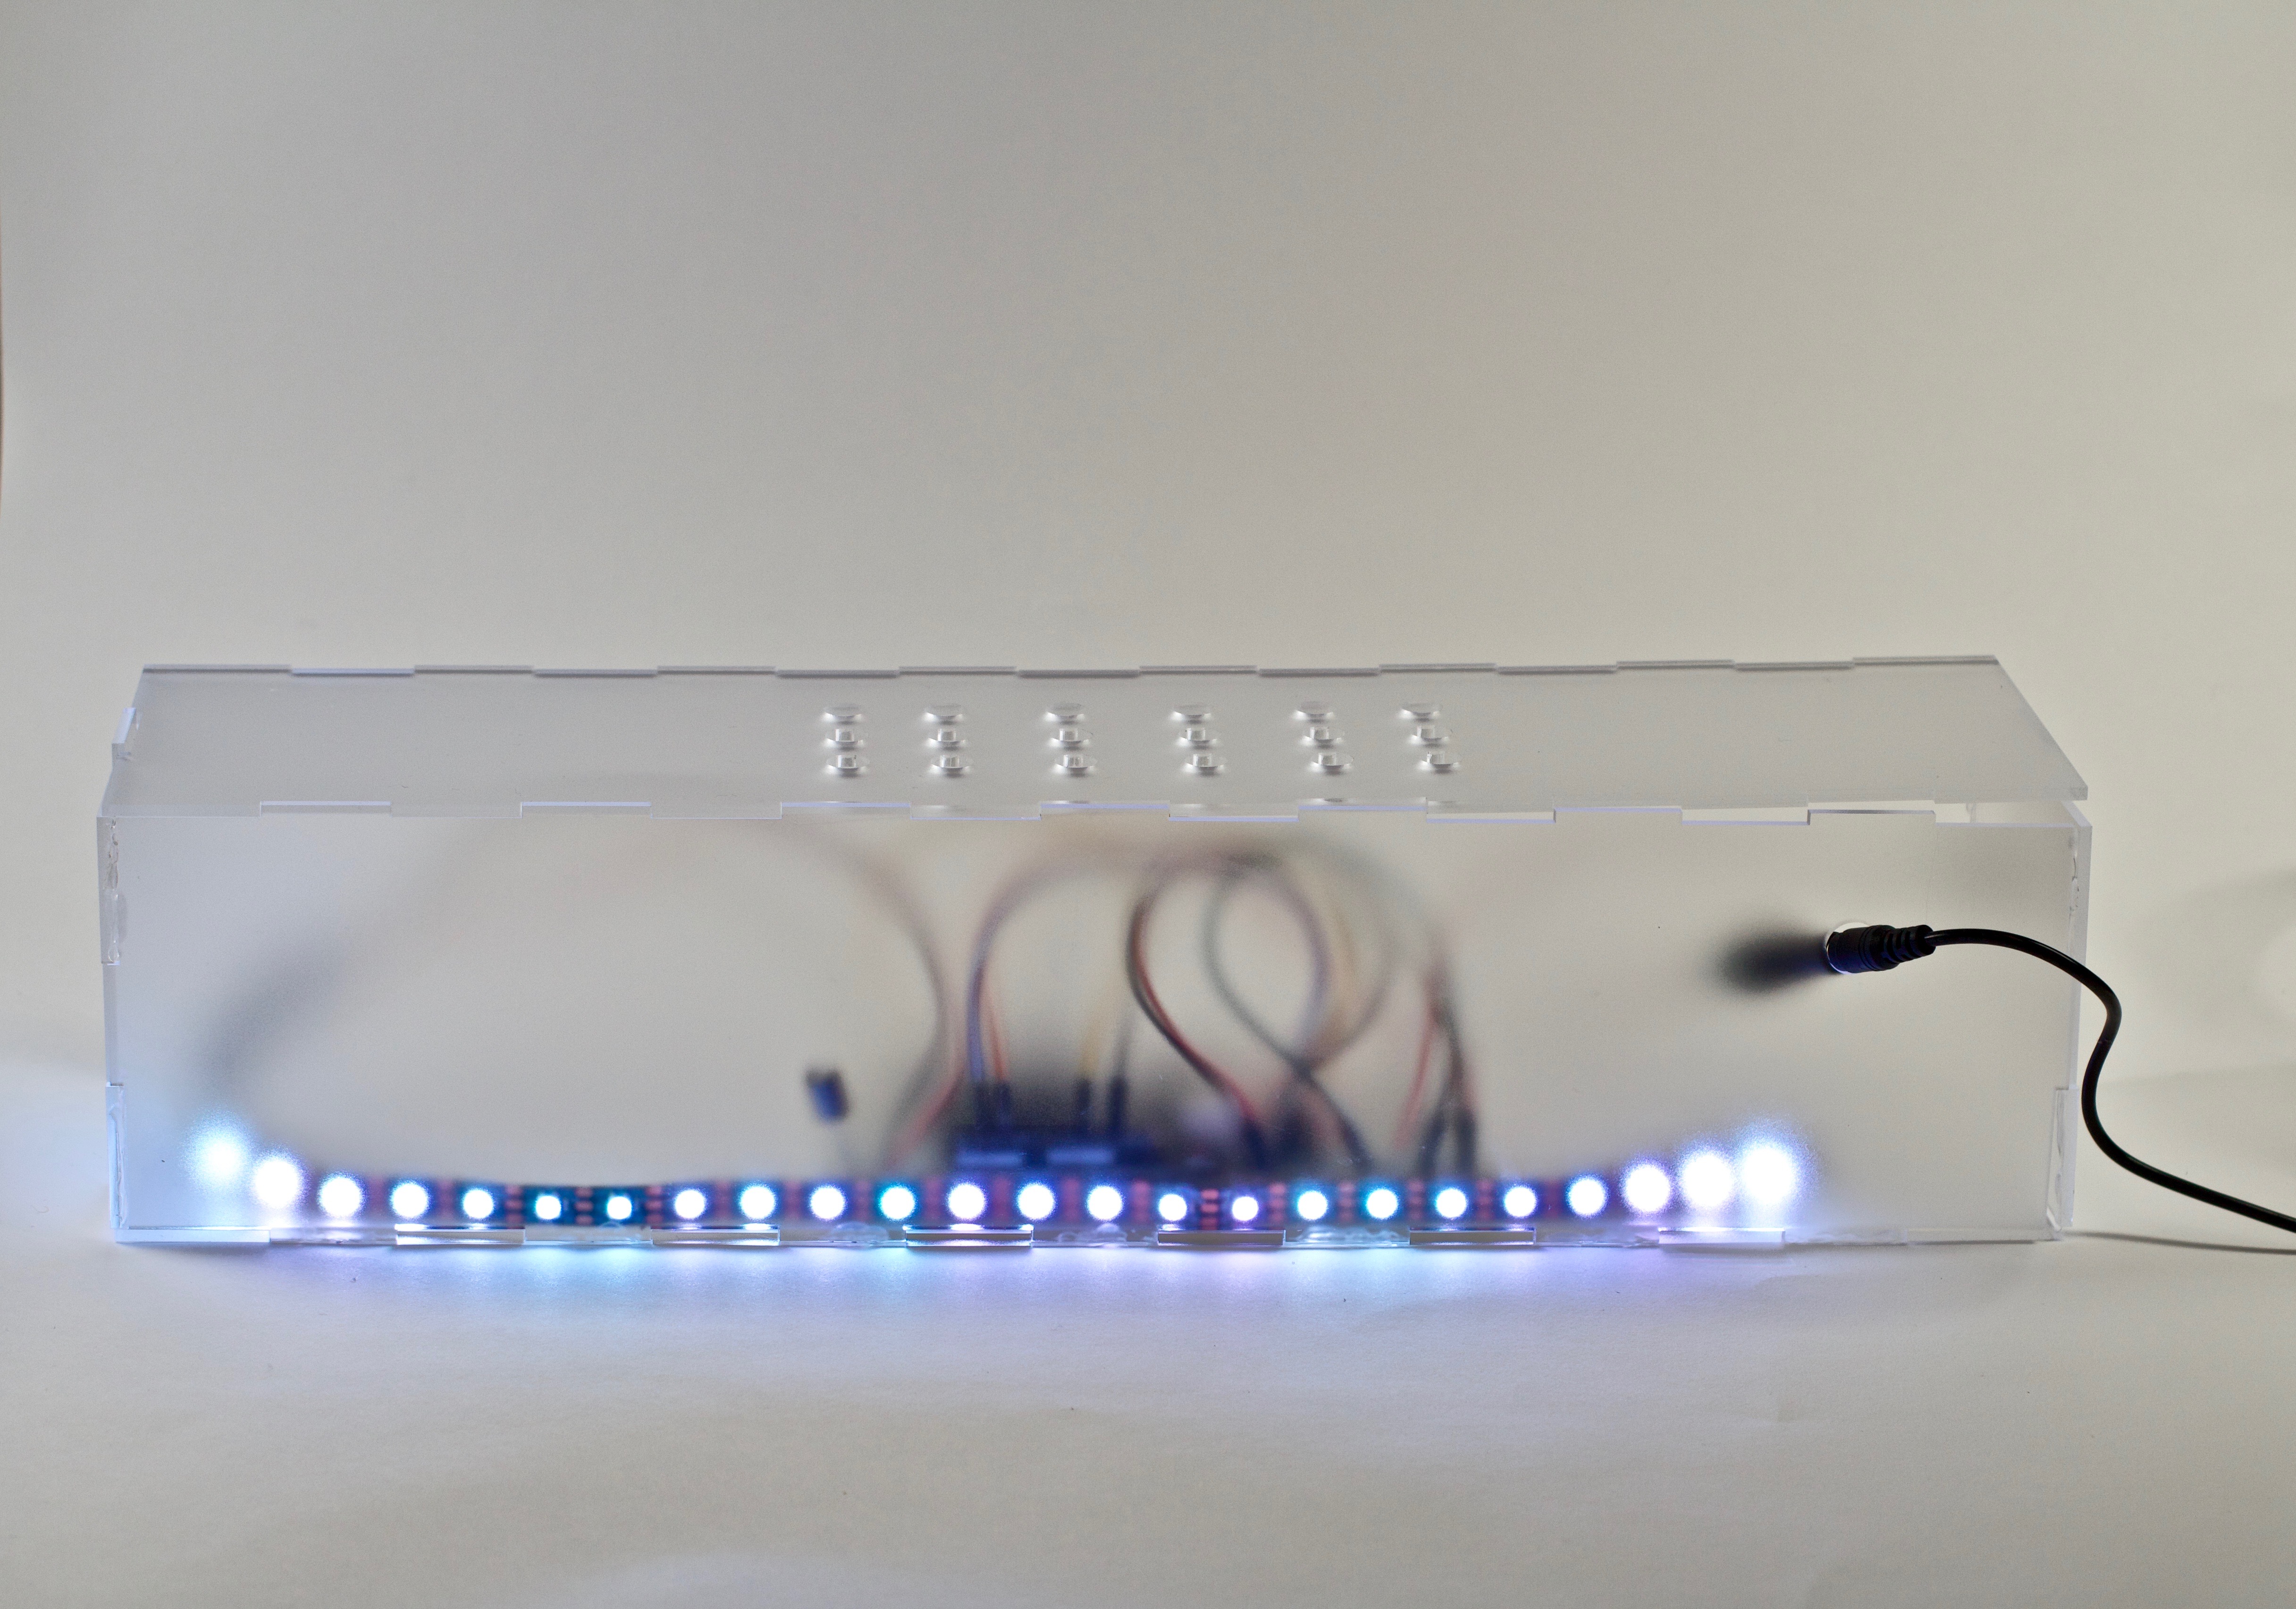
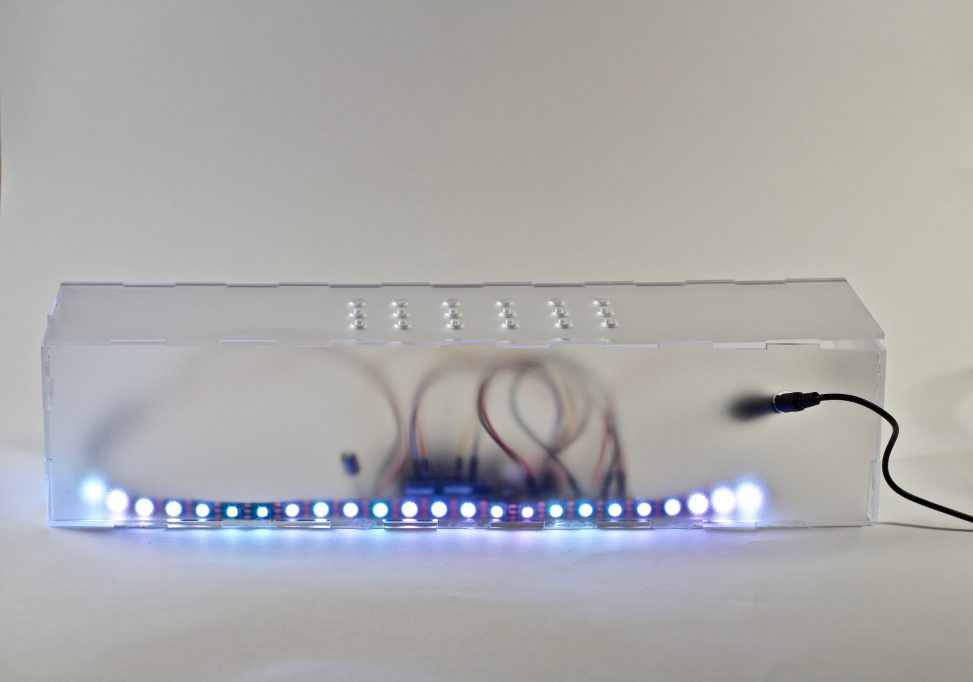
an overall shot of the lightbox when lit up after detecting a loud enough sound.
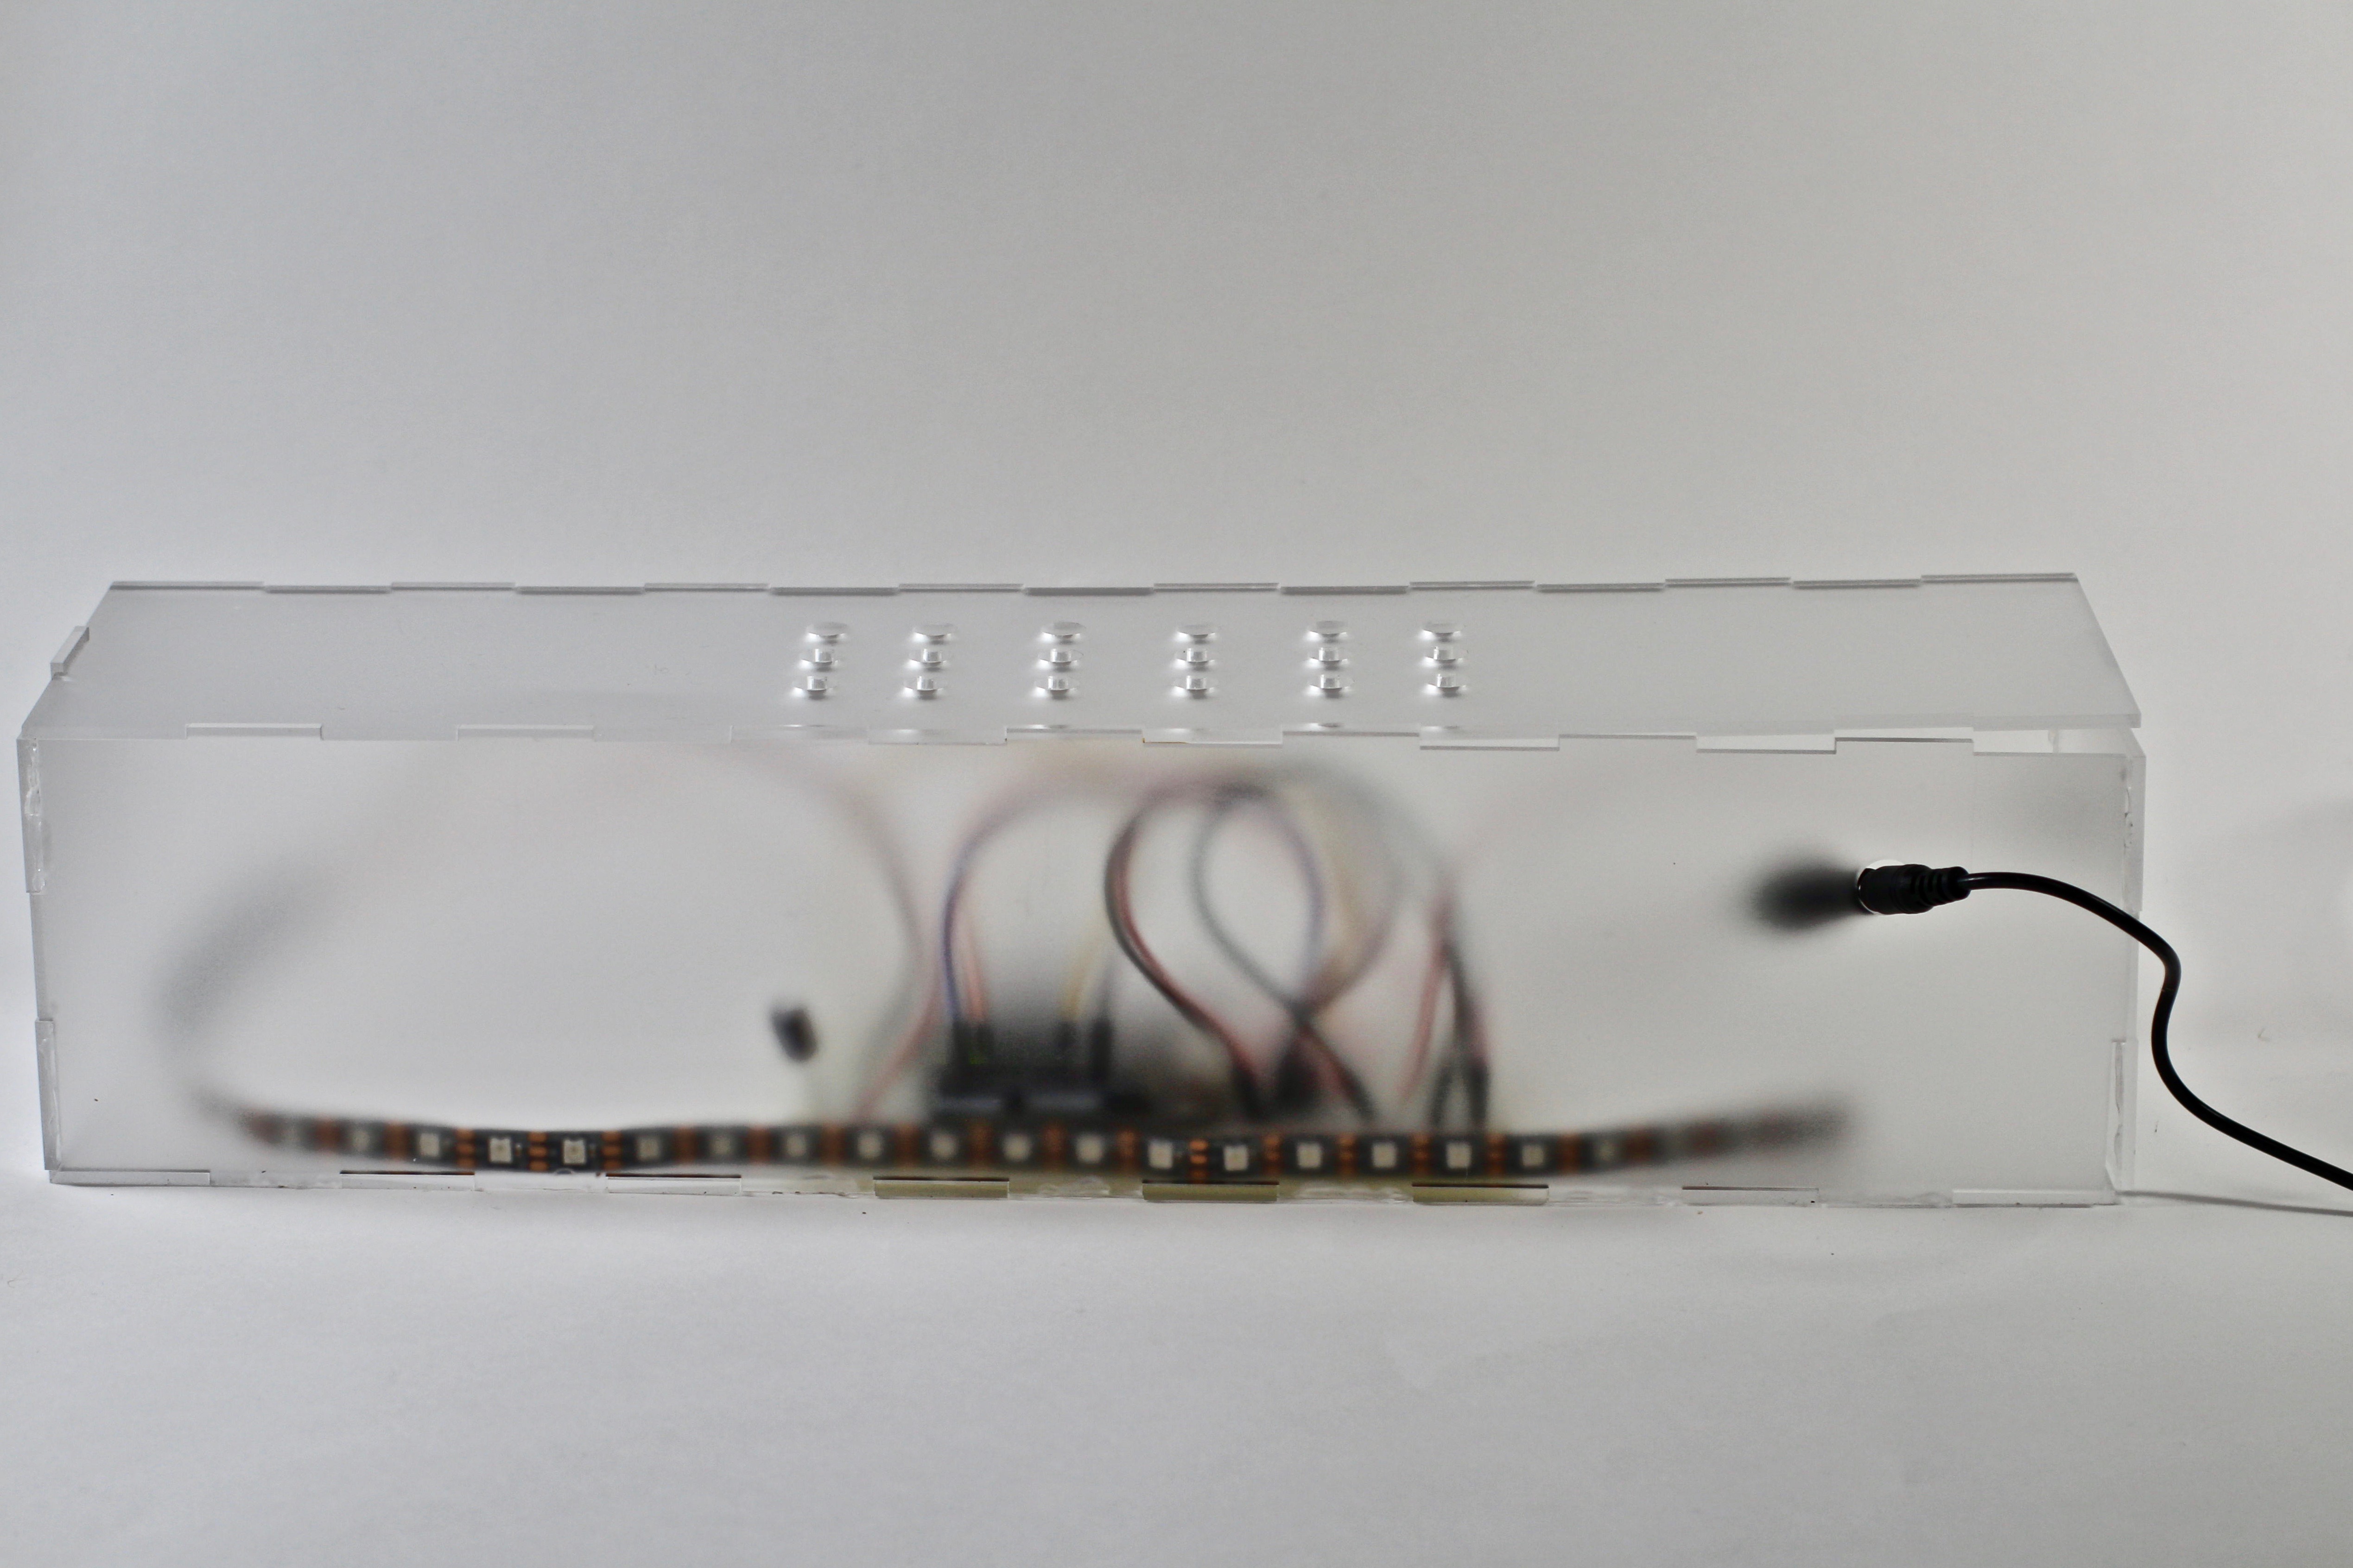
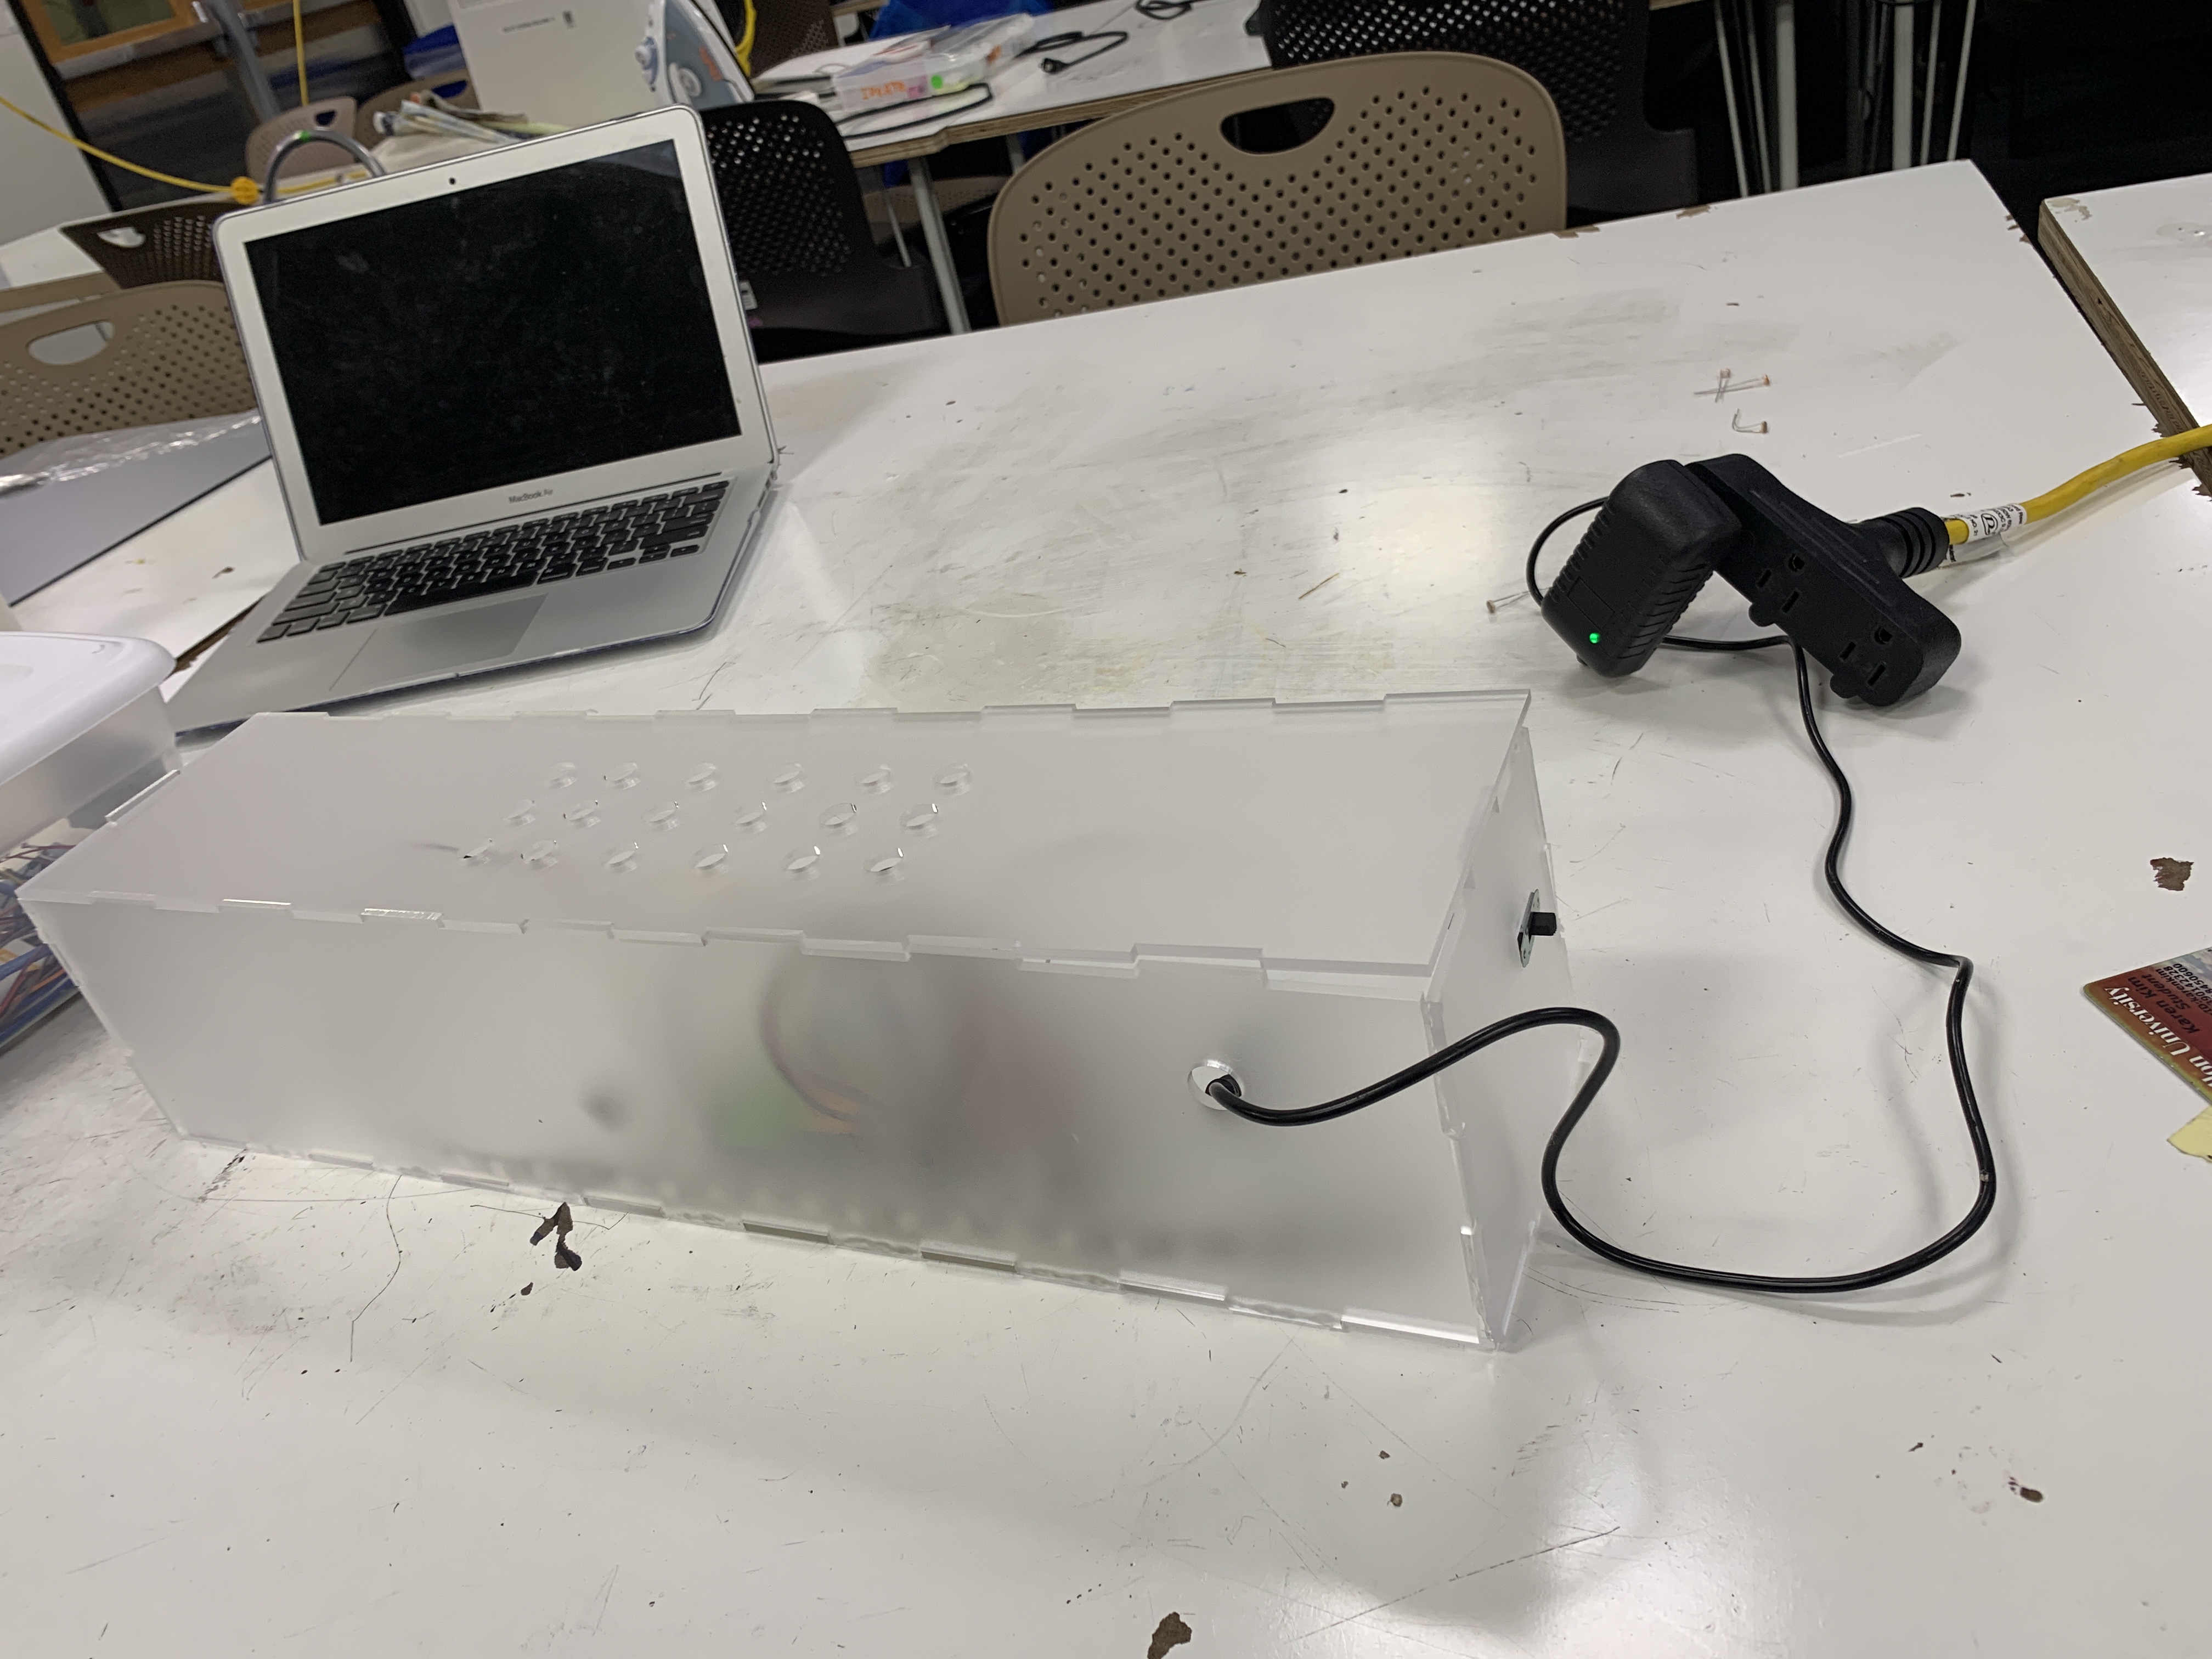
an overall shot of the lightbox when unlit.
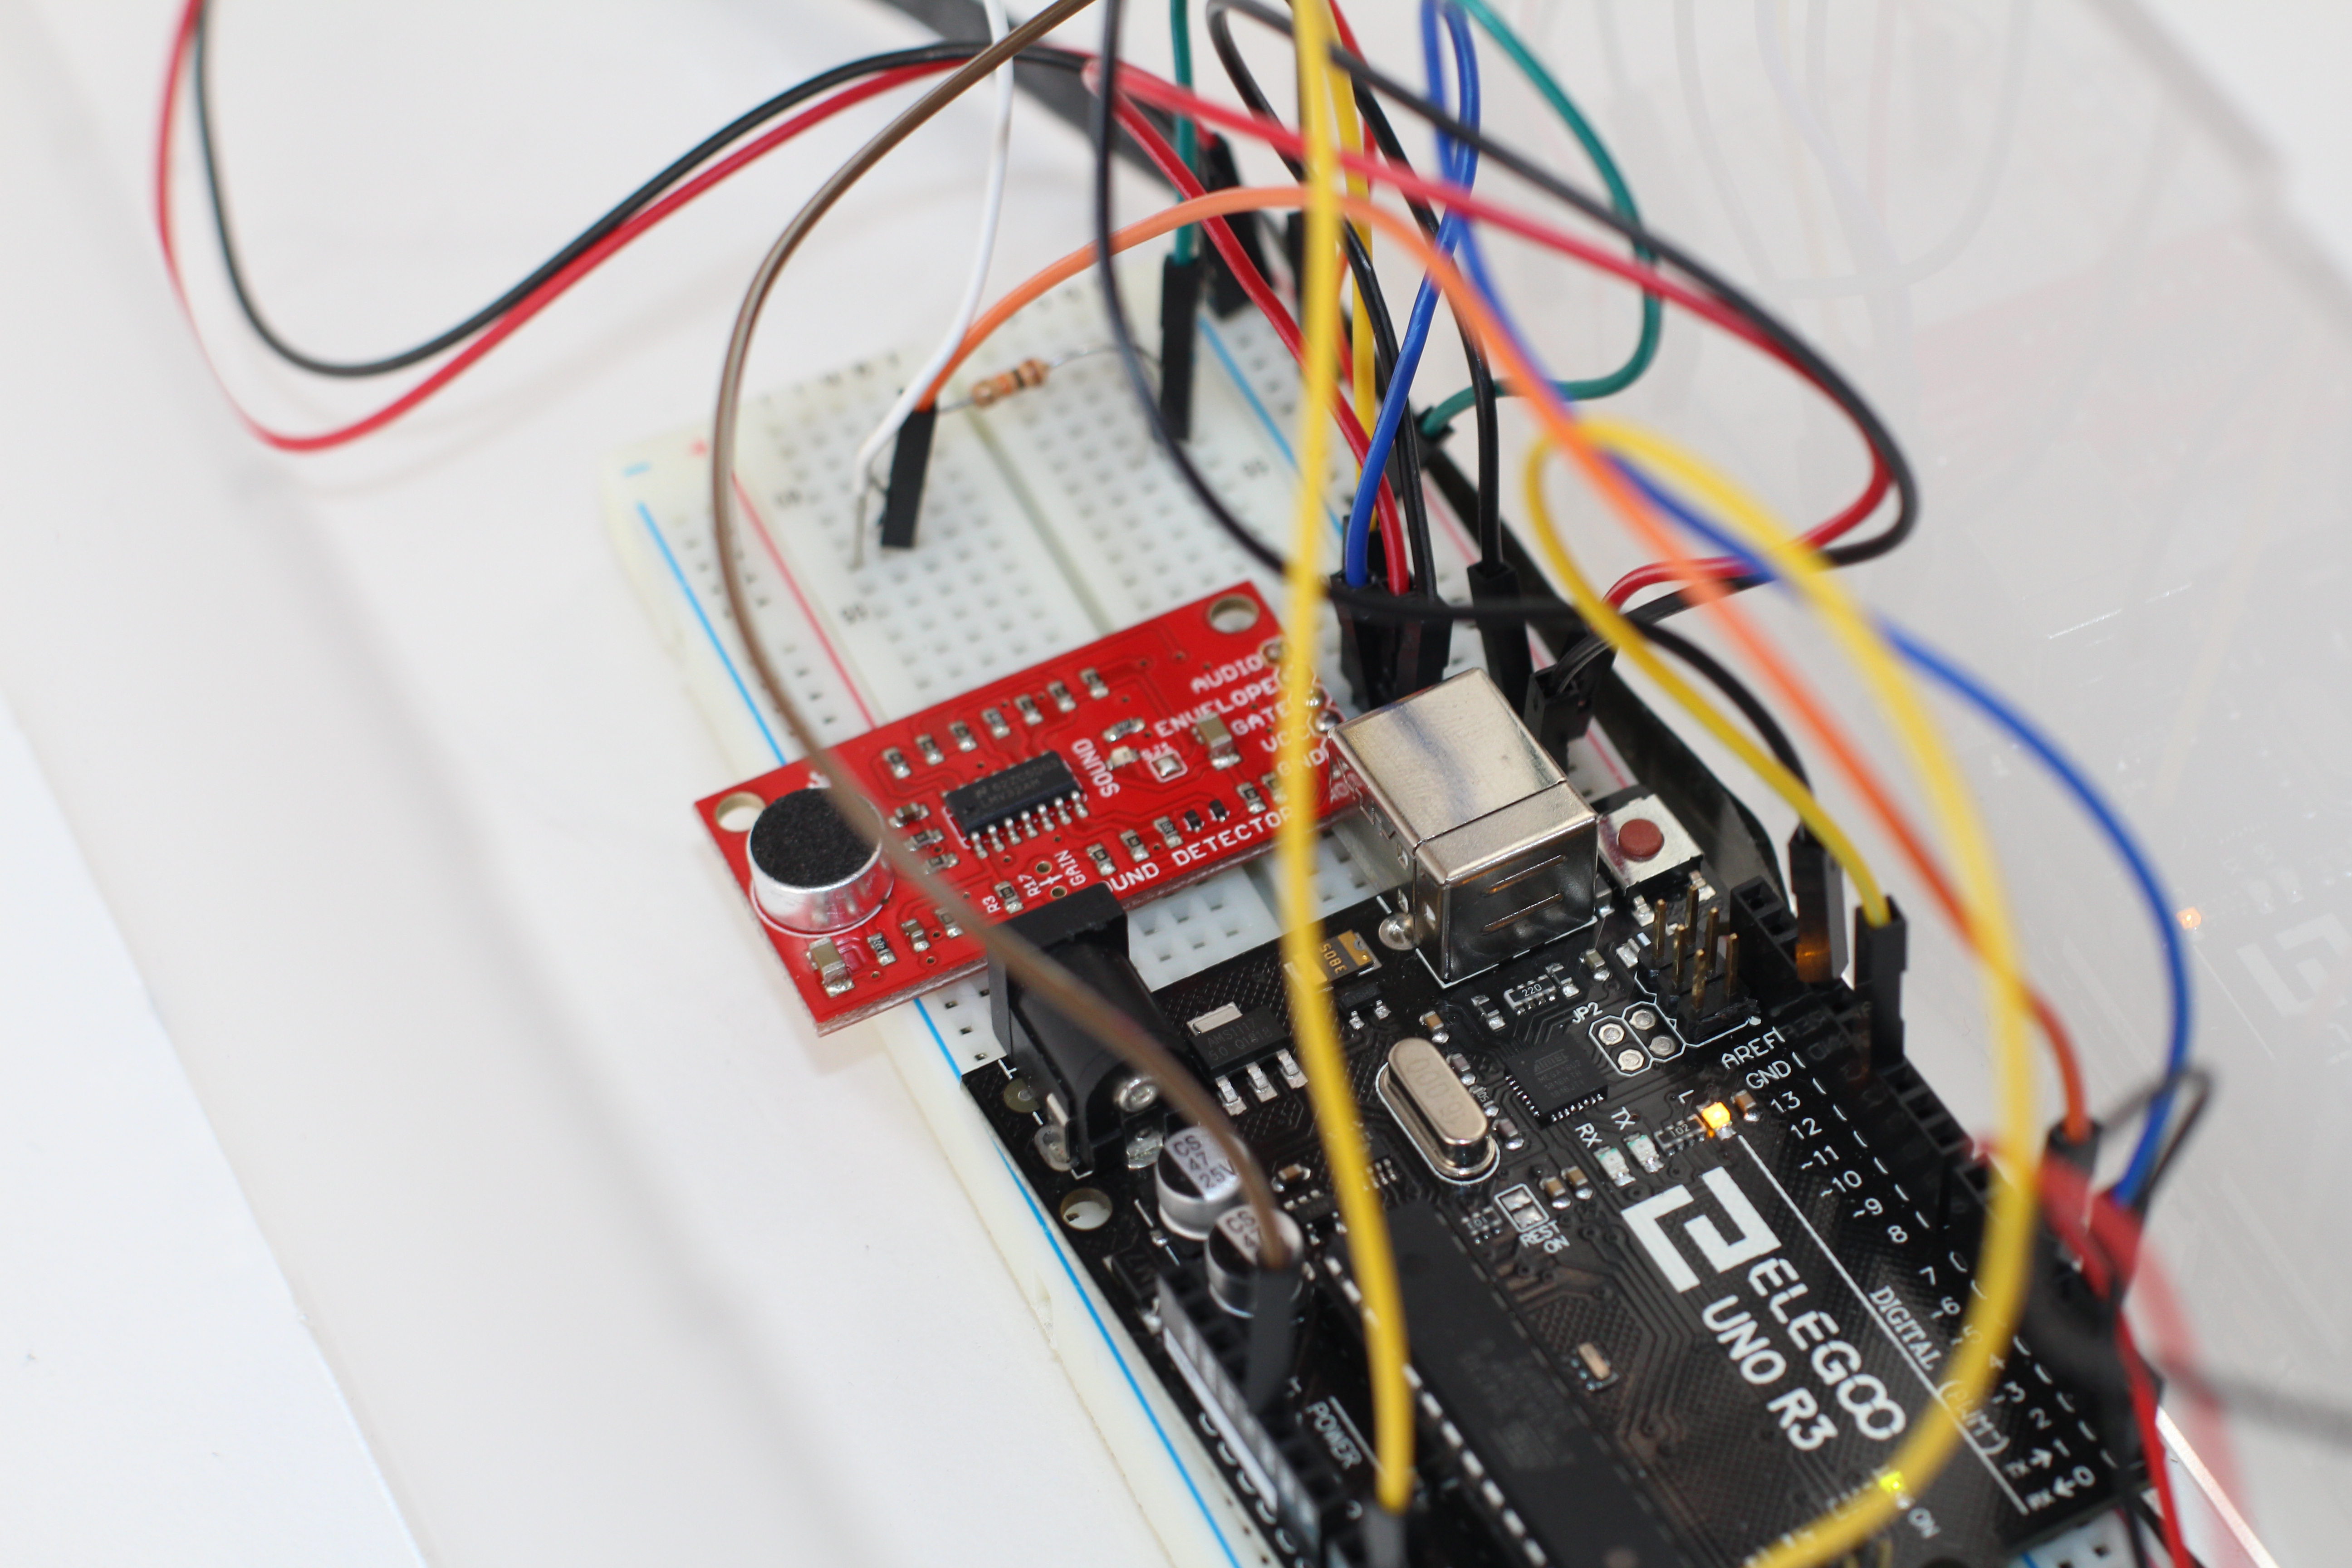
close up shot of the inside where the electronics are housed, including the arduino and sound detector.
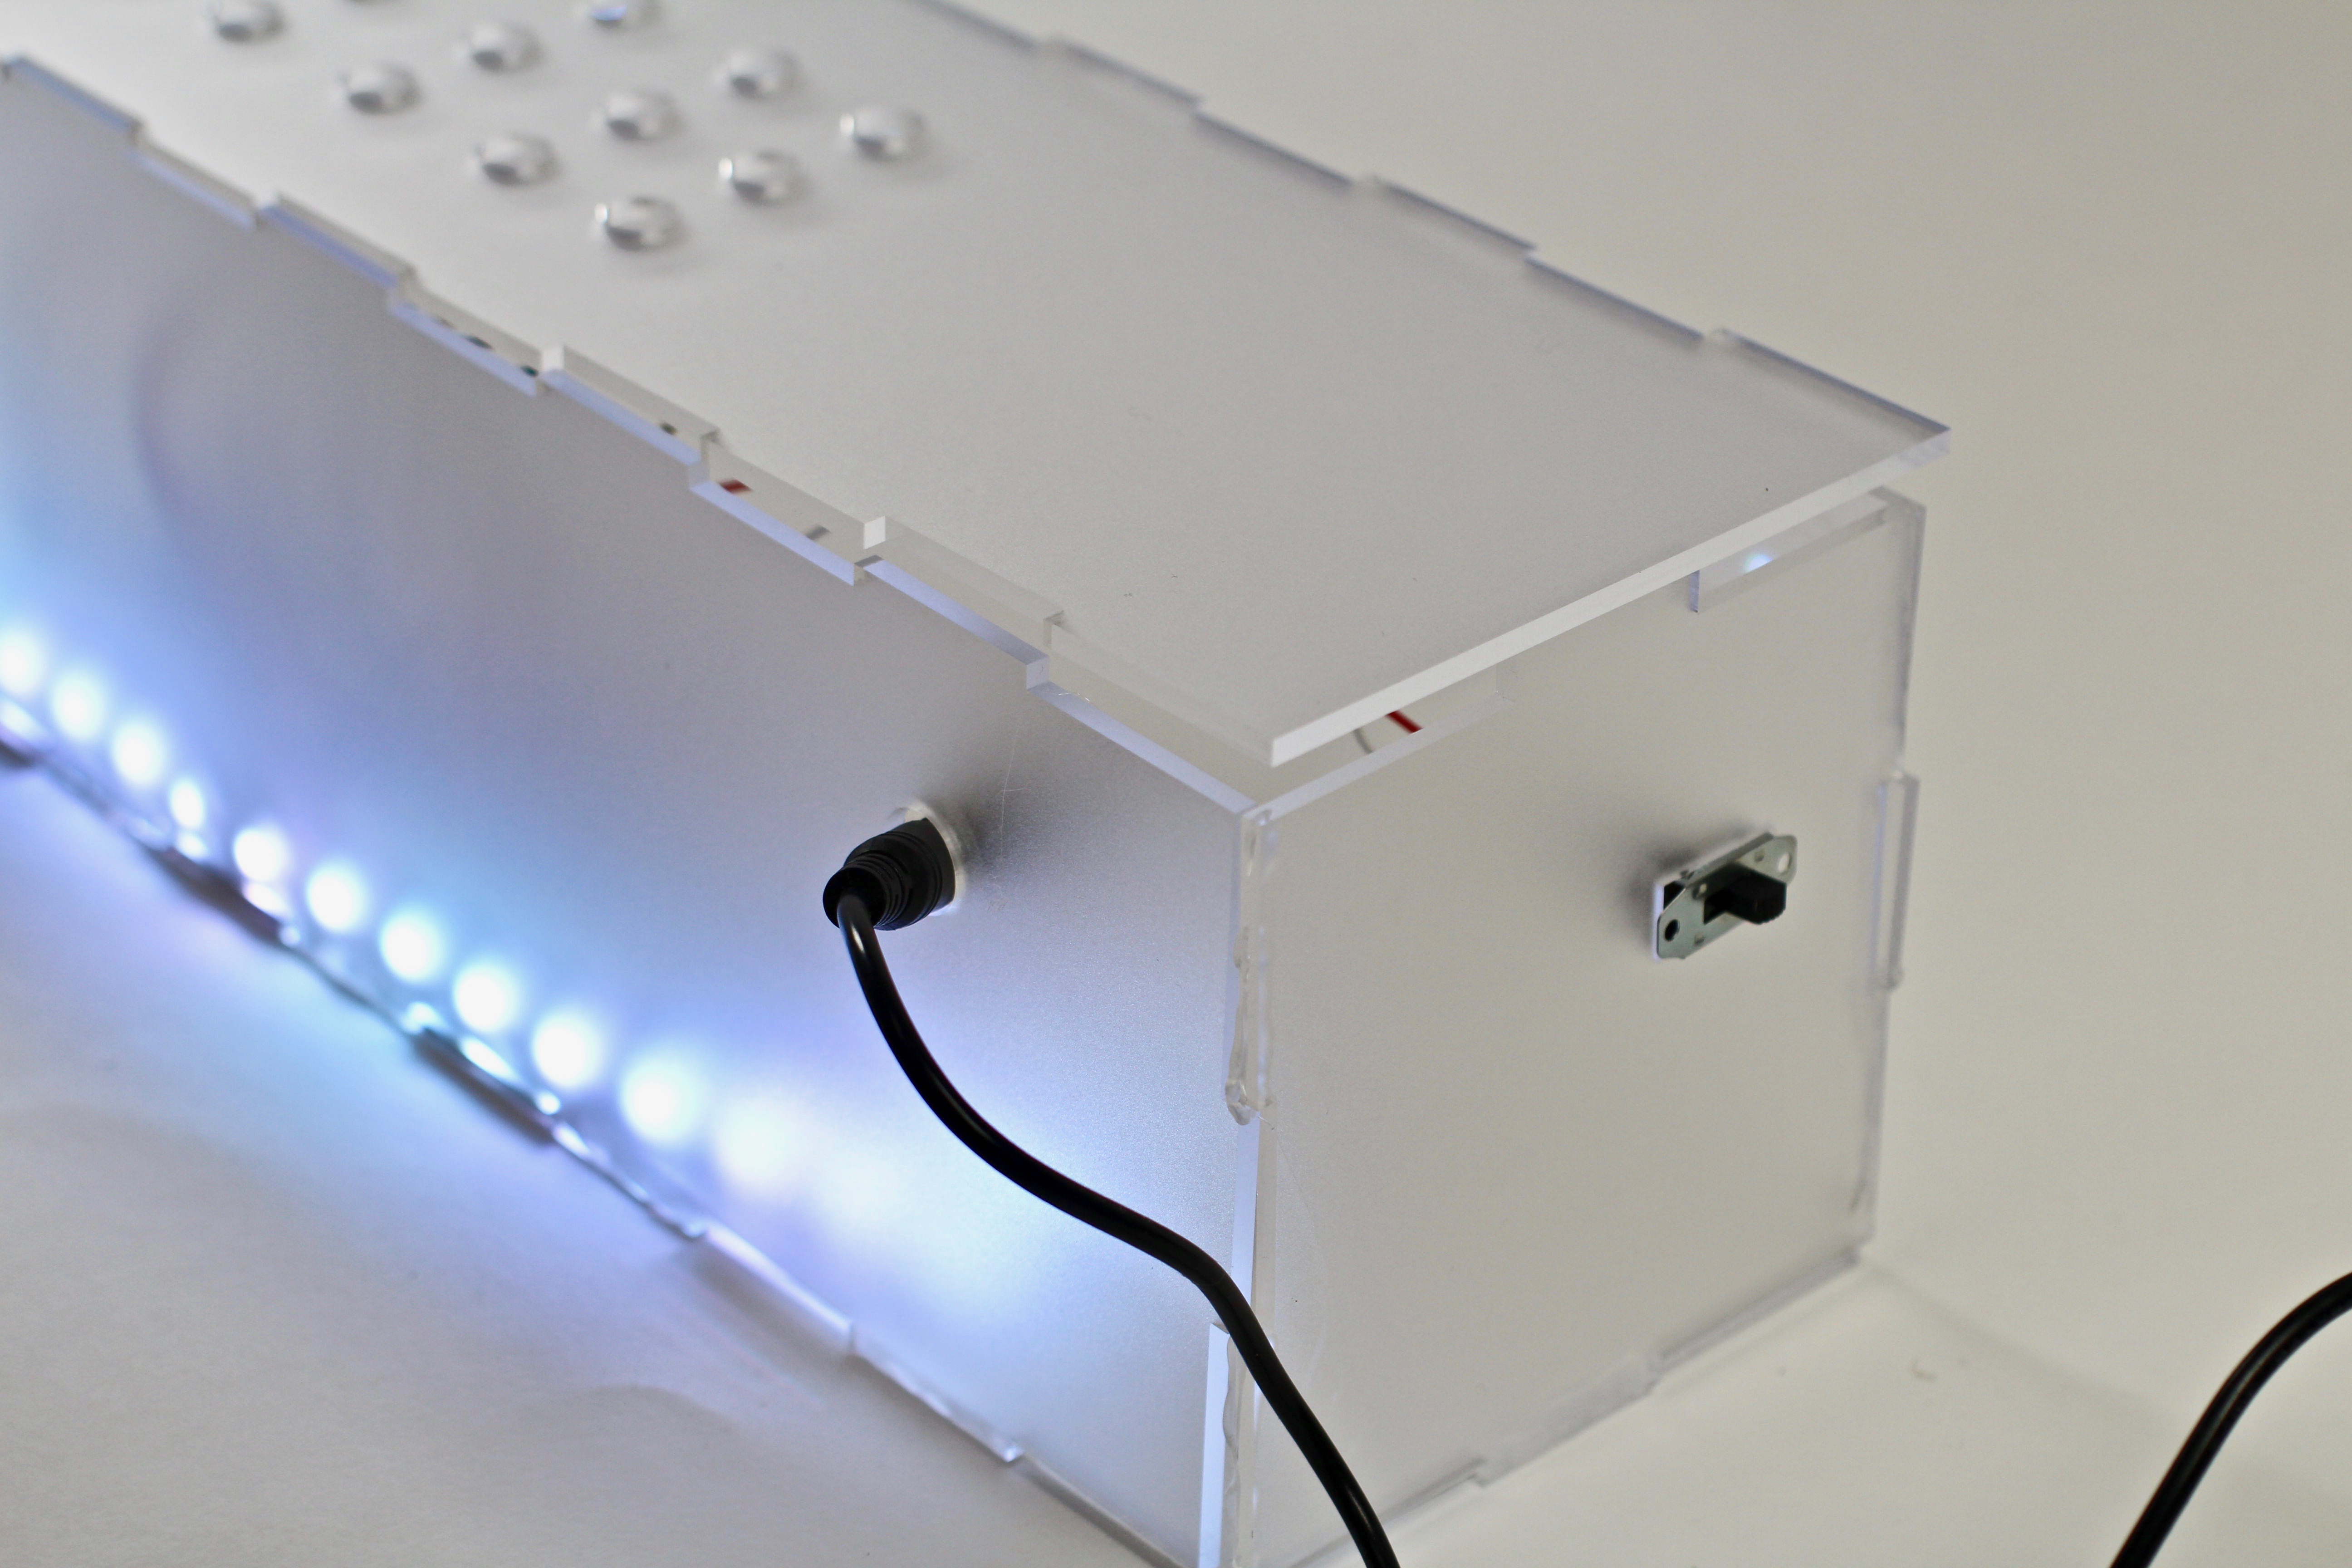
closeup shot of the side of the box where the “nighttime switch” is located to turn on sound detection, as well as the hole to connect to the power source.
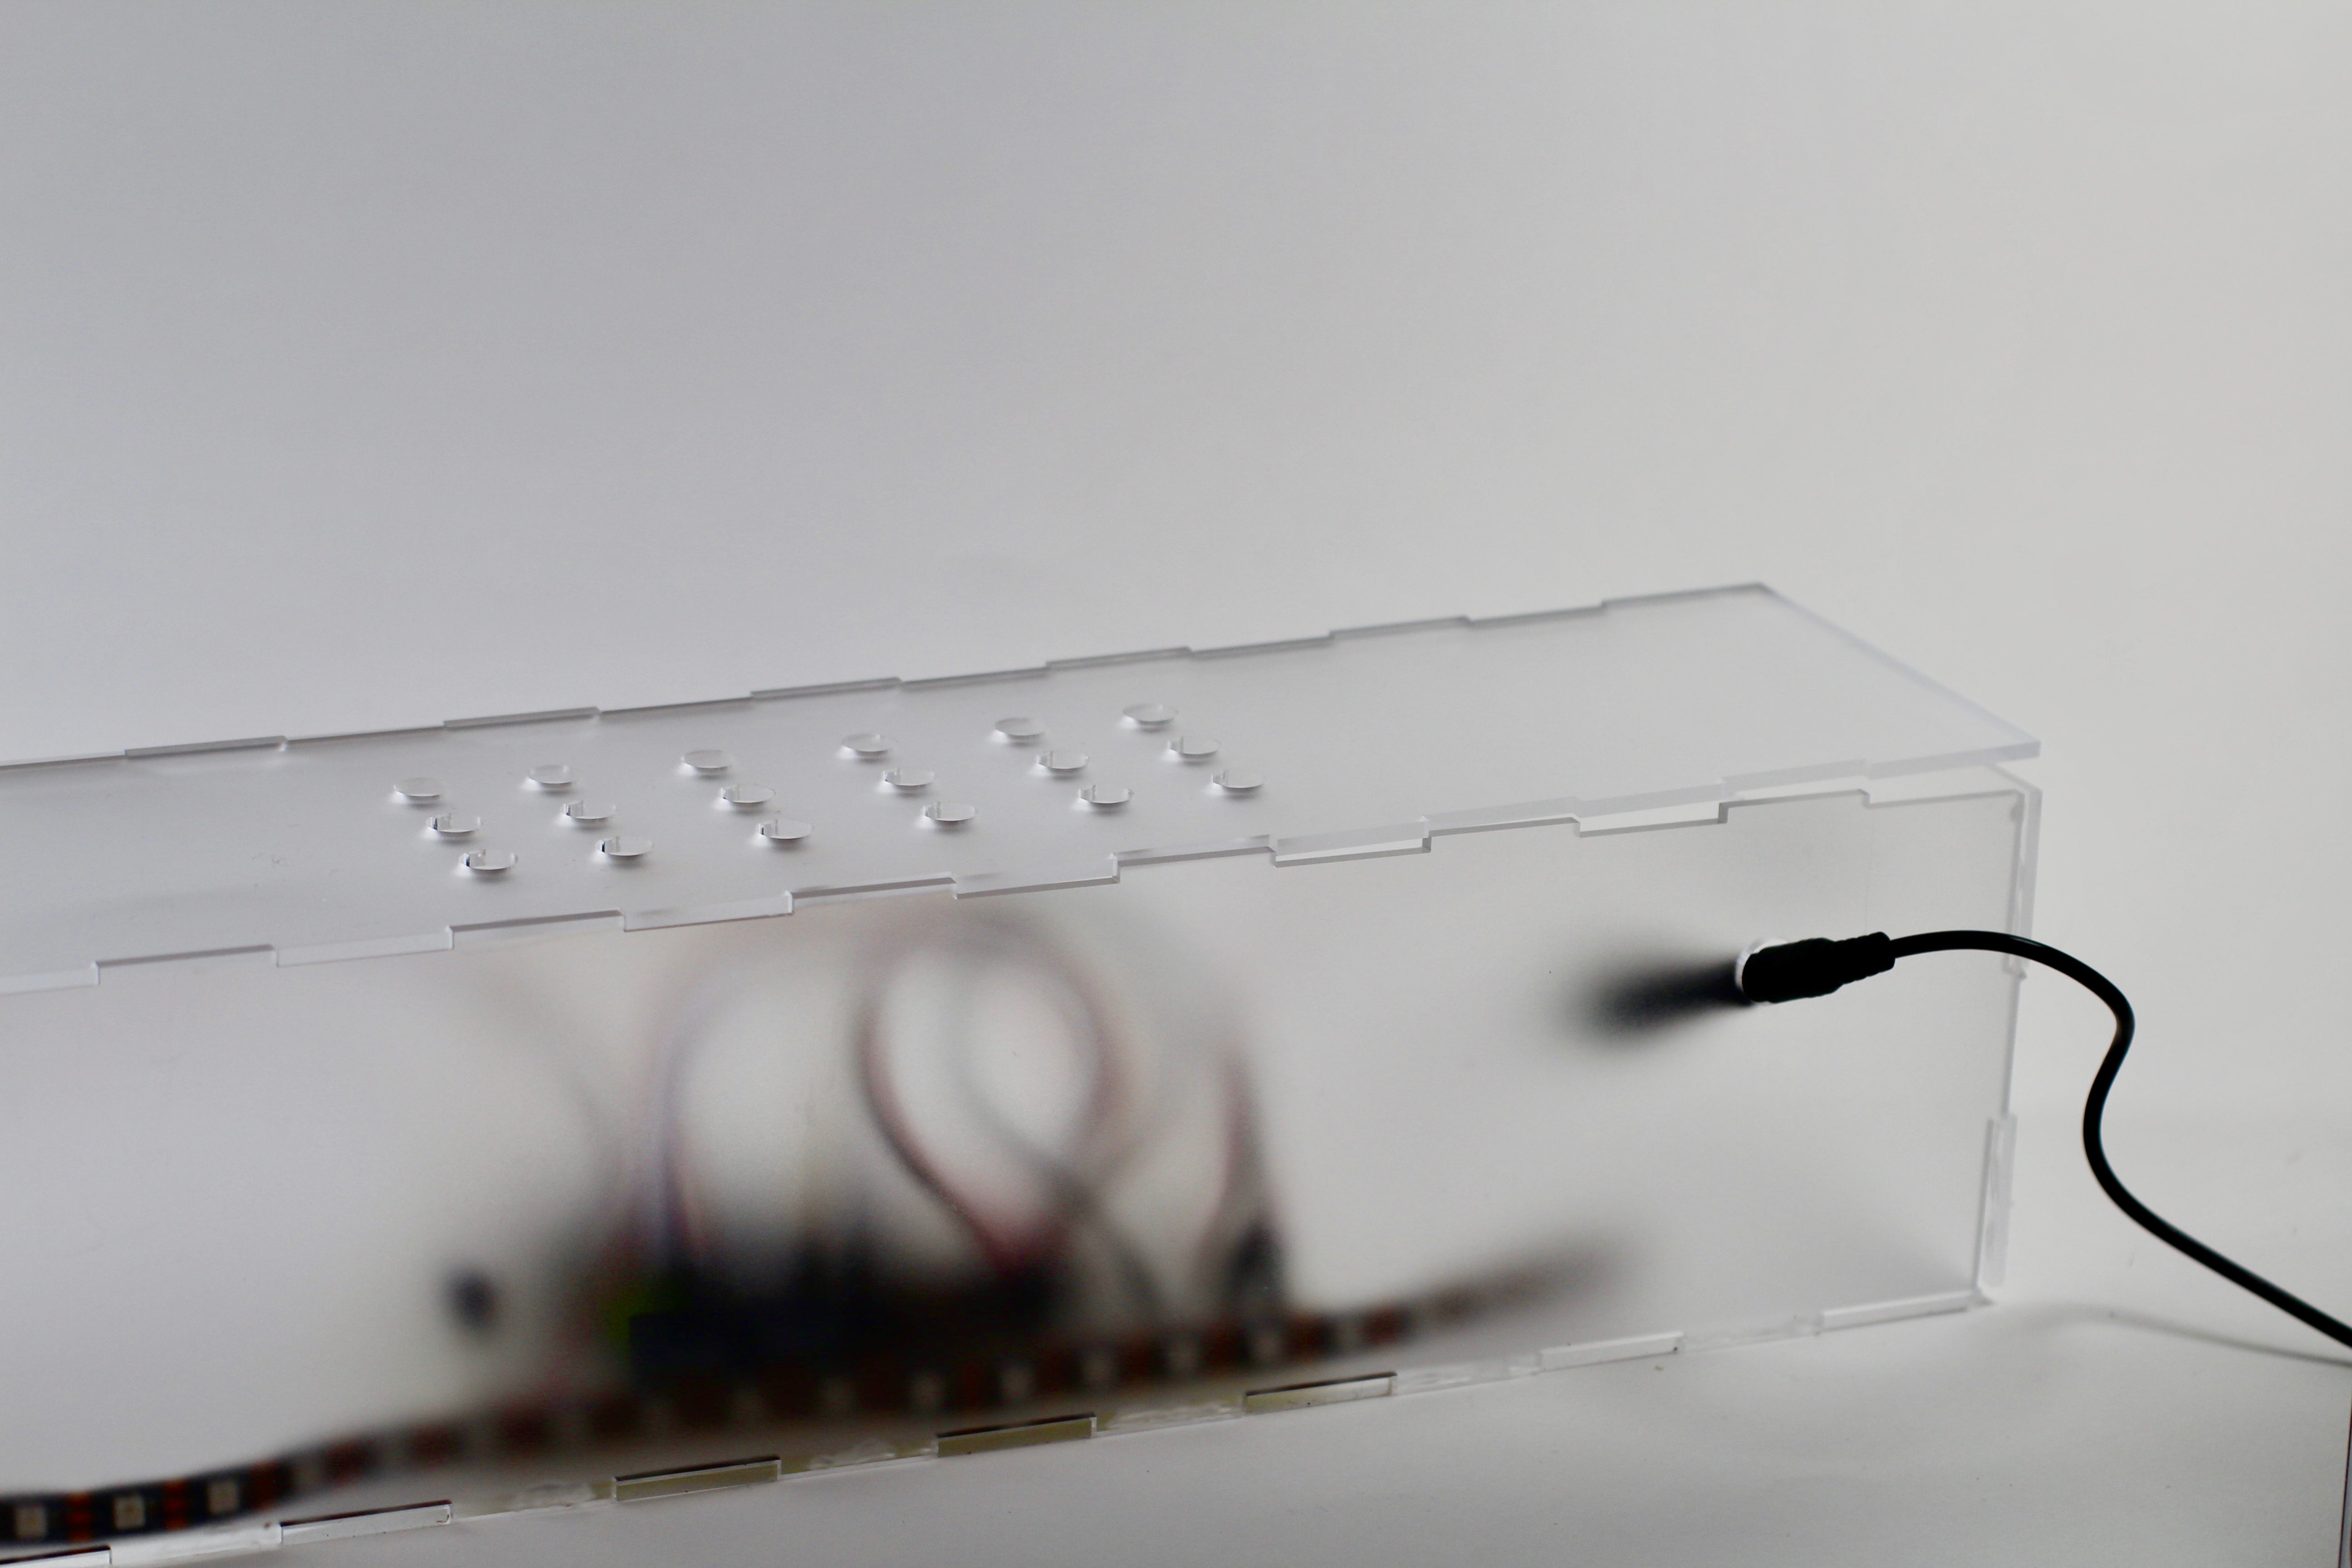
different angle shot of the unlit box showing the holes at the top to allow more sound to go through.
short gif of the box (without volume) going from unlit –> lit after hearing a loud enough sound.
Here is a video of the box lighting up in action with sound, in response to taps on the ground next to it (would be footsteps in real life, as i walk out the door).
Process
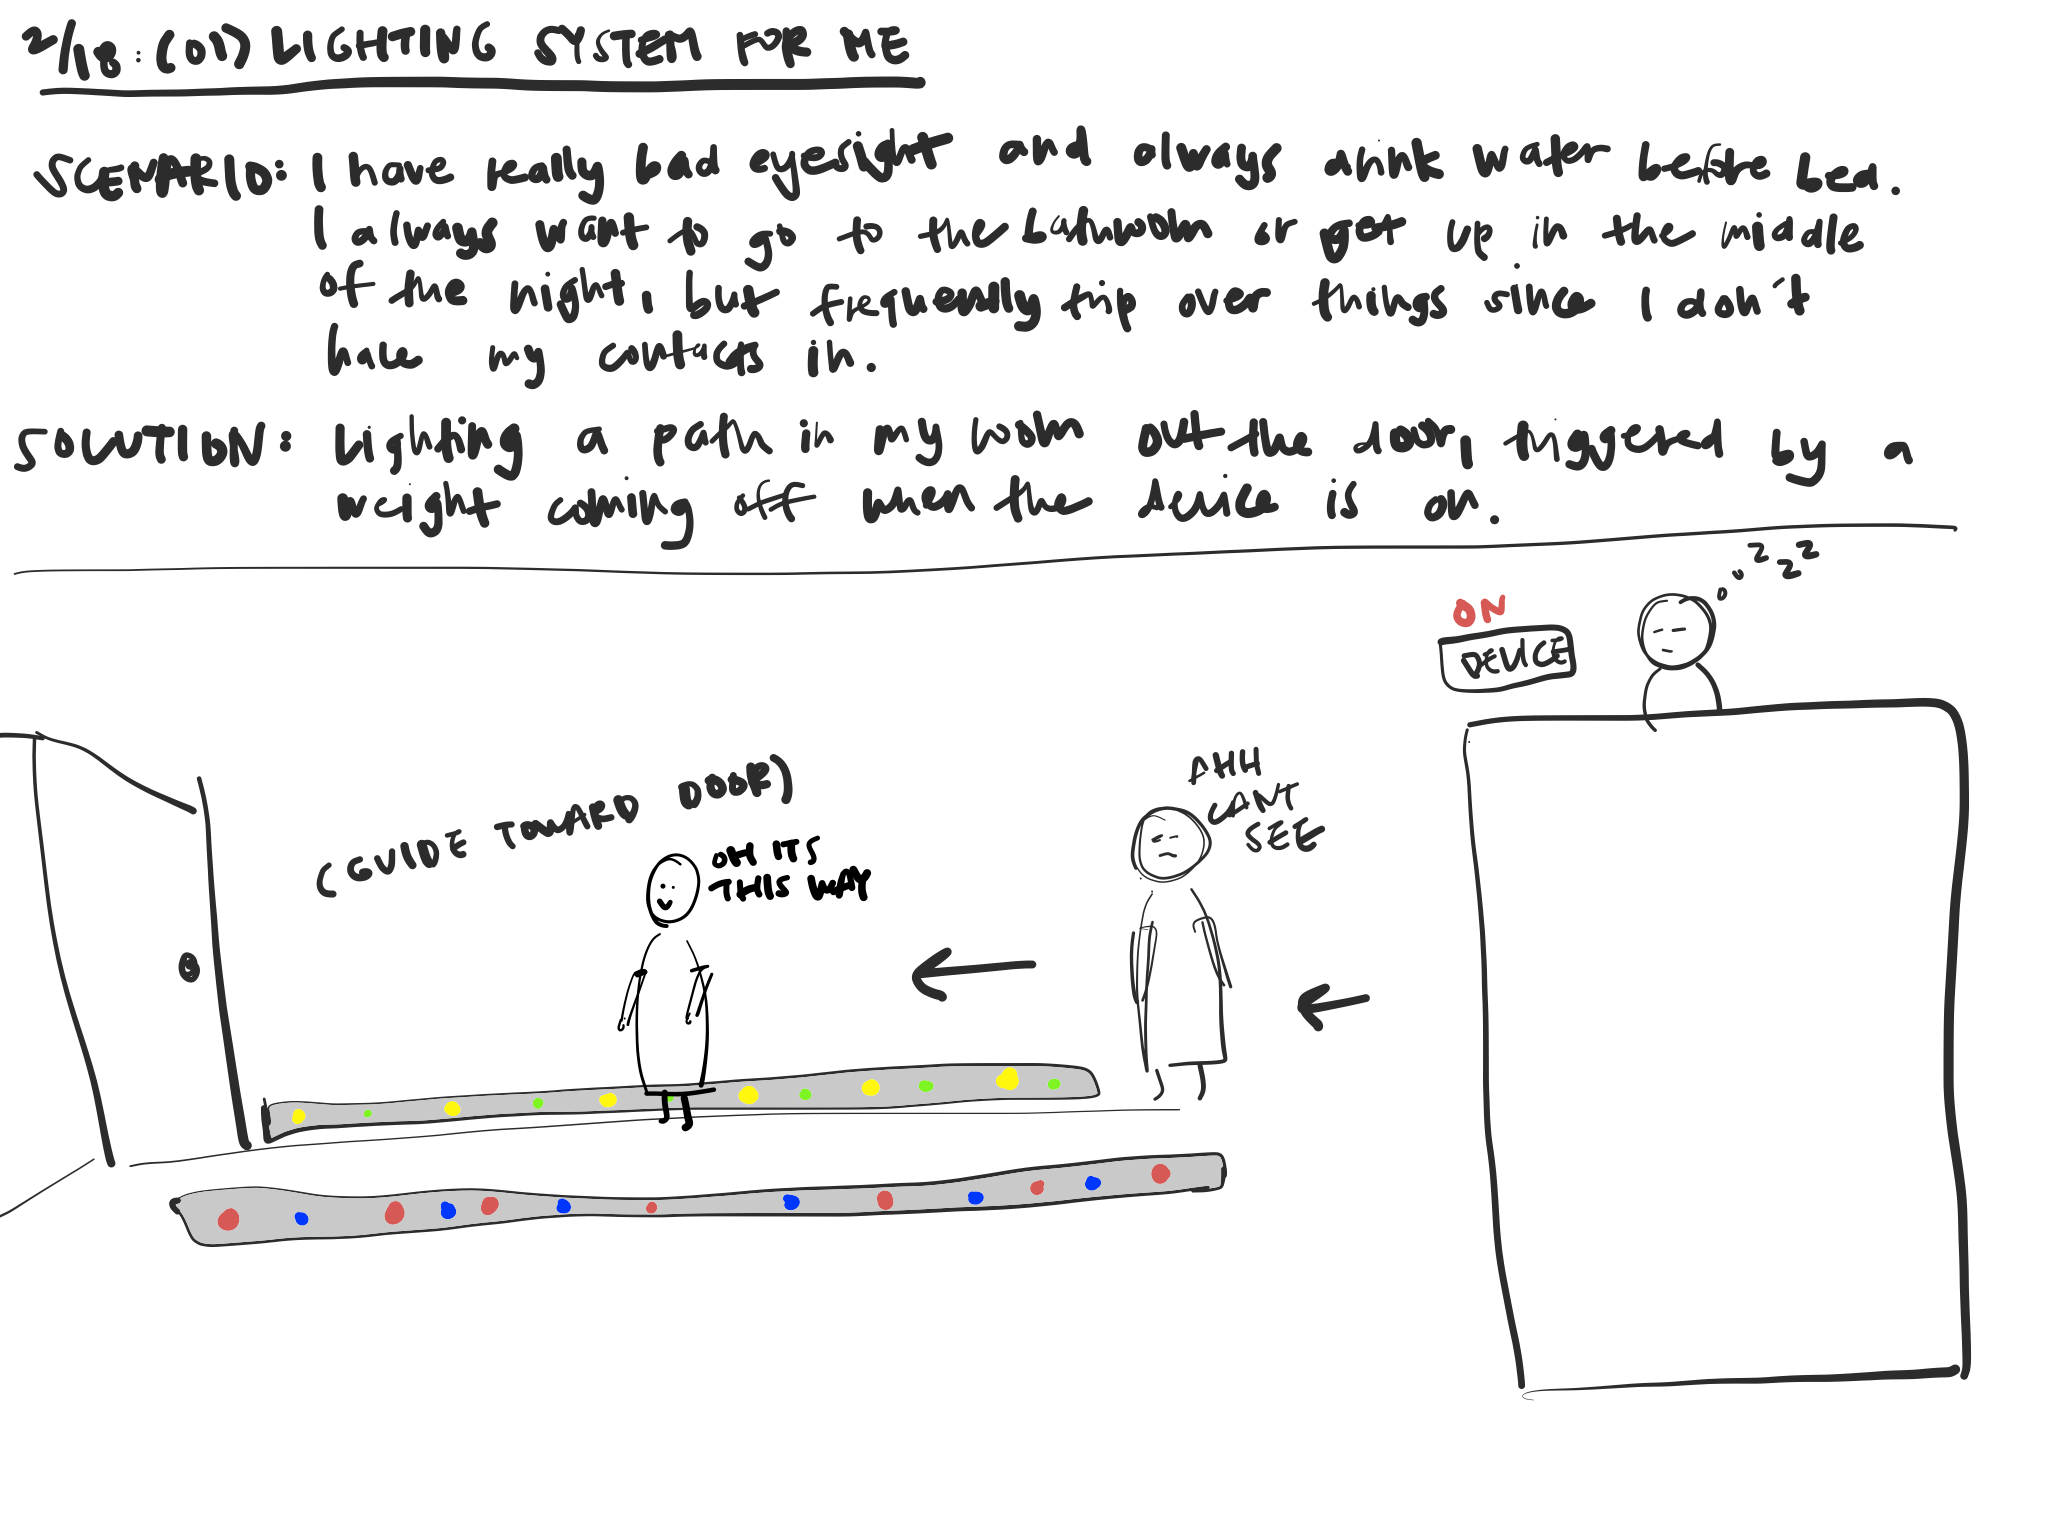
my initial sketch for the assistive device, where i envisioned a sort of exit ramp of led strips lighting the way out the door.
This idea was actually the very first one that I had, because I run into the problem of accidentally pulling down my lamp and crashing it onto the floor trying to turn it on, or tripping on something on the floor because I can’t navigate out the door without my contacts in and when it’s dark in my room. I was kind of inspired by LED strips that sometimes line the bottom of walls or airplanes to give extra lighting as well as lights that turn on when you clap, and thought that it would be really cool to have a feature like that for my purposes.
Important steps
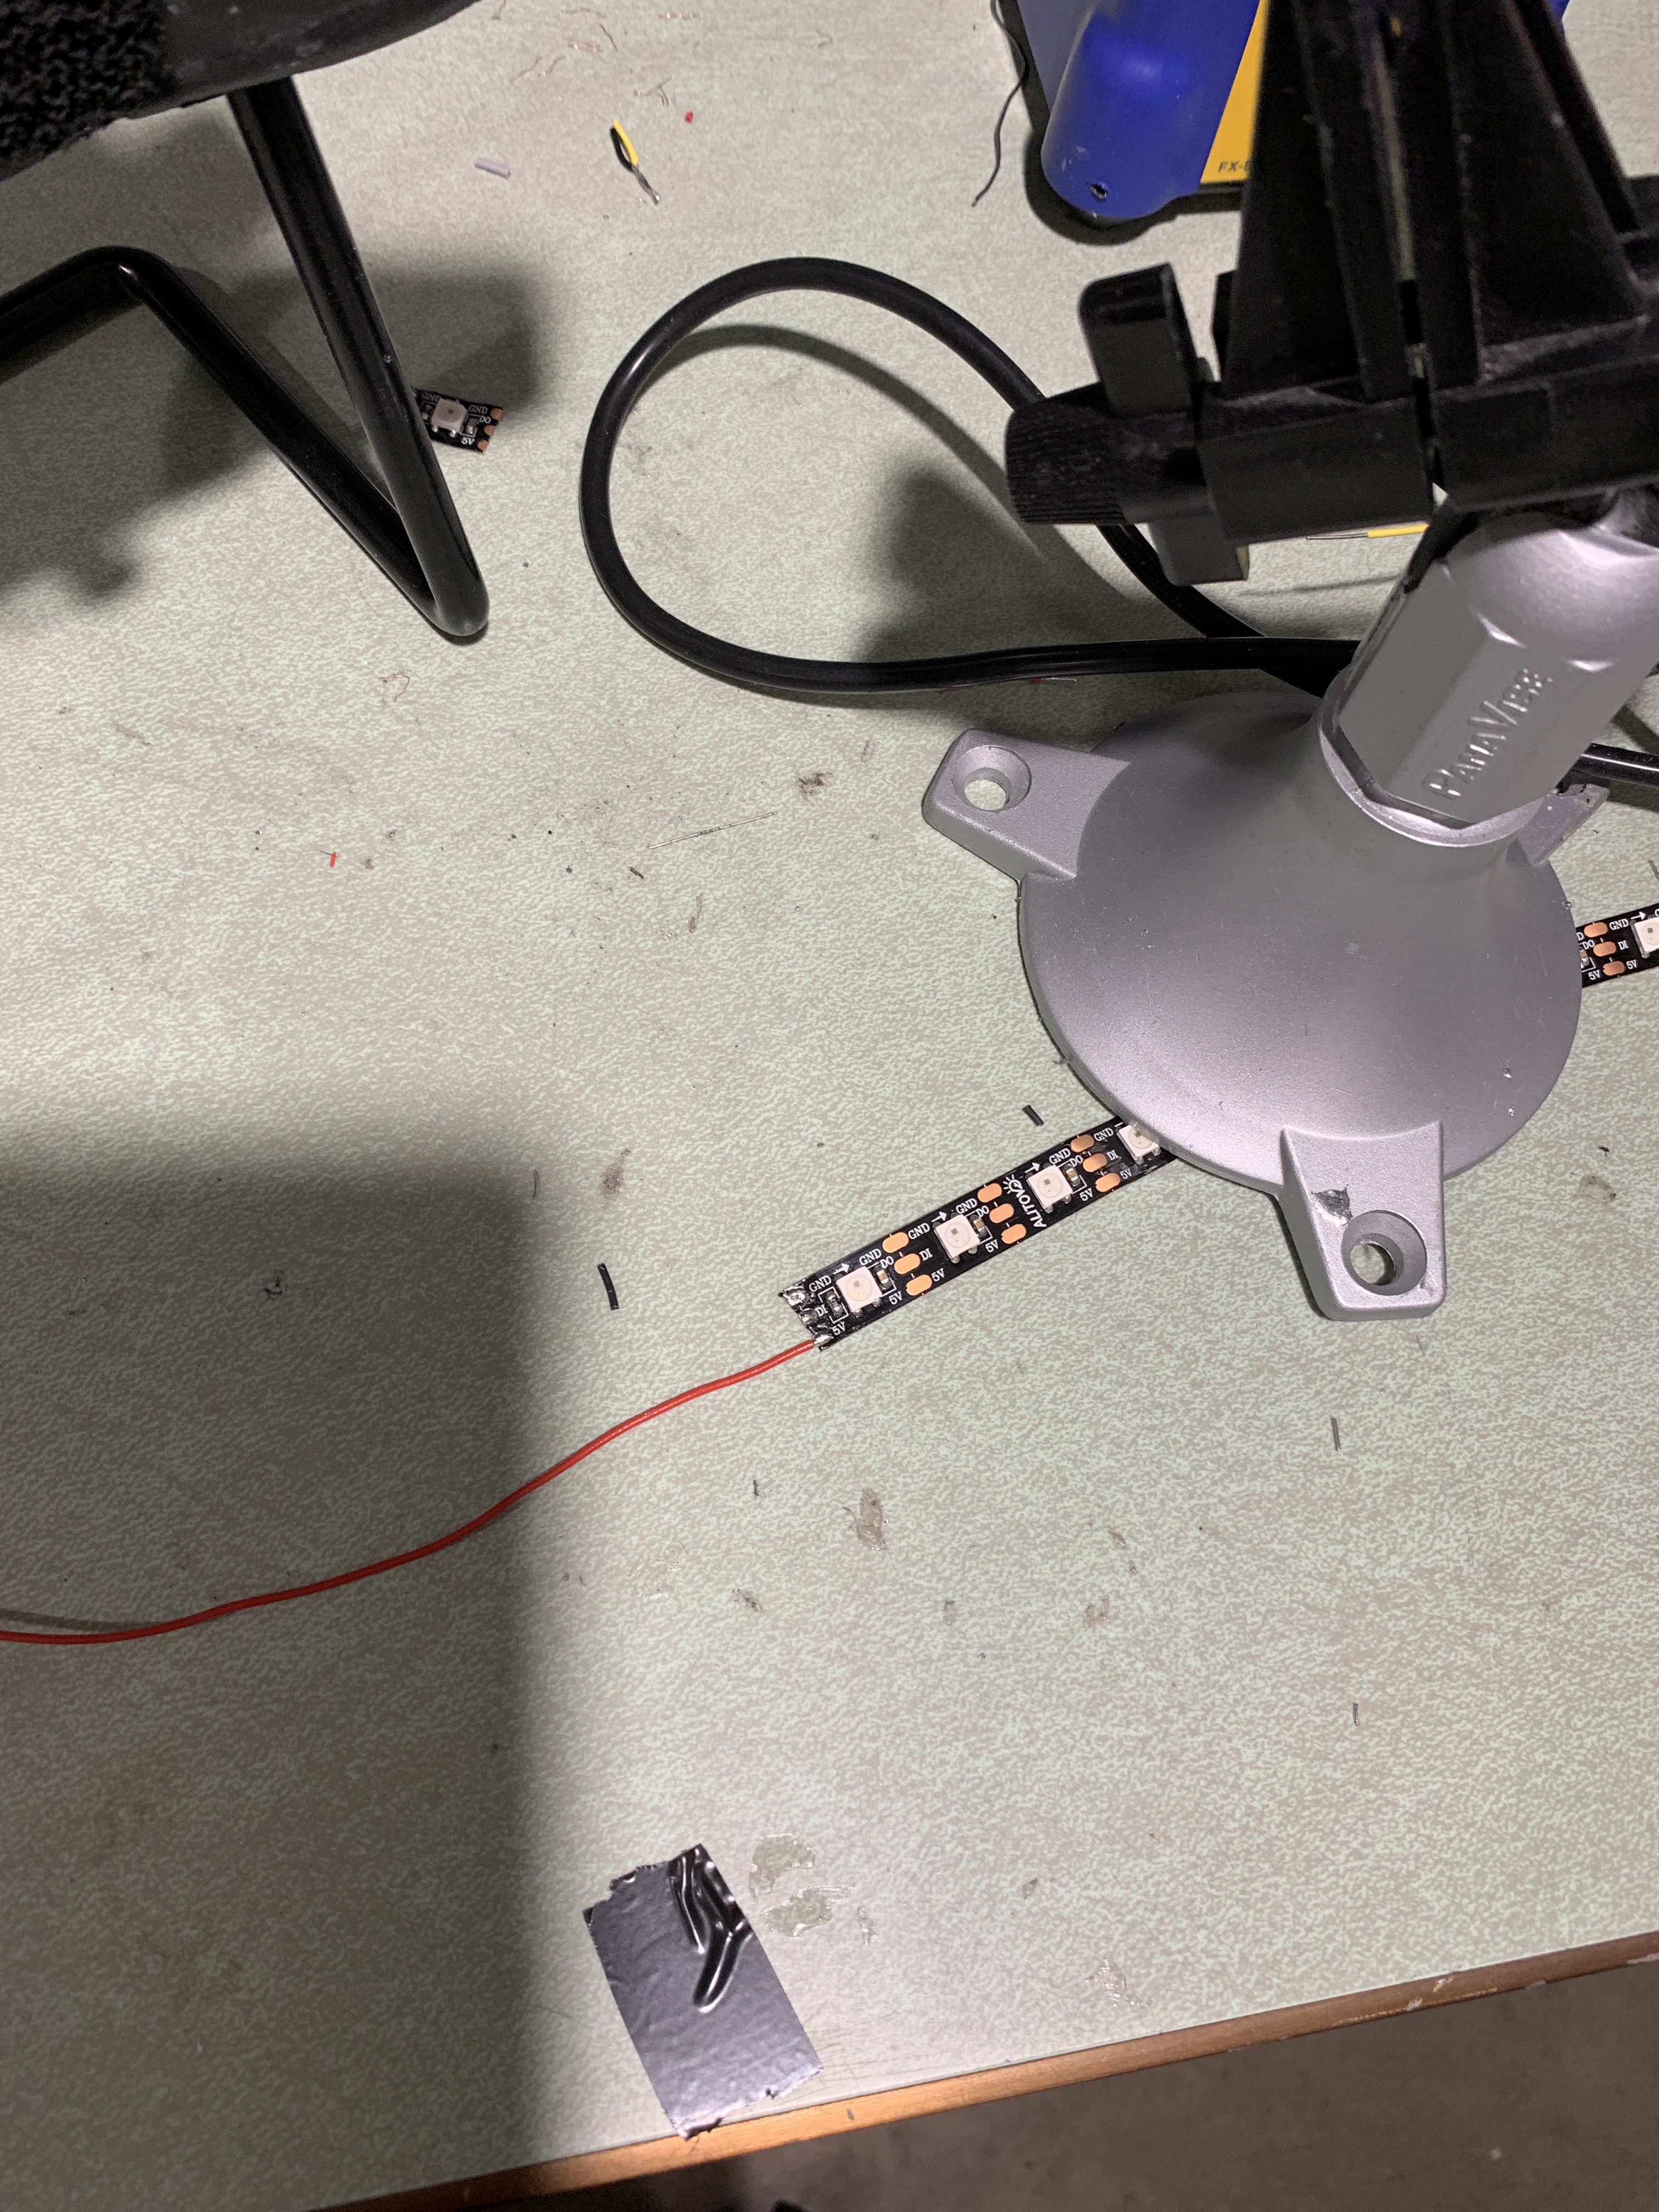
soldering wires onto the LED strips– which was kind of tricky.
One of the first things that I had to do was solder wires onto the LED strips, and as someone with not much experience in soldering it was actually pretty tricky to affix the wires to the LED strips. A few times I burned off the contact part or didn’t attach them properly, so ended up having to cut off some ends of the strip in the process. I also didn’t know that there was a direction to the LED strip at first, so had been soldering the wires onto the wrong side. After a few attempts, I was successful!
I also realised here that I didn’t want my device to always be on and registering sounds, since that would cause it to light up just randomly throughout the day. As shown in images above– I added a nighttime switch to turn on before going to sleep that turns on the sound detection, and can be turned off when not in use.
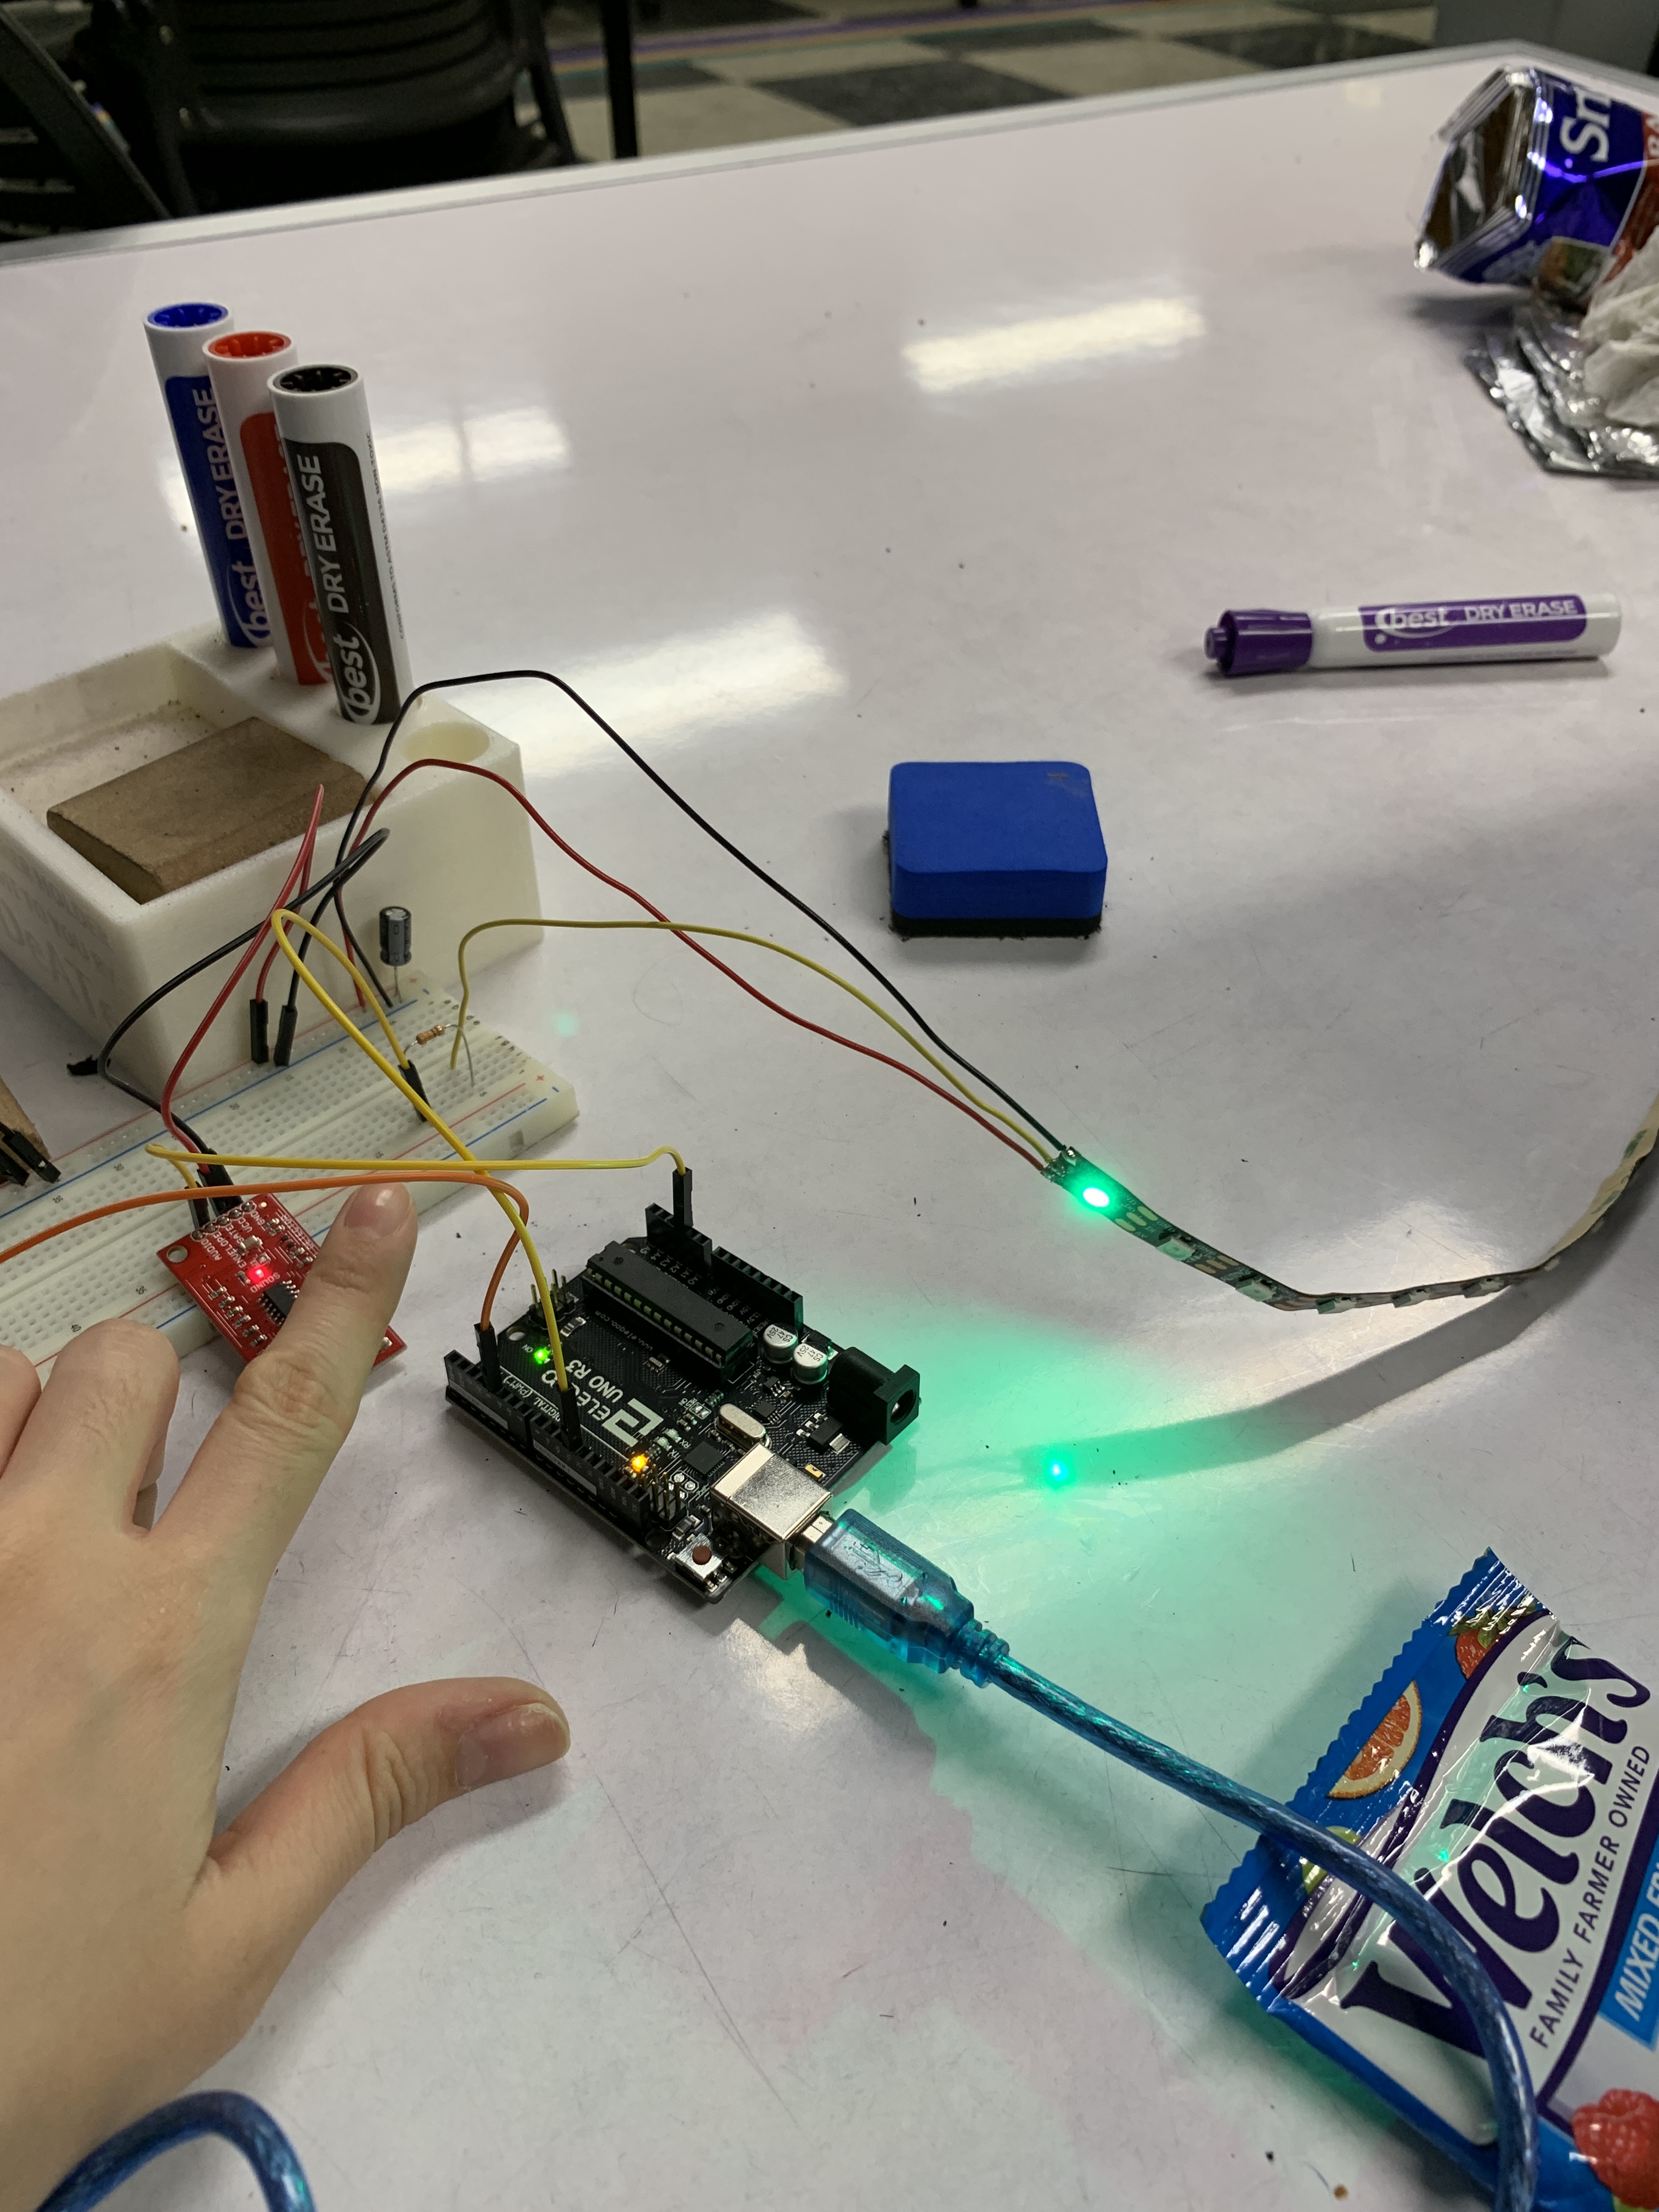
trying to connect the sound detector to the LED strip, and had some strange bugs.
I worked with sound in my last project so I knew that it would be finicky to work with, but really wanted to make it work. It took a lot of trial and error with both the sound detector as well as the LED strip, and had some weird things happen– like only one LED turning on in response to the sound detector, or the sound detector not registering sounds correctly.
I also decided at this point that I wanted a turn-off mechanism, so added into the code a feature where if the same sound threshold is reached, the LEDs will turn off. For this feature, I added a delay so the light will stay for a while before turning off in response to a similarly loud sound. I worked with the code to continually adjust the sound threshold levels and with some libraries to implement the LED strips correctly, which took a while.
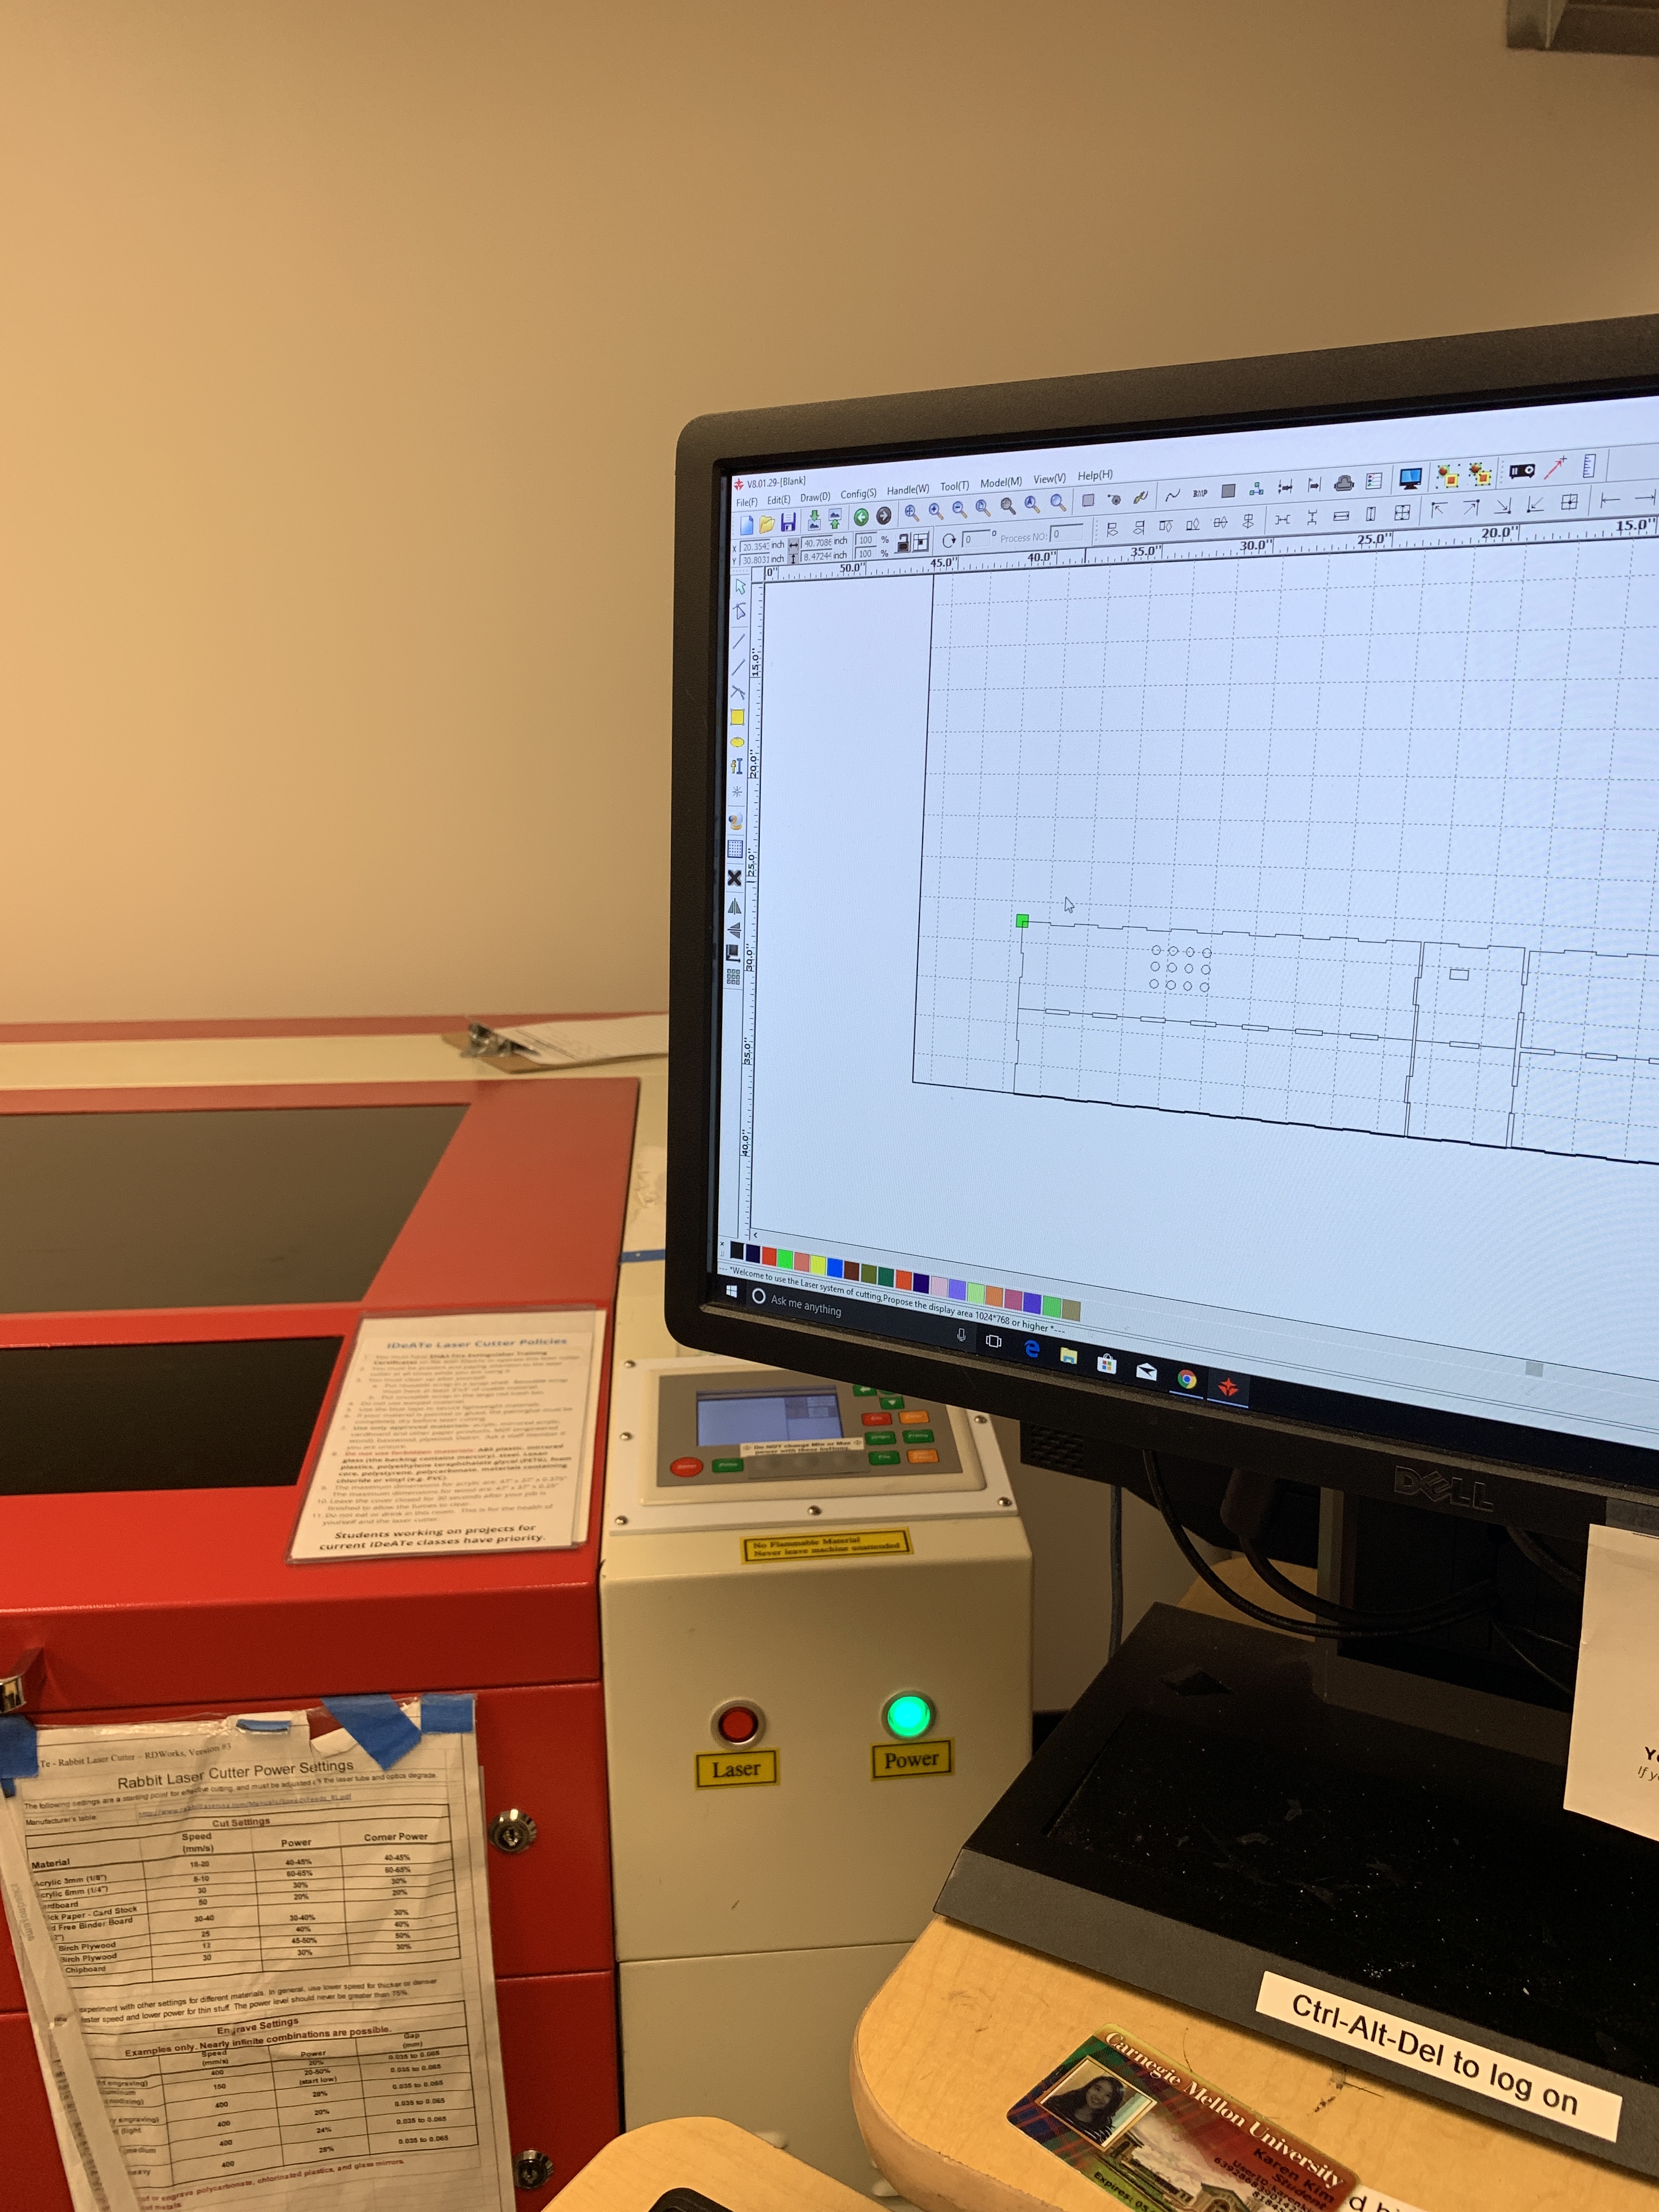
laser cutting my box.
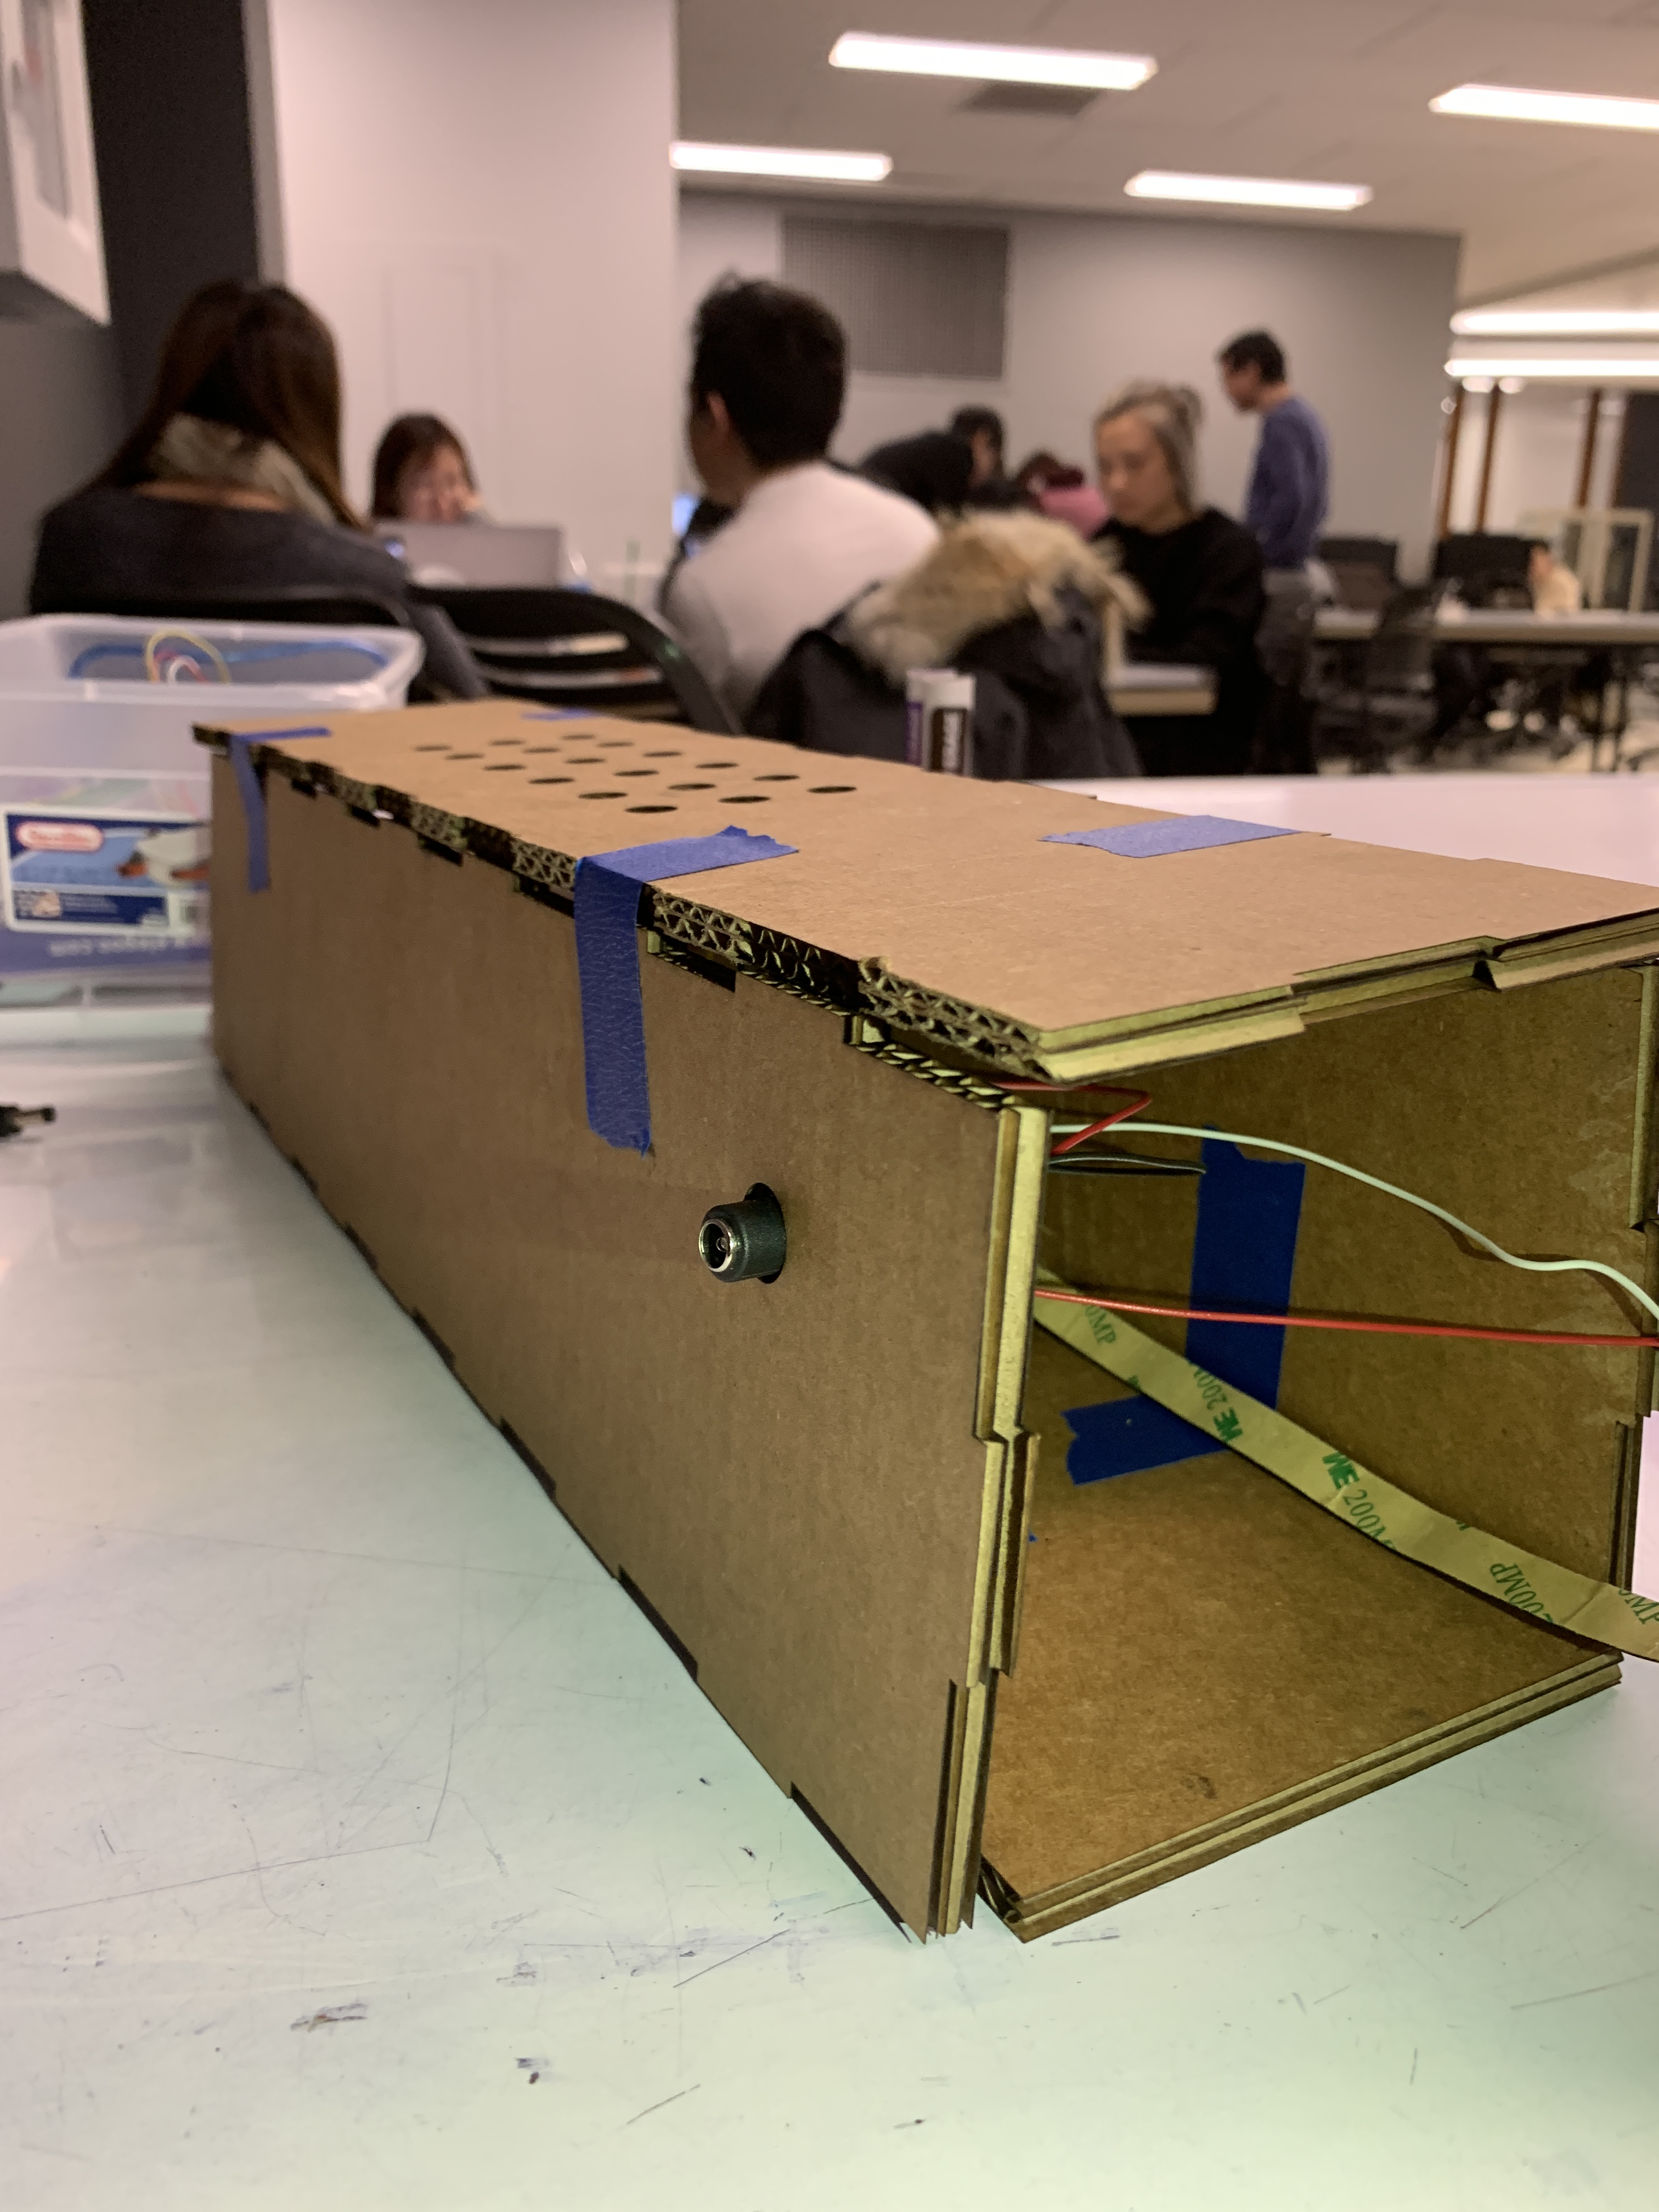
i first made a cardboard prototype of the box before cutting it in acrylic.
To make sure I got the sizing right, I started off by making a cardboard prototype of my box. It was important that the box was long enough to show the entirety of the strip horizontally, which is why the box is pretty big (18 inches long). I also made sure to include holes at the top to allow more sound to come through. Luckily, it worked out well on my first step and after creating this cardboard one I moved on to acrylic.
the first image that i took of the completed box, where everything looks organised.
Initially I wanted my box to have a wood lid and bottom with acrylic sides, but ended up making it all acrylic just due a lack of available materials. I decided on frosted acrylic because the LED strip is really bright, and the clear acrylic would have been too much. Mainly, I wanted the box to just look really clean and organised and house all of the electronics inside with minimal parts coming out.
I glued the sides and bottom together, but left the top unattached in case I wanted to fix something inside with the electronics, ever add more LEDs, etc.
Discussion
During the critique, the sound detector was acting up/there seemed to be some loose wires, which made the lighting-up function slightly unstable. After pressing the wires in and reconnecting power, it worked a lot better but it still showed how it can sometimes be unreliable.
Could use a different input method to avoid the problems you were having with sound. Could also make more like a landing strip for planes – a path to the door
I thought it was funny that this comment was made relating to the landing strip inspiration that I also had when coming up with the idea for this device (but hadn’t mentioned at the crit), so I was glad that the sort of design was well understood. I agree with the idea of using a different input other than sound to control some instabilities of sound levels, but also think that sound is the most intuitive way to control a light like this. Something more mechanical or pressure based would still require sight navigation to the object and the access point, which is a factor that I wanted to solve with my device.
I really like how it has to be a similar sound level to turn off so that someone else’s noise doesn’t accidently turn it off. You could also put sensors that are on the side of your bed so when you get off it’ll turn on.
During my initial ideation process, I also thought about this box staying right by my bed and it detecting weight or something along those lines, but mostly found out that the type of sensor I was looking for didn’t really exist. Hearing the idea of putting the sensors right on my bed, though, is something that I hadn’t thought about and would be really interesting to think about in a future iteration of this device. It would be really cool to have the same light that I created in this project to affix onto the side of my bed and light up when I get up.
I’m really happy about the way that my device turned out, especially the effect of the LED strip against the box. I like that if I keep it on my floor and I accidentally kick it, it will light up and show that I messed with it and still act helpfully. This aspect of interactiveness was one of the main goals that I wanted to achieve, and am satisfied that I was able to learn more about working with sound and light and meet this initial goal. Even though I had previously worked with this sound detector, it was a surprisingly trickier than I remember it being, and I had to calibrate threshold levels many many times before reaching a point of relative stability. I’m pretty confident now that I am comfortable working with sound as a dimension, though, and look forward to exploring more mechanical sensors in the future as well.
Another aspect that I got more exposure and experience with was soldering/desoldering/using heat shrink. Making the device look organised and more visually pleasing to look at was a fun process for me I had never heard of heat shrink before, so it was actually really fascinating to use– same with getting better at soldering more detailed pieces. I ran into some changes along the way in regards to the actual form of the box, which was also a surprise for me but also a process that was most fun. Initially I had intended to use super long LED strips and create very thin rectangular strips to just hold the strips and connect them to electrical outlets along the wall in my room. However, some issues I realised with this– it was difficult to house the electronics in a compact way with such a thin box, and I decided that I wanted one thing rather than two separate strips. After deciding on making one box, I had a vision for a really nicely constructed mostly wooden box with acrylic panels on the side for light to come through, but also found it difficult to get ahold of nice wood (there was also no plywood available to use), and working with a sliding lid or hinges was construction that I realised was a little ambitious for the time that I personally had.
It was really fun for me to watch the device go from just a breadboard with an LED strip –> cardboard box –> acrylic box –> attached acrylic box, and I think that’s definitely one of the most fun things about actually making physical things instead of solely software. In the future, I want to learn more about more intricate construction and also work with nice wood! That is the direction that I want to take in a future iteration of my device, mainly focusing on the construction of the form. For this project, I used hot glue to keep the sides intact and used frosted clear acrylic throughout, but I would really like to use hinges and wood for a final version. I’d like the box not only to be used after turning it onto nighttime mode, but can stay in my room as a sort of decorative piece.
Overall, I learned a lot both about coding sound/light + physical construction, and I’m excited to continue moving forward in having more experience with making things that are both useful and nice to look at.
Technical information
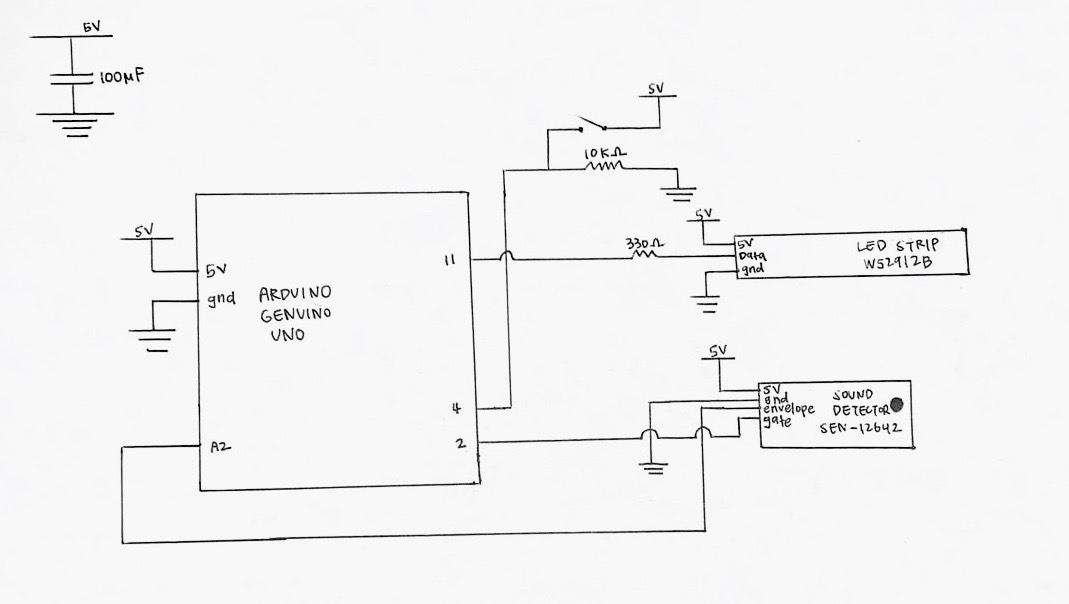
Schematic
Code
- <span class="com">/*
- * Project Name: Sight Light
- *
- * Description: This device uses a sound detector and LED strip so that
- * the LED strip lights up in response to a certain sound threshold being
- * detected. The purpose of the device is to provide light easily without
- * needing to physically turn it on. The PololuLED library is used to
- * light up the LED strip with white light.
- *
- */</span><span class="pln">
- </span><span class="com">#include</span><span class="pln"> </span><span class="str"><PololuLedStrip.h></span><span class="pln">
- </span><span class="com">// create an ledStrip object, and specify which pin it will use</span><span class="pln">
- </span><span class="typ">PololuLedStrip</span><span class="pun"><</span><span class="lit">11</span><span class="pun">></span><span class="pln"> ledStrip</span><span class="pun">;</span><span class="pln">
- </span><span class="com">// create a buffer for holding the colors </span><span class="pln">
- </span><span class="com">#define</span><span class="pln"> LED_COUNT </span><span class="lit">28</span><span class="pln">
- rgb_color colors</span><span class="pun">[</span><span class="pln">LED_COUNT</span><span class="pun">];</span><span class="pln">
- </span><span class="com">// Pin Mapping</span><span class="pln">
- </span><span class="kwd">const</span><span class="pln"> </span><span class="kwd">int</span><span class="pln"> button_pin </span><span class="pun">=</span><span class="pln"> </span><span class="lit">4</span><span class="pln">
- </span><span class="kwd">const</span><span class="pln"> </span><span class="kwd">int</span><span class="pln"> mic_pin </span><span class="pun">=</span><span class="pln"> A2</span><span class="pun">;</span><span class="pln">
- </span><span class="com">// sound threshhold </span><span class="pln">
- </span><span class="kwd">const</span><span class="pln"> </span><span class="kwd">int</span><span class="pln"> clap_thresh </span><span class="pun">=</span><span class="pln"> </span><span class="lit">50</span><span class="pun">;</span><span class="pln">
- </span><span class="com">// creating variables for "nighttime" switch and if strip is turned on</span><span class="pln">
- </span><span class="kwd">bool</span><span class="pln"> nighttime </span><span class="pun">=</span><span class="pln"> </span><span class="kwd">false</span><span class="pun">;</span><span class="pln">
- </span><span class="kwd">bool</span><span class="pln"> strip_on </span><span class="pun">=</span><span class="pln"> </span><span class="kwd">false</span><span class="pun">;</span><span class="pln">
- </span><span class="com">// defining rgb colors for the led strip</span><span class="pln">
- rgb_color color_on</span><span class="pun">;</span><span class="pln">
- color_on</span><span class="pun">.</span><span class="pln">red </span><span class="pun">=</span><span class="pln"> </span><span class="lit">255</span><span class="pun">;</span><span class="pln">
- color_on</span><span class="pun">.</span><span class="pln">green </span><span class="pun">=</span><span class="pln"> </span><span class="lit">255</span><span class="pun">;</span><span class="pln">
- color_on</span><span class="pun">.</span><span class="pln">blue </span><span class="pun">=</span><span class="pln"> </span><span class="lit">255</span><span class="pun">;</span><span class="pln">
- rgb_color color_off</span><span class="pun">;</span><span class="pln">
- color_off</span><span class="pun">.</span><span class="pln">red </span><span class="pun">=</span><span class="pln"> </span><span class="lit">0</span><span class="pun">;</span><span class="pln">
- color_off</span><span class="pun">.</span><span class="pln">green </span><span class="pun">=</span><span class="pln"> </span><span class="lit">0</span><span class="pun">;</span><span class="pln">
- color_off</span><span class="pun">.</span><span class="pln">blue </span><span class="pun">=</span><span class="pln"> </span><span class="lit">0</span><span class="pun">;</span><span class="pln">
- </span><span class="kwd">void</span><span class="pln"> setup</span><span class="pun">()</span><span class="pln">
- </span><span class="pun">{</span><span class="pln">
- </span><span class="typ">Serial</span><span class="pun">.</span><span class="kwd">begin</span><span class="pun">(</span><span class="lit">9600</span><span class="pun">);</span><span class="pln">
- pinMode</span><span class="pun">(</span><span class="pln">mic_pin</span><span class="pun">,</span><span class="pln"> INPUT</span><span class="pun">);</span><span class="pln">
- pinMode</span><span class="pun">(</span><span class="pln">button_pin</span><span class="pun">,</span><span class="pln"> INPUT</span><span class="pun">);</span><span class="pln">
- pinMode</span><span class="pun">(</span><span class="pln">night_led_pin</span><span class="pun">,</span><span class="pln"> OUTPUT</span><span class="pun">);</span><span class="pln">
- pinMode</span><span class="pun">(</span><span class="pln">led_strip_pin</span><span class="pun">,</span><span class="pln"> OUTPUT</span><span class="pun">);</span><span class="pln">
- </span><span class="com">//initial values for LEDs </span><span class="pln">
- analogWrite</span><span class="pun">(</span><span class="pln">night_led_pin</span><span class="pun">,</span><span class="pln"> LOW</span><span class="pun">);</span><span class="pln">
- analogWrite</span><span class="pun">(</span><span class="pln">led_strip_pin</span><span class="pun">,</span><span class="pln"> LOW</span><span class="pun">);</span><span class="pln">
- </span><span class="pun">}</span><span class="pln">
- </span><span class="kwd">void</span><span class="pln"> loop</span><span class="pun">()</span><span class="pln">
- </span><span class="pun">{</span><span class="pln">
- </span><span class="com">// reading inputs</span><span class="pln">
- </span><span class="kwd">int</span><span class="pln"> mic_val </span><span class="pun">=</span><span class="pln"> analogRead</span><span class="pun">(</span><span class="pln">mic_pin</span><span class="pun">);</span><span class="pln">
- </span><span class="kwd">int</span><span class="pln"> button_state </span><span class="pun">=</span><span class="pln"> digitalRead</span><span class="pun">(</span><span class="pln">button_pin</span><span class="pun">);</span><span class="pln">
- mic_val </span><span class="pun">=</span><span class="pln"> constrain</span><span class="pun">(</span><span class="pln">mic_val</span><span class="pun">,</span><span class="pln"> </span><span class="lit">0</span><span class="pun">,</span><span class="pln"> </span><span class="lit">100</span><span class="pun">);</span><span class="pln"> </span><span class="com">//convert mic val to val b/t 0-100</span><span class="pln">
- </span><span class="com">// determining color for the led strip, on and off and white light</span><span class="pln">
- </span><span class="kwd">if</span><span class="pln"> </span><span class="pun">(</span><span class="pln">strip_on </span><span class="pun">==</span><span class="pln"> </span><span class="kwd">true</span><span class="pun">)</span><span class="pln"> </span><span class="pun">{</span><span class="pln">
- </span><span class="kwd">for</span><span class="pun">(</span><span class="typ">uint16_t</span><span class="pln"> i </span><span class="pun">=</span><span class="pln"> </span><span class="lit">0</span><span class="pun">;</span><span class="pln"> i </span><span class="pun"><</span><span class="pln"> LED_COUNT</span><span class="pun">;</span><span class="pln"> i</span><span class="pun">++)</span><span class="pln"> </span><span class="pun">{</span><span class="pln">
- colors</span><span class="pun">[</span><span class="pln">i</span><span class="pun">]</span><span class="pln"> </span><span class="pun">=</span><span class="pln"> color_on</span><span class="pun">;</span><span class="pln">
- </span><span class="pun">}</span><span class="pln">
- </span><span class="pun">}</span><span class="pln">
- </span><span class="kwd">else</span><span class="pln"> </span><span class="pun">{</span><span class="pln">
- </span><span class="kwd">for</span><span class="pun">(</span><span class="typ">uint16_t</span><span class="pln"> i </span><span class="pun">=</span><span class="pln"> </span><span class="lit">0</span><span class="pun">;</span><span class="pln"> i </span><span class="pun"><</span><span class="pln"> LED_COUNT</span><span class="pun">;</span><span class="pln"> i</span><span class="pun">++)</span><span class="pln"> </span><span class="pun">{</span><span class="pln">
- colors</span><span class="pun">[</span><span class="pln">i</span><span class="pun">]</span><span class="pln"> </span><span class="pun">=</span><span class="pln"> color_off</span><span class="pun">;</span><span class="pln">
- </span><span class="pun">}</span><span class="pln">
- </span><span class="pun">}</span><span class="pln">
- ledStrip</span><span class="pun">.</span><span class="pln">write</span><span class="pun">(</span><span class="pln">colors</span><span class="pun">,</span><span class="pln"> LED_COUNT</span><span class="pun">);</span><span class="pln">
- delay</span><span class="pun">(</span><span class="lit">350</span><span class="pun">);</span><span class="pln">
- </span><span class="com">// night time mode selection</span><span class="pln">
- </span><span class="kwd">if</span><span class="pln"> </span><span class="pun">(</span><span class="pln">button_state </span><span class="pun">==</span><span class="pln"> HIGH</span><span class="pun">)</span><span class="pln"> </span><span class="pun">{</span><span class="pln">
- </span><span class="kwd">if</span><span class="pln"> </span><span class="pun">(</span><span class="pln">nighttime </span><span class="pun">==</span><span class="pln"> </span><span class="kwd">false</span><span class="pun">)</span><span class="pln"> </span><span class="pun">{</span><span class="pln">
- nighttime </span><span class="pun">=</span><span class="pln"> </span><span class="kwd">true</span><span class="pun">;</span><span class="pln">
- </span><span class="pun">}</span><span class="pln">
- </span><span class="kwd">else</span><span class="pln"> </span><span class="pun">{</span><span class="pln">
- nighttime </span><span class="pun">=</span><span class="pln"> </span><span class="kwd">false</span><span class="pun">;</span><span class="pln">
- </span><span class="pun">}</span><span class="pln">
- </span><span class="pun">}</span><span class="pln">
- </span><span class="com">// led strip turns on only if the sound is higher than the threshold</span><span class="pln">
- </span><span class="kwd">if</span><span class="pln"> </span><span class="pun">(</span><span class="pln">nighttime </span><span class="pun">==</span><span class="pln"> </span><span class="kwd">true</span><span class="pun">)</span><span class="pln"> </span><span class="pun">{</span><span class="pln">
- </span><span class="kwd">if</span><span class="pln"> </span><span class="pun">(</span><span class="pln">mic_val </span><span class="pun">></span><span class="pln"> clap_thresh </span><span class="kwd">and</span><span class="pln"> strip_on </span><span class="pun">==</span><span class="pln"> </span><span class="kwd">false</span><span class="pun">)</span><span class="pln"> </span><span class="pun">{</span><span class="pln">
- strip_on </span><span class="pun">=</span><span class="pln"> </span><span class="kwd">true</span><span class="pun">;</span><span class="pln">
- </span><span class="pun">}</span><span class="pln">
- </span><span class="kwd">else</span><span class="pln"> </span><span class="kwd">if</span><span class="pln"> </span><span class="pun">(</span><span class="pln">mic_val </span><span class="pun">></span><span class="pln"> clap_thresh </span><span class="kwd">and</span><span class="pln"> strip_on </span><span class="pun">==</span><span class="pln"> </span><span class="kwd">true</span><span class="pun">)</span><span class="pln"> </span><span class="pun">{</span><span class="pln">
- strip_on </span><span class="pun">=</span><span class="pln"> </span><span class="kwd">false</span><span class="pun">;</span><span class="pln">
- </span><span class="pun">}</span><span class="pln">
- </span><span class="pun">}</span><span class="pln">
- </span><span class="pun">}</span>
Comments are closed.