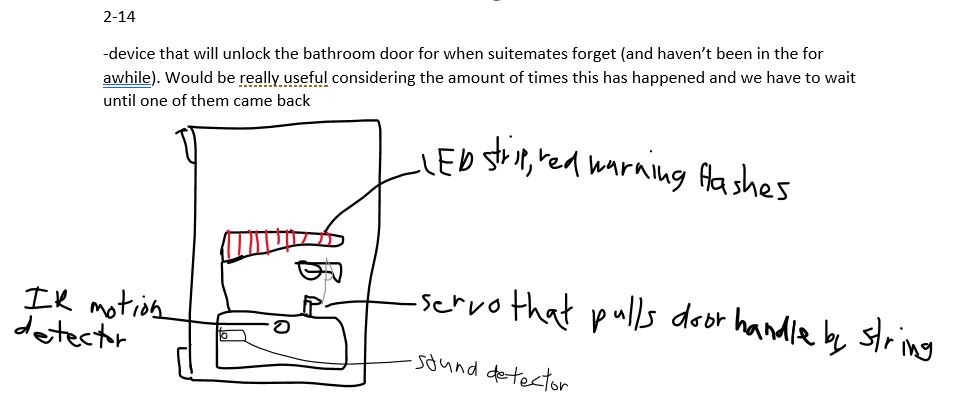
My project is meant to unlock the bathroom door after no motion for 30 minutes to prevent against us getting locked out when our suitemates forget to unlock our side.
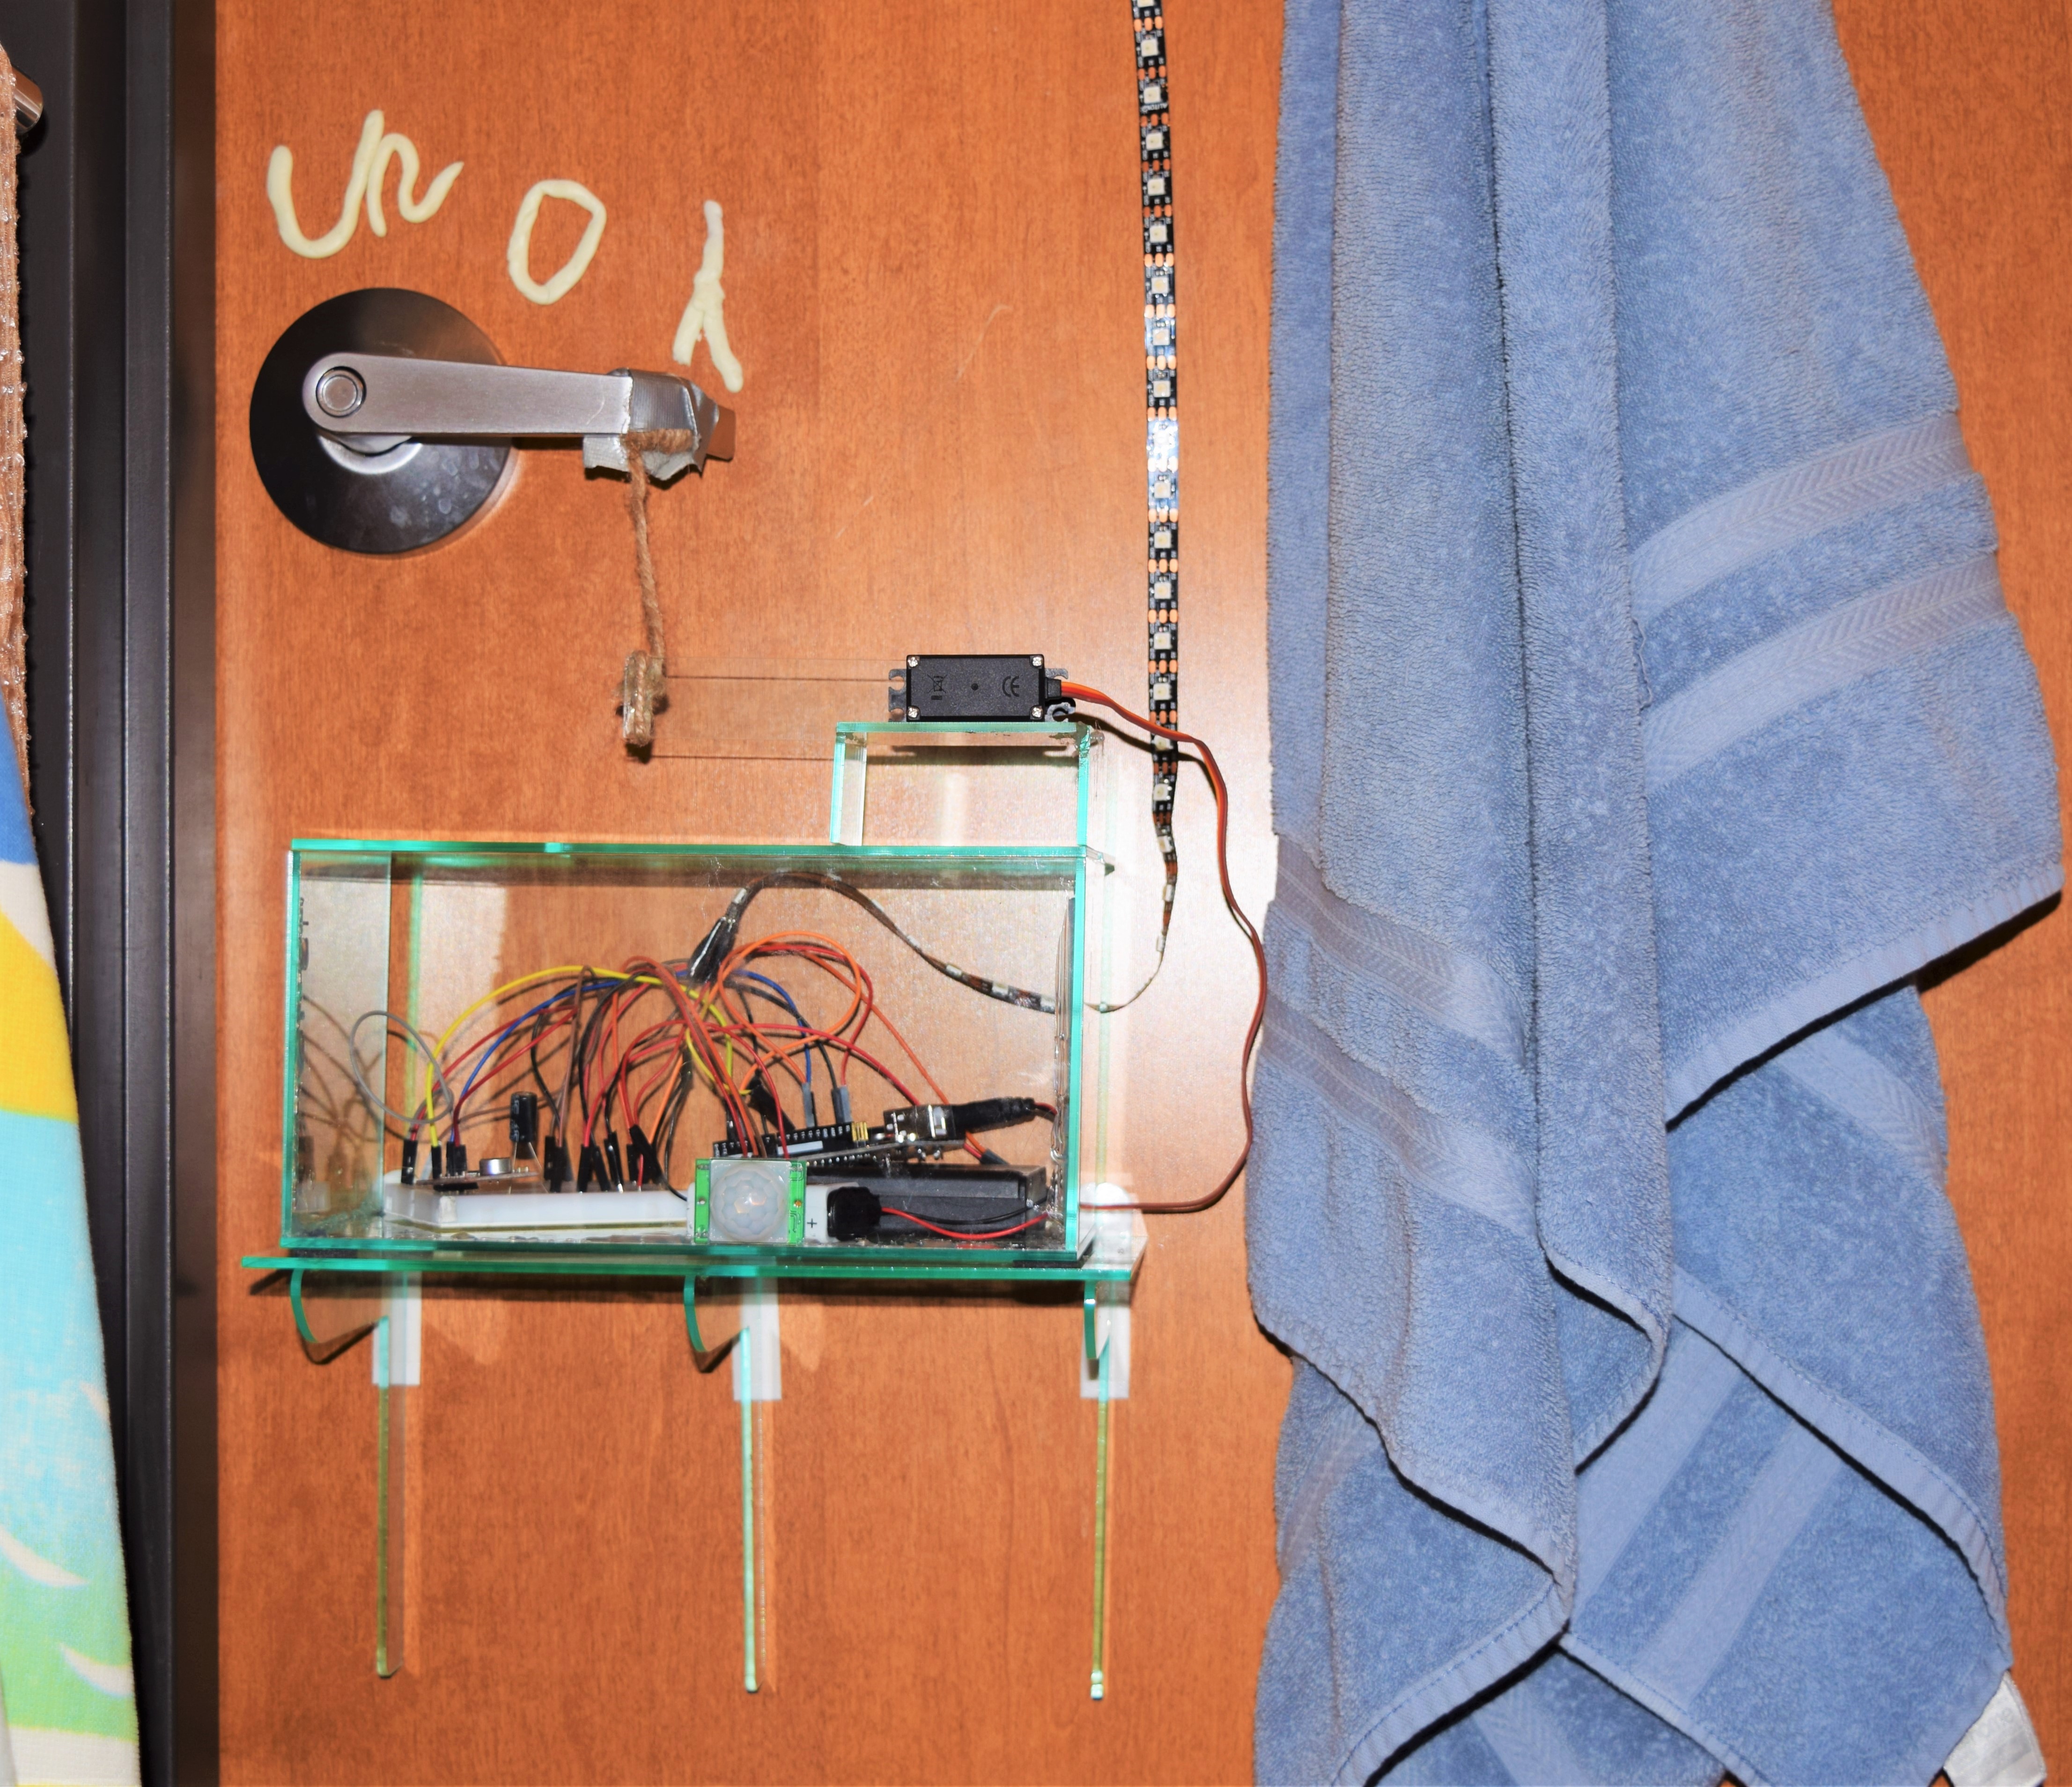
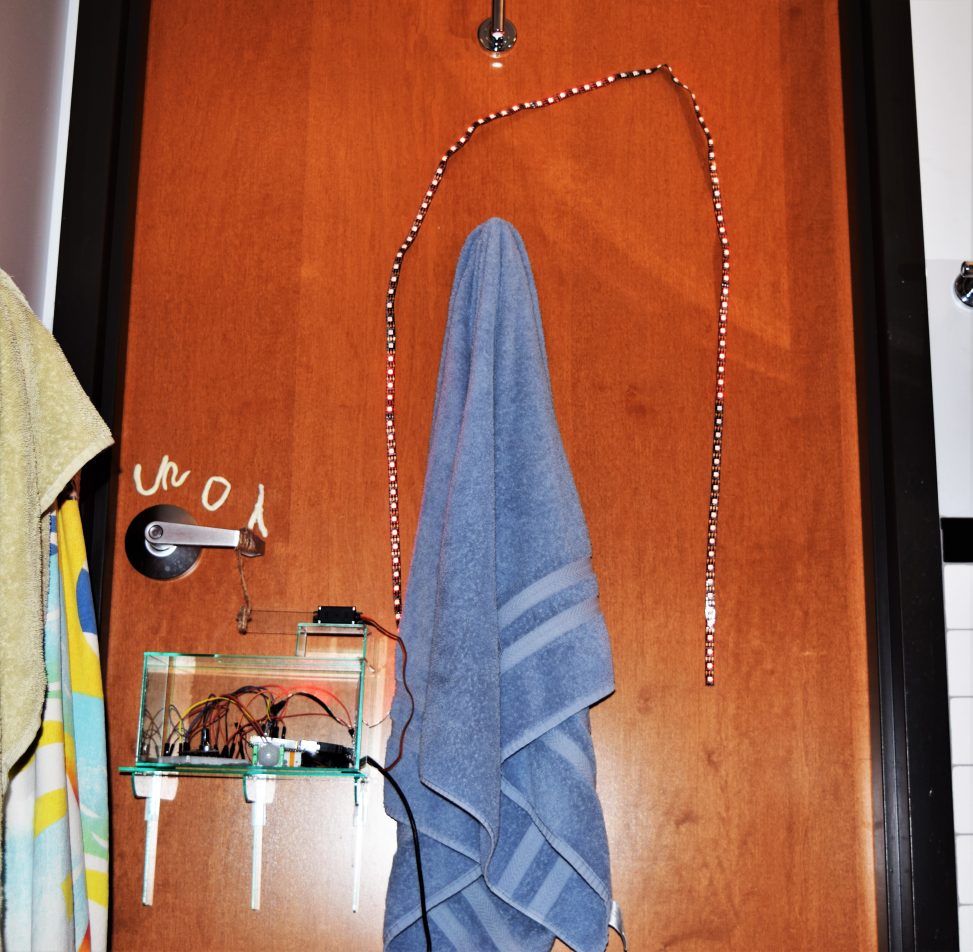
This is how my project is setup on the door with a proper view of its housing.
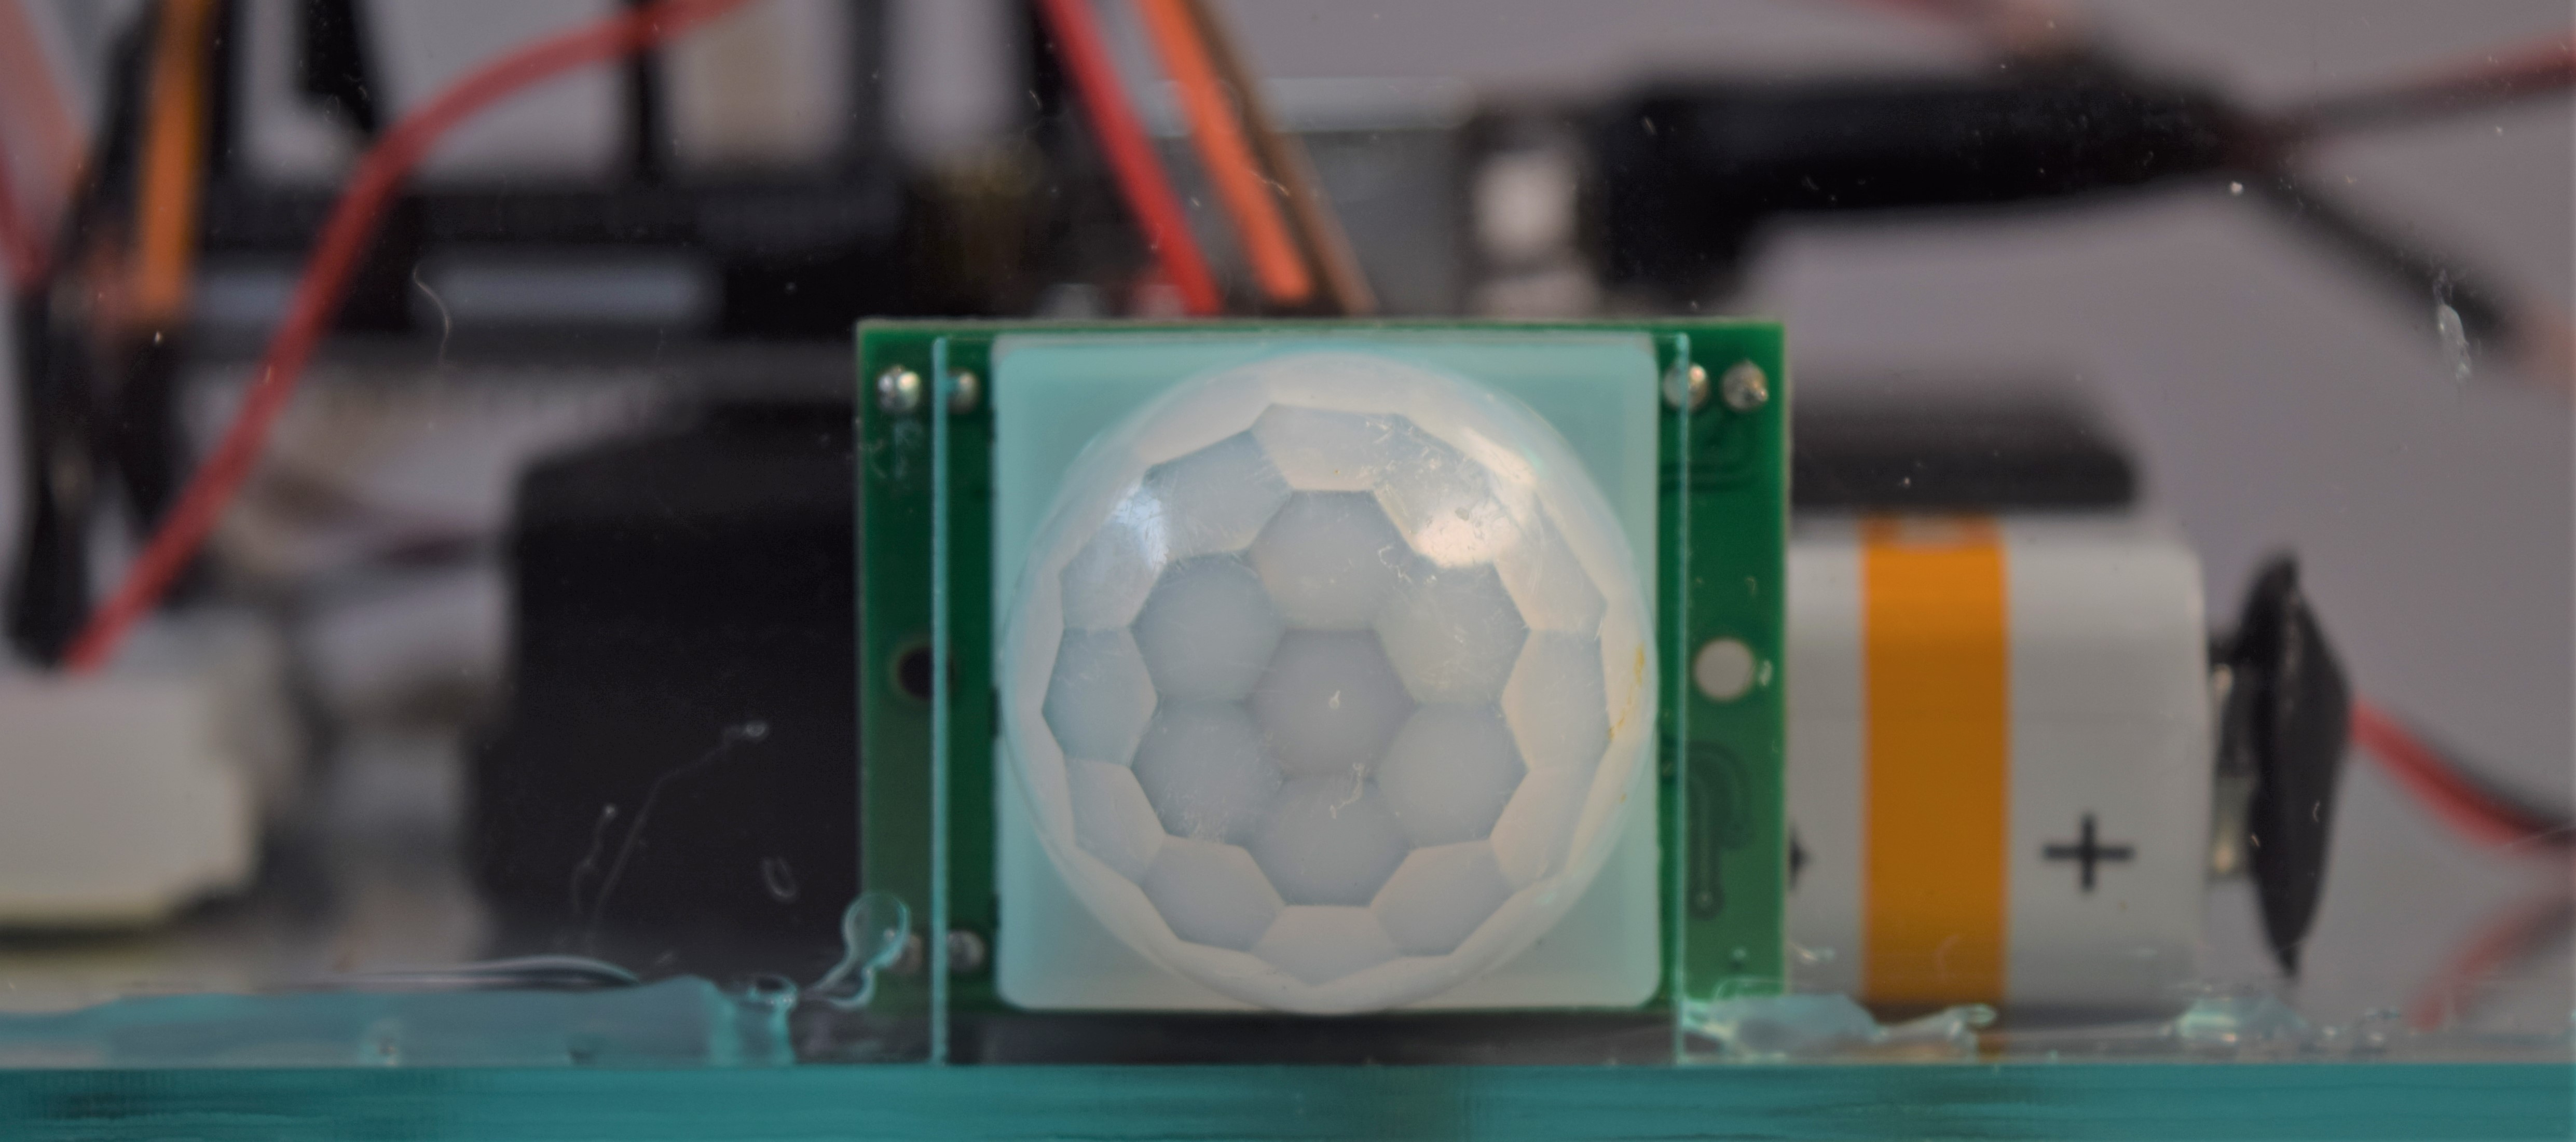
pir motion detector in cutout made for it
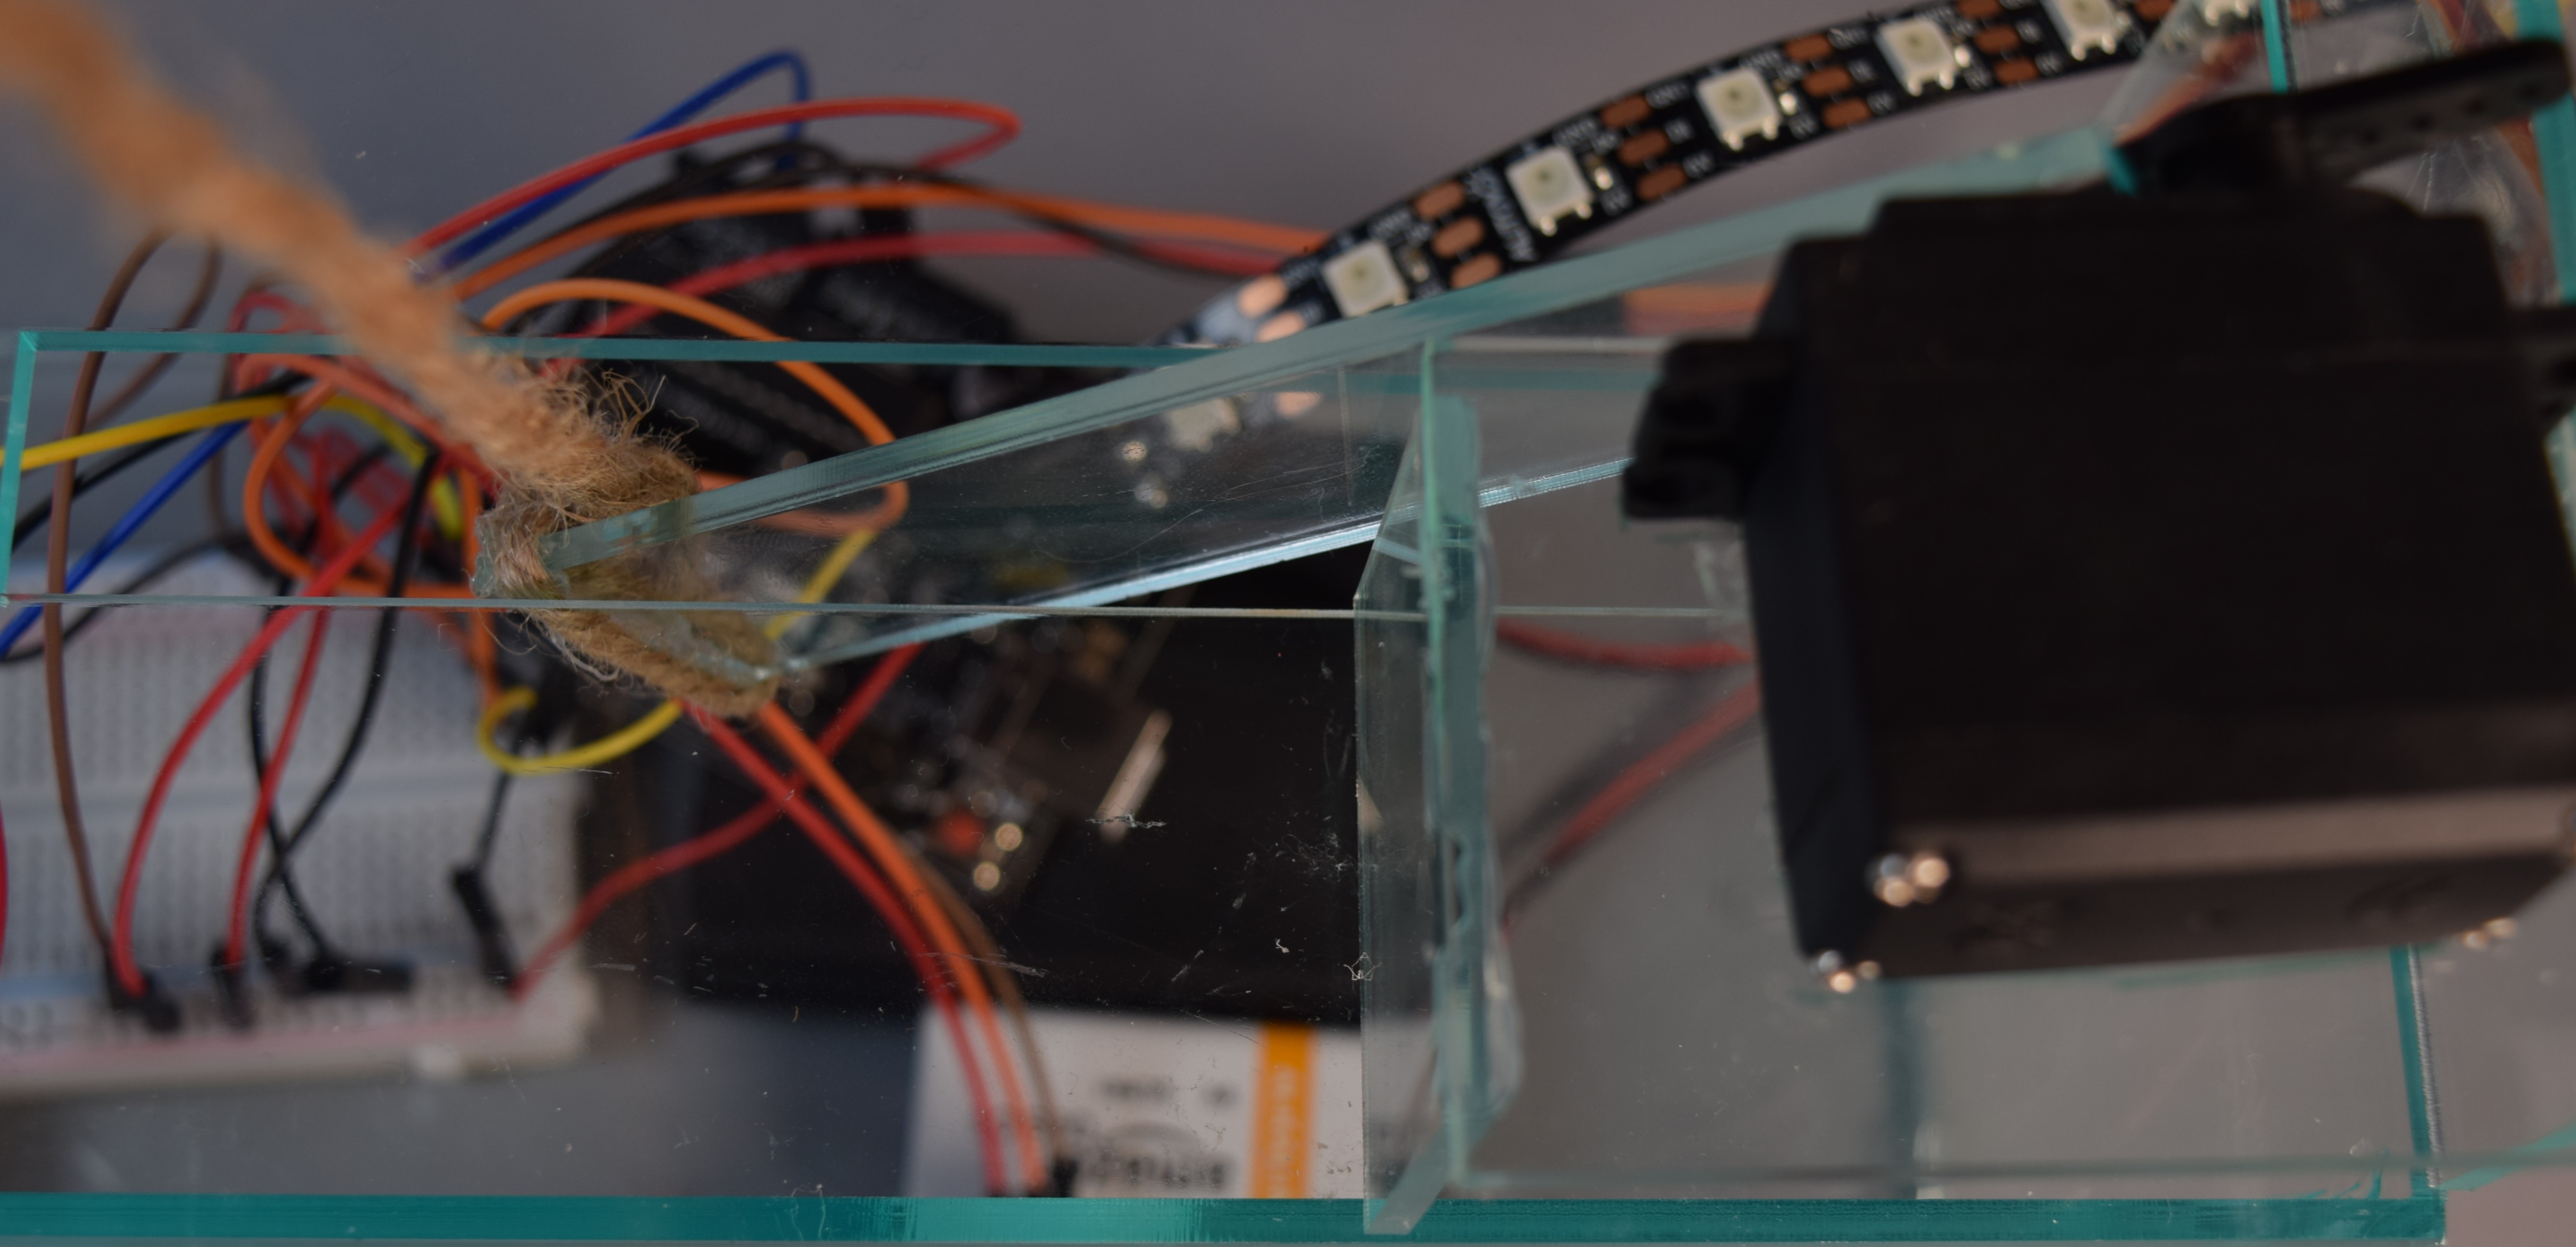
Motor mounted on top with slot for lever arm
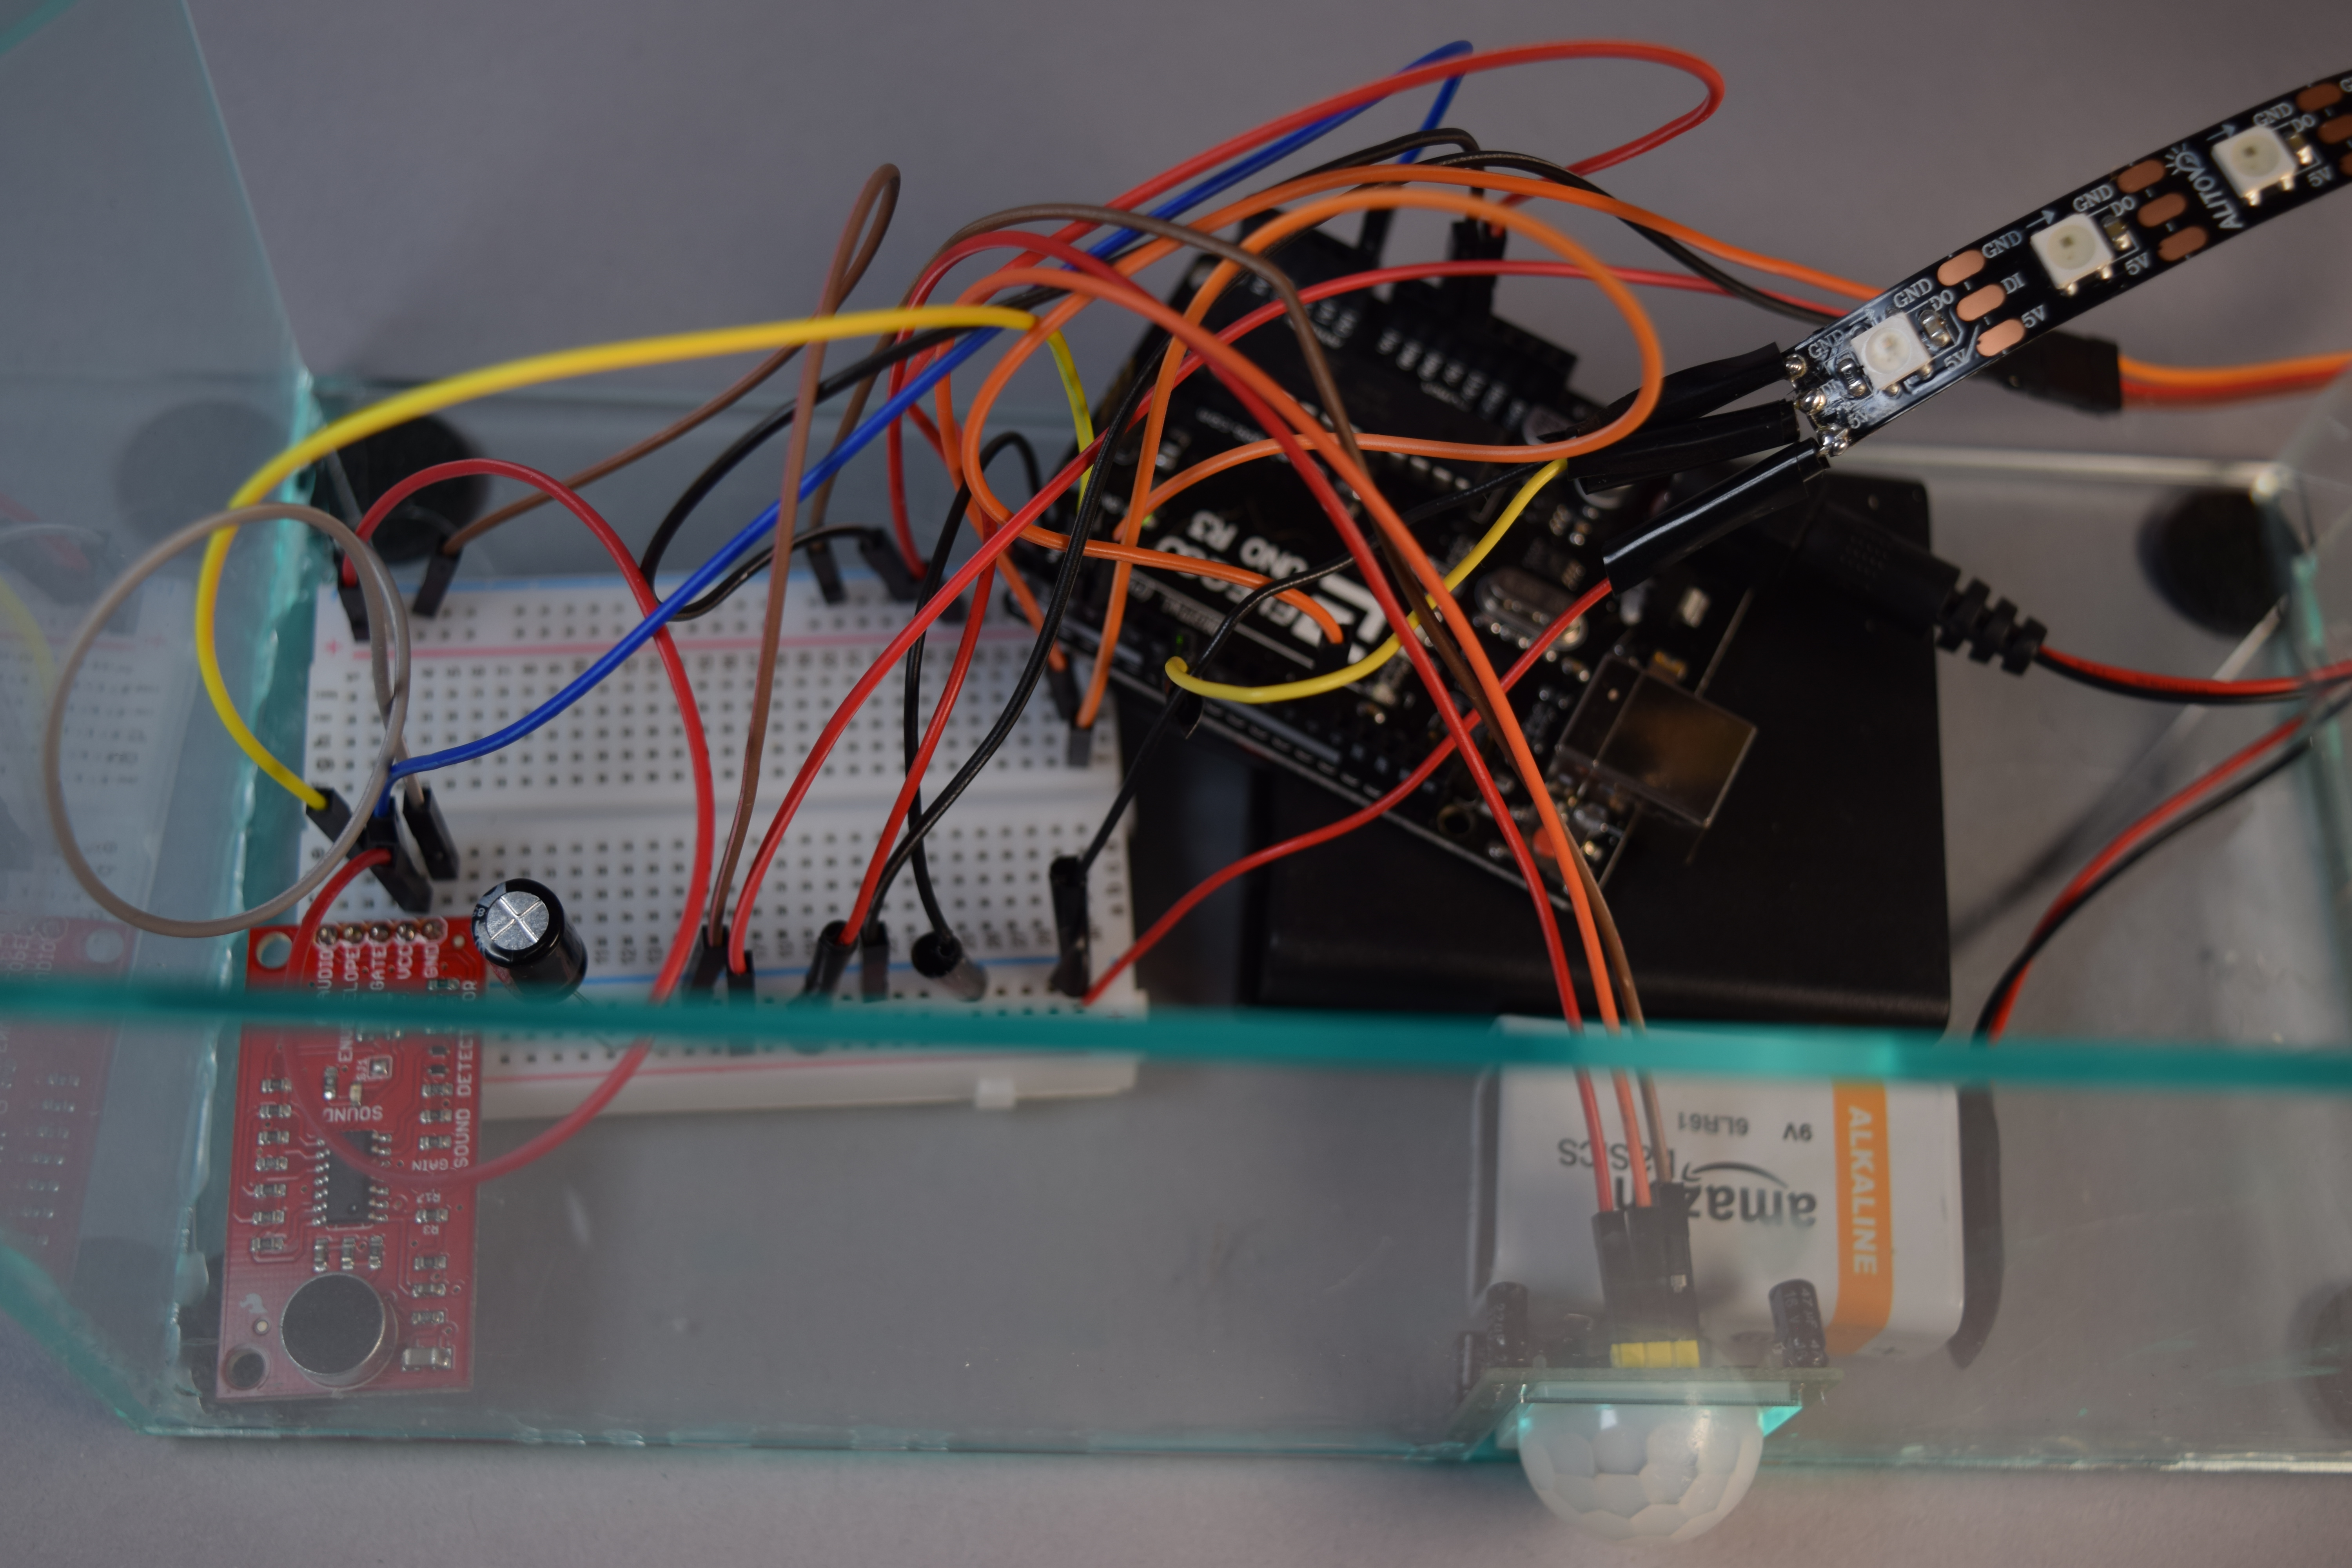
internal wiring
Decision Points:
- I was having a really hard time trying to get my LED strip to either flash red or flow through the strip with a gradient in the context of my code. I was able to make it work separately, but once put into this code, it would only stay on red. I was in the lounge of my dorm when I was playing around with the gradient example code from the Pololu library while trying to understand why it worked in one context but not the other; I was extremely frustrated and my suitemate who was also in the lounge commented that that while the flashing and gradient looked really cool, it was a bit dizzying. I then asked her what she thought about the lights when it was just on by itself and she said it was more than enough to get her attention and it was why she had started to look at what I was doing in the first place. Because of this, I settled on having the LED strip just light up red instead of spending more time trying to make it have a pattern.
- Another decision that I had to make was the acrylic for the housing. I was choosing between making it look cleaner with white or what I personally believed was cooler and would stand out more with green tinted or more of an in-between with frosted. I really liked the green tinted acrylic after I saw it on someone else’s project in the Fab Lab a few weeks prior, but I knew it would mean that all of my wiring would be completely visible. White acrylic on the other hand would make my project look much more aesthetically professional. Frosted acrylic would mostly hide the wiring and would have an ominous aspect to it. After talking to my roommate and suitemates who I share the bathroom with, I learned that they also thought seeing the wiring was cool. With a few extra opinions that supported my first choice, I went with that even if to others it would seem aesthetically worse as this project was to be for us.
Process:
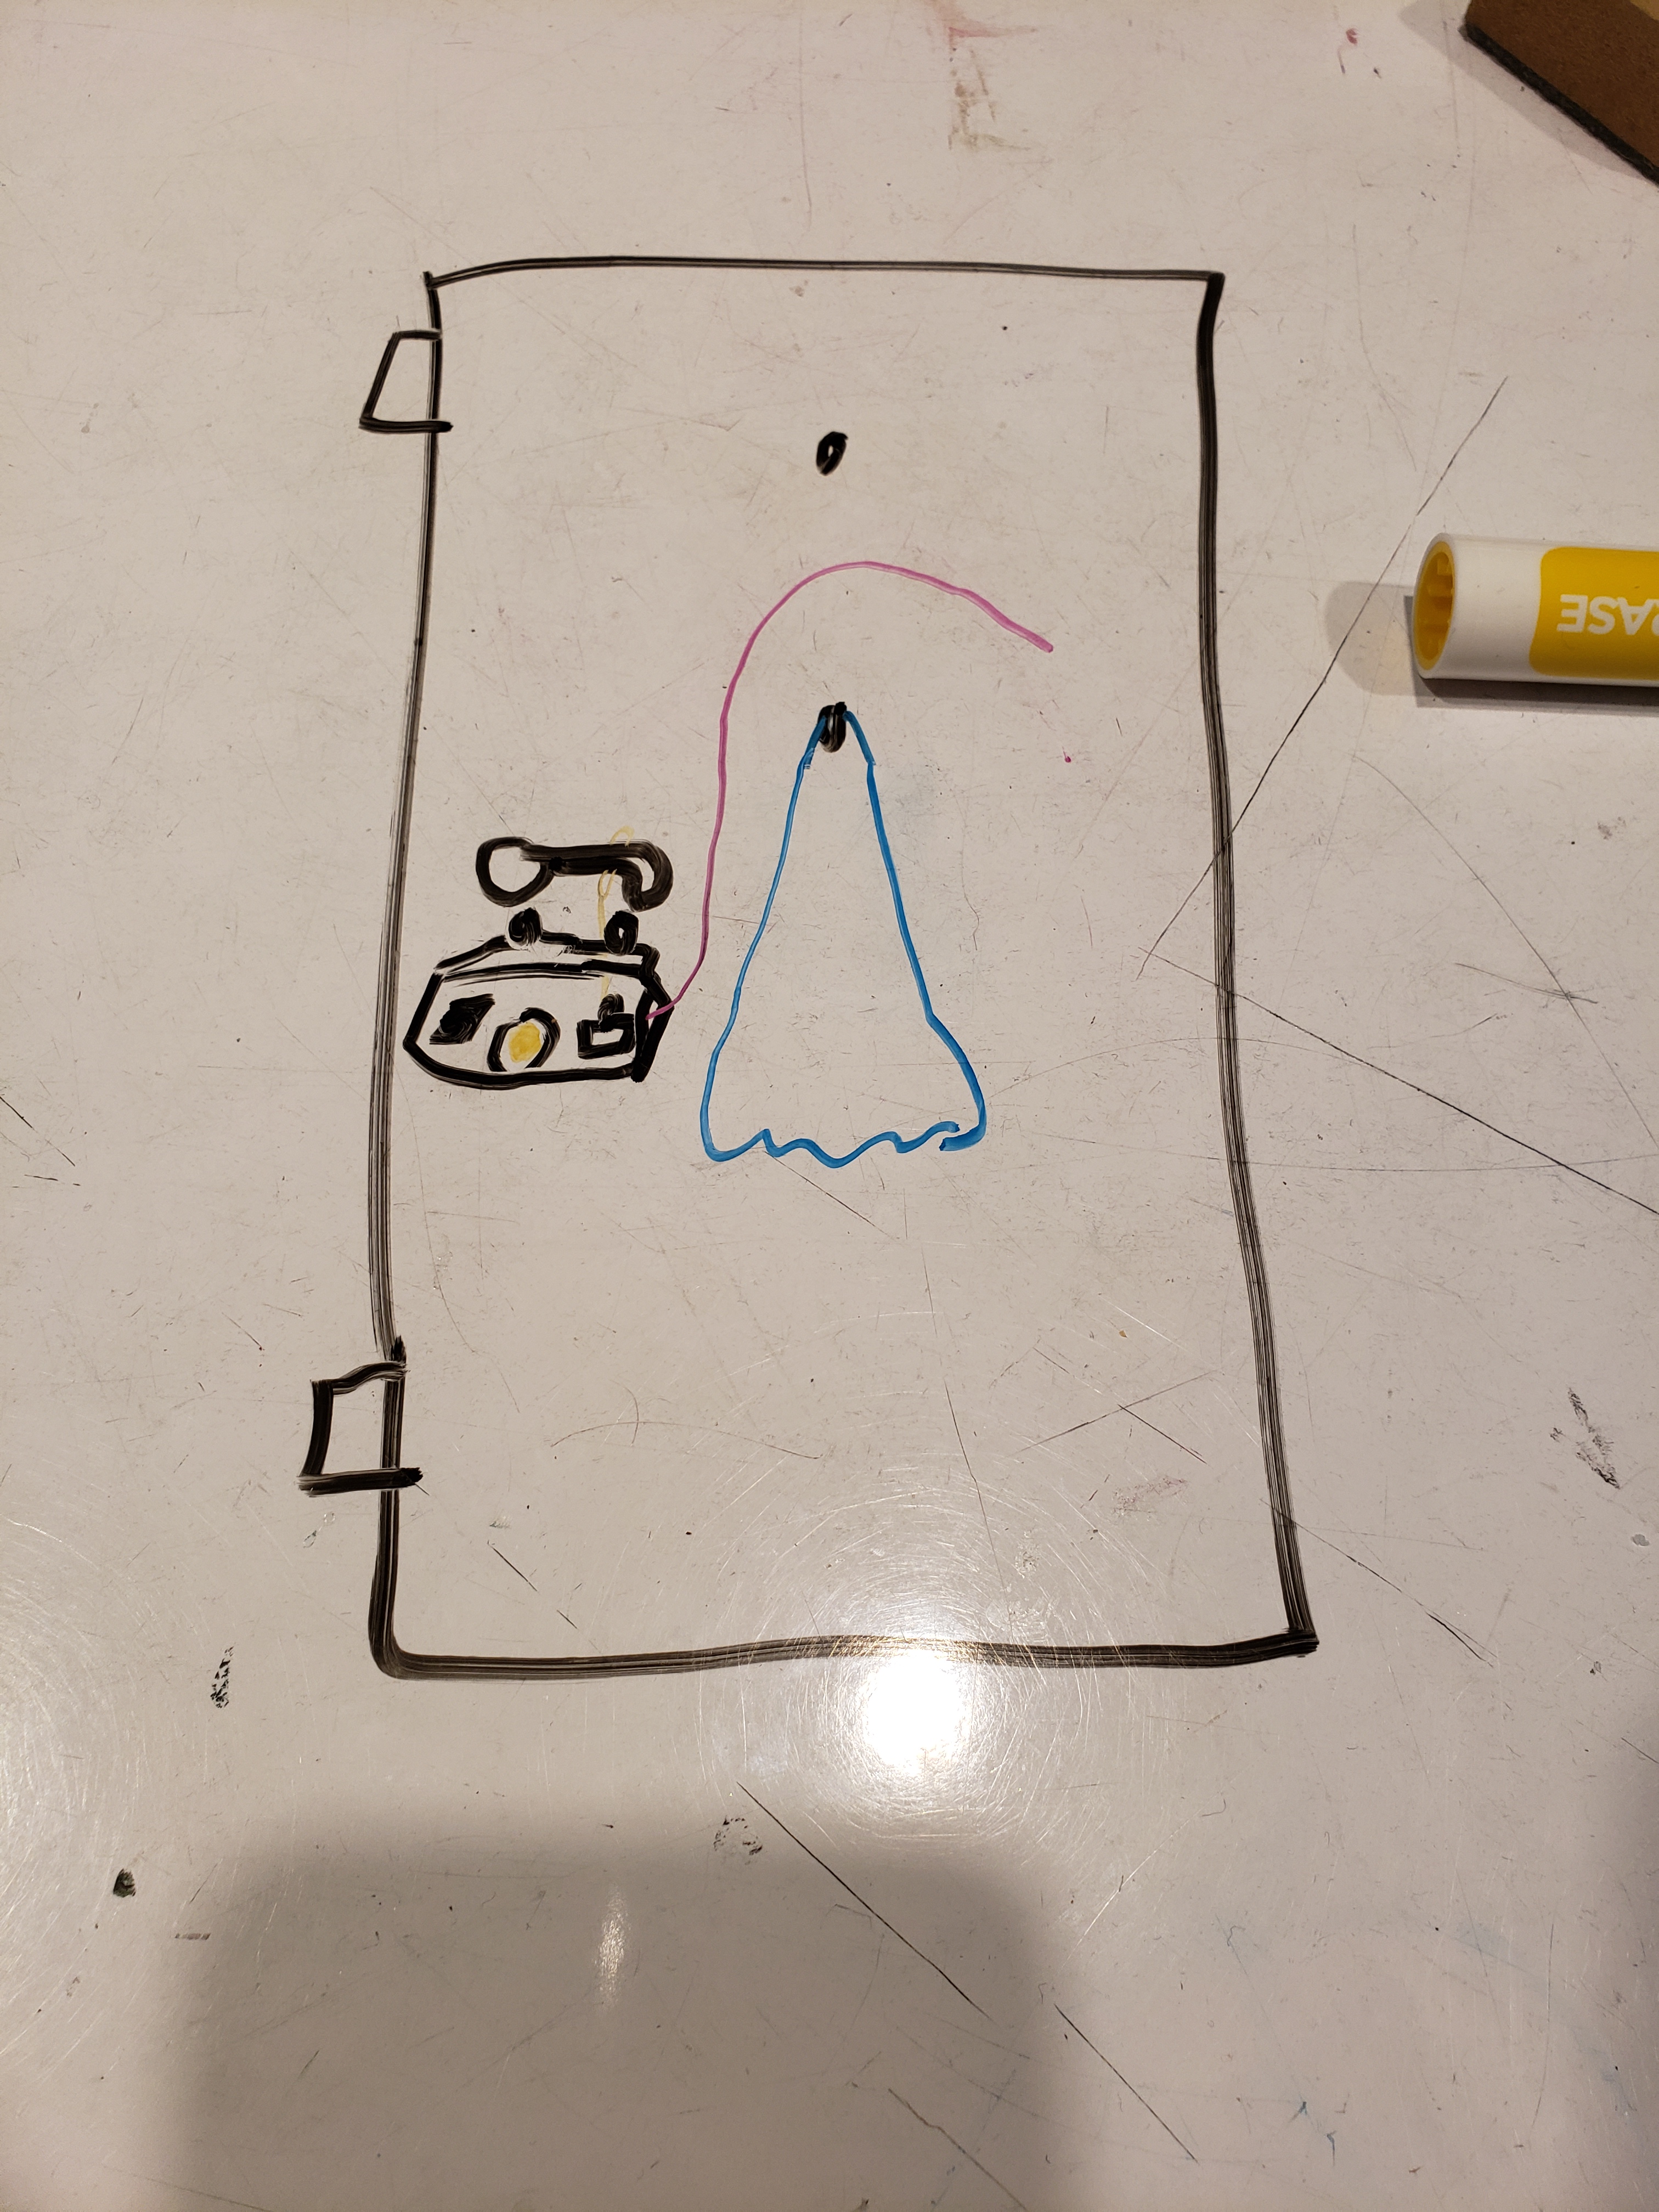
initial idea
1st sketch with door in mind-would be hung on hangers
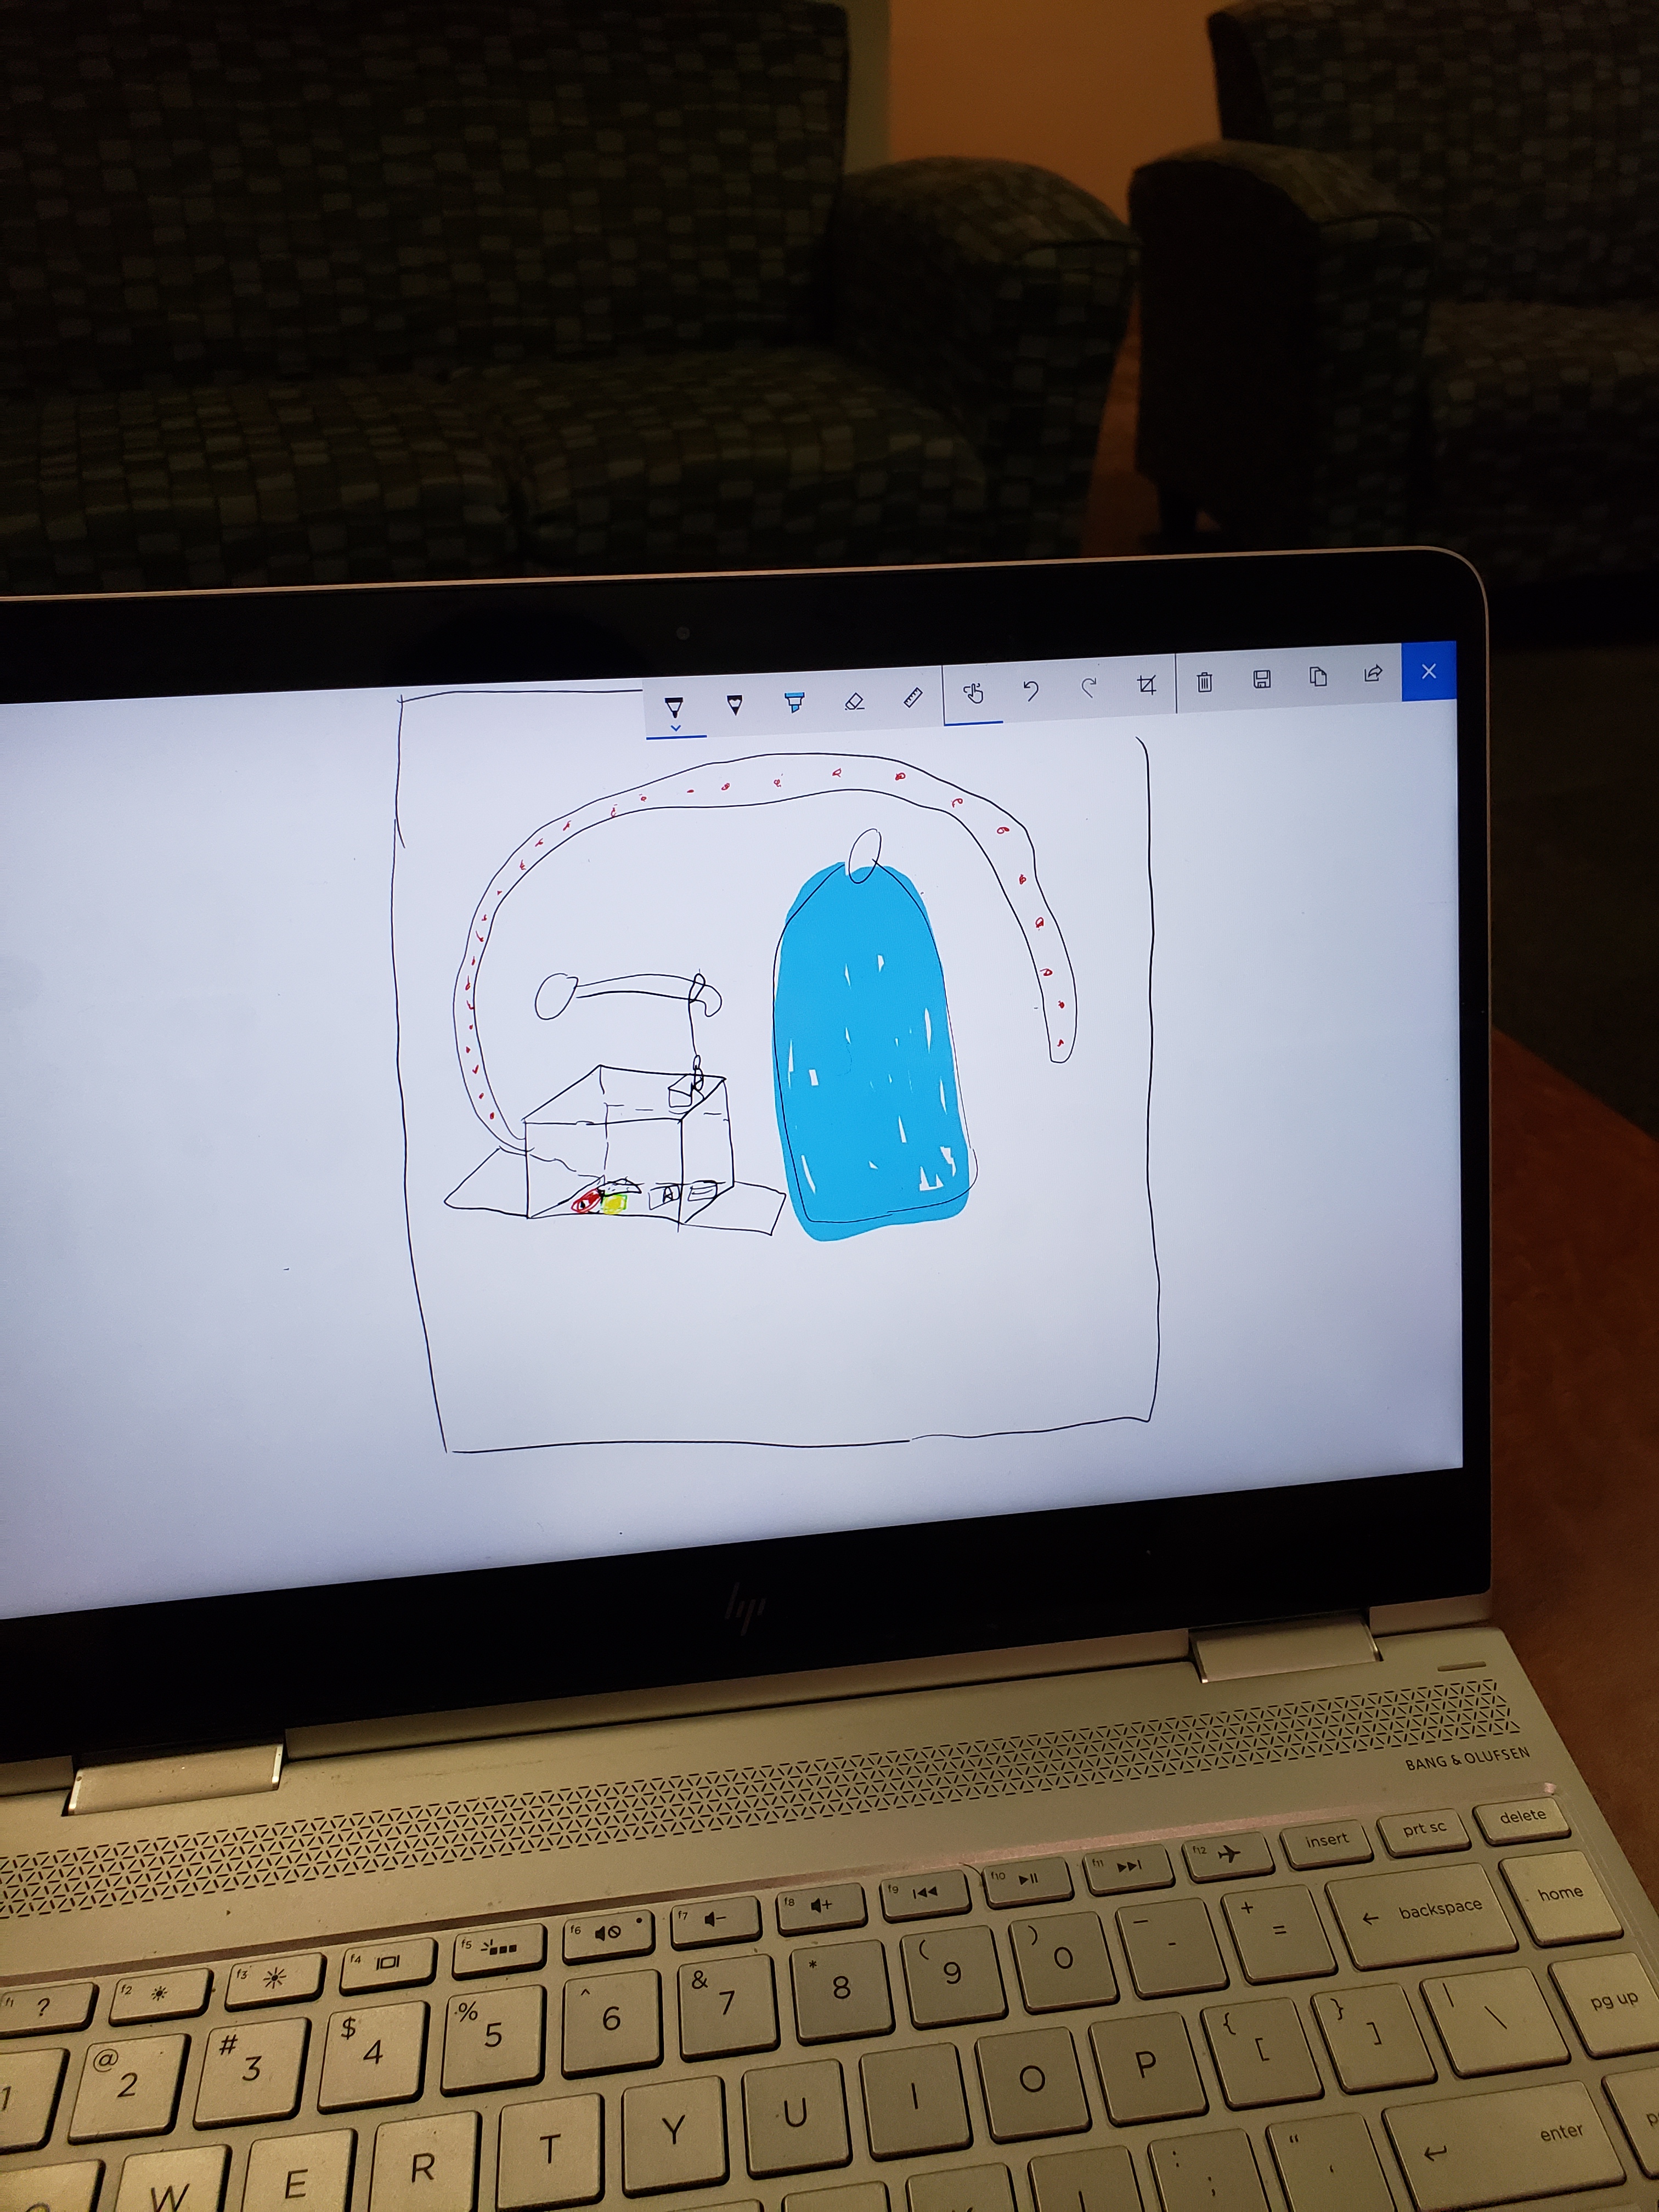
sketch with shelf but LED strip starting on opposite side

testing in setting
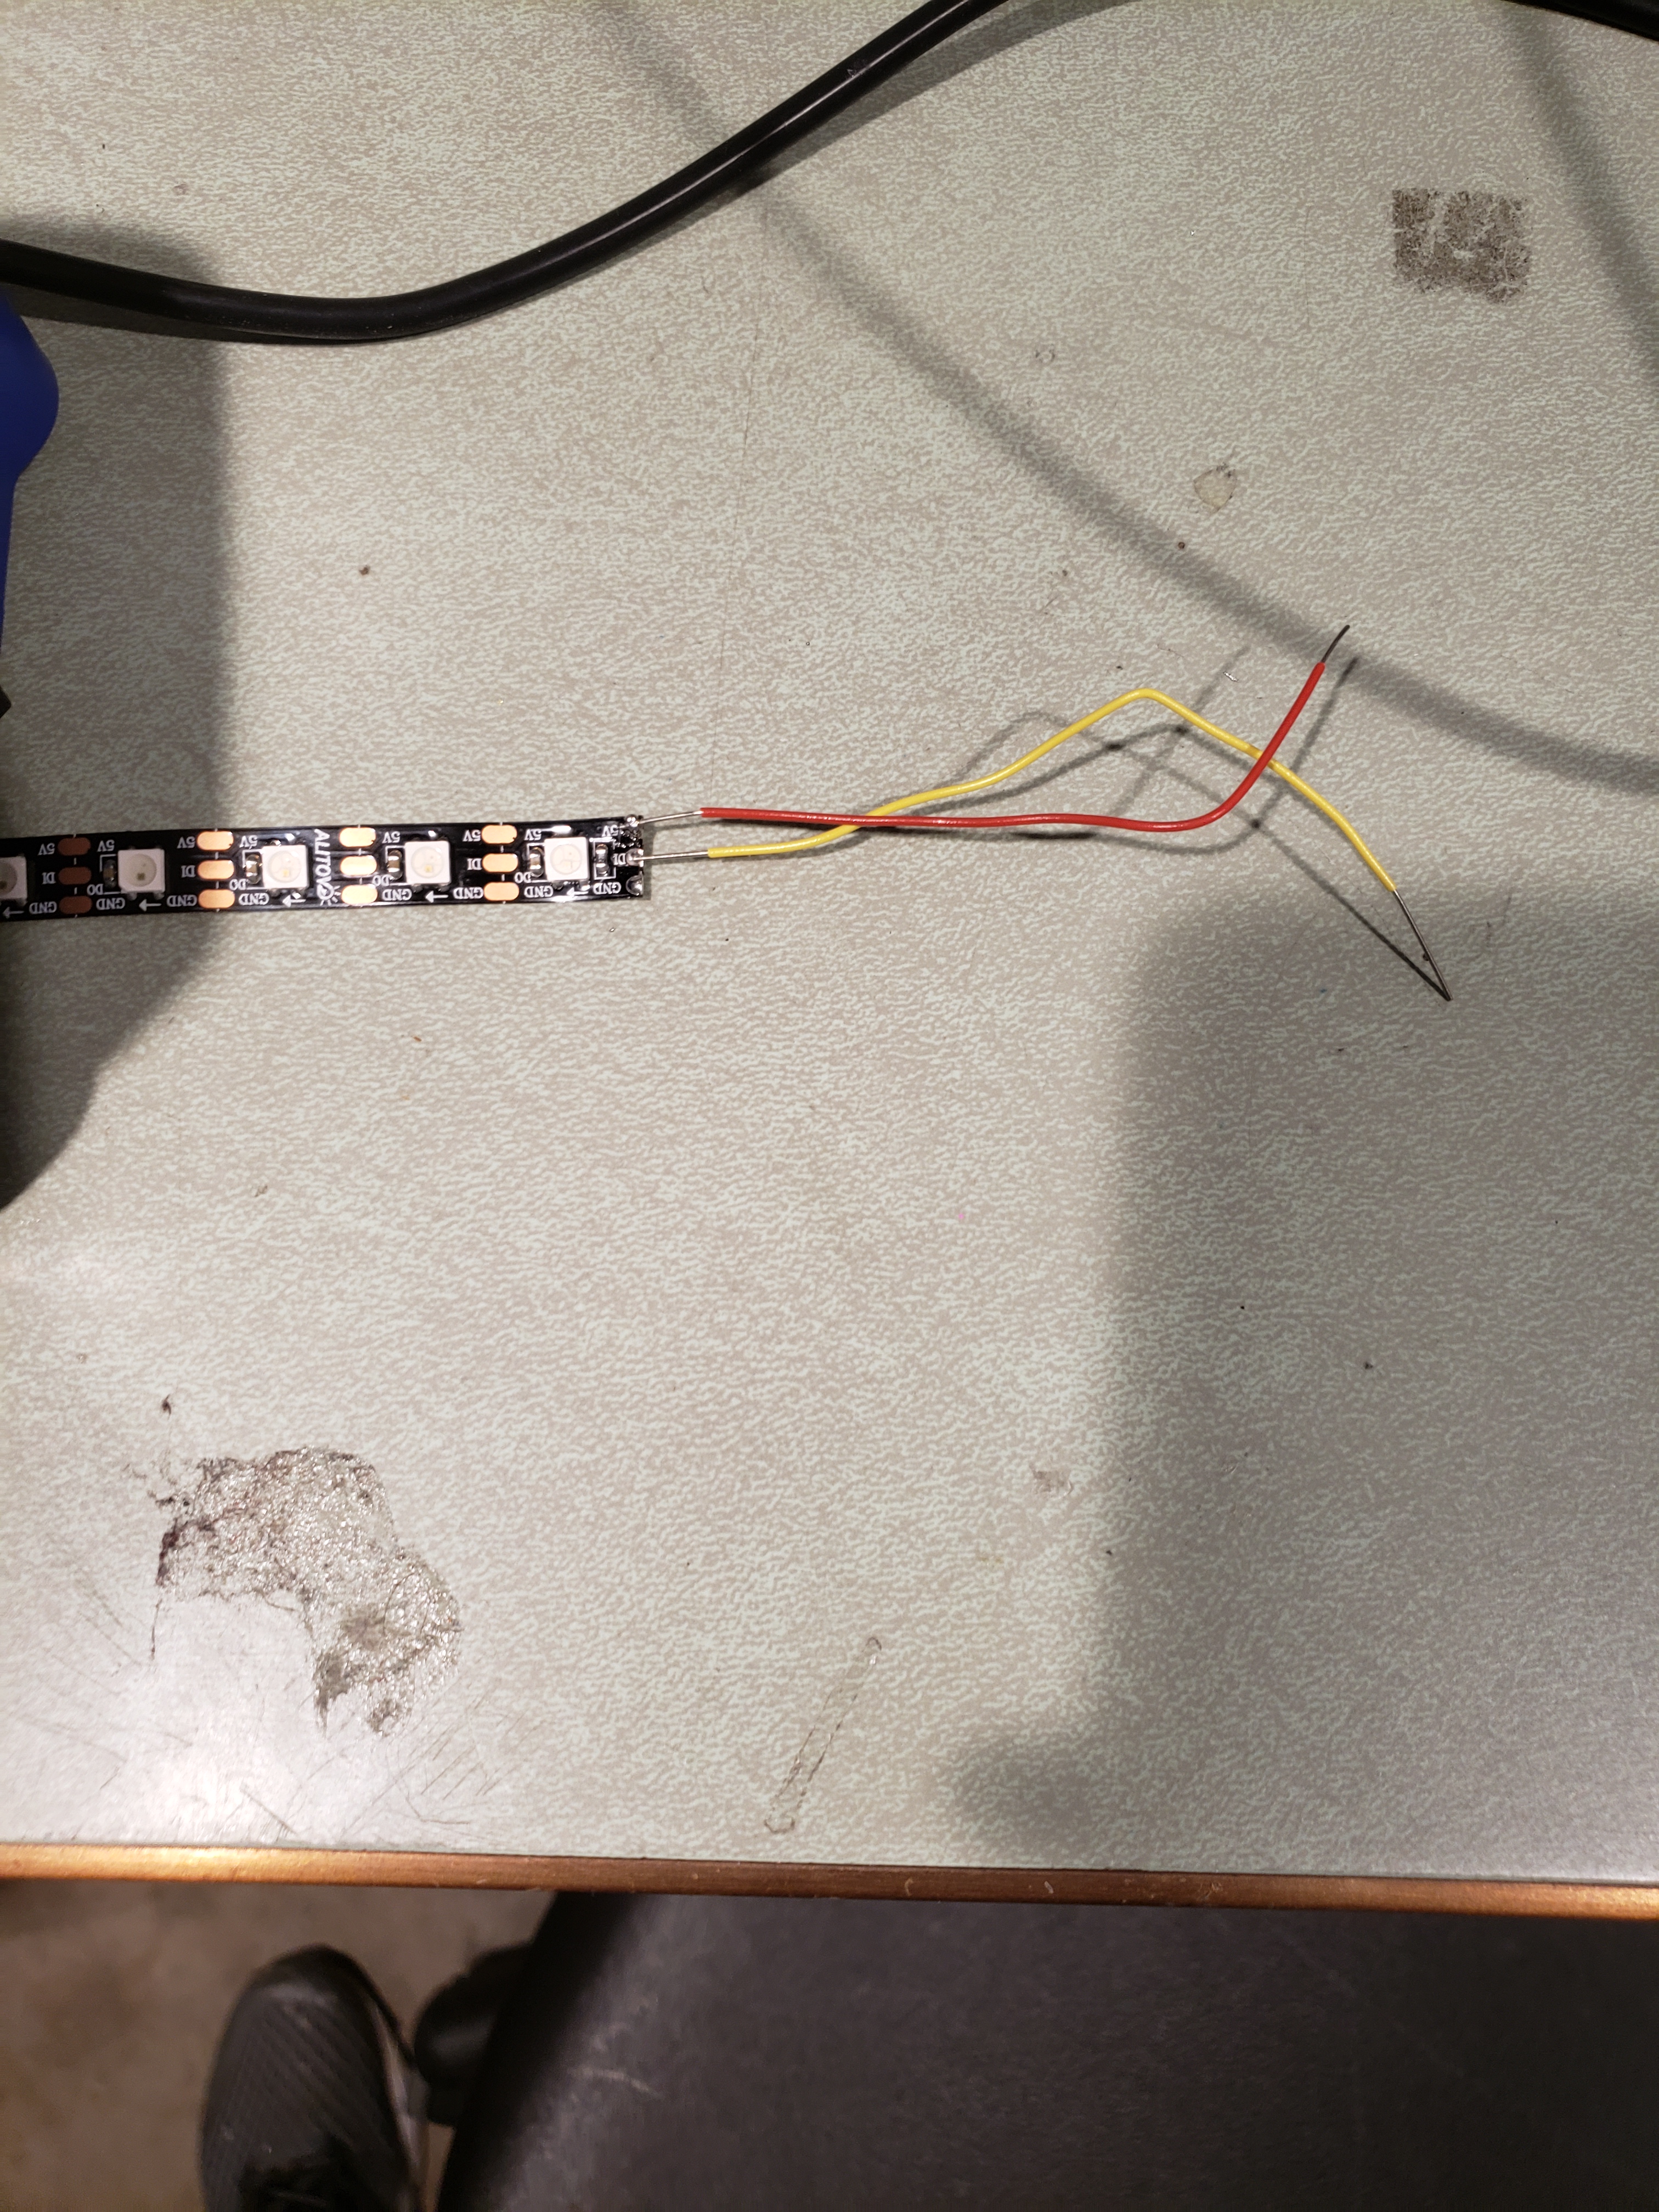
soldering leads on LED strip
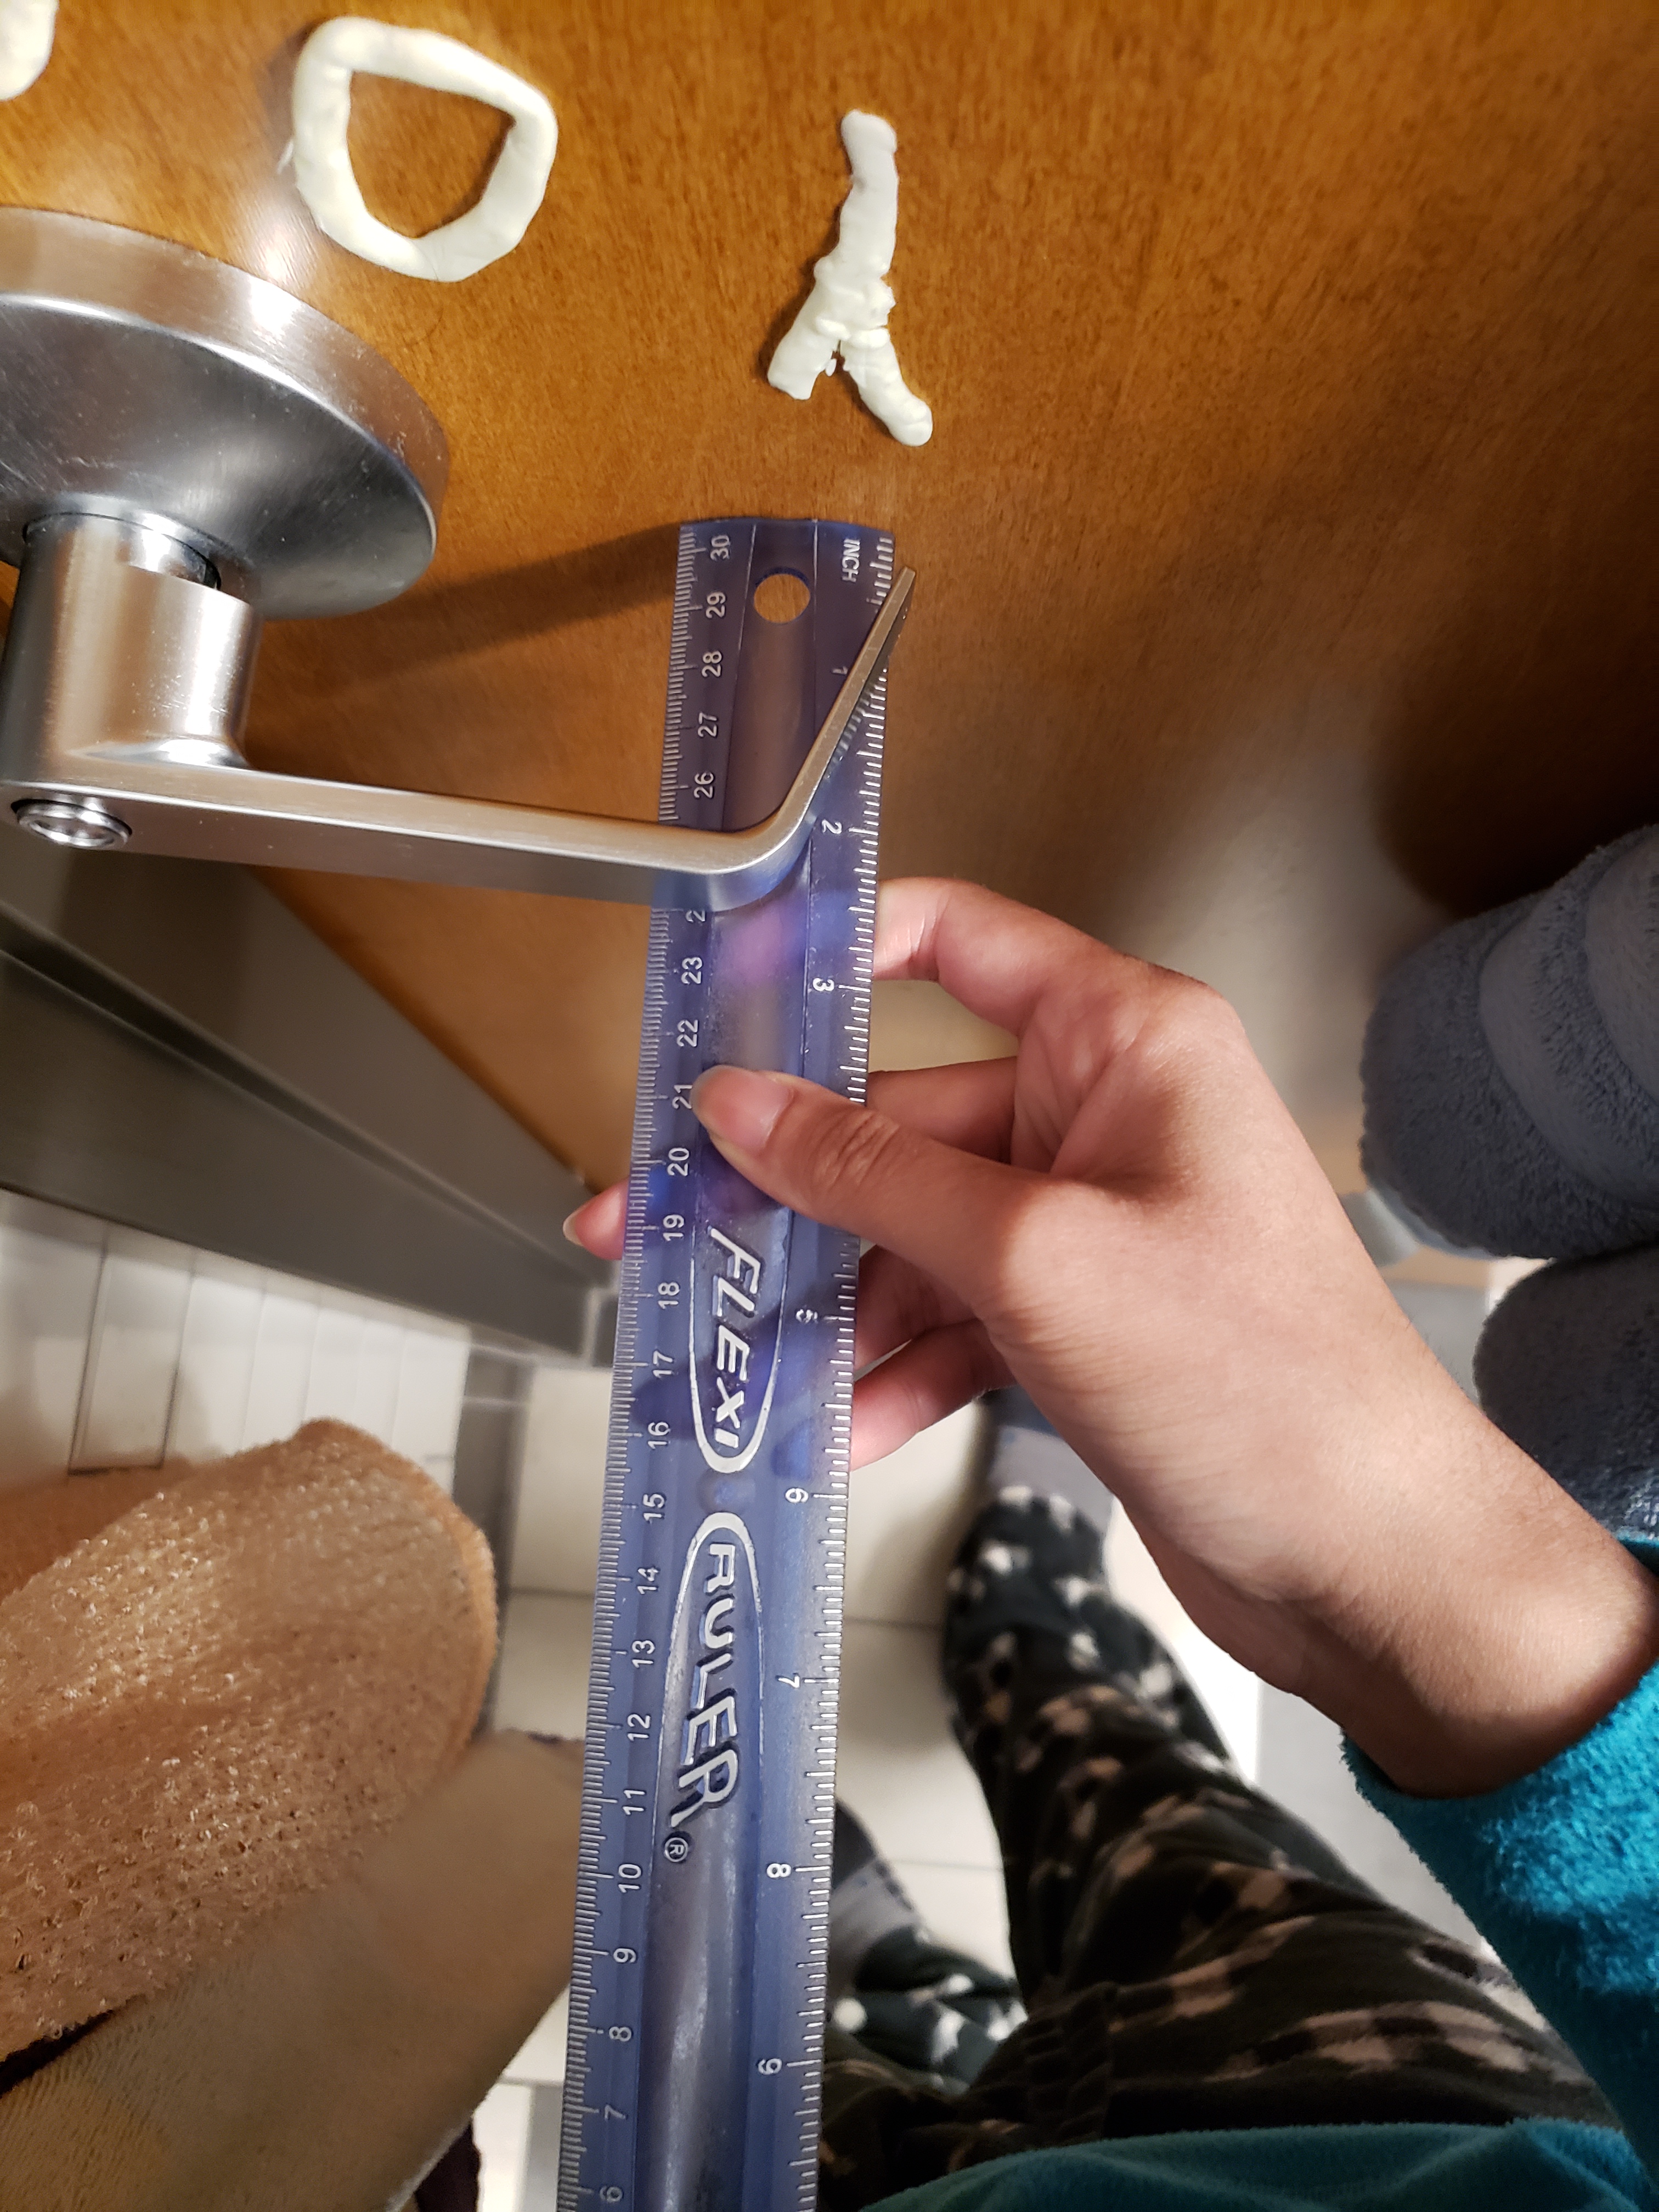
measuring dimensions on door
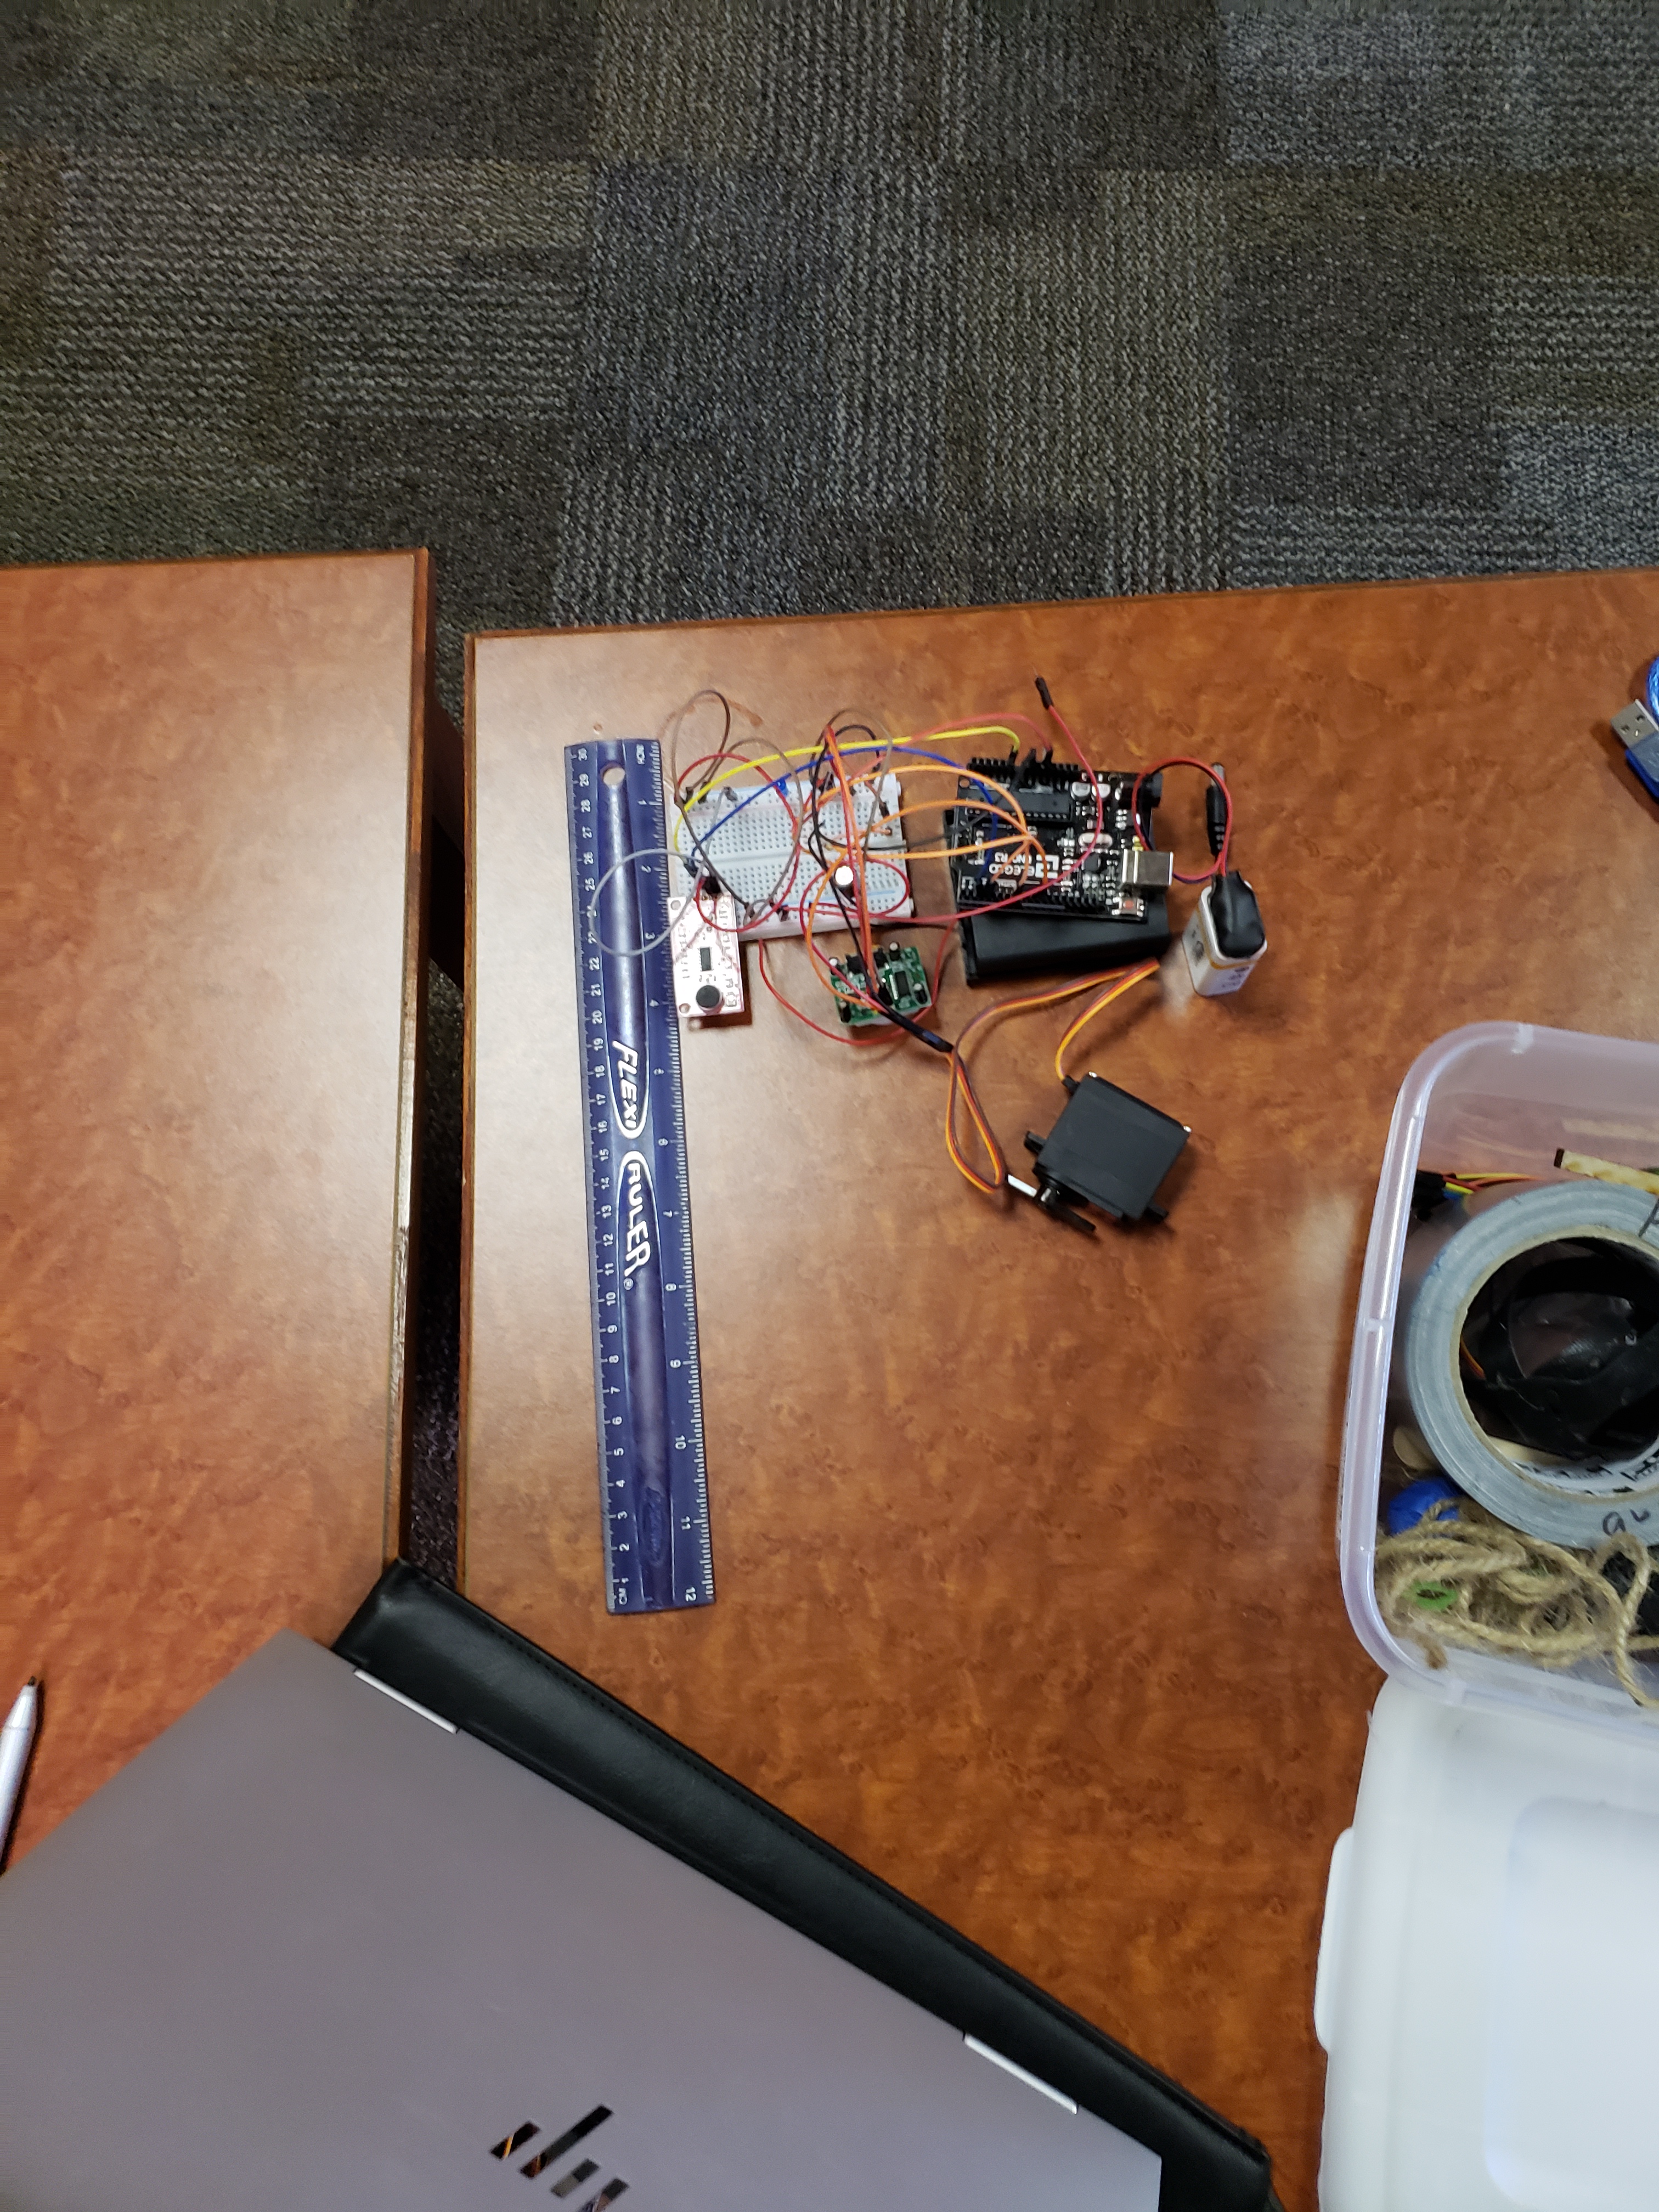
measuring electronics for box dimensions
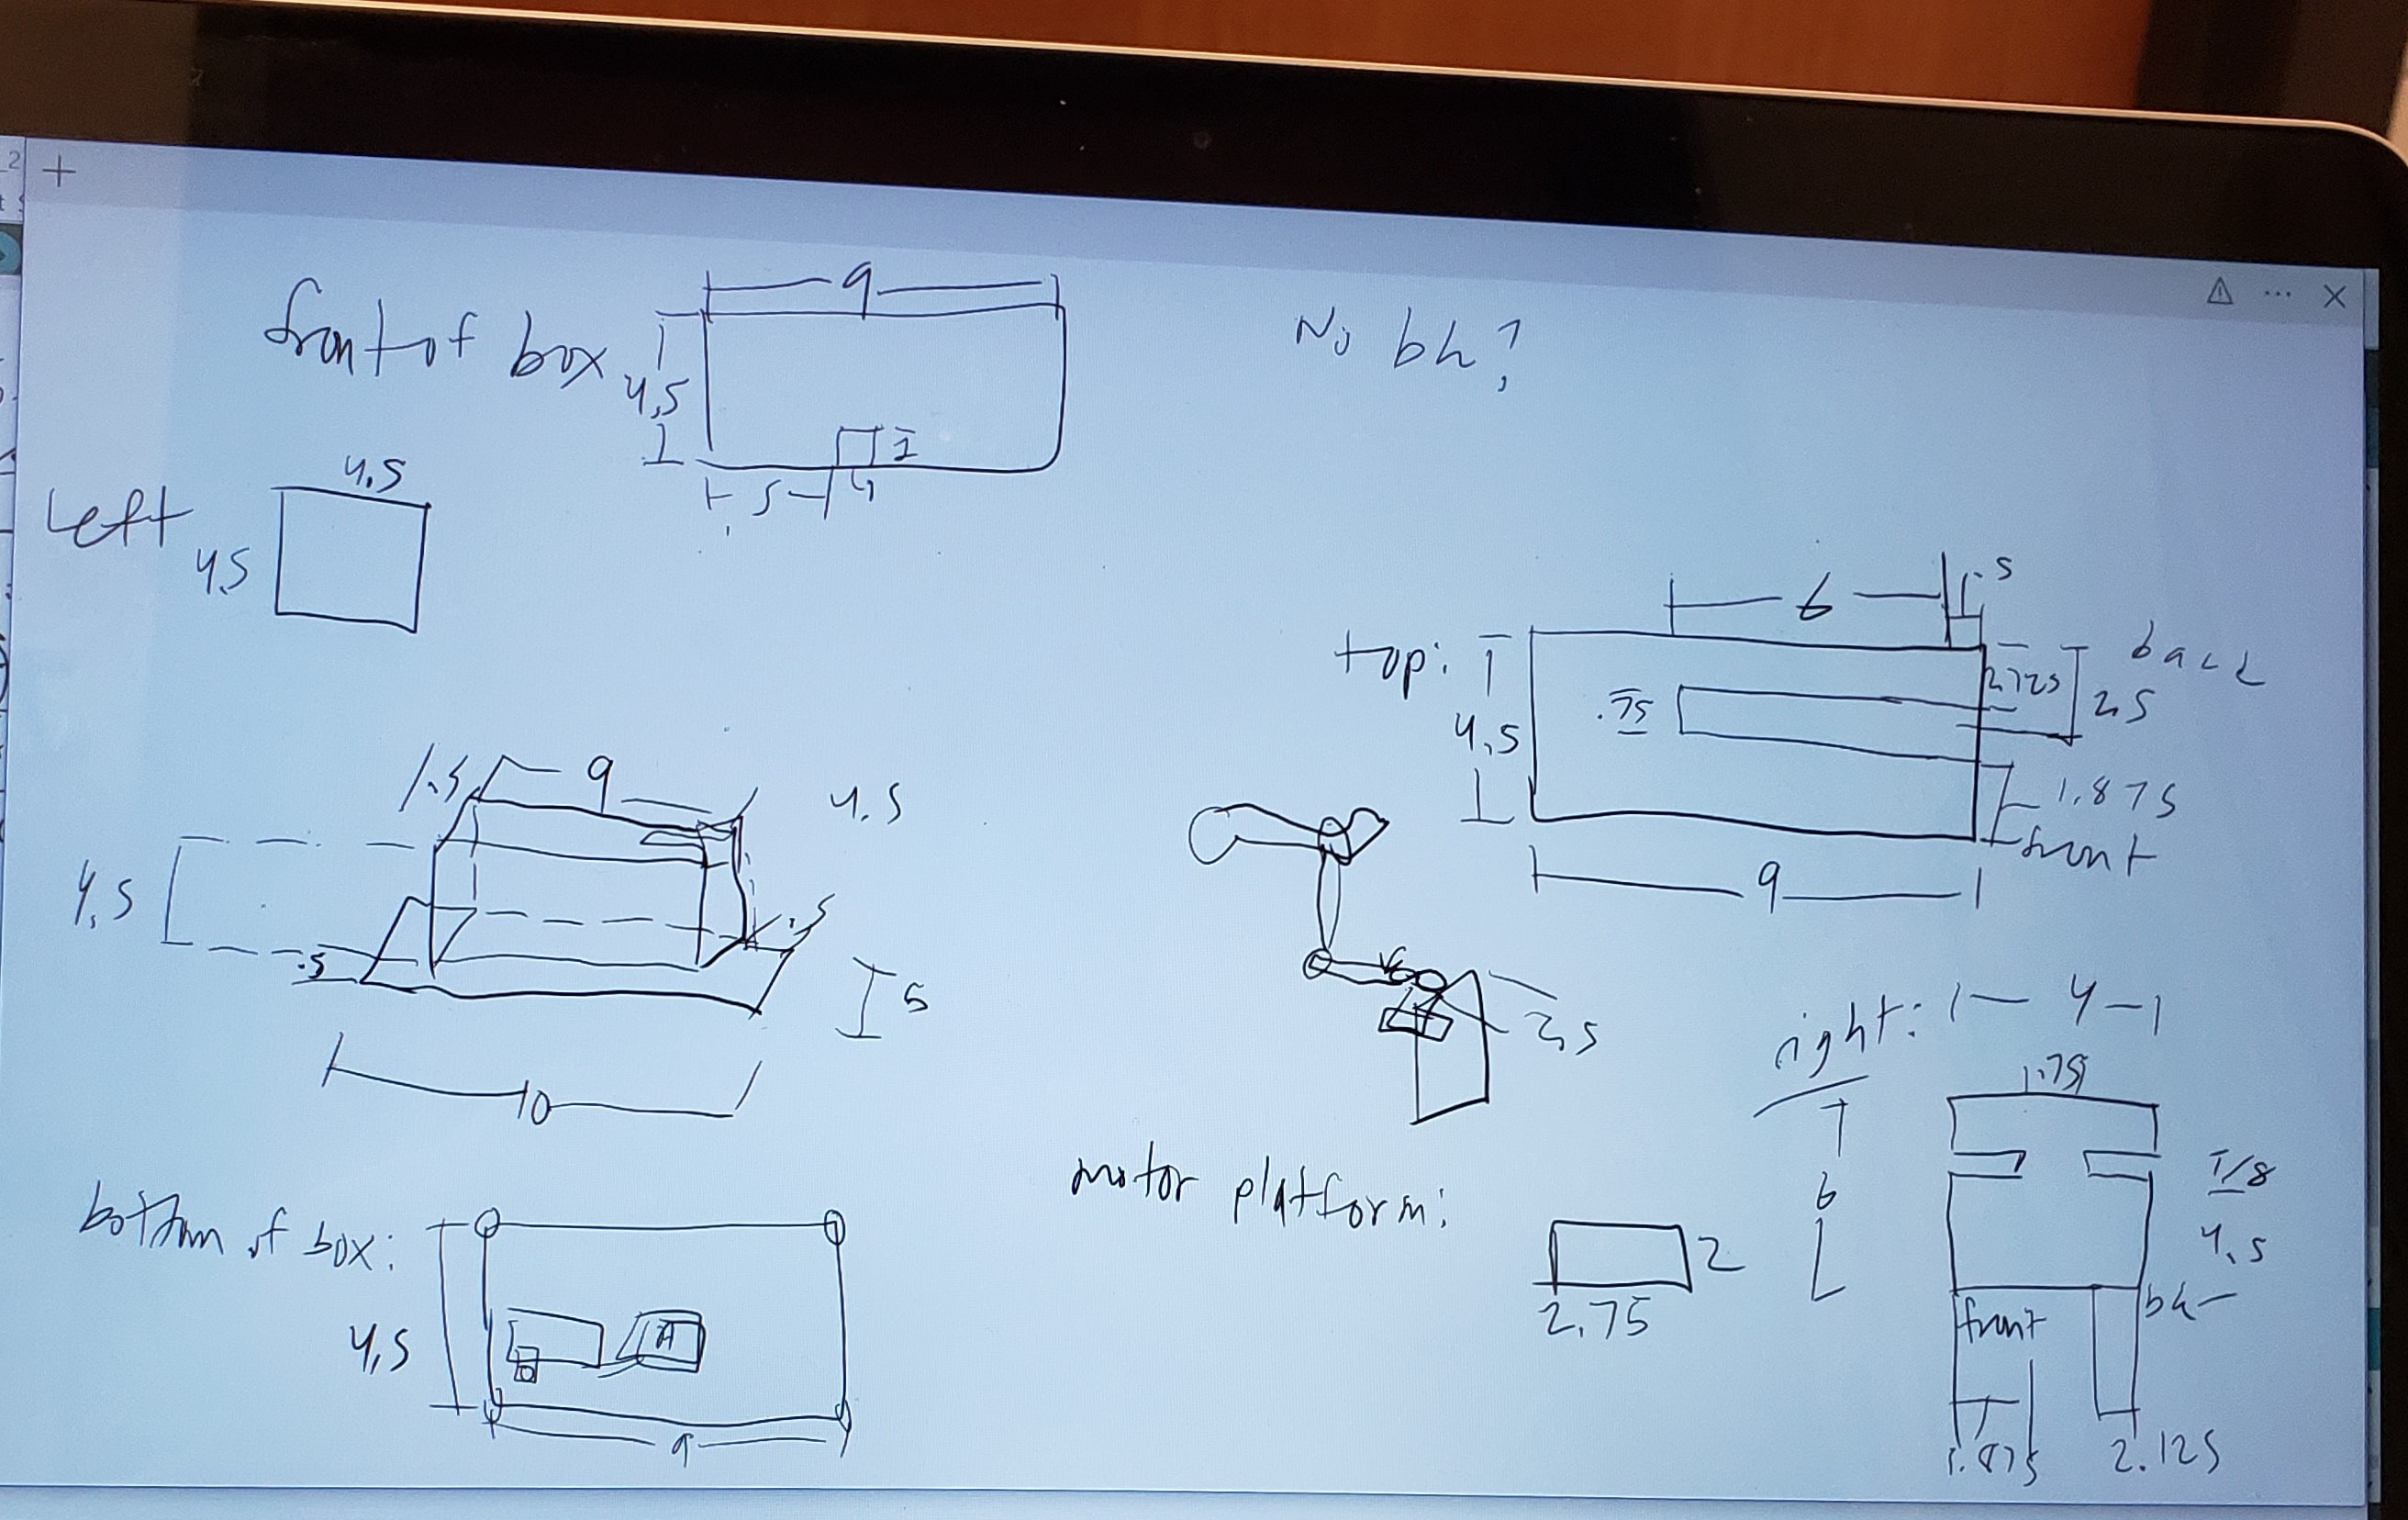
figuring out box dimensions
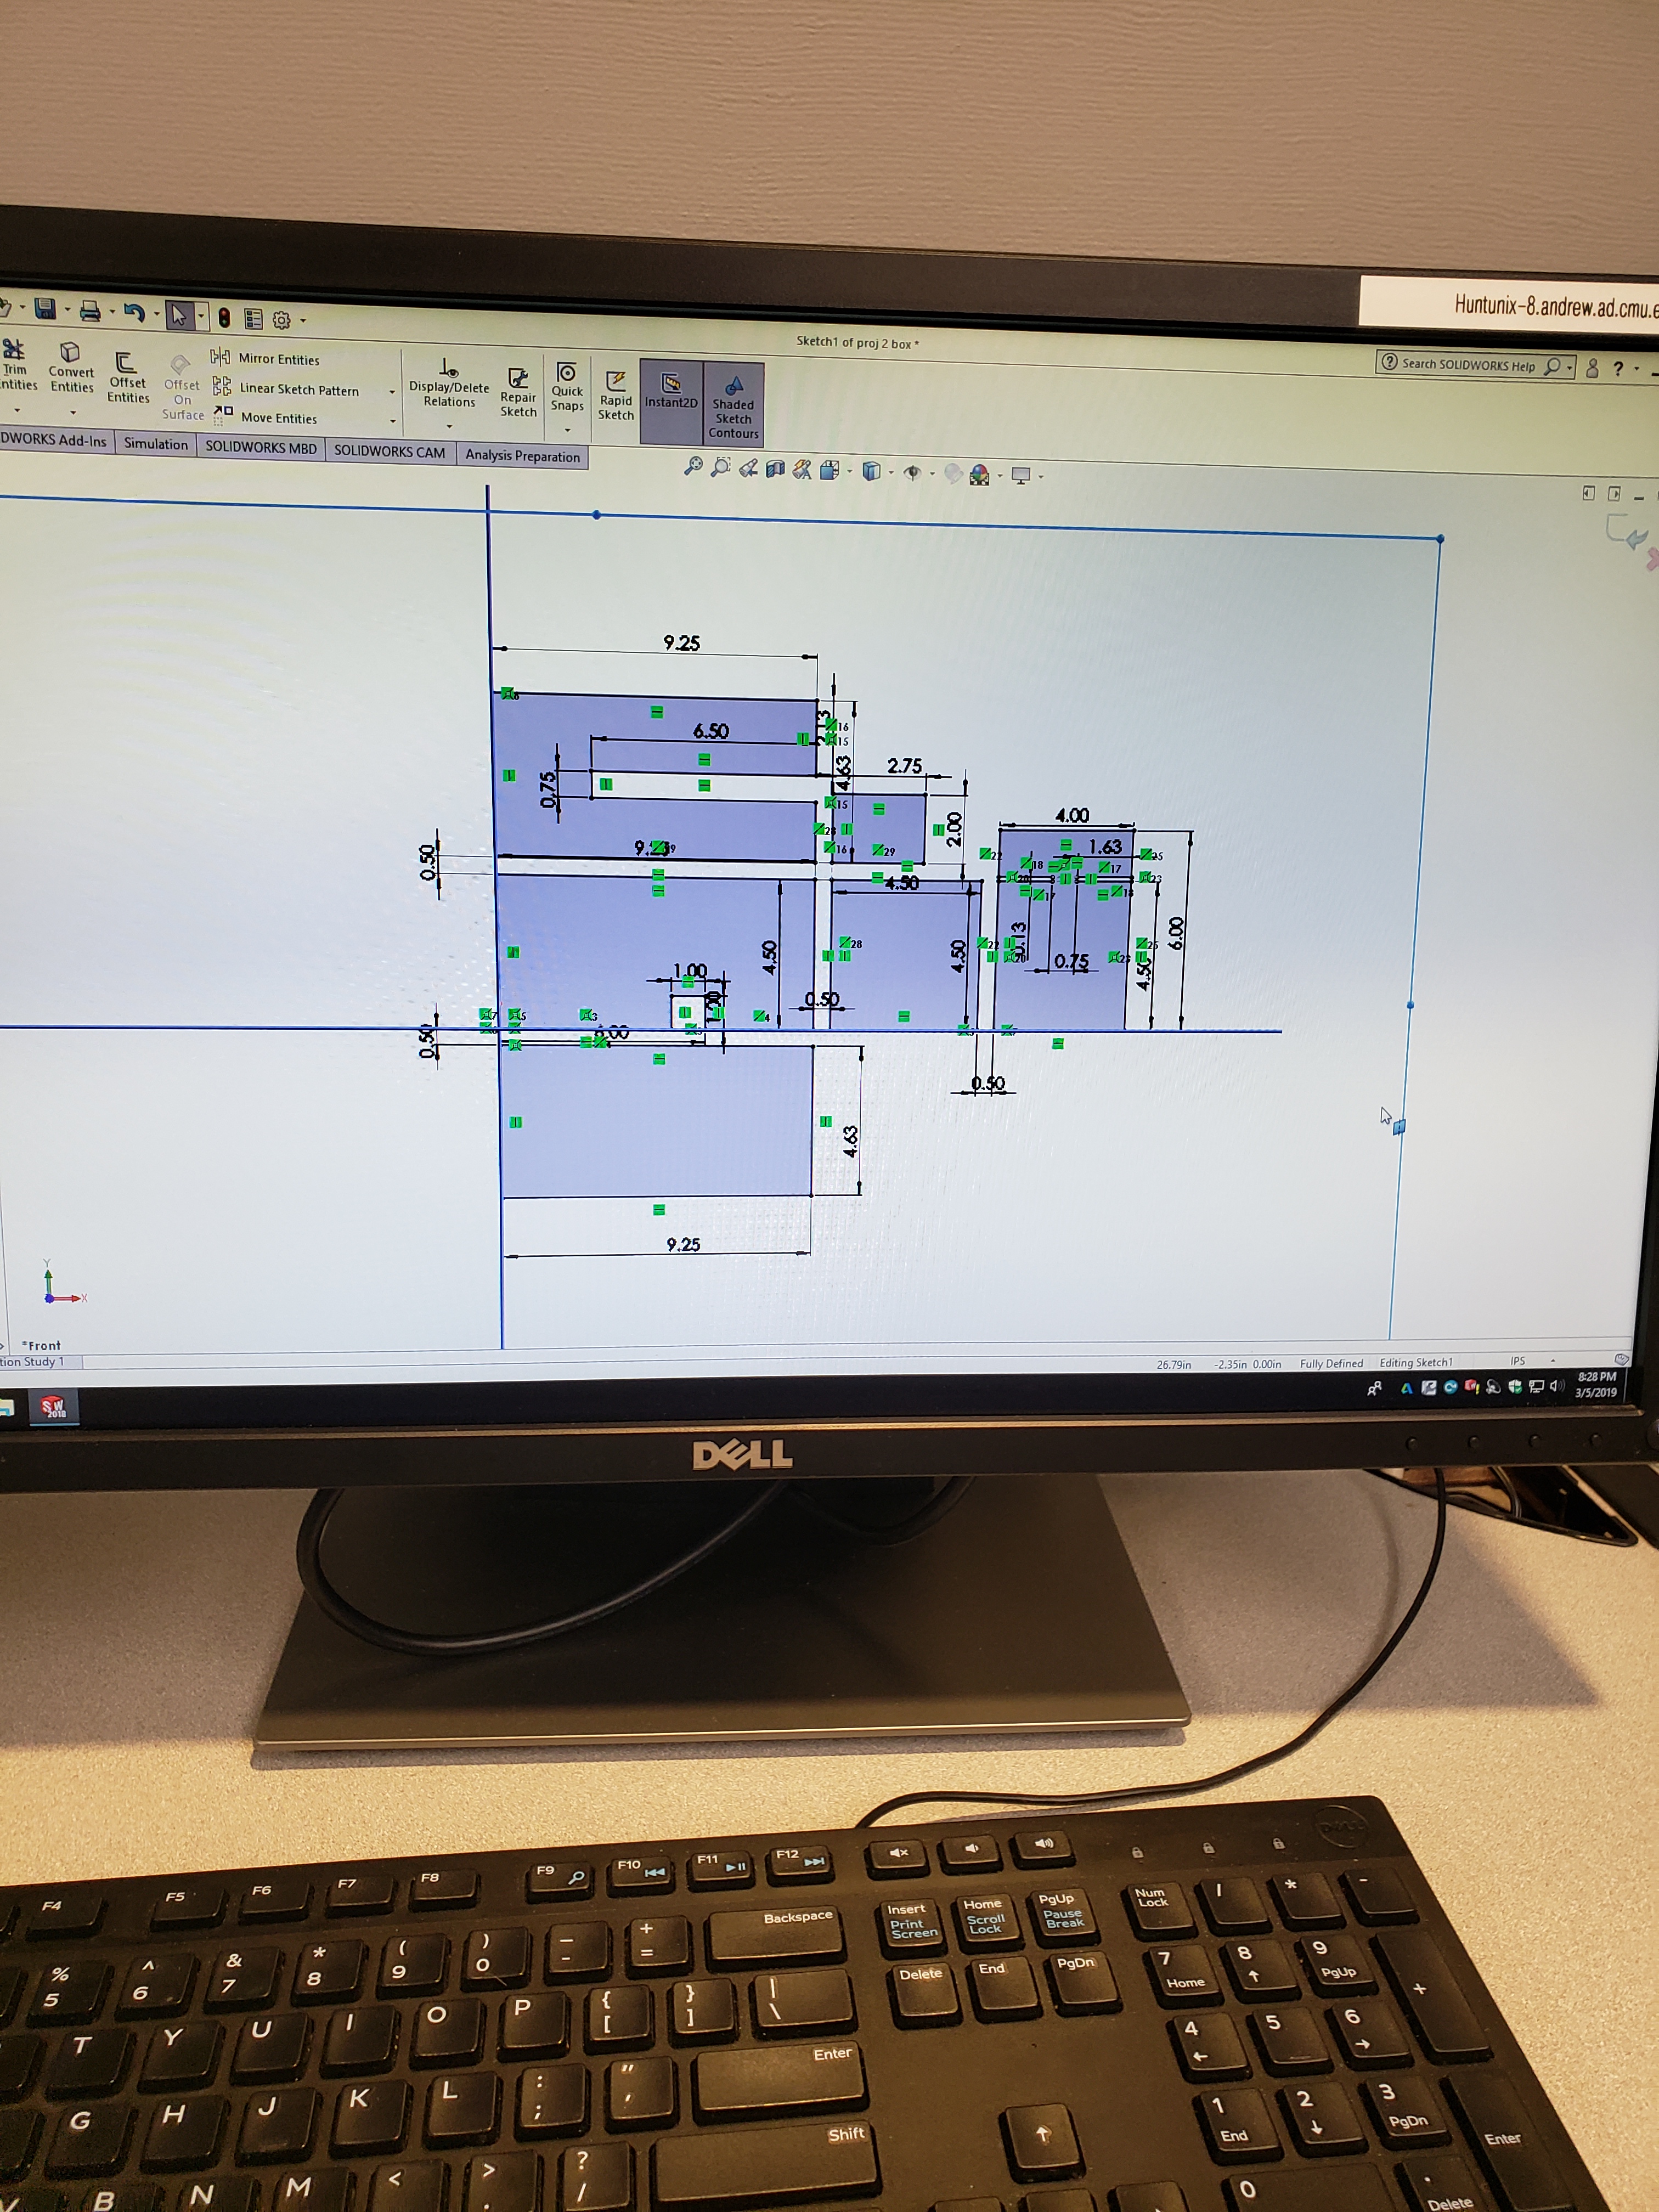
solidworks of box and motor platform
Discussion:
Overall, I am pretty happy with the way my project turned out. While it is by no means flawless and there are some things that I would do differently, I learned a lot from this experience and most important, I know that I did the best that I possibly could have and put in more than enough time and effort. While the motor was unable to actually unlock the door, I am very happy that I was able to make something that did exactly as I wanted it to in every other aspect. As someone reiterated, I “thought about a lot of different use cases for [my] device,” and I’m glad to say that the contingencies do function properly. Not being able to unlock the door is a mechanical problem separate from my code and electronics that with the materials available that are Arduino compatible, is out of my control. If I were to try and make this work, I would use the HS-5645MG motor by HiTEC. That motor unlike the one I used is made to have a much higher torque, but it isn’t programmed by the Arduino and so I used the most powerful motor that was.
I think that my project looks pretty cool with the tinted green acrylic and being able to see all of the wires; however, I do agree with someone who said my project “could be more compact so as to minimize space.” This would make it take up less room on the door as well as minimize the chances of someone brushing into it when entering and leaving the bathroom. I could have done this by soldering on a board. The sound detector is being rented from lending, but I could have soldered most other components with smaller wires so that it would take up much less space. This would have been a real challenge I learned that soldering is something that I need more practice at. Many of my connections had to get re-soldered on because I didn’t do a good enough job the first time and the few wires that I did solder took me a long time. Someone else had commented that “less LEDs could be used as more of a meter display of how long movement hasn’t been detected.” While I do think I went a bit extreme on the number of LEDs used, I still like having the LEDs go on only as a warning. I believe that the meter would be an annoyance to whomever is in the bathroom.
Many of the lessons that I learned from this project can be summed up as someone else said, that in physical computing, a project tends to not work when you need it to. I learned just how frustrating it can be to try and figure out a hardware electronics problem as there are so many things that can go wrong, and it tends to be something that you don’t necessarily expect. As I was trying to get a picture of my project working for this documentation, my battery pack wasn’t supplying power even though the batteries weren’t dead. At first I realized that the ground wire was frayed, but that wasn’t the root problem. It took a very long time to figure out and fix, but it turns out that in the holder, the batteries weren’t properly touching the ends of the case as a spring was stuck at a too compressed state. I also learned the importance of covering up leads, especially on power and ground. As I was just about done with my project and only had to hot glue the motor on, I accidentally touched power to ground while I was unplugging it from the breadboard to try and save the batteries for the crit. This caused quite a bit of damage and took awhile to fix. Seemingly small problems made this project quite frustrating electrically, but thankfully, the mechanical hardware part of it went well for me; my knowledge that I’m better in that realm was echoed from this project. Coding wise, I learned quite a bit and it went much more smoothly than electrically. I learned about interrupts as well as how to reset to the beginning of a loop with one. I also learned the usefulness of the time library and how to use a pir motion detector.
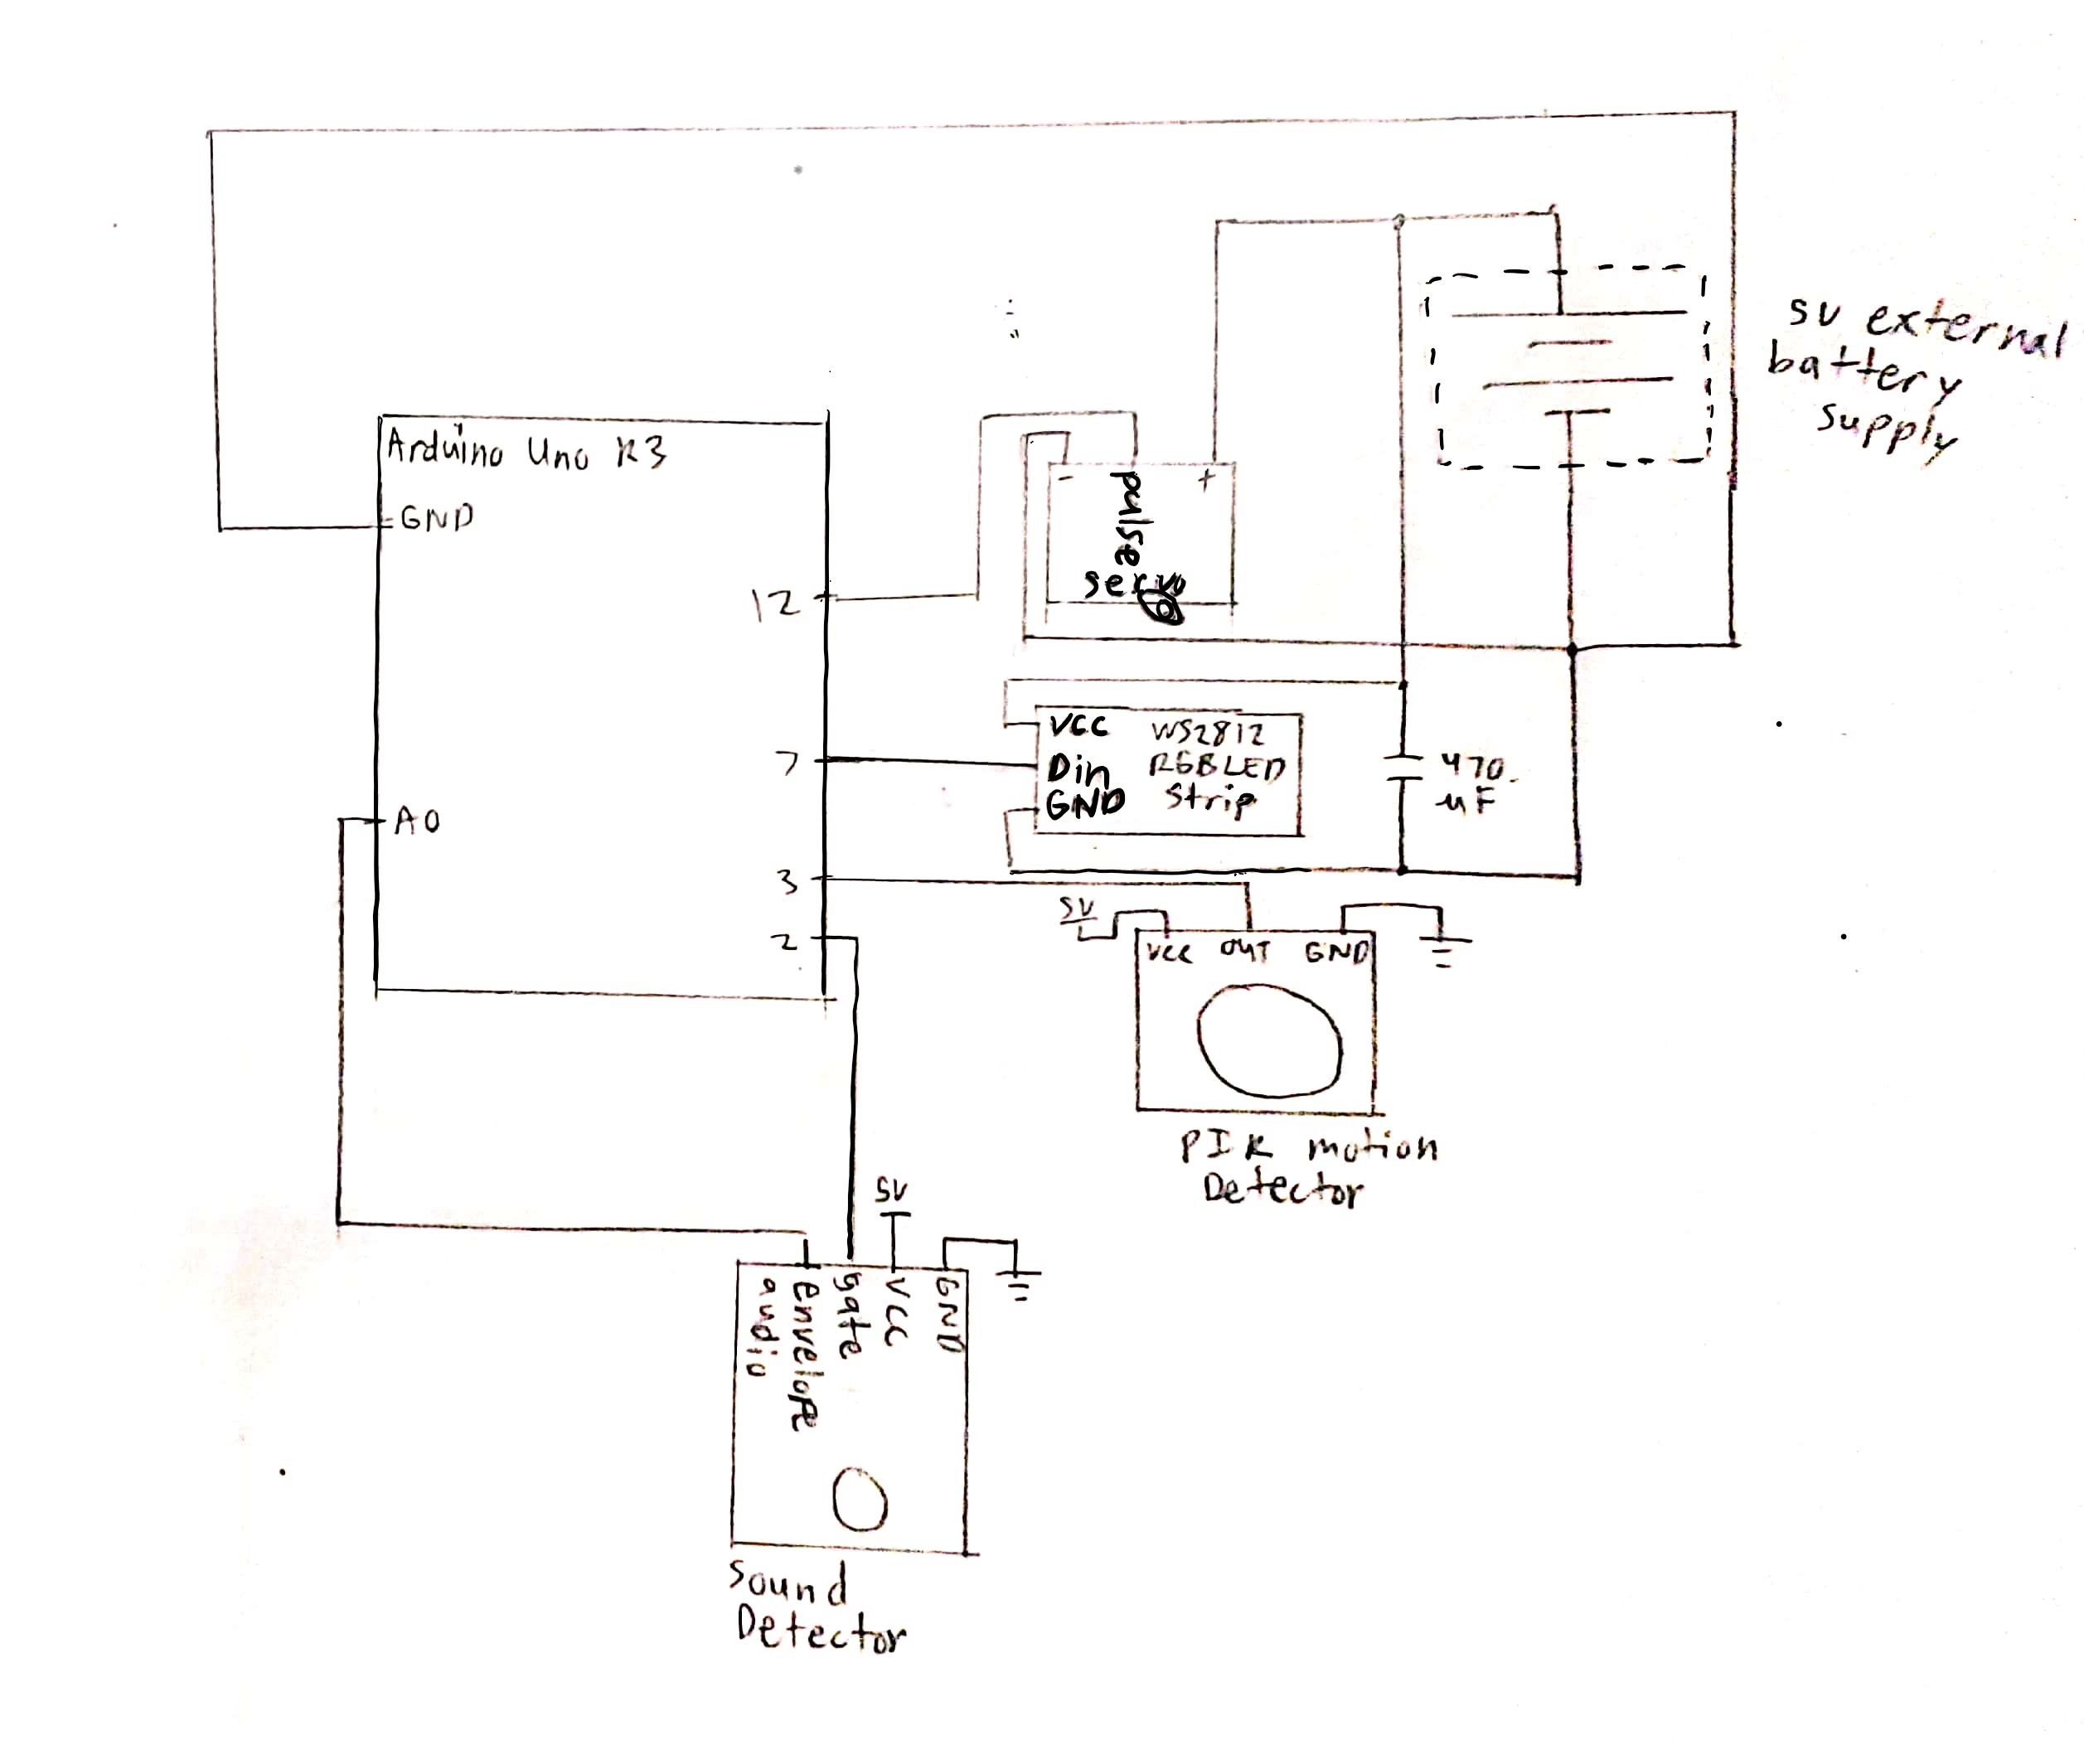
Schematic
Code:
/*
 Unlock the Bathroom Door
 By Seema Kamath

 Description:
 This code checks the bathroom for motion and will unlock it after 30 minutes without movement with two safeguards. The first of these is there is a while loop
 that only runs when the noise in the bathroom is less than when the shower is on. This prevents the door from accidently unlocked if someone is in the shower for
 longer than 30 minutes. The second safeguard is if somone is in the bathroom, but very still for a long period of time, they are given a warning to move by the LED
 strip turning red. As long as they move while the LED strip is on, the motor will not turn on to unlock the door.

 Pin Mapping:
 The gate on the sound detector is connected to pin 2.
 The envelope on the sound detector is connected to pin A0.
 The Digital in wire on the LED strip is connected to pin 7.
 The servo motor is conncted to pin 12.
 The PIR motion detector is conntected to pin 3.

 Credit:
 I got TimeLib.h from https://github.com/PaulStoffregen/Time as well as learned about millis() from here.
 I learned about the pir motion detector from https://dronebotworkshop.com/using-pir-sensors-with-arduino-raspberry-pi/
 I learned about resarting loops with interrupts from http://forum.arduino.cc/index.php?topic=45686.0
*/

bool reset;
int showerLevel = 600; //soundVal when shower on
#include <TimeLib.h>
const int PIN_GATE_IN=2; //connected to gate on sound detector
const int PIN_ANALOG_IN=A0; //connected to envelope on sound detector

#include <Servo.h>
Servo myLittleMotor;
const int SERVOPIN = 12;

#include <PololuLedStrip.h>
PololuLedStrip<7> ledStrip;//LED in pin 7
const int LED_COUNT=120;
rgb_color red[LED_COUNT];
rgb_color black[LED_COUNT];

const int PIRPIN = 3;
void pirISR() {
  int pirVal = digitalRead(PIRPIN);
  reset = true;
}

const int LEDPIN = 7;
void setup() {
  Serial.begin(9600);
  pinMode(PIN_GATE_IN, INPUT);
  pinMode(PIRPIN, INPUT);
  pinMode(LEDPIN, OUTPUT);
  attachInterrupt(digitalPinToInterrupt(PIRPIN), pirISR, HIGH);//this calls void pirISR() whenever there is motion and makes the PIRPIn an interupt
  myLittleMotor.attach(SERVOPIN);
  delay(60000);//1 minute delay is needed so that the pir motion sensor can get accostumed to its current environment
}

void loop() {
  int pirValue;
  int soundVal;
  unsigned long currentTime; //using unsigned long so that this will be able to keep track of the time passed for more than just 30 seconds as I'd need it
  //for much longer
  int timePassed;
  soundVal = analogRead(PIN_ANALOG_IN);
  Serial.println(soundVal);
  Serial.println("resarted");
  while (soundVal < showerLevel) {
    pirValue = digitalRead(PIRPIN);
    Serial.println(soundVal);
    static unsigned long startTime = millis();//only happens at begginning because of static
    currentTime = millis();
    timePassed = abs(currentTime - startTime);
    Serial.println(timePassed);
    if (reset) {
        Serial.println("reset");
        reset = false;
        break;}
    if (pirValue == 1) { //motion detected
      Serial.println("motion detected");
      delay(6000);//takes 6 seconds for motion sensor to reset
      startTime = millis();
    }
    else if (timePassed >= 1800000) {//30 minutes of no motion
      unsigned long LEDstartTime = millis();
      unsigned long LEDtimeNow = millis();
      byte time = millis() >> 2;
      while (abs(LEDtimeNow - LEDstartTime) < 5000) {
        LEDtimeNow = millis();
        Serial.println(abs(LEDtimeNow - LEDstartTime));
        for (uint16_t i = 0; i < LED_COUNT; i++) {//this rotates through each LED on the strip so that each one will be red
          byte x = time - 8 * i;
          red[i] = rgb_color(255 - x, 0, 0);
        }
        ledStrip.write(red, LED_COUNT);
        delay(10);
      }
      for (uint16_t i = 0; i < LED_COUNT; i++) {
        black[i] = rgb_color(0, 0, 0);
      }
      ledStrip.write(black, LED_COUNT);
      if (reset) {
        Serial.println("reset");
        reset = false;
        break;
      }
      delay(500);//gives a little bit of time before the motor starts so that the LED strip and motor are in no way competing fot the battery's power
      Serial.println("move");
      myLittleMotor.write(150);
      delay(2000);//gives enough time for motor to have unlocked door
      myLittleMotor.write(180);//returns motor to horizontal position
      startTime = millis();
    }
  }
}
Comments are closed.