
Description
Today, there is an extreme focus on efficiency and scheduling an individual’s entire life. People divvy their calendars up into blocks of time when they should be working, sleeping, resting, etc. Most people don’t work that way; I certainly don’t. I can’t flip a switch and go from work mode to rest mode or vice versa. Thus, the purpose of this project is to use colored lights to influence my emotional state. By changing the colors of the lights, I’m hoping to put myself in different moods that are conductive to work, rest or any other type of activity I may choose to do.
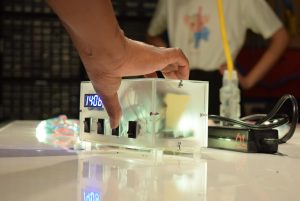
Jayla (the digiTOOL Professor) interacting with the final project
The final project includes a clock and a series of switches. Each switch is engraved with a symbol and correlates to an activity I may engage in: work, rest, party and sleep. By flipping a switch, the colors change to a palette that triggers a helpful emotional response; however, there is a hierarchy and logic to the switches in the event that someone attempts to turn all switches on. First of all, the sleep switch must be turned to awake in order for the lights to turn on at all. Once that is done, if the work switch is flipped on, then the lights won’t change to any other color scheme even if rest or party are flipped. Rest is the next in the hierarchy, operating just like the work switch with party being the next palette in the hierarchy.
The colors chosen for each activity are as follows*:
Work: I chose red and orange colors. Reds traditionally encourage passion and hard work. Though red is typically associated with physical labor and blue with intellectual labor, I found that blue hues were too relaxing, calming and cold to put me in the mood for work. This may vary between individuals, though. Orange is commonly associated with creativity, and as someone who takes mostly project-based classes, I figured it would help to have my creativity stimulated while working.
The red and orange colored work lights
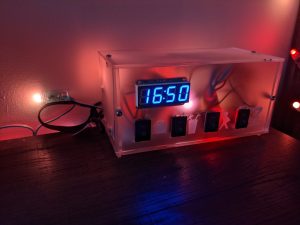
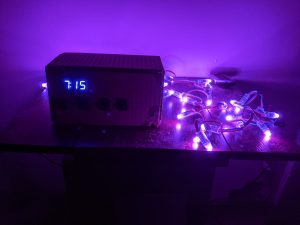
Rest: The colors I chose were many purple, pink and blue tones. All of these colors bring about a calming emotional response in me. These are dream-like colors that promote relaxation. As such, they are very fitting when I want to relax.
The purple, pink and blue colored rest lights
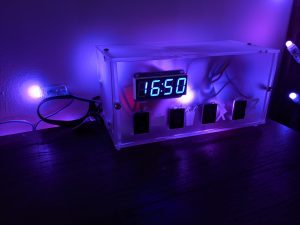
Party: As someone who prefers house parties over ragers, I chose yellow, pinks and blues. Yellows are energetic happy colors, pinks are intimate, gentle and fun, and blues, especially the hue I used, are very calming. These colors inspire a lot of positive emotions that fit for a party.
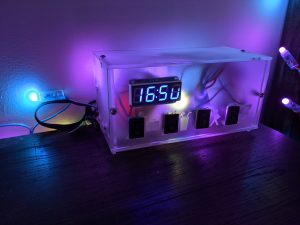
The yellow, pink and blue colored party lights
Awake: When the sleep switch is flipped to awake, the lights simply turn on. The color I chose for this are slightly yellow. This is because I want to be energetic and happy when I wake up, but yellow is also my favorite color so it helps me start the day with a lot of positive emotions.
The awake lights: though difficult to tell in this photo, the white lights have a yellow hue
*In video and pictures, the colors of the LEDs aren’t quite accurate to how they appear in person; the hues are ever so slightly off. Additionally, the clock flickers in video but not in person.
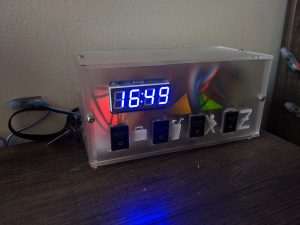
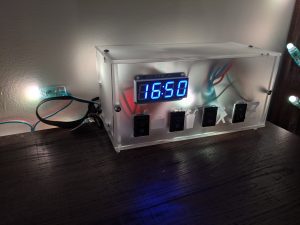
A picture of the clock when all lights are off and it is in sleep mode
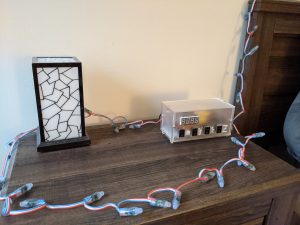
An image for scale. The clock on my bedside table, the intended location of the final project
Process Reflection
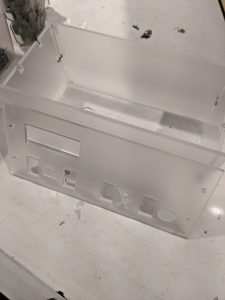
The biggest challenge I had throughout this process was laser cutting the clock out of the frosted acrylic. The first time I laser cut the box, there were quite a few errors that made it impossible to attach the front and back. Furthermore, the measurements for the switch cut outs were slightly off so I had to also fix the cut outs. I was also unaware of how the engraving would appear, so I had to redo the images. This took up a lot of time and resources and required me to make constant edits and fixes.
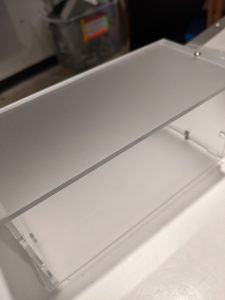
The first laser cut box. The front and back are not attached as it doesn’t quite fit
The first laser cut front. The sleep/awake switch symbol appears to be just a circle and the rest symbol failed to print
On the other hand, wiring the project was fairly easy. After some reminders of circuitry that I had forgotten since the last time I had wired something, I got the lights and clock working pretty quickly. I had both working for the first prototype. In retrospect, I probably could have attempted some more advanced circuitry and coding for a more interesting result, but I am happy with how it works technically and aesthetically.
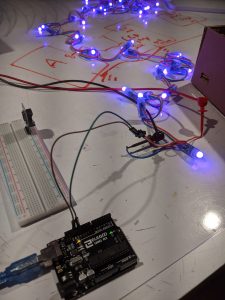
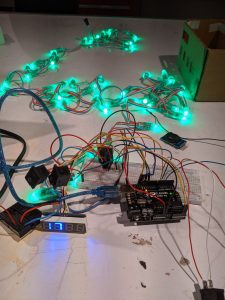
Got the lights hooked up and working
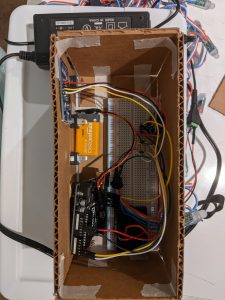
Made a box and stuffed all wires in there – including the clock I had hooked up
The first prototype. The switches don’t actually work at this point
Got the switches hooked up and working
An example of one of the more interesting directions I could have taken include making the clock an actually alarm clock. I would set the time the “alarm” would go off, which instead of making noise would just trigger the lights to change. This would have more strongly tied into the thematic idea of strict scheduling that was one of the driving ideas behind this project. Also, as mentioned in the critique, there were other ways I could have incorporated the lights to more strongly influence my emotional state. For example, it was specifically brought up that lights that are higher up encourage a person to work while lower level lights are more relaxing. These missed opportunities would have taken more work, but I believe they also would have elevated my project to another level.
Code
/* Light on Schedule
 * by Leah Walko
 * Takes input from four switches to swap the colors of LED lights
 * 7 -> work switch input
 * 6 -> rest switch input
 * 5 -> party switch input
 * 4 -> sleep/awake switch input
 */

//    HT16K33.h
//    FILE: demo_displayTime.ino
//  AUTHOR: Rob Tillaart
// VERSION: 0.2.1
// PURPOSE: demo
//     URL: http://www.adafruit.com/products/1002
//     URL: https://github.com/RobTillaart/HT16K33
//    PololuLedStrip
//  Author: Pololu
//     URL: https://github.com/pololu/pololu-led-strip-arduino
//    RTClib
//  Author: Adafruit
//     URL: https://github.com/adafruit/RTClib

// display stuff
#include "HT16K33.h"

HT16K33 seg(0x70);

/* LedStripGradient: Example Arduino sketch that shows
 * how to control an Addressable RGB LED Strip from Pololu.
 */

// LED stuff
#include <PololuLedStrip.h>

// Create an ledStrip object and specify the pin it will use.
PololuLedStrip<12> ledStrip;

// Create a buffer for holding the colors (3 bytes per color).
#define LED_COUNT 60
rgb_color colors[LED_COUNT];

// time clock
#include <Wire.h>
#include "RTClib.h"

RTC_DS3231 rtc;

// switches
int workPin = 7;
int restPin = 6;
int partyPin = 5;
int awakePin = 4;

void setup()
{

  seg.begin();
  Wire.setClock(100000);
  seg.displayOn();
  seg.setDigits(4);

  if (! rtc.begin()) {
    while (1);
  }

  rtc.adjust(DateTime(F(__DATE__), F(__TIME__)));

  //switches
  pinMode(workPin, INPUT_PULLUP);
  pinMode(restPin, INPUT_PULLUP);
  pinMode(partyPin, INPUT_PULLUP);
  pinMode(awakePin, INPUT_PULLUP);
}


void loop()
{
  // switches -> pull up for true false is inverted
  boolean work = !digitalRead(workPin);
  boolean rest = !digitalRead(restPin);
  boolean party = !digitalRead(partyPin);
  boolean awake = !digitalRead(awakePin);

  // Set the time
  DateTime now = rtc.now();

  // Update the colors.
  for (uint16_t i = 0; i < LED_COUNT; i = i + 4)
  {
    if(!awake)
    {
      colors[i] = rgb_color(0, 0, 0);
      colors[i+1] = rgb_color(0, 0, 0);
      colors[i+2] = rgb_color(0, 0, 0);
      colors[i+3] = rgb_color(0, 0, 0);
    }
    if(awake && work)
    {
      colors[i] = rgb_color(1, 255, 1);
      colors[i+1] = rgb_color(50, 225, 20);
      colors[i+2] = rgb_color(87, 255, 0);
      colors[i+3] = rgb_color(50, 255, 5);
    }
    if(awake && !work && rest)
    {
      colors[i] = rgb_color(0, 255, 247);
      colors[i+1] = rgb_color(13, 194, 255);
      colors[i+2] = rgb_color(13, 129, 255);
      colors[i+3] = rgb_color(13, 93, 255);
    }
    if(awake && !(work || rest) && party)
    {
      colors[i] = rgb_color(0, 255, 202);
      colors[i+1] = rgb_color(210, 255, 0);
      colors[i+2] = rgb_color(255, 25, 246);
      colors[i+3] = rgb_color(18, 179, 146);
    }
    if(awake && !(work || rest || party))
    {
      colors[i] = rgb_color(200, 255, 30);
      colors[i+1] = rgb_color(200, 255, 30);
      colors[i+2] = rgb_color(200, 255, 30);
      colors[i+3] = rgb_color(200, 255, 30);
    }
  }


  // Write the colors to the LED strip.
  ledStrip.write(colors, LED_COUNT);

  // display time
  seg.displayTime(now.hour(), now.minute(), true, false);
  seg.displayColon(1);
}


// -- END OF FILE --