Interactive paper menu interactions

As technology advances, many interactions are drastically changing. When I came back to China, I was shocked by how mobile ordering in restaurants is widely adopted. It went from ordering with a server, to ordering using a tablet/ipad, to a table of people ordering from the same phone, to now where everyone can contribute to the same order using their own phone. Just like many people who prefer reading a paper book, I really enjoyed flipping through menus at restaurants.

However, we cannot ignore the benefit of having electronic orders: the order goes directly to the kitchen and all orders are automatically  stored digitally. To combine the paper feel of the menu and the benefit of having a digital menu, this project explores 3 ways of interactions that can be used in a interactive paper menu using paper circuits.

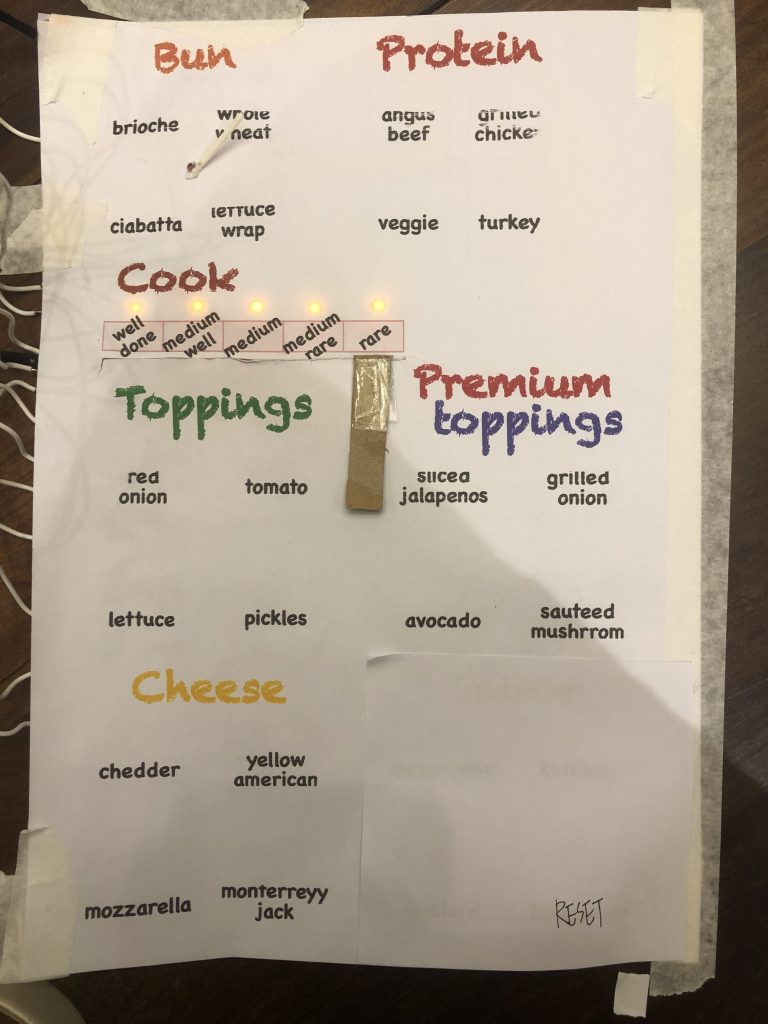
The initial goal was to have a full menu, but I realized it was too ambitious so I scaled down the project, but I did make these designs for a imaginary make-your-own burger restaurant. I will discuss more about the original design later.
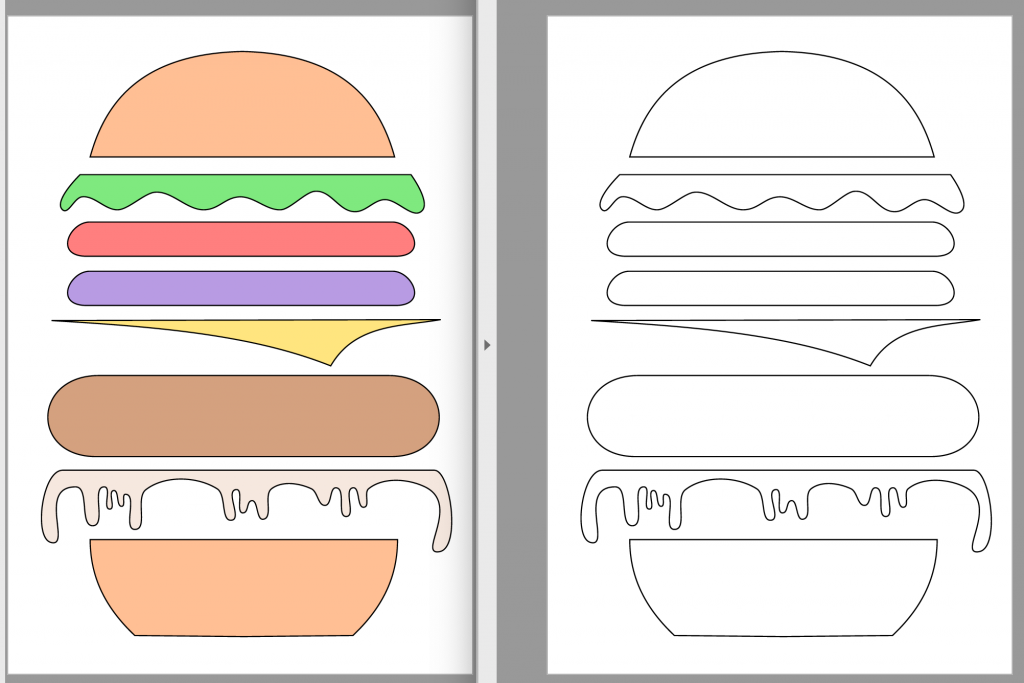
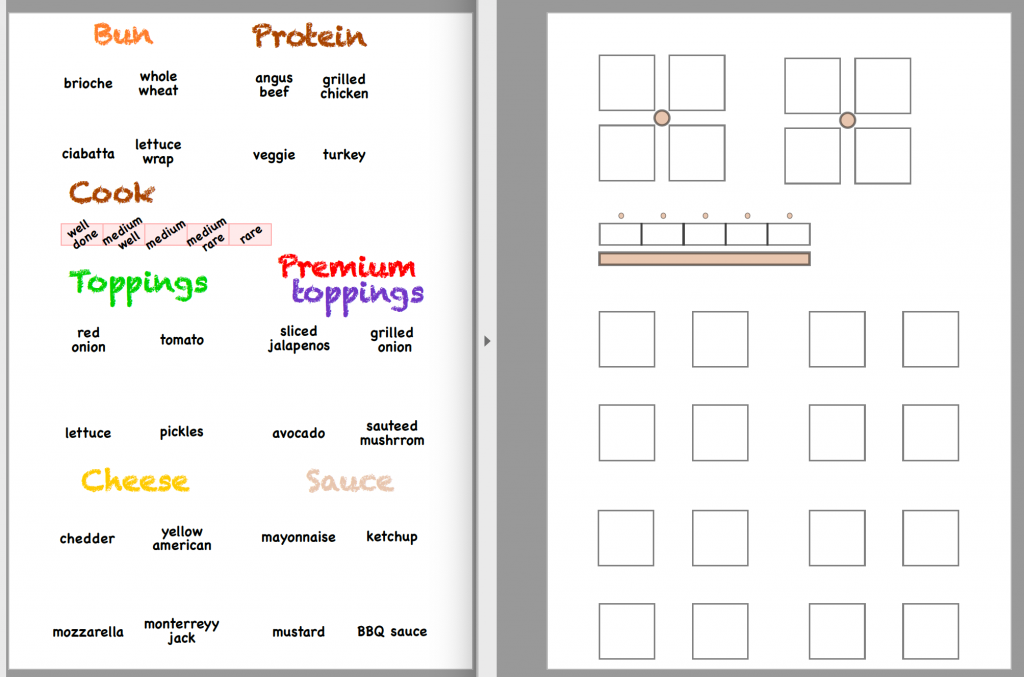
So for this project, what I ended up doing was 3 different interactions:

    • presses (equivalent to a button)
    • slider (equivalent to a linear potentiometer)
    • wheel (equivalent to a circular potentiometer)

I won’t include a schematic here because paper circuits are quite different from using wires and parts. And in fact, the only materials I used here is:

    • an arduino uno

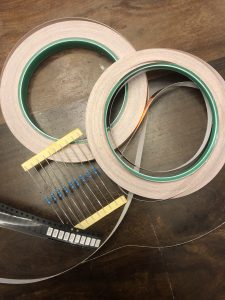
      Conductive tape, resistors, and SMD LEDs
    • wires to connect the paper circuit to arduino
    • solder & soldering iron to connect wires&resistors&LEDs to paper circuit
    • conductive tape (conductive on both sides, which made the fabrication much easier!)
    • resistors
    • SMD LEDs
    • paper
    • tapes

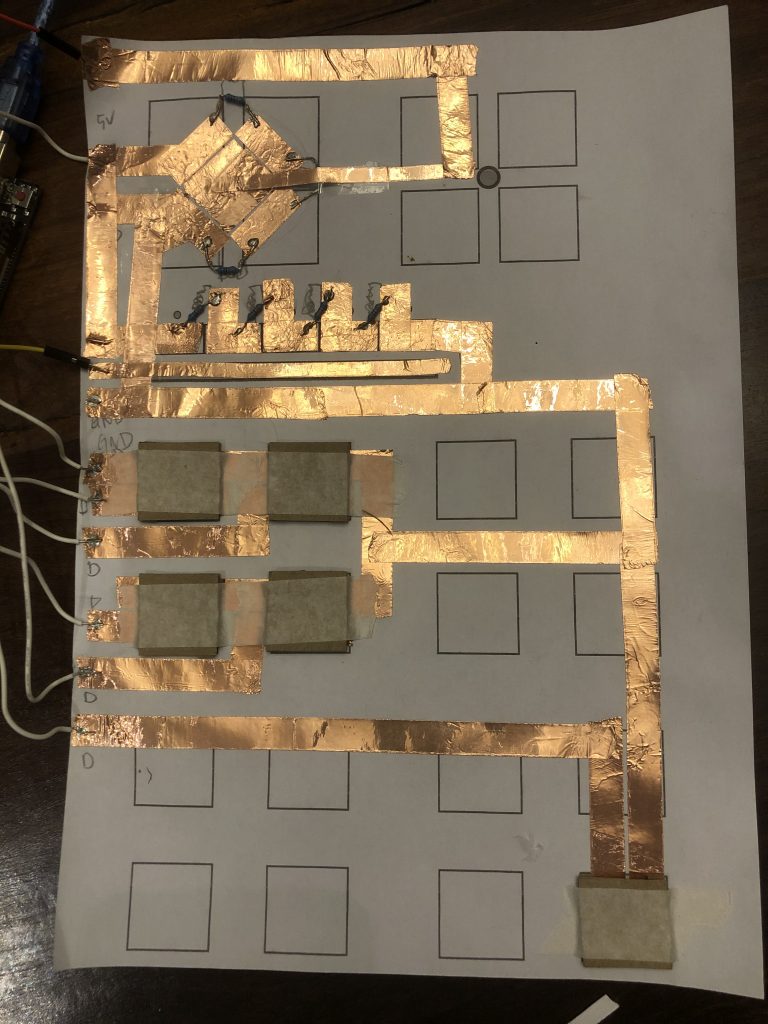
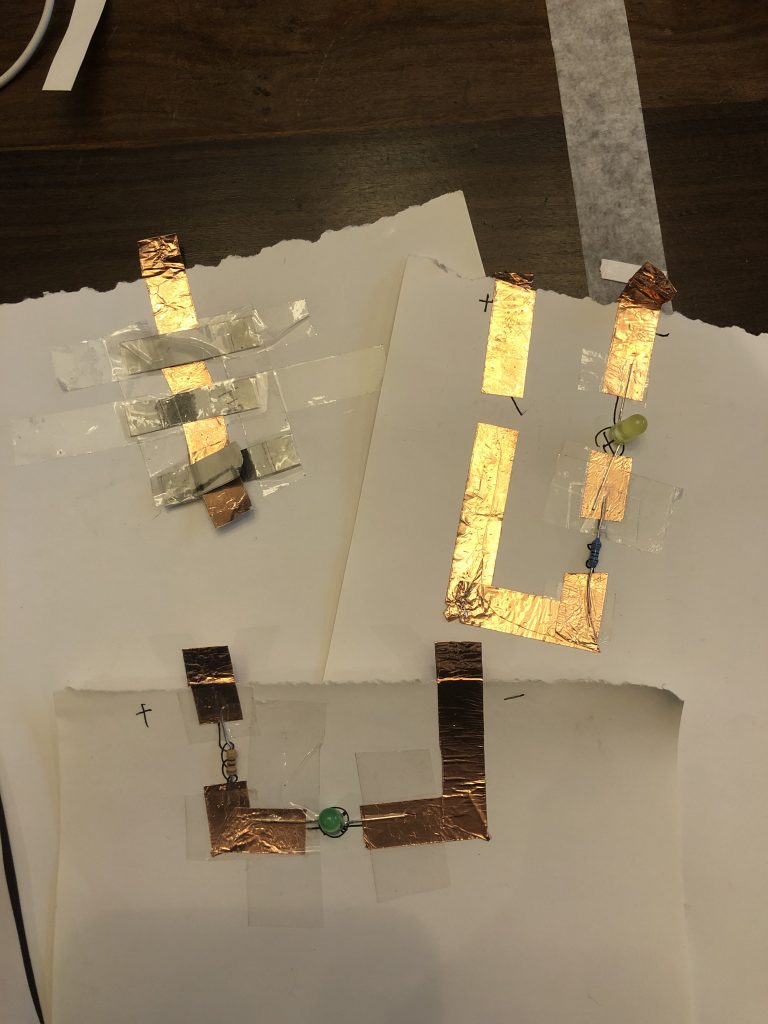
Here is what the paper circuit initially looked like for testing. On the top we have the wheel, then the slider,and those taped cardboard squares are presses.
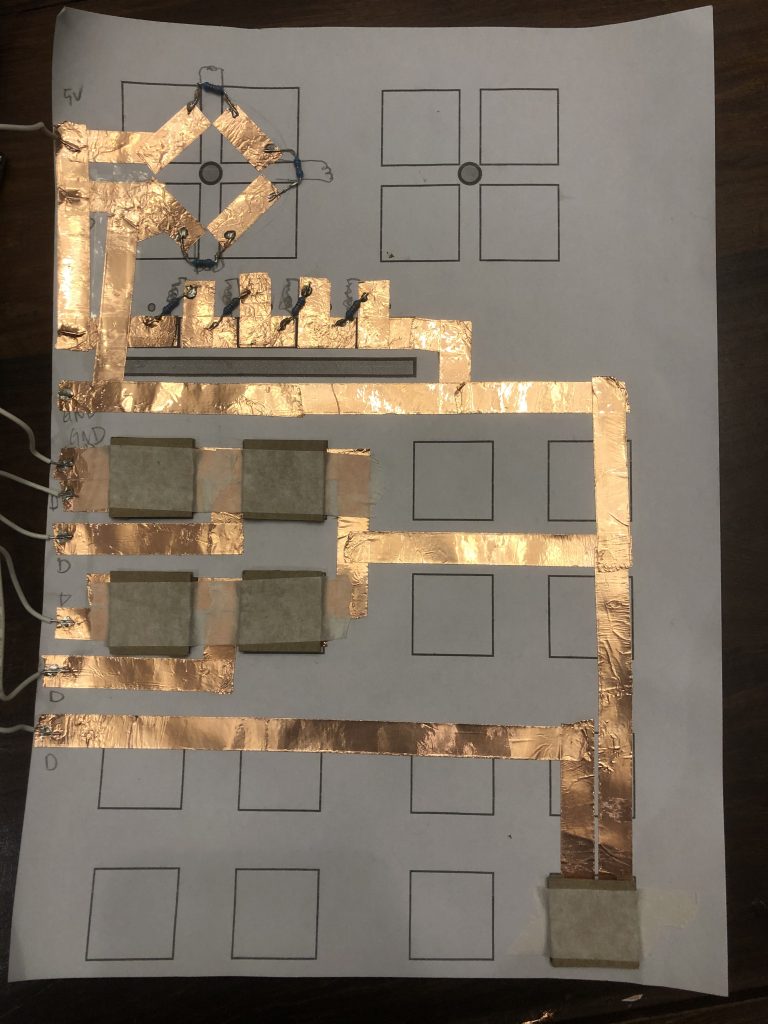
First, let’s look at the wheel. 3 resistors(for 4 segments) are used, and they are connected in sequence with one end to 5v and one end to ground. We use an analog pin(connection to the analog pin not included here) and use the read value to determine which segment of the wheel is in contact with pin.

Then, we have the slider. Similar to the wheel, the wirings of it is exactly the same, except for they are placed linearly on paper. We used 4 resistors here because  we have 5 segments.
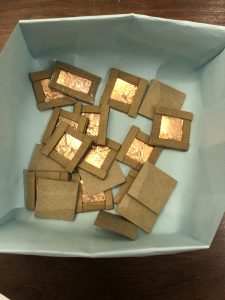
Presses are simply buttons. On the paper, we have one tape connected to the ground, and one tape connected to a digital pin (with internal pullup resistor). We use non-conductive tape to tape these “buttons” on top gap between the ‘ground’ tape and ‘digital pin’ tape. When the ‘button’ is pressed, the conductive part of the button connects the ‘ground’ tape and ‘digital pin’ tape, and thus makes the value change for the digital pin read.

Working with conductive tape was definitely more tedious and involves more planning compared with using wires, but one thing I found convenient was that to make  2 pieces of overlapping conductive tape non-conductive with each other, simply place a piece of non-conductive tape between the two, which is why in some of my photos, you see traces with different purposes “overlap” with each other.
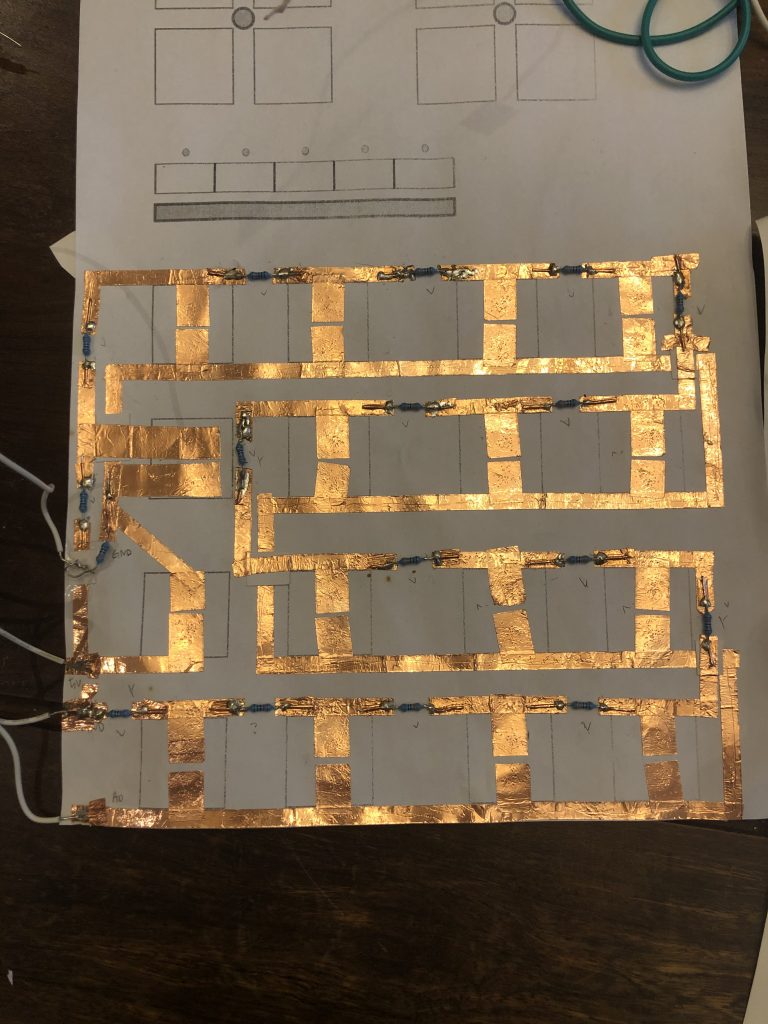
In the image below, we added a block of conductive tape for the wheel, and a line for the slider, they are connected to the analog pins that read the values.  The 2 pieces on the right are used to create connections between these newly added circuits and the ones in the previous image.
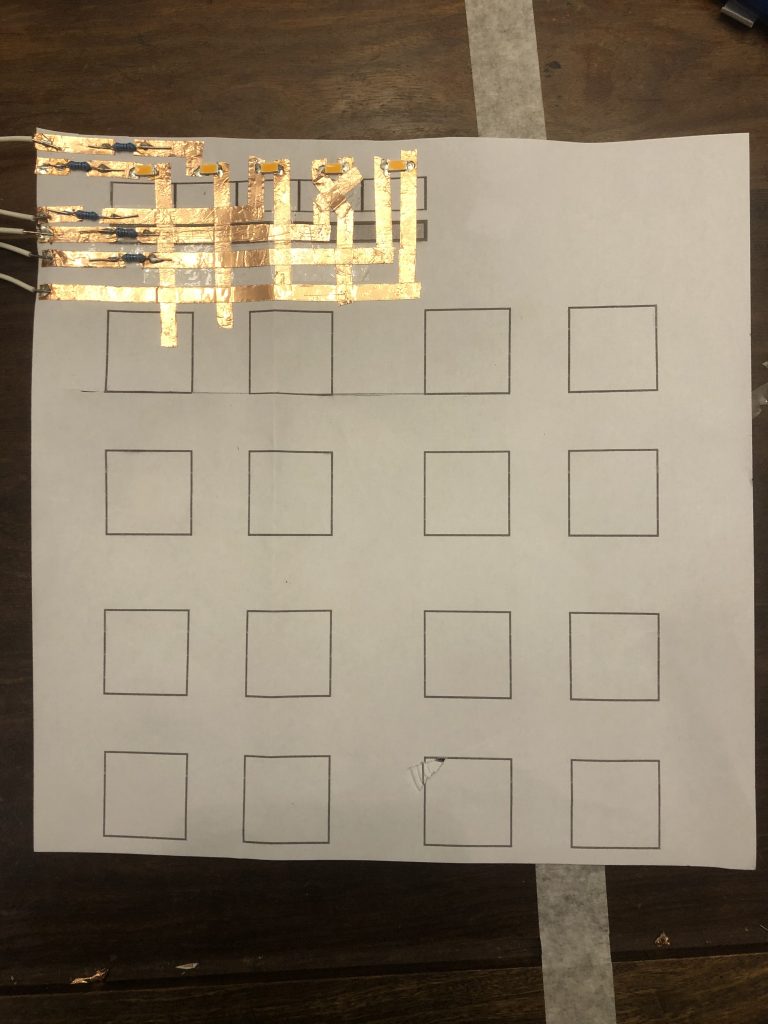
So that was the first layer of the circuit, I call them input layer. Now let’s look a the second layer, the output(LEDs) layer. Each LED is wired to a digital pin with 220 ohms resistors in between and the other side to ground.
Then I connected the two layers by taping them together.
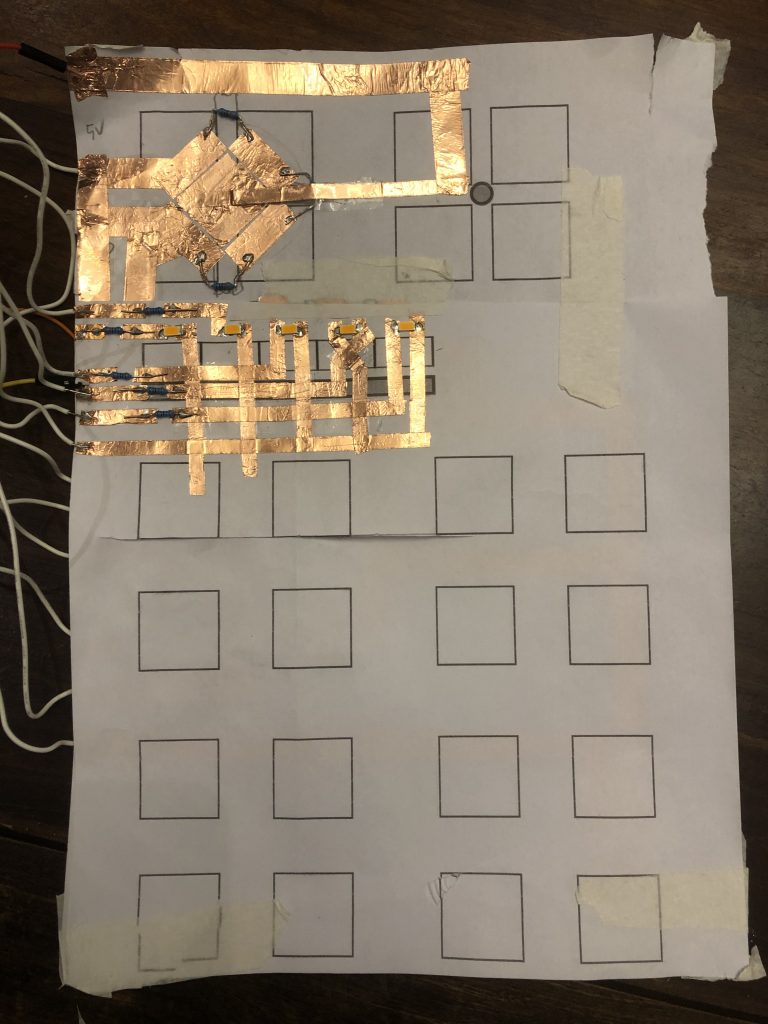
And finally, I put the graphic layer on the top. Notice the two pieces coming out of the graphic layer, they are our means of interactions. And they connect the layers simply by going through the papers.
So before this final version of the project, I tried a variety of things.

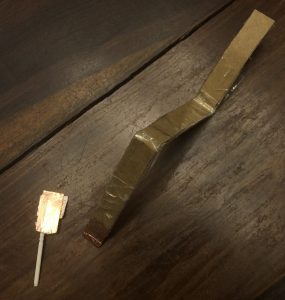
Here are some initial playing with the paper circuit. On the top left, I tried using graphite pencil marks as resistors, while it works, I thought it was too much trouble to make it as robust as I would like.
Below was my attempt to use a single analog pin to read 15 button/presses inputs. While it worked when I tested with tactile buttons, the readings again was not robust enough for the effect I needed.
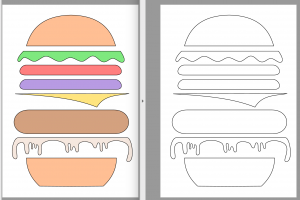
The interaction I originally envisioned was that we have 2 wheels, a slider, and 16 presses on the right. And as things are being selected, the corresponding part on the burger gets lighted up. And once all the parts are lighted up, the order is ready to be completed. I gave up doing this when I realized that I don’t have enough digital pins, nor does the analog reading method works.
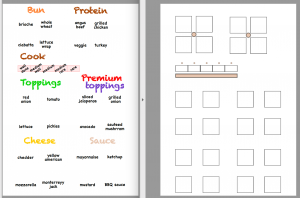


The main thing I struggled with was robust connections and readings, so I got lots of fuzzy readings that can’t just be fixed from the software side. For future works, getting an arduino mega with more pins would open up a lot more possibilities, and also some explorations in how to have robust connections using paper circuits.

#include <Bounce2.h>

const int WHEELPIN = A2;
const int WHEELLENGTH =4;
const int WHEELTHRESHOLD[] = {170, 512, 853, 1023};
const char *WHEELNAME[] = {"ciabatta", "lettuce wrap", "whole wheat", "brioche"};
char *bunselection = "none";

const int SLIDERPIN = A3;
const int SLIDERLENGTH = 5;
const int SLIDERTHRESHOLD[] = {1023, 897, 644, 340, 130};
const char *SLIDERNAME[] = {"well done", "medium well", "medium", "medium rare", "rare"};
char *cookselection = "none";

const int RESETBUTTON = 3;

const int TOPPINGSNUM = 4;
const int TOPPINGSPIN[] = {7, 6, 5, 4};

const int LEDNUM = 5;
const int LEDPINS[] = {13, 12, 11, 10, 9};
Bounce buttons[] = {Bounce(), Bounce(), Bounce(), Bounce(), Bounce()};
Bounce b = Bounce();

const char *TOPPINGNAME[] = {"red onion", "tomato",
                     "lettuce", "pickels"};
bool toppingsSeletion[] = {false, false, false, false};

void reset() {
  for (int i=0; i< TOPPINGSNUM; i++) {
    toppingsSeletion[i] = false;
  }
  bunselection = "none";
  cookselection = "none";
}
void setup() {
  Serial.begin(9600);
  for (int i=0; i< TOPPINGSNUM; i++) {
    buttons[i].attach (TOPPINGSPIN[i] , INPUT_PULLUP);
    buttons[i].interval(100);
  }
  buttons[TOPPINGSNUM].attach (RESETBUTTON , INPUT_PULLUP);
}

void loop() {
  // check for reset 
  buttons[TOPPINGSNUM].update();
  if (buttons[TOPPINGSNUM].fell()) {
    Serial.println("reset");
    reset();
  }

  // check for toppings selection
  for (int i=0; i< TOPPINGSNUM; i++) {
    buttons[i].update();
    if (buttons[i].fell()) {
      toppingsSeletion[i] = (!toppingsSeletion[i]);
      Serial.print(TOPPINGNAME[i]);
      if (toppingsSeletion[i]) {
        Serial.println(" is selected");
      }
      else {
        Serial.println(" is no longer selected");
      }
    }
  }

  // check for wheel
  int wheelVal = analogRead(WHEELPIN);
  for (int i=0; i< WHEELLENGTH; i++) {
    if (wheelVal <= WHEELTHRESHOLD[i]) {
      if (WHEELNAME[i] != bunselection) {
        bunselection = WHEELNAME[i];
        Serial.print("bun selection changed to: ");
        Serial.println(bunselection);
      }
      break;
    }
  }

  int sliderVal = analogRead(SLIDERPIN);
  for (int i=SLIDERLENGTH-1;  i>= 0; i--) {
    if (sliderVal <= SLIDERTHRESHOLD[i]) {
      if (SLIDERNAME[i] != cookselection) {
        cookselection = SLIDERNAME[i];
        Serial.print("cook changed to: ");
        Serial.println(cookselection);
        for (int j=0; j<LEDNUM; j++) {
          digitalWrite(LEDPINS[j], LOW);
        }
        for (int j=0; j<=i; j++) {
          digitalWrite(LEDPINS[j], HIGH);
        }
      }
      break;
    }
  }
}


Interactive Restaurant Menu — Still in paper form!

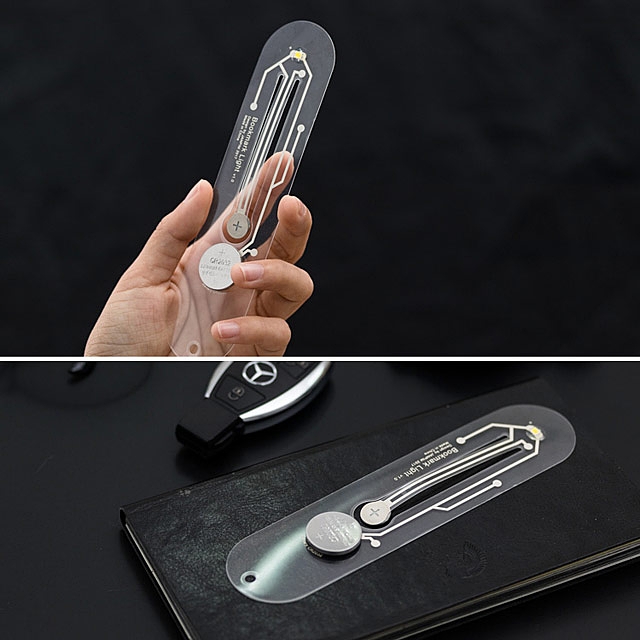
Inspired by the LED bookmarks, I thought of how circuits could be integrated into traditionally paper like things. Restaurants menus have been evolving quite a lot, and I experience this culture shock every time I come back to China: they went from paper menu, to ordering from tablets/ipads, to having customers scanning a QR code to order and pay from their phone in the last few years. As much as I appreciate the convenience, I really enjoy the feeling of flipping through a paper menu.

LED bookmark

I understand many pros of having a digital ordering system for the customer end:

    • saves time for servers & the number of servers needed
    • avoid ordering mistakes
    • the order directly goes from customers to the kitchen without going through the servers
    • customers can see how much they will be spending right away

Adapting such system is costly, but the wide adoption indicates that the productivity beats the cost. However, in the US, we don’t really see restaurants that uses digital ordering system for the customers.

Some AR applications are used for restaurant menus, and there is a restaurant in London named Inamo that has interactive table tops. BUT I’m proposing a interactive menu that is still in the traditional paper form but takes advantage of the digital ordering system. 

Say when the customers presses on a dish on the paper menu, the dish he/she want to order lights up. The menu can display how much the customer will be paying. And when the customer finish ordering, he/she hits submit, and the order goes directly to the kitchen. The waiter can then collect the menu away, and the menu will be ready for the next customer to order.

As for components, I think I will need:

    • conductive tape
    • leds (either those flat/sewable leds or some fancier way of lighting things up while maintaining the overall paper like texture)
    • digit display/lcd to display price
    • a “submit” button
    • to select a dish, things that could work: tactile button, switch button, or even faking a button using tape


”欢迎光临“ A motion sensor that welcomes customers

Years ago(when I was a kid) in China, when you walk into most convenience stores and small shops, an accessory by the door will welcome you by saying “welcome”, and it also serves to notify the store owners that they have customers. I remember when I was a kid, I found it really annoying, because it makes the sound not only when you walk in, but also when you walk out. And if you stand by the door, it will keep ‘welcoming’ you. It’s probably because the accessory sensor only detects for distance, and it’s not smart enough to distinguish when not to make the sound.

Nowadays, I don’t hear it as often, and I’m not sure if it’s because the sensing accessory it too annoying, or simply because people associate this sound with ‘low-end’ stores. But I thought if this sensing accessory could become smarter, maybe it’s not a bad idea to bring it back?

So I added 2 features:

    1. only makes the sound when someone walks in, not out;
    2. don’t make the sound if the store owner is already by the door or near the door

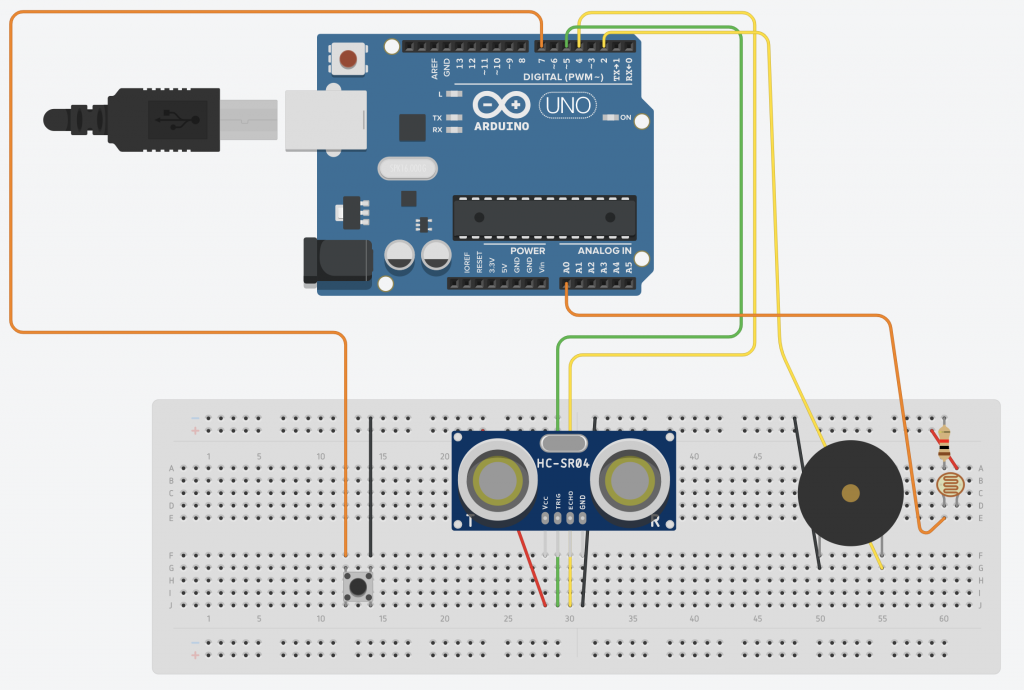
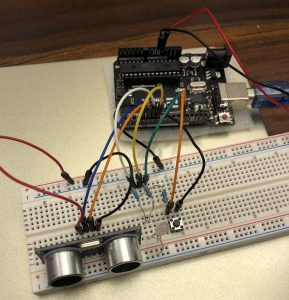
I initially wanted to use 2 ultrasonic distance sensors(1 to sense the person walking through the door, and another to sense the store owner being nearby the door), but I only had 1 distance sensor, so I used a button to indicate the event of “the owner is nearby the door”.

Input: Button, Photo-resistor, ultrasonic distance sensors

Output: buzzer speaker

I wasn’t able to get the speaker to play “Welcome” in Chinese, but I tried to mimic the tones of the way “Welcome” sounds with these sensing accessories(shoutout to my musically talented friend Michelle).

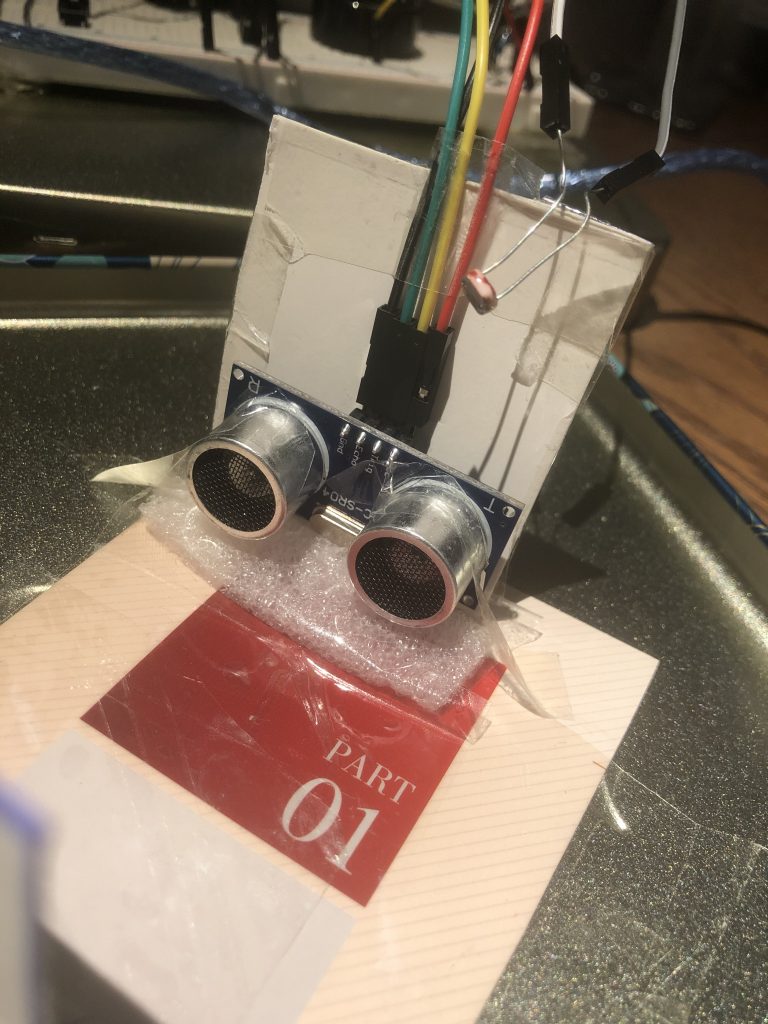
I used a photoresistor to detect whether the person is going in or out, but this scheme is far from reliable. A real motion sensor can do a much better job than what I have.

#include<Wire.h>


// PIN INIT
const int SPEAKERPIN = 3;
const int TRIGPIN = 4;
const int ECHOPIN = 5;
const int BUTTONPIN = 7;
const int PHOTOPIN = A0;


// GLOBAL VARS
int distanceThreshold = 4;
int prevPhotoVal = 0;

int get_distance(){
  unsigned long duration;
  int distance;
  digitalWrite(TRIGPIN, HIGH);
  delay(1);
  digitalWrite(TRIGPIN, LOW);
  duration = pulseIn(ECHOPIN, HIGH, 20000);
  distance = duration / 57;  // Divide by round-trip microseconds per cm to get cm
  return distance;
}

void setup() {
  Serial.begin(9600);
  pinMode(SPEAKERPIN, OUTPUT); 
  pinMode(ECHOPIN, INPUT);
  pinMode(TRIGPIN, OUTPUT);
  pinMode(PHOTOPIN, INPUT);
  pinMode(BUTTONPIN, INPUT_PULLUP);
}

void loop() {
  int buttonUp = digitalRead(BUTTONPIN);
  int currPhotoVal = analogRead(PHOTOPIN);
  int distance = get_distance();
  if (distance < distanceThreshold && buttonUp) {
    if(currPhotoVal > prevPhotoVal) {
      tone(SPEAKERPIN , 185, 200);
      delay(200);
      tone(SPEAKERPIN , 146.83, 200);
      delay(200);
      tone(SPEAKERPIN , 185, 200);
      delay(200);
      tone(SPEAKERPIN , 146.83, 400);
      delay(400);
    }
  }
  prevPhotoVal = currPhotoVal;
}


Mini Assignment 9

What sounds would you add to your house to make it more accessible?

  • I sometimes plug in the phone/tablet/laptop charger, but not to the devices, so when I wake up in the morning, things are out of battery. A sound that reminds me to plug in the devices would be helpful.
  • When filling water in a rush, I leave the kettle empty, and when I need water again later, I have to wait for the water to boil. A sound that reminds me to fill up the kettle befoe I need water should help.
  • Lights that are accidentally left on over night!
  • This one is far from realistic, but finding things within the house is not easy! Especially when it involves climbing up the stairs… so if somehow the house can know where things are and make sounds…

Surfing Paddling Metronome

I learned surfing for the first time this past weekend and paddling was one of the hardest part of it. Here are some of the common mistakes/mistakes that I made:

    1. Starts increasing paddling “faster”(in quotations because by faster, it does not mean moving your arms faster but paddle the water stronger with the same tempo so that the surfboard moves faster) too late
    2. Not paddling “fast” enough
    3. Arms are moved too fast and lost the tempo
    4. Stop paddling too early

So I thought what kind of device can offer some cues to beginners like me? Auditory cue is a great idea here because there is already a lot to look at and strength requirement does not really allow haptic cues.

Here is the device that uses an acceleration sensor as input, and a speaker as output. The device always make sounds with the same tempo like a metronome, but depending on how close the wave is(acceleration), the pitch of the sound it makes is different.

Users can listen to the sounds to decide when to paddle faster, how fast, and when to stop while maintaining the rhythm.

I couldn’t accurately simulate the change acceleration change, so for demoing purpose, I’m swinging the acceleration sensor back and forth, but you can still hear the different pitches when swinging at different speeds.

Assignment 8

I find it interesting that many old sound effects don’t even apply today. For example, some of the old computer sound effects are no longer relevant today. Another point to note related to film sound effects is that because of the mass use of certain sound effects in the film industry, we relate certain sounds with certain events when in fact these events don’t actually make these sounds in real life. For example, fruit cutting always has sounds in movies but we don’t really hear that in real life, but we can easily recognize these sounds. And for special effects sounds that I’ve never actually heard, I actually never question them and just remember it and make new association. Now that I’m thinking about it, I am not sure if that is a good thing…

I think many sounds carry emotions. When I hear someone scream, I get agitated. When I hear nails scratching a blackboard, I get disturbed. When I hear sound of the waves, I feel peaceful.

Sound in Physical Interactions

There is a music staircase in a mall in my hometown in China. I couldn’t find any videos for that mall, but here is something similar. Stepping on different stairs makes different notes.


This is one of the golf training aids that uses sounds to indicate something is wrong with your swing. This particular example is for if your swing is too long, but there are some other ones that monitor rotational angles and separation between upper and lower body.

This one does not have much interaction but I just wanted to put it here. Japanese singing toilets were very interesting…

Smart Curtain

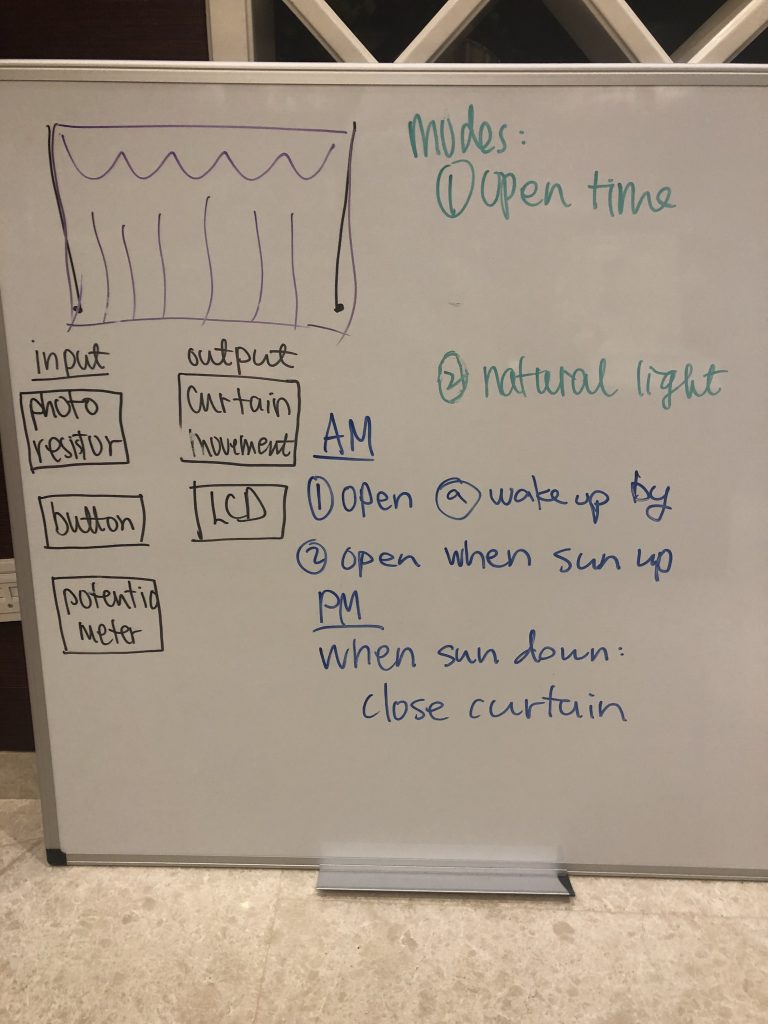
At the beginning of the semester, Chloe had an idea for an alarm clock that wakes people up through lights rather than sounds. I then bought an alarm clock, sunrise alarm clock, that has a similar functionality, and it has been great. Then I thought, well instead of using artificial lights, why can’t we use natural lights? (Of course natural light would not work if you are waking up in the middle of the night).

sketches

I then came up with this idea of a smart curtain that is basically a reverse sunrise alarm clock. It serves as an “alarm clock” as it opens and lets lights in at the time you set. I also added a natural light mode: curtains are closed when the sun is down, and the curtain is opened when the sun is up. Houses/apartments in China are much closer to one another than ones in the US, so you have to close your curtains at night. But I rely on the lights to help me wake up in the morning, so ever since I came back home in China, my mom has been yelling at me to close my curtains completely every other night.

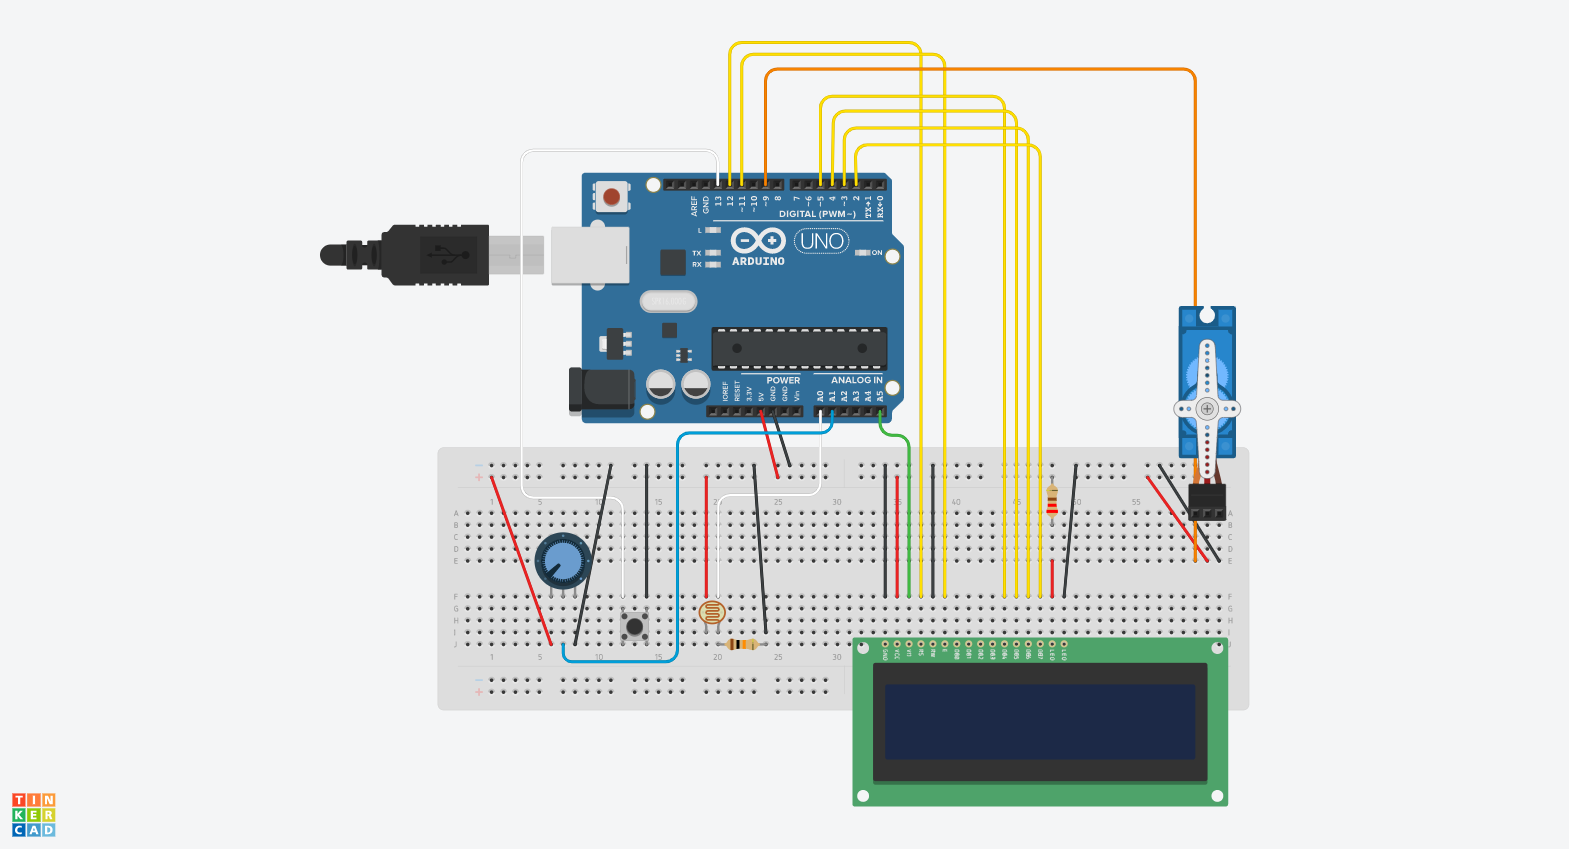
schematic

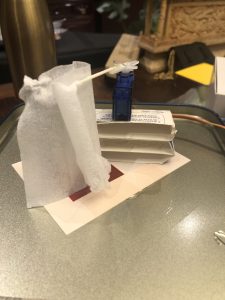
I don’t have access to a linear stepper motor, nor a time module. So I used a servo motor to show the actions of opening and closing the curtains, and hardcoded the current time.

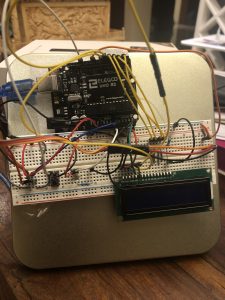
In addition, I used a potentiometer to adjust time, and I kept on getting connection issues with the potentiometer to have consistent readings. I used a push button to change mode, a photo cell to detect day/night(in practice, this photo cell needs to be placed such that only outdoor lightings are sensed but not indoor lightings), and an LCD to display mode and time.

the beautiful curtain(wet wipe)


This smart curtain can be improved in some ways. In alarm mode, the curtain could be slowly opening instead of opening at once, to fake the effect of sunrise. Like the sunrise alarm clock that can be controlled by smart phones, smart curtain should do that too and maybe even integrate with a traditional alarm system, i.e. slowly opens up at curtain and then alarm rings.

Code:

#include <LiquidCrystal.h>
#include <Servo.h>

LiquidCrystal lcd = LiquidCrystal(7,6,5,4,3,2);
Servo myservo;
const int POTPIN = A1;
const int BUTTONPIN = 13;
const int PHOTOPIN = A0;
const int SERVOPIN = 9;
const int PHOTOTHRESH = 300;


bool isAlarm = true;
bool isOpen = false;
int clockTime = 0; // used for demo purpose
long long lastLCDTime = 0; 
long long LCDinterval = 100;
long long lastDebounceTime = 0;  
long long debounceDelay = 50; 


void openCurtain() {
  for (int pos = 89; pos > 0; pos -= 1) {
    // in steps of 1 degree
    myservo.write(pos);
    delay(15);
  }
  isOpen = true;
}

void closeCurtain() {
  for (int pos = 0; pos < 90; pos += 1) {
    // in steps of 1 degree
    myservo.write(pos);
    delay(15);
  }
  isOpen = false;
}

void updateLCD(long long currTime, int h, int m, bool isAlarm) {
  if (currTime - lastLCDTime > LCDinterval) {
    lcd.clear();
    lcd.setCursor(2, 0);
    String mode = isAlarm ? "alarm" : "natural";
    lcd.setCursor(2, 1);
    lastLCDTime = currTime;
  }
}

void setup() {
  lcd.begin(16, 2);
  analogWrite(A5, 40);
  myservo.attach(SERVOPIN);
  myservo.write(0);
  pinMode(BUTTONPIN, INPUT_PULLUP);
  Serial.begin(9600);
}

void loop() {
  // read button
  long long currTime = millis();
  if (currTime-lastDebounceTime>debounceDelay) {
    if (digitalRead(BUTTONPIN) == 0) {
        isAlarm = !isAlarm;
    }
    lastDebounceTime = currTime;
  }

  // read potentiometer
  int potVal = analogRead(POTPIN);
  int potTime = potVal/(1023.0/(24.0*60.0));
  int h = potTime/60;
  int m = potTime%60;

  // read photo resistor
  int photoVal = analogRead(PHOTOPIN);

  updateLCD(currTime, h, m, isAlarm);
  if ((!isAlarm) && (!isOpen) && (photoVal>PHOTOTHRESH)) {
    openCurtain();
  }
  else if (isAlarm && (!isOpen) && (potTime==clockTime)) {
    openCurtain();
  }
  else if (isOpen && (photoVal<PHOTOTHRESH)) {
    closeCurtain();
  }
  
}


Work, but not too long

With WFH and remote learning, I find it either really hard to focus and keep on getting distracted, or sitting too long in front of my laptop until my back hurts.

Work, but not too long “rewards” you when you sit in front of your laptop for a short period of time, and “warns” you when you sit in front of your laptop for too long.

Consider this example scenario: You tried to get some work done, but you keep going to the kitchen or lying on the couch. And when you finally stayed in front of your laptop for a short period of time, you are rewarded! Now that you got into the momentum, you keep working and working. Hours went by, and by the time you realized that you’ve been sitting too long, your back already hurts.

In my system, the “reward” is a colorful light sequence, and the “warning” is blinking red lights. It uses a button to set the background distance to maximize its portability, and uses ultrasonic to measure the distance.


For demoing purpose, the “reward” period is set to be 5s, and the “warning” period is set to be 15s. But in reality, a 30min “reward” period and a 2h “warning” period are practical.

Before I sit down, I hit the button to get the background distance. Then I sit, there is a “reward” for every “reward” period until I hit the warning period. If I stand up and move away from the laptop, then the timer/cycle restarts.

What’s missing in this video is that warning is only on for a short period of time. Like how you can snooze an alarm, you are snoozing the system when you stay seated, and after another reward period, the system will warn you again.

One flaw of the system is that it requires manually setting the background distance, and it can be easily solved using computer vision to detect whether a face is present. Such solution would require a lot more computing power and much more sophisticated software.

Example: data over time to interact with

GIS: “A geographic information system (GIS) is a framework for gathering, managing, and analyzing data. Rooted in the science of geography, GIS integrates many types of data. It analyzes spatial location and organizes layers of information into visualizations using maps and 3D scenes. ​With this unique capability, GIS reveals deeper insights into data, such as patterns, relationships, and situations—helping users make smarter decisions. ”

There are some examples in the link where GIS is used for monitor changes and forecasting.