Month
January 2016
Explained: A complete kit sold by Parallax at $135 for one, and $225 for a complete kit. It uses BASIC Stamp control boards and comes equipped with servos, QTI line sensors, and other components all mounted on an aluminum… Continue Reading →
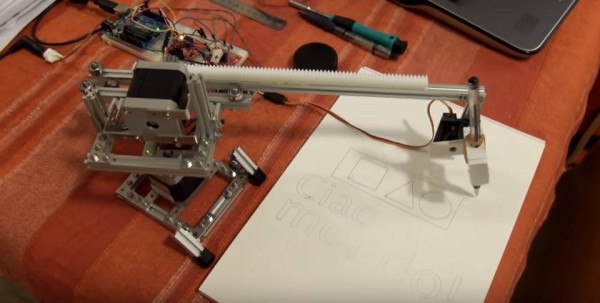
Polar Arm with Arduino Created by Alessandro G. EXPLAINED: A way of drawing inputted data with high accuracy on paper with a swivel polar arm creation CHOSEN: This project was chosen because it could be modified to clean a whiteboard table in designated… Continue Reading →
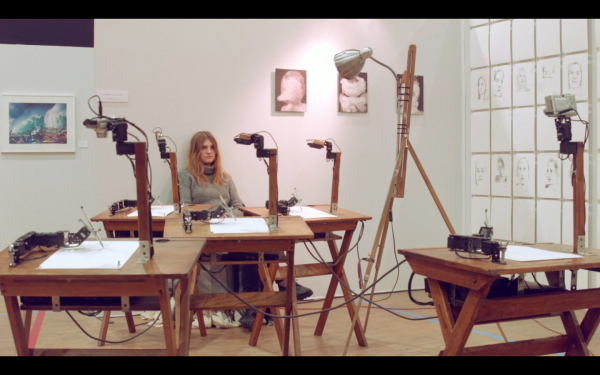
5RNP EXPLAINED: A drawing robot exhibition which gathering visitors’ portrait based on image processing. CHOSEN: This project is a good example as a combination of art and technology. Which gives the robots a different charm. And the usage of computer vision… Continue Reading →
EXPLAINED: The arduino-based drawing robot has a marker that it controls through… Continue Reading →
EXPLAINED: Tracerbot will circle while tracing on paper a object placed next to it. It utilizes a Spark Photon kit, cut out plexi sub-structure, wheels, 9v batteries, sensors and more. It detects a objects shape and leaving a outline of… Continue Reading →
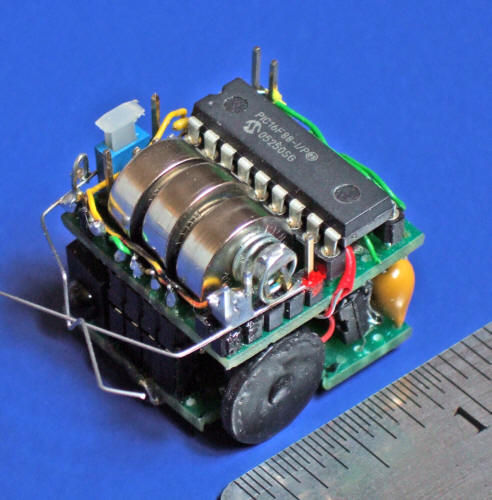
EXPLAINED: An autonomous sumo robot that is only one cubic inch in volume. CHOSEN: I chose this robot because it is an incredibly small robot. One of our ideas was to build one of our sumo bots smaller, but not nearly… Continue Reading →
Hoberman Sphere Computational Design of Mechanical Characters Mechanical Movements Strandbeests Pen Plotters [I | II | III] Rapid Prototyping Design and Control of Tensegrity Soft Robot for Locomotion Omnidirectional Wheels Vertigo
Computational Design of Linkage-Based Characters EXPLAINED: A system for designing linkage based characters using a catalog of linkage types. CHOSEN: I chose this project because it shows a new approach to designing complex linkages. This gives users without large amounts of… Continue Reading →
Here’s the example I shared in class for using OSC with the Photons. It’s also available as a Gist on Github.
|
1 2 3 4 5 6 7 8 9 10 11 12 13 14 15 16 17 18 19 20 21 22 23 24 25 26 27 28 29 30 31 32 33 34 35 36 37 38 39 40 41 42 43 44 45 46 47 48 49 50 51 52 53 54 55 56 57 58 59 60 61 62 63 64 65 66 67 68 69 70 71 72 73 74 75 76 77 78 79 80 81 82 83 84 85 86 87 88 89 90 91 92 93 94 95 96 97 98 99 100 101 102 103 104 105 106 107 108 109 110 111 112 113 114 115 116 117 118 119 120 121 122 123 124 125 126 127 128 129 130 131 132 133 134 135 |
#include "simple-OSC/simple-OSC.h" // create OSC object UDP osc; // set IP addresses and ports for I/O IPAddress outIp(128, 237, 246, 8); unsigned int outPort = 9000; unsigned int inPort = 3000; // creat named variables for pins int leftMotorPin = D1; int rightMotorPin = D0; int ledPin = D7; // runs once at the beginning of the program void setup() { // start serial & OSC Serial.begin(115200); osc.begin(inPort); pinMode(leftMotorPin, OUTPUT); pinMode(rightMotorPin, OUTPUT); pinMode(ledPin, OUTPUT); // You can view Serial.print() commands sent from the Photon via your computer's console (while it's plugged in to the computer). // Do `ls /dev/tty.usb*` in terminal to find the address of the Photon, // then do `screen ADDRESS BAUD` to make a serial monitor. // For example, if my Photon is "/dev/tty.usbmodem331", I'd do 'screen /dev/tty.usbmodem331 115200'. // while waiting for connection to be set up while (!WiFi.ready()) { // wait and print to console delay(500); Serial.print("."); } // print to console when connection is started Serial.println(""); Serial.println("WiFi connected"); // get Photon's IP:PORT and print it to console IPAddress ip = WiFi.localIP(); Serial.print(F("ip : ")); Serial.print(ip); Serial.print(F(" : ")); Serial.println(inPort); } // continuously runs throughout the life of the program, after setup() void loop() { // RECEIVE === // create message object OSCMessage inMessage; // if the incoming OSC packet is larger than 0 bytes int size = 0; size = osc.parsePacket(); if (size > 0) { // copy each byte from the incoming packet to the message object while (size > 0) { inMessage.fill(osc.read()); size--; } // if the message can be parsed if (inMessage.parse()) { Serial.println("Message Received"); // route it to a callback function inMessage.route("/A", leftCallback); inMessage.route("/B", rightCallback); } } // SEND === // To test sending messages, you can use `nc -ul PORT` in terminal to listen to incoming messages on localhost. // For example, if outIp is my computer's IP address (128.237.246.8), and outPort is the port I'm sending to (9000), // then I'd run `nc -ul 9000` in terminal, and send a message from the Photon using the following example. // // For TouchOSC, you'd want to send the appropriate route to your mobile device's IP. Follow instructions [here](http://hexler.net/docs/touchosc) // create an outgoing message object OSCMessage outMessage("/sensor"); // add parameters to the object outMessage.addString("test"); outMessage.addFloat(-3.14); outMessage.addInt(-1); // send the object outMessage.send(osc, outIp, outPort); } // callbacks are run asynchronously from the main loop() void leftCallback(OSCMessage &inMessage) { Serial.println("LEFT CALLBACK"); if (inMessage.getInt(0) == 0) { Serial.println("LEFT OFF"); digitalWrite(leftMotorPin, LOW); digitalWrite(ledPin, LOW); } else { Serial.println("LEFT ON"); digitalWrite(leftMotorPin, HIGH); digitalWrite(ledPin, HIGH); } } void rightCallback(OSCMessage &inMessage) { Serial.println("RIGHT CALLBACK"); Serial.println(inMessage.getInt(0)); if (inMessage.getInt(0) == 0) { Serial.println("RIGHT OFF"); digitalWrite(rightMotorPin, LOW); digitalWrite(ledPin, LOW); } else { Serial.println("RIGHT ON"); digitalWrite(rightMotorPin, HIGH); digitalWrite(ledPin, HIGH); } } |
On a number of occasions this semester (approximately once per project), you are going to complete a “looking outwards” assignment, where you search relevant fields for projects related to the current topic. You will then make a blog post of… Continue Reading →
