Overview
This project was designed to make an alarm clock that stops the alarm by matching a random color puzzle.
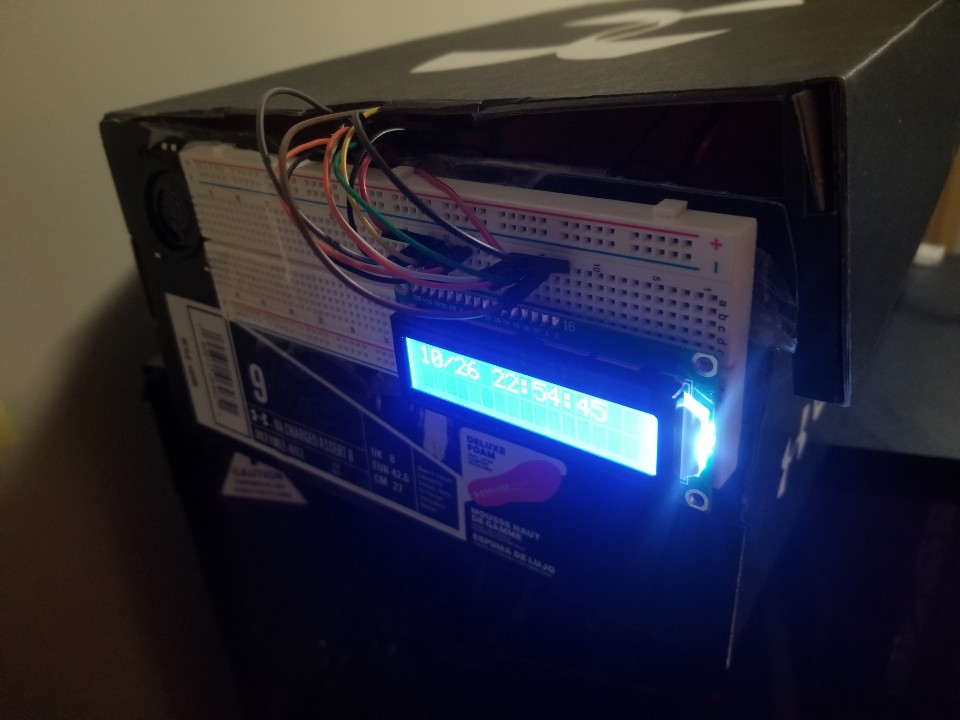
Final Project Product
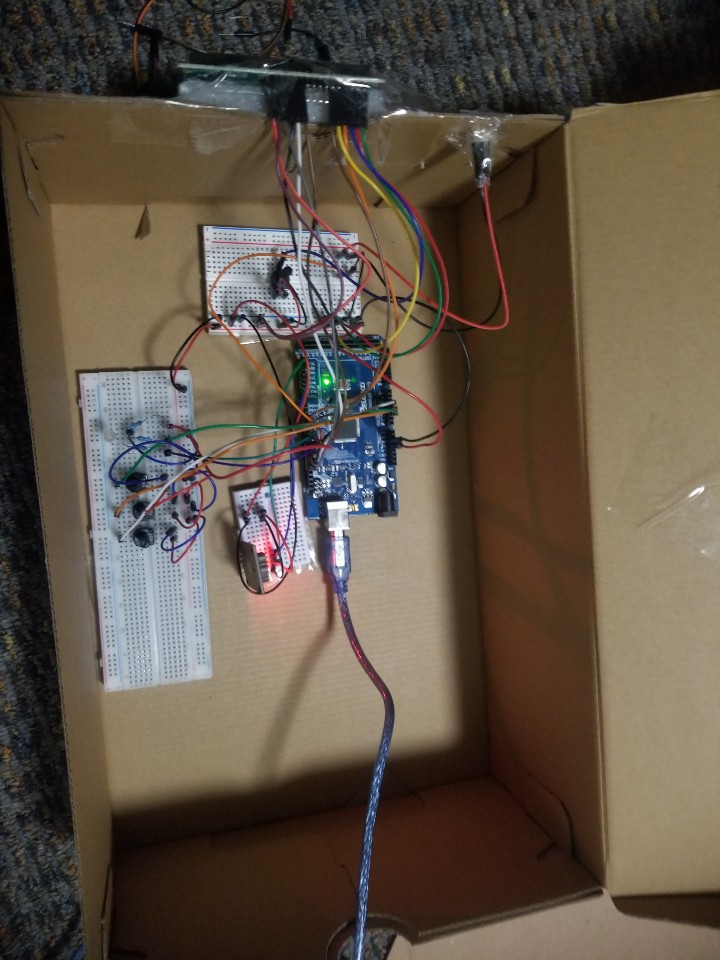
Wires and other electrical parts inside the box
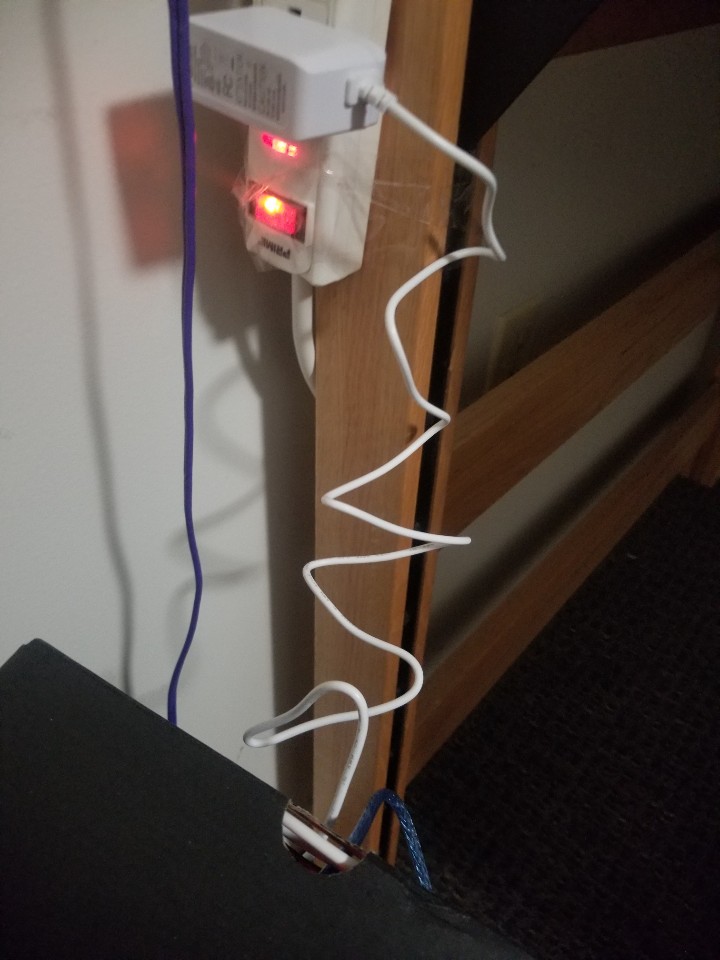
Powerline for the alarm clock
*For clear demonstration, I used a flat-plain type alarm clock video instead of a shoebox type.
Process images and review
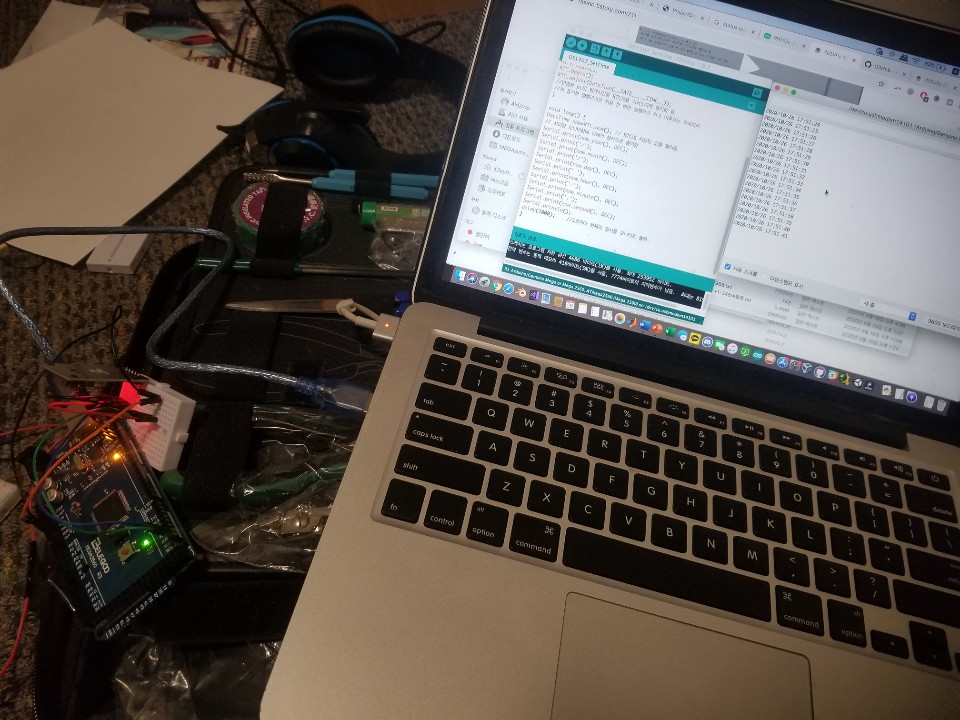
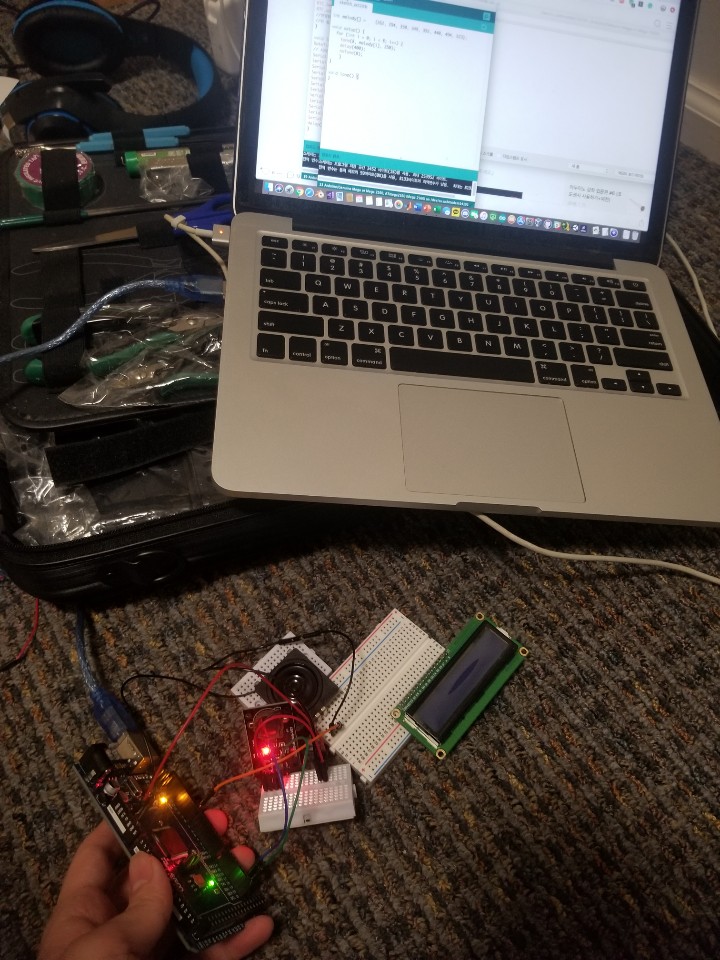
Decision 1: Decide to test all components and check whether my idea will work.
During the prototype check day, I had a lot of problems with my gadgets. Therefore, I decided to test each gadget I brainstormed to see how it works and change if it does not work correctly.
Check 1: Turning off the alarm by changing the color of the led.
Here, there were two problems in total.
The first problem came up LCD becoming dull by having too many signals in a short amount of time. I solved this issue by adding a delay command on the Arduino.
The second problem came up with the neo-pixel strip. I tried to use the neo-pixel strip for this project but there were connection issues with the wire. Therefore, I decided to use a simpler RGB LED. (Unfortunately no photo)
Check 2: Learn how to use the other two new components
Fortunately, there were no big issues with testing these new modules.
Testing how the real-time clock module works
Adding Piezo Speaker to Arduino and tested with the Real-Time Clock module.
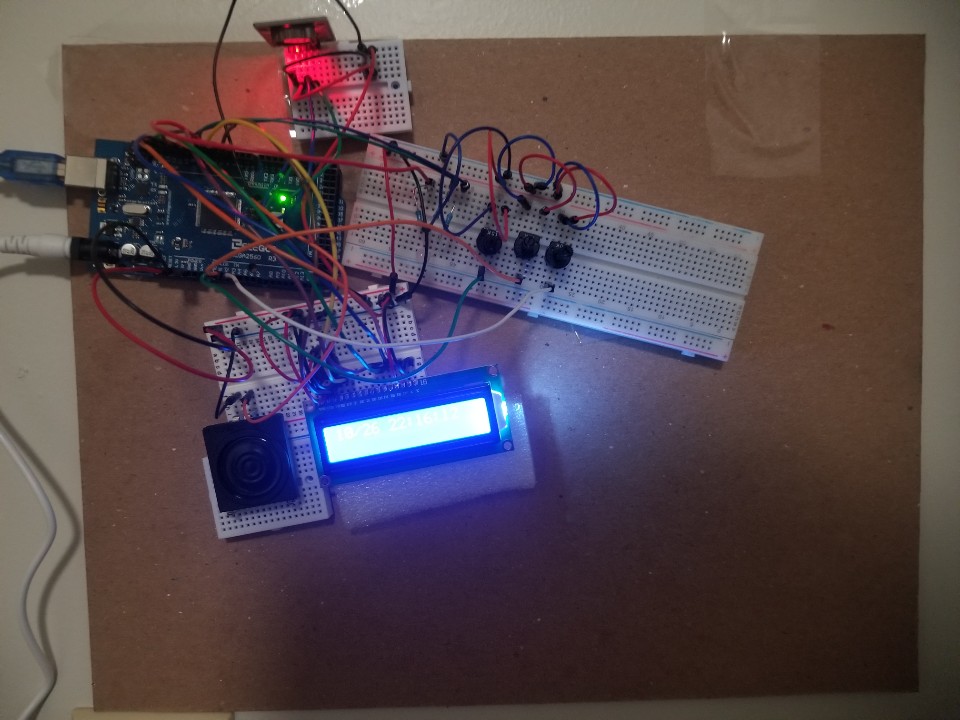
Adding all components into one circuit
Decision 2: For better design, I looked for a box where I can put components.
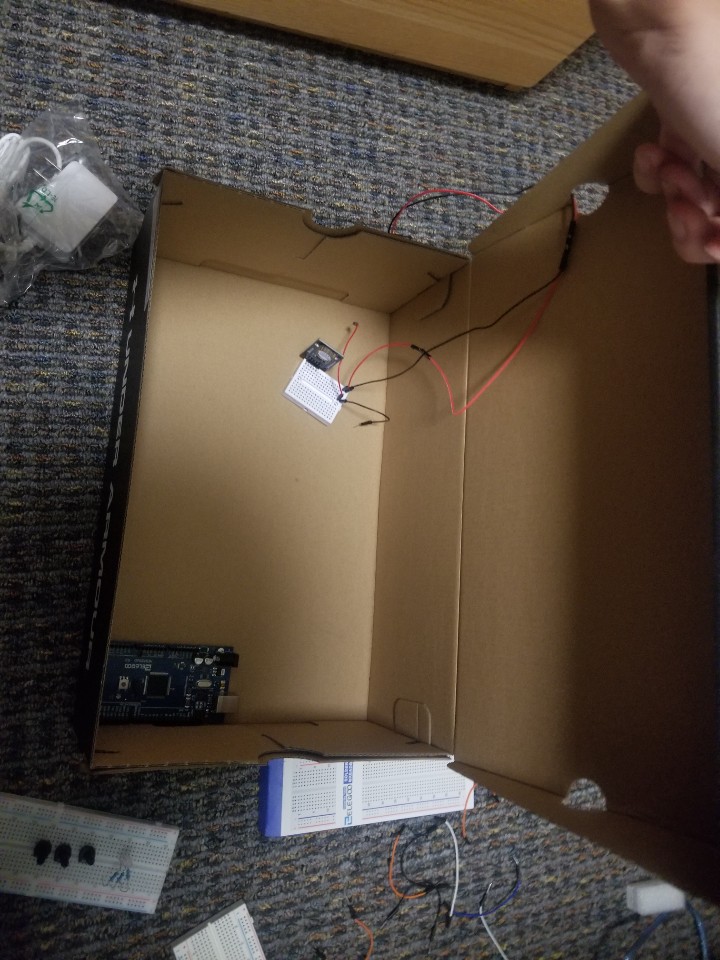
Decided to use a shoebox instead of just planting a bunch of circuits on top of the board
By this point, I thought the alarm clock will be a good design-wise but…
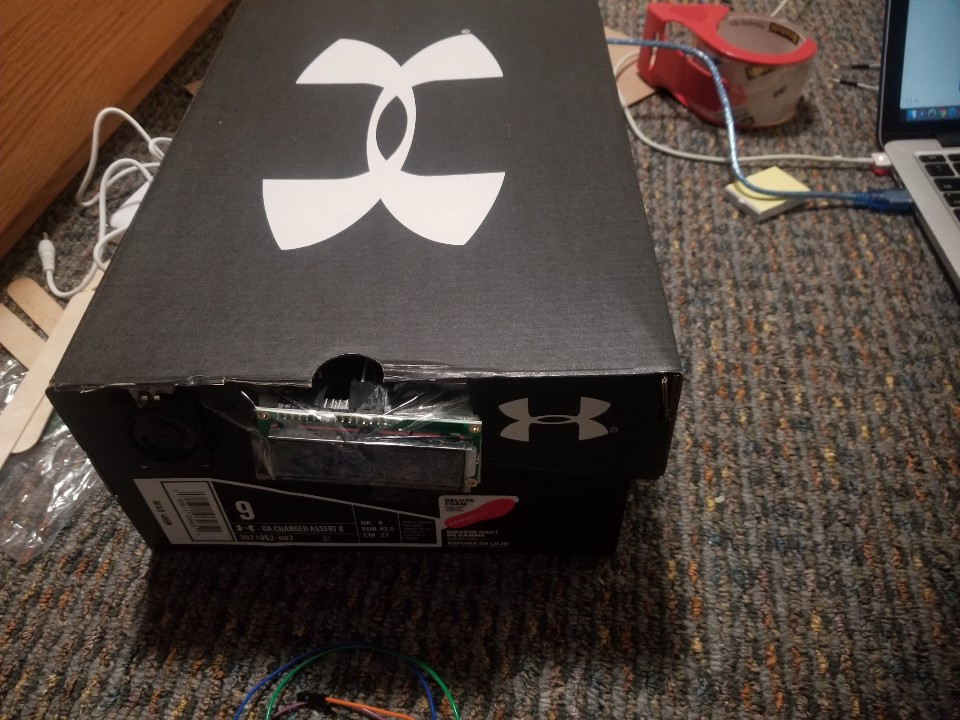
Final Product
the box was too big for a small alarm clock. D:
Discussion
I got the question, “[Is] there a function for accessibility for those who are color blind.” I never thought of this question before I build this device. For this project, there is no function that is accessible for color blinds. However, I can allow users to select a color pool when they set up the alarm. For example, if someone is green color blind, I build a push-button function that can exclude the green color type answer from the puzzle. The second feedback I got was “you’re using a finite number of predefined colors, is there any reason to use a potentiometer as opposed to toggle switches?” In this case, yes. We can use the switch button to select those colors. However, I used a potentiometer because it gives more flexibility in the color pool. For instance, if I use a potentiometer I can use Violet(R:128 G:0 B:255) and Rose(R:255 G:0 B:128) for the color problem.
Overall, I was happy with my project function-wise. My project worked on how I intended. There were little mechanical wiring issues with LCDs but I was able to fix it after trying out several times. However, I was not satisfied with design-wise. In the beginning, I was thought using a shoebox would give a good and organized design aesthetic outfit because I saw other projects made with a shoebox. However, my LCD screen was too small compared to the size of the box creating an ugly shape.
During this project, I learned that sending too many signals in a short amount of time can create an error in Arduino. For example, as I mentioned in the process check 1 section, I had a problem with LCD being dull when I renewed the LCD screen every 1 millisecond. It did not create a problem when I used LCD only, but it generated dull letters when I turned my LCDs. I was able to solve this problem by adding a delay command on Arduino.
If I have a second chance to rebuild this project, I will add several new functions to my alarm clock. First, I want to add a push-button function so that I can modify the time without connecting the computer. Currently, I am resetting my time based on the computer and codes. So, if I need to change alarm time or clock time, I need to turn on the computer and re-upload code when I need to change those settings. Also, I want to customize the size of the box to improve aesthetic value.
Technical information
Schematic:

Code:
/*
* Alarm Clock with color puzzles
* Daniel Moon (seonghym)
*
*
* Description: This code takes the time from the computer and computes the time
* on LCD screen by using the Real Time Clock Module. Then, if it reaches a certain time,
* the speaker starts to ring. To turn off the speaker, we need to match the random color
* specified on the LCD screen with LED attached to the circuit by turning three potentiometers.
*
*Credit:
*   -Real Time Clock Module
*   https://forum.arduino.cc/index.php?topic=128928.0
*
*   -Sample Speaker Code in Arduino website
*   https://www.arduino.cc/en/Tutorial/BuiltInExamples/toneMelody
*
* Pin mapping:
*
* pin   | mode   | description
* ------|--------|------------
  8      output   Speaker
  7      output   LCD pin(B)
  6      output   LCD pin(G)
  5      output   LCD pin(R)
  A2     input    Potentiometer for Red Color
  A3     input    Potentiometer for Green Color
  A4     input    Potentiometer for Blue Color
  3      ouput    LCD rs
  4      output   LCD enable
  10     output   LCD d4
  11     output   LCD d5
  12     output   LCD d6
  13     output   LCD d7
*/

#include <LiquidCrystal.h>
#include <RTClib.h>
#include <Wire.h>
RTC_DS1307 RTC;

//LCD set
LiquidCrystal lcd(3,4,10,11,12,13);//LCD

//Sets pin for LED change
#define redPotPin A2
#define bluePotPin A3
#define greenPotPin A4

//For timer counts
unsigned long timeVal=0;

//Sets alarm time
int alarmHour = 22;
int alarmminute = 47;

//Sets puzzle value
//Total 7 different color types.
String colour[] = {"white","blue","green","red","yellow","purple","cyan"};
int randVal = 0;

//Sets pin numbers
int speakerPin=8;
int redLedPin = 5;
int greenLedPin = 6;
int blueLedPin = 7;

//Sets Color of LED
int color_value[3] = {0,0,0};
int target_color_value[3] = {1,1,1};

//Check whether day passed
bool timePassed = true;
//Check whether alarm clock is ringing
boolwakeVal = false;

void setup() {
randomSeed(analogRead(0));
Serial.begin(9600);

//Adjust Real Time Clock with PC
Wire.begin();
RTC.begin();
RTC.adjust(DateTime(__DATE__,__TIME__));
//Adjust LCD
lcd.begin(16,2);
lcd.clear();

//sets a random value for puzzle
randVal = random(0, 6);
//Serial.println(randVal);

//Sets outputs for RGB LED
 pinMode(redLedPin, OUTPUT);
 pinMode(greenLedPin, OUTPUT);
 pinMode(blueLedPin, OUTPUT);
}

void loop() {
DateTime now=RTC.now();
//only executes every 1 seconds
if(millis()-timeVal>=1000){
  //Sets LCD with correct time
  lcd.clear();
  lcd.setCursor(0,0);
  lcd.print((String)now.month() + "/" + now.day()+ " " + now.hour()+":"+now.minute()+":"+now.second());
  if(wakeVal){
    //Operates the color puzzle
    lcd.setCursor(0,1);
    lcd.print(colour[randVal]);
  }
  timeVal=millis();
}
if(now.hour() == 24){
  //Resets the alarm activation
  timePassed = true;
}
if((wakeVal || now.hour() == alarmHour && now.minute() == alarmminute) && timePassed){
  wakeVal = true;
  //Serial.println("Made it 1");
  //Rings the alarm
  tone(speakerPin, 262, 250);
  //Sets the puzzle
  ColortoNum(colour[randVal]);
  //Changes LED color
  color_value[0] = analogRead(redPotPin)/4; //(0~1023 => 1024/4=256)
  color_value[1] = analogRead(bluePotPin)/4;
  color_value[2] = analogRead(greenPotPin)/4;
  ColorVal(color_value[0],color_value[1],color_value[2]);
}
//Chekc whether the puzzle is correct
if(timePassed && color_value[0] == target_color_value[0]&&color_value[1] == target_color_value[1]&&color_value[2] == target_color_value[2]){
  if(wakeVal){
    timePassed = false;
  }
  //Turns the puzzle and alarm off
  wakeVal = false;
  randVal = random(0, 6);
  Serial.println(randVal);
  //ColortoNum(colour[randVal]);
  Serial.println("Made it 2");
  noTone(speakerPin);
  ColorVal(0,0,0);
}
}

//Sets LED color
void ColorVal(int red, int green, int blue)
{
  analogWrite(redLedPin, red);
  analogWrite(greenLedPin, green);
  analogWrite(blueLedPin, blue);
}

//Check Whether LED shows correct color
void ColortoNum(String colour){
  if (colour == "white"){
    target_color_value[0] = 255;
    target_color_value[1] = 255;
    target_color_value[2] = 255;
  }
  else if (colour == "blue"){
    target_color_value[0] = 0;
    target_color_value[1] = 0;
    target_color_value[2] = 255;
  }
  else if (colour == "red"){
    target_color_value[0] = 255;
    target_color_value[1] = 0;
    target_color_value[2] = 0;
  }
  else if (colour == "green"){
    target_color_value[0] = 0;
    target_color_value[1] = 255;
    target_color_value[2] = 0;
  }
  else if (colour == "yellow"){
    target_color_value[0] = 255;
    target_color_value[1] = 255;
    target_color_value[2] = 0;
  }
  else if (colour == "purple"){
    target_color_value[0] = 255;
    target_color_value[1] = 0;
    target_color_value[2] = 255;
  }
  else if (colour == "cyan"){
    target_color_value[0] = 0;
    target_color_value[1] = 255;
    target_color_value[2] = 255;
  }
}