
The Simple Management Rotary Tool (SMRT) is a compact way to keep track of all your daily tasks for the day. Powered by an Arduino Uno, this device only has 3 other components to it: a rotary encoder, a 20×4 LCD I2C, and a single button. The making of this was not extremely challenging, but more difficult than I had originally planned.
The first step I took was putting my initial thoughts into electronics. I had wired a standard 16×2 LCD with a couple buttons, that I would eventually turn into one button and a rotary encoder.
This worked out great. It was simple, and it did exactly what I wanted. The issue I had was this was all hard coded. I was manually counting out the number of letters in order to fit into the screen. My thought to this was to change the code, but this is where things got a little dicey. Trying to cut off strings at certain points and such was challenging. I tried going through and using character operations and different string operations, but no luck. I knew what I wanted the function to do, but I didn’t know of a command to do it. I was essentially trying to reinvent the wheel.
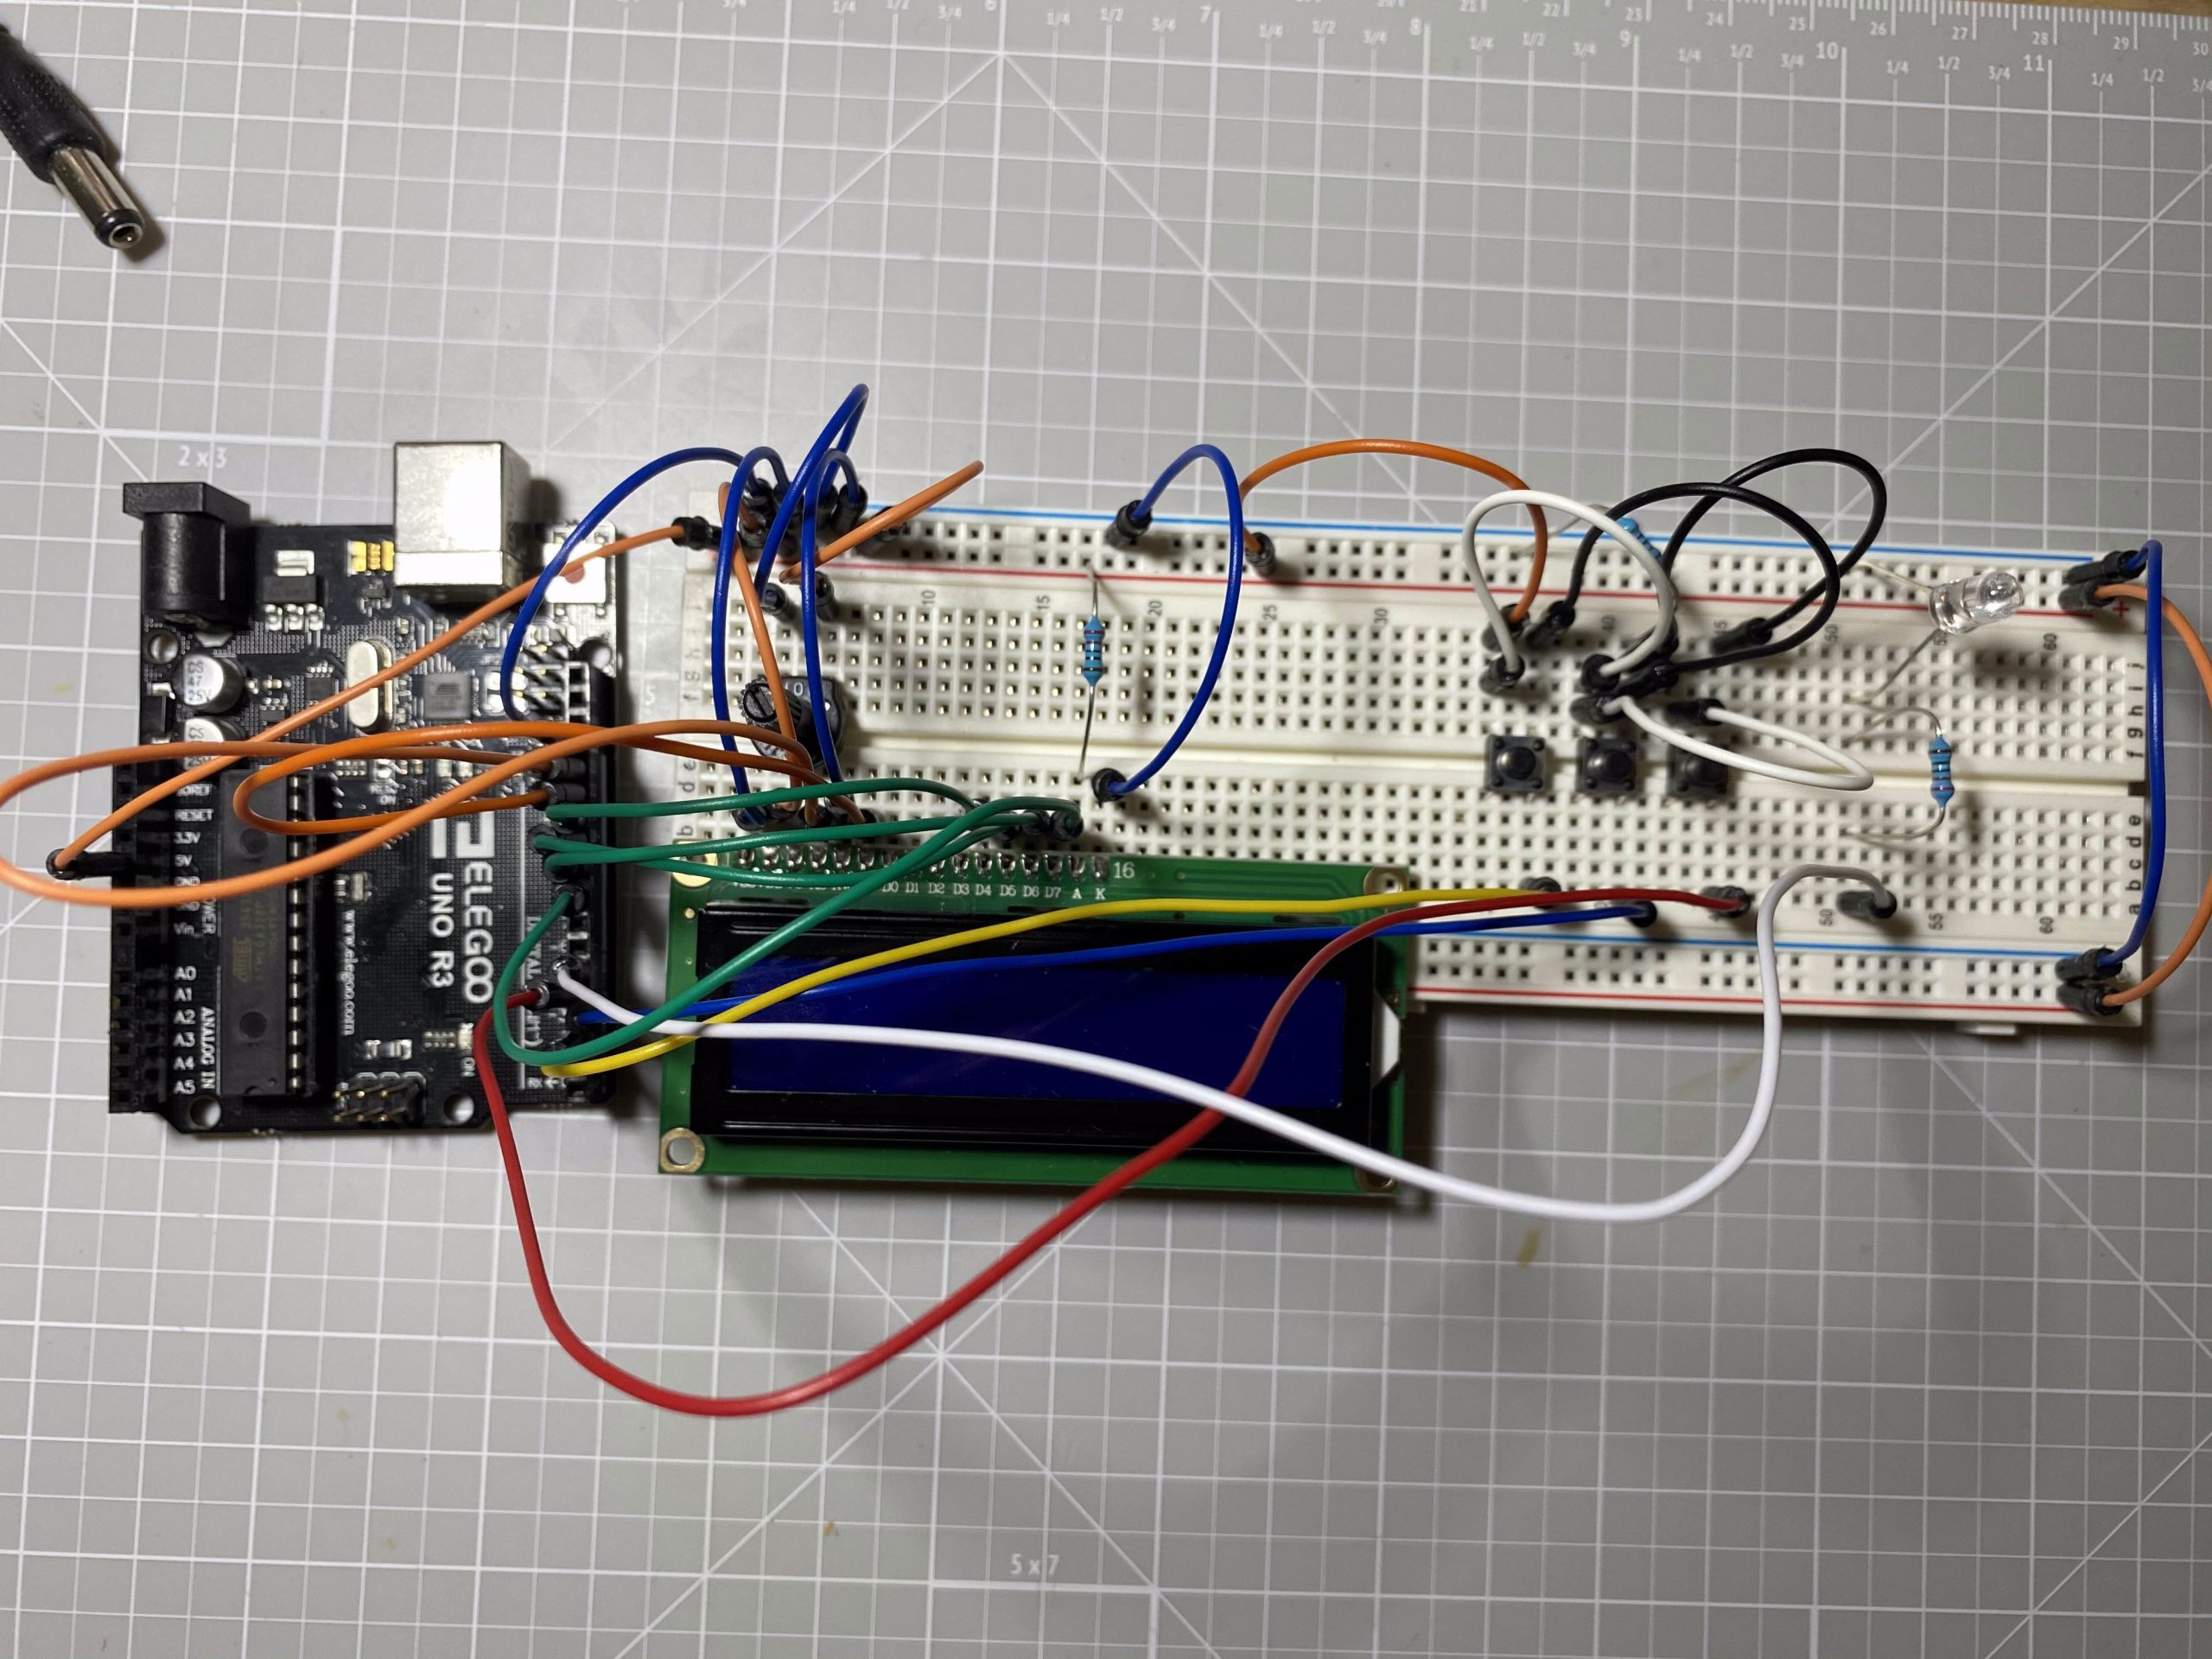
Before picture with all of the complex wiring.
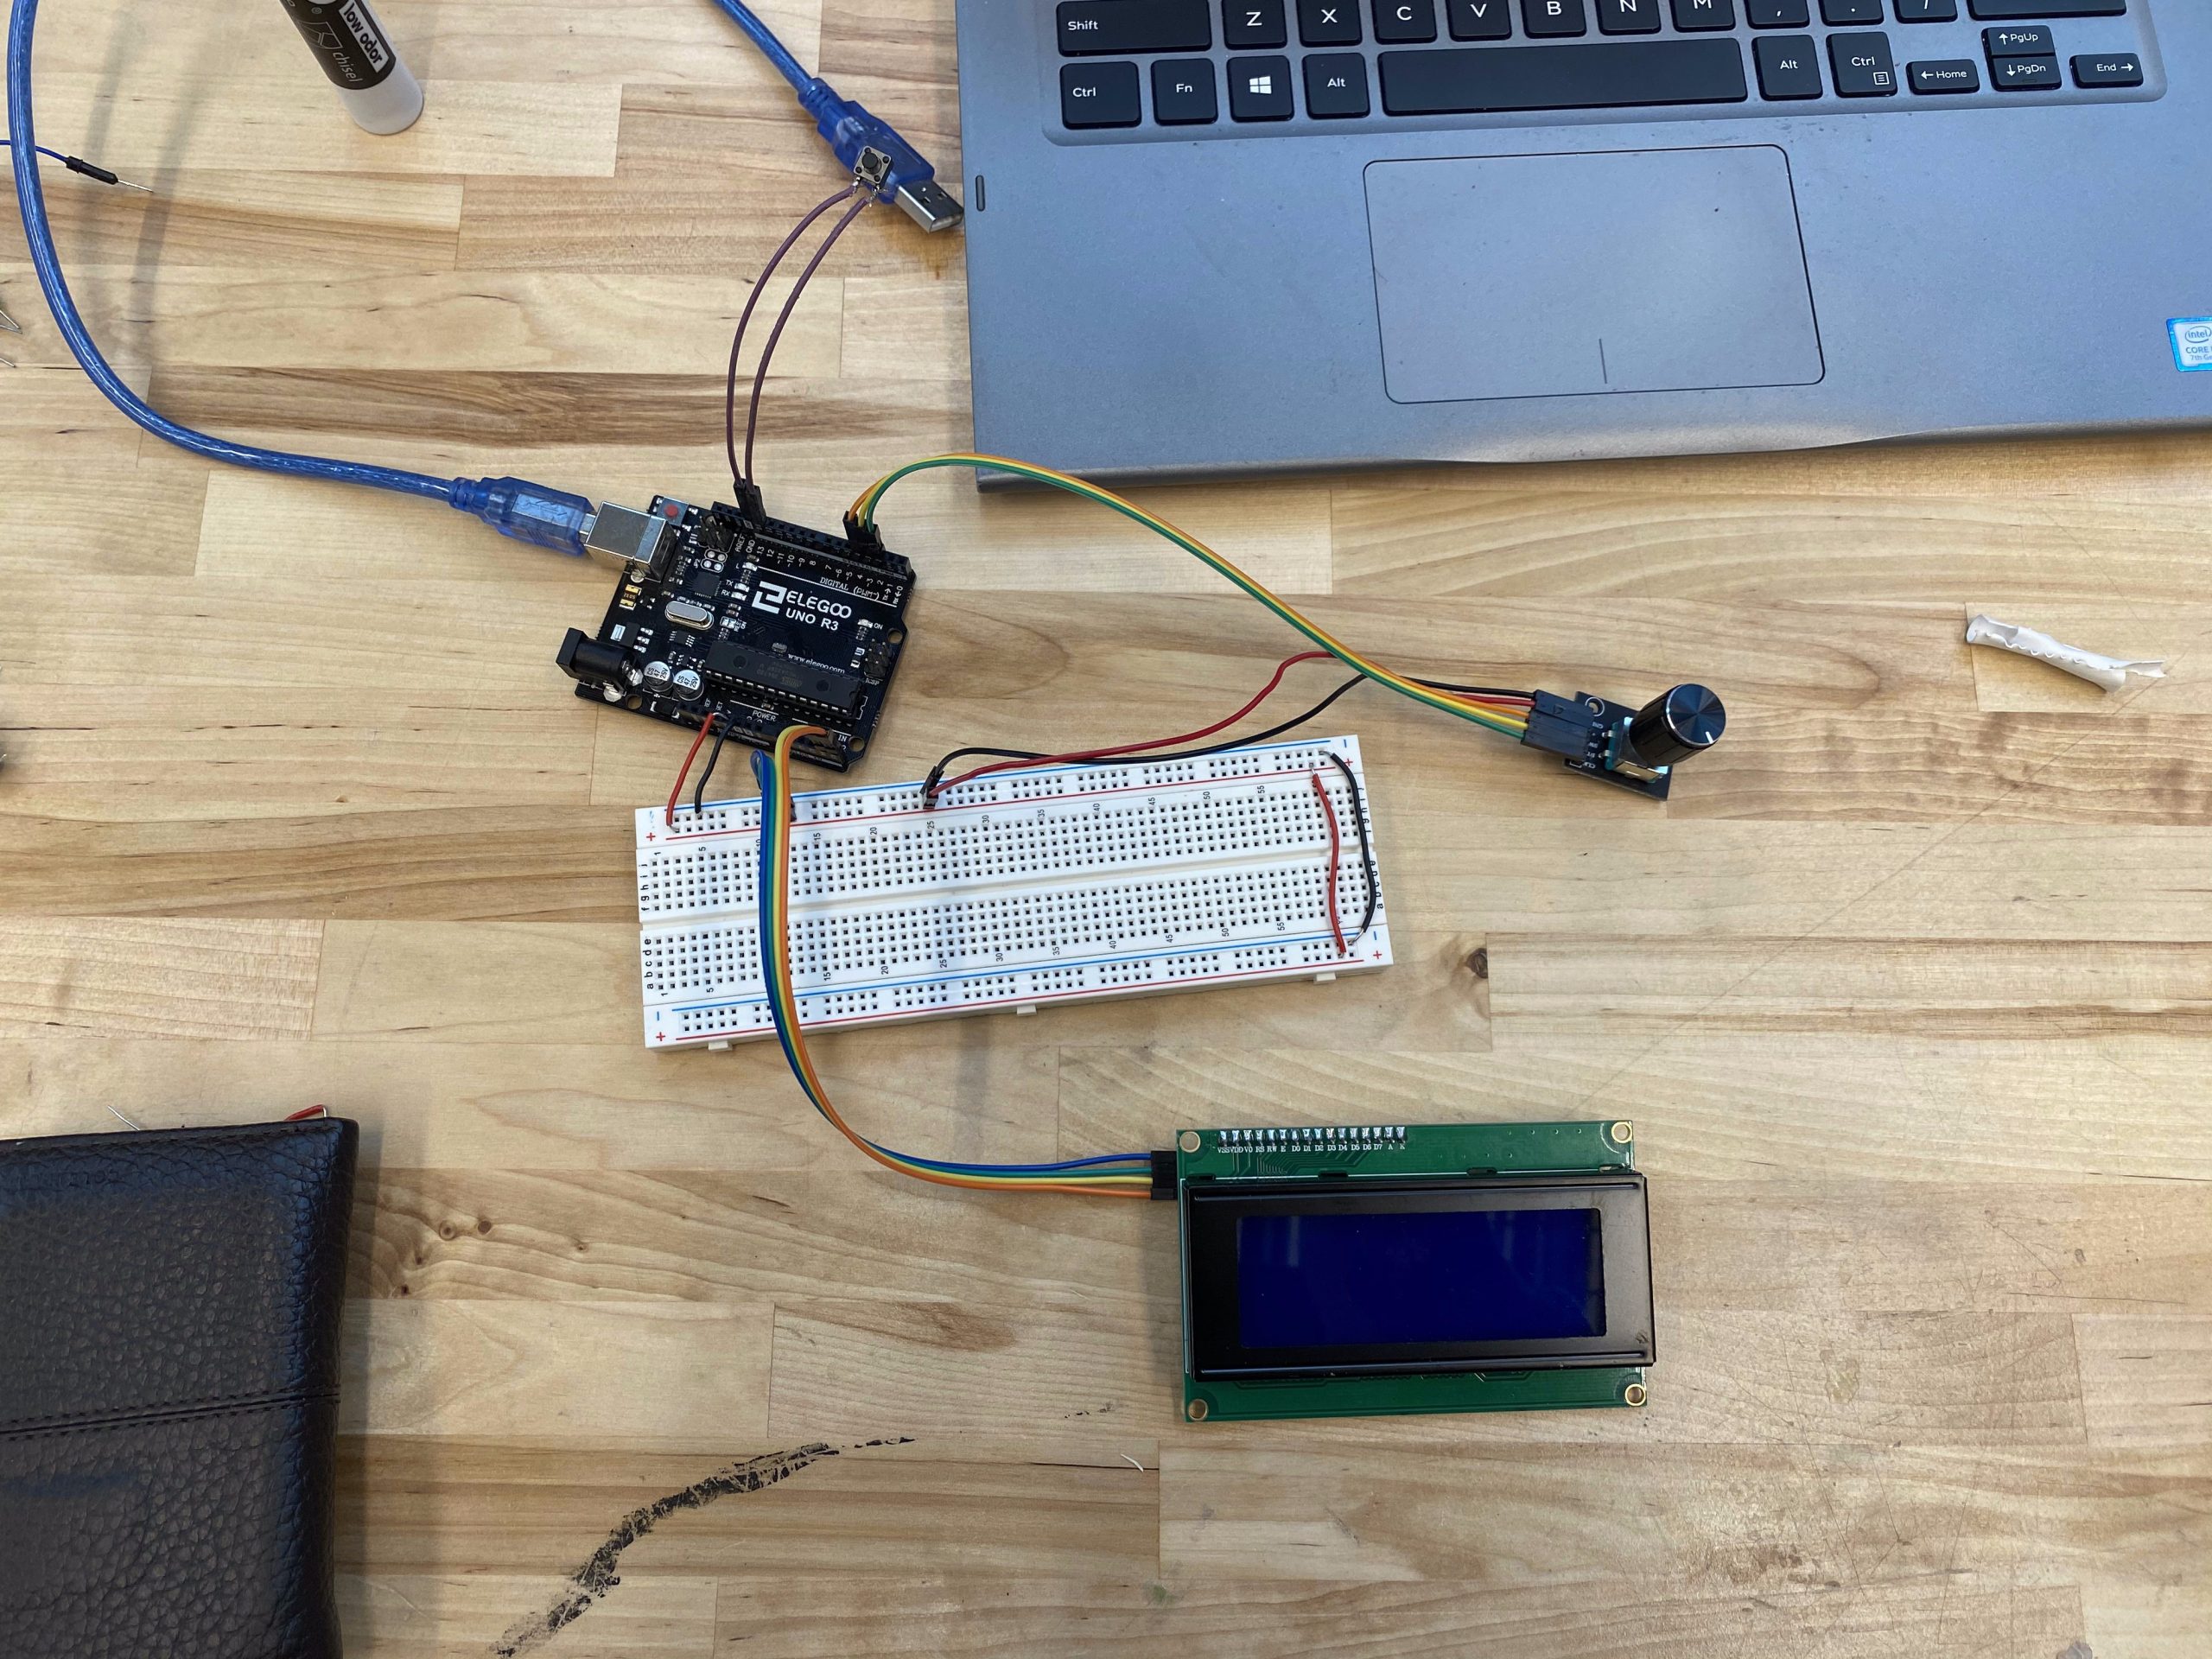
This is the after picture with a clean slate of wiring.
The next iteration was much cleaner. I switched from the standard 16×2 LCD to using the 20×4 LCD I2C that came with a handy backpack to simplify the wiring. Then I installed the rotary encoder and a button with a pull up resistor and that was everything to it. The wiring went from cramped to clean in mere seconds.
Important point, this all took place in the first week of development. This is where I got confident. This is also the point in which I tried to simplify the design, but in doing so, made it all the more complicated. My plan was going to be to make a “custom PCB” that would fit all of my needs. I really like PCBs because they are compact and you do not have to worry about faulty wiring within the breadboards (I had experienced this issue with some buttons before the change). This was done with a perfboard that I had soldered some wires to.
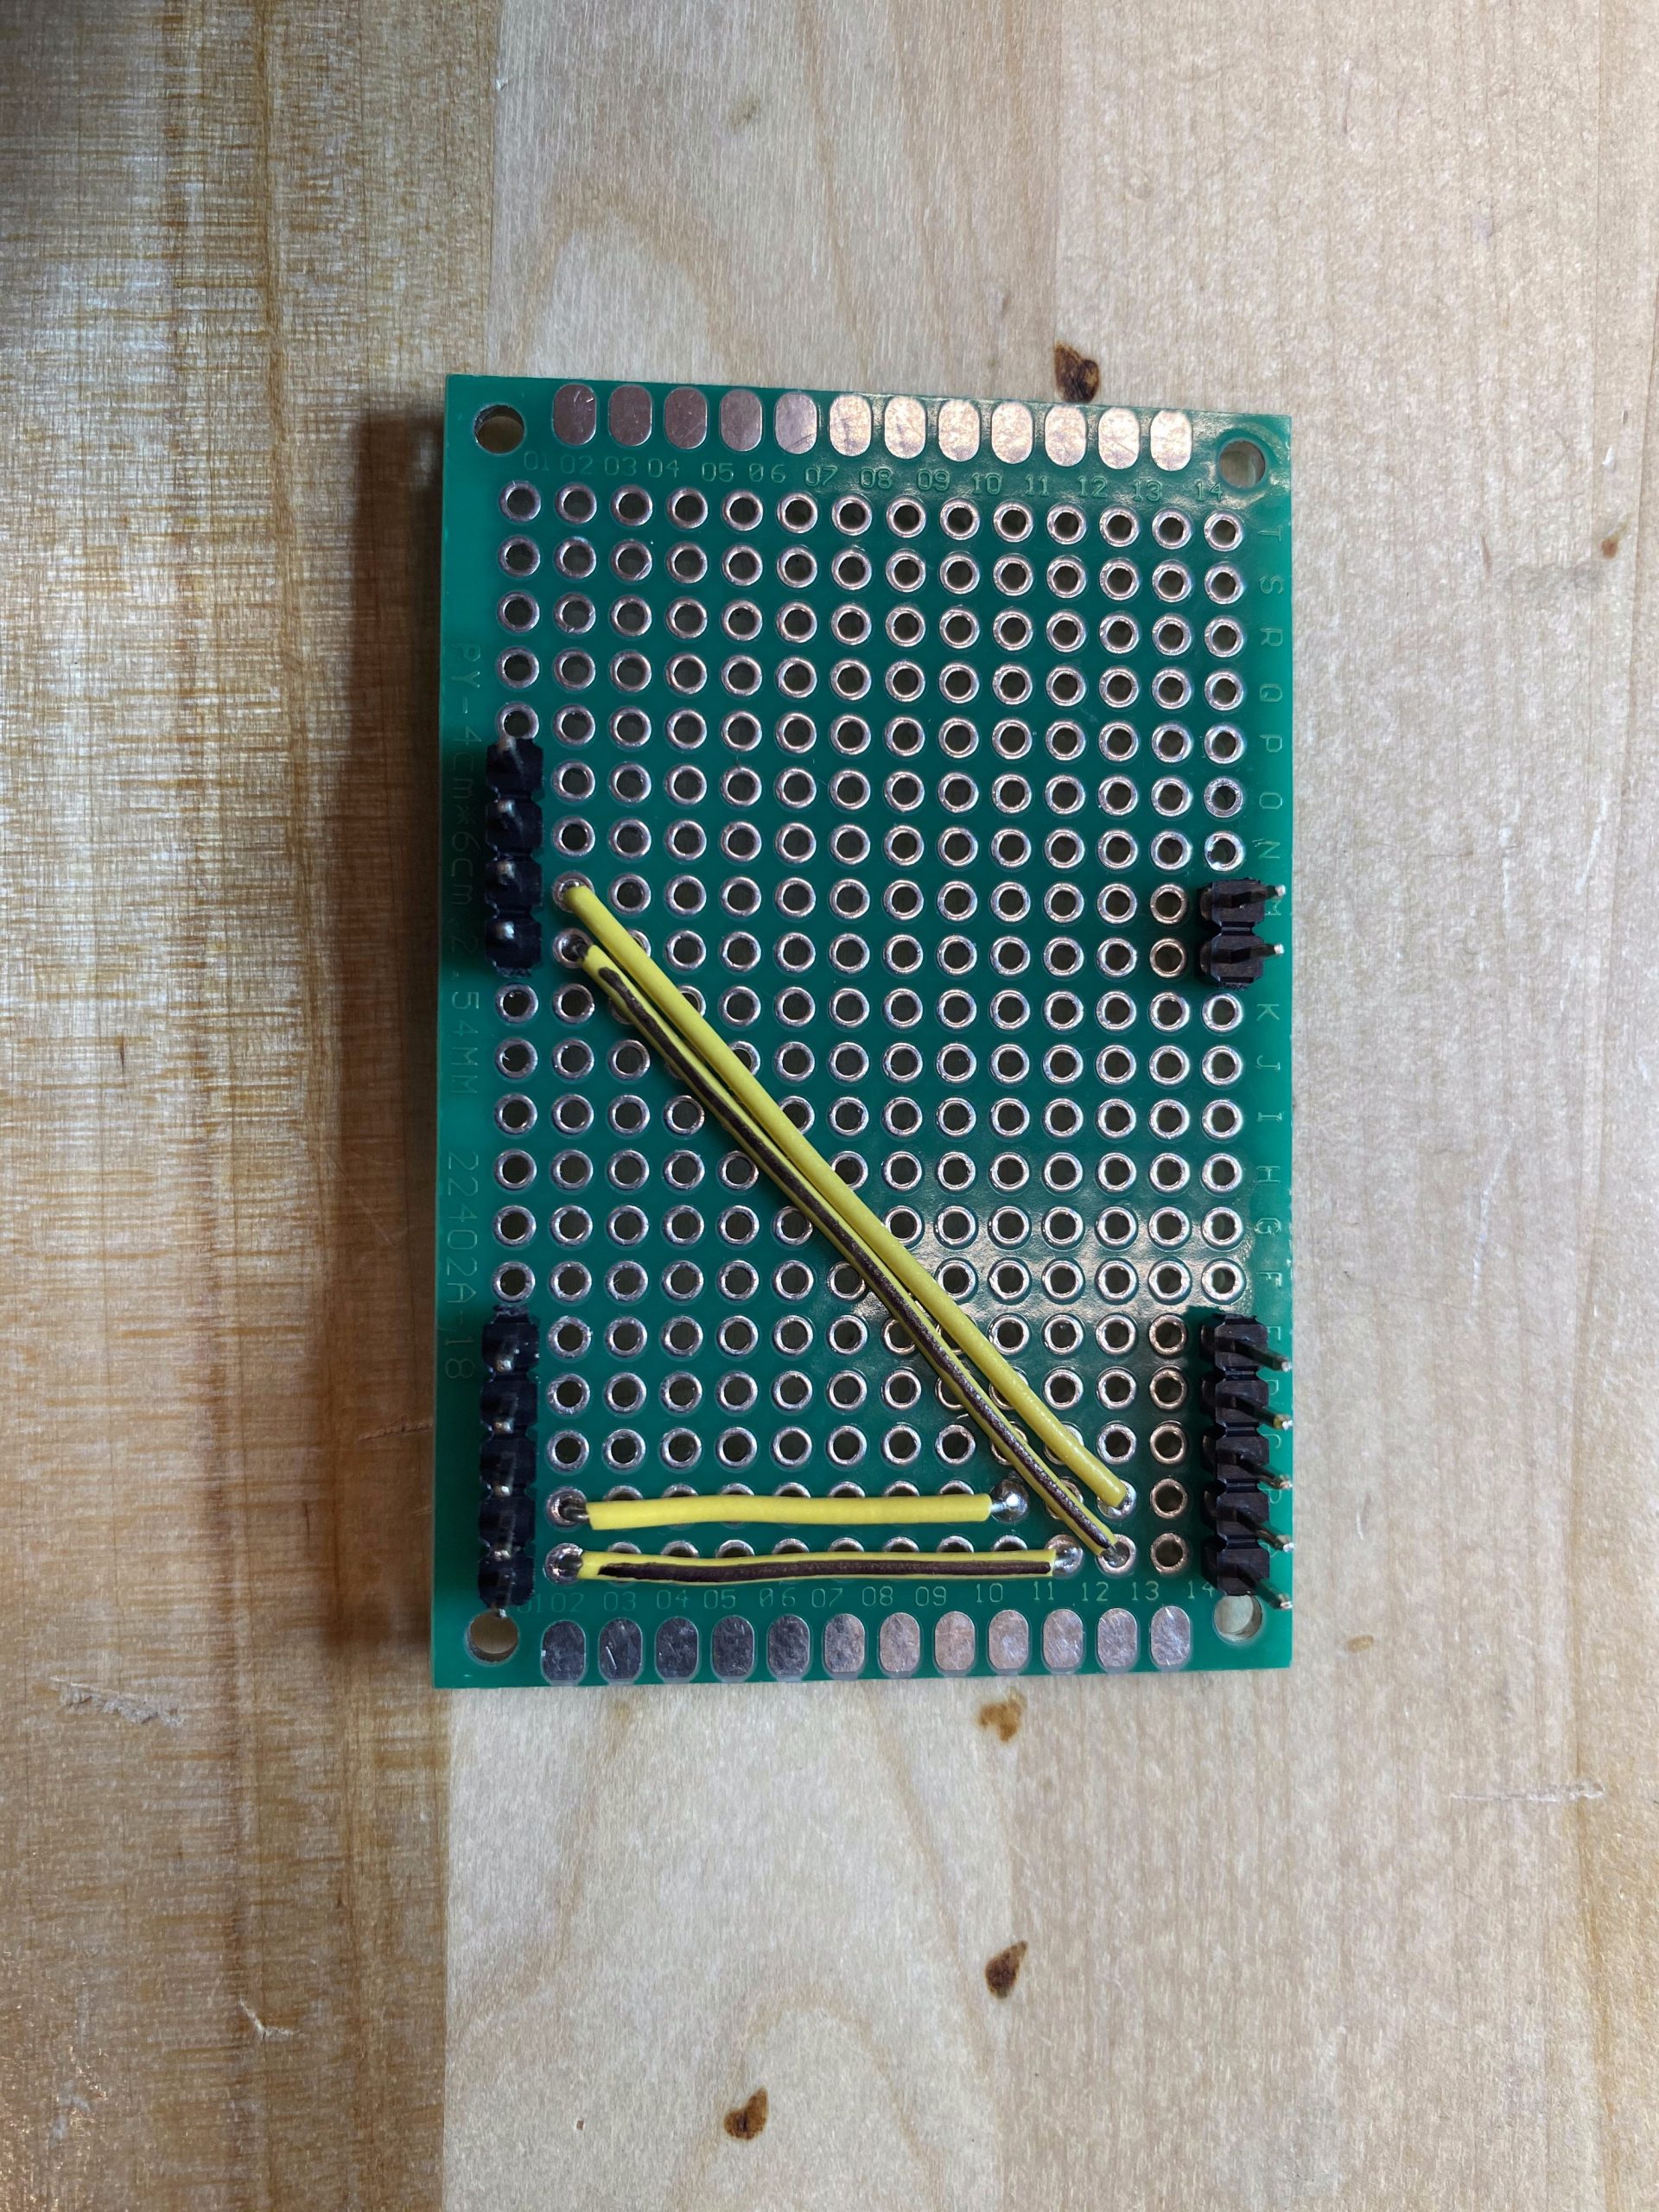
This is the front side of the perfboard.
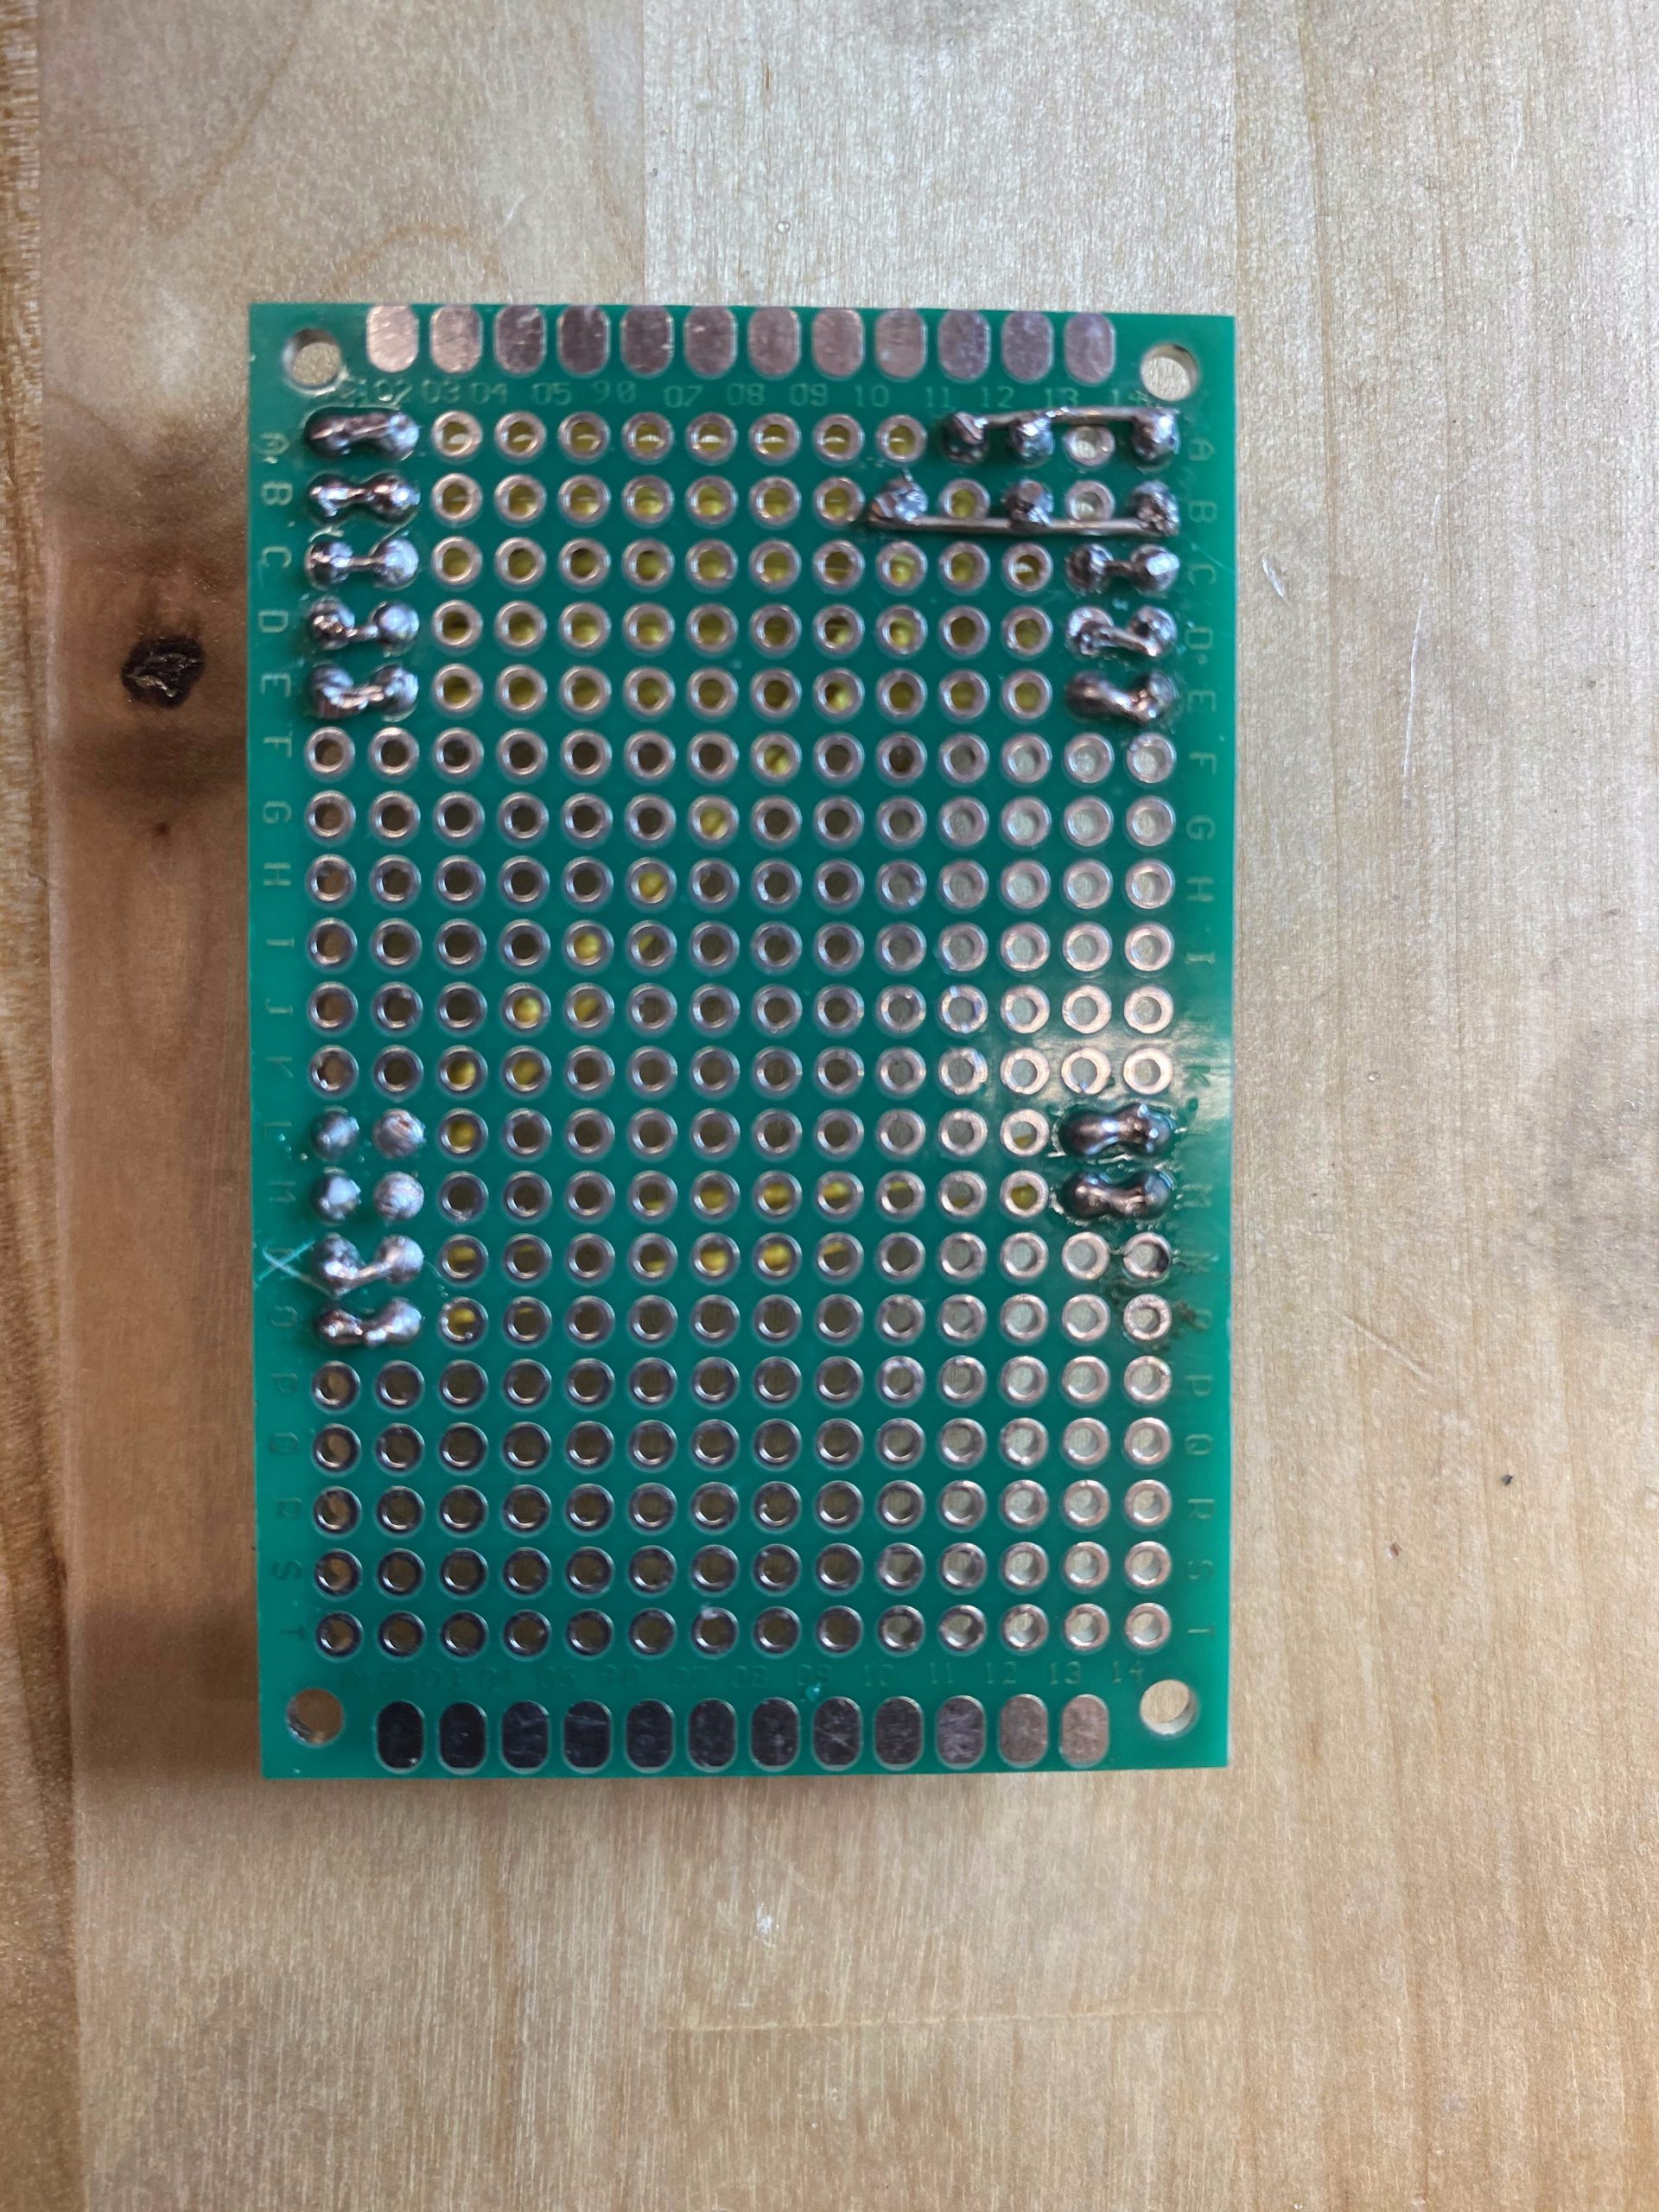
This is the backside of the perfboard. There are a couple wires that were soldered onto the pins after realizing they were not soldered on.
After all of this work, the code finally was updated, and everything was going well. This is of course until I remembered that I had to laser cut the box and it was 10pm (TechSpark closes at 11pm).
This problem was made much nicer because I realized that the CAD files I had made with Inventor were not loading properly the .dwg files that I would use to laser cut the box parts. I had to set out to redesign and remake the entire box from scratch, which took a while, but ended up with a nice looking design!
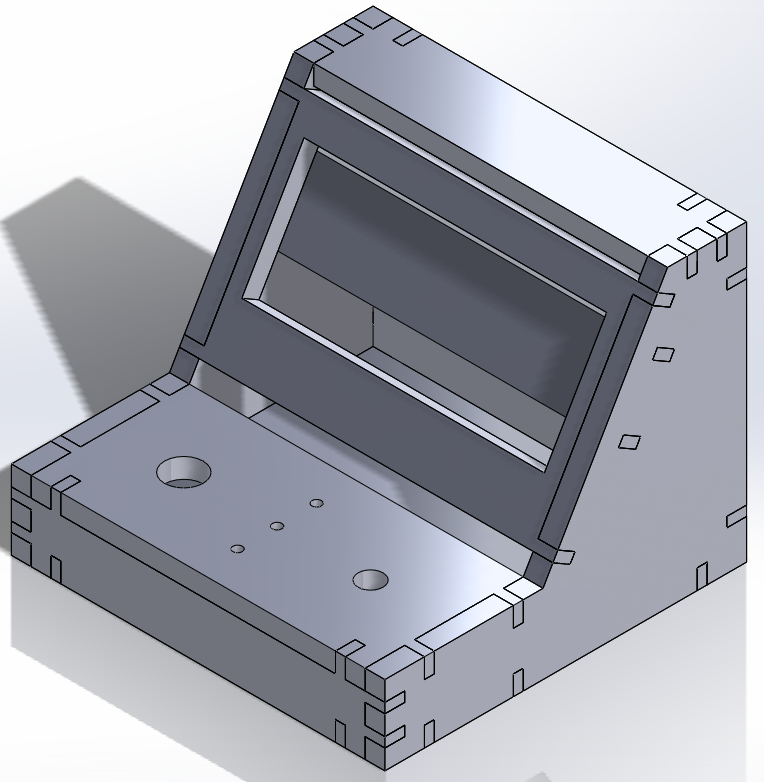
This is the Solidworks version of the final assembly that would be laser cut.
Again, there were more issues with the sizings of everything, and when it was all said and done, the final product looked like this:
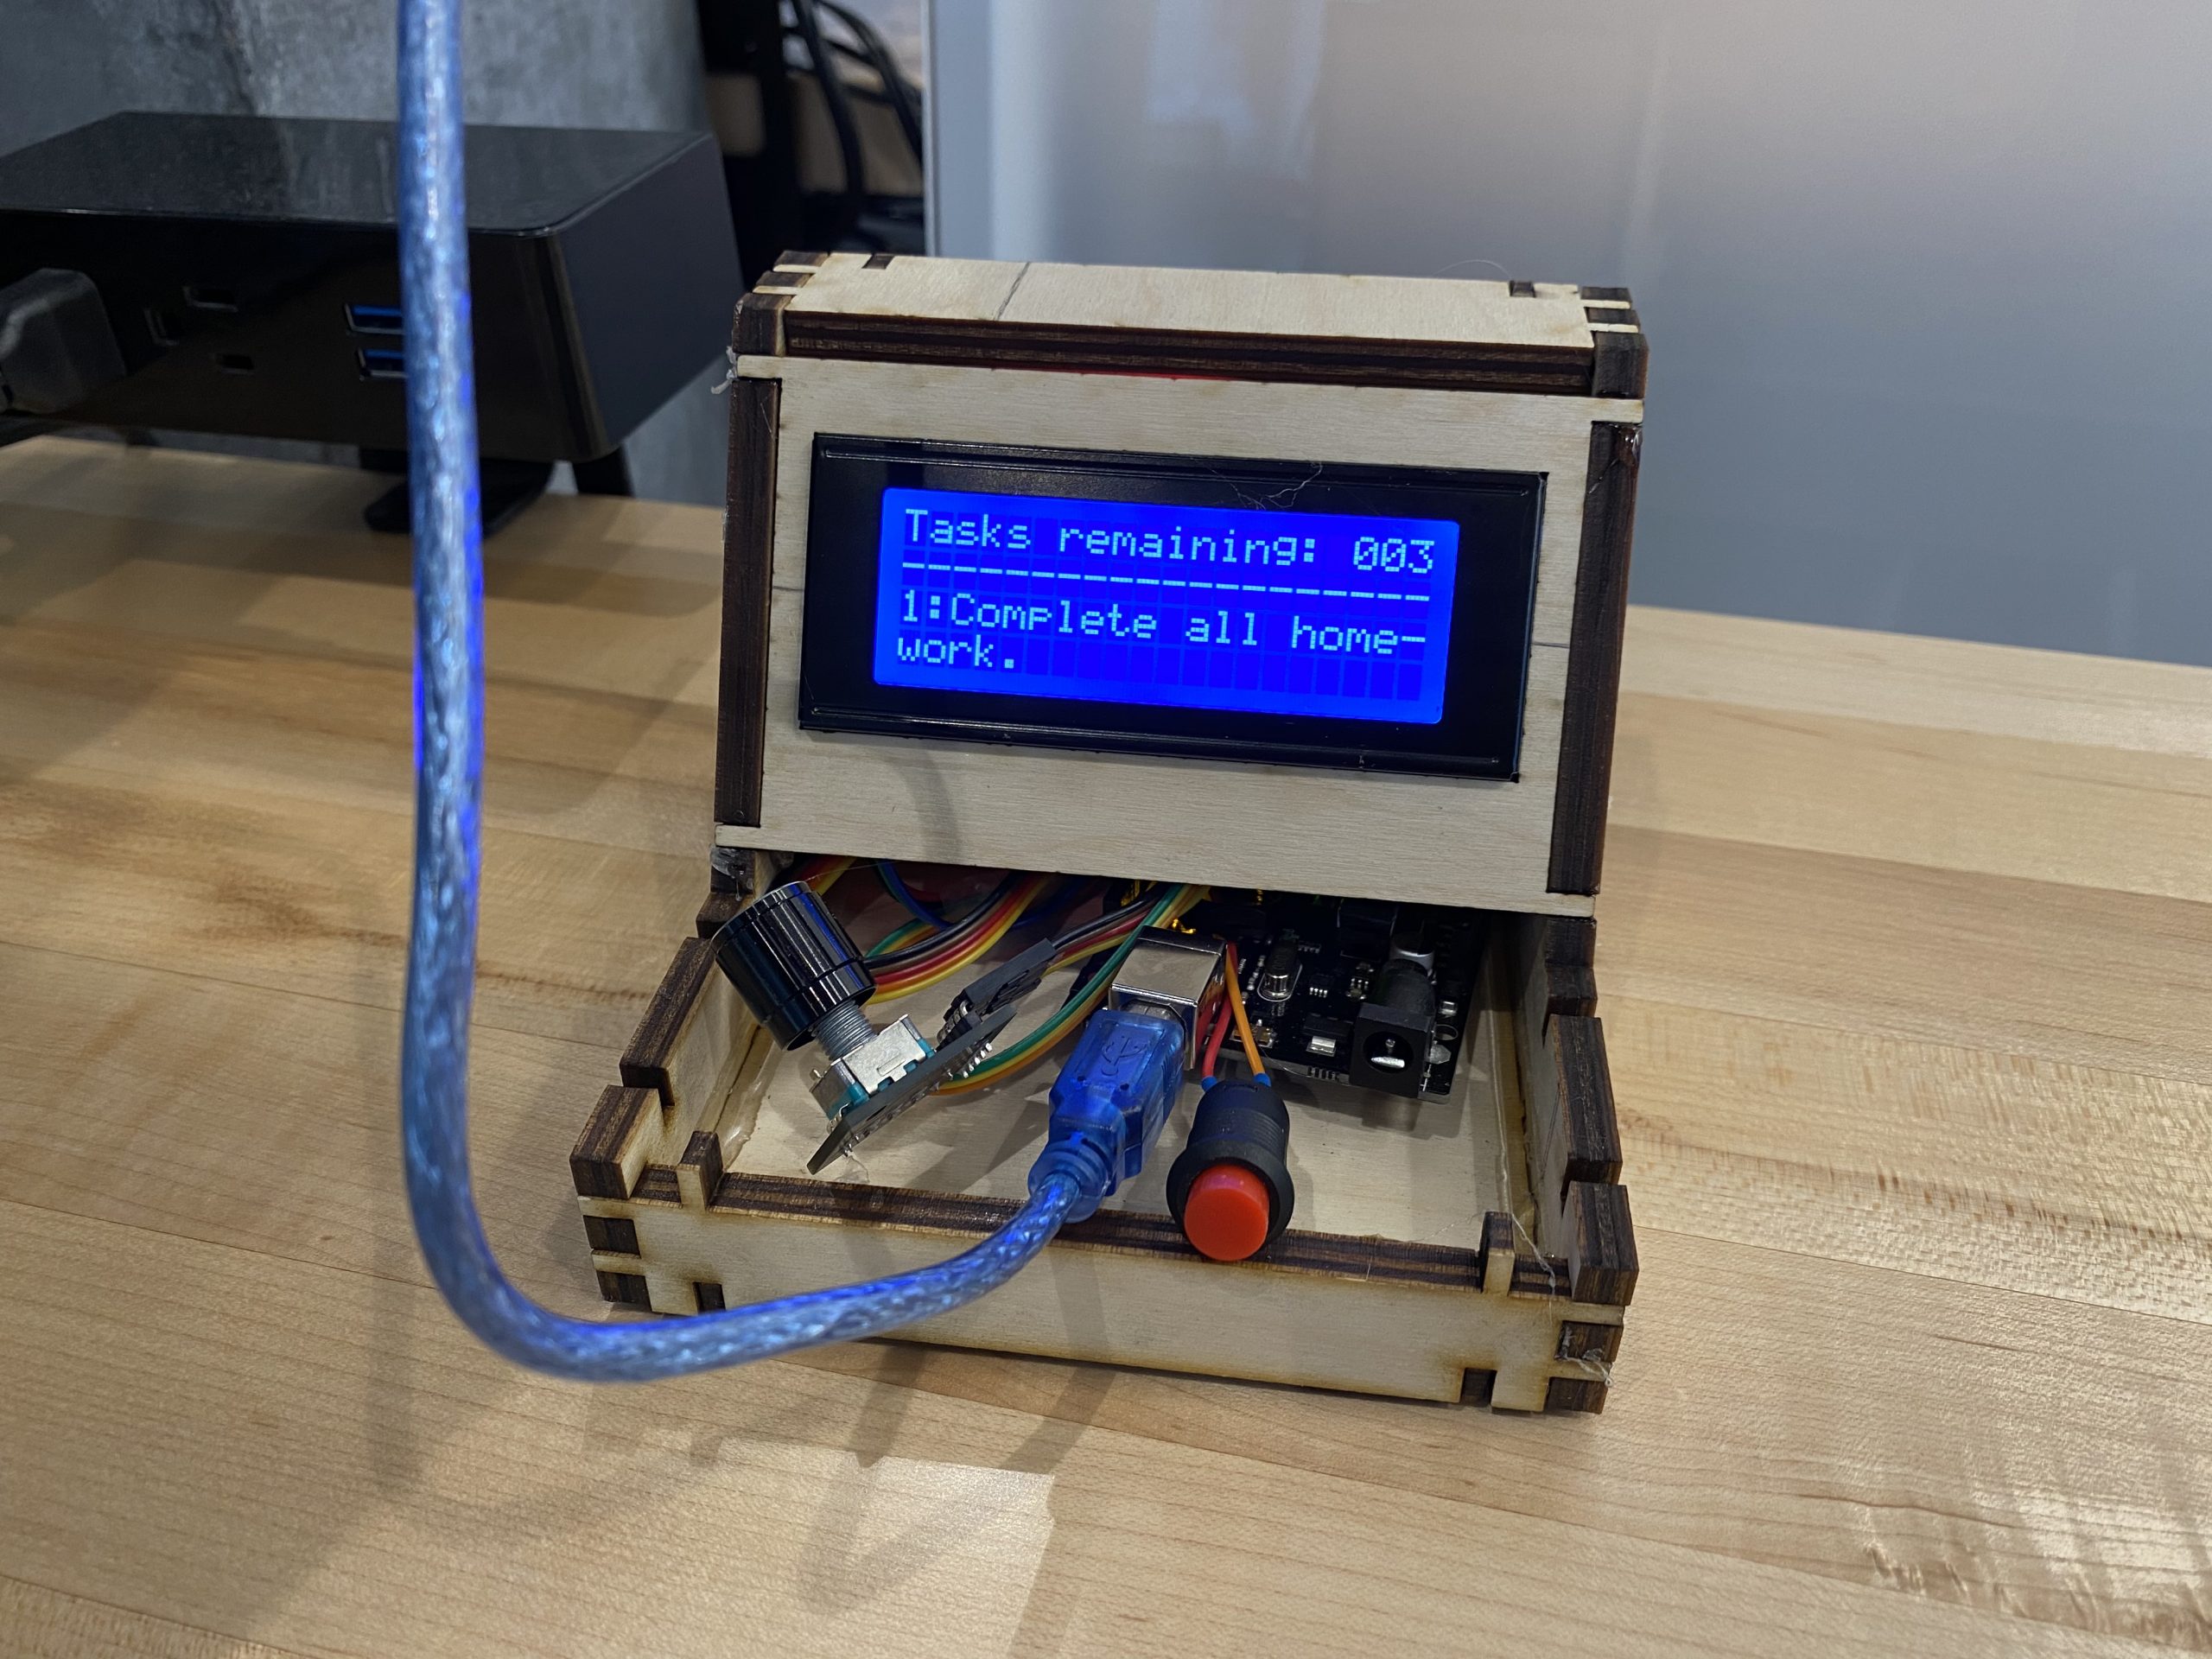
This is the front view of the final product for the project 2.
Discussion:
Quote: “Cool idea! I think the simplicity of a knob and a button makes the system really simple to use, plus it has a sort of arcade cabinet aesthetic that I can’t help but love.”
Response: I agree! The simplicity is what makes this enjoyable from my perspective. The arcade cabinet was also by design! Just to make things fun for the user. There is a scenario in which this has a small game tied to finishing each task and there’s a fun LED display to go along with it!
Quote: “I can see that the digital solution might be an improvement on paper both by narrowing your focus and by providing a physical affordance you might come to associate solely with productivity. You might consider how to improve the rewards you receive if the gamification was also important.”
Response: One thing I would love to do with it would be to design a custom game with LCD I2C using custom characters and such, however that was outside the time that I wanted to spend on the physical completion of this project.
Self Critique:
Overall, I am not pleased with the final outcome. The coding took a lot longer than I thought it would, simply because I do not have a great understanding for the language yet. It took a long time to just understand how the different variables were going to interact and finding a means that loops properly with the LCD. The actual construction of everything took 30 minutes, but I wish I would have spent that time maybe three to four days before the due date so that I could properly redesign and plan for what errors might have occurred. If you looked at the box from the outside, the wires were pretty well hidden, and there was some soldering – unnecessary because I was unable to work with the Arduino Promicro (Leonardo) – that made the project look like a lot less work went into it than actually did. I did have fun learning and working on this, and it is something that I think I want to continue to work on and finish throughout my free time.
What I Learned:
The biggest thing I learned was to not underestimate a project. I definitely went into this knowing what I wanted the device to do, but not quite realizing how difficult the coding was going to be. Specifically the parts that were more confusing for me were the various string operations and working with arrays. These are things that I have used extensively in MATLAB, but how they work varies from language to language. My advice to the past Carl would likely be to find someone who can explain it all to me sooner. I went to a buddy of mine for help because he is seen as the coding master in my friend group and he was able to walk me through the steps and we figured out something together.
Next Steps:
The next ideal steps in this project would be to redesign the box that it was put into and add LEDs/ a fun game to the code. Really start to dive further into this idea that it looks like an arcade cabinet. Maybe then I could design a quick bit for the outside of the wooden box and make it look nice. This way it would be pleasing to look at, compact in design, and functions like a game piece to hopefully be more efficient when working.
Technical Information:
Schematic–
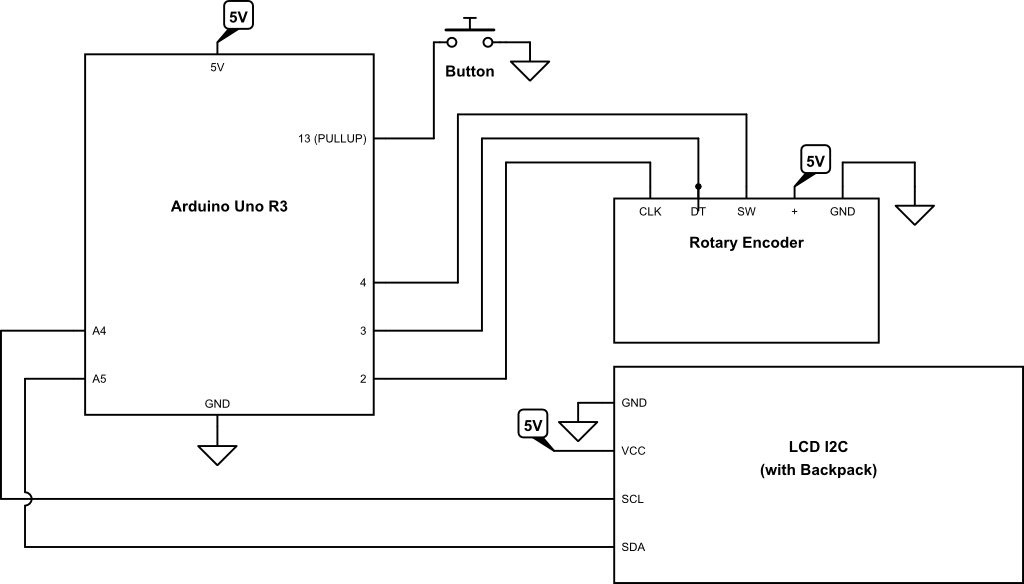
This is the schemativ for the design.
Code–
/*  Project 2
 *   Carl Young (cryoung)
 *   Time: 12 hours
 *
 *   Collaborations:
 *   Ryan Bates for debugging
 *   Aidan Smith for debugging and ideation with
 *    regards to the String functions.
 *
 *   Challenges:
 *   Biggest thing was the string displays and
 *    getting the right length of strings to display.
 *
 *   Next Time:
 *   Do more of this upfront. 80% of it was done, but
 *    that definitely was not enough. I should have
 *    just finished it.
 *
 *   Pin Mapping:
 *
 *   pin    / mode    / description
 *   -------/---------/------------
 *   13       input     completion button
 *   10       output    LED blue
 *   9        output    LED green
 *   8        output    LED red
 *   4        input     rotary encoder SW
 *   3        input     rotary encoder DT
 *   2        input     rotary encoder CLK
 *   A4       input     LCD I2C SDA
 *   A5       input     LCD I2C SCL
 */

// -----===== Varibales =====-----
// Component Pins
#define inputCLK 2
#define inputDT 3
#define inputSW 4
#define redLED 8        // not used
#define greenLED 9      // not used
#define blueLED 10      // not used
#define completeSW 13

// -----===== Libraries =====-----
#include <LiquidCrystal_I2C.h>
#include <Wire.h>
#include <Encoder.h>

LiquidCrystal_I2C lcd(0x27,20,4);
Encoder rencoder(inputCLK,inputDT);

// Task Variables
unsigned int taskNum = 1;
unsigned int taskTotal = 3;
int taskTotalOG = taskTotal;
String taskDisplay = ((String)taskTotal);
String taskOne = "Complete all homework.";
String taskTwo = "Shower before going to bed.";
String taskThree = "Play Overwatch.";
String taskFinish = "ALL DONE!";
String taskList[] = {taskOne,taskTwo,taskThree,taskFinish};
String splitString[2];
String space = "                                       ";

// Completing Tasks
int completeButtonState = 0;
int lastCompleteState = 1;
bool completedTasks[] = {0,0,0};

// Encoder Variables
int currentStateCLK;
int previousStateCLK;
long positionEncoder = 0;
bool lock = false;
String encdir = "";
int lockButtonState = 0;
int lastLockState = 1;
unsigned int lockCount = 0;

// -----===== SetUp =====-----
void setup(){
  // Initialize LCD
  lcd.init();
  lcd.init();
  lcd.backlight();
  lcd.setCursor(0,0);

  // Task Printing
  overallDisplay();
  lcd.setCursor(0,1);
  lcd.print("--------------------");

  // Initialize Pins
  pinMode(inputCLK,INPUT);
  pinMode(inputDT,INPUT);
  pinMode(inputSW,INPUT_PULLUP);
  pinMode(completeSW,INPUT_PULLUP);
  pinMode(redLED,OUTPUT);
  pinMode(greenLED,OUTPUT);
  pinMode(blueLED,OUTPUT);
  Serial.begin(9600);
  previousStateCLK = digitalRead(inputCLK);
}

// -----===== Loop =====-----
void loop(){
  if(taskTotal != taskTotalOG){
    overallDisplay();
    taskTotalOG = taskTotal;
  }
  displayCurrentTask(taskNum);
  int lockSwitch = digitalRead(inputSW);
  int completeSwitch = digitalRead(completeSW);
  currentStateCLK = digitalRead(inputCLK);
  lockDetection();
  Serial.println(lock);
  while(lock == true){
    digitalWrite(redLED,HIGH);
    digitalWrite(greenLED,LOW);
    digitalWrite(blueLED,LOW);
    lockDetection();
    checkComplete();
  }
  if(completedTasks[taskNum-1] == true){
    taskNum++;
  }
  encoderMovement();

  while(completedTasks[0] == 1 && completedTasks[1] == 1 && completedTasks[2] == 1){
    displayCurrentTask(4);
    celebrationLoop();
  }

  delay(10);
}

// -----===== Functions =====-----
// Wraps text if too long
void textWrap(String temp){
  String supportingText = "-";
  if(temp.length() < 38){
    if(temp.length() < 18){
      supportingText = " ";
    } else {
      supportingText = "-";
    }
    int diff = 36-temp.length();
    temp = temp + space.substring(0,diff);
  }
  if(temp.length() > 17){
    splitString[0] = temp.substring(0,17)+supportingText;
    splitString[1] = temp.substring(17);
  } else {
    splitString[0] = temp.substring(0);
    splitString[1] = "";
  }
}

// Displays the task associated with taskNum
void displayCurrentTask(unsigned int number){
  textWrap(taskList[taskNum-1]);
  lcd.setCursor(0,2);
  lcd.print((String)taskNum+":"+splitString[0]);
  lcd.setCursor(0,3);
  lcd.print(splitString[1]);
}

// Encoder position code - GOOD
void encoderMovement(){
  long newPos = rencoder.read()/4;
  if(newPos != positionEncoder && newPos > positionEncoder){
    positionEncoder = newPos;
    taskNum--;
    if(taskNum < 1){
      taskNum = taskTotal;
    }
  }
  if(newPos != positionEncoder && newPos < positionEncoder){
    positionEncoder = newPos;
    taskNum++;
    if(taskNum > taskTotal){
      taskNum = 1;
    }
  }
}

// Adjusts the lock state and checks status of lock via lockCount
void lockDetection(){
  lockButtonState = digitalRead(inputSW);
  if(lockButtonState != lastLockState){
    if(lockButtonState == 0 && lock == false){
      lockCount++;
    }
    delay(50);
    lastLockState = lockButtonState;
    if(lockCount%2 != 0){
      lock = true;
    } else {
      lock = false;
    }
  }
}

// Simple button change for complete that also changes the state of the
//  task complete list and the lock
void checkComplete(){
  completeButtonState = digitalRead(completeSW);
  if(completeButtonState != lastCompleteState){
    if(completeButtonState == 0){
      // if button is pushed
      if(lock == true){
        lock == false;
        lockCount++;
      }
      completedTasks[taskNum-1] = true;
      taskTotal--;
      //Serial.println((String)"taskNum: "+taskNum);
      //Serial.println((String)"taskTotal: "+taskTotal);
      //Serial.println((String)"completedTask?: "+completedTasks[taskNum-1]);
    }
    delay(50);
    lastCompleteState = completeButtonState;\
    digitalWrite(blueLED,HIGH);
    delay(250);
    digitalWrite(blueLED,LOW);
  }
}

void overallDisplay(){
  if(taskTotal < 10 && taskTotal >= 0){
    taskDisplay = ((String)"00"+taskTotal);
  } else if(taskTotal > 9 && taskTotal < 100){
    taskDisplay = ((String)"0"+taskTotal);
  }
  lcd.setCursor(0,0);
  lcd.print("Tasks remaining: " + taskDisplay);
}

void celebrationLoop(){
  digitalWrite(blueLED,HIGH);
  digitalWrite(greenLED,LOW);
  digitalWrite(redLED,LOW);
  delay(250);
  digitalWrite(blueLED,LOW);
  digitalWrite(greenLED,HIGH);
  delay(250);
  digitalWrite(greenLED,LOW);
  digitalWrite(redLED,HIGH);
  delay(250);
  digitalWrite(redLED,LOW);
}