Introduction:
This purpose of this post is to document the different prototypes associated with the AutoBath. The AutoBath will allow Brenda to independently change the temperature and pressure of her bathtub using a remote. See previous documentation here: https://courses.ideate.cmu.edu/60-223/f2020/work/brenda-seal-team-one/
Mimi:
This prototype was trying to answer the question: how should Brenda control and change the temperature of the bath?
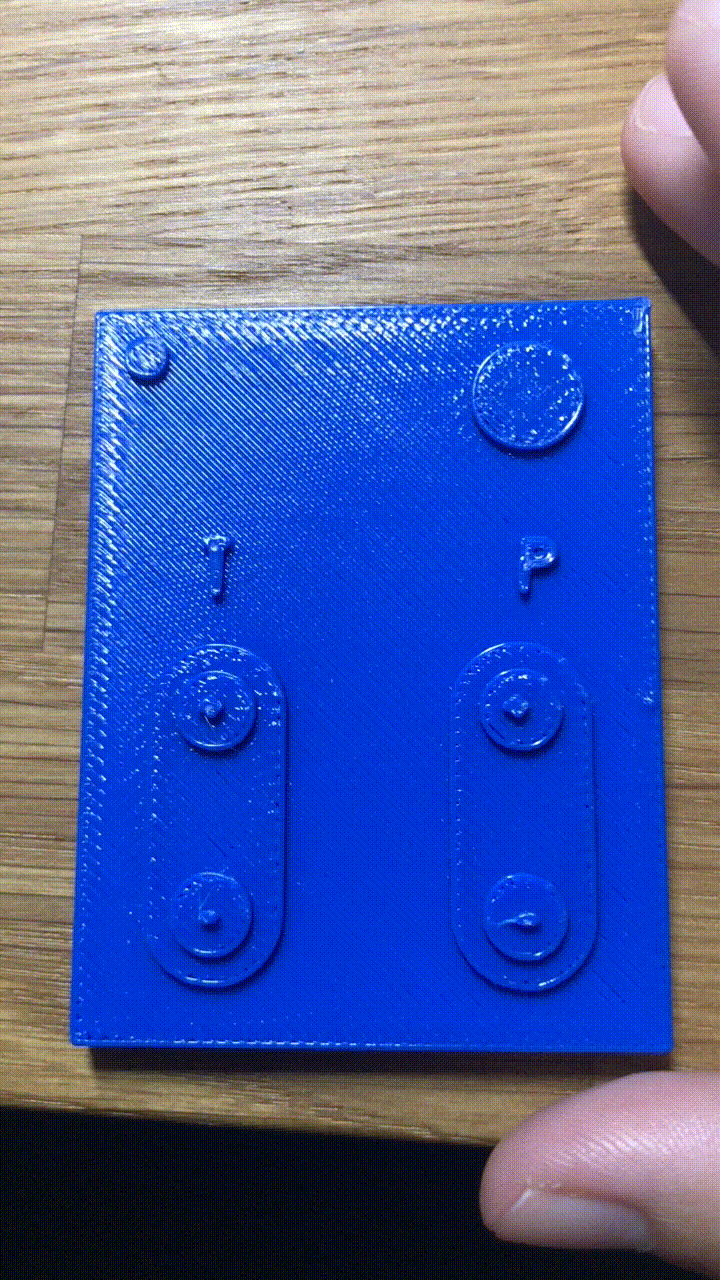
The final prototype for controls was a remote control that was 3D printed. The remote was modeled in SolidWorks. It includes an up and down button for temperature and pressure as well as a power button and an LED to communicate that the remote is on.

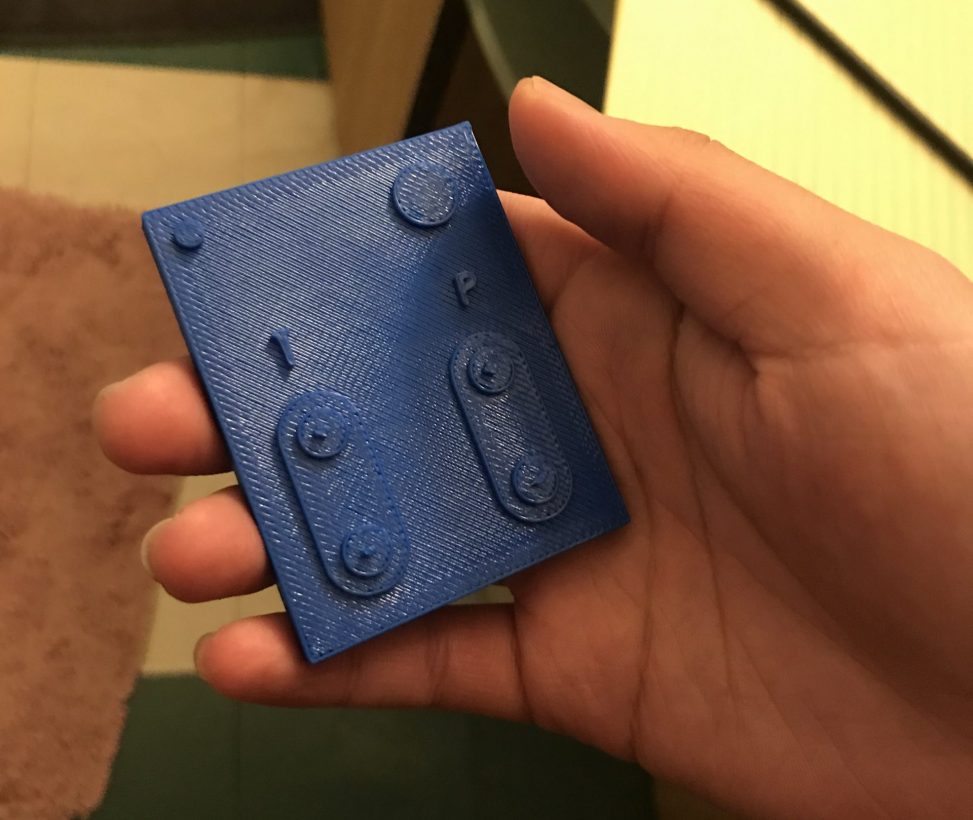
Mimi’s roommate holding the 3D printed remote while giving feedback about its design. Demonstrates how the remote fits in someones hand.
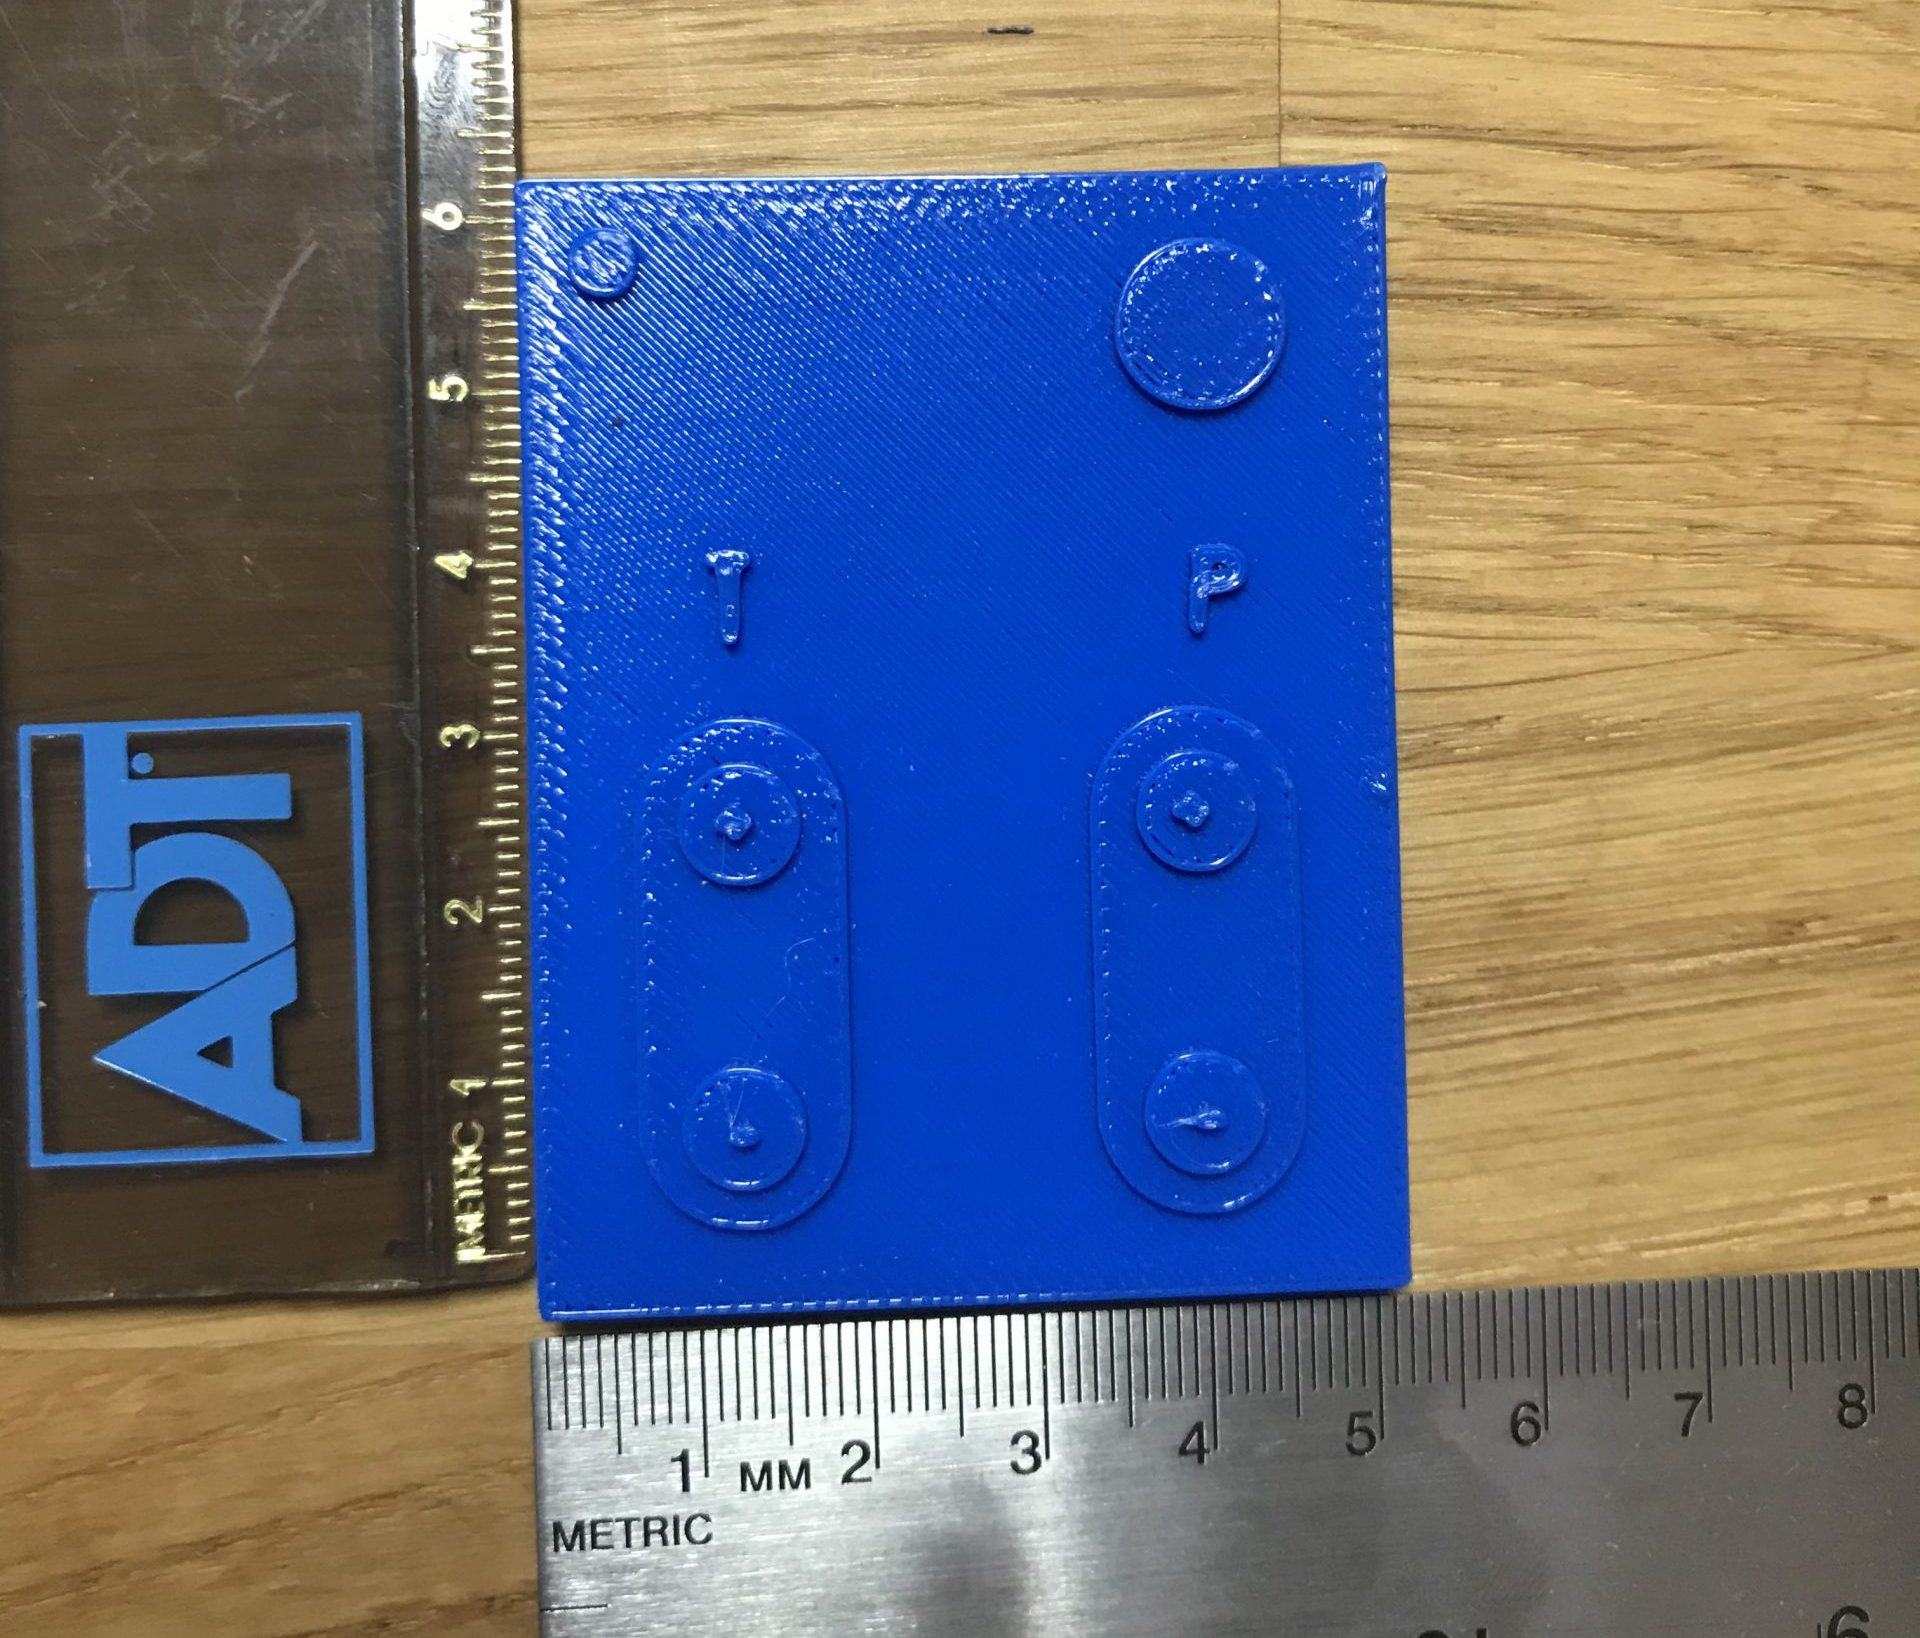
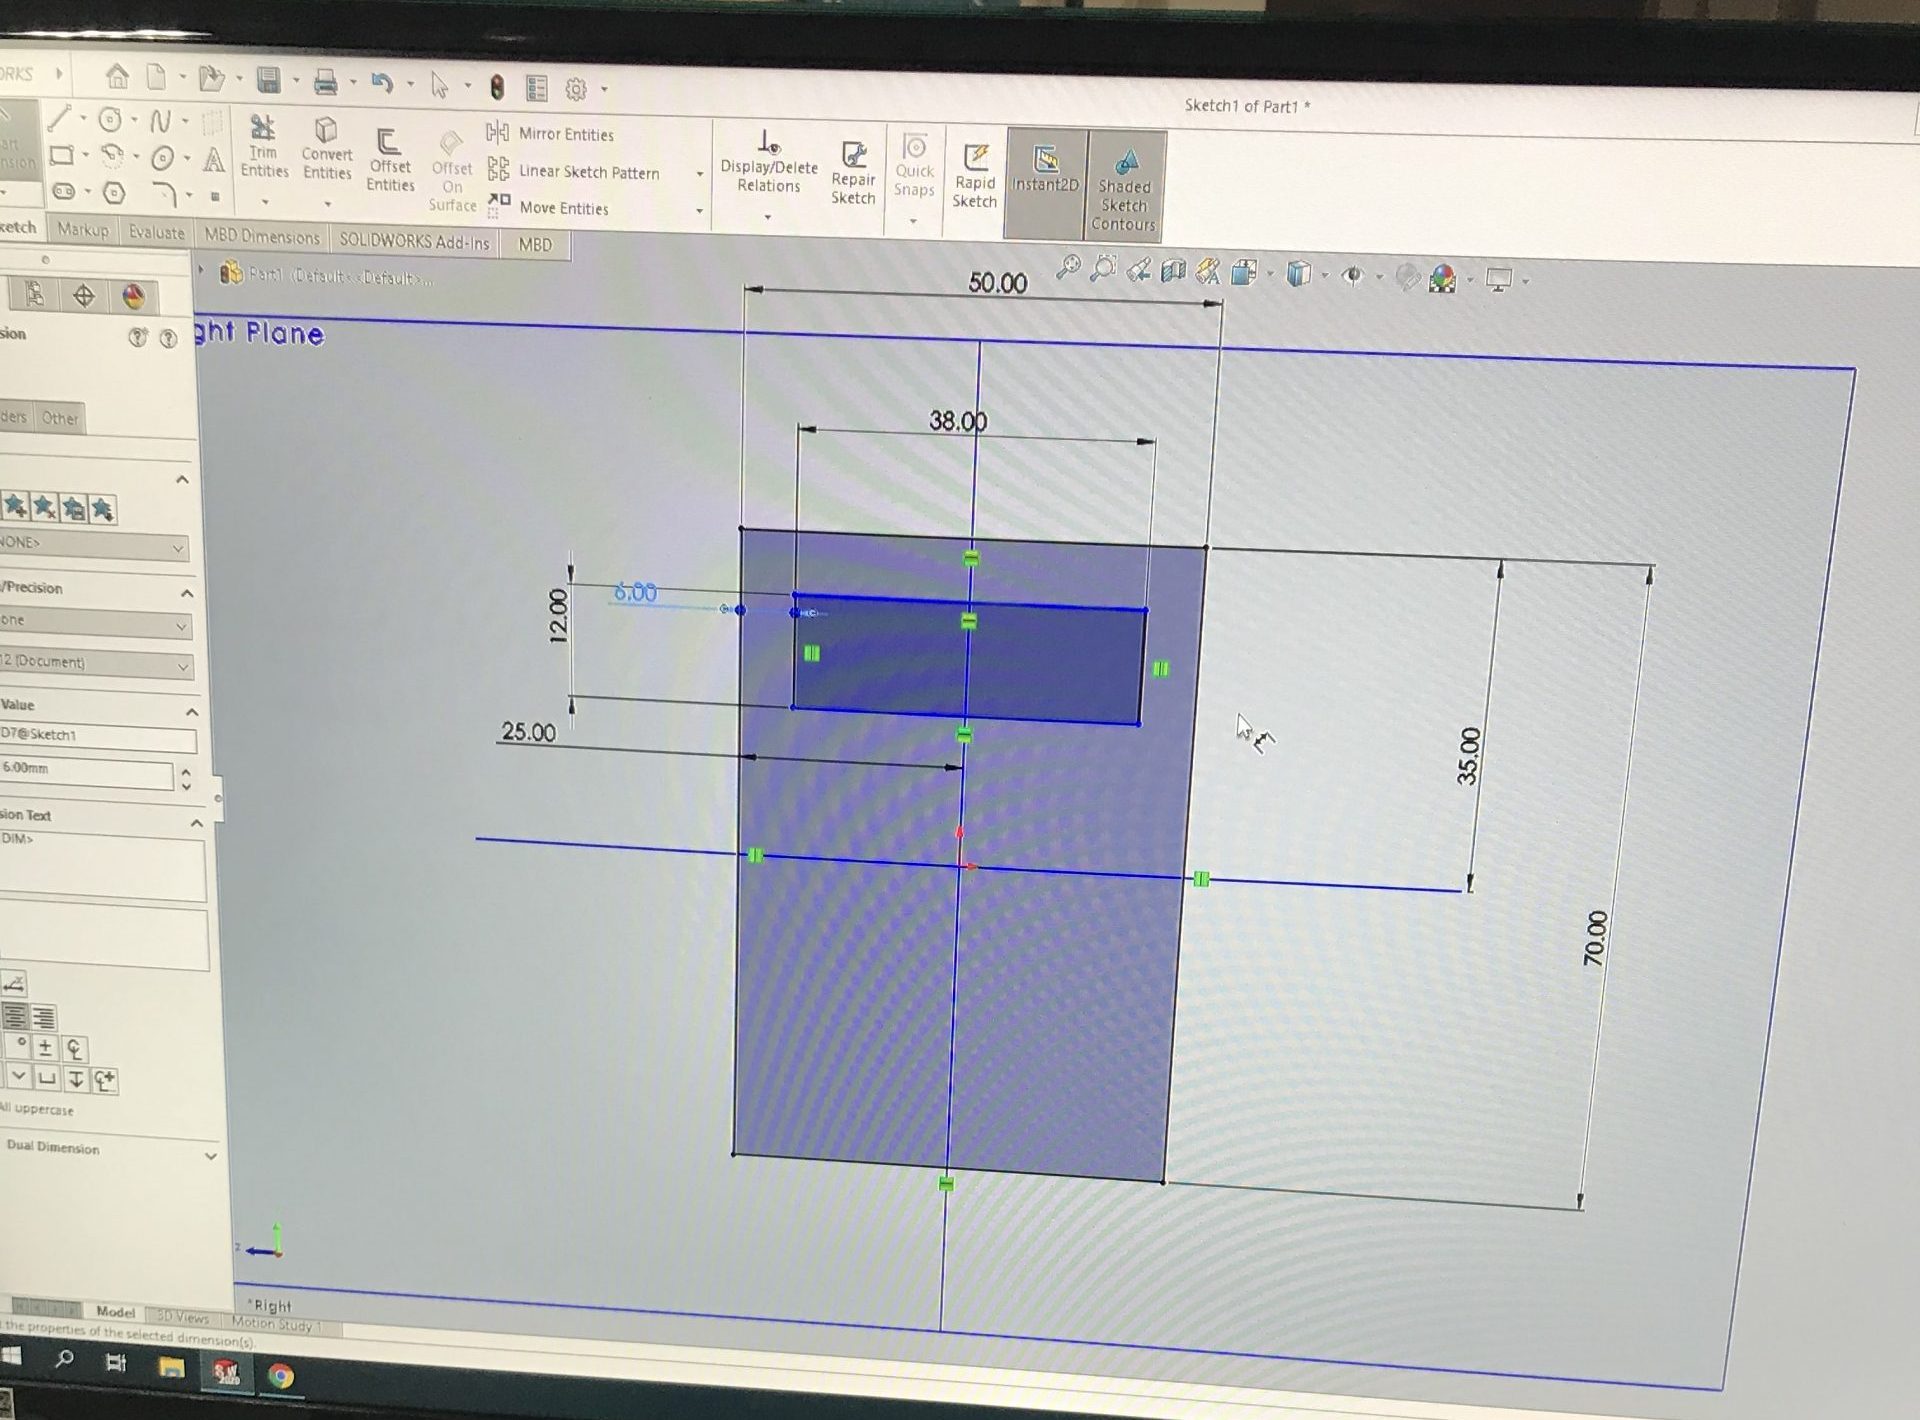
Shows the 3D printed remote is 6mm by 5 mm.

The top right circle represents the power button. The top left circle represents an LED that would be on when the remote is powered on.
Demonstrates how to increase the temperature of the water.
Process Images:
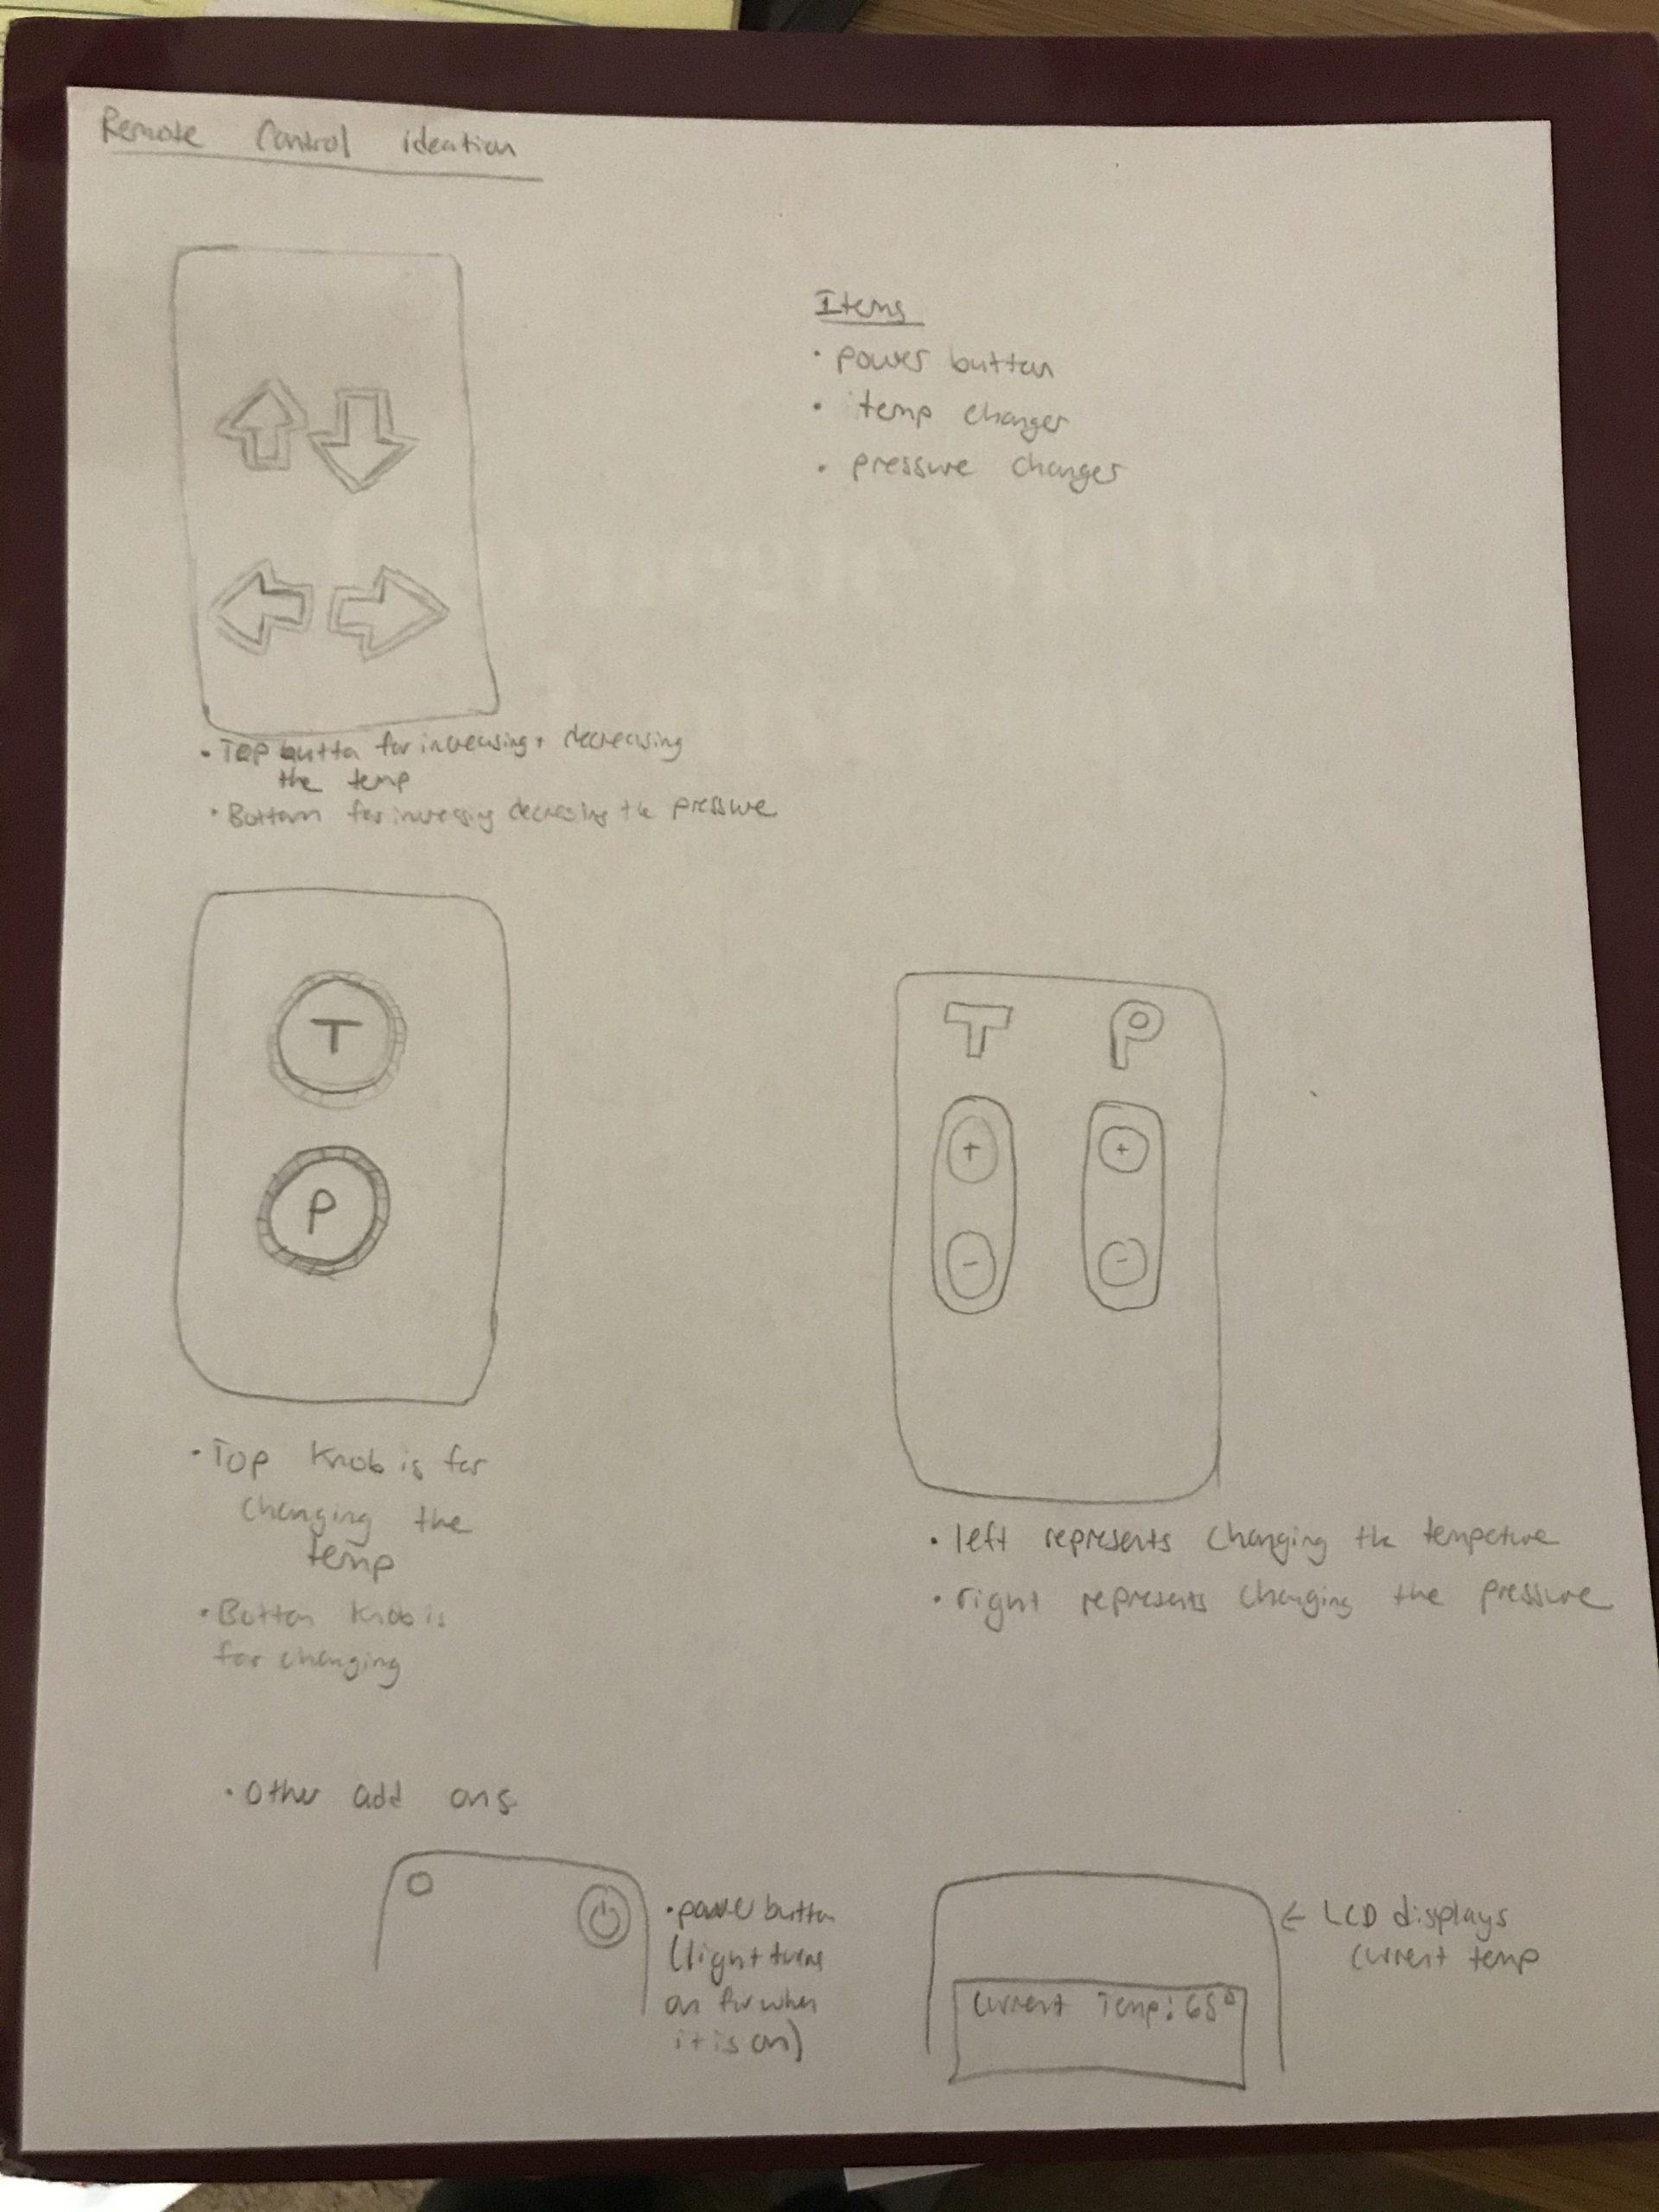
Sketches of possible layouts for the remote
A model of the remote with an LCD. After deciding to make the remote with an IR sensor, we realized we didn’t want an LCD on the remote.
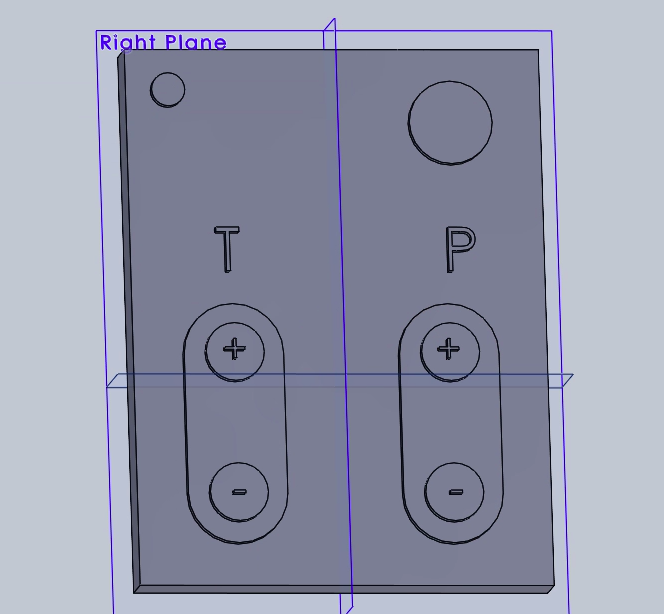
Screenshot of the remote control modeled in CAD before being 3D printed.
Thoughts:
The feedback on this prototype revolved around the ergonomics and the usability of this remote. For the physically proximate prototype presentation I showed the 3D printed remote to my roommate. Her feed back was that the remote was too squareish thus making it hard to hold comfortably. She also said it would be nice to have some sort of feedback to know how far you are turning the temperature knob and the pressure knob like you would have if you were physically turning the knobs. Lastly, she recommended the buttons be spaced out a little more to prevent the possibility of hitting the wrong button.
Brenda’s (our client) feedback was similar. She was not opposed to making the remote easier to hold, though it was hard for her to tell because she could not hold the prototype herself. She liked the tactile feel to the buttons and suggested making that more prominent because it easier for her to feel which button she needs to hit rather than see it. Brenda also suggested I think about the storage of the remote. She said it would nice if it could be attached to the wall or the side of the tub.
I will be attempting to implement all of this feedback into the the remote design going forward. The only surprising thing during the prototyping experience was how hard to it was to reconcile the dimensions on SolidWorks and real life. It was hard to tell how big the remote was going to turn out and feel when just looking at a computer screen. That made the 3D printed model more useful than I initially thought.
Carl:
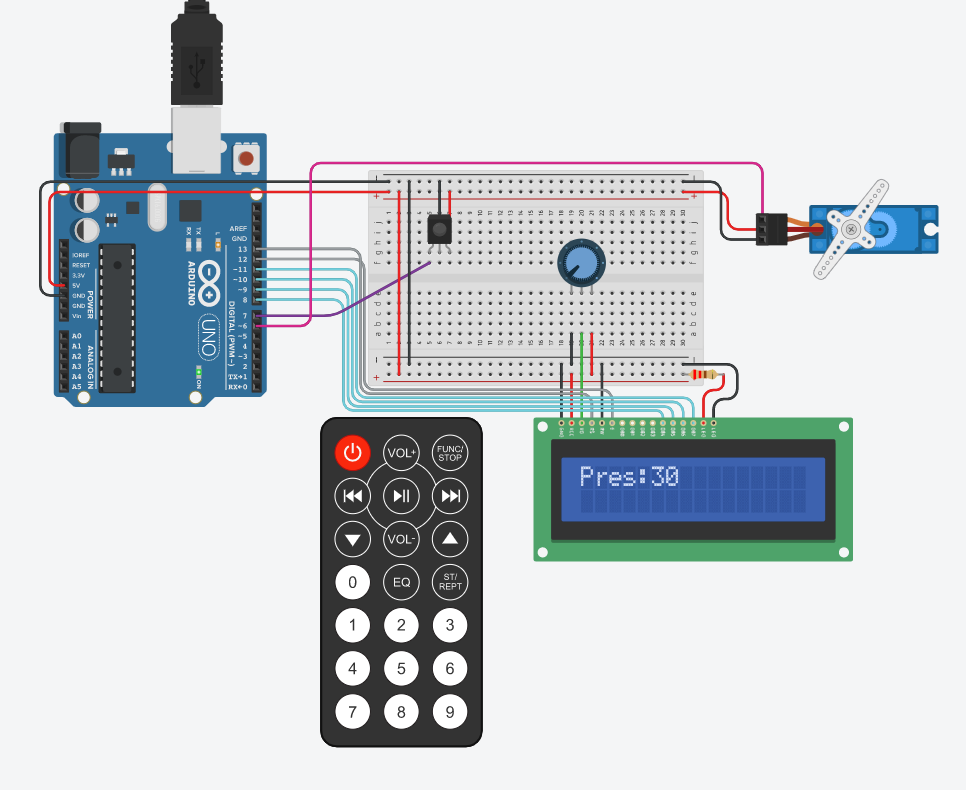
The question that I was trying to have answered was the physical demonstration of pushing buttons that would then translate towards moving a motor. The prototype itself was made up of a simple display screen, a motor tha has an input of angles, and a small sensor that is able to read infrared signals. The user would press a button and the motor would turn CCW by some degree that was adjusted from 0-180 degrees. “Pres” refers to “Pressure” as Brenda describes the temperature hardly changes, it is only the turning on and off of the faucet that is truly important. While both are important for the safety of the user, this was only a proof of concept.
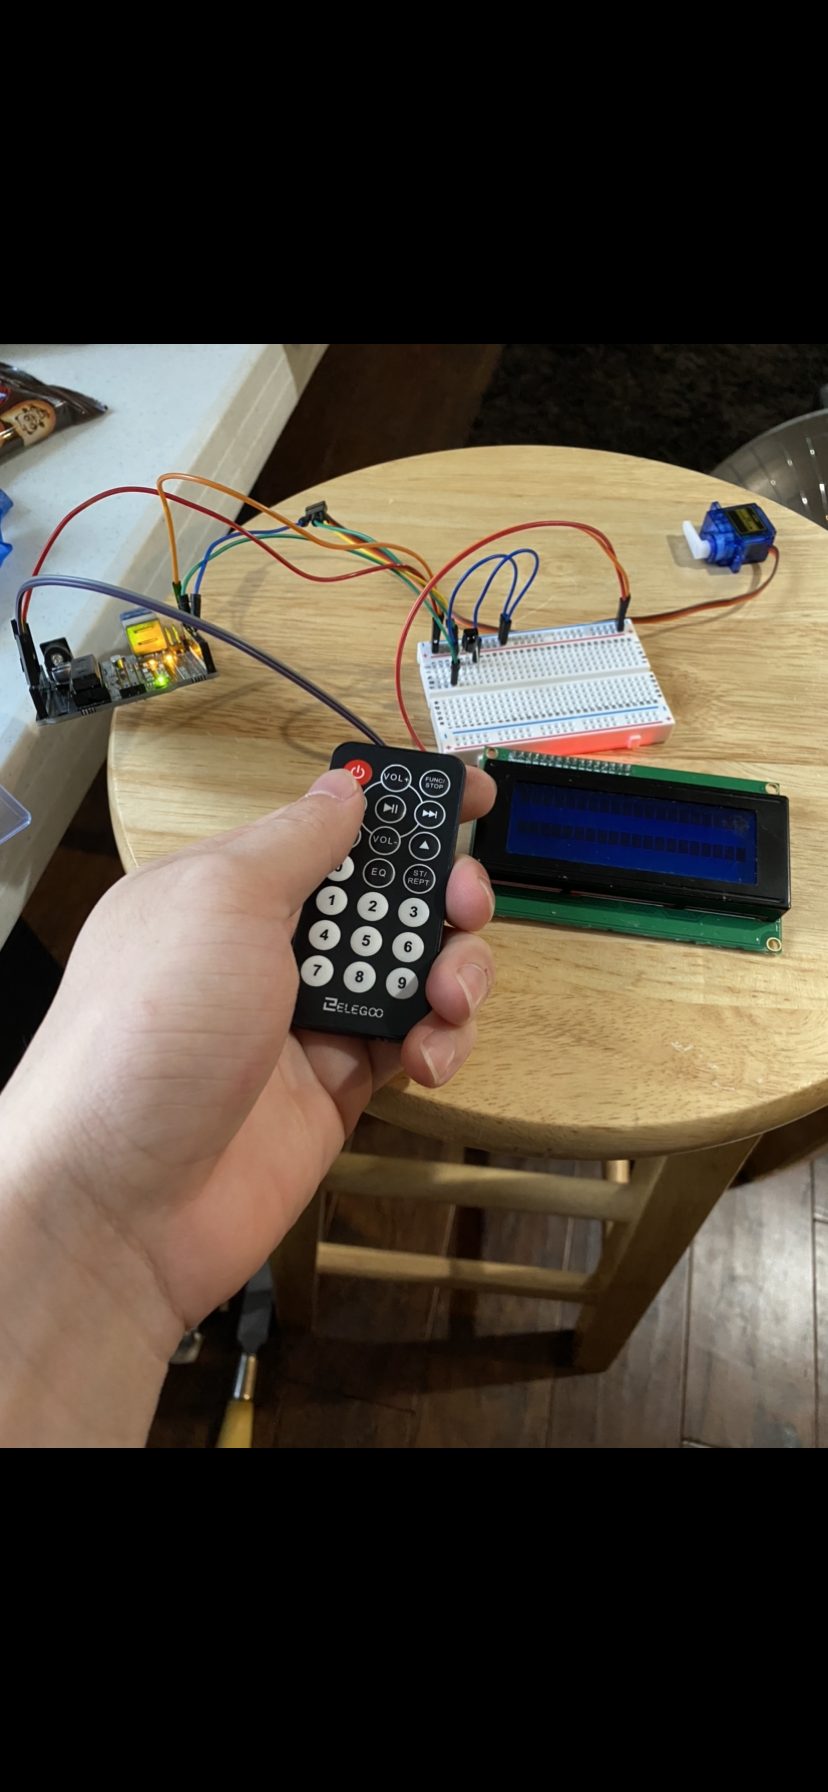
Shows size of remote in hand.

Shows the size of each component relative to each other. This is important because it shows the capability to design a small PCB that would be much easier for the future case for the device.
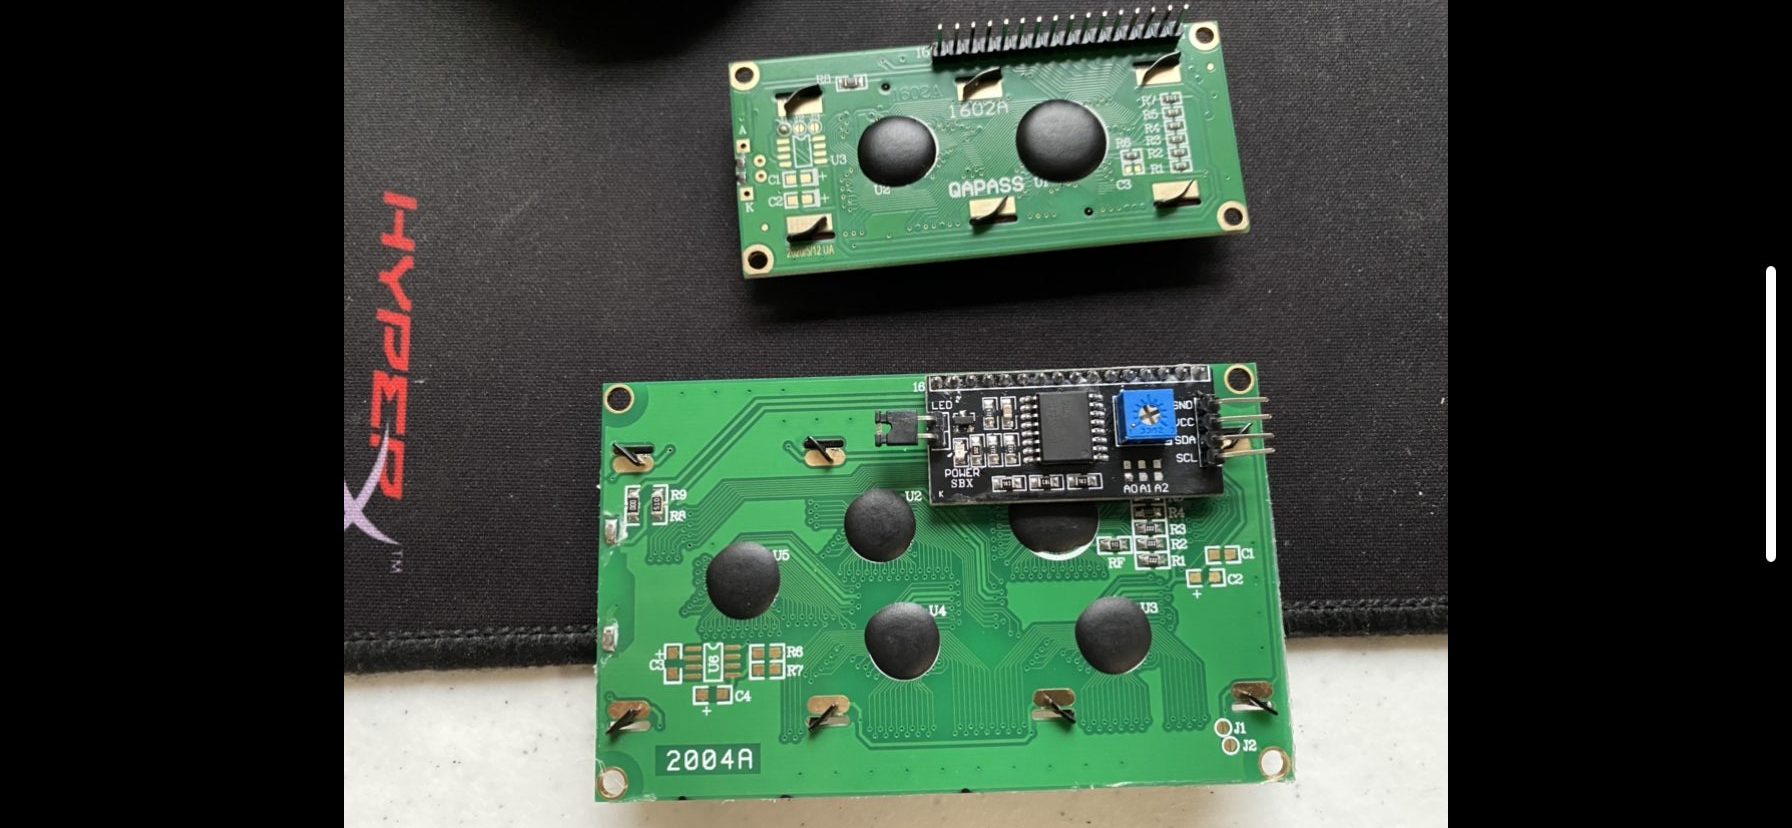
A big design choice was to go with the LCD I2C 20×4 versus the LCD 16×2 because of size and capabilities. Should alternate languages need to be used as well. This choice simply made the most amount of sense for the direction of the project.
This is the TinkerCAD version of the prototype.
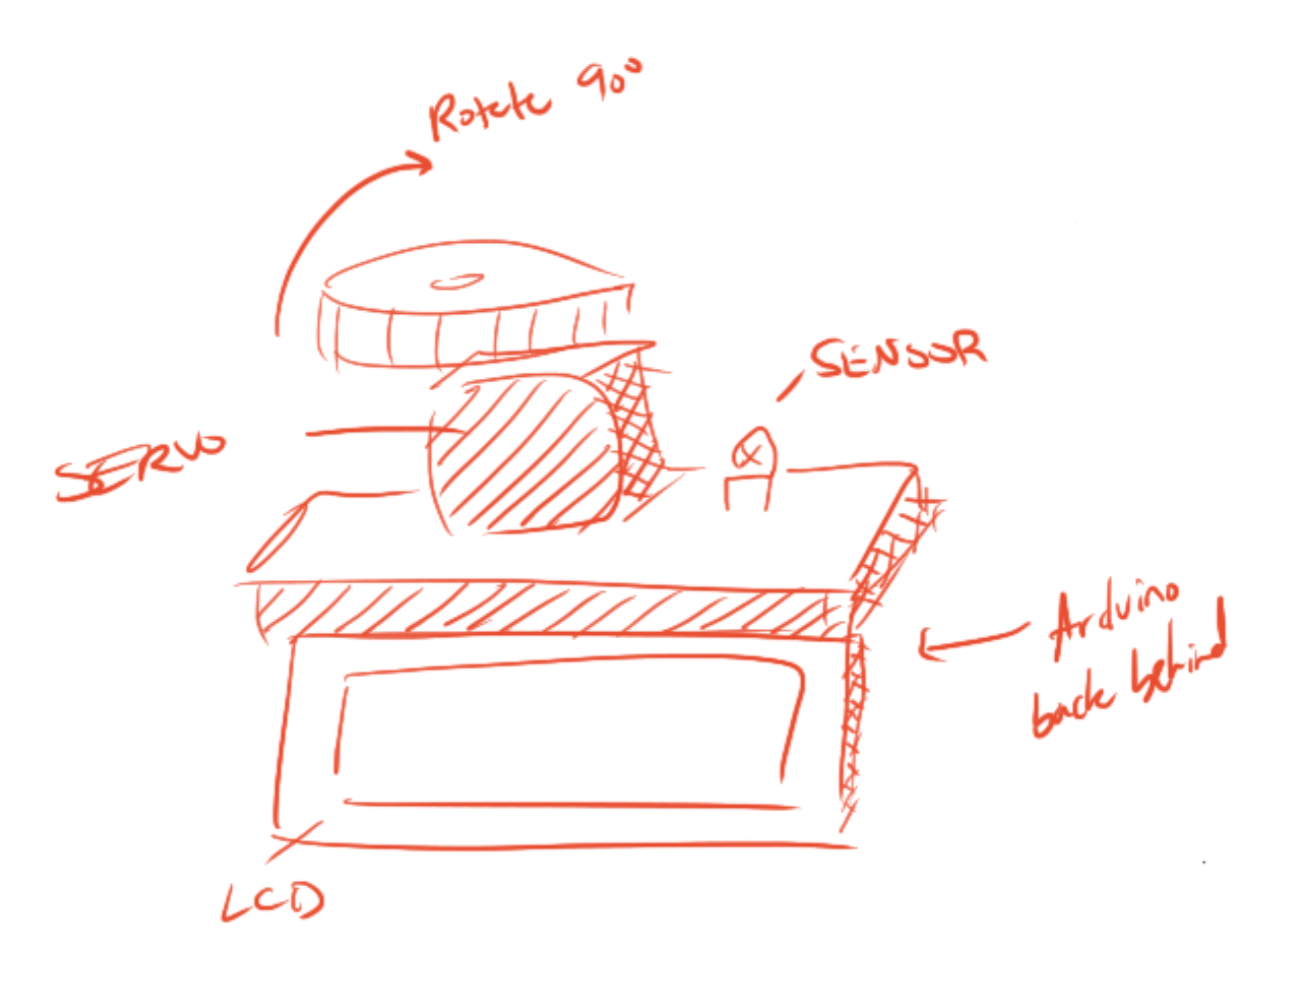
This was a rough idea for the design. It was just going to be sleek and compact. After the creation of the device, it makes more sense to use a PCB and then keep everything closed off.
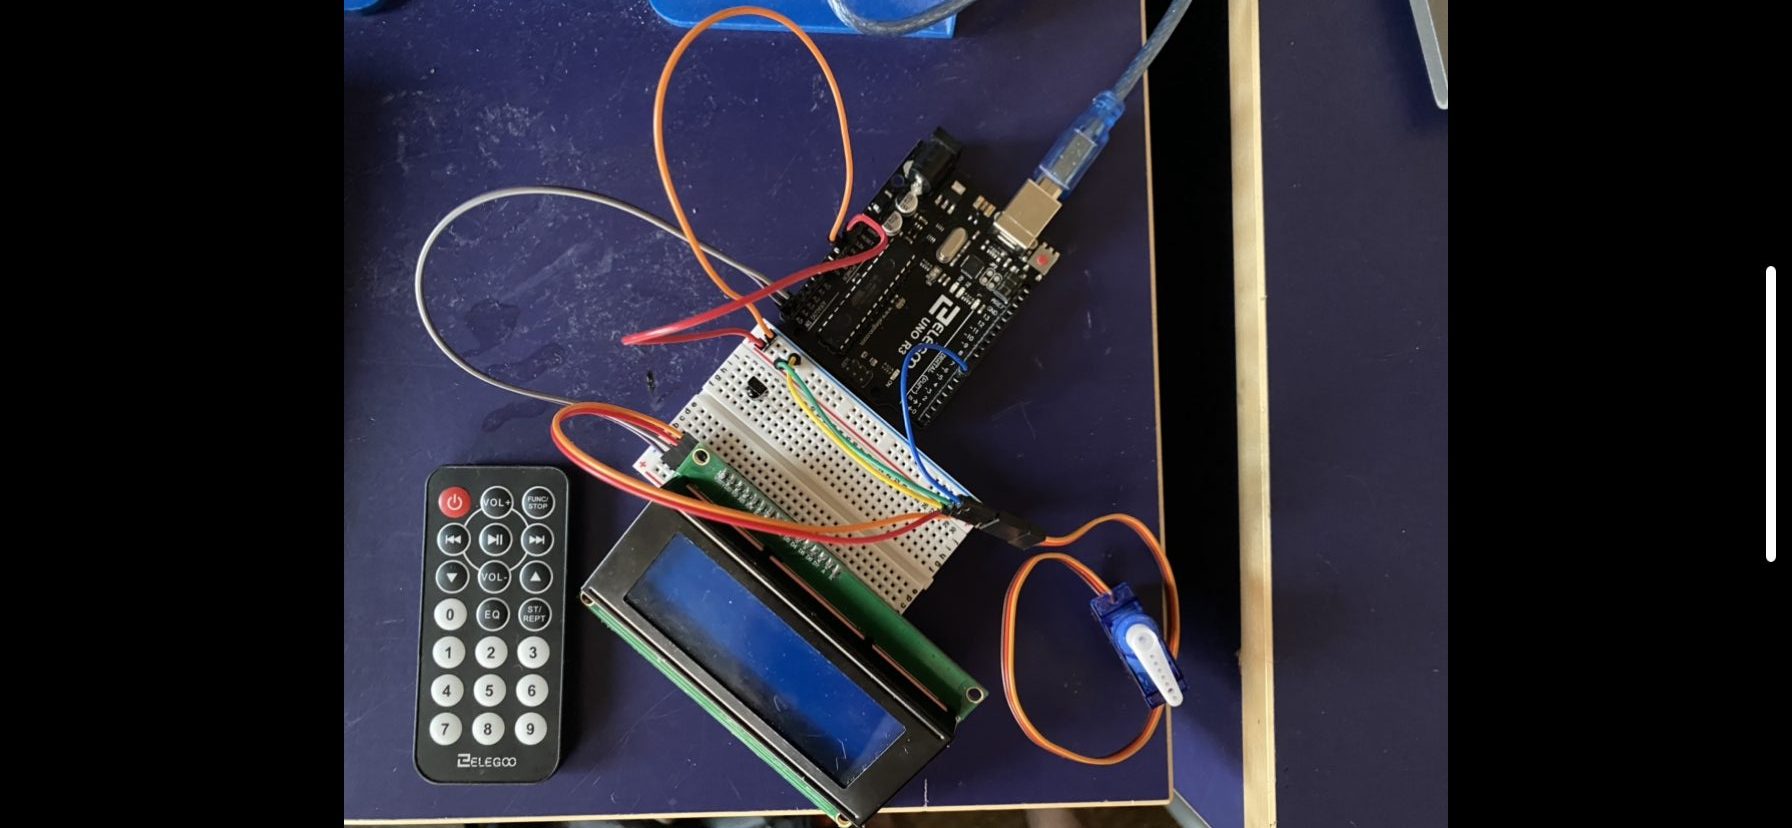
This is the finished look. Thispicture differes because it is more focused on the final rather than the remote being placed in the hand.
Thoughts:
My biggest take away from this was the difficulty of designing the enclosure. Once the prototype had begun working, it was challenging to think of a next step. There were several components of the design that were contingent on being in the space and taking proper measurements and finding the structure that Brenda’s house would have been built on and so on. That being said, this prototype was a success for what it was meant to do. It was meant to demonstrate the simple capabilities of turning a motor when there was an input from a remote control.
The feedback that I receieved that I was looking more into was simplifying everything down, which touches into the design element of things. Where is the LCD going to be held? How is the sensor going to be waterproof? All of these questions that I had yet to think of. The feedback that was less insightful, and thus warranted not being taken, was more of the critique with the remote itself. This was the section that I was not going to be working on because of the work that Mimi had already undergone, so it was useless for me to consider those. Kind of like a trust thing where my partner was going to get it done regardless, and we can address that situation at a completely seperate time.
Moving Forward:
Overall, the prototyping part of this project went well for our team. Prototyping remotely was challenging at times but seeing pictures from Brenda was extremely helpful. We were able to get a working prototype for the mechanism that will move the temperature and pressure knobs and a working design of the remote that will control those functions.
For the remote prototype the next steps will start with a redesign of the remote in SolidWorks. The feedback from the in person and client critique will be implements to make the remote easier to hold and more tactile. Furthermore, some thoughts and research will be done to create a good way to store the remote. Also the electronic components of the remote will be modeled in tinkercad as if the remote was going to be physically made.
As for the motor mechanics, future steps then go into establishing a means for integrating the motor system into the physical bathroom. Because of the need for a more powerful motor, the final product would likely need to feature a stepper motor rather than a servo motor. Using the stepper would then require the use of a specific driver, needing a 12V power supply. This power supply is typically plugged into the wall, but that would make it a little bit more dangerous. Integrating a batter or a series of batteries would allow for this to work out a little bit better and narrow in on the number of moving parts. After a working model is created, the next step would be to optimize the entier system to allow for universal usage for potentially all faucet types. This would enable a greater marketability for the product as a whole to help impact more people’s lives.
In the future, it would nice to jump from the idea phase to the actual making phase earlier. We had our idea for our project pretty early but it took us some time to make physical, tangible progress with our idea. Once we started actually prototyping we ran into problems that we had to fix. For example, the remote prototype was originally going to be just a radio module prototype, but we realized it would be much easier to do a IR sensor remote. If we started physical prototyping earlier than we would have discovered and fixed these problems earlier leaving more time to work on our final prototypes.
https://docs.google.com/spreadsheets/d/1EqbDtPq6eH5k-xbRc-XUx_uFbc1yXL8K7nxA7on8S0o/edit?usp=sharing