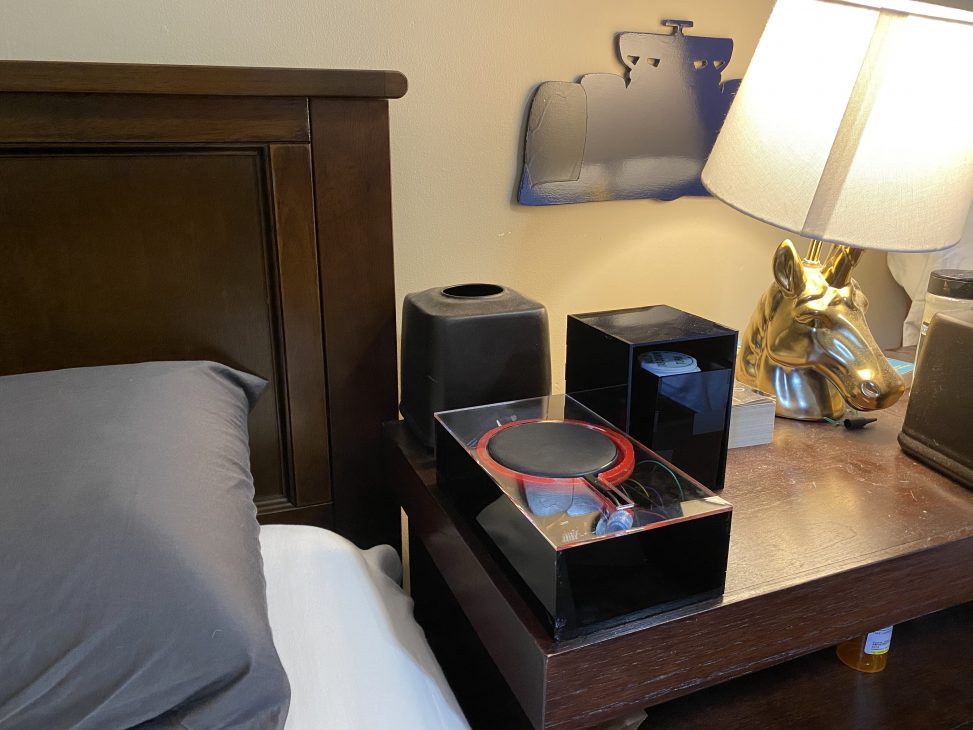

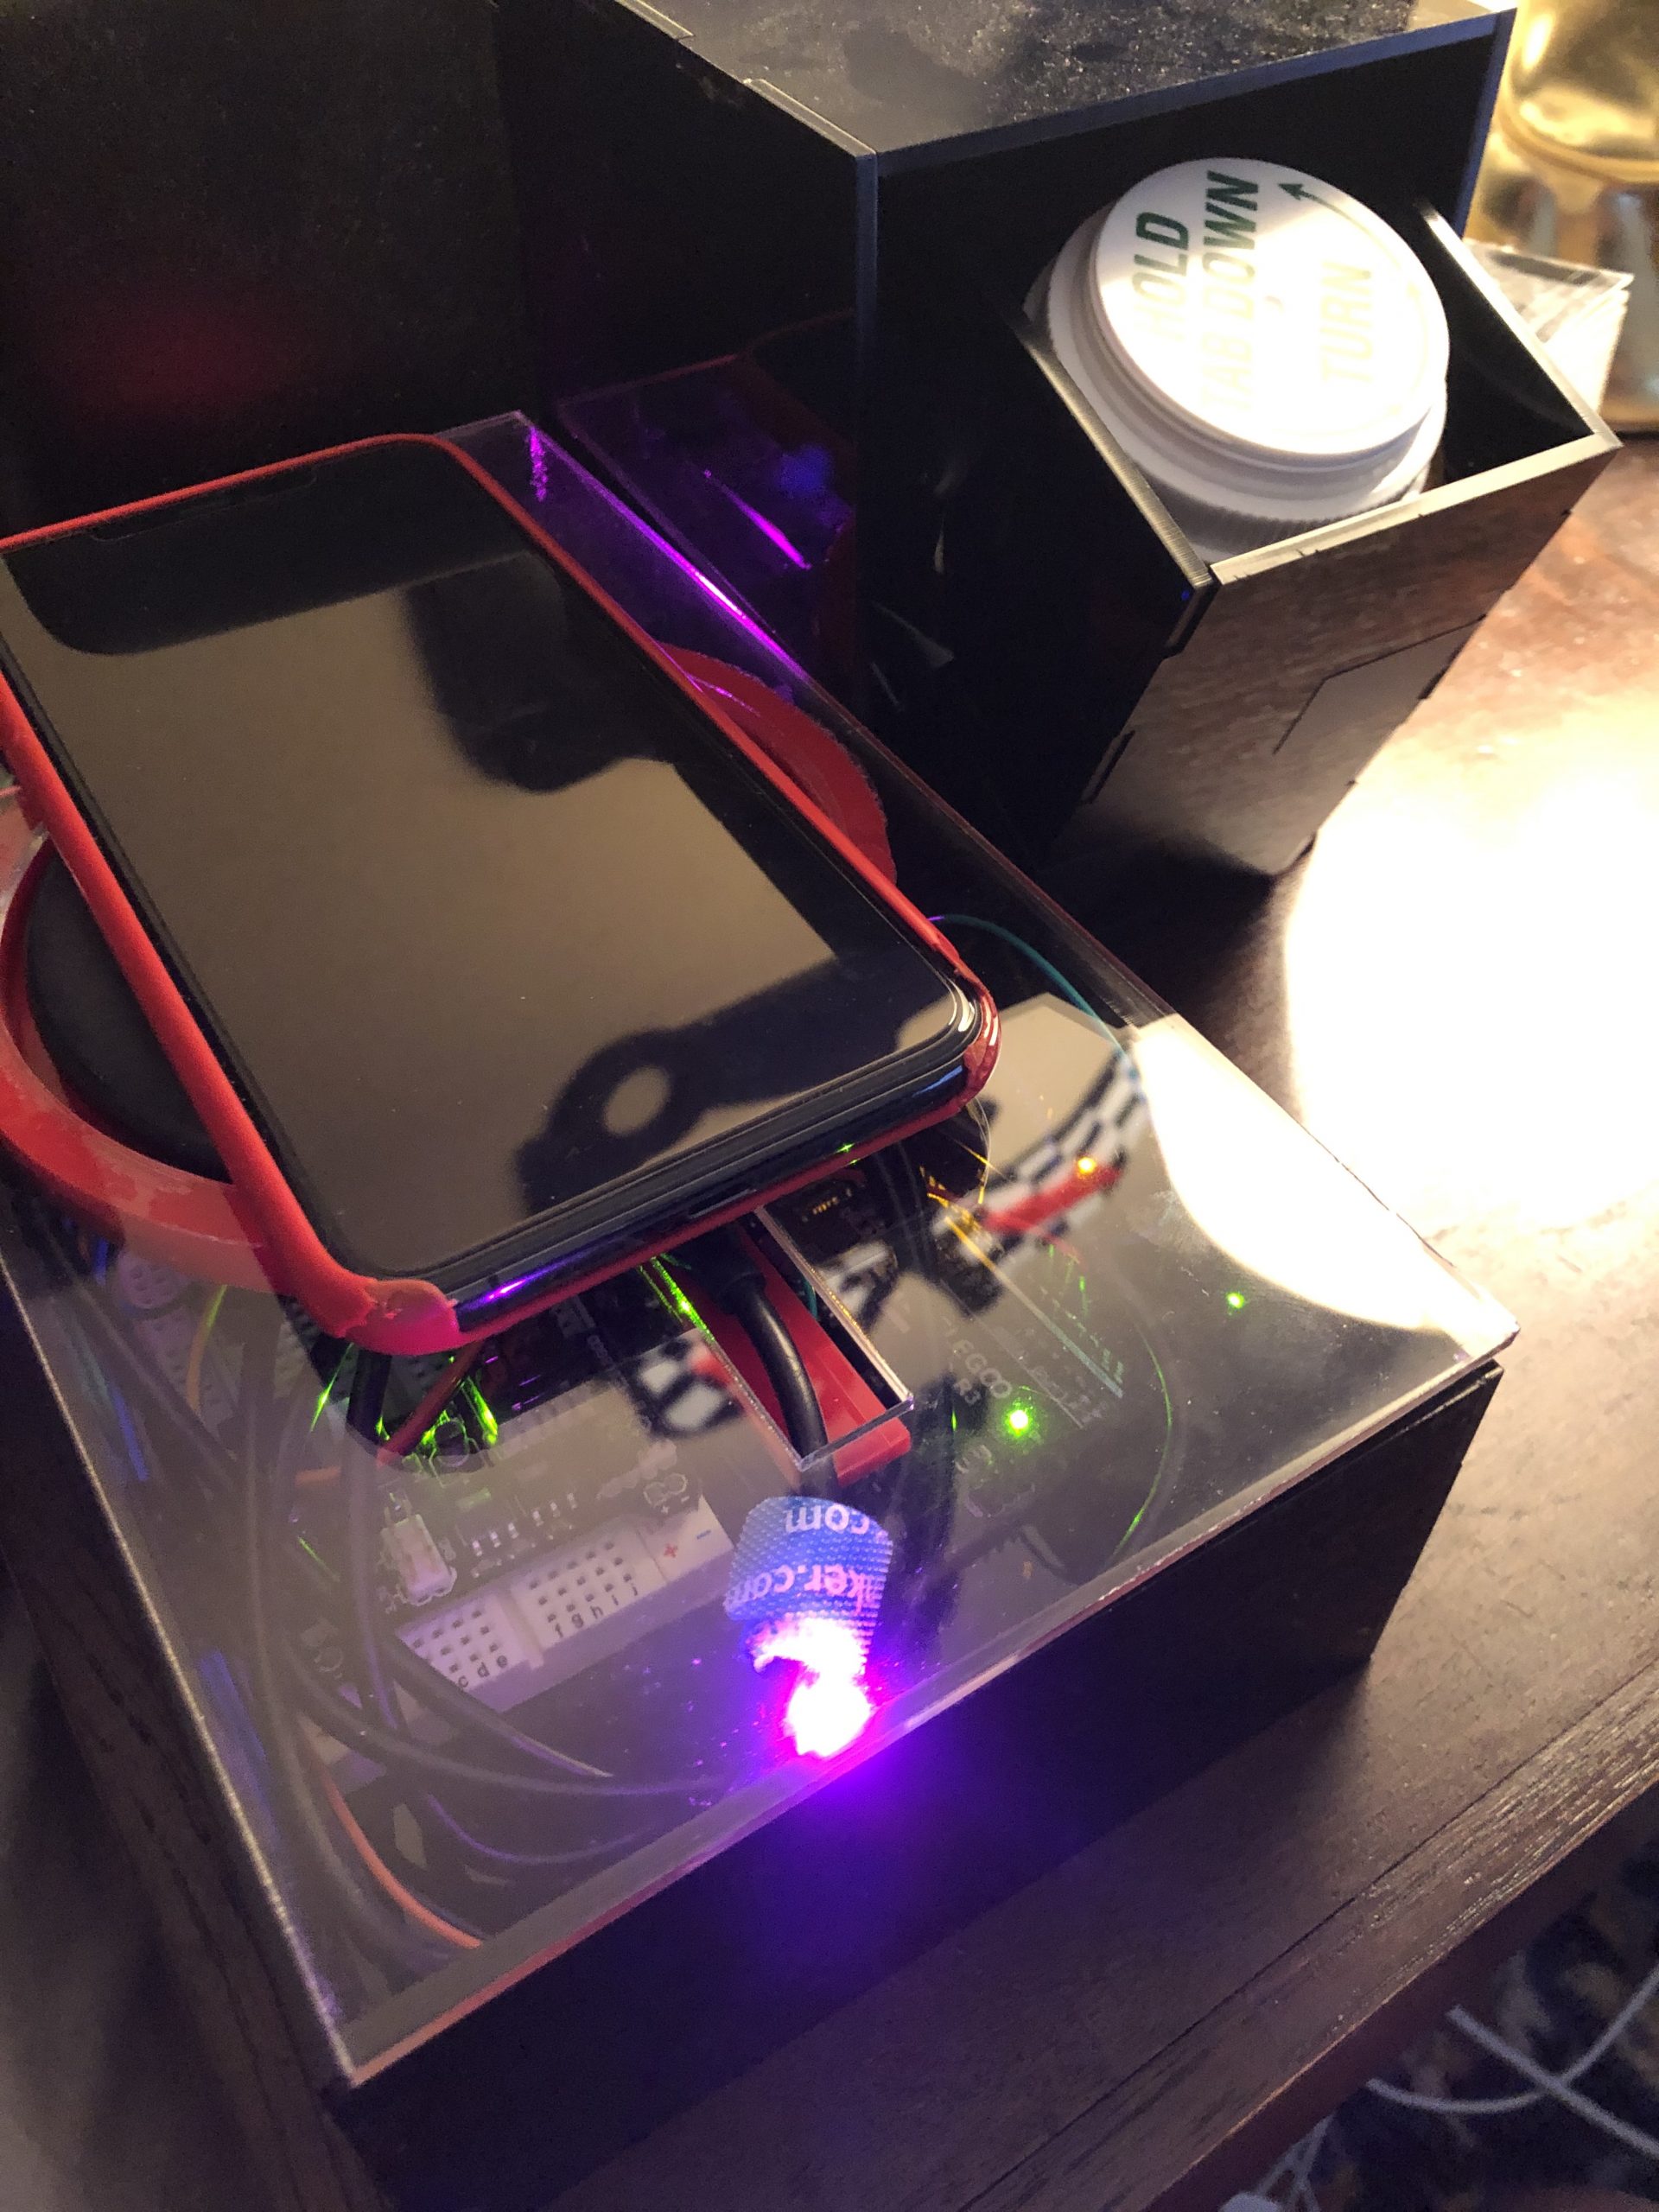
Overall image of the Automated Medicine Dispenser on my nightstand
The Automated Medicine Dispenser incorporates a wireless charger and phone stand into a single device that allows the user to dispense their medicine bottle upon stopping an alarm.
Overview
Opening Sequence
Closing Sequence
Overall Photo
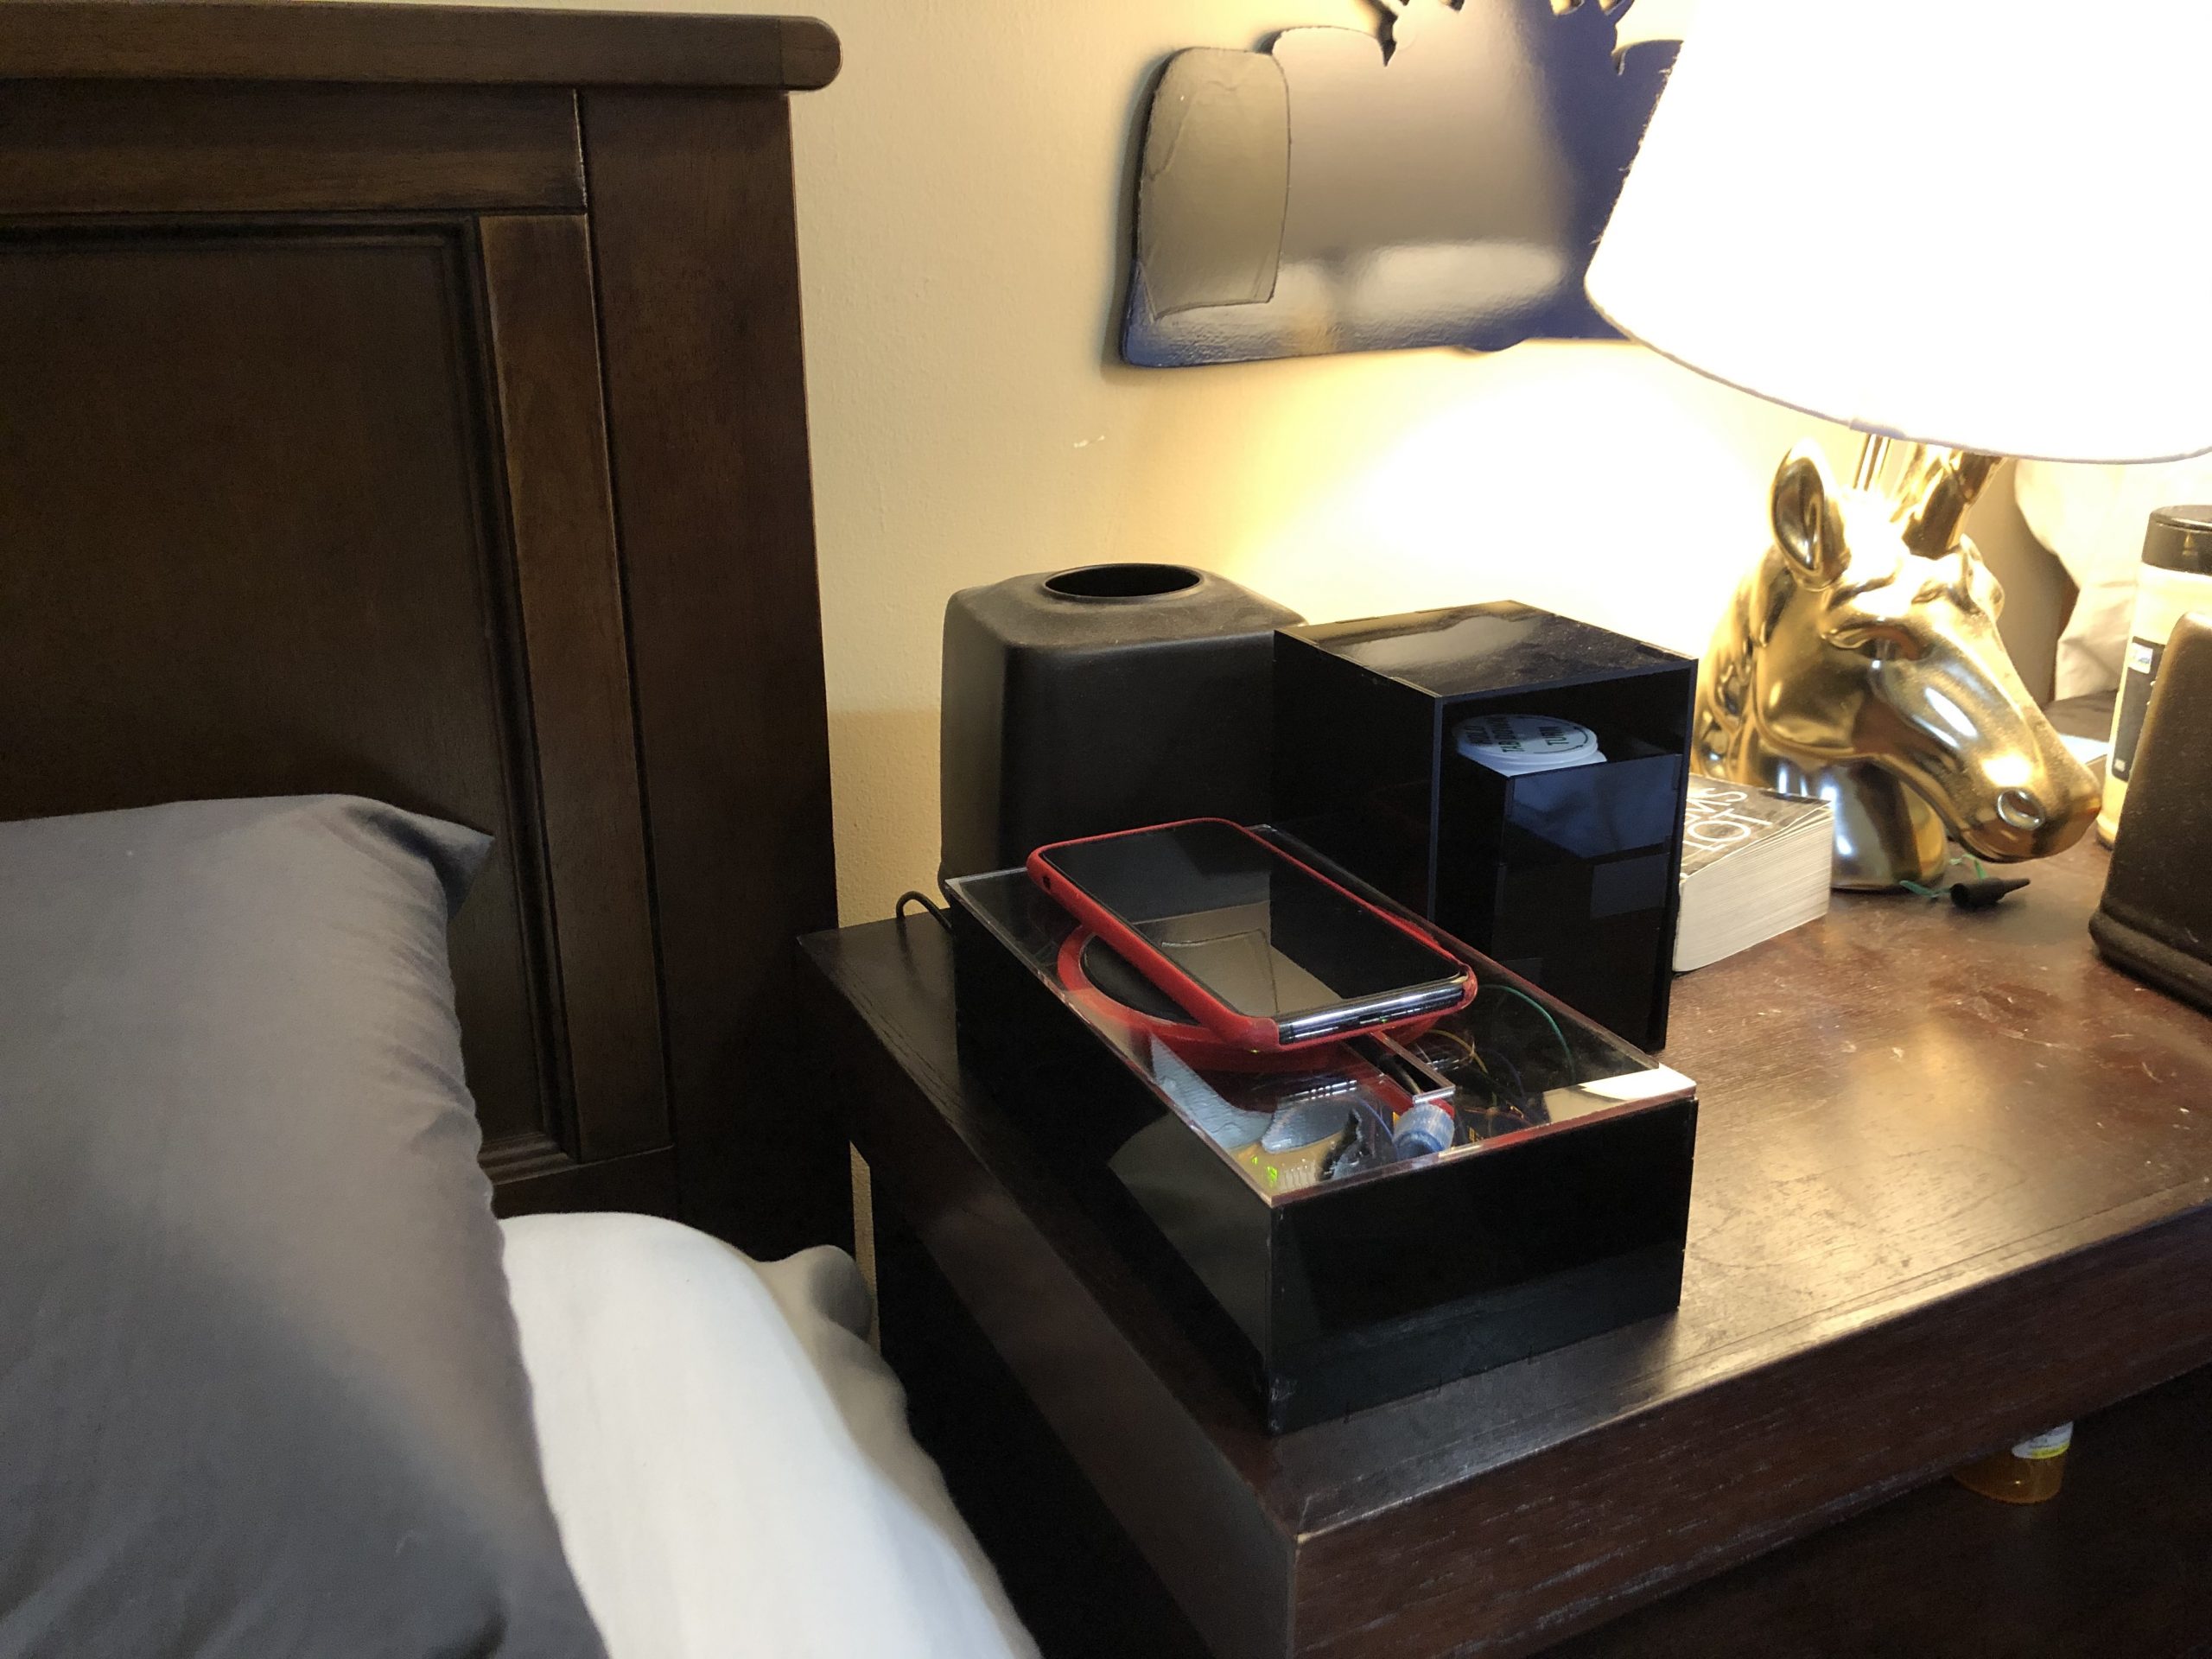
Overall photo showing the scale of the device relative to an iPhone.
Detail Photos
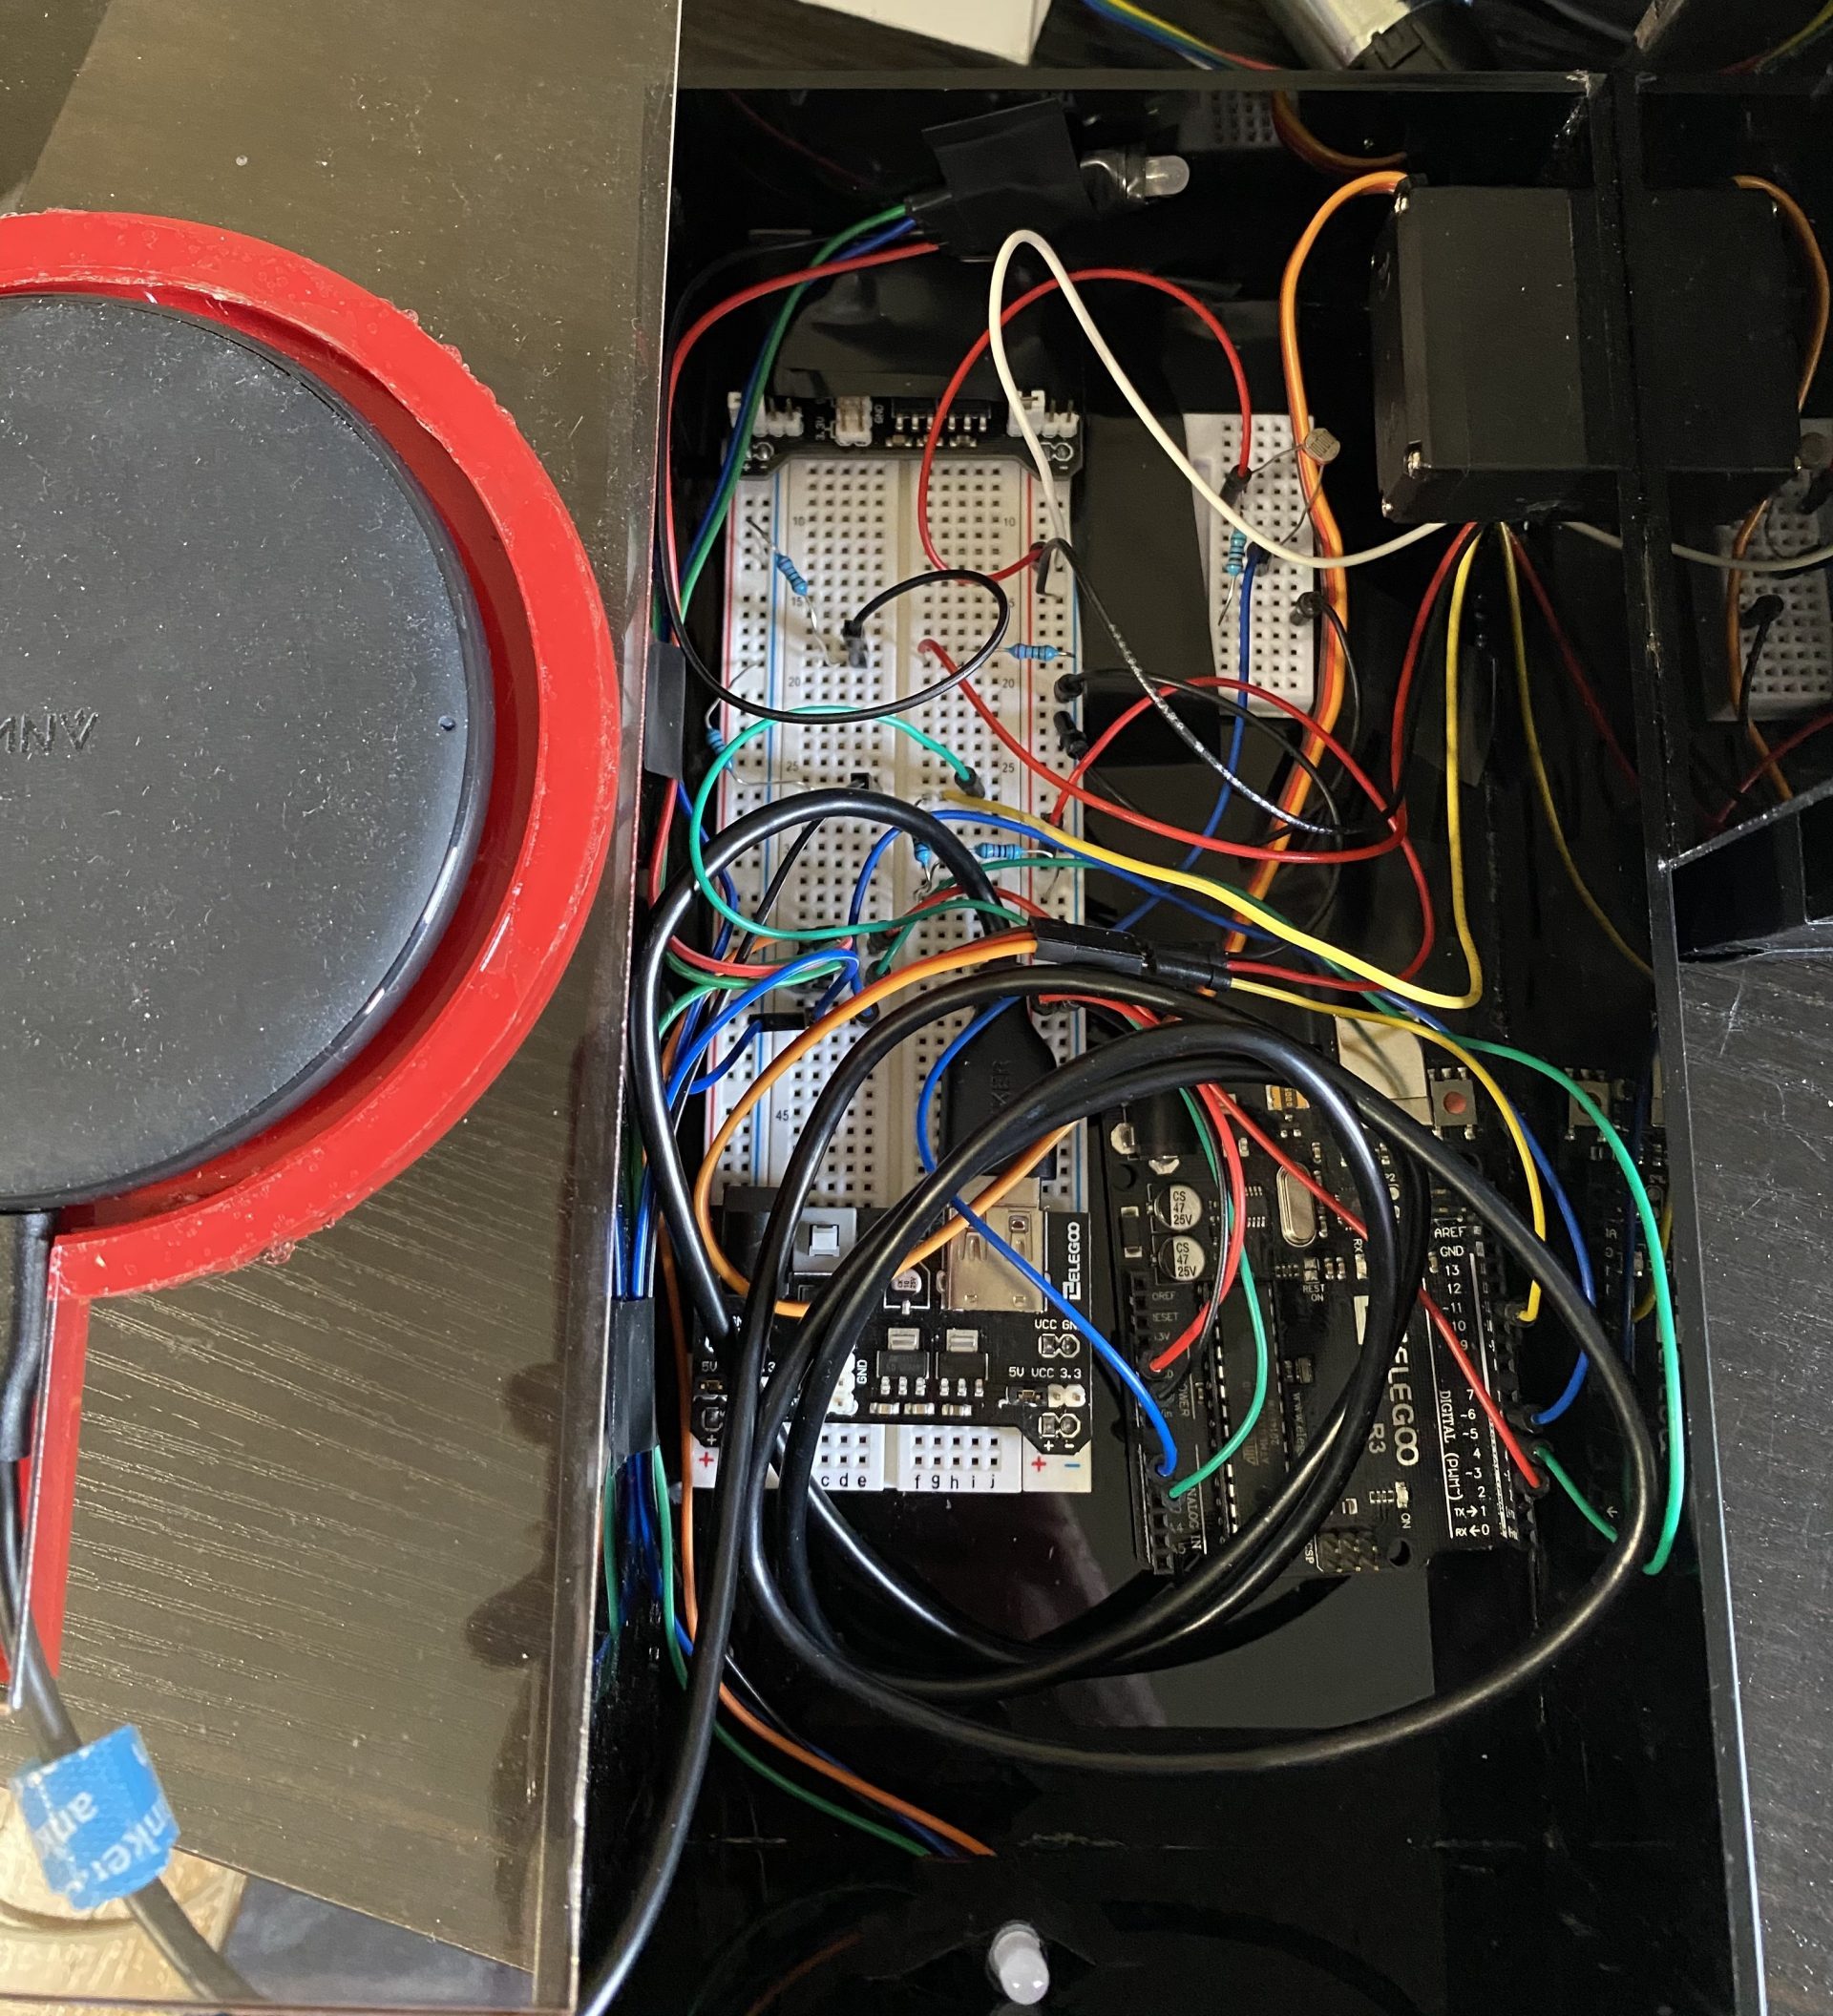
Image of the internal wiring of the Automated Medicine Dispenser.
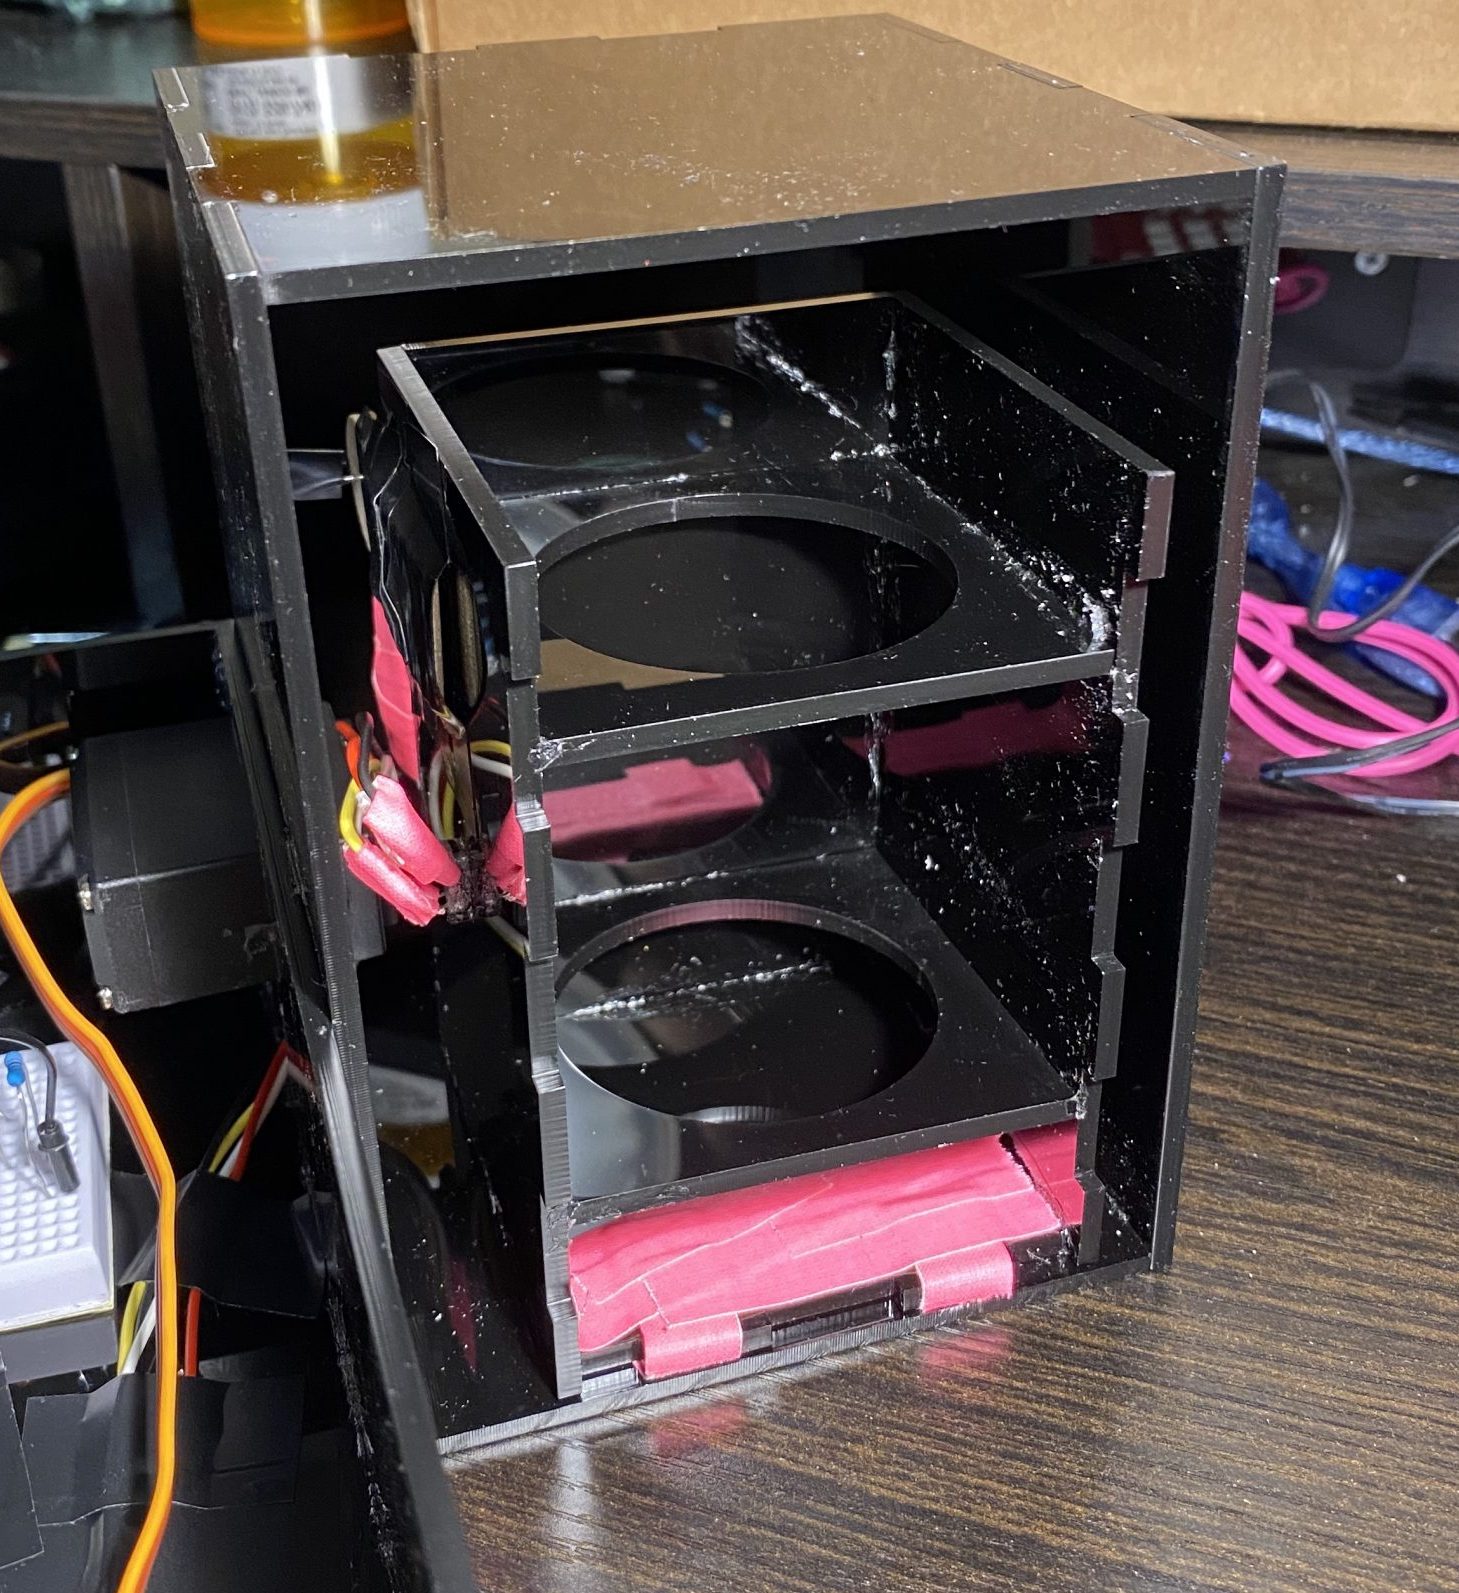
Depiction of the inside of the medicine holder. The cutouts help position the medicine bottle in the center of the holder in order to improve consistency in the optical proximity sensor readings.
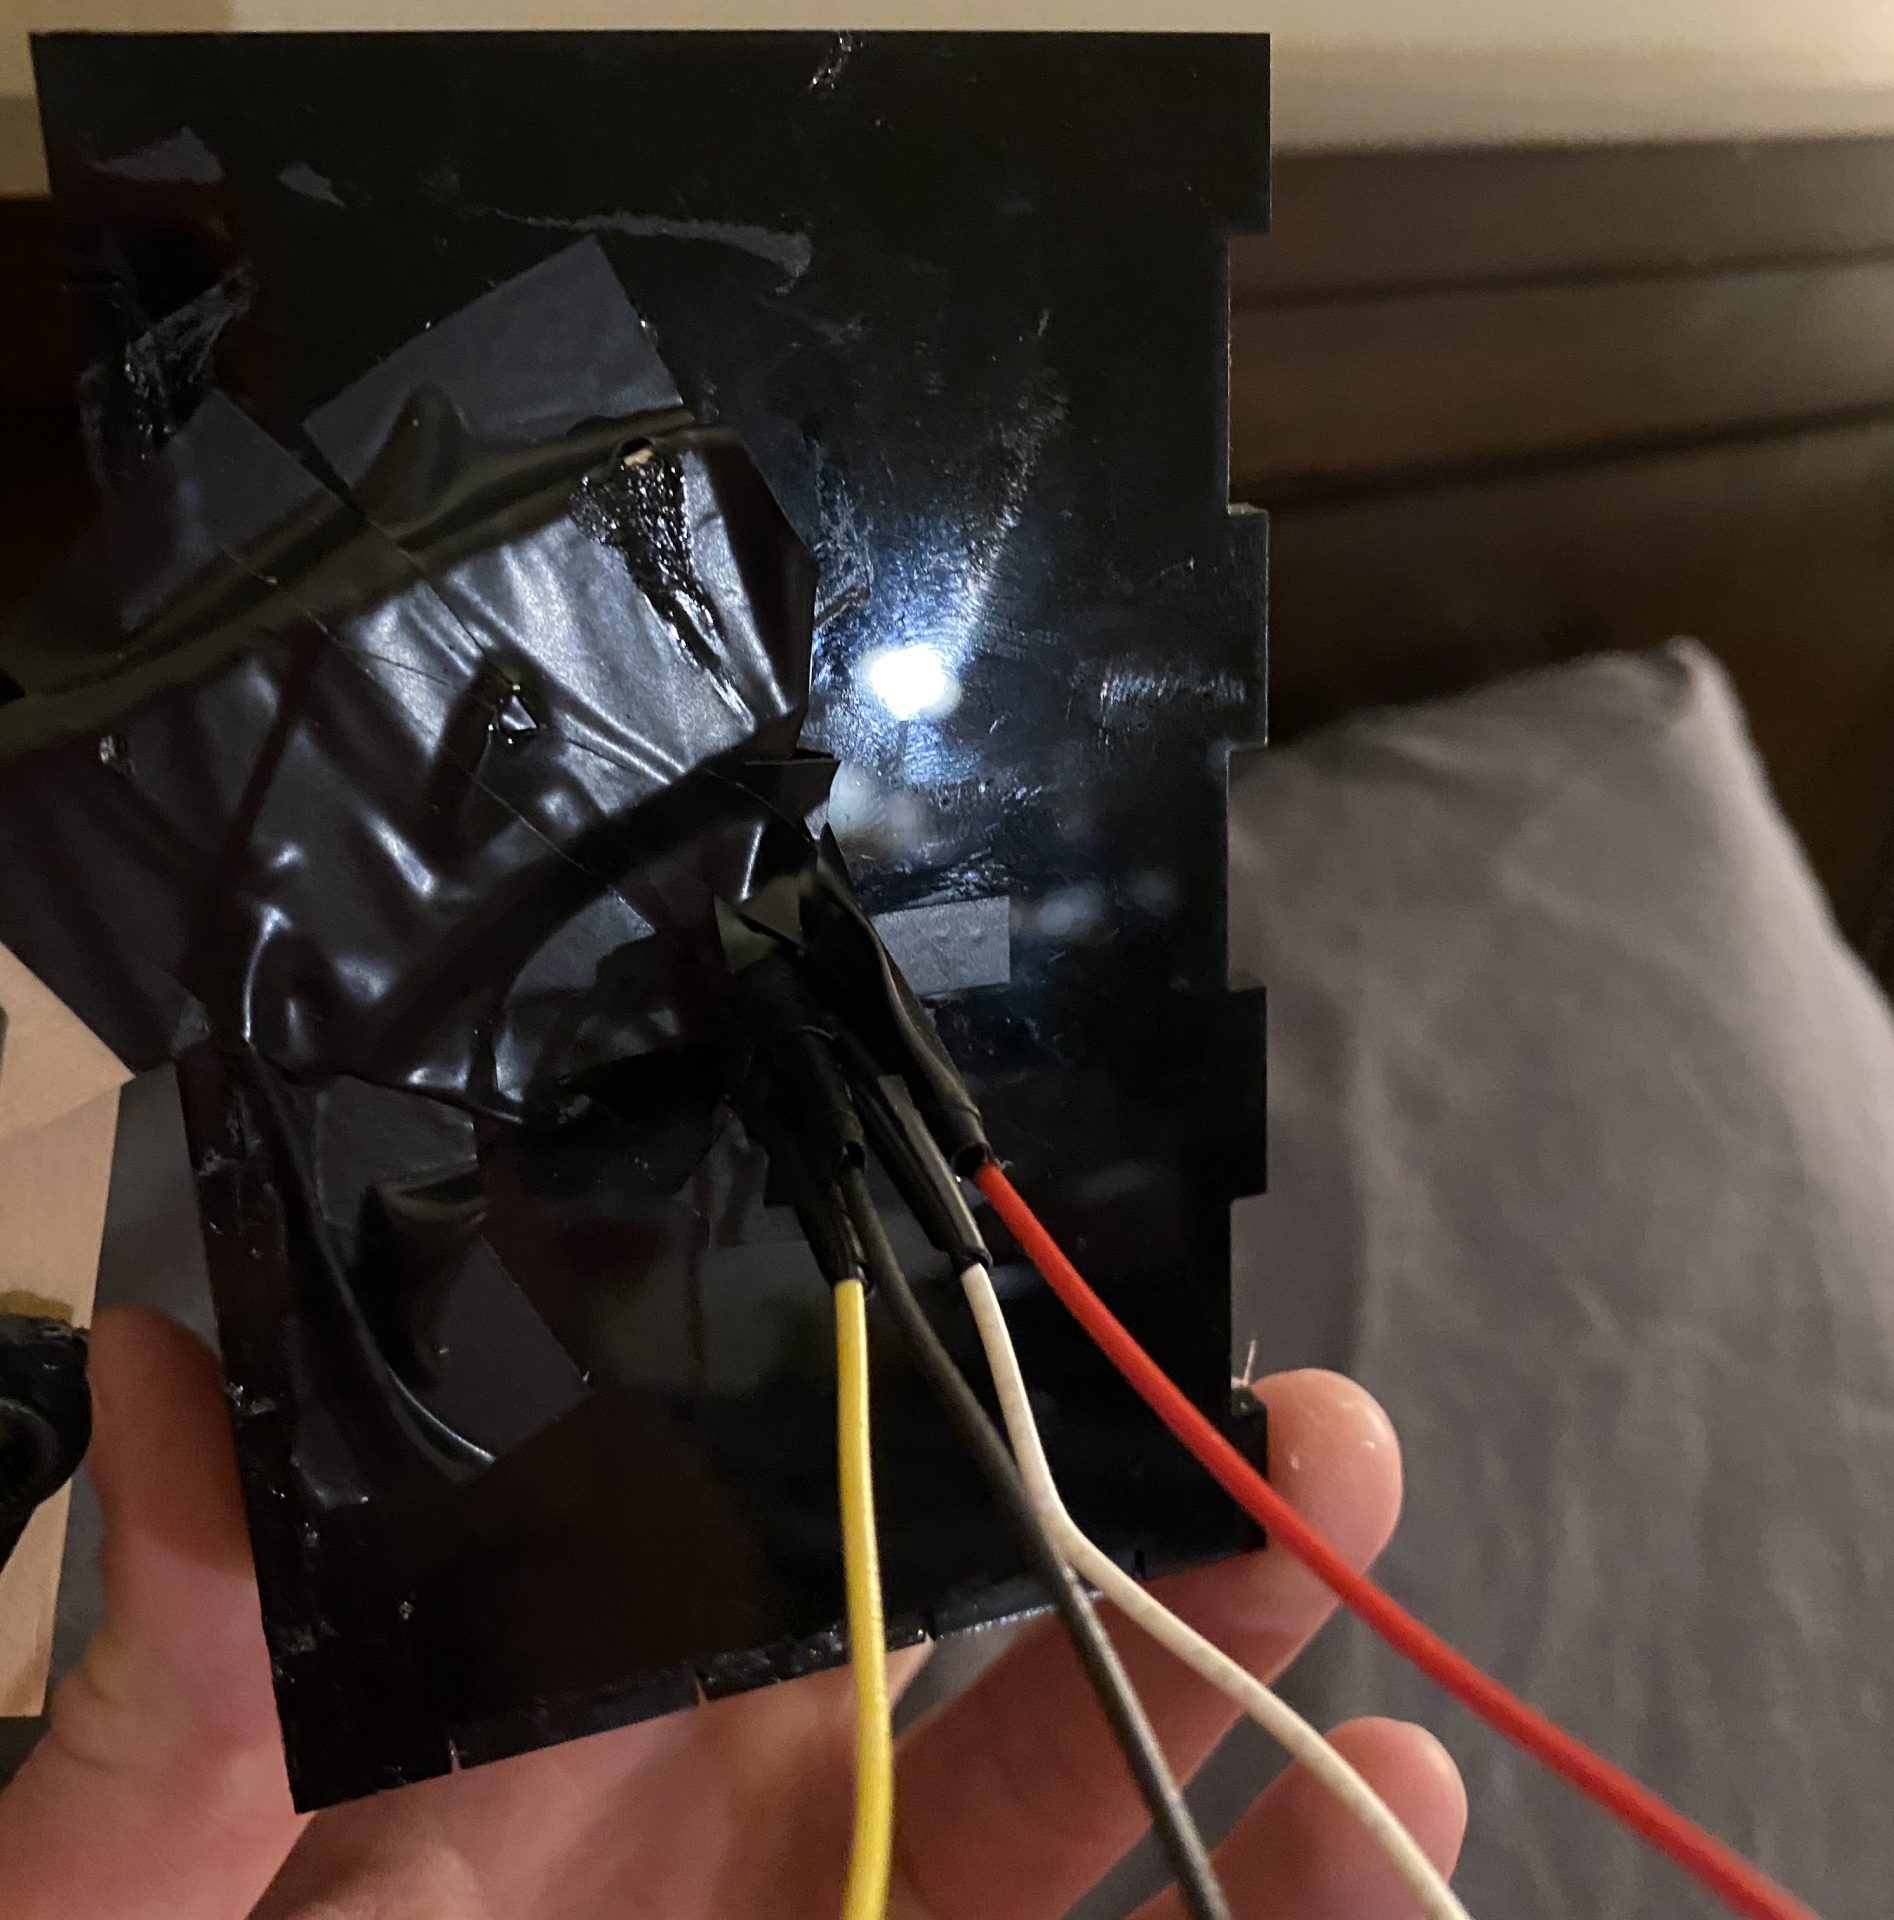
Mounting position of the optical proximity sensor in the side wall of the medicine holder box. Electrical tape was used to protect the sensor housing and prevent unwanted wire crossings.
Use of the Device
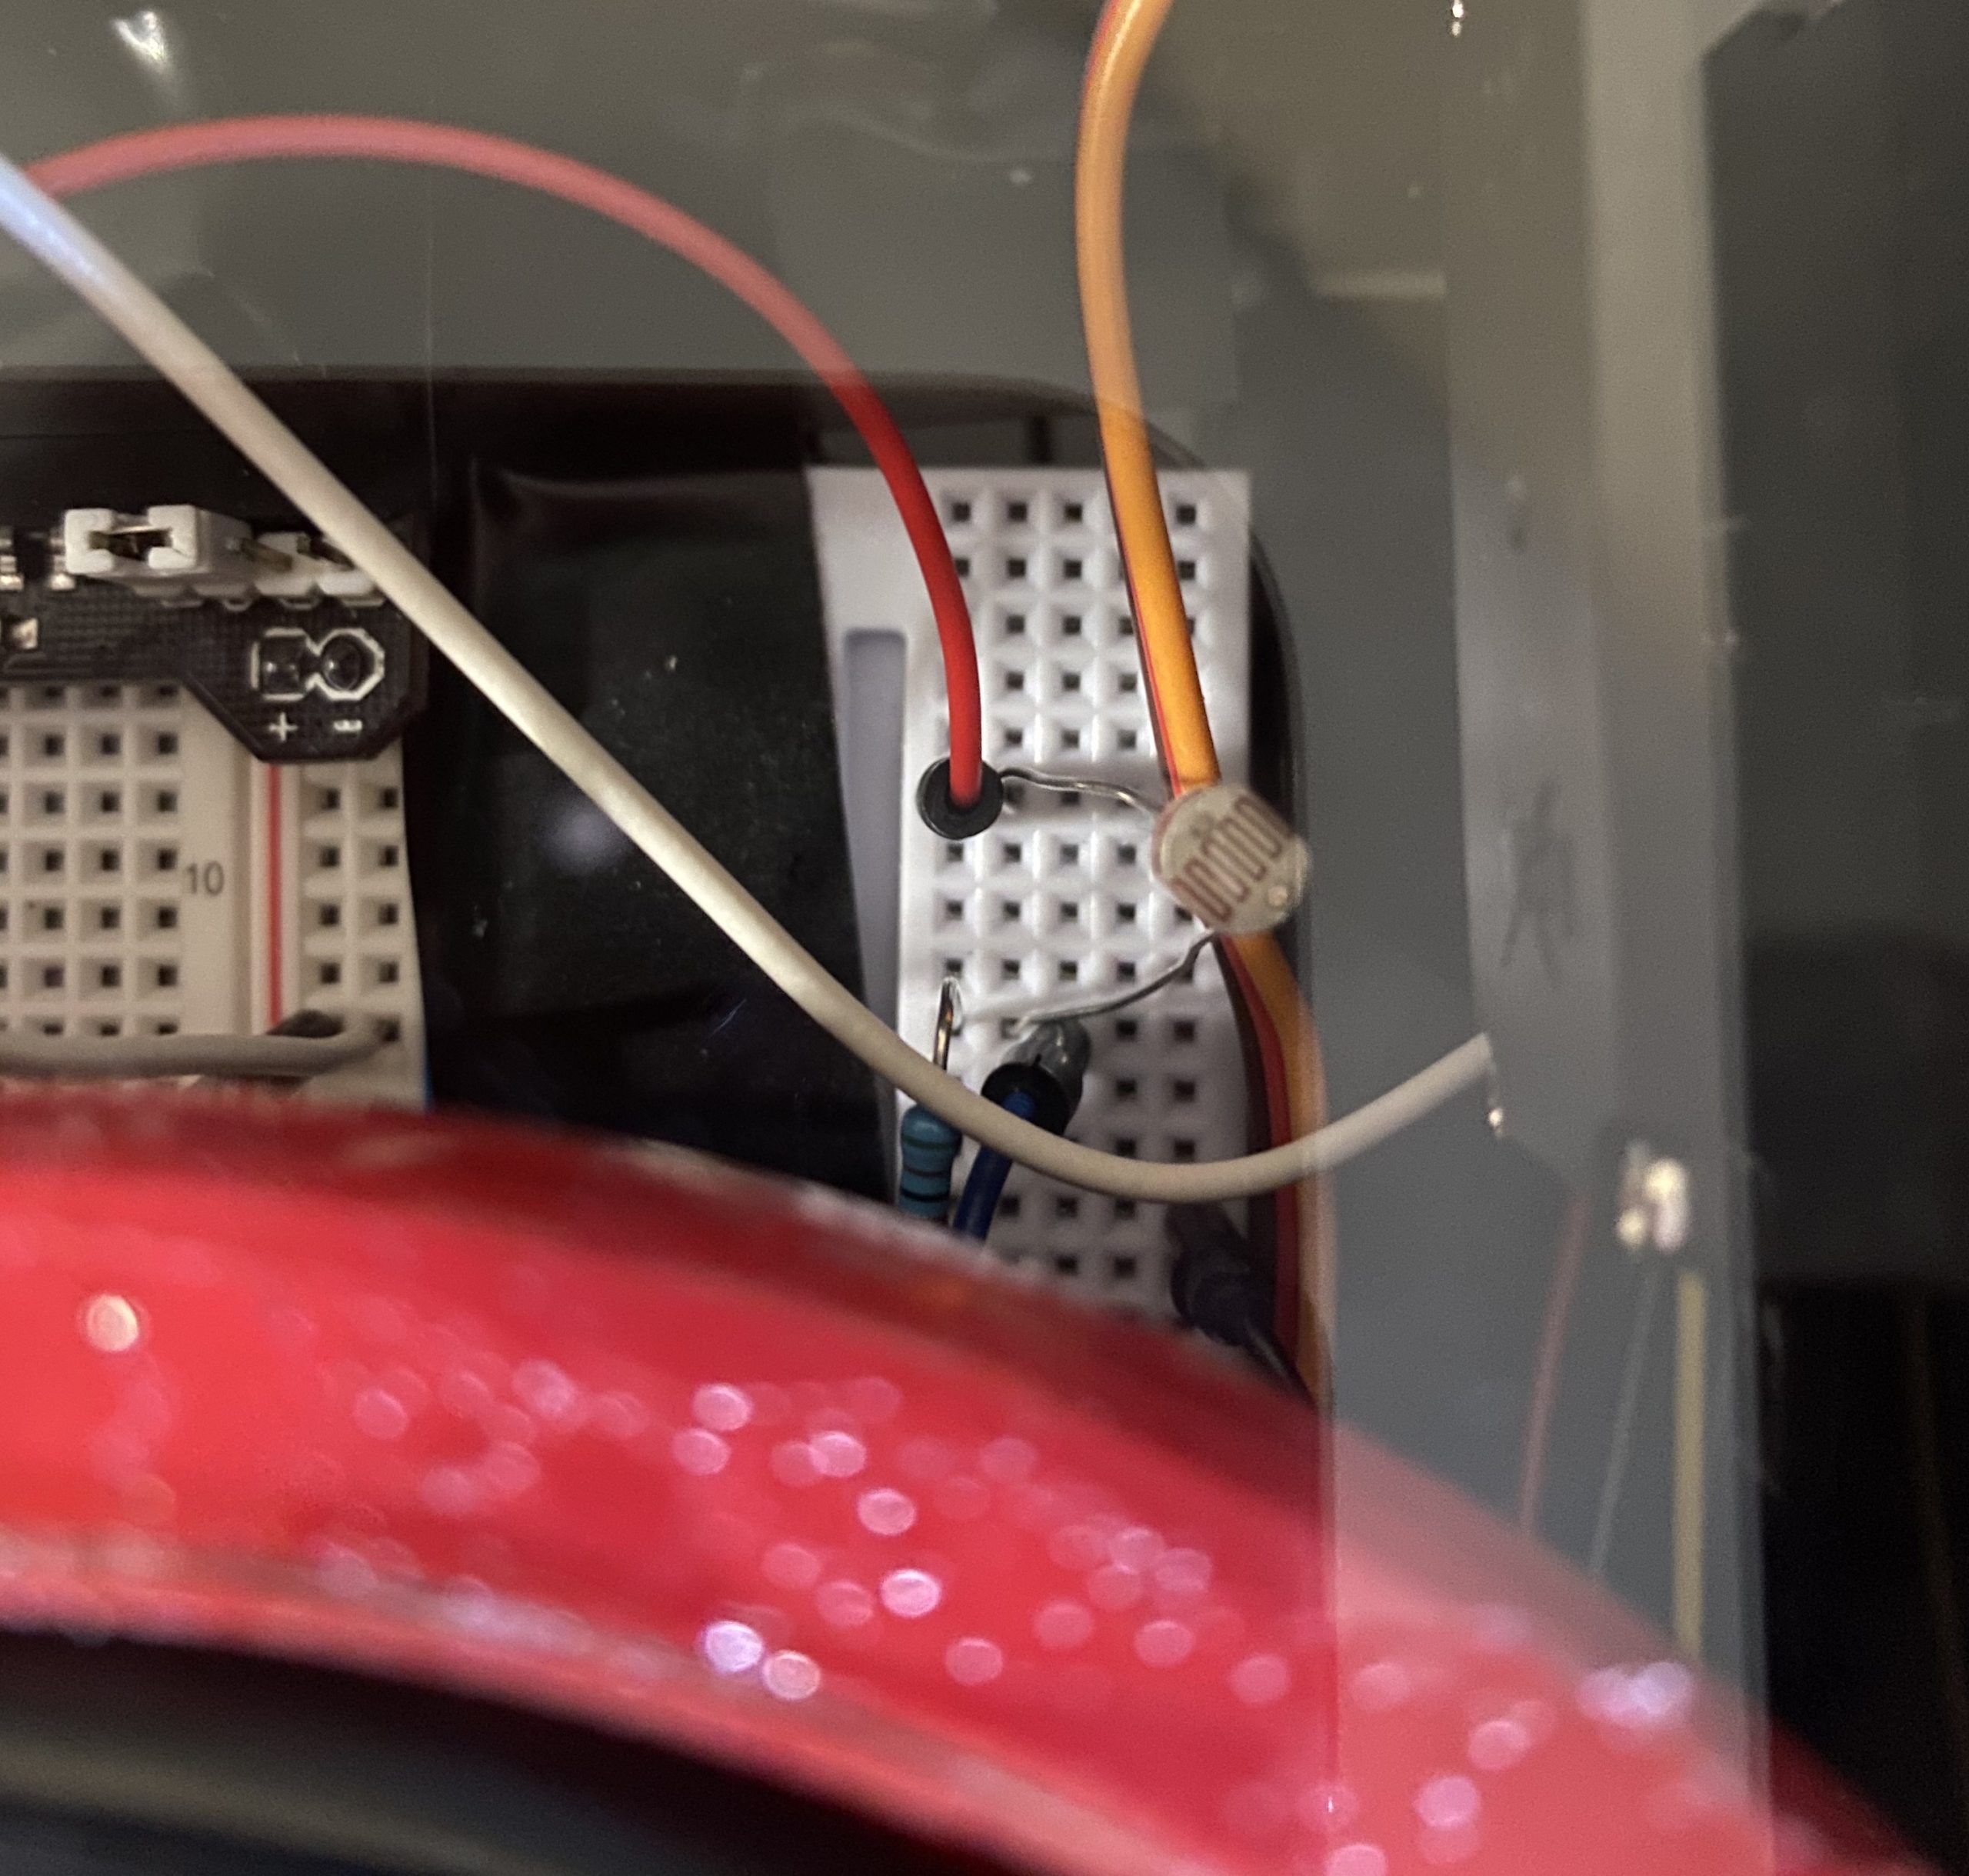
Shown above is the photoresistor actuated by the phone flashlight. The image above was taken in the phone’s resting position on the stand.
Depiction of the rainbow lights and servo actuation during the dispensing sequence.
Process Images and Review
Tilt Mechanism Troubles
The first major change from my original plan involved the tilting mechanism for the medicine bottle holder. In my original design, the medicine bottle holder incorporated a servo at the axis of rotation in order to complete the tilting motion (Note: original design shown below). This mechanism, however, proved to be infeasible because of the design requirements involving form factor. Since I wanted to have a flush front surface of the outer housing, the servo needed to be positioned further back requiring a different type of actuation mechanism. In addition to form factor, this original design also created the added challenge of aligning an axle on the other side of the holder with the center of rotation of the servo.

The original tilt mechanism actuated at the axis of rotation of the medicine bottle holder.
Upon reaching these previous conclusions about my original design, I switched to a linkage mechanism for the actuation of the tilt motion. This new design also came with its own challenges, mainly changing the original outer housing design to incorporate enough room for the servo in back and figuring out a reliable way to connect the linkage to the bottle holder. As shown below, the final mechanism incorporated popsicle sticks as the links and a needle for the pin joint with electrical tape forming the connections to the servo and bottle holder.
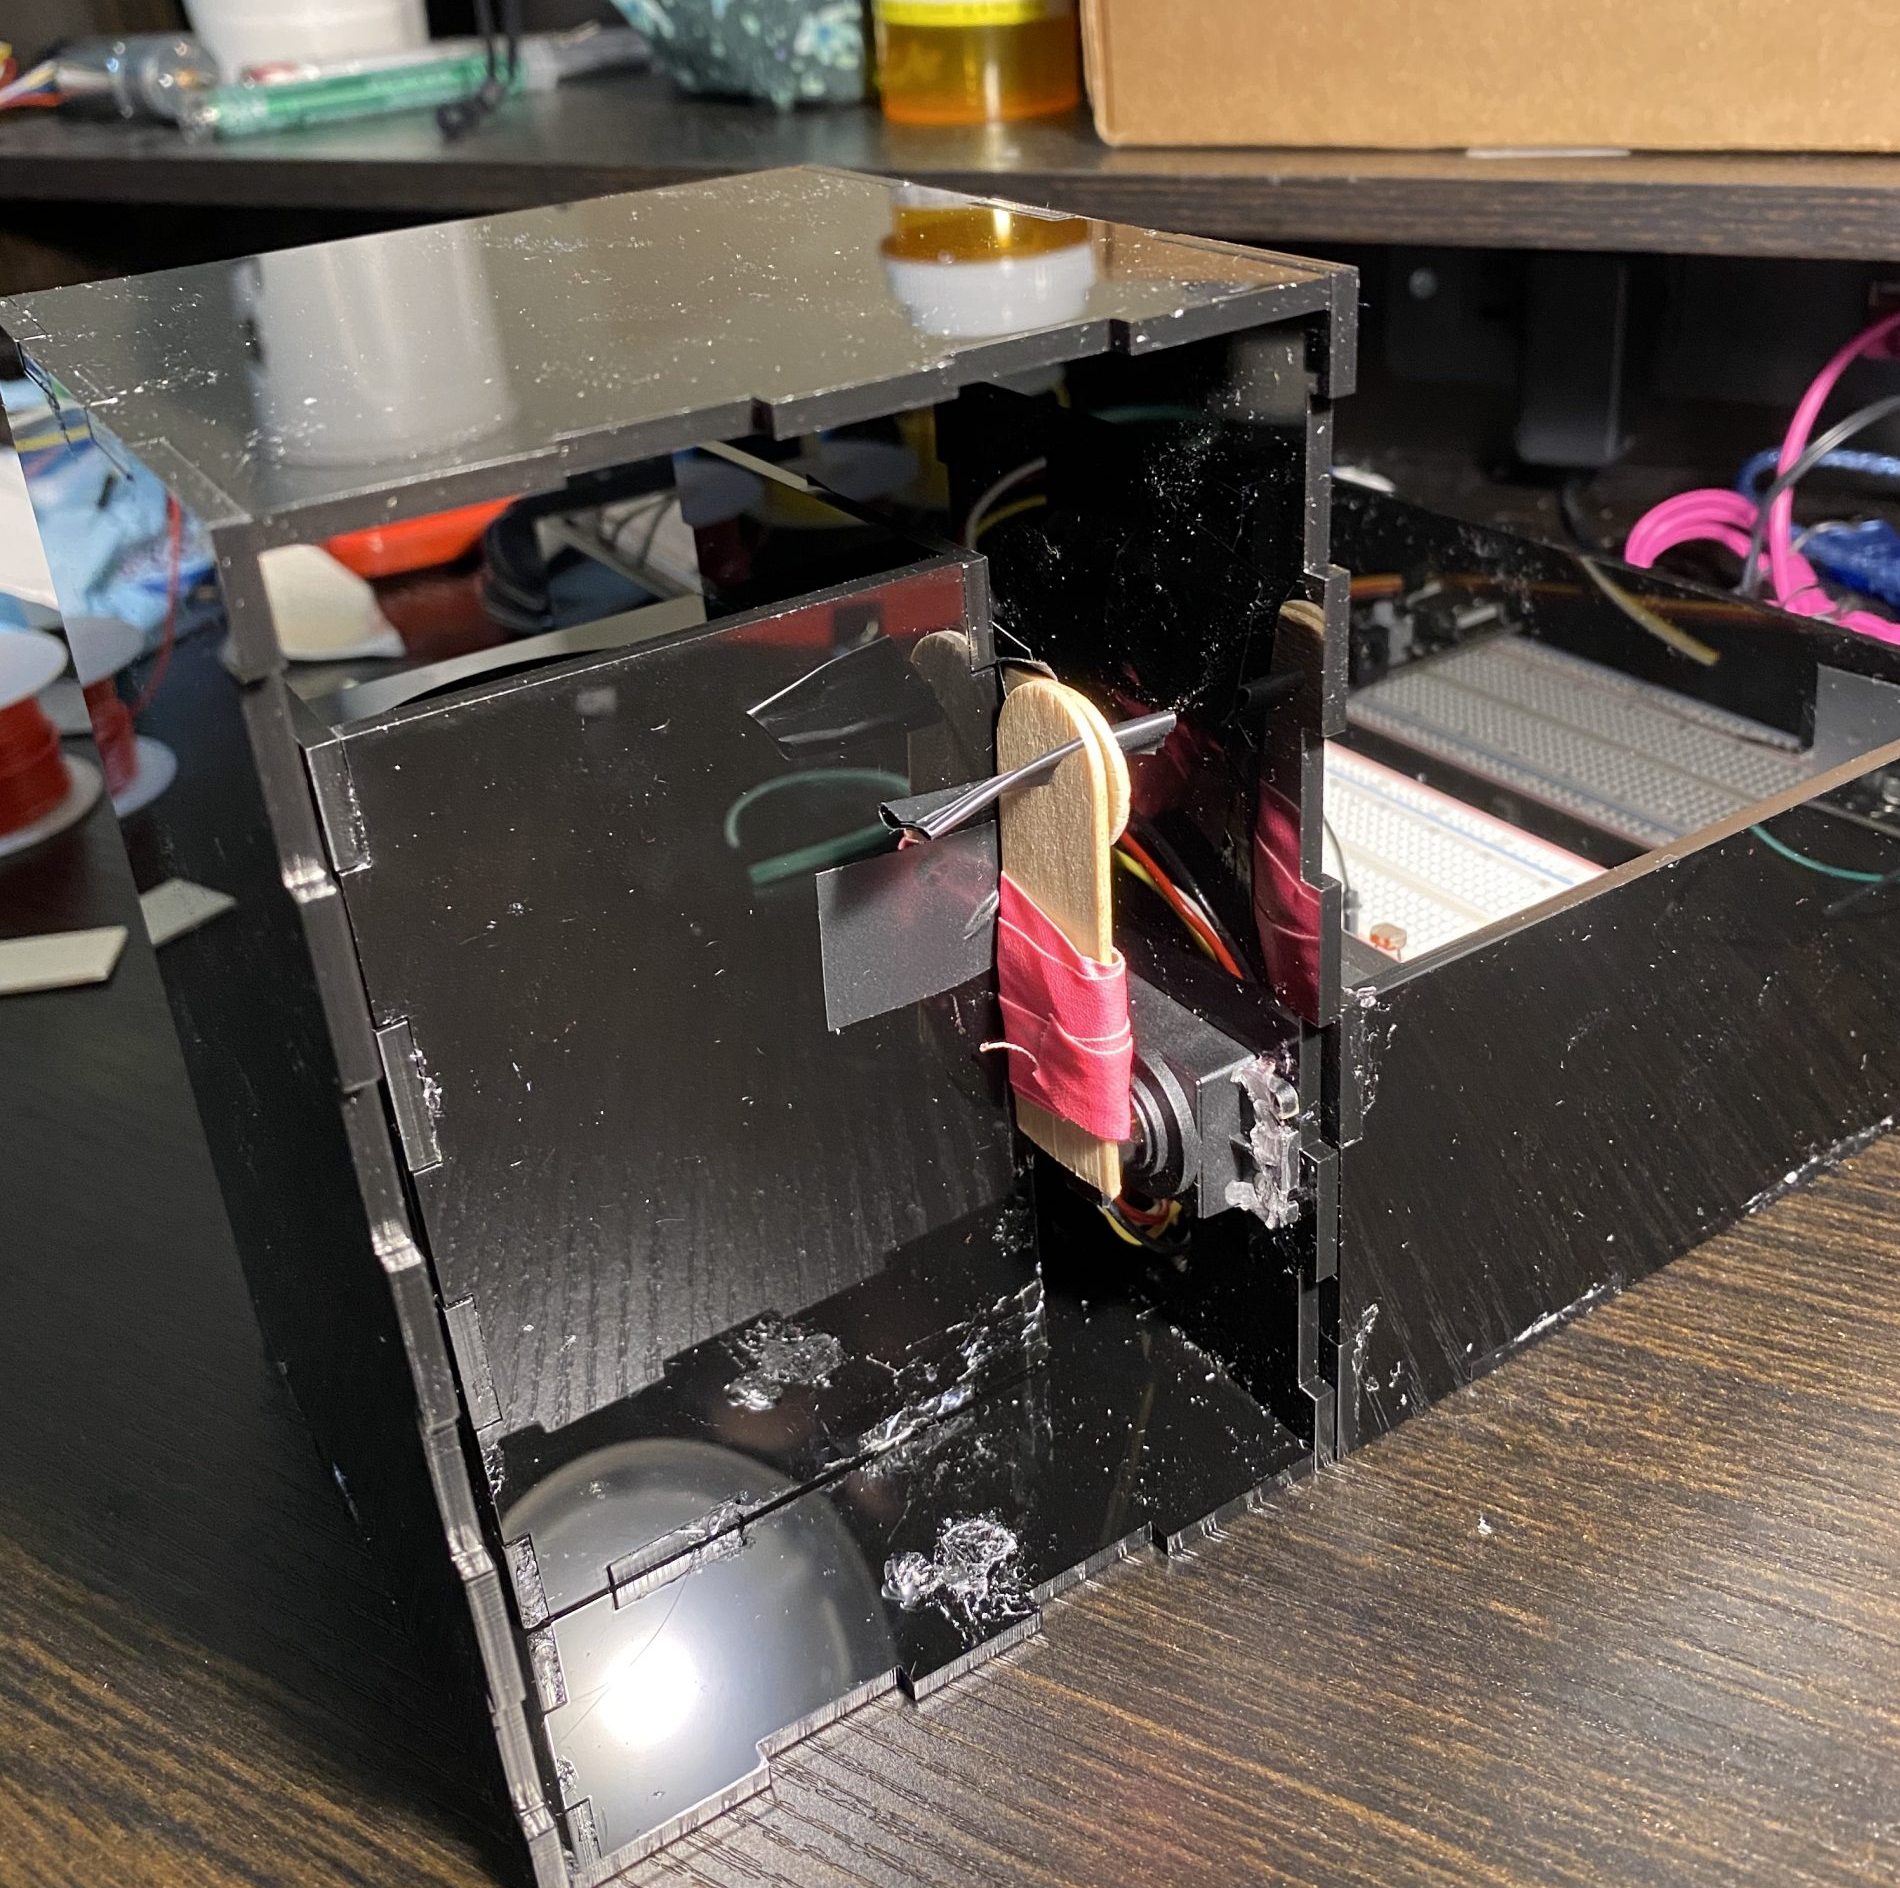
Linkage mechanism for the updated tilting mechanism.
Wireless Charger Surface Exposure
Moving on to the surface of the wireless charger, the original design intended for this part to be hidden by a flat top piece that would allow the charging signal to penetrate through and reach the phone. In addition, this cover would also allow the light from the phone flashlight to penetrate and reach the photoresistor. A version of this design is pictured below using a relatively thicker paper that still allowed light to pass through.
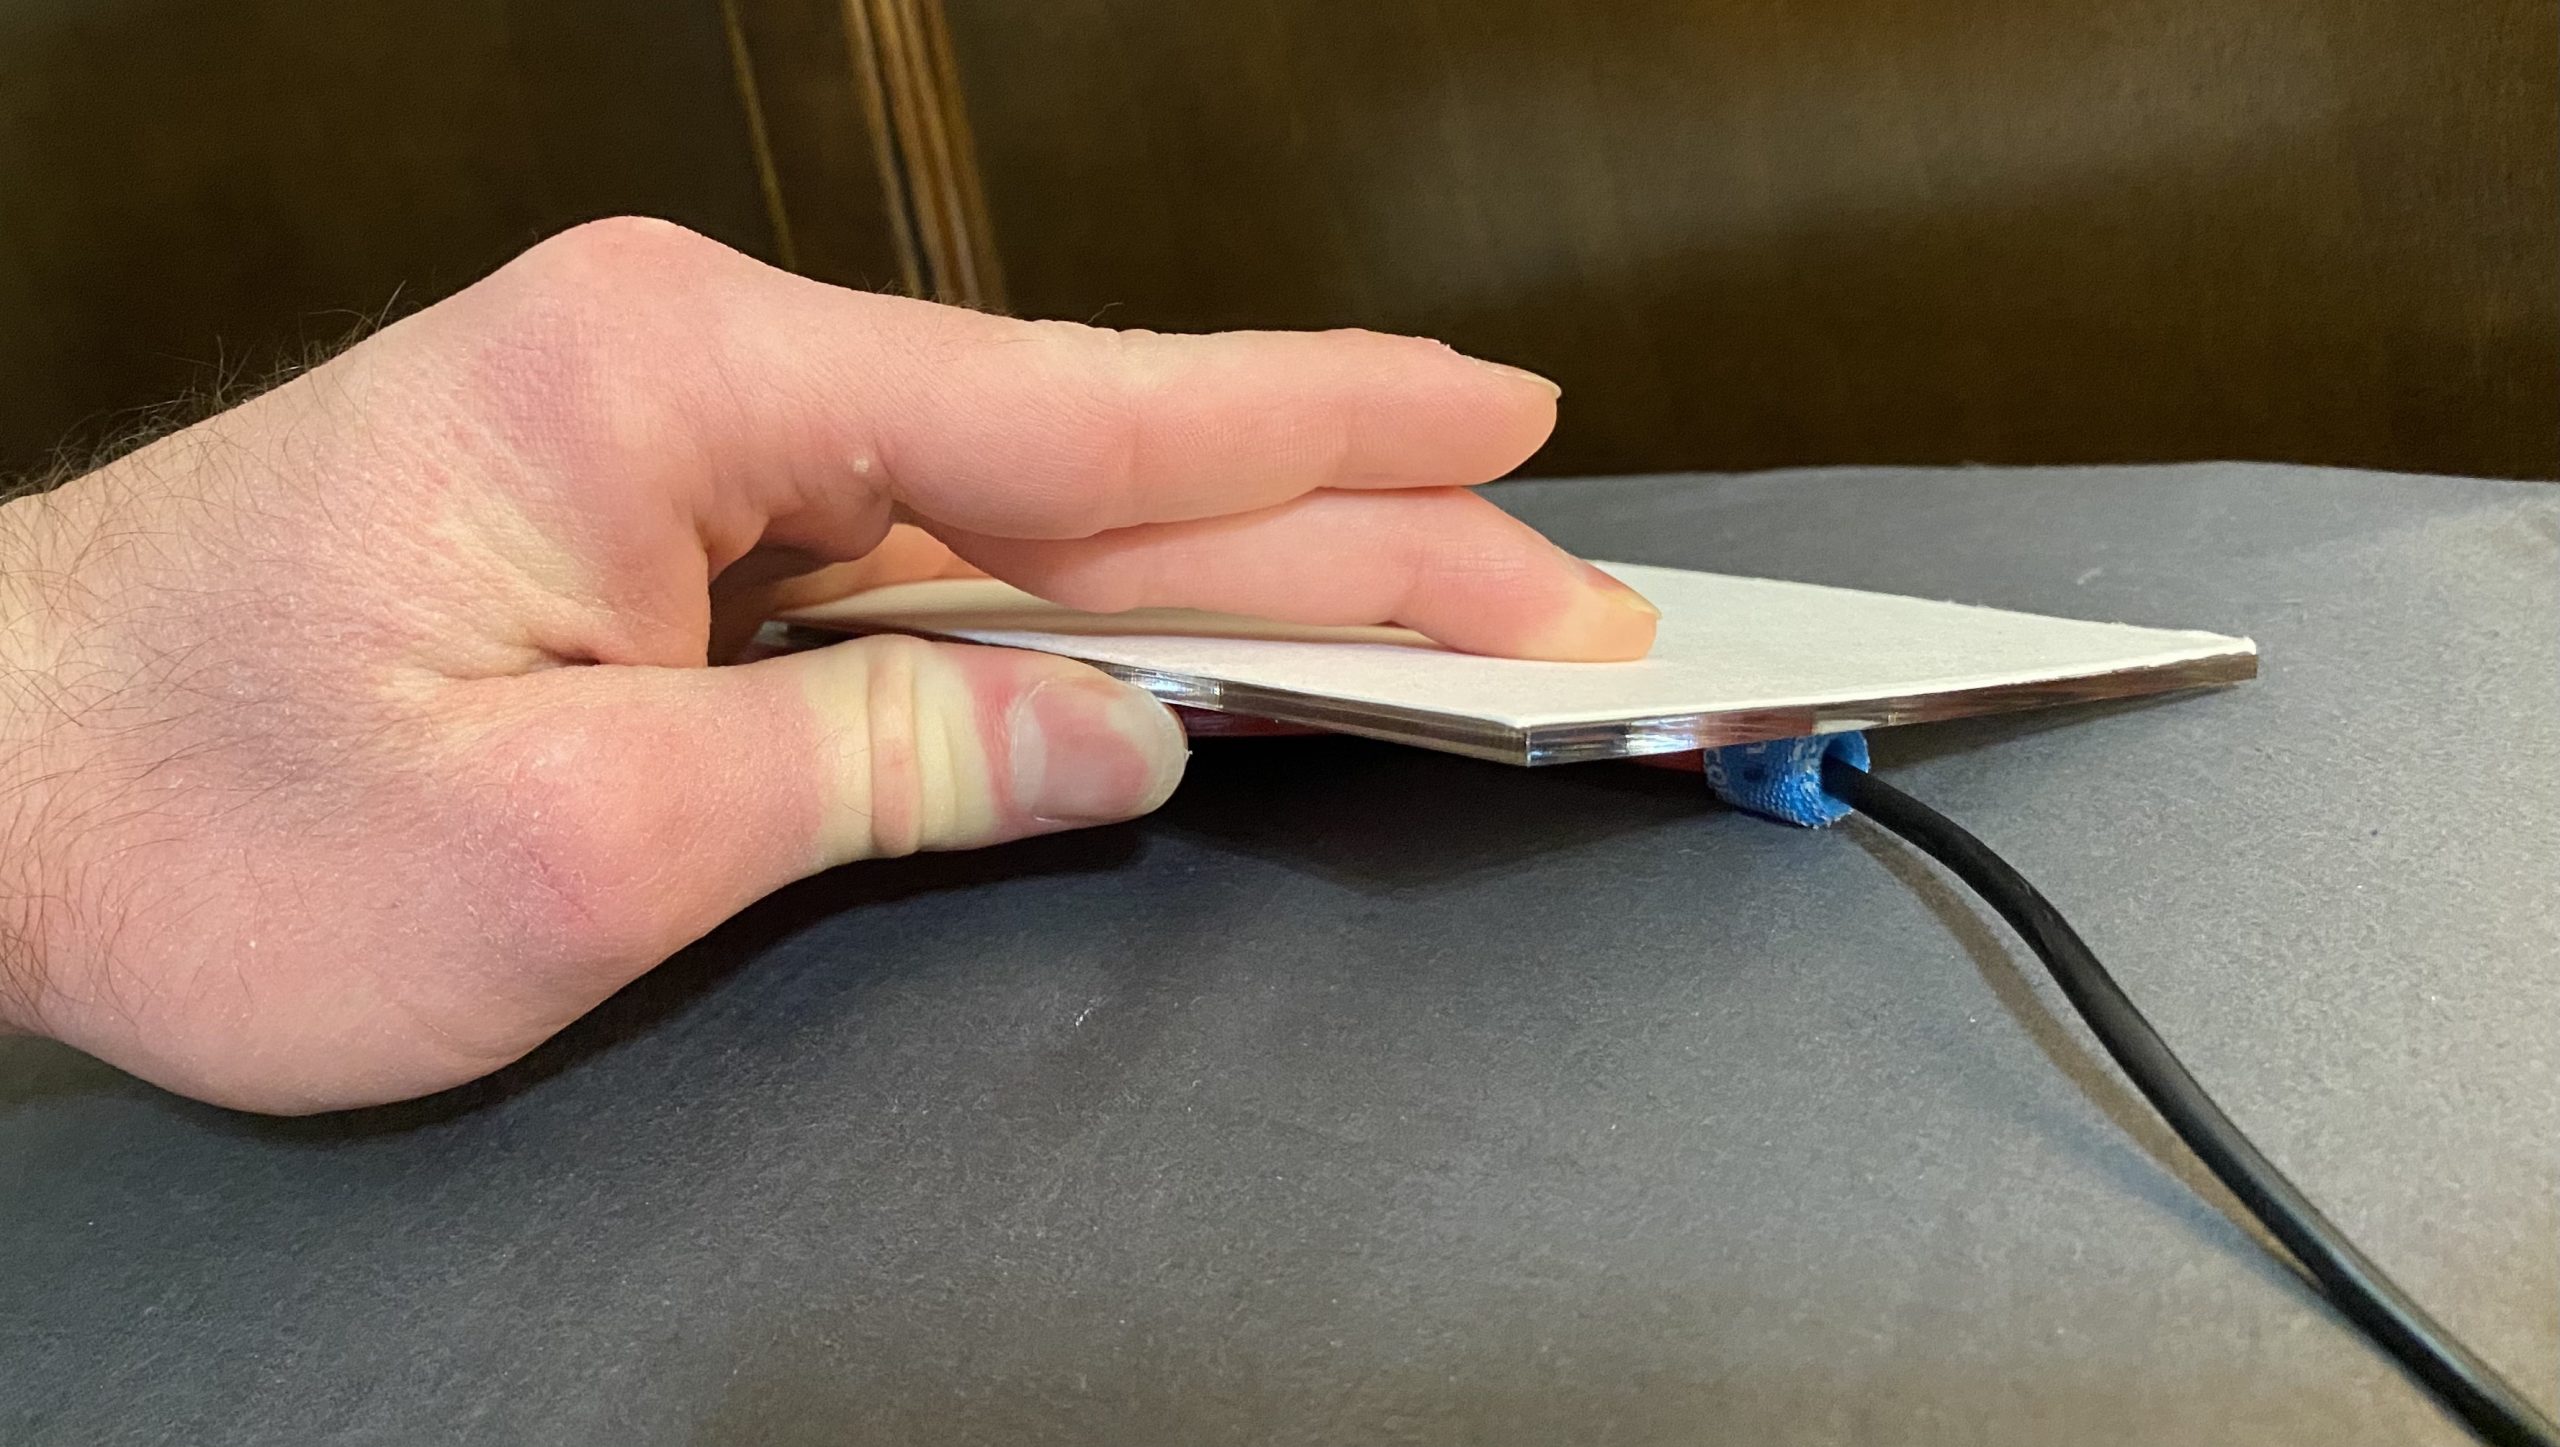
Image of the original charger covering idea that was later removed.
While this design was more aesthetically pleasing, the final version did not include this covering and instead left the wireless charger exposed. The first reason contributing to this decision was the uneven bump that resulted from too small of a cutout for the charger (Note: bump pictured below). As a result of this bump, the covering was not able to be completely flat. In addition to this unevenness, the paper also reduced the ability to see the inner workings of the device which I felt was important to this prototype. Seeing the inner workings, as was confirmed by some in the critique, allowed for a better understanding of the complexity and resulted in a more robust looking device.
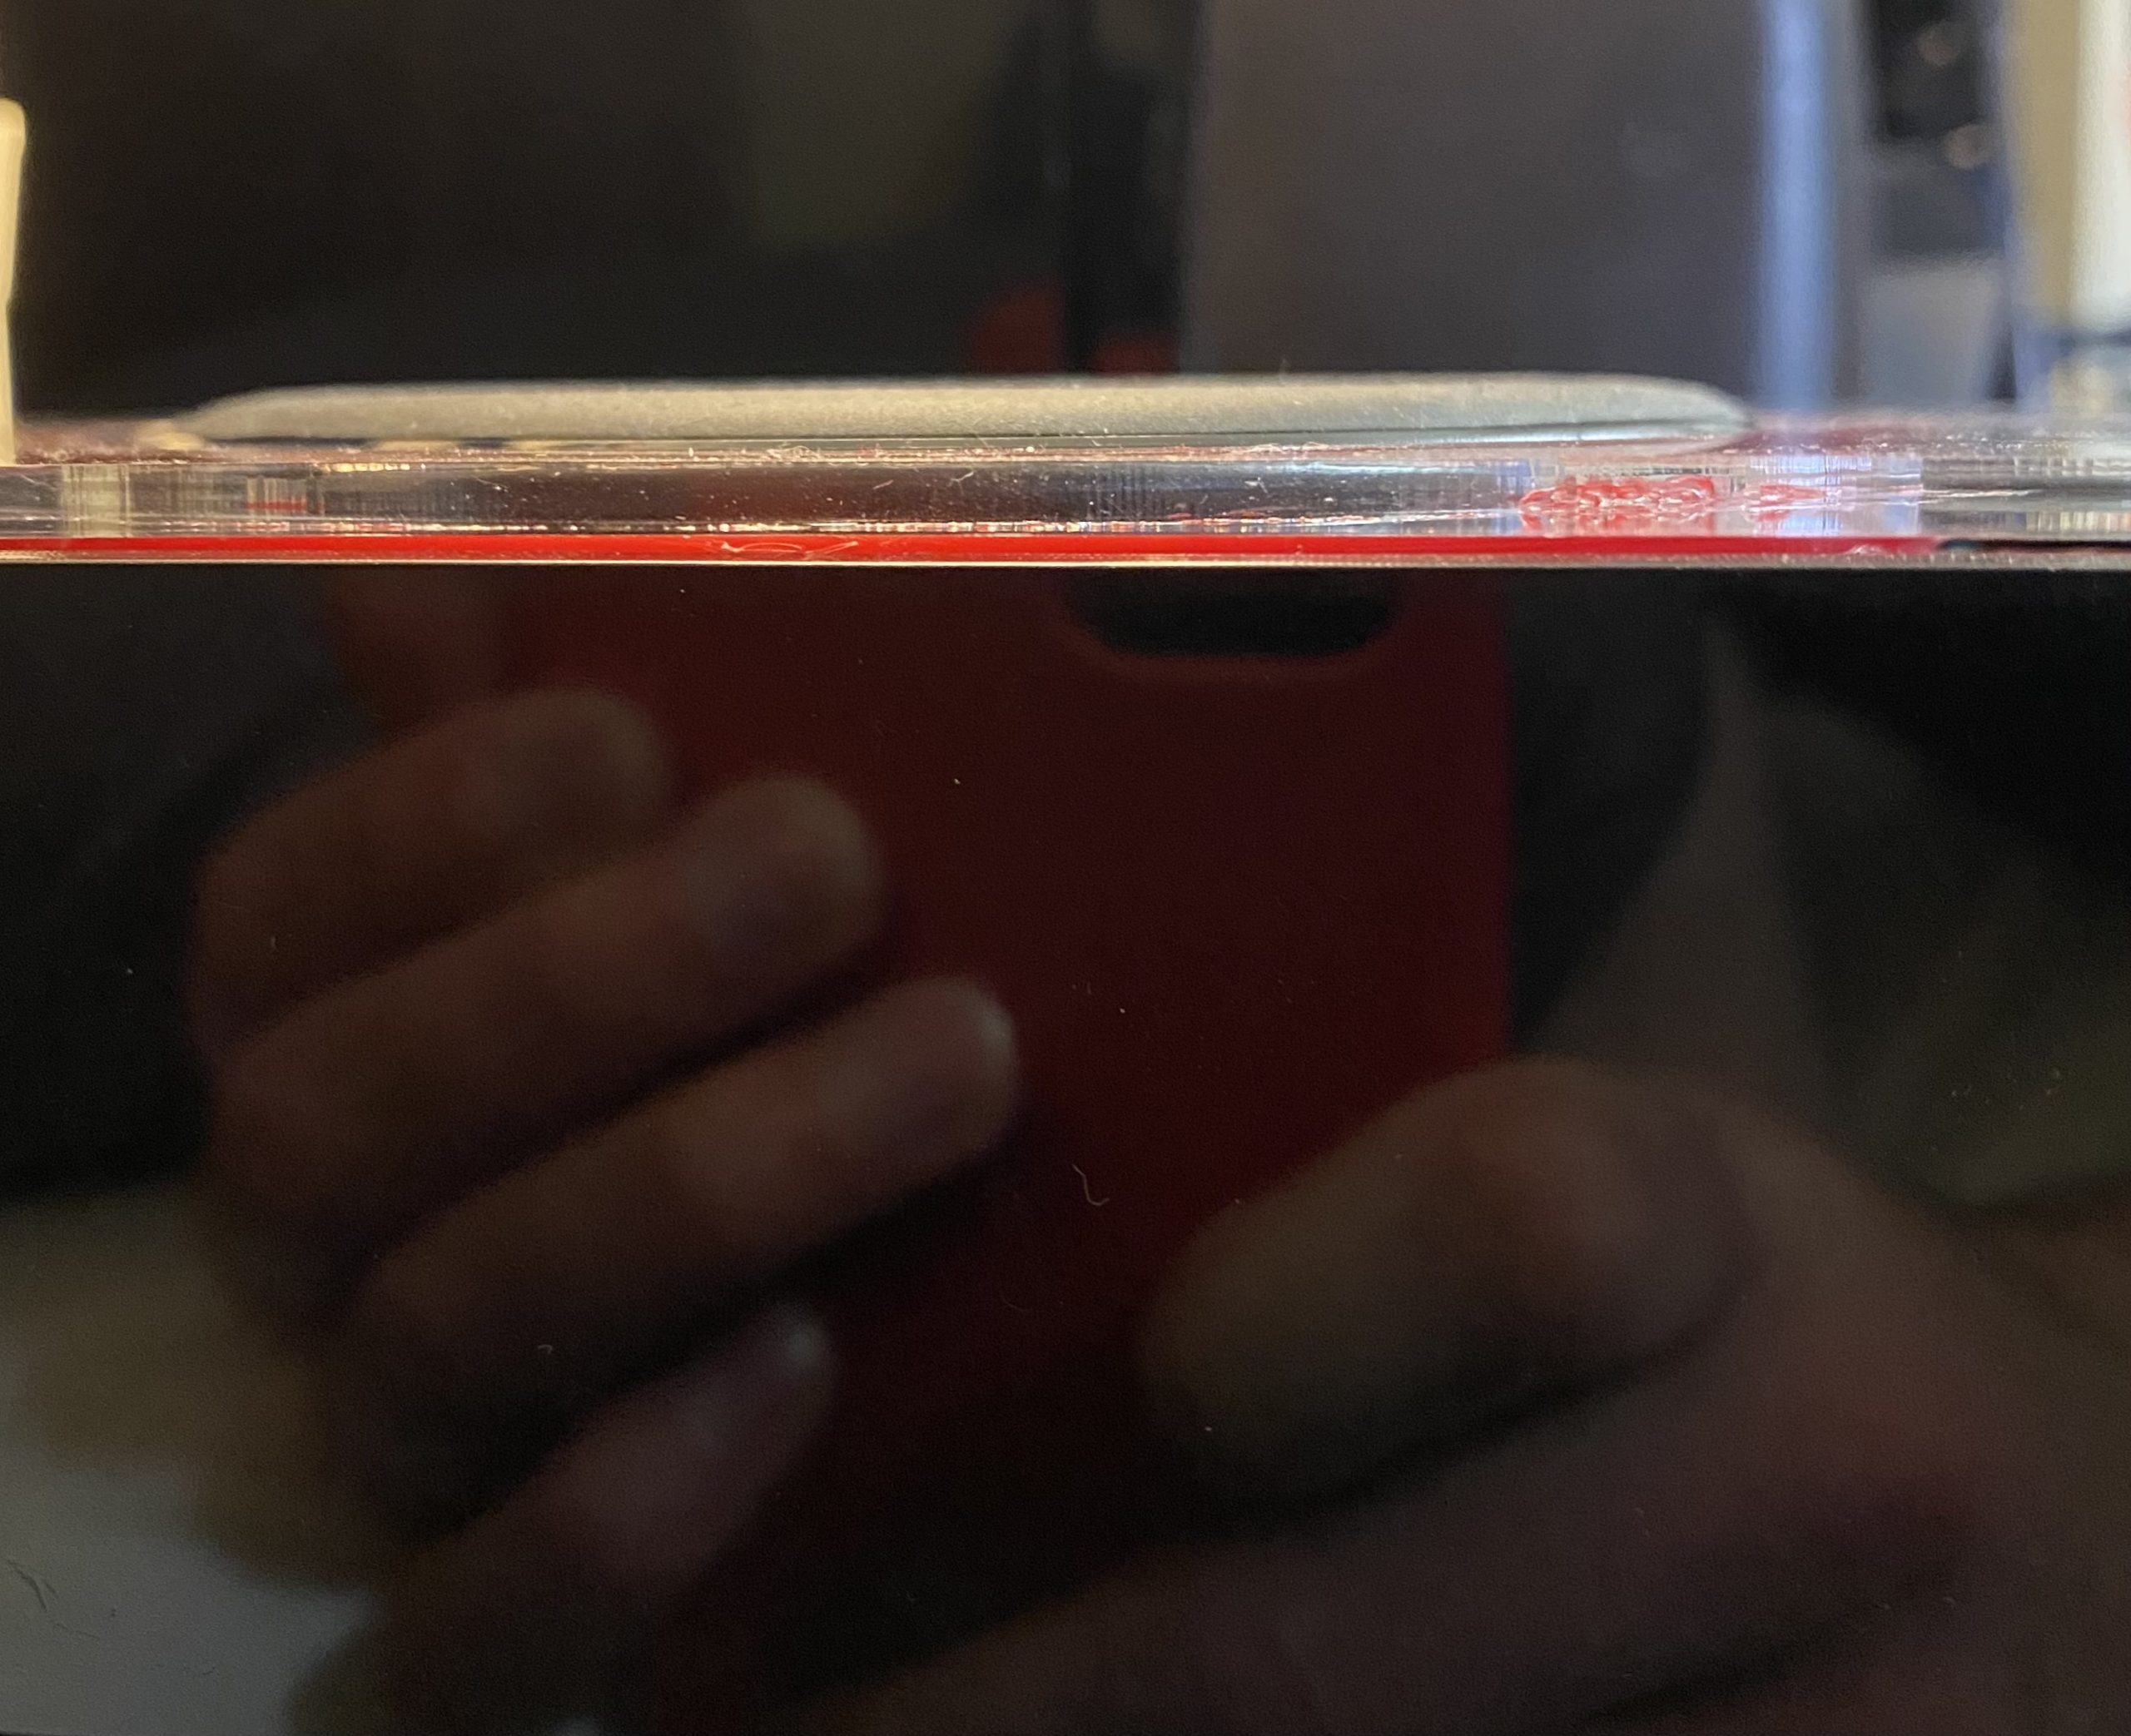
Side view of the surface bump on top of the phone stand.
Discussion
During the critique of the project, there were many amazing points brought up about the overall design and aesthetic of my prototype. One critique about the placement of the proximity sensor stood out to me as it was something that I spent a lot of time thinking about. This person critiquing wrote that I should “Put the prox[imity] sensor under the pill bottle to sense when pill bottle has been removed/replaced.” This is something that I briefly considered while designing this mechanism but never really gave much thought to because it would interfere with the tilting mechanism and how far it could retract. Looking back on this decision, however, this would’ve been a much more accurate way of detecting whether the bottle had been taken because there is more variance in the sensor reading. When initially testing the final sensing mechanism, I had trouble getting the sensor to read a consistent change in the distance when the medicine bottle was taken which could have easily been solved by this new mounting point. In addition to this critique, another person also questioned “from a form factor perspective … [how] the two separate housings could be integrated into a single form.” Again, the housing form was something that I gave a lot of thought to during the ideation phase of this project and is something that I am very satisfied with about the final result. While it would look nice to have everything in a single form factor, I like the placement of the phone slightly below the top of the medicine dispenser section because it provides for a more natural feeling phone stand aesthetic. I felt that having the phone placed too high would result in an awkward looking final product.
Looking back on the process of this project, while the end result did not work out in exactly the way I had hoped in terms of reliability and overall aesthetic appeal, I was very satisfied with the functionality and proof of concept. From a reliability standpoint, the tilting mechanism did not meet the standards I was hoping to achieve due to the last minute changes to the entire design. In addition, I encountered a lot of trouble trying to time the retraction of the bottle holder in such a manner that didn’t break the flimsy pin joint constructed from a sewing needle.
Putting this project in perspective with my technical abilities, the biggest thing I learned is that mechanical aspects of a device are much more deceiving than they might seem. In beginning this project, I had a very clear image of the final product in my mind which didn’t change much throughout the process except in regards to the mechanical components. Upon getting further into the actual assembly of the final prototype I encountered many issues with the tilting mechanism that could have been solved much earlier on with a bit more thought on their design. Paying close attention to the mechanical aspects of the project is something that I would definitely change if I were to redesign this device in a future version.
While I do not plan on building another version of this project in the near future, the first thing I would do differently if I did build this project again would be to figure out a better system for dispensing the medicine. While my tilting idea is nifty, the physical constraints of the tilting action resulted in the final product falling out of line with my original idea.
Technical Information
Block Diagram
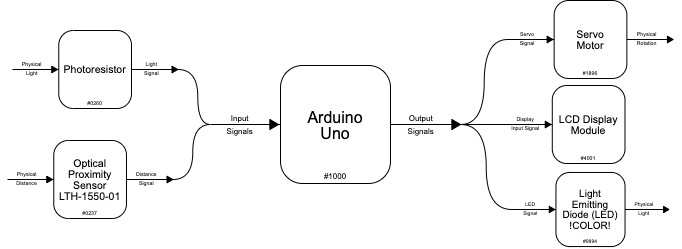
Functional block diagram of the Automated Medicine Dispenser
Schematic
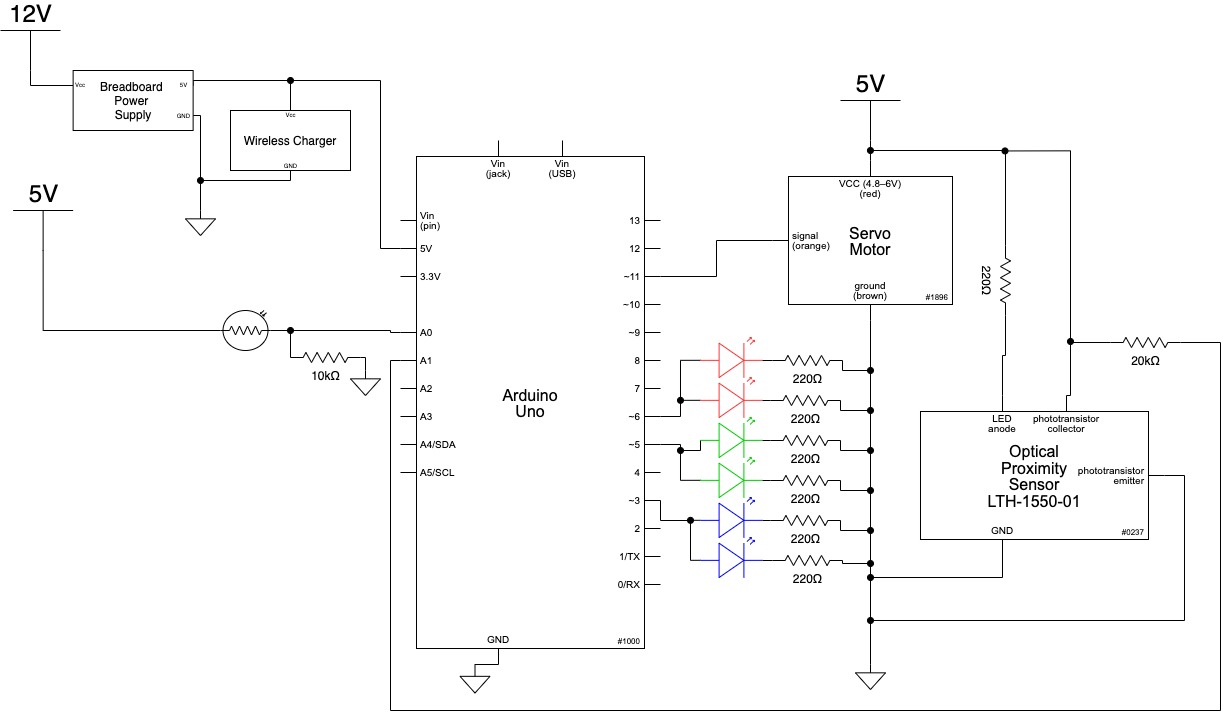
Full electrical schematic of the Automated Medicine Dispenser
Code
/*
   Medicine Dispenser
   Judson Kyle (judsonk)

   Collaboration and sources:
   1) https://forum.arduino.cc/index.php?topic=8498.0 for rainbow blinking

   2) https://courses.ideate.cmu.edu/16-223/f2020/text/exercises/electronics/photointerruptor/photointerruptor.html
      was consulted for the wiring of the proximity sensor

   Description: This device allows the user to dispense their medicine by utilizing the shortcuts on the iPhone
                to flash the flashlight for 1 second upon stopping their alarm. When the photoresistor detects
                this action, the servo pushes out the medicine holder while simultaneously flashing rainbow lights.
                The proximity snesor inside the medicine holder detects when the medicine bottle has been taken out
                and then placed back. Upon placing the medicine bottle back, the servo retracts the holder while
                simultaneously turning off the LED's. After all of this happens, the cycle is reset.

   Pin mapping:

   Arduino pin | type   | description
   ------------|--------|-------------
   3             output    Red LED
   5             output    Green LED
   6             output    Blue LED
   11            output    Servo
   A0            input     Photoresistor
   A1            input     Optical Proximity Sensor

*/
#include <Servo.h>

const int OPTPIN = A1;
const int RED = 3, GREEN = 5, BLUE = 6;
const int PHOTOPIN = A0;
const int SERVOPIN = 11;

//Thresholds
int distThresh = 800, lightThresh = 600;

int optVal = 0, photoVal = 0;
int counter = 0;
bool medicineTaken = false, bottleTaken = false;
bool alarmSnoozed = false, dispenseMedicine = false, prev_bottleTakenState = false;

//warningLights variables
int timerVal = 3000;
unsigned long waitingVal = 0;

//Servo Variables
Servo medicineTilter;
bool tiltServo = false;
int tiltAngle = 180;


// Number of colors used for animating, higher = smoother and slower animation)
int numColors = 255;

// The combination of numColors and animationDelay determines the
// animation speed, I recommend a higher number of colors if you want
// to slow down the animation. Higher number of colors = smoother color changing.
int animationDelay = 5; // number milliseconds before RGB LED changes to next color

void setup() {

  //Output pins
  pinMode(RED, OUTPUT);
  pinMode(GREEN, OUTPUT);
  pinMode(BLUE, OUTPUT);

  //Input pins
  pinMode(OPTPIN, INPUT);
  pinMode(PHOTOPIN, INPUT);

  //Servo Intialization
  medicineTilter.attach(SERVOPIN);
  medicineTilter.write(0);

  Serial.begin(9600);
}

//Code to loop through
void loop() {
  //Read sensor data
  optVal = analogRead(OPTPIN);
  photoVal = analogRead(PHOTOPIN);

  //Determine whether bottle has been taken or not
  if (optVal > distThresh) {
    bottleTaken = true;   //If taken --> bottleTaken = true
  } else if (optVal <= distThresh) {
    bottleTaken = false;  //If sensed in the holder --> bottleTaken = false
  }

  //Check for alarm snoozing action
  if (photoVal > lightThresh && alarmSnoozed == false) {

    alarmSnoozed = true;

    //Dispense medicine upon alarm snooze
    dispenseMedicine = true;//Dispense medicine upon alarm snooze
    medicineTilter.write(tiltAngle);
  }

  //Actions that follow detection of an alarm snoozed event
  if (dispenseMedicine == true) {

    // This part takes care of displaying the
    // color changing in reverse by counting backwards if counter
    // is above the number of available colors
    float colorNumber = counter > numColors ? counter - numColors : counter;

    // Play with the saturation and brightness values
    // to see what they do
    float saturation = 1; // Between 0 and 1 (0 = gray, 1 = full color)
    float brightness = 0.8; // Between 0 and 1 (0 = dark, 1 is full brightness)
    float hue = (colorNumber / float(numColors)) * 360; // Number between 0 and 360
    long color = HSBtoRGB(hue, saturation, brightness);

    // Get the red, blue and green parts from generated color
    int red = color >> 16 & 255;
    int green = color >> 8 & 255;
    int blue = color & 255;

    setColor(red, green, blue);

    // Counter can never be greater then 2 times the number of available colors
    // the colorNumber = line above takes care of counting backwards (nicely looping animation)
    // when counter is larger then the number of available colors
    counter = (counter + 1) % (numColors * 2);

    // If you uncomment this line the color changing starts from the
    // beginning when it reaches the end (animation only plays forward)
    // counter = (counter + 1) % (numColors);

    delay(animationDelay);

    //Track when the bottle has been put back after taking the medicine
    if (prev_bottleTakenState == true && bottleTaken == false) {
      medicineTaken = true;
      waitingVal = millis();
    }

    if (medicineTaken == true) {

      //Delay the reset to allow for safe return of medicine bottle without breaking linkage
      if (millis() - waitingVal > timerVal) {
        resetSystem(); //reset for next cycle
      }
    }
  }

  prev_bottleTakenState = bottleTaken; //Update previous bottleTaken state boolean

}

//---------Helper Functions-----------------------

//Turn all LED's off
void clearLEDs() {
  //Turn all LED's off
  digitalWrite(RED, LOW);
  digitalWrite(GREEN, LOW);
  digitalWrite(BLUE, LOW);

}

//Reset the system
void resetSystem() {

  medicineTilter.write(0);  //Return bottle holder to rest position
  clearLEDs();              //Turn LED's off

  //Reset state variables
  alarmSnoozed = false;
  dispenseMedicine = false;
  medicineTaken = false;

}

//Rainbow color changing helper functions copied from source 1
void setColor (unsigned char red, unsigned char green, unsigned char blue)
{
  analogWrite(RED, red);
  analogWrite(GREEN, green);
  analogWrite(BLUE, blue);
}

long HSBtoRGB(float _hue, float _sat, float _brightness) {
  float red = 0.0;
  float green = 0.0;
  float blue = 0.0;

  if (_sat == 0.0) {
    red = _brightness;
    green = _brightness;
    blue = _brightness;
  } else {
    if (_hue == 360.0) {
      _hue = 0;
    }

    int slice = _hue / 60.0;
    float hue_frac = (_hue / 60.0) - slice;

    float aa = _brightness * (1.0 - _sat);
    float bb = _brightness * (1.0 - _sat * hue_frac);
    float cc = _brightness * (1.0 - _sat * (1.0 - hue_frac));

    switch (slice) {
      case 0:
        red = _brightness;
        green = cc;
        blue = aa;
        break;
      case 1:
        red = bb;
        green = _brightness;
        blue = aa;
        break;
      case 2:
        red = aa;
        green = _brightness;
        blue = cc;
        break;
      case 3:
        red = aa;
        green = bb;
        blue = _brightness;
        break;
      case 4:
        red = cc;
        green = aa;
        blue = _brightness;
        break;
      case 5:
        red = _brightness;
        green = aa;
        blue = bb;
        break;
      default:
        red = 0.0;
        green = 0.0;
        blue = 0.0;
        break;
    }
  }

  long ired = red * 255.0;
  long igreen = green * 255.0;
  long iblue = blue * 255.0;

  return long((ired << 16) | (igreen << 8) | (iblue));
}