Overview

This clock-adjacent object visualizes my current energy level estimated by the ultradian rhythm.
Process
Rotating Cam Visualization of Sine Wave
Linear Visualization of Sine Wave
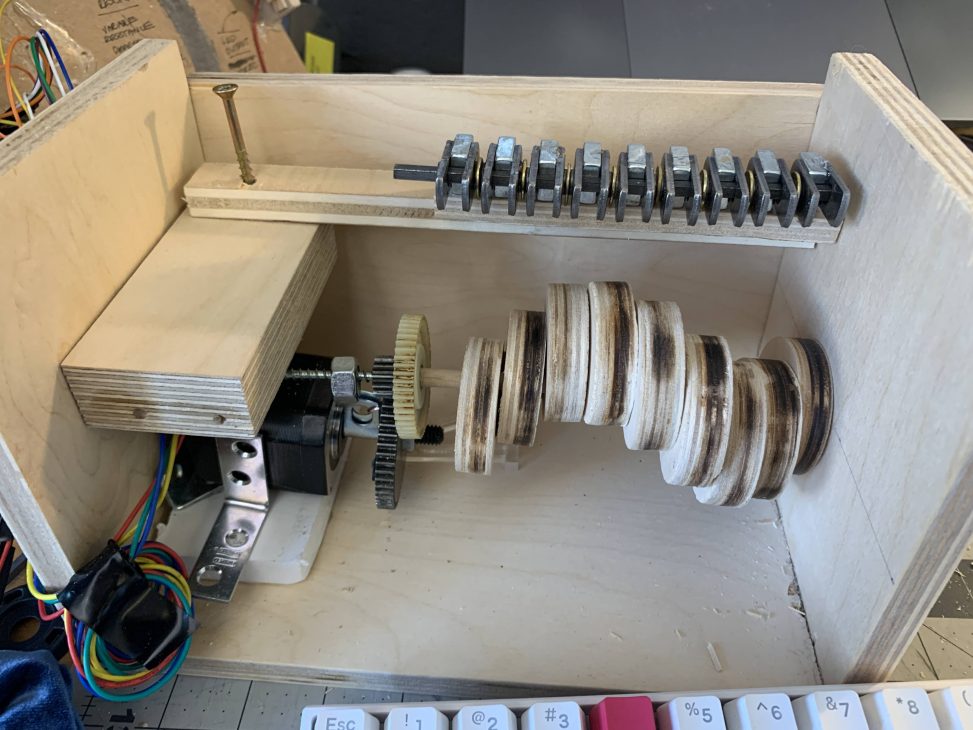
There are a few main components to my assembly – the shaft with offset cams, the dowels that sit on top of the cams, the stepper motor mount, and the housing for the entire assembly. Below I will show my process for working on each one.
The Cam Shaft
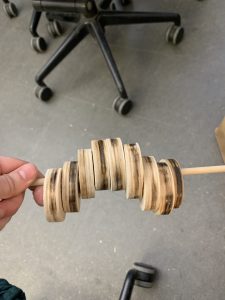
I used a drill press to cut out 9 circles from a piece of plywood. I used a hand drill to drill a hole in each one so I could align them on the wooden dowel. Using glue, I arranged each circle to be offset from the one previous by about 1cm.
I tried making a smaller one, but found the distance between each cam was not enough to show the sine wave clearly.
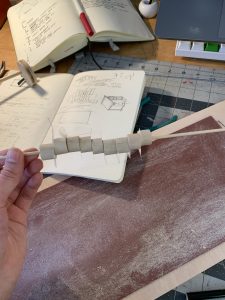
The Rods and Rod Holders
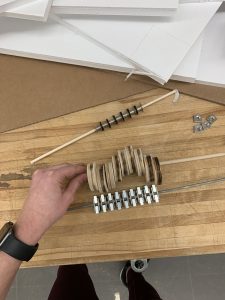
Next, I had to figure out how to align the plastic rods above the circles. I rummaged around in the parts drawers at Products Studio and tried out many different arrangements of small metal pieces until I found something that I could space the dowels apart with. I considered using sewing bobbins (pictured left) but eventually settle on using a combination of square nuts and screw plates that I carefully arranged side by side to create the correct spacing for the plastic rods.
The Stepper Motor Mount and Gear Connection
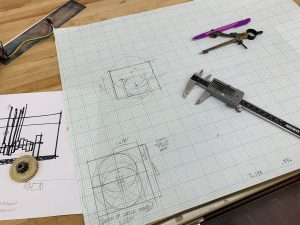
Using Calipers and Bisecting Curves, I figured out the dimensions of the box and screw plate.
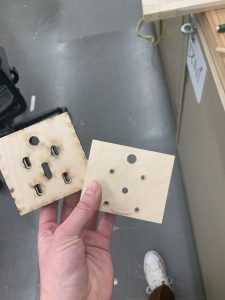
This part was very difficult, since if the gear is slightly off, the whole mechanism does not work. I tried many different to hold the stepper motor in place. First, I tried a simple angle bracket, but this was not secure enough. Next, I tried using the drill press to create a face plate but the measurements were just ever so slightly off. Finally, I created two laser-cut pieces of 1/8″ plywood stacked on top of eachother to allow for a counter-bore so the screw can sit flush. Instead of holes, I used ovals with a 1/4″ of wiggle room to allow for precision alignment and adjustment to ensure the gear sits perfectly in place.
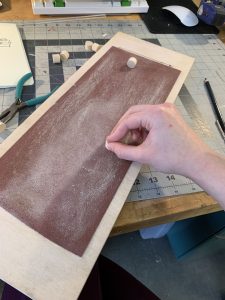
The Housing
The housing was the least complicated and simply consisted of a 5 board box made of plywood. I used the tablesaw and a nail gun to assemble this.
Discussion
Response to In-Class Critique
Response to comments gathered during the in-class crit. Quote (verbatim) from at least two written critiques that you received (positive, negative, or otherwise) from the in-class crit, and respond to them. (You may agree or disagree—in either case, explain your position.)
“It’s soooo hard to build complex mechanical devices like this—congrats on even attempting it, but in a two-week project, I’m not surprised that you faced some real challenges completing this to your satisfaction.”
To this point, I would like to say that this was probably the biggest challenge I faced during this project. I think that this project taught me a lot about the role of mechanisms in ideation development. It is really difficult to bring a complex mechanical concept into reality since mechanisms require every aspect of an idea to be thought out, yet iteration is essential to the design process. It was really difficult for me to know what I should focus on next since everything seemed dependent on another part or piece of code. If I were to approach this project again, I would make sure that I had a functional mechanical prototype with all of the pieces that I wanted to have before moving forward. Since I continued to develop the mechanism while trying to tackle the code and the aesthetics, this project became very unwieldy. I am glad to have a better sense now of the significance of isolating mechanisms from the computation and design.
“I really like the idea of functional poetry; to make this poetic and functional at the same time. It brings art into practicality, which as an artist myself, I really appreciate. Now that you just now mention it, the fiber optic lighting would have been dope. Also, this inspired me to write a program to trace my own energy level.”
This comment felt really great to hear since I was really trying to negotiate between poetry and function with my object and I am glad that someone else resonated with that. Additionally, I am so happy to think I inspired someone else! It is a great reminder to me that a project does not need to be perfect to communicate with or even inspire another person. This is hard to remember in the face of many mechanical failures, so I really appreciate this comment.
“Maybe you could try out a simpler mechanical output that doesn’t require so many components. It will still be very beautiful just to simply have something moving linearly or something”
I think that this person definitely has a point, if I were to go back I think I would try to omit the pegs. That being said, my main mechanical output is really just the stepper motor. I think it was important for me that my visualization of this concept had some volume to it and I was not satisfied with simply linear depictions of these values. I would certainly revisit this idea and work to consider alternate representations of energy levels.
Self-Critique
Are you happy with how the project came out? Did it satisfy your own goals? This should not simply be a recital of your process, but rather a meaningful reflection.**
While I am happy with my explorations during the process of this project, I am not satisfied with where the final project stands. Despite warnings about pursuing physical mechanisms, I had no idea how ambitious my undertaking was actually going to be. I spent so much of the project time trying to simply give my idea a physical form, let alone develop the technology to where it needed to be. A huge hurdle was simply getting the components I needed in a timely manner since I didn’t even know what parts I needed until I played around with the mechanisms for a few hours, googled issues I came into, and learned about new parts. I learned so much from this tinkering though – for example, I now know what a coupler does, the affordances of a D-shaft, and that there are different standards of screw sizes!
I plan to continue developing this project further since I have learned so much and feel that with more time, I will be able to create something I feel more satisfied with.
What you learned about your own abilities and/or limitations through the process of working on this project.
I confirmed some more things I already knew about my process – I tend to embrace a non-linear process, which is very difficult to make significant progress forward with. As I was warned about, I struggled with the mechanical aspect of this project. I have put significant time towards this project, both independently and in working one-on-one with not just Zach, but many hours with my studio shop advisor as well. Despite this, my project remains incomplete. I cannot help but feel a little disappointed that I did not get further with this project, but there were simply so many unfamiliar variables present.
In the last project, I took time to intentionally segment off short lo-fi prototyped versions of my idea (i.e. I made a simple version of my graphite resistor before trying to make it more complex). This helped significantly in reducing the number of variables I was working with. I think with this project, I didn’t quite know how to do a similar segmenting of the work which had a significant impact on my ability to complete the project.
Moving forward, I will make an even greater effort to segment the parts of my project and consult with knowledgeable advisors early on in the process, especially when involving mechanisms. After trying to jimmy-rig so many aspects of the project and then finally finding the right parts, I feel I have a better appreciation of precision tools. I will make greater efforts to attain these tools early on too.
Next-Steps
Next steps. Do you expect to build another iteration of this project?
I am currently working on another iteration of this project. I have already made a lot of progress with refining the mechanism by taking the time to carefully measure all of the interlocking parts. This is in an attempt to get some closure on this rendition of my idea. I would certainly consider other visualizations of energy tracking and time. I also learned that I am fascinated by cam mechanisms and I would love to explore those further.
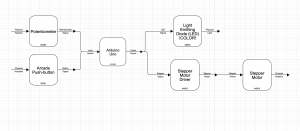
Technical Information