
HeliTop!
Benton Shortridge, Chay Gruber, and Matthew Swain
What is a HeliTop?
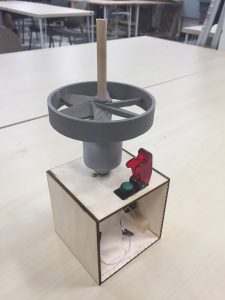
Well I’ll tell you! The HeliTop is a spinning top with attached fan blades. The blades are attached so that when the top reaches a certain velocity, the blades will provide enough lift so that the top will lift off into the air! To aid in the speeding up of the top, it is launched from a box that spins the top at the push of a button!The target audience for the HeliTop is 7-12 year olds that have an interest in flying objects and general fun.The HeliTop flies into the air right in front of your eyes!
Video Below!
What are the learning goals?
Through using the HeliTop children will learn the basic components of lift and why it works, including blade angle (angle of attack), surface area, and the importance of radial velocity in lift. The children will learn this by observing the Helitop fly up into the air if it reaches the essential angular velocity needed to produce enough lift to create a net, upward force. After the Helitop begins to slow down due to air resistance, it will lose lift and begin to drop down toward the ground before potentially continuing to spin.
Operation Information
The HeliTop works by using the current from a wall outlet to run a basic motor that is inside of a box. This motor is attached to a 3D printed piece that the HeliTop sits in. At the push of the button, the motor will start to spin the top until it reaches a velocity at which the force of lift from the blades is larger than the weight of the top.
To play with the toy, a child simply picks up the top, loads it into the launcher (by lining up the indented notches with the protruded notches of the launcher) and presses the button. At that point, the motor is powered from a wall socket and the 3D printed housing starts spinning until the top reaches a velocity at which it lifts off of the launcher, spins in the air, and lands somewhere while continuing to spin.
Process of Manufacturing
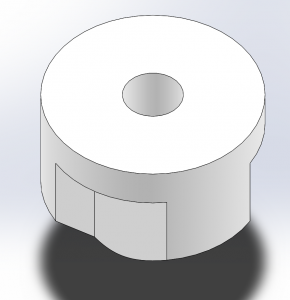
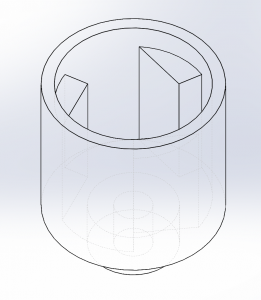
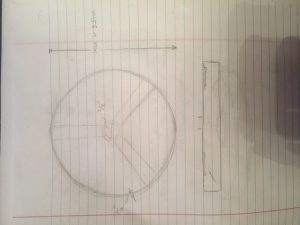
- Draw the top pieces and the motor housing piece in CAD ( pictures attached)
- Print the pieces using an NV Bot 3D Printer
- Put the pieces together using a ⅜ in. dowel.
- Take plywood and use a laser cutter to cut it into 4 3 in. x 3in. Sheets
- Cut a 1 in diameter hole in one of the sheets
- Use a 5 minute epoxy to bond the four pieces together to make a box.
- Screw a motor that you randomly found in Phys. Comp. to the box so that the spinning part sticks out of the hole.
- Attach the motor to the motor housing using the 5 minute epoxy
- Solder some wires to the motor and connect them to a switch that you also found in phys. Comp. In addition attach these wires to a power inlet from which you can plug the motor into a wall.
- When the epoxy is dry, place the top in the housing and press the button!
The approximate cost of the project was about 2.50 for the wood, 3 for the PLA, 2 for the epoxy and 3 for the motor and wires so the overall cost was around 11 dollars.
What if we had more time?
If our team had more time, we would have perfected that ratio of the weight of the top to the amount of lift produced by our helicopter blades. Our ultimate goal of the Helitop was to make a top that would lift up into the air and maintain enough momentum to continue spinning on the ground, as a conventional spinning top would, for an ample amount of time. Our top was capable of spinning at a high angular velocity after being accelerated up to max speed by our motorized Helitop launcher. Our launcher worked well, but the top was too heavy to lift out of the launcher and off of the top of the box. In order to fix this, we would have made the helicopter ring, which guarded the blades, thinner. We also would have shaped new helicopter blades out of balsa wood and glued them to the helicopter ring as well at the center where the axle of the top is. With these fixes the Helitop would then function as it was originally designed to do.
We could adapt our activity to older children by making a part of the activity to actually put the structure together using the basic techniques of soldering and wiring. This activity would be much more involved and would teach the children a higher level of application and project making. We could adapt it to younger children by making a version of the top that does not involve electricity or the motor and just flies very easy from being spun. This way the children would be able to have more of a hands-on experience.
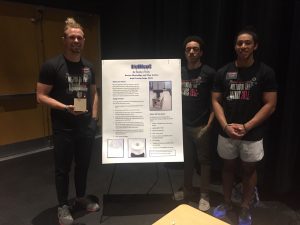
HANDOUTS
Below are the handouts that we incorporated into the display of our project and accompanying activity during Moving Fourth( Without the pictures)
Paper Planes and Lift!
Lift: An upward force that keeps an airplane in the air by opposing the downward force of the
Weight.
Design #1: Most basic airplane, flies far
- Fold the paper in half.
- Unfold and then fold the top two corners into the center line.
- Again, fold the paper in half.
- Finally, fold the edges down to meet the bottom of the body.
A basic design with decent distance and speed.
Design #2: Aerodynamic and Flies very far
- Fold the paper in half.
- Unfold and then fold the corners into the center line.
- Fold the top edges to the center.
- Fold the plane in half.
- Fold the wings down to meet the bottom edge of the plane’s body.
Design #3
This plane has a lot of stability and can fly very far.
- Fold the paper in half.
- Unfold and then fold the top two corners to the center line.
- Fold the top peak down to create a square.
- Fold the top two corners to the center about an inch above the downward facing point, to form a triangle shape on top and a diamond shape on bottom.
- Fold the downward facing point up to secure the flaps.
- Fold the plane in half away from you and flatten it out.
- Fold the edges down to create the wide wings. The body, or part you hold, should be about half an inch tall.