Tap Happy

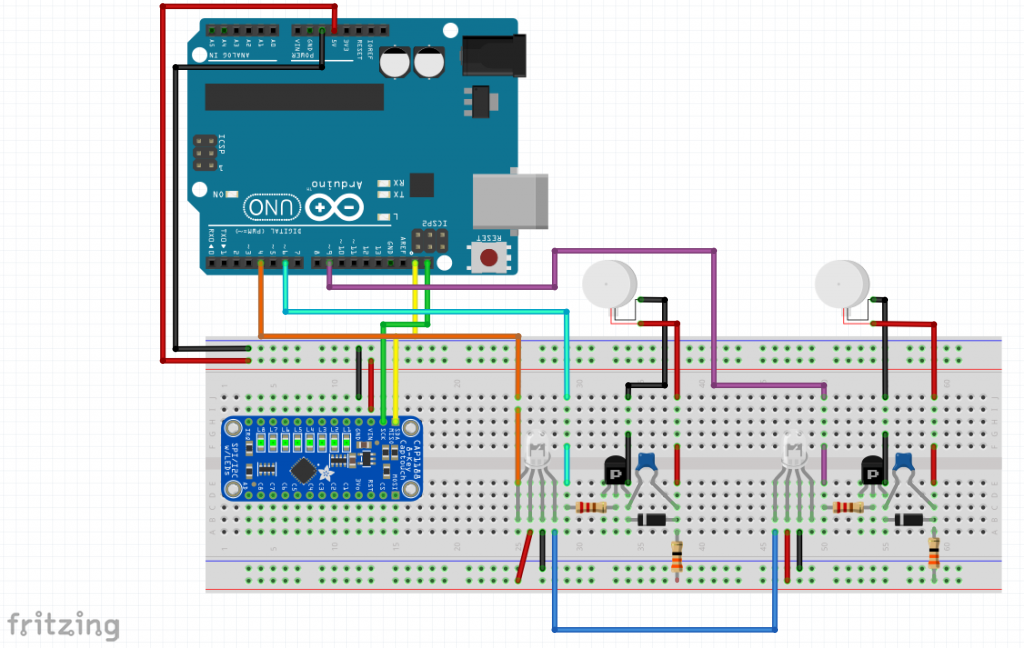
Final Presentation Setup:
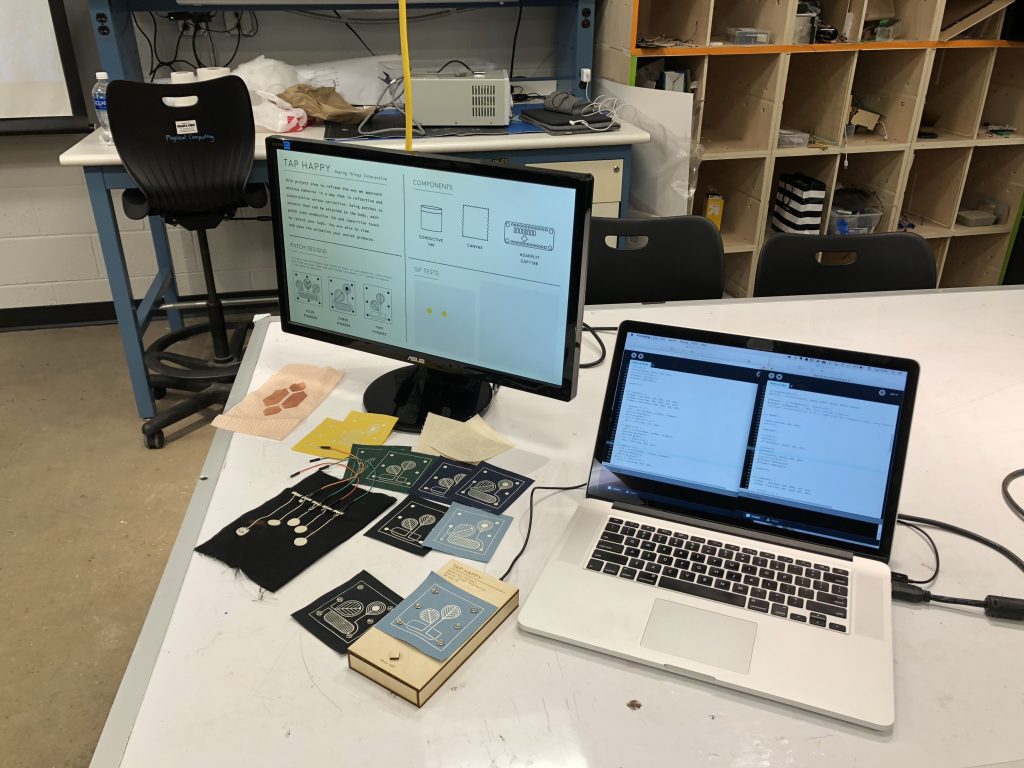
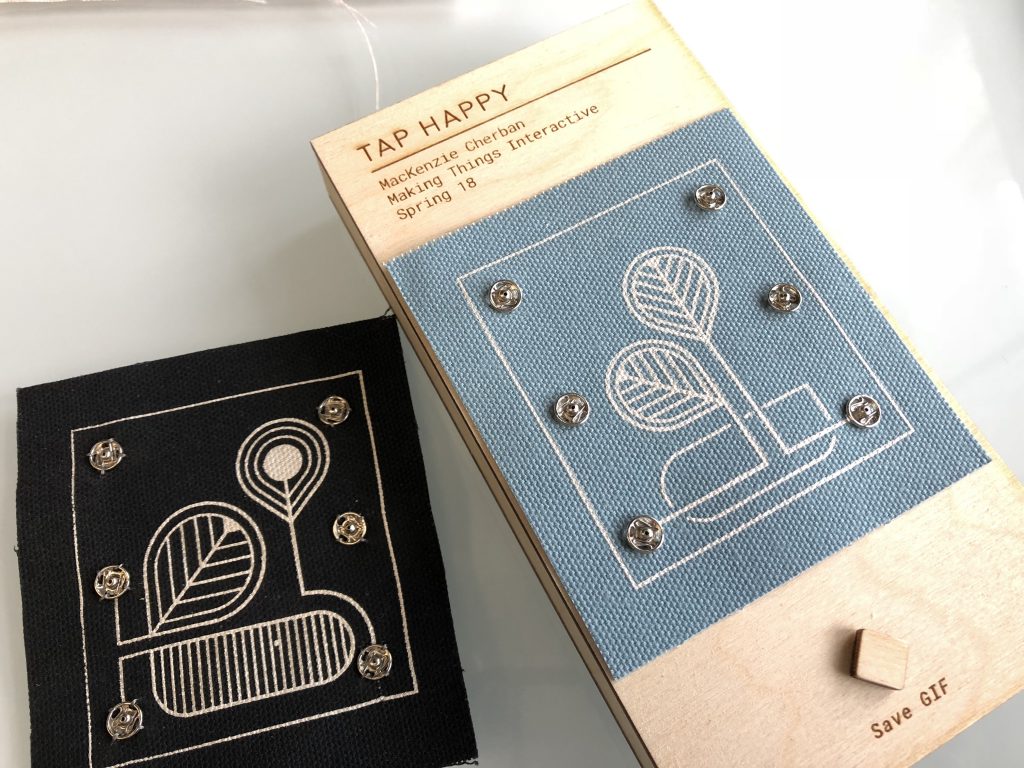
 

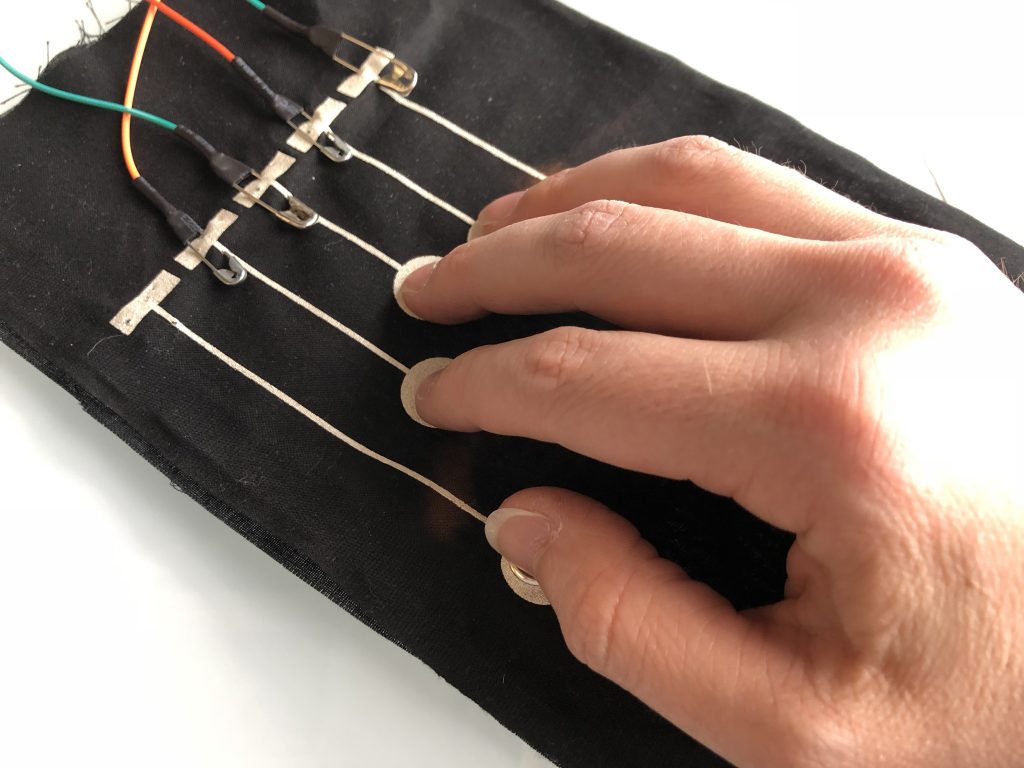
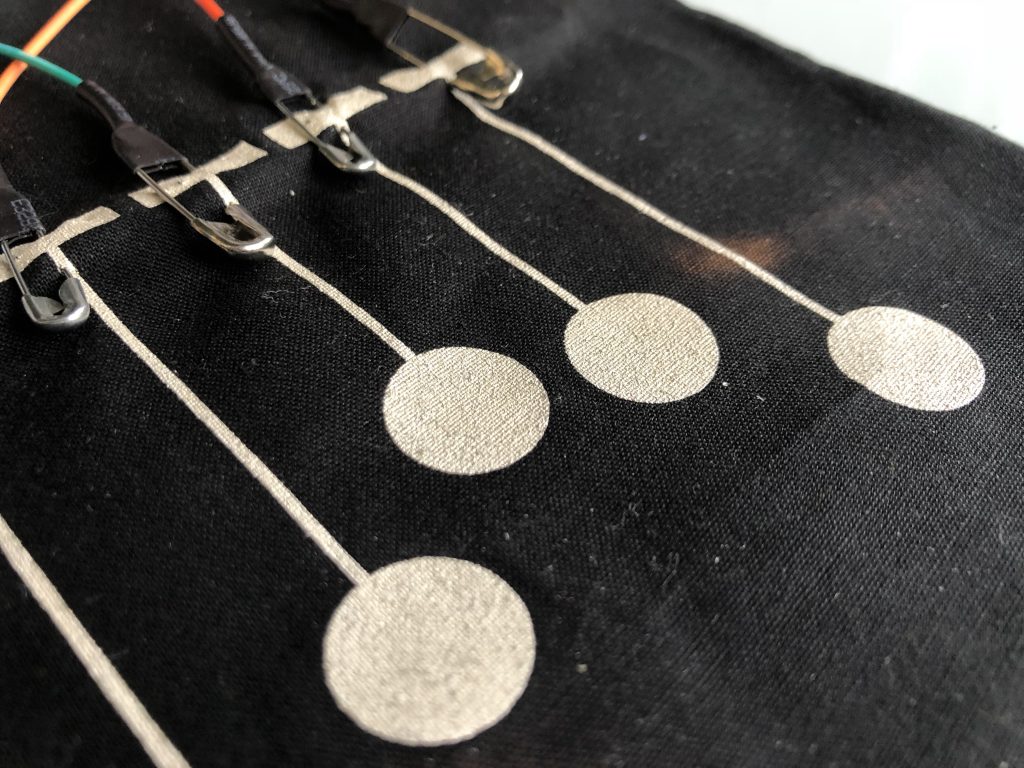
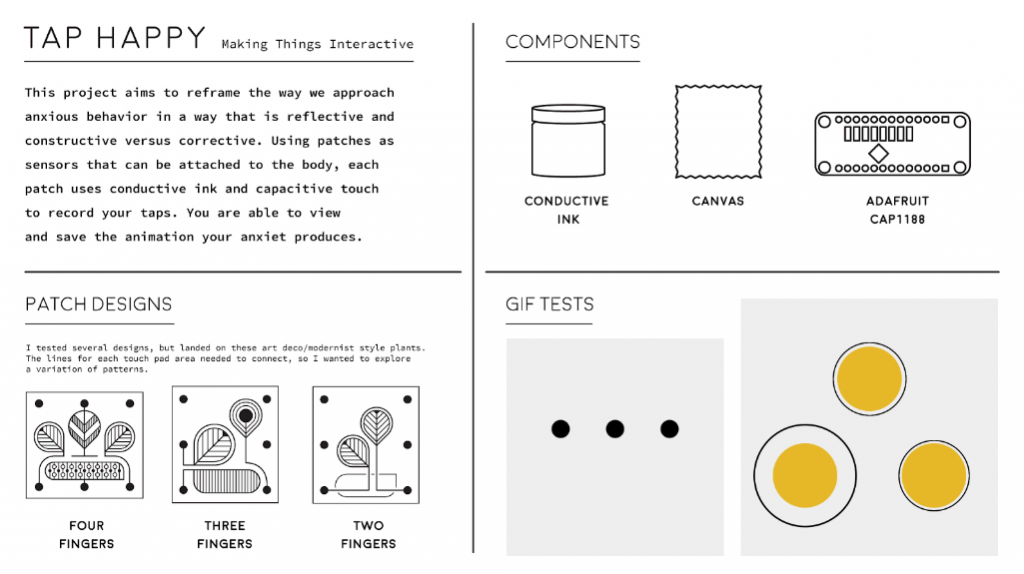
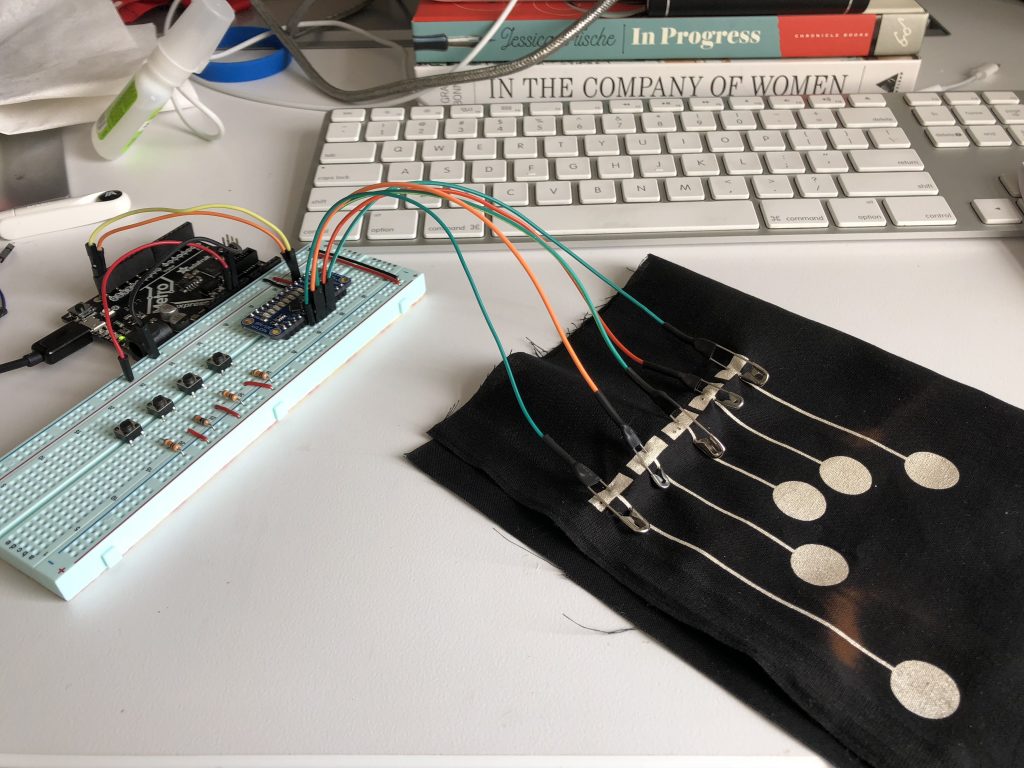
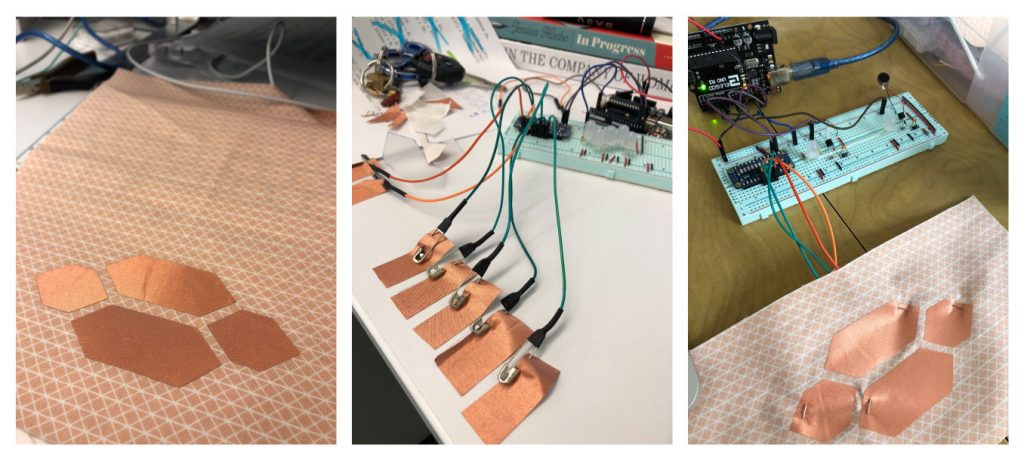
^ Two patches, one has two tappable areas, the other has three.
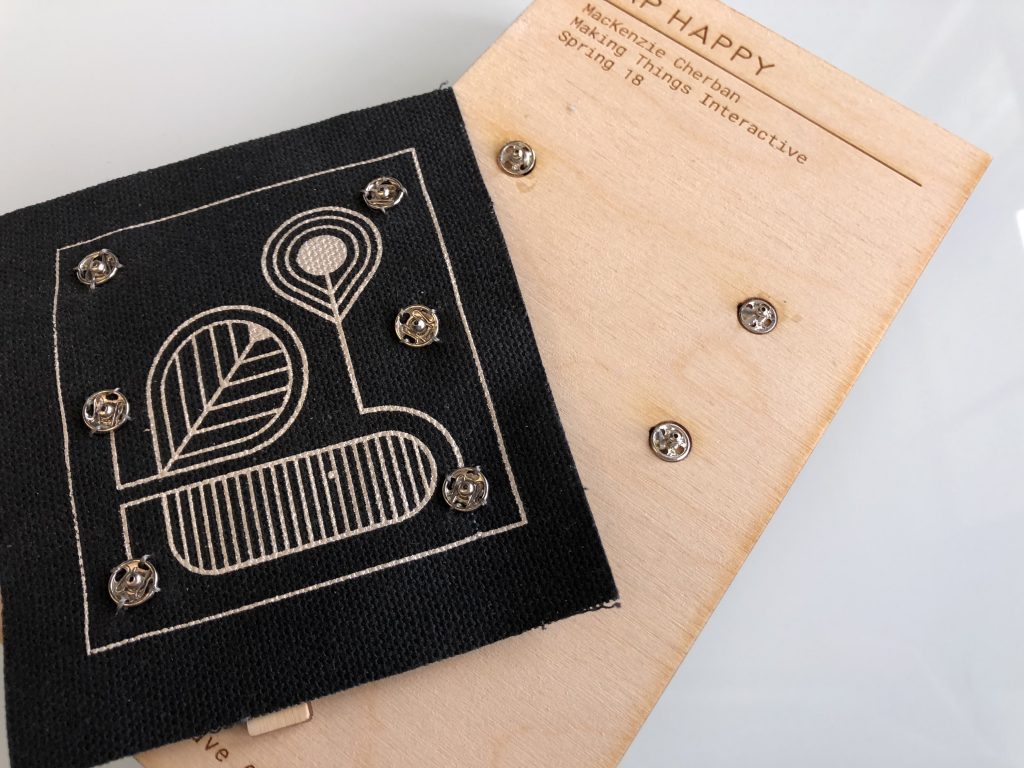
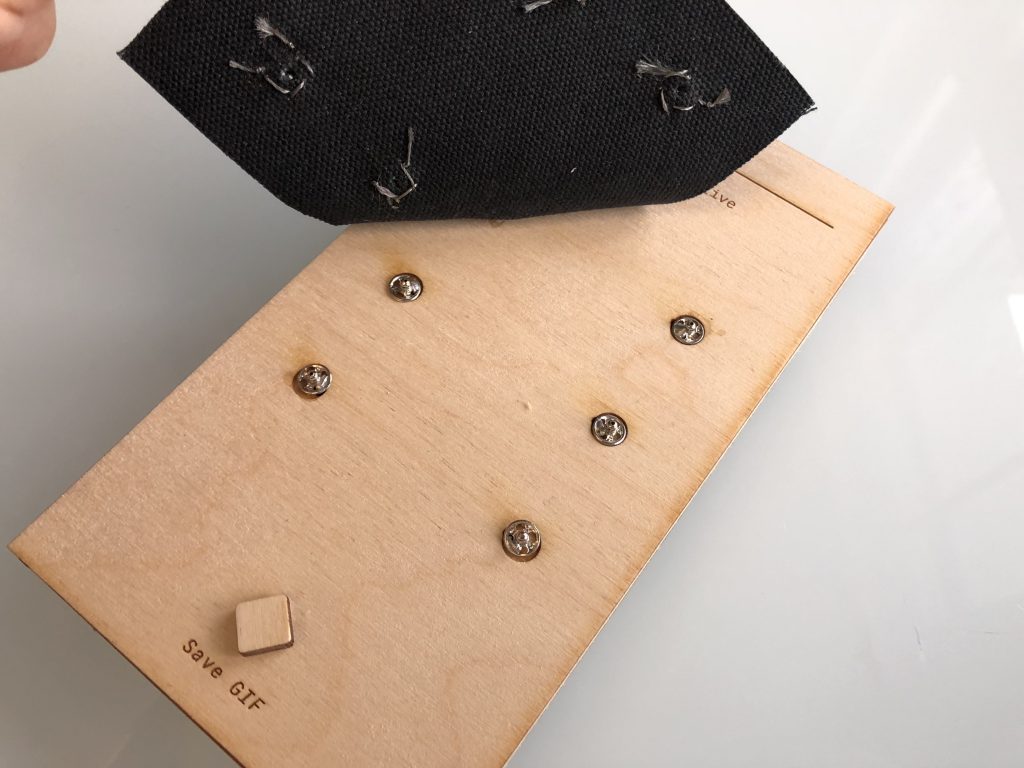
^ Swapping out the patches to test.
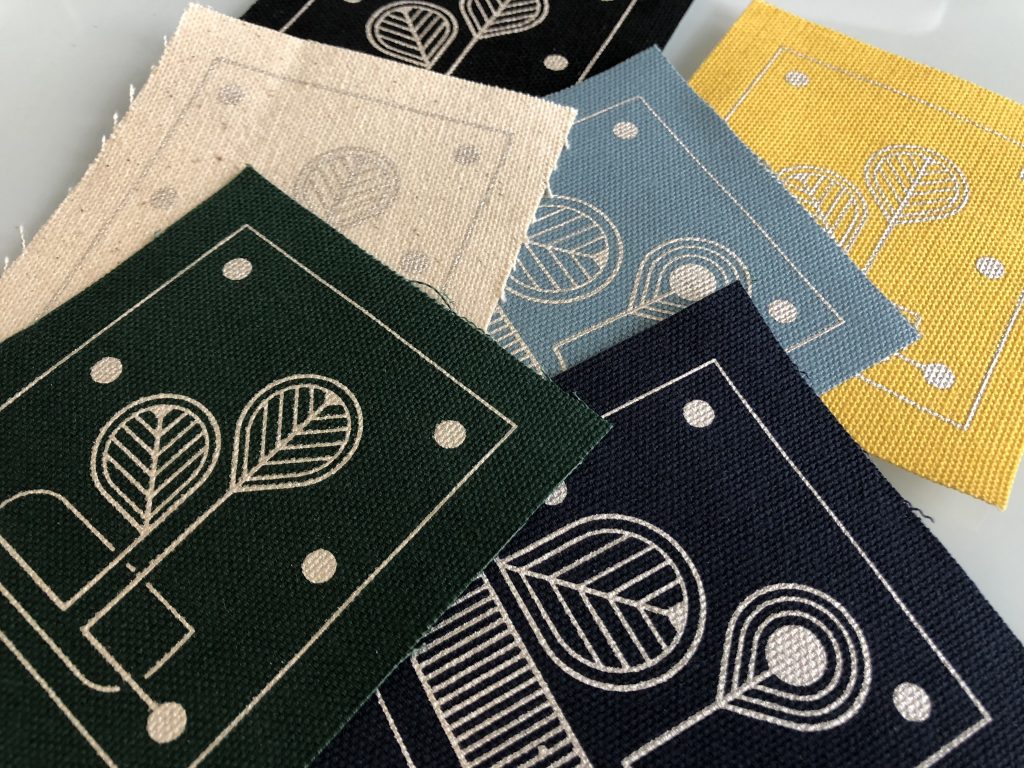
^ Design samples on the various colors of canvas. The texture was a bit too rough for this application.
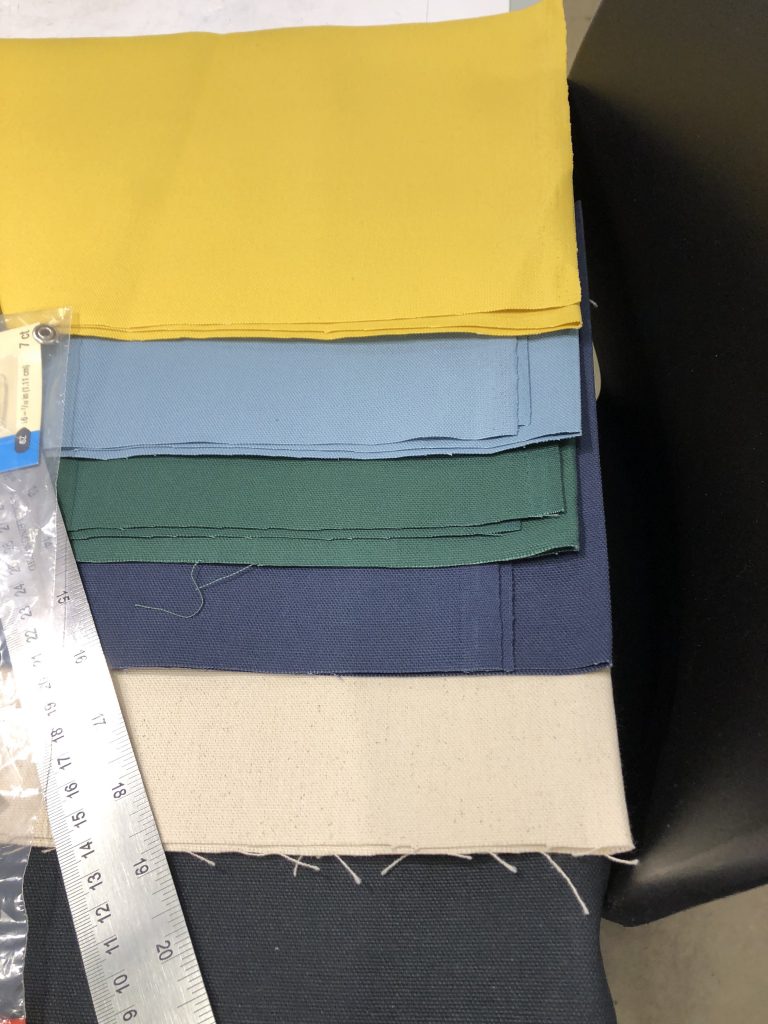
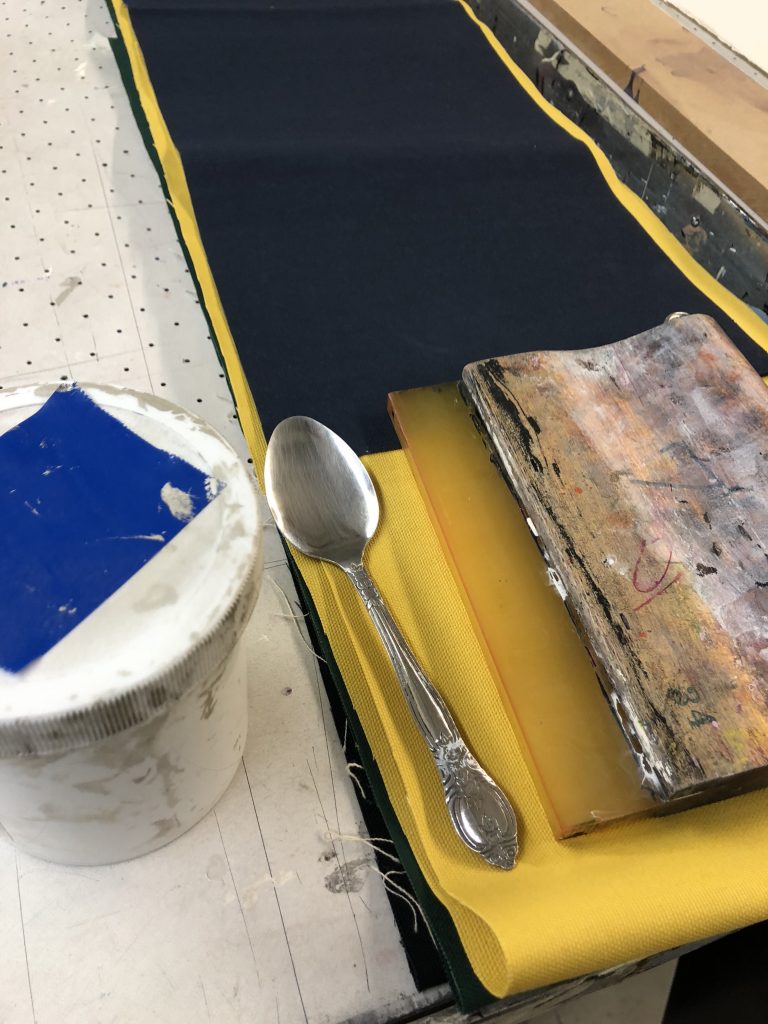
     

^ Process of making the patches

First Tests with taps + conductive ink:
Example of two user animations, created on presentation day:

Arduino Code:
//--------CAP1188 SETUP --------
#include
#include
#include
#define CAP1188_SENSITIVITY 0x1F // Setting the sensitivity....lower the number the more sensitive!!
static const int CAP1188_RESET = 12; // Reset Pin is used for I2C or SPI
Adafruit_CAP1188 cap = Adafruit_CAP1188();
//------------------------------

const int numOfCaps = 3;

//-----CAP TOUCH Variables-----
uint8_t touched;
uint8_t light;
int capState[numOfCaps] = {0, 0, 0};
int lastCapState[numOfCaps] = {0, 0, 0};
int capCurrent[numOfCaps] = {false, false, false};

//-----TIMING N@T------
int pinState[numOfCaps] = {1, 1, 1}; //debouncing
bool timing[numOfCaps] = {false, false, false};
uint32_t dbTime = 20;
uint32_t eTime[numOfCaps] = {};
uint32_t dbStart[numOfCaps] = {};
uint32_t start[numOfCaps] = {};
uint32_t sendTime[numOfCaps] = {};

//-----TIMING BREAK-----
static const int btnPin = 2;
int btnState;
int lastBtnState;

void setup() {
Serial.begin(115200);
Serial.println("CAP1188 test!");
pinMode(btnPin, INPUT);
// Initialize the sensor, if using i2c you can pass in the i2c address
if (!cap.begin()) {
//if (!cap.begin()) {
Serial.println("CAP1188 not found");
while (1);
}

Serial.println("CAP1188 found!");
cap.writeRegister(CAP1188_SENSITIVITY, 0x6F);

}

void loop() {
touches(); // sensing for touches
for (int i = 0; i < numOfCaps; i++) {
touchOnce(i);
debounceBtn(i);
timeTest(i);
}
endSession();
}

void touches() {
touched = cap.touched();
light = cap.readRegister(0x3);

if (touched == 0) {
// No touch detected
return;
}

for (uint8_t i = 0; i < 8; i++) {
if (touched &amp; (1 &lt;<i> dbTime) {// db timer has elapsed
capState[n] = pinState[n]; // button state is valid
}
//+++++++++++++++++++++++++++++++++++
}</i>

void timeTest(int t) {
if (capState[t] == 0 &amp;&amp; !timing[t]) { //if button state is NOT pressed and timing is NOT happening
sendTime[t] = 0;
start[t] = millis(); // start timing
timing[t] = true;
}

if (capState[t] == 1 &amp;&amp; timing[t]) { //if button state is pressed and timing is happening
eTime[t] = (millis() - start[t]); // record elapsed time
sendTime[t] = eTime[t];
timing[t] = false;
}
}

void endSession() {
// read the pushbutton input pin:
btnState = digitalRead(btnPin);

// compare the buttonState to its previous state
if (btnState != lastBtnState) {
// if the state has changed, increment the counter
if (btnState == HIGH) {
Serial.println("E");
}
// Delay a little bit to avoid bouncing
delay(50);
}
// save the current state as the last state, for next time through the loop
lastBtnState = btnState;
}

void serialButtonCount() {
Serial.print(capCurrent[2]);
Serial.print(",");
Serial.print(capCurrent[1]);
Serial.print(",");
Serial.print(capCurrent[0]);
// Serial.print(" ");
Serial.print(",");
Serial.print(sendTime[2]);
Serial.print(",");
Serial.print(sendTime[1]);
Serial.print(",");
Serial.println(sendTime[0]);
}
Processing Code Two Tap:
import gifAnimation.*;
import processing.serial.*;

float x, y;
color col1, col2, col3;
color[] colorVal = new color[10];
String[] values;

GifMaker gifExport;
int frames = 0;

int bOne; //button one
int bTwo; //button two
int bThree; //button three
int tOne; //time one
int tTwo; //time two
int tThree; //time three

float colMap1, colMap2, colMap3;
float growMap1, growMap2, growMap3;

int endState = 0;
int lastEndState;

int xpos1, ypos1, xpos2, ypos2, xpos3, ypos3;
float radius1 = 100;
float radius2 = 100;
float radius3 = 100;

int pos1x = 200;
int pos1y = 550;
int pos2x = 400;
int pos2y = 250;
int pos3x = 400;
int pos3y = 550;

Circle myCircle;

int num = 0;

void setup() {
size(800, 800);
frameRate(12);
noFill();
ellipseMode(CENTER);
//colorMode(RGB, 255);

//update the serial port index based on your setup
Serial arduino = new Serial(this, Serial.list()[3], 115200);
arduino.bufferUntil('\n');

ellipseMode(RADIUS);
myCircle = new Circle(pos1x, pos1y, pos2x, pos2y, pos3x, pos3y);

gifExport = new GifMaker(this, "export.gif");
gifExport.setRepeat(0); // make it an "endless" animation
//gifExport.setTransparent(0, 0, 0); // make black the transparent color. every black pixel in the animation will be transparent
}

void draw() {

background(240, 240, 240);
noFill();

tapEvent();

fill(col2);
noStroke();
ellipse(pos2x, pos2y, 100, 100);

fill(col3);
noStroke();
ellipse(pos3x, pos3y, 100, 100);
//println(gifExport);
gifExport.setDelay(1);
gifExport.addFrame();

saveGif();
}

void tapEvent() {
colMap1 = map(tOne, 100, 2000, 255, 150);
colMap2 = map(tTwo, 100, 2000, 255, 150);

if (bThree == 1) {
col3 = color(colMap1, colMap2, 255);
myCircle.display();
myCircle.grow();
} else if (bThree == 0) {
col3 = color(240, 240, 240);
}
if (bTwo == 1) {
col2 = color(colMap1, colMap2, 255);
myCircle.display();
myCircle.grow();
} else if (bTwo == 0) {
col2 = color(240, 240, 240);
}
if (bOne == 1) {
col1 = color(colMap1, colMap2, 255);
myCircle.display();
myCircle.grow();
} else if (bOne == 0) {
col1 = color(240, 240, 240);
}
}

void saveGif() {
if (endState != lastEndState) {
// if the state has changed, increment the counter
if (endState == 1) {
boolean finished = gifExport.finish(); //exports gif
num++;
println(finished);
if (finished == true) {
gifExport = new GifMaker(this, "export" +str(num)+ ".gif");
gifExport.setRepeat(0); // make it an "endless" animation
}
endState = 0;
}
// Delay a little bit to avoid bouncing
delay(50);
}
// save the current state as the last state, for next time through the loop
lastEndState = endState;
}

void serialEvent(Serial p) { // code from Rebecca Fienbrink
String rawString = p.readString(); //read the string from serial
rawString = rawString.trim(); //trim any unwanted empty spaces
try { //split the string into an array of 2 value (e.g. "0,127" will become ["0","127"]
values = rawString.split(",");
//for(int i =0; i 1) {
bOne = int(values[0]); //convert strings to int
bTwo = int(values[1]); //convert strings to int
bThree = int(values[2]); //convert strings to int
tOne = int(values[3]);
tTwo = int(values[4]);
tThree = int(values[5]);
//println(values[0] + "," + values[1] + ","+ values[2] );
//println(values[3] + "," + values[4] + ","+ values[5] );
} else if (values.length == 1) {
endState = 1;
//println(end);
} else {
endState = 0;
}
}
catch(Exception e) {
println("Error parsing string from Serial:");
e.printStackTrace();
}
}

class Circle {
// The Constructor is defined with arguments.
Circle(int x1, int y1, int x2, int y2, int x3, int y3) {

xpos1 = x1;
ypos1 = y1;
xpos2 = x2;
ypos2 = y2;
xpos3 = x3;
ypos3 = y3;
}

void display() {
stroke(0);
strokeWeight (3);
noFill();
//ellipse(xpos1, ypos1, radius1, radius1);
strokeWeight (3);
noFill();
ellipse(xpos2, ypos2, radius2, radius2);
strokeWeight (3);
noFill();
ellipse(xpos3, ypos3, radius3, radius3);
}

void grow() {
growMap1 = map(tOne, 100, 8000, 1, 4);
growMap2 = map(tTwo, 100, 8000, 1, 4);
growMap3 = map(tThree, 100, 8000, 1, 4);
//if (bOne == 1) {
// radius1 = radius1 + growMap1;
//}
if (bTwo ==1) {
radius2 = radius2 + growMap2;
}
else if (bThree == 1) {
radius3 = radius3 + growMap3;
}
}
}
Processing Code Three Tap:
import gifAnimation.*;
import processing.serial.*;

float x, y;
color col1, col2, col3;
color[] colorVal = new color[10];
String[] values;

GifMaker gifExport;
int frames = 0;

int bOne; //button one
int bTwo; //button two
int bThree; //button three
int tOne; //time one
int tTwo; //time two
int tThree; //time three

float colMap1, colMap2, colMap3;
float growMap1, growMap2, growMap3;

int endState = 0;
int lastEndState;

int xpos1, ypos1, xpos2, ypos2, xpos3, ypos3;
float radius1 = 100;
float radius2 = 100;
float radius3 = 100;

int pos1x = 200;
int pos1y = 550;
int pos2x = 400;
int pos2y = 250;
int pos3x = 600;
int pos3y = 550;

Circle myCircle;

int num = 0;

void setup() {
size(800, 800);
frameRate(12);
noFill();
ellipseMode(CENTER);
//colorMode(RGB, 255);

//update the serial port index based on your setup
Serial arduino = new Serial(this, Serial.list()[3], 115200);
arduino.bufferUntil('\n');

ellipseMode(RADIUS);
myCircle = new Circle(pos1x, pos1y, pos2x, pos2y, pos3x, pos3y);

gifExport = new GifMaker(this, "export.gif");
gifExport.setRepeat(0); // make it an "endless" animation
//gifExport.setTransparent(0, 0, 0); // make black the transparent color. every black pixel in the animation will be transparent
}

void draw() {

background(240, 240, 240);
noFill();

tapEvent();

fill(col1);
noStroke();
ellipse(pos1x, pos1y, 100, 100);

fill(col2);
noStroke();
ellipse(pos2x, pos2y, 100, 100);

fill(col3);
noStroke();
ellipse(pos3x, pos3y, 100, 100);
//println(gifExport);
gifExport.setDelay(1);
gifExport.addFrame();

saveGif();
}

void tapEvent() {
colMap1 = map(tOne, 100, 2000, 255, 150);
colMap2 = map(tTwo, 100, 2000, 255, 150);
colMap3 = map(tThree, 100, 2000, 255, 150);

if (bThree == 1) {
col3 = color(colMap1, colMap2, colMap3);
myCircle.display();
myCircle.grow();
} else if (bThree == 0) {
col3 = color(240, 240, 240);
}
if (bTwo == 1) {
col2 = color(colMap1, colMap2, colMap3);
myCircle.display();
myCircle.grow();
} else if (bTwo == 0) {
col2 = color(240, 240, 240);
}
if (bOne == 1) {
col1 = color(colMap1, colMap2, colMap3);
myCircle.display();
myCircle.grow();
} else if (bOne == 0) {
col1 = color(240, 240, 240);
}
}

void saveGif() {
if (endState != lastEndState) {
// if the state has changed, increment the counter
if (endState == 1) {
boolean finished = gifExport.finish(); //exports gif
num++;
println(finished);
if (finished == true) {
gifExport = new GifMaker(this, "export" +str(num)+ ".gif");
gifExport.setRepeat(0); // make it an "endless" animation
}
endState = 0;
}
// Delay a little bit to avoid bouncing
delay(50);
}
// save the current state as the last state, for next time through the loop
lastEndState = endState;
}

void serialEvent(Serial p) { // code from Rebecca Fienbrink
String rawString = p.readString(); //read the string from serial
rawString = rawString.trim(); //trim any unwanted empty spaces
try { //split the string into an array of 2 value (e.g. "0,127" will become ["0","127"]
values = rawString.split(",");
//for(int i =0; i 1) {
bOne = int(values[0]); //convert strings to int
bTwo = int(values[1]); //convert strings to int
bThree = int(values[2]); //convert strings to int
tOne = int(values[3]);
tTwo = int(values[4]);
tThree = int(values[5]);
//println(values[0] + "," + values[1] + ","+ values[2] );
//println(values[3] + "," + values[4] + ","+ values[5] );
} else if (values.length == 1) {
endState = 1;
//println(end);
} else {
endState = 0;
}
}
catch(Exception e) {
println("Error parsing string from Serial:");
e.printStackTrace();
}
}

class Circle {
// The Constructor is defined with arguments.
Circle(int x1, int y1, int x2, int y2, int x3, int y3) {

xpos1 = x1;
ypos1 = y1;
xpos2 = x2;
ypos2 = y2;
xpos3 = x3;
ypos3 = y3;
}

void display() {
stroke(0);
strokeWeight (3);
noFill();
ellipse(xpos1, ypos1, radius1, radius1);
strokeWeight (3);
noFill();
ellipse(xpos2, ypos2, radius2, radius2);
strokeWeight (3);
noFill();
ellipse(xpos3, ypos3, radius3, radius3);
}

void grow() {
growMap1 = map(tOne, 100, 8000, 1, 4);
growMap2 = map(tTwo, 100, 8000, 1, 4);
growMap3 = map(tThree, 100, 8000, 1, 4);
if (bOne == 1) {
radius1 = radius1 + growMap1;
} else if (bTwo ==1) {
radius2 = radius2 + growMap2;
} else if (bThree == 1) {
radius3 = radius3 + growMap3;
}
}
}

Future Considerations:

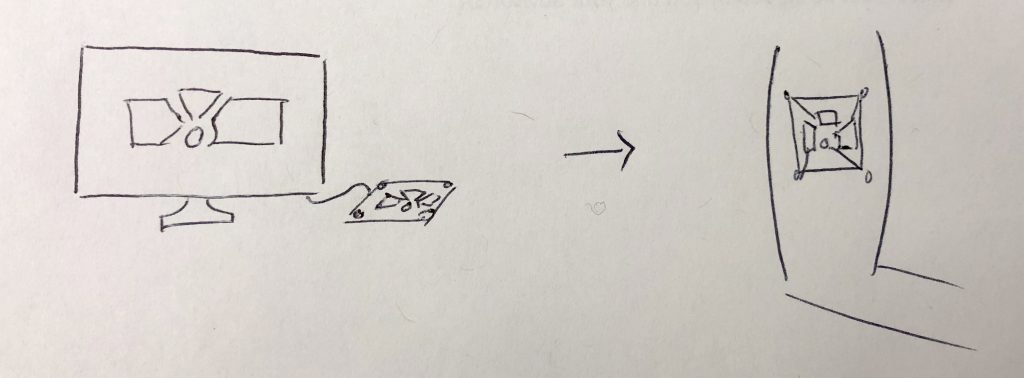
I want to continue to work on this project. Considerations for the patch include fabric type and design of the tappable areas. For the Processing end of things, I’d like to explore what else is possible with the data being sent and well as build a state machine and initialization sequence so that the system knows how many tappable areas are present when plugged in so that two Processing sketches are not needed. On the Arduino side of things, I would like use timing to save the GIF animations rather than a button press.
Proposal

Anxious Animation
Do you ever find yourself tapping your fingers on your arm or legs, out of boredom, anxiety, anger? This projects aims to convert said anxious behavior, tapping your fingers, into a more tangible output. While it may not reduce the stresses that cause us to fidget, perhaps a slightly more positive outlook could be achieved. This project doesn’t exist to fix a problem, but rather to reduce it or reframe it. This project would be considered a success if people were able to view their anxious habit as rewarding, via sound or animation, rather than as a result of negative outward effects. Form may depend on how the user taps. Perhaps they tap, but maybe they swirl their finger in circles? Final animation and sounds will be influenced by meditative imagery or sound, symmetrical and calming.
Plan:

create wearable patch that can live on cloths and upload to computer
• flora, lilypad, or particle
• capacitive touch board
• eeprom or some type of data storage for taps
• fabric
• battery

p5js or processing sketch to output the data collected
animation
• controls that influence color
• shape
• size?
sound
• tones to match taps
• controls for pitch, tone, etc.

manufacturing
• people need to be able to tap
• plug into computer
• select sound or animation
• “clear data”?

Materials:

• Flora, lily pad, particle
• capacitive touch capabilities
• eeprom or data storage of some kind
• fabric
• batteries
• conductive fabric or thread

Time:

• May need to order some things such as extra storage and conductive fabric/ink
• Leave time to program with data in p5 or processing

Deliverables:

• Need a desk for laptop and potentially patch
• Perhaps I have a jacket or lap pad that people can actually wear to tap
• Power

Media for Show:
I may want an additional flyer or poster

Monster Breath
Anxiety can consume me, making it difficult to breathe. While I have meditation and breathing exercises, I often feel I do them ‘wrong’ or am too stressed to even remember them. This project is a desktop friend that lives on your workspace, detects when you need to calm down, and starts to breathe. You can see the monster’s breath rising and falling, prompting the user to follow along with the subtle breathing creature. You can set, perhaps based on heart rate, how long the breathing lasts. Perhaps the silly form of a friendly monster will help reduce anxiety in addition to the meditative breathing. Research may include different types of breathing techniques and may influence final form. For example, 5 seconds in, hold, 7 second out, or breath counting. Lights may be involved to help guide the user through the exercise. But depending on the breathing exercise, maybe the monster has one eye..or three, form decisions like that may come after more research.

Plan:

create a monster of sorts, friendly of course
• find fabrics that allow for movement and fur like look
• figure out heart rate detection? perhaps through fitbit or other existing wearables?
• catch attention of stressed user (light? sound? haptic buzz?)
• test, bit by bit each step of the interaction
• detection of HR
• breathing
• turning on and off muscle wire
• completion phase
• maybe monster smiles
• eyes that light based on touch?

Manufacturing:
• design monster
• figure out power relay


Materials:

• Arduino or particle or two
• HR api, sensors
• fabric
• muscle wire
• power relay
• lights

Time:

• May need to order some things
• muscle wire, HR sensor?, power relay
• time to..
• build/construct monster
• set muscle wires and insulate
• solder

Deliverables:
  • Need a desk for laptop
  • depending on monster’s form, somewhere to put him
Media for Show:
  • I may want an additional flyer or poster

Patch UI – Story

The year, is now. The default interface is screen. But let’s disrupt that. Patches have made a resurgence in fashion, from iconic branding elements to pineapples and pizzas, patches provide great flexibility in the statement you want to make. Using safety pins, conductive ink/fabric, and fabric, Patch UIs allow users to interact with others by interacting with the patches on their cloths.

Each patch can be reprogrammed or updated through the web portal, this is the only screen time you’ll need. Different patterns and levels of complexity are available. Different modes offer different options. You can use the patch as human to human interaction or human to computer interaction. Perhaps you want to send a gentle notification, or get someone’s attention at a loud event, or send emojis to a friend without even touching a screen? Record music or create an animations based on the patterns of touch.

Assignment Eight

Accelerometers, Interrupts, timing oh my.

Weakness: MPU-6050 GY-521 (a.k.a. “The Devil”)

I knew this was my weakness, and it still is. It’s broken me. After many frustrating hours moving this thing around, several tutorial (links below), and ultimately having it sit on the table and increment while no movement or rotation. I gave up. While I could get the tutorials to work, everything thing hooked up and the processing sketches to run, I still didn’t know what it was actually doing. Reading through the code only kind of helped, but when things started get dicey is how exactly they were using the raw data.

Gyroscopes and Accelerometers on a Chip

Arduino 5 Minute Tutorials: Lesson 7 – Accelerometers, Gyros, IMUs

Tutorial: How to use the GY-521 module (MPU-6050 breakout board) with the Arduino Uno

https://create.arduino.cc/projecthub/Aritro/getting-started-with-imu-6-dof-motion-sensor-96e066

http://www-robotics.cs.umass.edu/~grupen/503/Projects/ArduinoMPU6050-Tutorial.pdf

The list could go on. I’ve racked up an extensive search history of accelerometers & arduino as well as MPU6050 tutorials.


Interrupts

After picking myself back up, I decided to tackle another weakness. Interrupts. I’ve been avoiding them for some time, and am still working at fulling understanding their capabilities. The trouble I always run into is how to exit a light sequence. I also ran into some issues while using music. I decided to make a few simple interactions with button, sounds, and light to tackle my interrupt fears head on.

This project simple starts a song, pauses the song mid-way, lights a NeoPixel sequence (also the devil), and exits the sequence. A second button will stop the song or light sequence and restart the song from the beginning.


Arduino Code
/***************************************************
DFPlayer - A Mini MP3 Player For Arduino
&lt;https://www.dfrobot.com/index.php?route=product/product&amp;product_id=1121&gt;

***************************************************
This example shows the basic function of library for DFPlayer.

Created 2016-12-07
By [Angelo qiao](Angelo.qiao@dfrobot.com)

GNU Lesser General Public License.
See &lt;http://www.gnu.org/licenses/&gt; for details.
All above must be included in any redistribution
****************************************************/

/***********Notice and Trouble shooting***************
1.Connection and Diagram can be found here
&lt;https://www.dfrobot.com/wiki/index.php/DFPlayer_Mini_SKU:DFR0299#Connection_Diagram&gt;
2.This code is tested on Arduino Uno, Leonardo, Mega boards.
****************************************************/

#include &lt;SoftwareSerial.h&gt;
#include &lt;DFRobotDFPlayerMini.h&gt;

SoftwareSerial mySoftwareSerial(10, 11); // RX, TX
DFRobotDFPlayerMini myDFPlayer;
void printDetail(uint8_t type, int value);

//--------NEOPIXEL SETUP --------
#include &lt;Adafruit_NeoPixel.h&gt;
#ifdef __AVR__
#include &lt;avr/power.h&gt;
#endif
static const int PIN = 5;
static const int NUMPIXELS = 2;
Adafruit_NeoPixel pixels = Adafruit_NeoPixel(NUMPIXELS, PIN, NEO_GRB + NEO_KHZ800);
//------------------------------

//------- TIMING --------
unsigned long lastSampleTime = 0;
unsigned long sampleInterval = 500; // in ms
//------------------------------

static const int bPinOne = 2;
static const int bPinTwo = 3;
int bCountOne = 0;
int bCountTwo = 0;
bool bStateOne = false;
bool bStateTwo = false;

int currentState = 0;

void setup() {
mySoftwareSerial.begin(9600);
Serial.begin(115200);

Serial.println();
Serial.println(F("DFRobot DFPlayer Mini Demo"));
Serial.println(F("Initializing DFPlayer ... (May take 3~5 seconds)"));

if (!myDFPlayer.begin(mySoftwareSerial)) { //Use softwareSerial to communicate with mp3.
Serial.println(F("Unable to begin:"));
Serial.println(F("1.Please recheck the connection!"));
Serial.println(F("2.Please insert the SD card!"));
while (true);
}
Serial.println(F("DFPlayer Mini online."));

myDFPlayer.volume(30); //Set volume value. From 0 to 30
myDFPlayer.play(1); //Play the first mp3

pinMode(bPinOne, INPUT_PULLUP);
pinMode(bPinTwo, INPUT_PULLUP);
attachInterrupt(digitalPinToInterrupt(bPinOne), bSwitchOne, CHANGE);
attachInterrupt(digitalPinToInterrupt(bPinTwo), bSwitchTwo, CHANGE);
pixels.begin();
pixels.show();

}

void loop(){

if(currentState == 3){
myDFPlayer.play(1);
}

if (currentState == 1){
myDFPlayer.pause();
rainbow(20);
} else if (currentState == 2){
pixelOff();
myDFPlayer.start();

}

if (myDFPlayer.available()) {
printDetail(myDFPlayer.readType(), myDFPlayer.read()); //Print the detail message from DFPlayer to handle different errors and states.
}
}

void bSwitchOne() {
unsigned long now = millis();

if (lastSampleTime + sampleInterval &lt; now) {
lastSampleTime = now;
bCountOne++;
bStateOne = true;
Serial.print("button one: ");
Serial.println(bCountOne);

if (bCountOne % 2 == 1){
currentState = 1;
} else if (bCountOne % 2 == 0){
currentState = 2;
}

}

}

void bSwitchTwo() {
unsigned long now = millis();

if (lastSampleTime + sampleInterval &lt; now) {
lastSampleTime = now;
bCountTwo++;
bStateTwo = true;
Serial.print("button two: ");
Serial.println(bCountTwo);

if (bCountTwo % 2 == 1){
currentState = 3;
} else if (bCountTwo % 2 == 0){
currentState = 4;
}
}

}

void rainbow(uint8_t wait) {
uint16_t i, j;

for (j = 0; j &lt; 256; j++) {
for (i = 0; i &lt; pixels.numPixels(); i++) {
pixels.setPixelColor(i, Wheel((i + j) &amp; 255));
}
pixels.show();
delay(wait);
}
}

void pixelOff() {
for (int i = 0; i &lt; pixels.numPixels(); i++) {
pixels.setPixelColor(i, (0, 0, 0));
}
pixels.show();
}

uint32_t Wheel(byte WheelPos) {
WheelPos = 255 - WheelPos;
if (WheelPos &lt; 85) {
return pixels.Color(255 - WheelPos * 3, 0, WheelPos * 3);
}
if (WheelPos &lt; 170) {
WheelPos -= 85;
return pixels.Color(0, WheelPos * 3, 255 - WheelPos * 3);
}
WheelPos -= 170;
return pixels.Color(WheelPos * 3, 255 - WheelPos * 3, 0);
}

void printDetail(uint8_t type, int value) {
switch (type) {
case TimeOut:
Serial.println(F("Time Out!"));
break;
case WrongStack:
Serial.println(F("Stack Wrong!"));
break;
case DFPlayerCardInserted:
Serial.println(F("Card Inserted!"));
break;
case DFPlayerCardRemoved:
Serial.println(F("Card Removed!"));
break;
case DFPlayerCardOnline:
Serial.println(F("Card Online!"));
break;
case DFPlayerPlayFinished:
Serial.print(F("Number:"));
Serial.print(value);
Serial.println(F(" Play Finished!"));
break;
case DFPlayerError:
Serial.print(F("DFPlayerError:"));
switch (value) {
case Busy:
Serial.println(F("Card not found"));
break;
case Sleeping:
Serial.println(F("Sleeping"));
break;
case SerialWrongStack:
Serial.println(F("Get Wrong Stack"));
break;
case CheckSumNotMatch:
Serial.println(F("Check Sum Not Match"));
break;
case FileIndexOut:
Serial.println(F("File Index Out of Bound"));
break;
case FileMismatch:
Serial.println(F("Cannot Find File"));
break;
case Advertise:
Serial.println(F("In Advertise"));
break;
default:
break;
}
break;
default:
break;
}
}

Assignment Seven

Patch UI

I wanted to create a simple wearable patch that could act as an integrated user interface. This first step was about understanding out this type of interface may work to send notifications. Using conductive fabric and capacitive touch, a user can simply touch the patch and send a light or vibration notification to someone. As I mentioned, this is just the first step, I plan to work further on this project to incorporate gestures such as swiping, investigate the form more by researching existing patch styles and alternative materials such as conductive ink that can be screen printed.

The patch itself is paired with a web program that can set the geometric pattern to hold different values. This way the user is able to program and reprogram the patch to suit their needs. This portion of the project needs a great deal of work, particularly in sending the data to the Arduino. This will be updated.

Password: MakingThingsInteractive

Arduino Code:
/***************************************************
This is a library for the CAP1188 I2C/SPI 8-chan Capacitive Sensor

Designed specifically to work with the CAP1188 sensor from Adafruit
----&gt; https://www.adafruit.com/products/1602

These sensors use I2C/SPI to communicate, 2+ pins are required to
interface
Adafruit invests time and resources providing this open source code,
please support Adafruit and open-source hardware by purchasing
products from Adafruit!

Written by Limor Fried/Ladyada for Adafruit Industries.
BSD license, all text above must be included in any redistribution
****************************************************/
//--------CAP1188 SETUP --------
#include &lt;Wire.h&gt;
#include &lt;SPI.h&gt;
#include &lt;Adafruit_CAP1188.h&gt;
#define CAP1188_SENSITIVITY 0x1F // Setting the sensitivity....lower the number the more sensitive!!
static const int CAP1188_RESET = 12; // Reset Pin is used for I2C or SPI
Adafruit_CAP1188 cap = Adafruit_CAP1188();
//------------------------------

//--------NEOPIXEL SETUP --------
#include &lt;Adafruit_NeoPixel.h&gt;
#ifdef __AVR__
#include &lt;avr/power.h&gt;
#endif
static const int PIN = 4;
static const int NUMPIXELS = 2;
Adafruit_NeoPixel pixels = Adafruit_NeoPixel(NUMPIXELS, PIN, NEO_GRB + NEO_KHZ800);
//------------------------------

//------- TIMING --------
unsigned long lastSampleTime = 0;
unsigned long sampleInterval = 500; // in ms

//------------------------------

//-----INCOMING VALUES-----
String incomingString; // setting string from p5.js

//-----VIBE PINS-----
static const int vibePinOne = 6;
static const int vibePinTwo = 9;

int vibeOne;
int vibeTwo;

int wait = 10;
int touchedNUM;

int lightCount = 0;
int personOneCount = 0;
int personTwoCount = 0;
int vibeCount = 0;

bool personOne = false;
bool personTwo = false;
bool light = false;
bool vibe = false;

void setup() {
Serial.begin(9600);
Serial.println("CAP1188 test!");
if (!cap.begin()) { // Initialize the sensor, if using i2c you can pass in the i2c address // if (!cap.begin(0x28)) {
Serial.println("CAP1188 not found");
while (1);
}
Serial.println("CAP1188 found!");
cap.writeRegister(CAP1188_SENSITIVITY, 0x6F); // 2x sensitivity THIS SEEMS TO WORK THE BEST FOR 3.5" plate sensors

pinMode(vibePinOne, OUTPUT);
pinMode(vibePinTwo, OUTPUT);
pixels.begin();
pixels.show();
}

void loop() {
unsigned long now = millis();
uint8_t touched = cap.touched();

if (touched == 0) {
// No touch detected
return;
}

if (lastSampleTime + sampleInterval &lt; now) {

lastSampleTime = now;

for (uint8_t i = 0; i &lt; 8; i++) {
if (touched &amp; (1 &lt;&lt; i)) {
int currentTouch = i + 1;

if (currentTouch == 1) { // RIGHT Light
touchedNUM = 1;
lightCount++;
light = true;
vibe = false;
} else if (currentTouch == 2) { // TOP Person One
touchedNUM = 2;
personOneCount++;
personOne = true;
personTwo = false;
light = false;
vibe = false;
// Serial.print("PersonOne: "); Serial.println(personOne);
// Serial.print("PersonTwo: "); Serial.println(personTwo);
} else if (currentTouch == 3) { // BOTTOM Person Two
touchedNUM = 3;
personTwoCount++;
personOne = false;
personTwo = true;
light = false;
vibe = false;
// Serial.print("PersonOne: "); Serial.println(personOne);
// Serial.print("PersonTwo: "); Serial.println(personTwo);
} else if (currentTouch == 4) { // LEFT Vibe
touchedNUM = 4;
vibeCount++;
light = false;
vibe = true;
}

if (personOne == true){
Serial.println("Active: PERSON ONE");
} else if (personTwo == true) {
Serial.println("Active: PERSON TWO");
}

}
}
}
personOneFun();
personTwoFun();
}

void personOneFun() {
if (personOne == true &amp;&amp; personTwo == false &amp;&amp; light == true) {
lightBLINK(0);
//lightON(0); // person ONE light on
lightOFF(1); // person two light off
vibeOFF(0); // vibes off
vibeOFF(1);
} else if (personOne == true &amp;&amp; personTwo == false &amp;&amp; vibe == true) {
lightOFF(0); // lights off
lightOFF(1);
vibeON(0); // person ONE vibe on
vibeOFF(1); // person two vibe off
} else {
lightOFF(0); // lights off
lightOFF(1);
vibeOFF(0); // vibes off
vibeOFF(1);
}
// Serial.print("Light Count: "); Serial.println(lightCount);
// Serial.print("Vibe Count: "); Serial.println(vibeCount);
}

void personTwoFun() {
if (personOne == false &amp;&amp; personTwo == true &amp;&amp; light == true) {
lightBLINK(1);
// lightON(1); // person TWO light on
lightOFF(0); // person one light off
vibeOFF(0); // vibes off
vibeOFF(1);
} else if (personOne == false &amp;&amp; personTwo == true &amp;&amp; vibe == true) {
lightOFF(0); // lights off
lightOFF(1);
vibeON(1); // person TWO vibe on
vibeOFF(0); // person one vibe off
} else {
lightOFF(0); // lights off
lightOFF(1);
vibeOFF(0); // vibes off
vibeOFF(1);
}
// Serial.print("Light Count: "); Serial.println(lightCount);
// Serial.print("Vibe Count: "); Serial.println(vibeCount);
}

void vibeON(int m) {
if (m == 0) {
digitalWrite(vibePinOne, HIGH);
delay(500);
digitalWrite(vibePinOne, LOW);
delay(250);
} else if (m == 1) {
digitalWrite(vibePinTwo, HIGH);
delay(500);
digitalWrite(vibePinTwo, LOW);
delay(250);
}

}

void vibeOFF(int m) {
if (m == 0) {
digitalWrite(vibePinOne, LOW);
} else if (m == 1) {
digitalWrite(vibePinTwo, LOW);
}
}

void lightON (int m) {
pixels.setPixelColor(m, pixels.Color(255, 255, 255));
pixels.show();
}

void lightOFF (int m) {
pixels.setPixelColor(m, pixels.Color(0, 0, 0));
pixels.show();
}

void lightBLINK (int m) {
pixels.setPixelColor(m, pixels.Color(255, 255, 255));
pixels.show();
delay(750);
pixels.setPixelColor(m, pixels.Color(0, 0, 0));
pixels.show();
delay(500);
pixels.setPixelColor(m, pixels.Color(255, 255, 255));
pixels.show();
delay(750);
pixels.setPixelColor(m, pixels.Color(0, 0, 0));
pixels.show();
delay(500);
}
p5js Code:
//-----SERIAL VARIABLES-----
var serial;
var portName = '/dev/cu.usbmodem1411';

//-----WINDOW DIMENSIONS-----
var windW = 900;
var windH = 600;

//-----Color Values-----
var colorLeft = 255;
var colorTop = 255;
var colorRight = 255;
var colorBottom = 255;

var personOneColor = 255;
var personTwoColor = 255;
var lightColor = 255;
var vibeColor = 255;

//-----button counts-----
var countLeft = 0;
var countTop = 0;
var countRight = 0;
var countBottom = 0;

var personOneClick = 0;
var personTwoClick = 0;
var lightClick = 0;
var vibeClick = 0;

//-----button selected-----
var buttonLeft = false;
var buttonTop = false;
var buttonRight = false;
var buttonBottom = false;

var personOne = false;
var personTwo = false;
var light = false;
var vibe = false;

//-----Icons &amp; Images -----
var personOneImg , personTwoImg, lightImg, vibeImg;
var personOneImgW , personTwoImgW, lightImgW, vibeImgW;

var squares = [];
//------------------------

var latestData

var serialPortThree;

function preload() {
// preload() runs once
personOneImg = loadImage('assets/person.png');
personTwoImg = loadImage('assets/person.png');
lightImg = loadImage('assets/light.png');
vibeImg = loadImage('assets/vibe.png');
personOneImgW = loadImage('assets/person-w.png');
personTwoImgW = loadImage('assets/person-w.png');
lightImgW = loadImage('assets/light-w.png');
vibeImgW = loadImage('assets/vibe-w.png');
}

function setup() {
//-----Serial Setup-----
serial = new p5.SerialPort();
serial.on('list', printList);
serial.on('connected', serverConnected);
serial.on('open', portOpen);
serial.on('data', gotData);
serial.on('error', serialError);
serial.on('close', portClose);

serial.list();
serial.open(portName);

console.log("Port Name: " + portName);
//----------------------

createCanvas(windW, windH);
smooth();
background(240);

// initial text at the top (where your color's RGB will be)
push();
textSize(25);
textAlign(CENTER);
noStroke();
text("PATCH UI", windW / 2, 50);
pop();

// for (var i = 0; i 220 &amp;&amp; mouseX 195 &amp;&amp; mouseY 330 &amp;&amp; mouseX 151 &amp;&amp; mouseY 544 &amp;&amp; mouseX 195 &amp;&amp; mouseY 330 &amp;&amp; mouseX 239 &amp;&amp; mouseY 140 &amp;&amp; mouseX 400 &amp;&amp; mouseY 315 &amp;&amp; mouseX 400 &amp;&amp; mouseY 480 &amp;&amp; mouseX 400 &amp;&amp; mouseY 645 &amp;&amp; mouseX 400 &amp;&amp; mouseY &lt; 500) {
vibeClick++;
if (vibeClick % 2 == 1 ){ //&amp;&amp; personTwo == false &amp;&amp; personOne == false &amp;&amp; light == false
vibeColor = 100;
vibe = true;
} else if (vibeClick % 2 == 0){
vibeColor = 255;
vibe = false;
personOneClick = 0;
personTwoClick = 0;
lightClick = 0;
}
console.log("Vibe clicked: " + vibeClick);
}
}

//-----SERIAL FUNCTIONS-----

function printList(portList) {
for (var i = 0; i 5)
// {
// aNum = aString[1];
// aOff = aString[3];
// aSize = aString[5];
// }
// console.log("aNum: " + aNum + "aOff: " + aOff + "aSize: " + aSize);
}

function serialError(err) {
// print('serialError ' + err);
}

function portClose() {
// print('portClose');
}

Arduino + p5js + Fritzing files


Looking Out

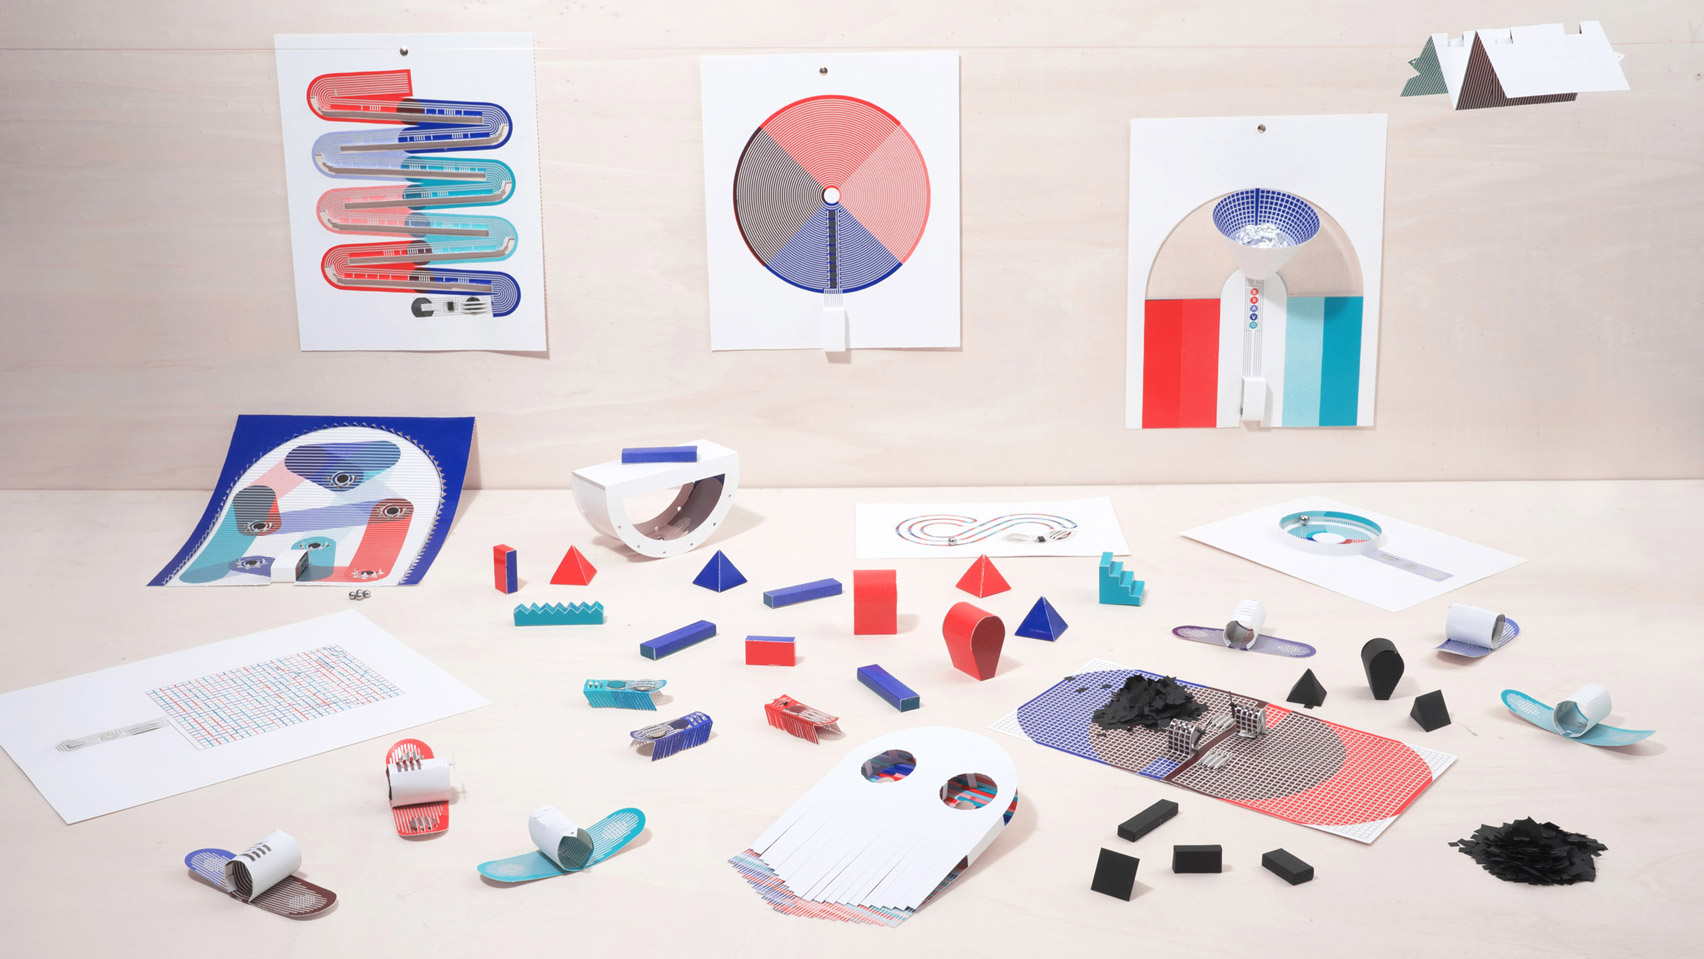
As I was looking through the various projects, I found myself drawn to projects that incorporated traditional materials in unexpected or new ways. Looking at how wood, cloth, ink, paper were transforming to provide an interface or an output. These projects were of interest not only for their traditional material quality, but for their lack of screen and the subtle, almost invisible nature of their forms.

Tangible Textural Interface | Eunhee Jo

Tangible Textural Interface by Eunhee Jo at Show RCA 2012

This project uses pressure and directional gesture to control sound. The form itself it beautiful and looks like many cloth speakers, however the surface comes to life with light hidden below the fabric and sound.

Frijlets | Umesh Janardhanan & Inbal Leiblich & Andrew Stock

http://cargocollective.com/gruckus/Frijlets

I stumbled upon this wood and magnetic project that is comprised of multiple components that can grown and expand depending on the task and how you want to interact.

Liquid MIDI | EJTech

liquid MIDI: paper goes electronic to create unique controls and sounds

This project was really interesting in terms of materials as well as aesthetically, the team here uses Bare Conductive ink (which I recommend following them on Instagram) to create textile, flexible, interfaces. They are using an Arduino and simple screen printed process to create these interfaces and show the potential.

Papier Machine | Marion Pinaffo & Raphaël Pluvinage

Papier Machine booklet features electronic toys that are made from its pages

This project was fun exploration of the materials and techniques to provide lo-fi interactive sheets that come alive as you bend, cut, fold, construct the pages. The simplicity of this project and the playful nature of it is what I found most interesting and worth sharing.

3D Printing on Fabric

https://blog.adafruit.com/2018/02/14/3d-printing-on-fabric-hexagon-triangle-pattern-test-wearablewednesday/

I thought this was interesting technique that could have some interesting implication in combining or housing technological components within fabric.


On a side note: I also found myself drawn to wearables that affix to the skin. Below are those links. I see a lot of potential across the board with these and look forward to following their progress in years to come.

Japanese research group develops wearable sensor that stays on the skin for a week

Self-healing “e-skin” could provide amputees with realistic sensations

L’Oréal launches wearable UV sensor to protect against skin cancer


Assignment Six

setPixelColor

For this assignment, I wanted to further explore the serial protocol between p5.js and Arduino. Specifically, how to send more complex information from p5 (long strings) and read multiple values on the Arduino. I created a sketch that acts as a NeoPixel color picker where you can slide along and set the color, then click on the corresponding box to light that exact NeoPixel on the Arduino.

***This project will be updated shortly to include gyro sensor***

Arduino Code:
//--------NEOPIXEL SETUP --------
#include
#ifdef __AVR__
#include
#endif
static const int PIN = 3;
static const int NUMPIXELS = 7;
Adafruit_NeoPixel pixels = Adafruit_NeoPixel(NUMPIXELS, PIN, NEO_GRB + NEO_KHZ800);

static const int buttonPin = 4;
int buttonState = 1;

//-----STRING TEST-----
int pos1; // comma one
int pos2; // comma two
int pos3; // comma three
int r;
int g;
int b;

//-----INCOMING VALUES-----
String incomingString; // setting string from p5.js

//-----OUTGOING-------
String sendState;

//--------TIME--------
unsigned long lastSampleTime = 0;
unsigned long sampleInterval = 500; // in ms

void setup() {
  // put your setup code here, to run once:
  Serial.begin(115200);
  pinMode(buttonPin, INPUT);

  pixels.begin();
  pixels.show();
}

void loop() {
  unsigned long now = millis();

  if (Serial.available() &gt; 0) {
    // "A,100,20,5" ADD COMMENTS
    incomingString = Serial.readStringUntil('\n'); // takes the incoming string sent from p5 and puts into incomingString

   
    pos1 = incomingString.indexOf(",");
    pos2 = incomingString.indexOf(",", pos1 + 1);
    pos3 = incomingString.indexOf(",", pos2 + 1);
    String letter = incomingString.substring(0, pos1);
    String red = incomingString.substring(pos2, pos1 + 1);
    r = red.toInt();
    String green = incomingString.substring(pos3, pos2 + 1);
    g = green.toInt();
    String blue = incomingString.substring(pos3 + 1);
    b = blue.toInt();
   
    if (letter == "A") { // LED POSITION 1
      pON(0, g, r, b); // 1
    } else if (letter == "B") { // LED POSITION 2
      pON(1, g, r, b); // 2
    } else if (letter == "C") { // LED POSITION 3
      pON(2, g, r, b); // 3
    } else if (letter == "D") { // LED POSITION 4
      pON(3, g, r, b); // 4
    } else if (letter == "E") { // LED POSITION 5
      pON(4, g, r, b); // 5
    } else if (letter == "F") { // LED POSITION 6
      pON(5, g, r, b); // 6
    } else if (letter == "G") { // LED POSITION 7
      pON(6, g, r, b); // 7
    }
  }
}


void pOFF(int n) {
  pixels.setPixelColor(n, pixels.Color(0, 0, 0));
  pixels.show();
  delay(2000);
  // pixelOff = true;
}

void pON(int n, int g, int r, int b) {
  pixels.setPixelColor(n, pixels.Color(g, r, b));
  pixels.show();
  // pixelOn = true;
}
p5 Code:
// color picker based on jasmine c. lee's sketch https://gist.github.com/jasmineclee/86236bc2bd16cb279b52

//-----SERIAL VARIABLES-----
var serial;
var portName = '/dev/cu.usbmodem1411';

//-----WINDOW DIMENSIONS-----
var windW = 600;
var windH = 400;

//-----Color Picker-----
var x; // where the spectrum starts (X)
var y; // where the spectrum starts (Y)
var end; // where the spectrum ends (X)
var totalWidth; // width of the spectrum
var totalHeight; // height of the spectrum
var incStart; // setting where the incrementing values will start, using X, but this will NOT change

//-----Color Values-----
var rd;
var gr;
var bl;

//-----Picker Variables-----
var colChange;
var colRecWidth = 1;

// array of colors in spectrum
var colorAtTime;
var array;
var arrayR;
var arrayG;
var arrayB;

// the colors at the specific time (what you're hovering over)
var rNow;
var gNow;
var bNow;
var colNow;

// the colors you've selected
var rChoice;
var gChoice;
var bChoice;

// setting up LED boxes
var squares = [];
var counter = 1;

var latestData;

function setup() {
  //-----Serial Setup-----
  serial = new p5.SerialPort();
  serial.on('list', printList);
  serial.on('connected', serverConnected);
  serial.on('open', portOpen);
  serial.on('data', gotData);
  serial.on('error', serialError);
  serial.on('close', portClose);

  serial.list();
  serial.open(portName);
  //----------------------

  createCanvas(windW, windH);
  smooth();
  background(245);

  x = 100; // where the spectrum starts on X
  y = 250; // where the spectrum starts on Y
  end = windW - x; // where the spectrum ends (y)
  totalWidth = windW - x*2;
  totalHeight = 75;

  incStart = x;

  rd = 255;
  gr = 0;
  bl = 0;

  rChoice = 0;
  gChoice = 0;
  bChoice = 0;

  array = [rd + ", " + gr + ", " + bl];
  arrayR = [rd];
  arrayG = [gr];
  arrayB = [bl];

  // initial text at the top (where your color's RGB will be)
  push();
  textSize(20);
  textAlign(CENTER);
  noStroke();
  text("NeoPixel Color Picker", windW / 2, 50);
  pop();

  for (var i = 0; i  y &amp;&amp; mouseY = incStart &amp;&amp; mouseX &lt;= incStart + totalWidth) {
        push();
        fill(245);
        noStroke();
        rect(0, y - 30, windW, 32);
        stroke(0);
        strokeWeight(1.5);
        line(mouseX, y - 20, mouseX, y + 1);
        fill(rNow, gNow, bNow);
        ellipse(mouseX, y - 20, 15, 15);
        noFill();
        rect(incStart, y + 2, totalWidth, totalHeight - 2);
        pop();
      }
    }
}

// function for whole color picker spectrum; increments represent the six segments of color changing
function colorPicker(increment1, increment2, increment3, increment4, increment5, increment6) {
  colChange = 4; // 3.825;

  while (x = increment1 &amp;&amp; x = increment2 &amp;&amp; x = increment3 &amp;&amp; x = increment4 &amp;&amp; x = increment5 &amp;&amp; x  200 &amp;&amp; mouseX = 100 &amp;&amp; mouseY  y &amp;&amp; mouseY = incStart &amp;&amp; mouseX &lt; incStart + totalWidth) {

      value = mouseX - 100 // this is to get determine where in the array you are (because at mouseX = 100, you&#039;re at the 0 index of the array)

      rNow = arrayR[value]; // sets the red value of what you&#039;re hovering over, from the array
      gNow = arrayG[value]; // sets the green value of what you&#039;re hovering over, from the array
      bNow = arrayB[value]; // sets the blue value of what you&#039;re hovering over, from the array

      if (rNow  255) { // this is to deal with any math that made the value greater than 255
        rNow = 255;
      }
      if (gNow  255) {
        gNow = 255;
      }
      if (bNow  255) {
        bNow = 255;
      }

      colNow = array[value];
      stroke(255);
      //fill(0); // this is here just in case I want to add a darker color option/slider later
      // rect(200, height - 200, 100, 25);
      fill(rNow, gNow, bNow);

    }
  }
  // else{
  //   fill(255);
  // }
  // rect(width / 2 - 50, 350, 100, 25); // this creates the rectangle at the bottom (but now, it's filled in w/ the color you're hovering over OR you have selected)

}

function mousePressed() {

  // this is to say: if you press on any part of the spectrum, you will make display the selected color at the rectangle AND fill in the rectangle at the bottom
  if (mouseX &gt;= incStart &amp;&amp; mouseX  y &amp;&amp; mouseY &lt; y + totalHeight) {
      push();
      fill(245);
      noStroke();
      rect(0, windH - 70, windW, 100);
      pop();

      textSize(18);
      noStroke();
      fill(0);
      text(&quot;R: &quot; + round(rNow), incStart, windH - 50);
      text(&quot;G: &quot; + round(gNow), incStart, windH - 33);
      text(&quot;B: &quot; + round(bNow), incStart, windH - 16);

      // push();
      // fill(0);
      // rect(width / 2 - 50, 350, 100, 25);
      // fill(rNow, gNow, bNow);
      // rect(width / 2 - 50, 350, 100, 25);
      // pop();

      // setting the color so that it can be used on the drawing pad
      rChoice = round(rNow);
      gChoice = round(gNow);
      bChoice = round(bNow);
    }
  }

  for (var i = 0; i &lt; squares.length; i++) {
    squares[i].clicked(mouseX, mouseY,rChoice,gChoice,bChoice);

  }
}

//-----SERIAL FUNCTIONS-----

function printList(portList) {
  // for (var i = 0; i 5)
        // {
        //   aNum = aString[1];
        //   aOff = aString[3];
        //   aSize = aString[5];
        // }
  // console.log("aNum: " + aNum + "aOff: " + aOff + "aSize: " + aSize);
}

function serialError(err) {
  // print('serialError ' + err);
}

function portClose() {
  // print('portClose');
}
p5 Object Code:
function Square(){
  this.w = 65;
  this.h = 25;
  this.col = 200;

  this.display = function(x,y,i){
    this.x = x;
    this.y = y;
    this.index = i;
    noStroke();
    fill(this.col);
    rect(this.x, this.y, this.w, this.h,1.5);
  }

  this.clicked = function(px,py, r, g, b){
    var sendLED;
    var red;
    var green;
    var blue;

    if (px &gt; this.x &amp;&amp; px  this.y &amp;&amp; py &lt; this.y + this.h){
    this.col = color(r, g, b);
      red = r.toString();
      green = g.toString();
      blue = b.toString();

      if (this.index == 0) {
        serial.write( &quot;A,&quot; + red + &quot;,&quot; + green + &quot;,&quot; + blue);

      } else if (this.index == 1) {
        serial.write( &quot;B,&quot; + red + &quot;,&quot; + green + &quot;,&quot; + blue);

      } else if (this.index == 2) {
        serial.write( &quot;C,&quot; + red + &quot;,&quot; + green + &quot;,&quot; + blue);

      } else if (this.index == 3) {
        serial.write( &quot;D,&quot; + red + &quot;,&quot; + green + &quot;,&quot; + blue);

      } else if (this.index == 4) {
        serial.write( &quot;E,&quot; + red + &quot;,&quot; + green + &quot;,&quot; + blue);

      } else if (this.index == 5) {
        serial.write( &quot;F,&quot; + red + &quot;,&quot; + green + &quot;,&quot; + blue);

      } else if (this.index == 6) {
        serial.write( &quot;G,&quot; + red + &quot;,&quot; + green + &quot;,&quot; + blue);

      }
    }
  }
}

Assignment Five

Simple Shapes

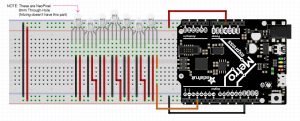
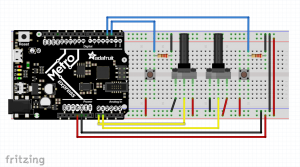
For this, I wanted to investigate different Arduino inputs and how that might control elements of my objects in p5. I used two pots and two tact switches. The pots control size and spacing, while the switches can add and subtract a rectangle element. Right now there are two circles, however I’d like to work and see more ways to add an object.

Arduino Code:
//--------NEOPIXEL SETUP --------
#include &lt;Adafruit_NeoPixel.h&gt;
#ifdef __AVR__
#include &lt;avr/power.h&gt;
#endif
static const int PIN = 40;
static const int NUMPIXELS = 1;
Adafruit_NeoPixel pixels = Adafruit_NeoPixel(NUMPIXELS, PIN, NEO_GRBW + NEO_KHZ800);


//--------POT &amp; TACT LEFT--------
static const int potLeft = A0;
int potValLeft;
int mapValLeft;

static const int switchLeft = 2;
int switchStateLeft = 0;
int lastStateL = LOW;

//--------POT &amp; TACT RIGHT--------
static const int potRight = A1;
int potValRight;
int mapValRight;

static const int switchRight = 3;
int switchStateRight = 0;
int lastStateR = LOW;


int count = 2;

const bool isInterrupt = true;

//--------TIME--------
unsigned long lastSampleTime = 0;
unsigned long sampleInterval = 500;

//------------------------------------------------------------------------------------

void setup() {
 // put your setup code here, to run once:
 Serial.begin(115200);

pinMode(switchLeft, INPUT);
 pinMode(potLeft, INPUT);
 pinMode(potRight, INPUT);
 pinMode(switchRight, INPUT);

pixels.begin();
}

void loop() {
 unsigned long now = millis();

potValLeft = analogRead(potLeft);
 potValRight = analogRead(potRight);

switchStateLeft = digitalRead(switchLeft);
 switchStateRight = digitalRead(switchRight);

if (lastSampleTime + sampleInterval &lt; now) {
 lastSampleTime = now;

mapValLeft = map(potValLeft, 0, 1023, 20, 350); // sends offset
 mapValRight = map(potValRight, 0, 1023, 20, 300); // sends size

if (switchStateLeft &amp;&amp; switchStateLeft != lastStateL) {
 if (count &lt;= 12 &amp;&amp; count &gt; 2) {
 count -= 1;
 } else {
 count = 2;
 }
 } else if (switchStateRight &amp;&amp; switchStateRight != lastStateR) {
 if (count &lt; 12) {
 count += 1;
 } else {
 count = 12;
 }
 }
 lastStateL = switchStateLeft;
 lastStateR = switchStateRight;

Serial.print("N,");
 Serial.print(count);
 Serial.print(",O,");
 Serial.print(mapValLeft);
 Serial.print(",S,");
 Serial.print(mapValRight);
 Serial.print("\r\n");
 
 }
}

/* //-----DEBUGGING-----
 Serial.print("count: ");
 Serial.println(count);

Serial.print("Left Pot Send: ");
 Serial.println(mapValLeft);

Serial.print("Right Pot Send: ");
 Serial.println(mapValRight);
*/
p5.js Code:
/*
//-----ATTRIBUTION-----
  Based on "Sea Shell" by Michael Pinn
  https://www.openprocessing.org/sketch/402526
*/

var serial;
var portName = '/dev/cu.usbmodem1411';

var xLen = 1200;
var yLen = 700;

var bubbles;
var bubbles2;

var latestData;
var aNum = 0; // number of squares from arduino
var aOff = 0; // offset number from arduino
var aSize = 0; // size number from arduino

function setup() {
 serial = new p5.SerialPort();
 // now set a number of callback functions for SerialPort
 serial.on('list', printList);
 serial.on('connected', serverConnected);
 serial.on('open', portOpen);
 serial.on('error', serialError);
 serial.on('close', portClose);
// serial.on('data', serialEvent);
 serial.on('data', gotData);

serial.list();
 serial.open(portName);

// set up our drawing environment
 createCanvas(xLen, yLen);
 background(240);
 ellipseMode(CENTER);
 rectMode(CENTER);

bubbles = new Bubble(240,0); // sets the location
 bubbles2 = new Bubble(240,5); // sets the location

}

function draw() {
 background(240);
 bubbles.show(40,100, 8, aOff); // sets up the size, offset, rotational controller (mouse position here
 bubbles2.show(aSize/2, aOff, aNum, mouseX); // sets up the size, offset, rotational controller (mouse position here)
}


class Bubble {
 constructor (l, w){
 this.l = l;
 this.w = w;
 }

show(s, o, n, m){
 this.s = s;
 this.offset = o;
 this.n = n;
 this.m = m;

push();
 translate(width/2, height/2);
 for (var i = 0; i &lt; 360; i += 360/this.n) {
 this.x = sin(radians(i)) * this.offset;
 this.y = cos(radians(i)) * this.offset;
 push();
 translate(this.x, this.y);
 rotate(radians(+i + this.m));
 stroke(this.l);
 strokeWeight(this.w);
 fill(sin(radians(i / 2)) * 255, 50, 100);
 rect(0,0,this.s,this.s,2);
 pop();
 }
 pop();
 }
}


//-----SERIAL FUNCTIONS-----

function printList(portList) {
 for (var i = 0; i &lt; portList.length; i++) {
 print(i + " " + portList[i]);
 }
}

function serverConnected() {
 print('serverConnected');
}

function portOpen() {
 print('portOpen');
}

function gotData() {
 var stringRead = serial.readLine(); // read the incoming string
 trim(stringRead); // remove any trailing whitespace
 if (!stringRead) return; // if the string is empty, do no more
 // console.log(stringRead); // println the string
 latestData = stringRead; // save it for the draw method

var aString = latestData.split(",");
 if (aString.length&gt;5)
 {
 aNum = aString[1];
 aOff = aString[3];
 aSize = aString[5];
 }
 // console.log("aNum: " + aNum + "aOff: " + aOff + "aSize: " + aSize);
}

function serialError(err) {
 print('serialError ' + err);
}

function portClose() {
 print('portClose');
}

Arduino, p5.js, Fritzing files