Smart Desk

The goal of this project is to add interactive functionality to an adjustable standing desk. Countless times my environment interrupts my workflow when I’m at home. I use my room as a home office, and it is important that my housemates and friends know when I am on an important call and cannot be interrupted. At the same time, I often find myself getting carried away and spending hours in front of my task without moving at all. The small systems on this desk aim to both aid the user in time management, but also help remind them that it is healthy to stop and take breaks.


Three Main Systems

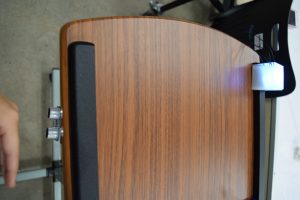
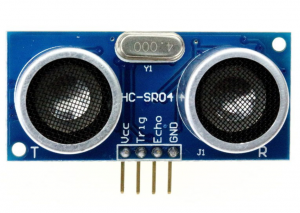
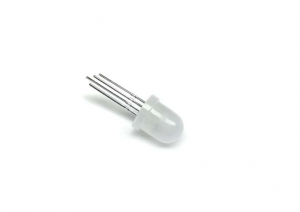
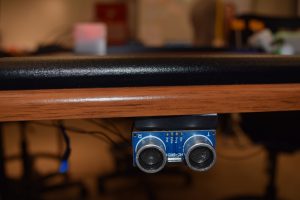
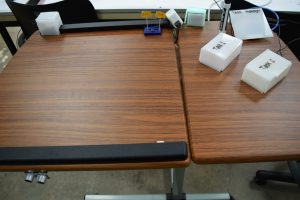
1.A ultrasonic sensor is visible under the table and will detect if a person is standing at the desk. If there is someone there, it triggers a neopixel light to turn on. If someone is standing there for more than 52 minutes, the neopixel turns red. This is meant to remind them to take a short break from the given task before continuing.

Note: the timer for the standing person is set to 5 seconds for demo purposes. If used for real tasks, the timer would be set for 52 minutes.
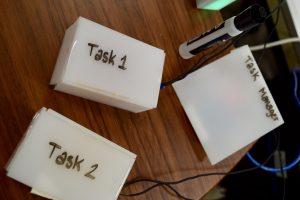
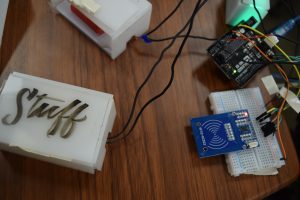
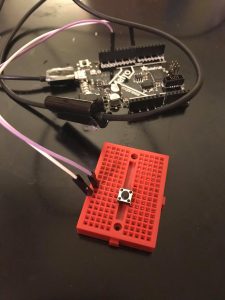
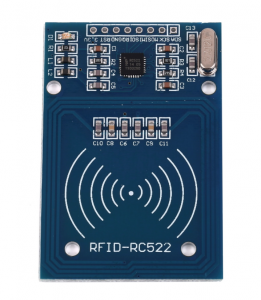
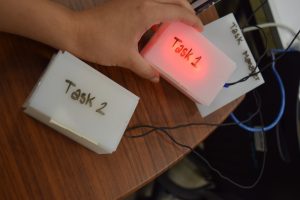
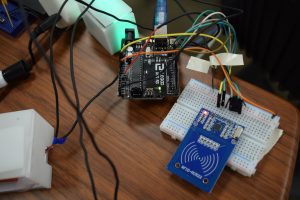
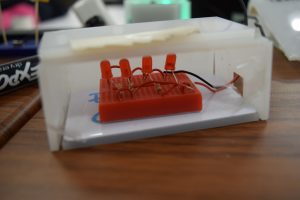
2. A task management system uses a RFID reader and RFID credit cards to set timers on the users task. The user swipes a box across the reader and a timer is set. This timer is visualized by the LEDs inside of the box turning on. When the time is about to end for the given task, the LEDs will blink before turning off. The user is only permitted to light up one task at a time, so they have a visual reminder of which task they should be working on. I wanted to use color-blind friendly colors, but our lab ran out of led colors.

Note: the timer for each task is set to 5 seconds for demo purposes. If used for real tasks, the timer can be set to the time the user desires to spend on each task.
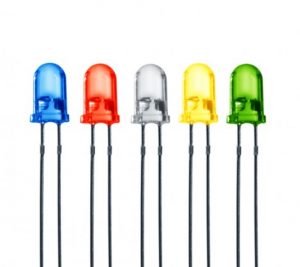
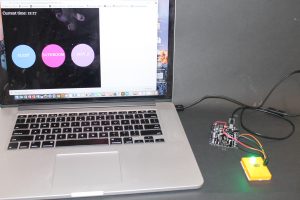
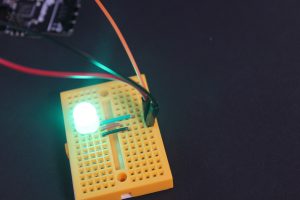
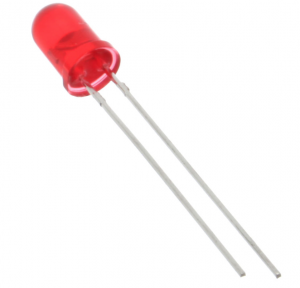
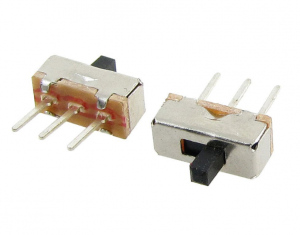
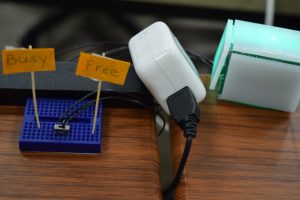
3. A led, ideally placed outside of your office door, is used to tell your housemates or if it is okay for them to come in and interrupt you or not. The switch would be placed on the desk and the user will choose to set it to green or red.
Actual Project:

Ultrasonic sensor
RFID task organizer
RFID Reader Wiring
Inside card box
Busy/free switch 
 

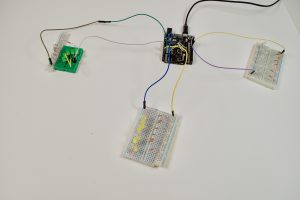
Smart Desk 
Future Work

While my desk was a simple prototype of a potential product, there are a few future ideas that resulted from the creation process.

  • Using the task box light system in an open office space to keep your team organized. Oftentimes, teams are working on multiple projects in parallel and this system could be used to visually communicate which project each individual is currently working on.
  • Add a temperature controlling functionality (a fan that automatically blows when the room reaches a certain temperature)
  • Expand the neopixel light system so it can be used as the main source of light while working. This will make the “take a break” alert more prominent and harder to avoid. I also want to make the alert blink as a warning before fully turning red.
Proposal

Title: Smart Desk

An interactive experience for office workers.

DESCRIPTIVE PARAGRAPH

The goal of this project is to add interactive functionality to an adjustable standing desk. Countless times my workflow gets interrupted by my environment, whether it be the room being too dark or too stuffy. I use my room as a home office, and it is important that my housemates and friends know when I am on an important call and cannot be interrupted. In the age of social media and technology, it is also increasingly difficult for people to focus on the task at hand without getting side tracked by notifications.

I am going to resolve this with interaction design by building solutions for these individual issues and integrating it into a seamless working experience for the user. It will detect when the user approaches the desk and begins to work and activate the other functions. There will be a light system that automatically turns on when the room starts to get too dark to do work. There will be a simple visual system placed directly outside the room to determine if the user can be interrupted or not. There will be a fan that turns on if the room temperature surpasses a certain number. There will be a task organization system to help increase productivity. It will use RFID cards and a timer to alert the user when they have been working on a task too long. There will also be an alert system for when users need to get up and take a break.

A success would be creating a visually appealing and functional desk that could be used as a polished product prototype. I assume that some of these planned functions may change or be altered according to my research on best practices for productivity. Ideally, the desk would not require a computer to be connected to the system and they would all run on their own battery powered arduinos.


YOUR PLAN

  1. Find sensor materials needed (proximity sensor, switches, photoresistor, RFID reader and cards, adafruit LEDs, arduino(s), potentially a LED display for timer functionality)
  2. Make the proximity sensor accurate enough to distinguish between someone walking by versus someone sitting/standing at the station to work
  3. Create the light system for the desk itself
  4. Create the out-of-room light alert system for housemates
  5. Build the fan functionality
  6. Build the RFID productivity organizer
  7. Build the “stand up and take a break” alert system

MATERIALS NEEDED

Sensor materials listed above and a pre-built standing desk.

DELIVERABLES FOR SHOW

I’ll need space for the standing desk.

MEDIA FOR SHOW

I’d like to have a video showing all the functionality of the desk. It may be impossible for me to physically alter the entire room to be so hot the fan turns on etc…


Smart desk

Computers and technology are an integral part of most people’s everyday lives. Individuals push themselves to have maximum productivity every day. In many cases, this drive to work has caused many people to disregard their own health and self-care. A pattern I’ve noticed in the tech industry is workers changing their work station set-up to be more ergonomic. Standing desks and unconventional desks are increasingly popular. Yet, it seems these changes help workers spend even more time in front of the screen. My vision is to create a work station that not only helps increase productivity, but also reminds the user to be human. From the minute the user approaches the desk, they will have a intuitive and seamless work session experience. Using light, timers, motors, and various sensors, the user will be able to organize their tasks while remembering to follow best practices for physical health. Many of us get in a “zone” while we work, which causes us to focus for hours on end without moving an inch. This desk will remind users to walk around and take a break on timed intervals. It will monitor the environment to ensure users are comfortable. It will have small “helpers” that will make working feel less tedious so users can really focus on their work. The desk will also try to accommodate people with vision and hearing problems by implementing different methods of user alert systems.

Asssignment 8–Arduino Timer

#include

#ifdef __AVR__
#include
#endif

static const int PIN = 3;
static const int NUMPIXELS = 2;
int incomingByte;
char incomingLetter;
Adafruit_NeoPixel pixels = Adafruit_NeoPixel(NUMPIXELS, PIN, NEO_GRB + NEO_KHZ800);
unsigned long interval = 10000;
unsigned long previousMillis = 0;

void setup() {
pixels.begin();
pixels.setPixelColor(0, pixels.Color(0, 0, 0));
pixels.setPixelColor(1, pixels.Color(0, 0, 0));
pixels.show();

}

void loop() {

unsigned long currentMillis = millis();

if (Serial.available() > 0) {
incomingByte = Serial.read();
incomingLetter = (char) incomingByte;
if (incomingLetter == ‘S’) {
while(currentMillis – previousMillis < interval) {
currentMillis = millis();
}

previousMillis = currentMillis;
pixels.setPixelColor(0, pixels.Color(255, 0, 0));
pixels.show();
}

else if (incomingLetter == ‘B’) {
while(currentMillis – previousMillis < interval){
pixels.setPixelColor(1, pixels.Color(0, 255, 0));
pixels.show();
currentMillis = millis();
}
previousMillis = currentMillis;
pixels.setPixelColor(1, pixels.Color(0, 0, 0));
pixels.show();
}

else {
pixels.setPixelColor(0, pixels.Color(0, 0, 0));
pixels.setPixelColor(1, pixels.Color(0, 0, 0));
pixels.show();
}
}
}

Exercise 3/23

https://blog.adafruit.com/2018/02/07/how-to-hack-a-color-sensing-umbrella/

This is a color sensing umbrella. You can touch the umbrella sensor to any object and it will light the umbrella up in the color it detects. This was created using a microcontroller, neopixel light strips, and a Flora color sensor. It uses a portable battery so the user is able to walk freely with the umbrella. I liked this idea because it’s a creative use for LEDs, visually appealing, and makes it safer for pedestrians at night.


https://learn.adafruit.com/ever-burning-flame-painting

This is another idea I found to be really interesting. It uses capacitive touch as it’s on/off toggle switch. When it is on, the flame lights up and flows in the pattern of real fire. I am always looking for ways to combine art and technology, so this project was especially appealing to me.


https://blog.adafruit.com/2018/01/17/one-day-this-tech-onesie-may-help-a-baby-with-jaundice/

Finally, this project drew my attention as they use LEDs as a solution for jaundice in babies. I felt personally connected to this as all of my younger cousins developed jaundice as infants. There is a microcontroller attached and LED strips can be controlled easily with a mobile device. The LEDs are on the inside of the suit, so the baby’s body is exposed to blue light without damage to the baby’s eyes.


I love LEDs!

Assignment 6.5/7

Door Sensor System

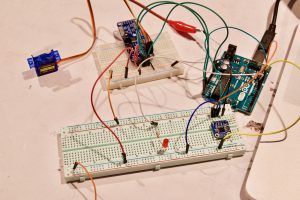
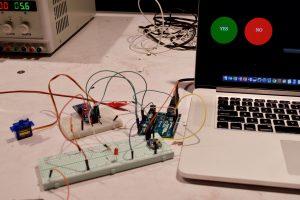
This assignment was meant to tie in a motor to an I/C protocol. The initial set up consisted of: proximity/ambient sensor, servo motor, 16 servo driver, red LED, and an arduino. The proximity sensor is meant to tell the user when there is someone standing at the door. The user can then choose the yes button to turn the door and let them in, or the no button to flash a red light telling them to leave.

The GUI was a set of simple buttons. Yes in green, red in no, and a yellow door button that flashes onto the screen to alert the user that there is someone at the door. The yellow circle will not appear until the proximity sensor is triggered.


Code:

Assignment7

Assignment 6

For this assignment, I decided to do another iteration of my assignment 4 light project using Neopixel.

I used the same basic GUI with three settings: Sleep, Bathroom, and Movie. The sleep mode is a green light, the bathroom mode is a red light, and the movie mode is a blue light.

I only got one neopixel to work so far because of some arduino issues / my original neopixel was broken.


Future work:

I want to create the full lighting system idea with neopixels. I also hope to integrate it into an interactive standing desk and make it bluetooth controlled. I also want to work on different light diffusion techniques to create a brighter light display.

Assignment6


Assignment 5

Car Driver

Description: 

For this assignment, I made a car animation. The user can click anywhere on the black background to place a car. The cars start at speed = 0 and add 10 each time the button is pressed.

Basic GUI: 

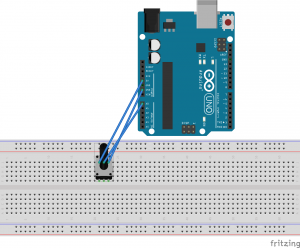
Breadboard: 

Video demo: 

Code: 

assignment5


**Code/idea is a combination of alterations from class 10 notes and http://coursescript.com/notes/interactivecomputing/objects/index.html  **

Assignment 4

Room Light Controller 

Background: 

My idea for this project stemmed from my own room here in Pittsburgh. I currently turn on three different lights to get the ideal lighting in my room. There are two lamps and a string of starry lights. This past weekend, I was about to watch a movie and found myself wishing that I didn’t have to keep getting up and down to adjust the various lights according to my tv activity (movie, video games, tv, etc…). I’ve also been finding that the dark winter mornings have been making it difficult for my body to want to wake up. These problems were my inspiration for this light system project.

Description: 

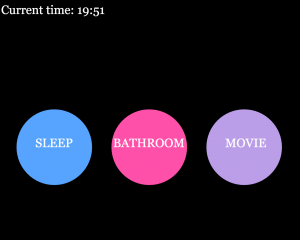
My light system starts with a simple GUI with three big buttons. The modes are sleep, bathroom, and movie. The idea behind the sleep button is that you would click it and the lights would turn on however many hours later you wish to sleep. The idea behind the bathroom mode is that the lights would turn on for about 3-5 minutes to guide you to the bathroom at night when you need to go in the middle of the night and then turn off, eliminating your need to touch a switch. The movie lights will turn on for about two hours and then turn off for ideal movie lighting. My vision is that there would be one long strand of lights lining my room ceiling. My demo is a prototype that I hope to further develop.

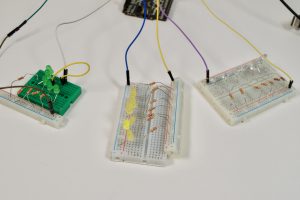
Photo of Arduino set-up 

Closer view of the three bread boards–they are all wired the same way 

Screenshot of simple GUI 

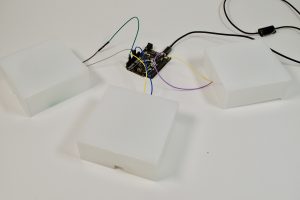
Final physical output

Process:

I started by using Javascript to create these buttons. I drew out the dimensions and figured out what if statements I needed to write to catch each click in the three distinct circles. Next, I sent a distinct serial key for each button to the Arduino to turn on three corresponding lights. I found that drawing the GUI and having them each turn on a single light was a smooth and promising process for me. I tried to remain aware of color blindness as I chose colors for the buttons and LEDs. My next step would turn out to be my most time consuming: figuring out how to program three different timer settings.

Problems:

It turns out there isn’t a particularly easy way to run timed programs on the Arduino. After many hours of reading various Arduino community threads and forums, I realized that there wouldn’t be a library to do what I wanted. I tried a few timer libraries, but many of them used strange loop formats that would not work with my p5.js set-up. Setting up three LED bread boards also posed issues as some of LEDs were different shades and overall they were not especially bright. I knew this issue would most likely remain unresolved until the next prototype due to material and time constraints.

Solution: 

After class on Tuesday, I wrote the timer into the javascript which turned out to be a much easier fix. I created functions for each mode, as well as functions to turn off each mode. I utilized a javascript function called setTimeout to turn off the LEDs after an amount of time. I used the same simple LEDs because this was our first prototype.

Result: 

My project is a prototype of system for a much bigger room. Each button controls a light square. Sleep is green, bathroom is white, and movie is yellow. Sleep turns on after 8000ms, bathroom turns on for 2000ms and movie turns on for 5000ms. I scaled back the time because if the timing works for seconds, it will work if I multiply it out and set it for hours. This also made it able for me to debug and run tests quickly. I laser cut three boxes to try and enhance the weak LED lighting. I chose frosted acrylic because I had used it in a previous project and it created a glowing effect.

Videos: 

The left button is ‘Sleep’, the middle button is ‘Bathroom’, and the right button is ‘Movie’. The LEDs are very dim and hard to see when the room is not dark. The buttons can be clicked at the same time and they will run their respective timers. The bathroom light is on for the shortest amount of time, the movie light is on for about double the bathroom light time, and the sleep light process is the longest. It is turned off for “8 hours” (in my simulation, it is 8000 ms) and then turns on indefinitely. I decided to leave it on because it is meant to wake the user up, so the timing will vary depending on the user and their morning schedule.

Light system with GUI.

Closer view of the light boxes

Future Work: 

I hope to scale this project up a lot. My dream would be to connect it to a long bright LED strand and fix up the GUI control system. Each mode should be able to enter custom times and there should be a reset/all off button. I would want to add a few more sensors that would provide other assistance, as well.


Code:

assignment4