Room Light Controller
Background:
My idea for this project stemmed from my own room here in Pittsburgh. I currently turn on three different lights to get the ideal lighting in my room. There are two lamps and a string of starry lights. This past weekend, I was about to watch a movie and found myself wishing that I didn’t have to keep getting up and down to adjust the various lights according to my tv activity (movie, video games, tv, etc…). I’ve also been finding that the dark winter mornings have been making it difficult for my body to want to wake up. These problems were my inspiration for this light system project.
Description:
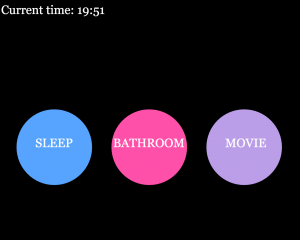
My light system starts with a simple GUI with three big buttons. The modes are sleep, bathroom, and movie. The idea behind the sleep button is that you would click it and the lights would turn on however many hours later you wish to sleep. The idea behind the bathroom mode is that the lights would turn on for about 3-5 minutes to guide you to the bathroom at night when you need to go in the middle of the night and then turn off, eliminating your need to touch a switch. The movie lights will turn on for about two hours and then turn off for ideal movie lighting. My vision is that there would be one long strand of lights lining my room ceiling. My demo is a prototype that I hope to further develop.
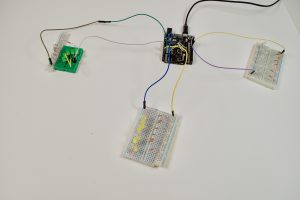
Photo of Arduino set-up

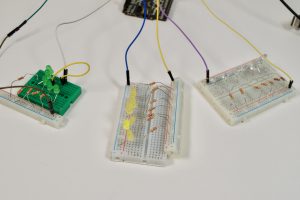
Closer view of the three bread boards–they are all wired the same way

Screenshot of simple GUI

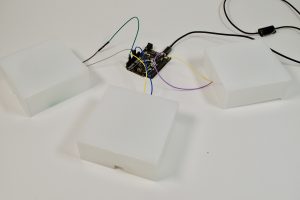
Final physical output

Process:
I started by using Javascript to create these buttons. I drew out the dimensions and figured out what if statements I needed to write to catch each click in the three distinct circles. Next, I sent a distinct serial key for each button to the Arduino to turn on three corresponding lights. I found that drawing the GUI and having them each turn on a single light was a smooth and promising process for me. I tried to remain aware of color blindness as I chose colors for the buttons and LEDs. My next step would turn out to be my most time consuming: figuring out how to program three different timer settings.
Problems:
It turns out there isn’t a particularly easy way to run timed programs on the Arduino. After many hours of reading various Arduino community threads and forums, I realized that there wouldn’t be a library to do what I wanted. I tried a few timer libraries, but many of them used strange loop formats that would not work with my p5.js set-up. Setting up three LED bread boards also posed issues as some of LEDs were different shades and overall they were not especially bright. I knew this issue would most likely remain unresolved until the next prototype due to material and time constraints.
Solution:
After class on Tuesday, I wrote the timer into the javascript which turned out to be a much easier fix. I created functions for each mode, as well as functions to turn off each mode. I utilized a javascript function called setTimeout to turn off the LEDs after an amount of time. I used the same simple LEDs because this was our first prototype.
Result:
My project is a prototype of system for a much bigger room. Each button controls a light square. Sleep is green, bathroom is white, and movie is yellow. Sleep turns on after 8000ms, bathroom turns on for 2000ms and movie turns on for 5000ms. I scaled back the time because if the timing works for seconds, it will work if I multiply it out and set it for hours. This also made it able for me to debug and run tests quickly. I laser cut three boxes to try and enhance the weak LED lighting. I chose frosted acrylic because I had used it in a previous project and it created a glowing effect.
Videos:
The left button is ‘Sleep’, the middle button is ‘Bathroom’, and the right button is ‘Movie’. The LEDs are very dim and hard to see when the room is not dark. The buttons can be clicked at the same time and they will run their respective timers. The bathroom light is on for the shortest amount of time, the movie light is on for about double the bathroom light time, and the sleep light process is the longest. It is turned off for “8 hours” (in my simulation, it is 8000 ms) and then turns on indefinitely. I decided to leave it on because it is meant to wake the user up, so the timing will vary depending on the user and their morning schedule.
Light system with GUI.
Closer view of the light boxes
Future Work:
I hope to scale this project up a lot. My dream would be to connect it to a long bright LED strand and fix up the GUI control system. Each mode should be able to enter custom times and there should be a reset/all off button. I would want to add a few more sensors that would provide other assistance, as well.
Code: