Independent Project: BLOOM

BLOOM from Brooke Ley on Vimeo.

Video

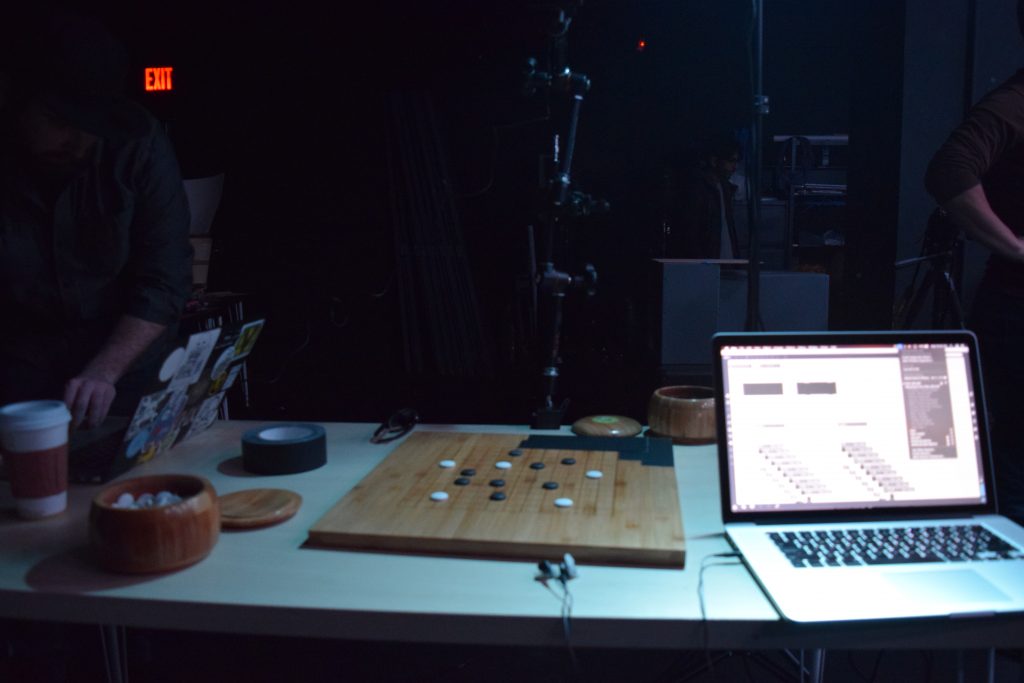
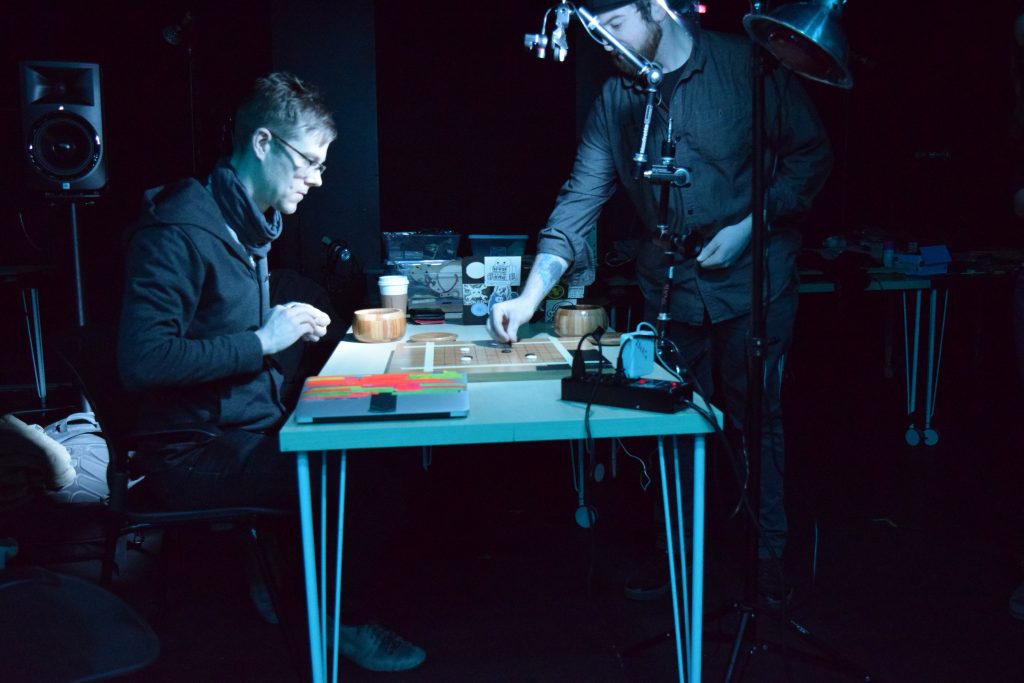
I originally created these videos for an installation piece for Augmented Sculpture, which is where the opening picture is from. The video is found footage of cacti and mushroom timelapses distorted through datamoshing. More information about the method of datamoshing I use can be found at this link. I used I-Frame destruction on the left and P-frame duplication on the right

Note of caution: Datamoshing is really annoying to do. I like this method the most because it gives you the most range of freedom over how it is distorted. However, you have to use this very ancient software since you’re not supposed to be able to corrupt video files in this way. If you want to get into datamoshing, feel free to contact me for some tips and techniques I’ve found that help.

Audio

The original piece I used was a paulstretched version of this song by my friend from Pitt. For this project, I wanted to recreate what I did with my video by distorting it in an artistic way. I used the Vinesauce ROM Corruptor which is typically used for distorting ROM files for video game emulators. It was named after this channel which will play corrupted videogames for fun results. Since it uses bit corruption, you can use this tool for more than just ROM files. I sent a wav of the paulstretched track through the corruptor twice, using bitshifting both times. I edited the track a bit afterwards in Ableton live to make it a little bit more listenable. I hope to experiment more with this tool in the future.

Mario v. Star Wars Go

Our idea was to play off the intensity surrounding the game of Go. We wanted to increase the intensity using two nostalgic fandoms battling against each other.

The idea behind what I built was to use level meter~ attached to a contact mic to trigger playback from a random bank of samples based on player turn. I also used cv.jit.track to track the position, and displacement of the payer’s hands. Kaitlin also used optical flux to control some parameters of the video.

The hardest part of this patch was programming the turn based logic, and separating the movement and stone play sounds. I wasn’t quite satisfied

Problems encountered: A single contact mic was not quite enough to trigger the samples every time someone put a stone down. We also ended up loosing the tracking dot too frequently and attached it to the players head, which yielded far less satisfying movement results.

Go Project

For the synthesizer engine of the piece, we used Max MSP. From Dan’s computer, he sent over OSC data to Steven’s machine to synthesize the gameplay. A video of this process can be found above. We used the UDP receive object to grab the data.

The OpenCV information was sent in the form of two arrays. The arrays were 9 binary representations of the columns. For example, the white array would send: “/white/100011101”. A ‘1’ would represent a piece on the go board section, and a ‘0’ would represent no piece on the go board section. The Max code would route the white and black array to different sections, and parse/unpack the arrays into individual messages. The combination of the unpack object, and a simple if statement, would send a “bang” message if a ‘1’ was received. There was 9 different indexes for both arrays, so there needed to be a total of 18 bang message systems. Each of the bangs were sent out to an individual synthesizer. In the code we named them “little_synth”, they were little synthesizers with an oscillator, and an ADSR. The inputs to the abstraction were for a bang message(note on), the pitch number, the attack of the filter, and the decay of the filter.

Each “little synthesizer” has an output that is set at the loading of the patch. The difference between the white group of little synths and the black little synths is the oscillator waveshape that is produced. The white little synths use a square wave to generate their sounds, using the “rect~” object in Max. The black little synths use a saw wave to generate their sounds, using the “phasor~” object in Max. We thought this would be a fun fight between the different waveshapes throughout the Go battle.

The little synths also played in different, yet harmonic keys. Each synth was a chord voicing over many octaves. The white synthesizers played an A minor 7 chord (A C E G) using MIDI pitch numbers, 45, 48, 52, 55, 57, 60, 64, 67, and 69. The black synthesizers played a C 7 chord (C E G Bb) using MIDI pitch numbers, 48, 52, 55, 58, 60, 64, 67, 70, 72. Ideally, the piece would sound more major, or minor, depending on who is winning the game, by having the most amount of pieces on the board. The sound is then all sent to an effects section. In the effects section there is a reverb object (using cverb~), and a delay object (using delay~). These object help liven up the dry synthesizers. The delay object particular helps create space in between each OSC message being received. After the effect section, it is sent to the dac~ object for output.

In the future, one improvement that could be made would be a method of actually calculating the current winner of the game, as it does not necessarily correlate to the number of pieces that player has on the board. It also might be effective to add samples from videogames to add to the theme created by the chiptune-like synths.

set up
set up and performance

Markov Chains in Cm

For our project (Joshua Brown, Garrett Osbourne, Stone Butler), we created a system of Markov chains which were able to learn from various inputs – MIDI information imported and analyzed through the following subpatch, as well as live performance on the Ableton pad.

Our overall concept was to create a patch which would take in a MIDI score, analyze it, and utilize the Markov systems to learn from that score and output something similar, using the captured and edited sounds we created.

Markov chains work in the following way:

Say there are three states: A B C
When you occupy state A, you have a 30% chance of moving to state B, 60% of moving to state C, and 10% chance of remaining in A. A Markov chain is an expression of this probability spectrum.
In a MIDI score, each of the “states” is a pitch in the traditional western tuning system. The patch analyzes the MIDI score and counts each instance of the note C, for instance. It then examines each note that comes after C in the score. If there are 10 C’s in the score, and 9 of those times, the next note is Bb, and the 1 other time is D, the Markov chain posits that when a C is played, 90% of the time, the next note will be Bb, and the other 10% of the time, the next note will be D. The Markov chain does this for each note in the score and develops a probabilistic concept of the overall movement patterns among pitches. Here is the overall patch:

The sounds were sampled from CMU voice students. We then chopped up the files such that each sound file had one or two notes; these notes corresponded to the notes in the c harmonic minor scale. The Markov chain system would use the data it had analyzed from the MIDI score (Silent Hill 2’s Promise Reprise, which is essentially an arpeggiation of the c minor scale) to influence the order / frequency of these files’ activations. We also had some percussive and atmospheric sounds which were triggered via the chain system as well. We played with a simple spatialization element, so as not to overwhelm.

This is what we created:

The audio-visuals patch was made by taking the patch we made in class (the cube visualization which responded to loudness of a mic input) and expanding it to include a particle system that was programmed to change position when a certain peak was reached. the positions were executed using the Ease package from Cycling ’74.

ESS Project 2 – Music from Blobs

Roles:
Computer vision programming – Dan Moore
Max Patch Programing and Sound Design – Kaitlin Schaer
Percussion Patch and Documentation – Arnav Luthra

Overview:
Our goal for the project was to create a live performance system that would create music from the act of drawing. To do this, we utilized computer vision to recognize shapes being drawn on a piece of paper and generate sounds in response to the shapes being drawn. We had three main “instruments” one of which was melodic while the other two were “whooshey” sounds.

Technical Details:
For the project, we ended up using two Max Patches and a separate instance of OpenCV. The computer vision processing was done on Dan’s laptop and allowed us to get the colors of various blobs, the location of the blob’s centroid (blob’s central point) and the velocity at which the blob was growing. We then took these parameters and send them over to Kaitlin’s laptop using OSC (Open Sound Control). From Kaitlin’s laptop, we took these parameters and used them to control an arpeggiator as well as resonant filters on the sounds. The arpeggiator added different notes within a fixed key depending on the location of the blob and then triggered two different midi instruments (the melodic saw wave and on the whooshey noises). The third instrument took white noise and applied resonant filters at a rhythmic interval to create a percussive effect. Parts of this patch were pieced together from various sources online and then compiled and modified to suit the needs of our project.

Video of final performance:
https://drive.google.com/open?id=0BzxqdpE9VUgJR04xMjlsN0U3MHc

Closing remarks:
Overall our presentation went well despite a few technical difficulties in the beginning (We ran into some difficulties getting Kaitlin’s laptop to receive the information from Dan’s). We were limited in what we could do with the computer vision aspect but if we were to continue this project we could find other interesting parameters to get from the drawings.

A Cyborg Duet in Ode to Bach

Summary
To accomplish the goal of having a computer perform in real-time with a human, we “faked” a violin duet (Abby & Nick) in accompaniment of a MIDI keyboard running through Ableton Live (Joey).

With this, we were able to produce a version of Bach’s Partita in D Minor, No. 1 that was truly a unique addition to the alterations/remixes of classical music that have been done in the past.

.wav
.mov

Process
The beginning of our ideation naturally started with how we could combine human live-performance with computer-performance. From the start, we were lucky enough to have both Abby and her electric violin; Nick is always excited to put his Max abilities to the test, and Joey was quick to be interested in getting on a MIDI keyboard to fill in any empty space that was naturally going to exist in our piece. After our quick decisions on the real-time human performance, we went through a few ideas concerning the real-time performance from the computer.

At first, we considered using a pedal board to allow Abby to create, play, and pause loops, but quickly realized this would be a lot of strain on her and could be much more “computerized” anyways. We ultimately decided we would “fake” a duet using the Max patch Nick made with Joey on the MIDI keyboard connected to Live.

Max Patch
The pitch and volume of the incoming signal control both the playback position and the volume of grainstretch. Using gbr.yin to track the pitch of Abby’s violin and meter, we’re able to track the incoming amplitude. After recording audio into Silo#0, a timer sends the length of the recorded audio to a scale object attached to the tracked pitch of the violin so that it can accurately control the position of the grain playback.
As a side-note worth mentioning, Nick built in a lot of extra functionality that we didn’t use (e.g. the transport control & the ability to record and loop the data from the violin).
[source code] https://gist.github.com/nikerk34/814ca8a7e43eca9f5f5b4f1c9fd48a54
[externals] http://ftm.ircam.fr/index.php/Gabor_Modules
http://www.maxobjects.com/?v=objects&id_objet=4758

Presentation and Closing Remarks
The presentation went extremely well other than a few technical difficulties in the beginning — sadly this was strictly due to not turning the “audio on.” Other than this hiccup, the volume on our keyboard for Joey’s side of the performance could have been slightly higher, but we received great feedback from the class.

Performance
https://drive.google.com/open?id=0BzxqdpE9VUgJb0VuTUoxVG52THM
[AUDIO COMING SOON]

Credits
Technology and production by Nick Erickson (max programming), Abby Adams (live violinist), and Joey Santillo (live synth); documented by Jack Kasbeer.

Project 2: Mbira – Omnichord Duo

Concept:

With our project, we wanted to use the unique instruments that some of the group members owned in a live performance manner. In the end, we discovered that both the Omnichord and the Mbira have peaceful and dream like qualities to them. We decided, then, to pair up these two instruments to make a dream-like live performance.


Mbira


Omnichord

Max Patch:

The max patch is structured to allow the user to create loops of live instrumentals in real time, while projecting a granularized version of the loop through a speaker across the room from the dry sound. We decided to use granular synthesis to further the trancelike direction we wanted our piece to have. The user can control grain parameters such as duration, rate and slope by adjusting the range for each parameter. For every grain produced, the parameters are randomized based on the current ranges selected. This gives the piece a sense of movement and change. The user can also control the levels of all speakers within the patch, and create crossfades between the dry and wet sounds for each loop. We used the grooveduck object to handle the loops, and the 03h granular synthesis library along with the poly~ object to create the grains. We also utilized the parallel parameter of the poly~ object to parallelize the computation of each grain in order to reduce CPU load.

In terms of changes to make in the future, one change that we would make would be to utilize a high-pass filter on the Mbira to remove the physical sounds that might have been generated from the way it is played. We could also utilize movement between the speakers and a more solid sense of sound direction to prevent the piece from becoming stagnant.

Link to the Max Files:

https://drive.google.com/drive/folders/0B3dc0Zpl8OsBMk9MeFJPTGRCVzQ?usp=sharing

Golan Levin’s Presentation: The Stomach Song

When Golan gave his lecture, he showed us a multitude of different experimental methods to produce and experience audio as well as visuals.

The entire lecture was captivating in the sense that it gave us a means of understanding what has been done, what can be done, and where to go from there. How can we expand on experimental methods of producing and experiencing. One specific video that Golan shared with us caught my attention and that was William Wegman – Stomach Song – https://www.youtube.com/watch?v=7bOym_kkvaE

It caught my attention because I believe in creating experiences that expand on a guests understanding of what it is to be a human being in order to expand our experience as human beings?

The average person in this video can see there is a face made up on the stomach. We grow to humanize it, and personify it. During the video we forget that it’s not a face, but rather a stomach. That stomach doesn’t have feelings, nor does it have desires. But, this doesn’t matter to us at the time because in order to suspend our disbelief and serve the narrative we unconsciously understand that we have to think of this as a face in order to gain anything from what I am watching.

Life is full of defeating moments that are hard for us to bear. But, humans are survivors, through thousands of years of evolution we have learned to endure and that is how we have made it this far. But, perhaps the next step in human evolution isn’t continuing to fight back from these defeating moments but rather to surrender to them. To find a balance and say “It’s okay for me to feel right now. It’s okay for this to be happening right now.”

Finding a harmony between fighting and surrendering in our experiences as we fill them with reliability and experimental aspects. Giving to the listener and urging the listener give back to us.

Perhaps, this is the next step in the evolution of understanding how to expand our experiences as human beings and I think we can do this through music.

I feel comfortable saying that most people listen to music because music makes them feel something. If a piece of music makes me feel nothing then I, personally, will be less inclined to listen to it, unless I am listening to it for the purpose of study. Using this approach of creating experiences that we might not understand but can learn to surrender to and appreciate is one method that will change how we experience listening and perhaps, life in general.

Golan Levin

Golan Levin visited the Experimental Sound Synthesis class and shared an interesting history of sonic art, paired with visuals. He showed us a few examples of using waves and grids to generate visuals using processing. He continued to show us a couple programs he has written that visualize various aspects of sound (frequency and time domain visualization, etc). My favorite aspect he exposed me to is autocorrelation graphs. The algorithm compares the wave to itself at offset intervals then takes the average. I find this fascinating because of my interest with moire patterns: two sets of lines interfering with one another. I plan to investigate this further, and use it visually in my screen prints.

As a design major, I use motion graphics (after effects) a lot. Golan showed us early motion artists who used paint, chemicals, and shapes to visualize audio. I was glad to see early forms of audio and motion. One of my favorite movies is Walt Disney’s Fantasia, and we watched sections of films that inspired Disney to create that film. Norman McLaren was an experimenter who made sound from visual pieces, exploiting the film technology at the time. McLaren designed a film using graphical sound to create audio and visuals. The shapes on screen creates sounds the viewer hears. McLaren also uses the shapes to tell an intricate story full of emotion, especially humor, longing, and desire.