Final Project – Heejin, Skylar, Jules

Group Questions & Photos:

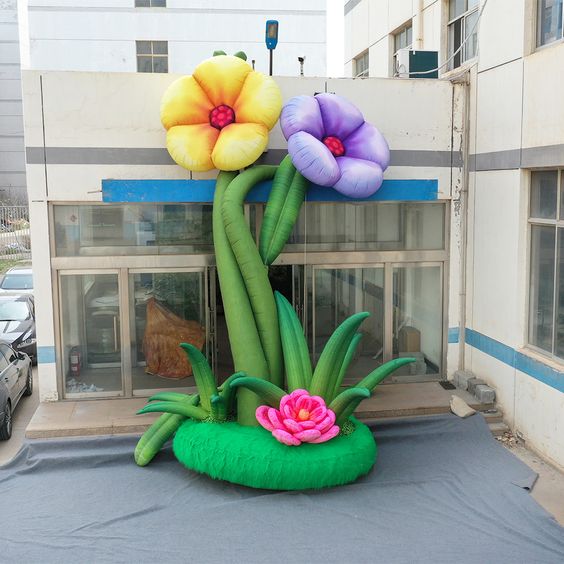
  • Through scouring lots of inflatable inspo pics, Heejin gravitated towards the inflatable flower shapes so we decided to build around that idea and thought of shapes that could complement the flowers and gardenscape.
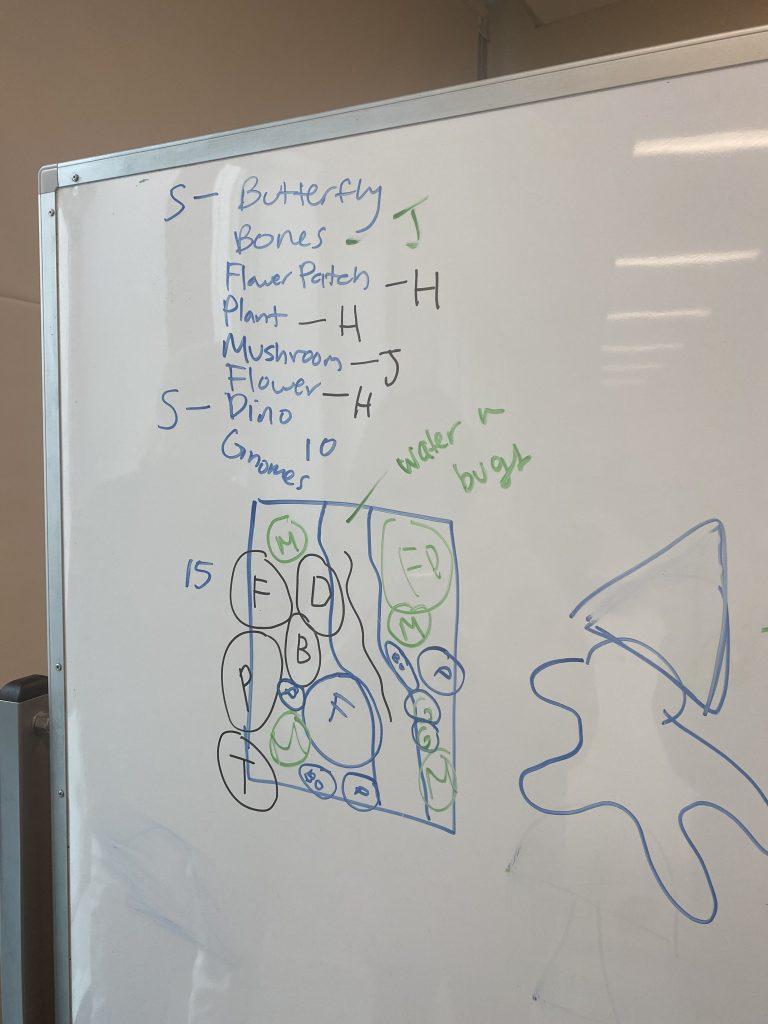
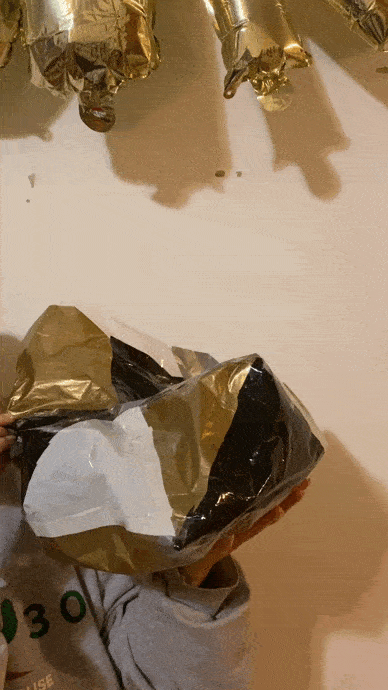
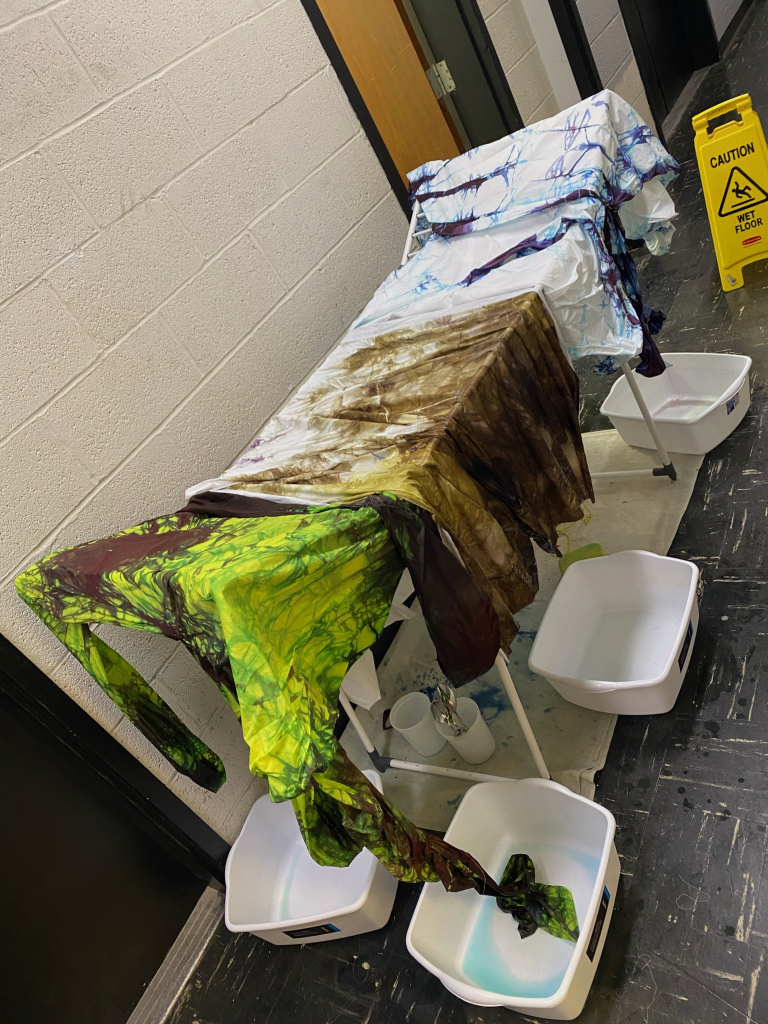
  • In the beginning, we found flower inspo pictures. We mapped out where we wanted our objects to go. Started building some pieces and did a test inflation to see how they work out. Spent a day dyeing the fabric. Created a new layout with our pieces and did another test inflation. At the end, we had finished sewing u all our pieces and put them all together for the show! (Then, we had to change the layout again for the animators xp)
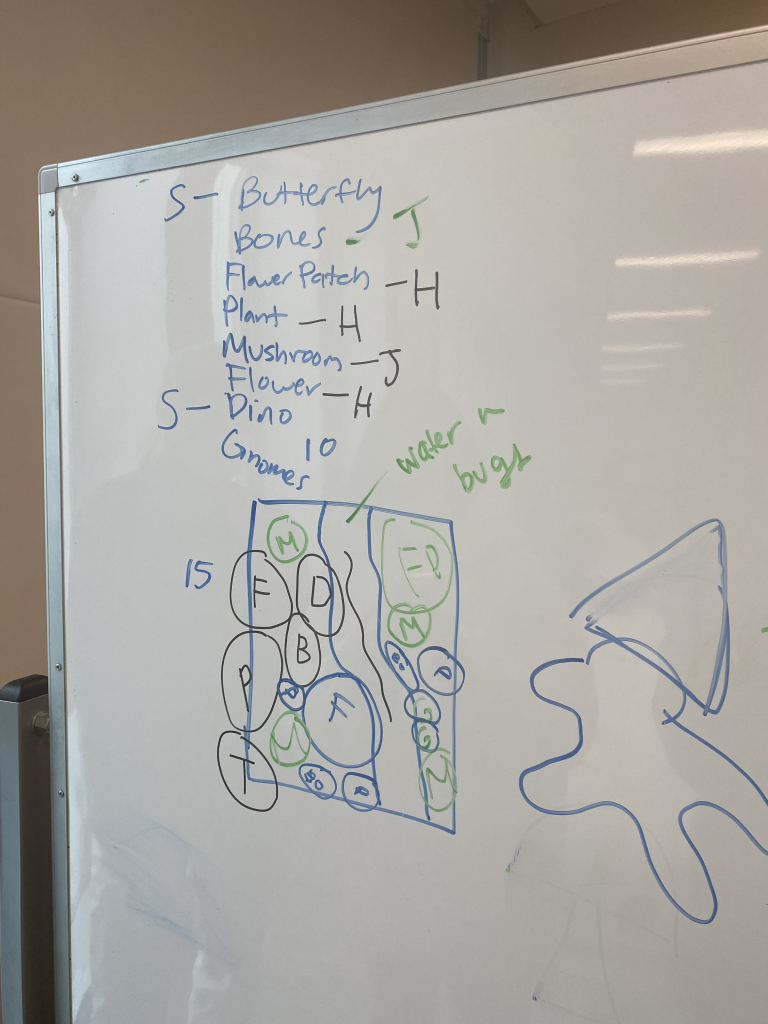
  • One of the challenges we encountered was figuring out how to combine the pieces together in a way that was somewhat cohesive. To figure it out, we repeatedly did test inflations and moved around our placement a lot. This also helped understand where we needed to fill the gaps and make objects to fit into places. Since our project was very modular, we didn’t encounter too many challenges.
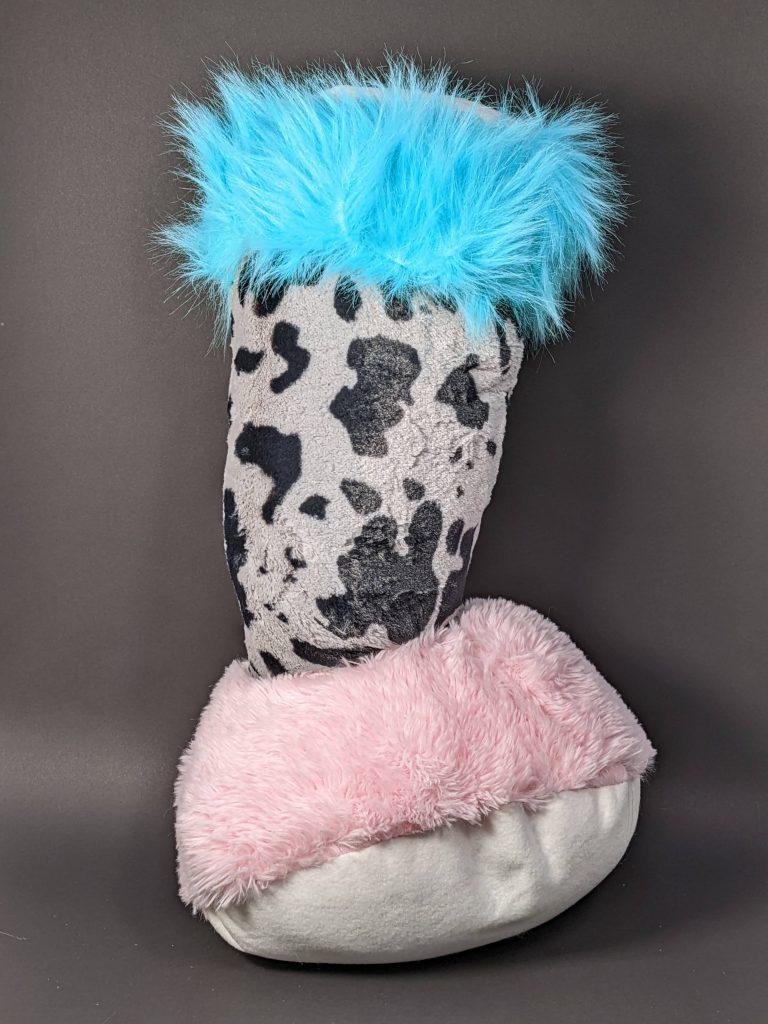
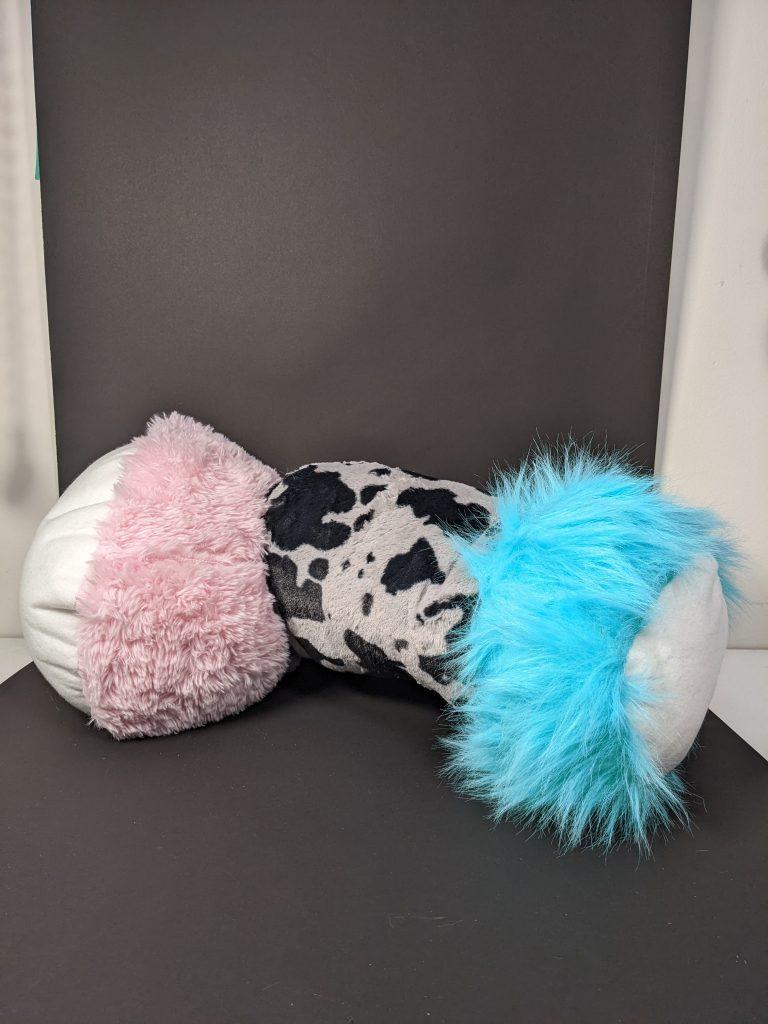
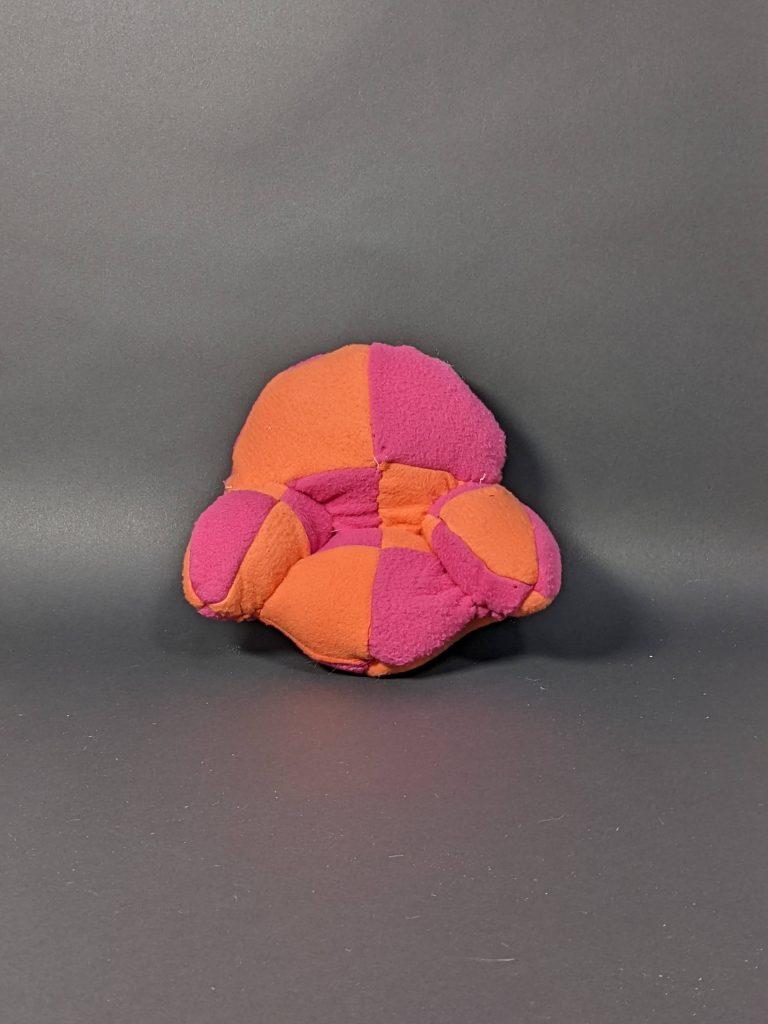
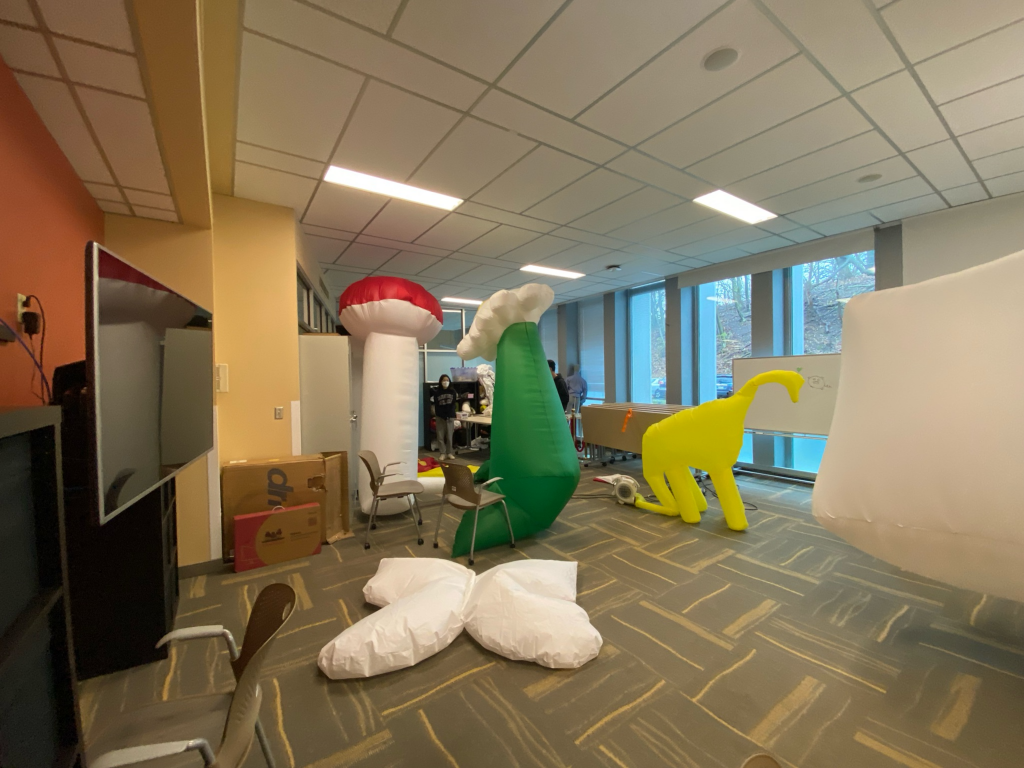
  • The “happy accidents” occurred throughout the piece. We all had kind of wonky looking shapes because we decided against prototyping the pieces in Rhino, but I think it made the environment feel more cohesive because all the shapes were a little out of proportion and whimsical.

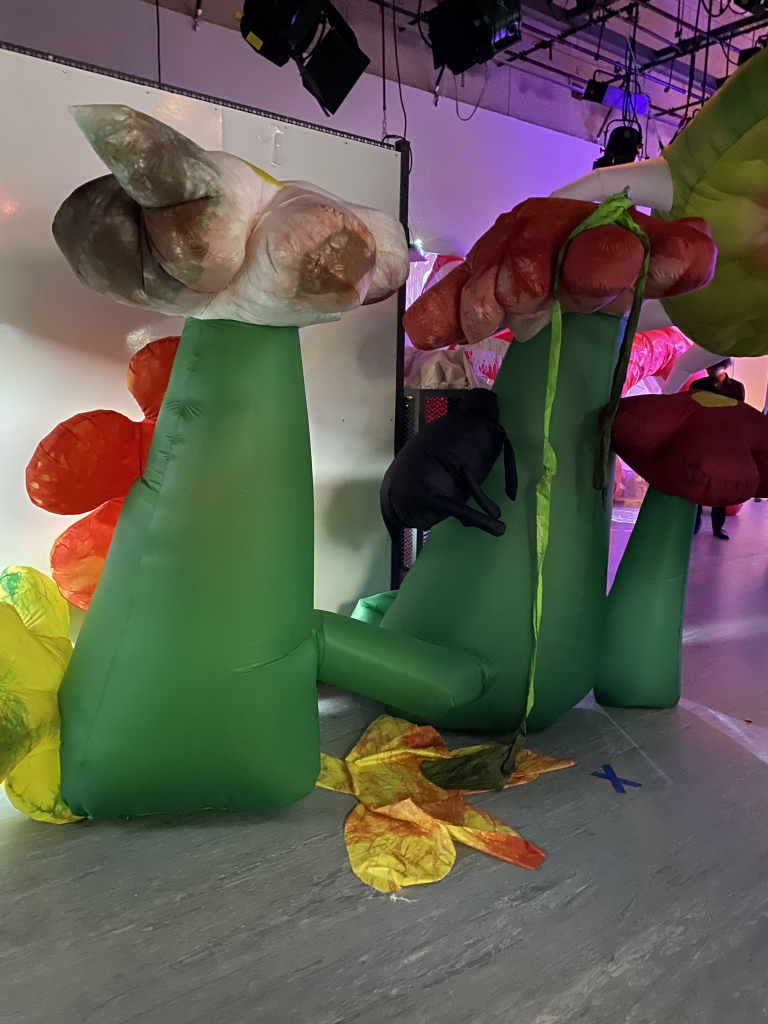
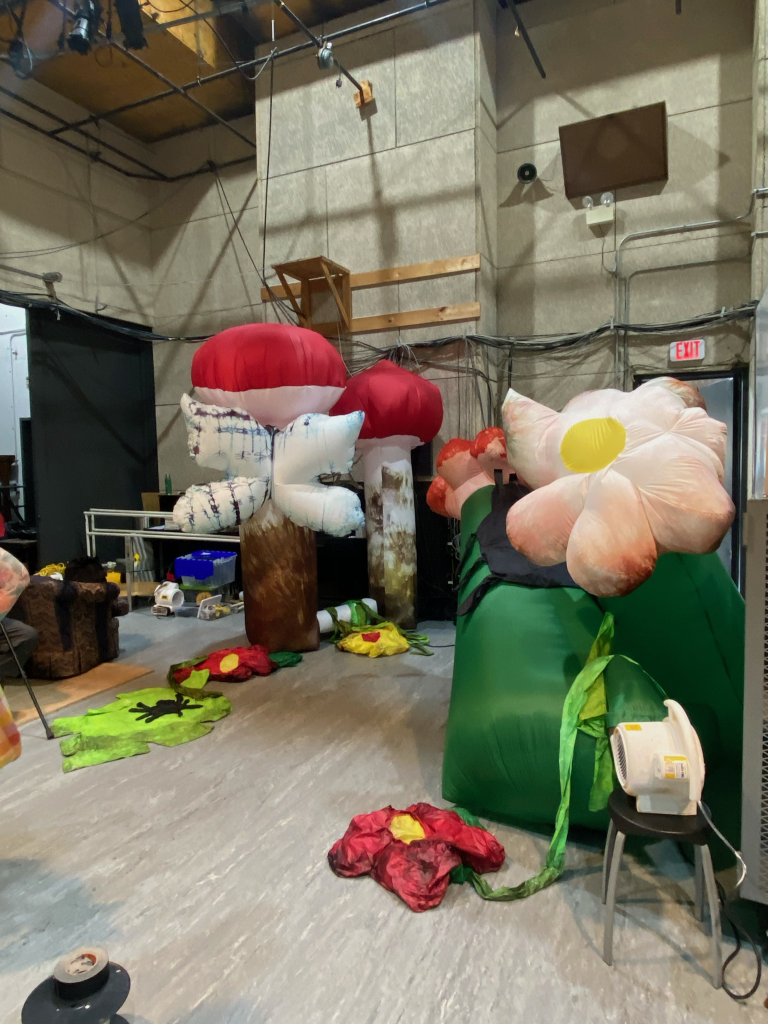
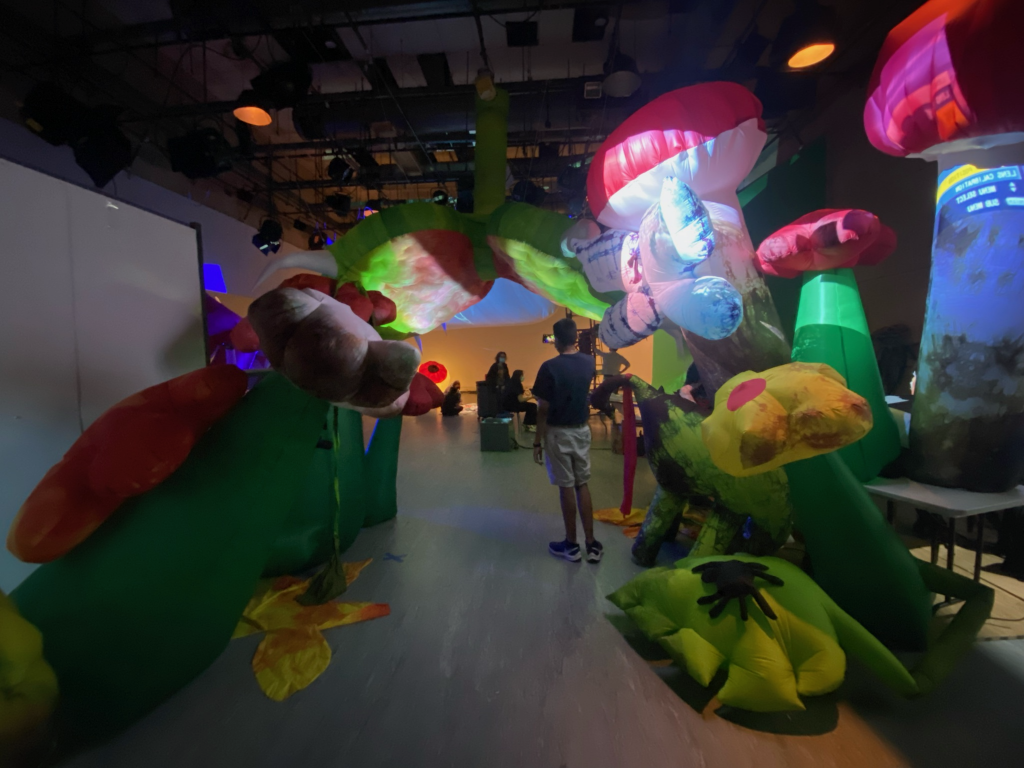
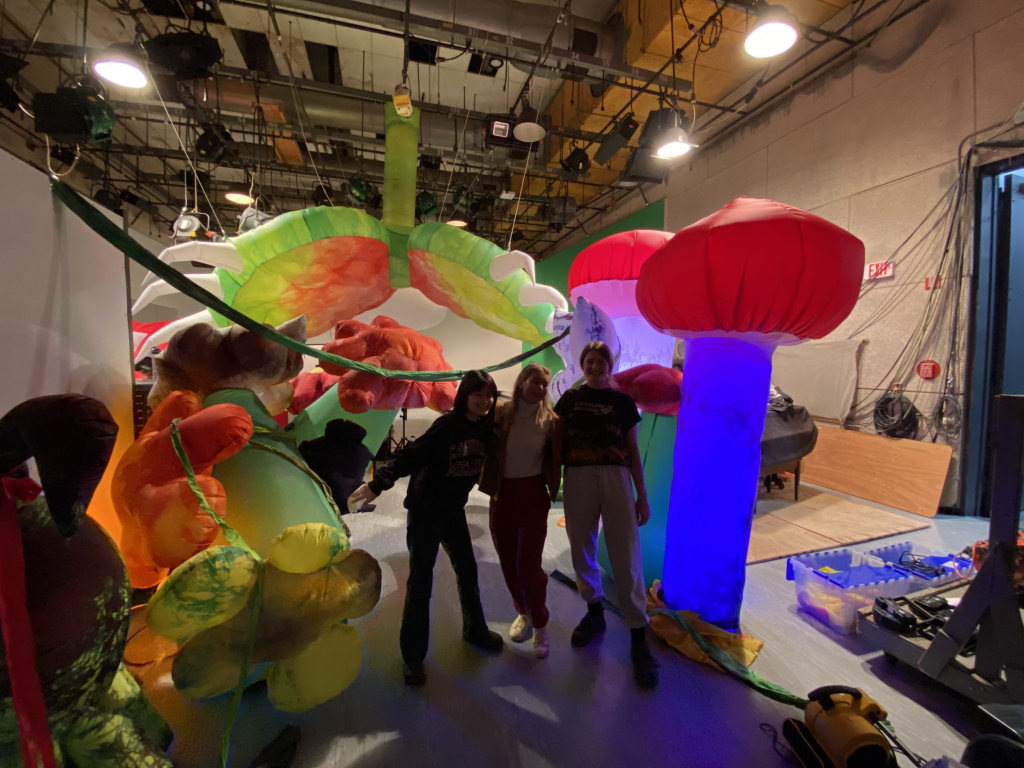
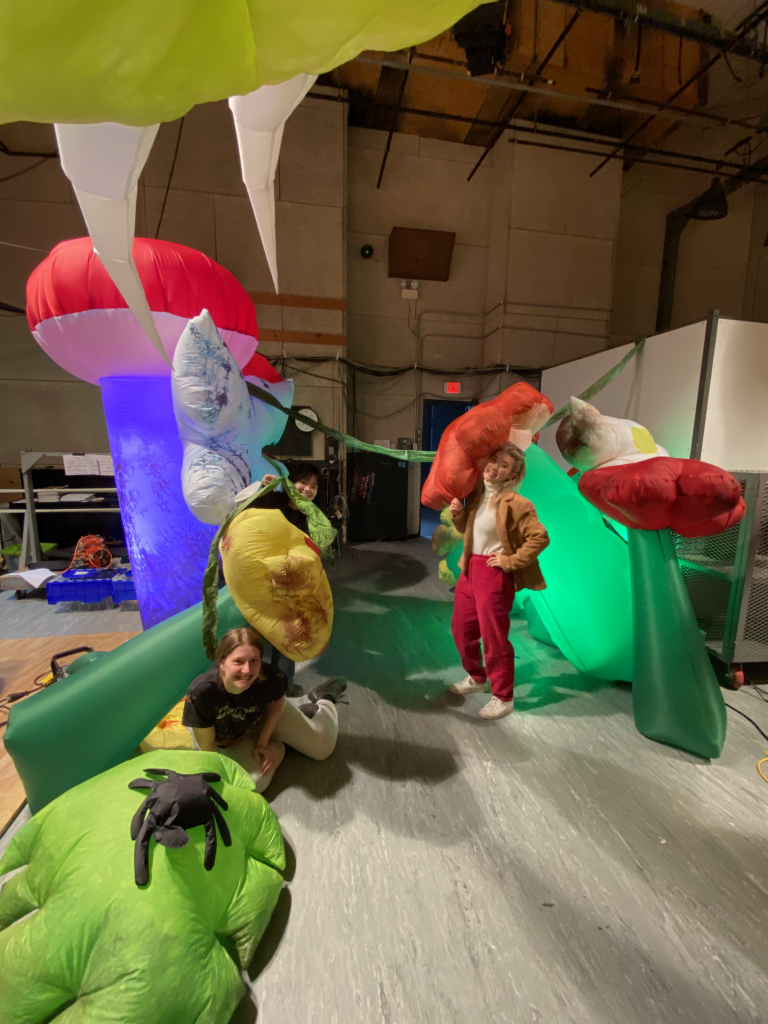
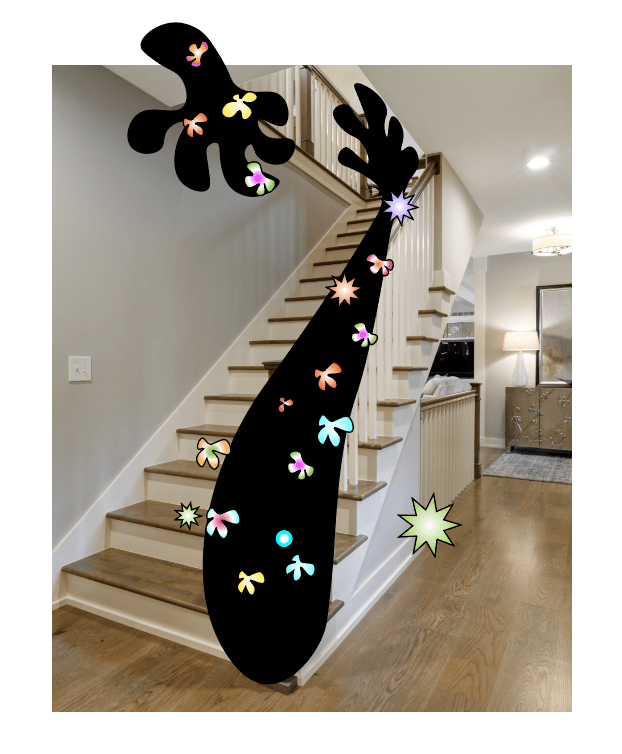
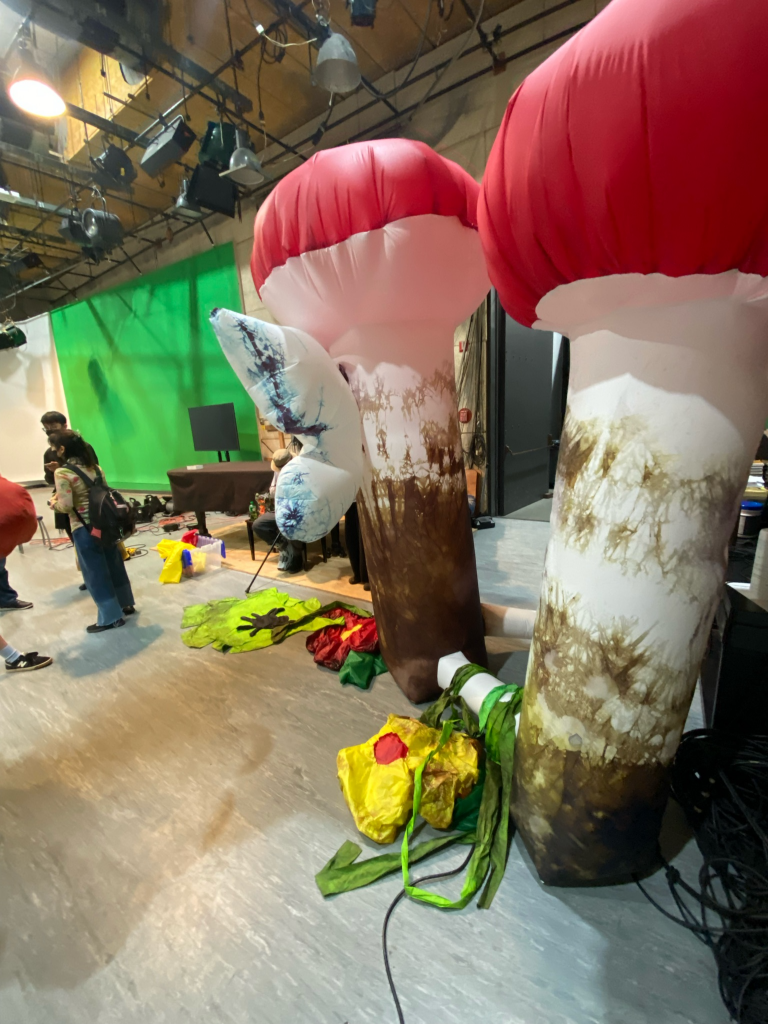
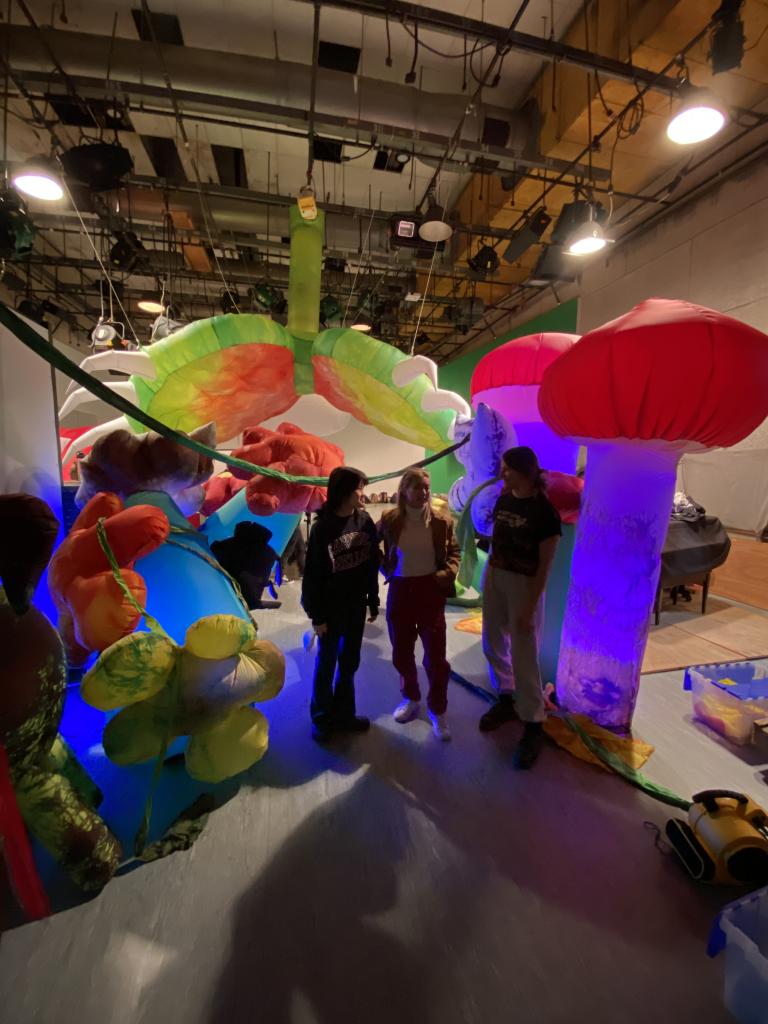
This project is an eclectic, psychedelic garden pathway with gargantuan flowers, mushrooms, and creatures. The projections are patterned light, bugs, and flowers that complement with the environment. The viewer feels very small in the space since the mushrooms and flowers span to 7 feet tall and give the viewer a wondrous experience.

Individual (Jules):

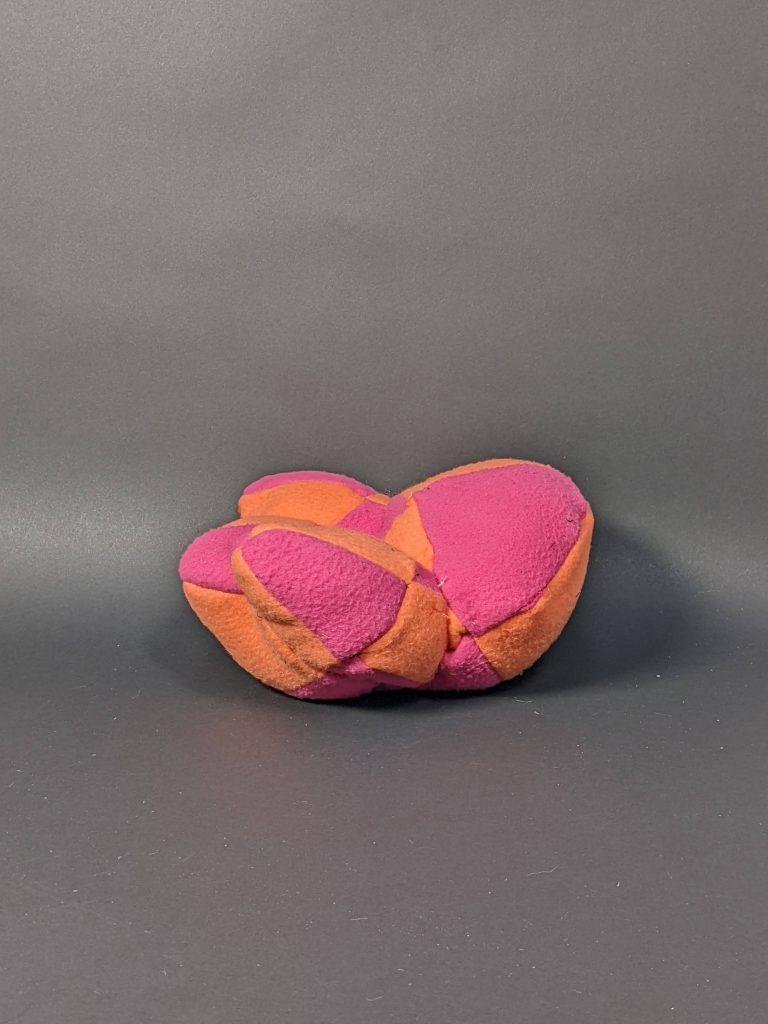
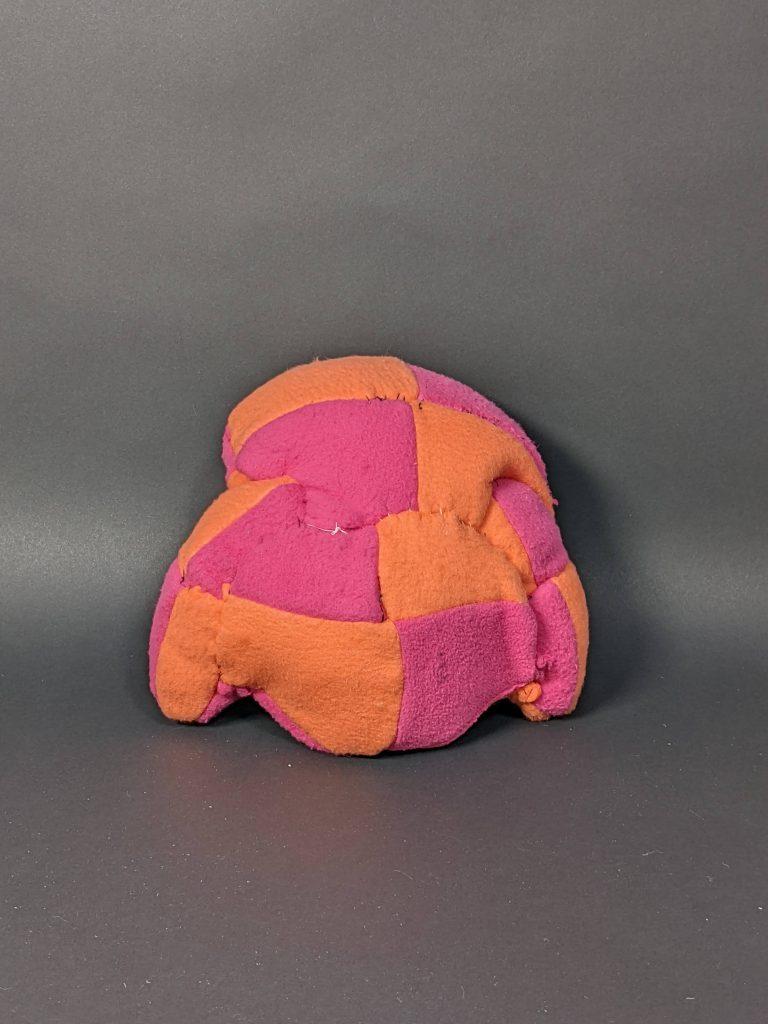
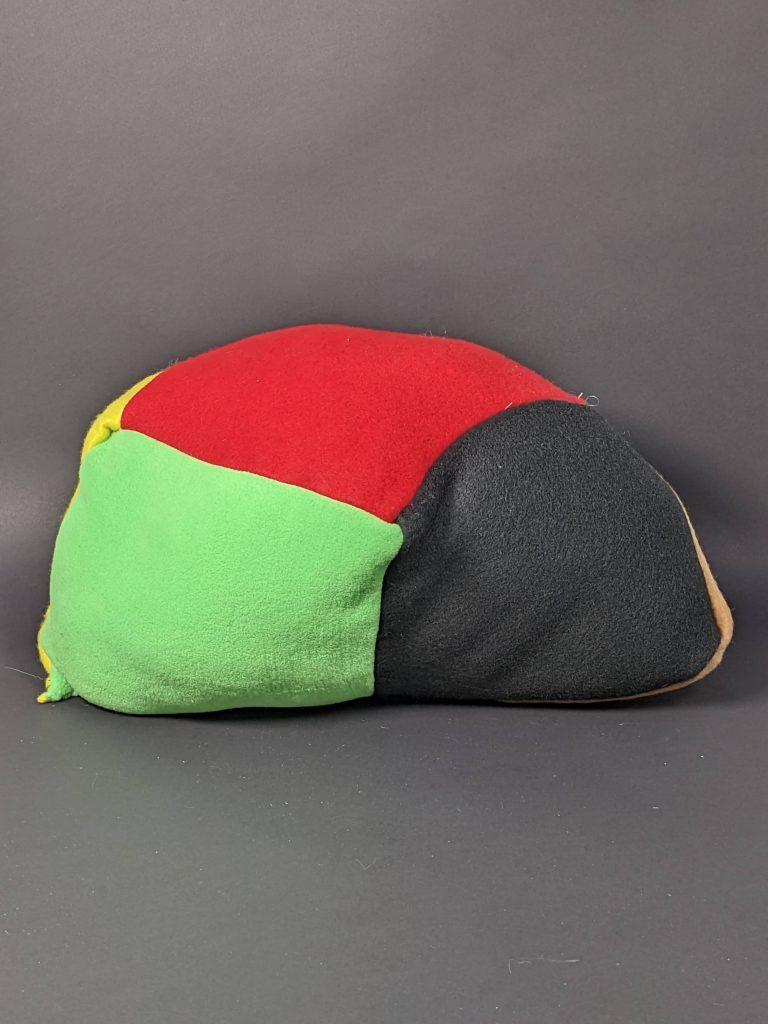
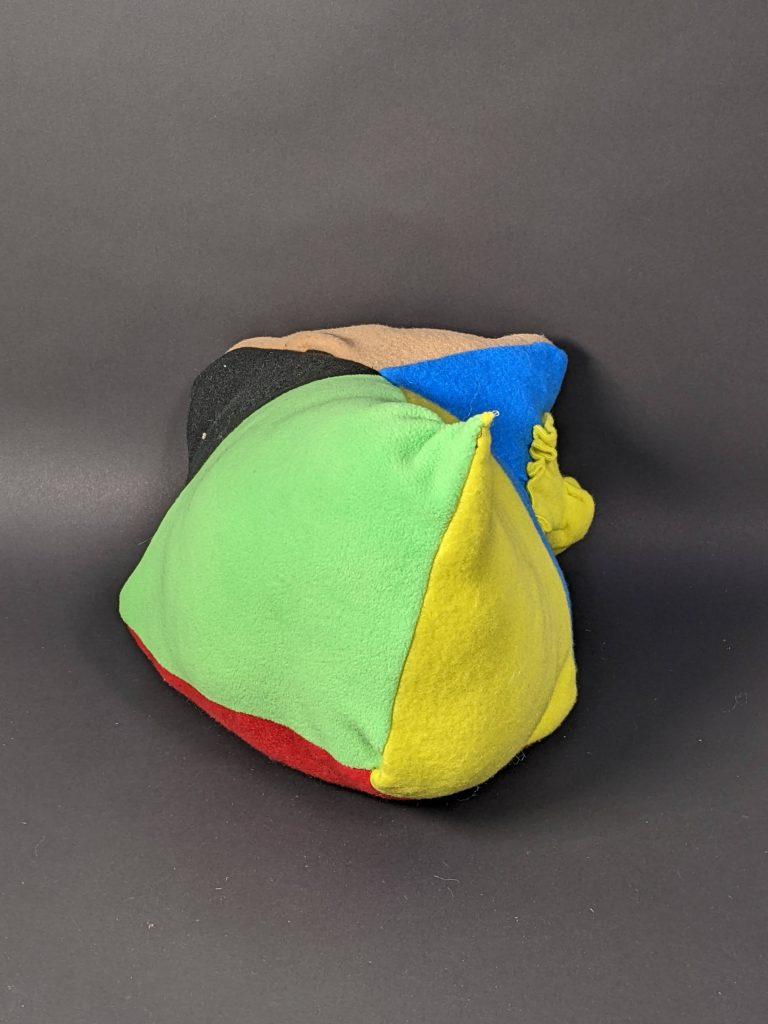
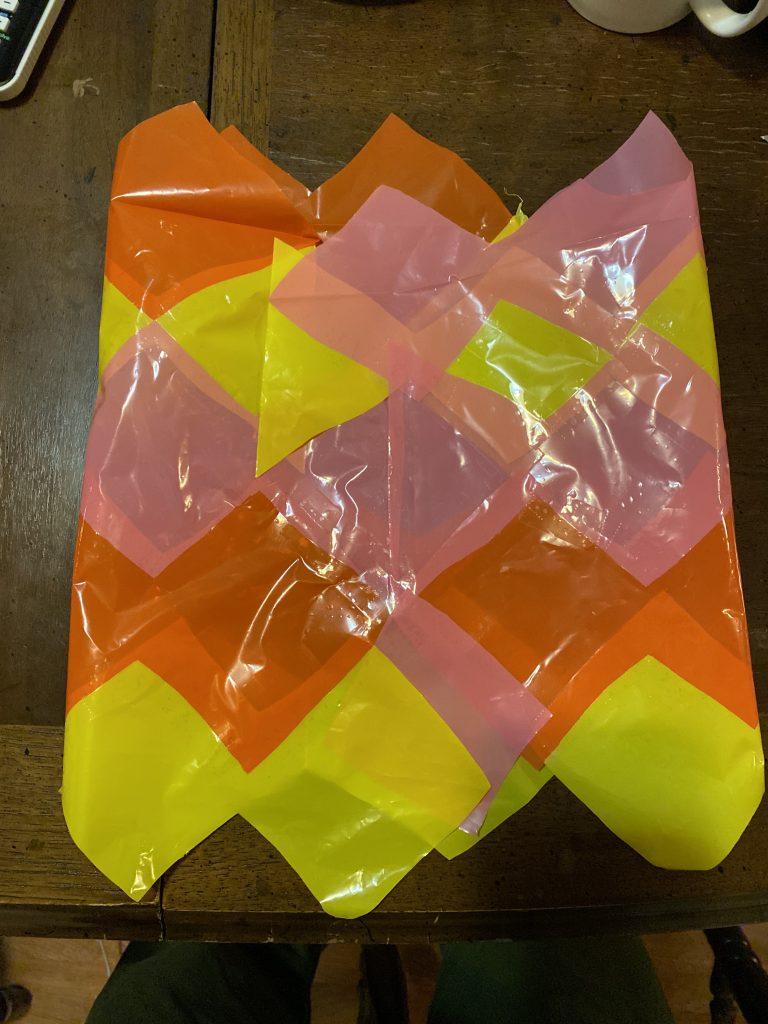
  • I thought our dye job came out more successfully than I thought it would. I wasn’t sure if bundling the fabric and dyeing it would look bad, but I think it added a really interesting element to the project that made it seem much more complex than if it was a solid color.
  • One of the challenges I encountered was making the mushroom cap more mushroom-like. In order to have the peak effect and the cap to form, I had to make a bunch of tiny pleats that was very exhausting and not fun. Before understanding the tiny pleats, I was making big pleats that did not look great
  • Top three things are knowing how to sew, use the laser cutter, and CAD. I think also in general, just time management and how to delegate parts of things in collaboration.
  • I think I observe that I can collaborate easily and I especially like to highlight other people’s skills in the creative process. I also observe that as long as someone is getting the work done, I don’t really care what small decisions or time management that someone is doing.
  • I would advise future students to start their projects as early as possible and frontload budgeting as much time as possible.

Individual (Skylar):

I think the most successful aspect of our project was the chaotic and busy feel that our process and dye jobs gave it. We did originally intend to have it be chaotic and creepy, but we didn’t really plan how to do that. I think having each of us own different parts of it and come up with new ideas before we put everything together was a fun way to achieve this – I felt really able to still ideate and create new things fairly late into the project, and it was different every time we set it up, which I don’t think the other groups got to do. I really appreciated that as in general I’m not someone who wants to stick with a meticulous plan. I love being able to just figure things out on the go. I think the dyeing was also a great addition and I’m really glad we did it.

We encountered group communication challenges often because we were all working on different parts and didn’t really understand how they would all fit together, especially because we kept coming up with new things. I think at the end we just decided to work with what we had and embrace the changes. We also struggled with connecting pieces since there were so many of them and it got so confusing to turn them all inside out. But we just made it work. 

  1. How to use sandbags 
  2. How to work with people who do not have my same amount of experience with group projects (I always had the same amount as people in my major, and did most projects with them, so it got to be really easy to collaborate by the end because we all knew each other) 
  3. How to use a walking foot and ripstop nylon (I want to make moreeee)

I think I can get frustrated when I feel like communication isn’t working but I like to think I feel comfortable letting people with different skills and experiences do what they are going to do without trying to micromanage. 

I would tell people in the future to believe in themselves and not let mistakes get them too down. 

Final Project Update – Heejin, Skyler, Jules

We started planning out the space and scrapped the cage idea.

We started to put together what our elements look like and split up some of the work. We talked about what we wanted some of the elements to look like (more 2d or 3d appearances). We also figured out dimensions for some of the individual objects. Currently, some of the patterns for the dinosaur, butterfly, and mushroom have been cut out.

Additionally, we started deciding some of the colors that we are going to dye the individual elements.

Final Project Proposal – Heejin, Skylar, Jules

Google Folder: https://drive.google.com/drive/folders/1-wQ4AfVUl1tBPIz-lVS8u94pxRpjEg4j?usp=sharing

Rough sketch of our idea.

Our idea is to build a creepy garden scene where the ground would roughly span a 15 by 10 foot area. Elements of this scene would include a large creature of some sort, flowers, and garden plants arranged in a rat-king style. There will be roughly 3 parts to the inflatable. One section consists of the cage archway to the garden scene and the other two sections will be the creature on one side and the plants on the other side of the archway.

In order to give the scene a creepy vibe, we intend on including bones, creepy gnomes, and hands as elements in the plant rat-king shape. The archway will appear as if the plants have joined together to form the cage shape.

Birds-eye-view drawing

Materials:

We intend on using a lot of a green fabric, so we hope that we would be able to purchase a roll of that. Also, we’re interested in dying parts of fabrics different colors. If we are only able to use the fabrics given, then we would make the whole thing red. In total, we estimate 200 sq. ft. for the floor, 100 sq. ft. for the archway, and 300-400 sq. ft. for the other plant objects.

The most challenging part of this piece would be managing all the different parts and figuring out how they would connect and inflate together. Our idea at the time being seems pretty intricate so it would be difficult to convey the detail that we are aiming for. We think if we plan out the pieces ahead of time and keep them organized and labeled, we will not get too confused in the process of connecting them.

Jules Yang – Push/Pull Part 1

My first inflatable was a combination of a cylinder for the cow print middle and modified cones for the ends. I cut out the tops of the cones to connect it to the cylinder and I cut out circles to cap the ends of the cones. I also utilized some pleating to get a kind of rippled effect on the cap of the white cylinder so that it would bulge outwards. This form was an interesting first exploration for me because I had to sew along many tricky curves. I really wanted to pick some garish, almost clashing type of fabrics to go together which is why I selected these very fluffy fabrics. However, they are balanced on either side by the white caps. I noticed the fluffy fabrics were very interesting to work with because they made pinning quite difficult at times and it was oftentimes tough to squeeze through the sewing machine especially with the pleats.

My next inflatable was my laser cut piece. I planned to make a funky looking sofa that I first designed out on Rhino. The piece is made up of ellipsoids of different dimensions put together. At first, I heavily warped each of the ellipsoids but scaled back on doing that because I realized it would be very difficult to split into pieces. Having no prior experience with Rhino and CAD, developing the pattern was a very difficult and frustrating process for me, but I eventually got the hang of it and really enjoyed the ease of the laser cutting and putting together the final result. I cut the same pattern onto two fabric pieces. I used kind of similar, yet also clashing colors to give it a funky look because I knew that when I put it together, I wanted it to have this checkerboard effect that highlighted where the Rhino cuts were. This piece required a lot of hand sewing which I enjoyed a lot, but it was also extremely tedious and was difficult because of the amount of tension I had to apply to really pull the back of the chair upright. One of the slight mistakes I realized I made was overstuffing the seat and back which made it kind of impossible to make it fully upright, but I enjoyed the full nature of the result regardless.

My last inflatable I wanted to play with primary colors and warping a more normal form like a cube. I started off with pinning and sewing together squares in a sort of haphazard order to create this new shape. Additionally, I used the technique shown in class with the circle that has slits cut in it in an attempt to create this shuttlecock shape that I sewed in the middle of one of the squares. The end result kind of reminded me of a seashell, arthropod ocean creature so I thought that it was kind of neat to have this little barnacle stuck to the side of it. Ultimately, the barnacle creature didn’t come out of as neat as I would have liked it to be so I left it at one instead of adding more. In this inflatable, I learned about how to join corners together as it was definitely a learning process for me to understand how to get the corners of this form crisp and some of them were slightly loose and I would have to go back and resew it closed. My friend also told me that he thought the form resembled the Pokemon Metapod which I’ve included a photo of below. 🙂

Jules & Heejin – Push/Pull Part 2

Our first idea is to expand upon the sofa couch that Jules made for Part 1 and make a large-scale version for Part 2. Location is still TBD, but we’re thinking of placing it somewhere near bookcases so that it would resemble an area where a reader would go to sit with a book. Additionally, if time allows, it would be great to make two of them placed next to each other so that it appears like a welcoming place for two friends to sit and read.

Our next idea is interlocking trees that resemble a large forest. We’re thinking of also placing this idea somewhere between two bookshelves, filling the space in between them.

Lastly, we wanted to incorporate an inflatable into one of the staircases of the library. We’re thinking of creating a snaking shape around a railing that resembles two arms that hug around it going upward. We also imagine that the arms would be adorned with some type of patterns that resemble tattoos or hair.

We decided to go in the direction of the sofa idea. We are using the colors of black and white.

Timeline of Benchmarks:

  • Wednesday, March 2nd – Get file pattern set up for projecting
  • Thursday, March 3rd – Start cutting out patterns
  • Friday, March 11th – Finish cutting out patterns
  • Saturday, March 12th – Have a portion of inflatable sewn
  • Monday, March 14th – Majority of inflatable sewn together
  • Tuesday, March 15th – Final modifications/testing
  • Wednesday, March 16th – Inflatable Due

Jules Yang – In the World

One of the rubber ducks floating in the Allegheny River.

For this assignment, I choose Florentijn Hofman’s giant inflatable duck sculpture series Rubber Duck. These ducks have the classic “bathtub rubber ducky” look, down to the bubbly shape and bright yellow body. These ducks have floated in various bodies of water around the world. His first display of the rubber duck was in France, but one aspect that I thought was particularly interesting was that the first appearance in the United States was actually in Pittsburgh in 2013! I had previously read in the news about this duck being installed in cities around the world so I thought it was especially fitting for this assignment because of how global this sculpture series is. Hofman said that this series is supposed to represent togetherness in global waters. I find these rubber ducks really amusing because they’re such a universal icon. To many, the rubber duck is a symbolism of playfulness and youth which I think draws in a big crowd.

Duck deflated in Hong Kong.

I was really interested in learning more about the construction of the ducks. They are made of PVC that are sewn together with sewing machines. The duck is kept inflated with a fan inside of its body. It seems to be fairly in line with how you construct a normal inflatable except that it is of course, extremely large scale, robust, and very waterproof, including the electric wiring that has to power the fan. I think it is super fascinating that the rubber duck series is kind of a simple idea, but it remarkably brings a lot of entertainment to people everywhere and is remembered over time.

https://en.wikipedia.org/wiki/Rubber_Duck_(sculpture)#Design

Jules Yang – Improvisation Inflatables

For my first inflatable, I started off with cutting out lots of random blue, clear, light green, and dark green pieces from the bags. I started off with the corner of one bag that I branched out of. At one point, I thought it looked kind of like a fish and the color palette was giving me ocean vibes.

I had lots of organic shapes that were kind of difficult to piece together. I used up the whole given tape roll on just half of the inflatable!

I learned from building this inflatable that it is hard to fit together pieces that are not made to fit together. Additionally, I figured out kind of how to make my own corners and points through joining together pieces in a 3-dimensional direction. This inflatable had a lot of leaks and holes that made it difficult to inflate so I also learned to repeatedly tape the bag on the outside and then turn it inside out to reinforce all the seams.

For my second inflatable, I decided to stick to some more regular shapes of mostly triangle-ish and square-ish shapes joined together.

I also learned how to use objects I had to lay the “seams” against them so that they are easier to tape.

In this inflatable, I reinforced all the seams by taping on the outside and inside. This one kept air a lot better than my first one because the edges matched together better with these shapes. I also was literally making my first inflatable on my bed so it was taped together all wrinkly, but once I had a large flat workspace, it made it a lot easier to make this inflatable a little more “crisp”. I also got a lot of practice with making these corners that I thought were really fun to make.

With my last inflatable, I decided to go with a more festive color palette. I layered yellow, orange, and pink bags on top of each other, folded them up, and cut out this diamond chain pattern to try something new out.

I joined these edges together and then at the top and bottoms, began attaching random pieces and creating new corners to create a more interesting shape.

At one section, I tried to connect a star-shaped hole together with a star face, but I learned from this inflatable that it is very hard to do that and ultimately was not very successful, but it taught me that in the future, I probably need to measure things more accurately because I was free-handing all the shapes.

I also created a pocket in one corner that I could poke the straw into so that I could secure the straw more tightly.

Overall, this assignment took me a lot longer than I thought, but it was a lot of fun and I learned a lot about how 3D structures are constructed. I was proud of how much I improved from one inflatable to the next.