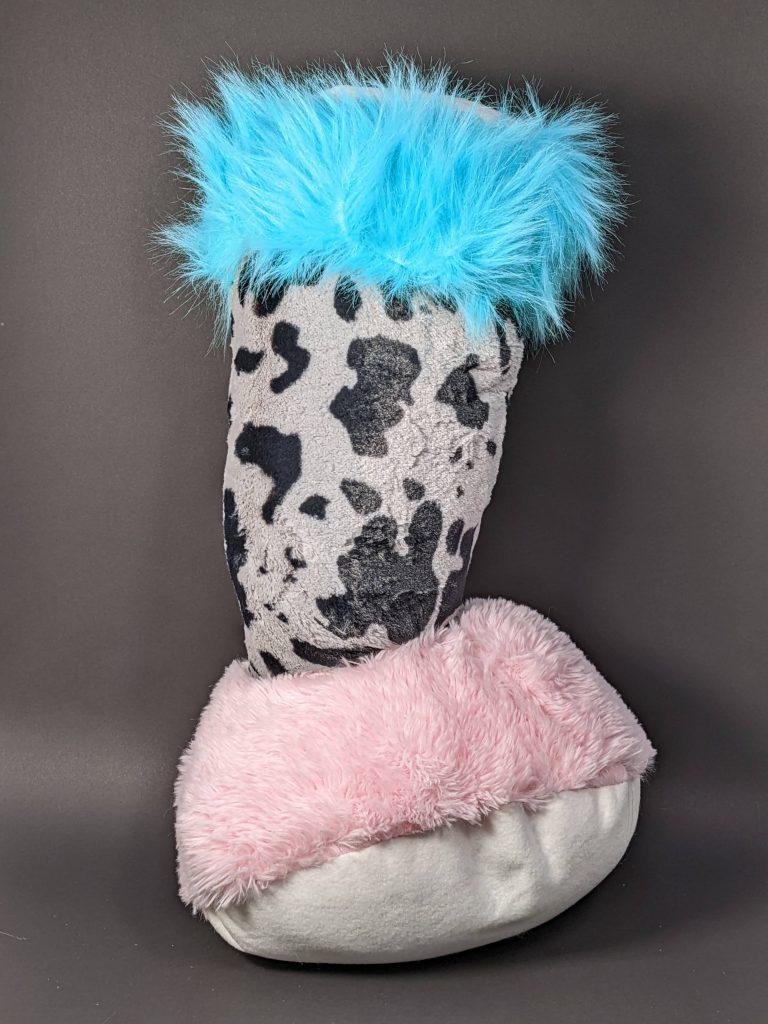
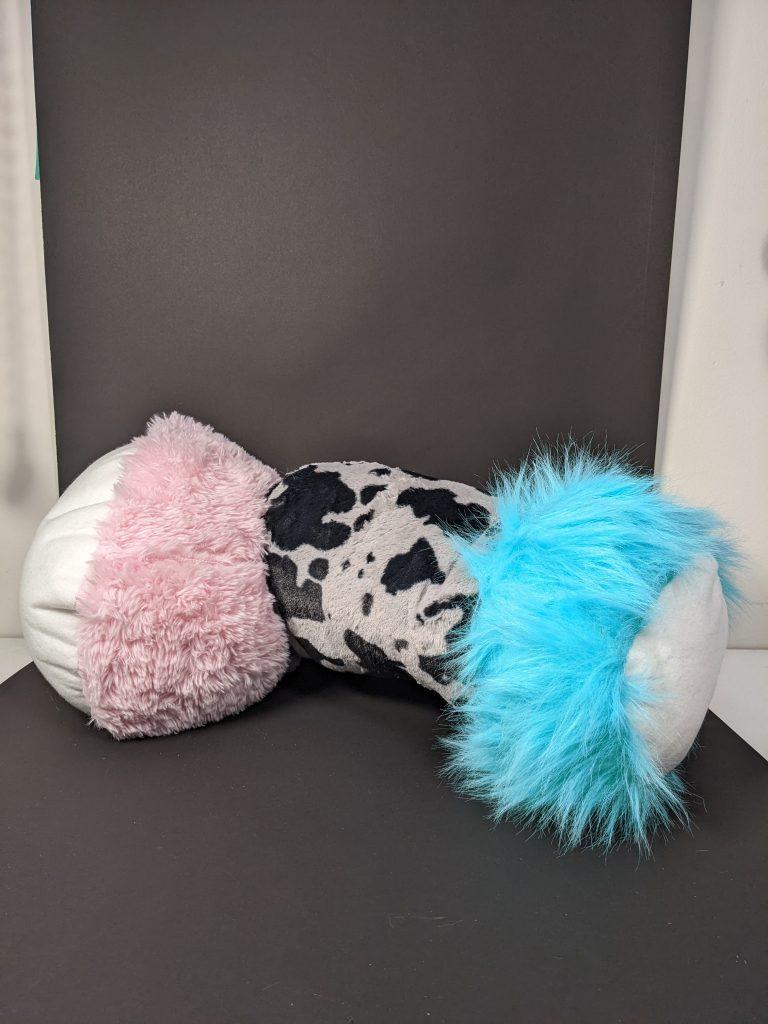
My first inflatable was a combination of a cylinder for the cow print middle and modified cones for the ends. I cut out the tops of the cones to connect it to the cylinder and I cut out circles to cap the ends of the cones. I also utilized some pleating to get a kind of rippled effect on the cap of the white cylinder so that it would bulge outwards. This form was an interesting first exploration for me because I had to sew along many tricky curves. I really wanted to pick some garish, almost clashing type of fabrics to go together which is why I selected these very fluffy fabrics. However, they are balanced on either side by the white caps. I noticed the fluffy fabrics were very interesting to work with because they made pinning quite difficult at times and it was oftentimes tough to squeeze through the sewing machine especially with the pleats.
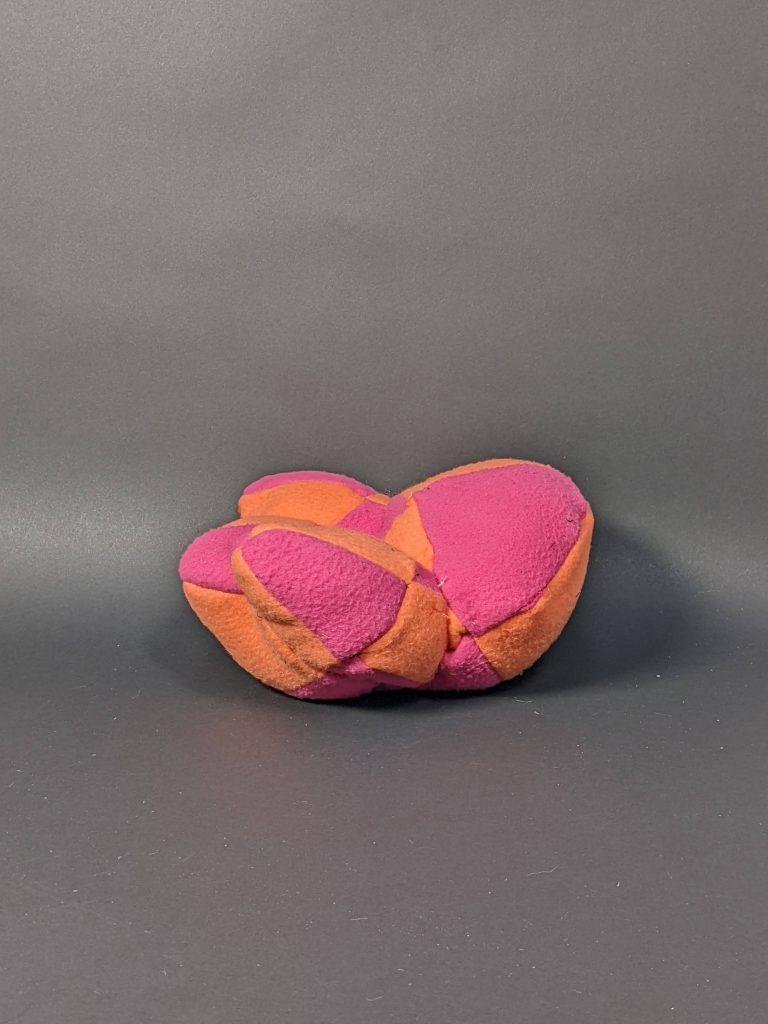
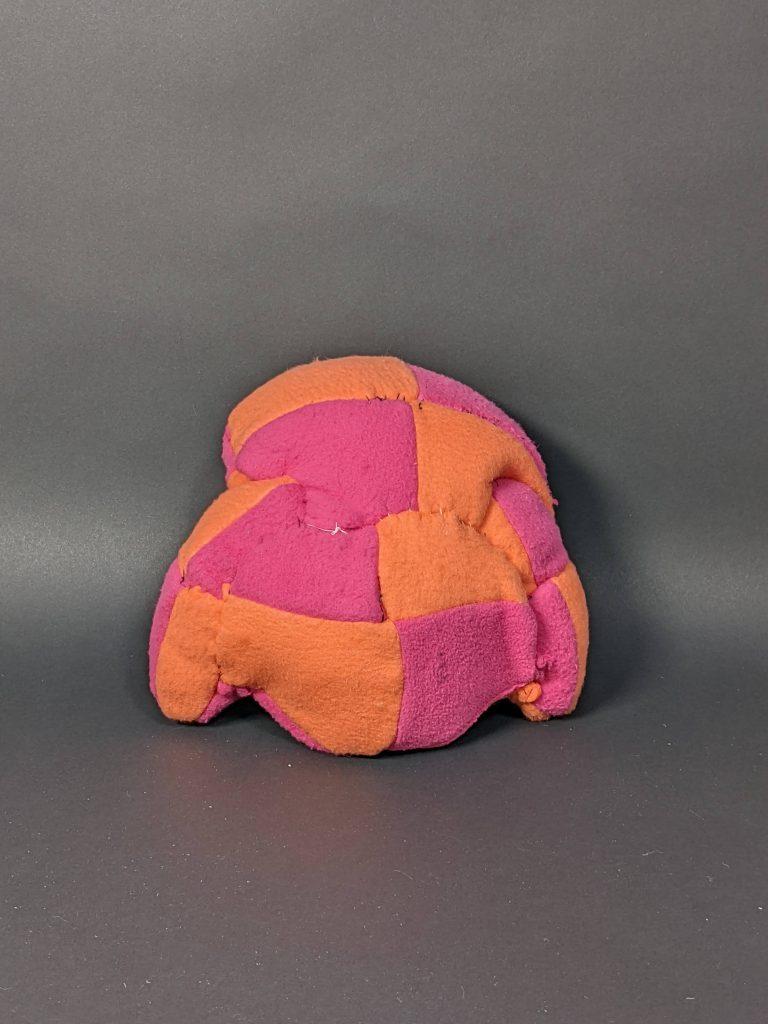
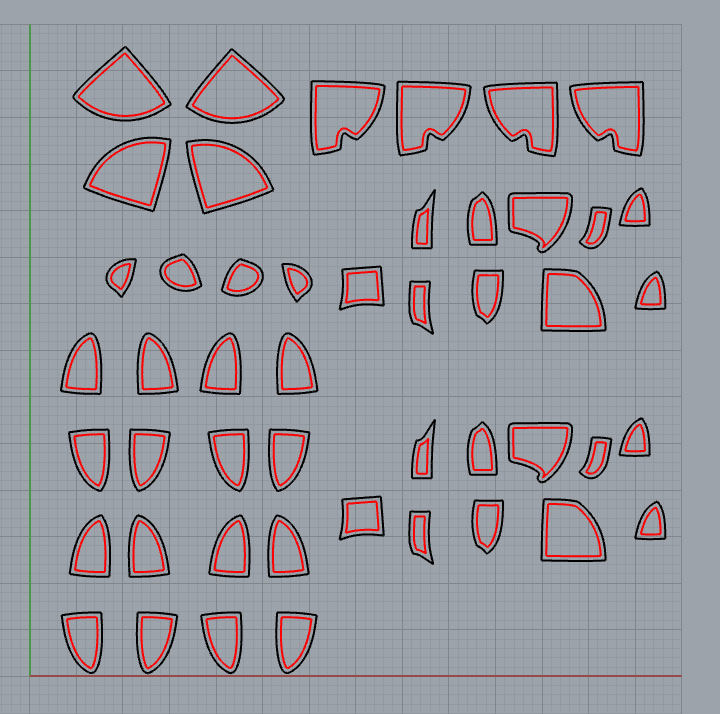
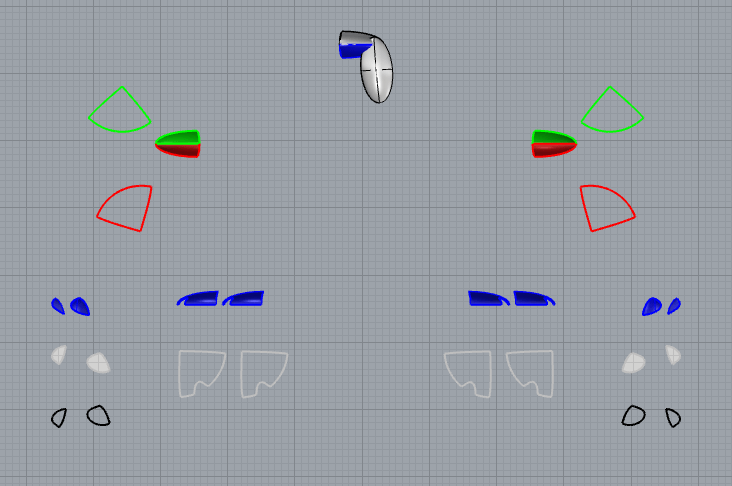
My next inflatable was my laser cut piece. I planned to make a funky looking sofa that I first designed out on Rhino. The piece is made up of ellipsoids of different dimensions put together. At first, I heavily warped each of the ellipsoids but scaled back on doing that because I realized it would be very difficult to split into pieces. Having no prior experience with Rhino and CAD, developing the pattern was a very difficult and frustrating process for me, but I eventually got the hang of it and really enjoyed the ease of the laser cutting and putting together the final result. I cut the same pattern onto two fabric pieces. I used kind of similar, yet also clashing colors to give it a funky look because I knew that when I put it together, I wanted it to have this checkerboard effect that highlighted where the Rhino cuts were. This piece required a lot of hand sewing which I enjoyed a lot, but it was also extremely tedious and was difficult because of the amount of tension I had to apply to really pull the back of the chair upright. One of the slight mistakes I realized I made was overstuffing the seat and back which made it kind of impossible to make it fully upright, but I enjoyed the full nature of the result regardless.


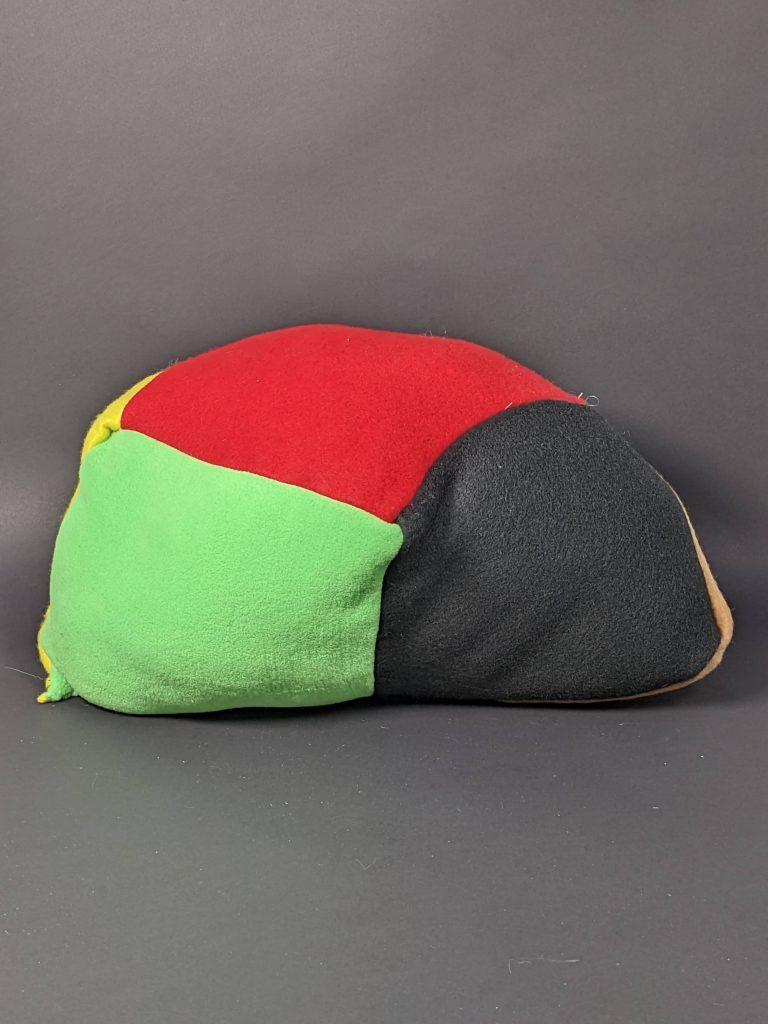
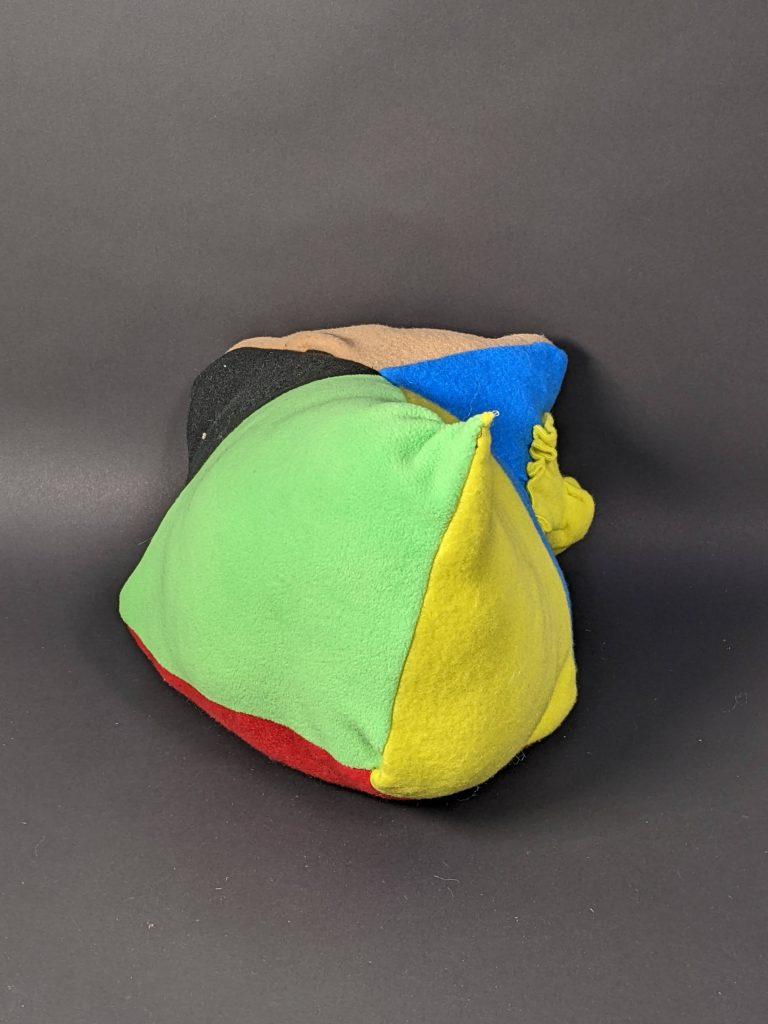
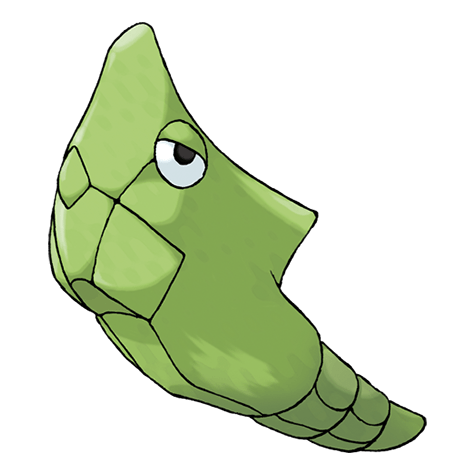
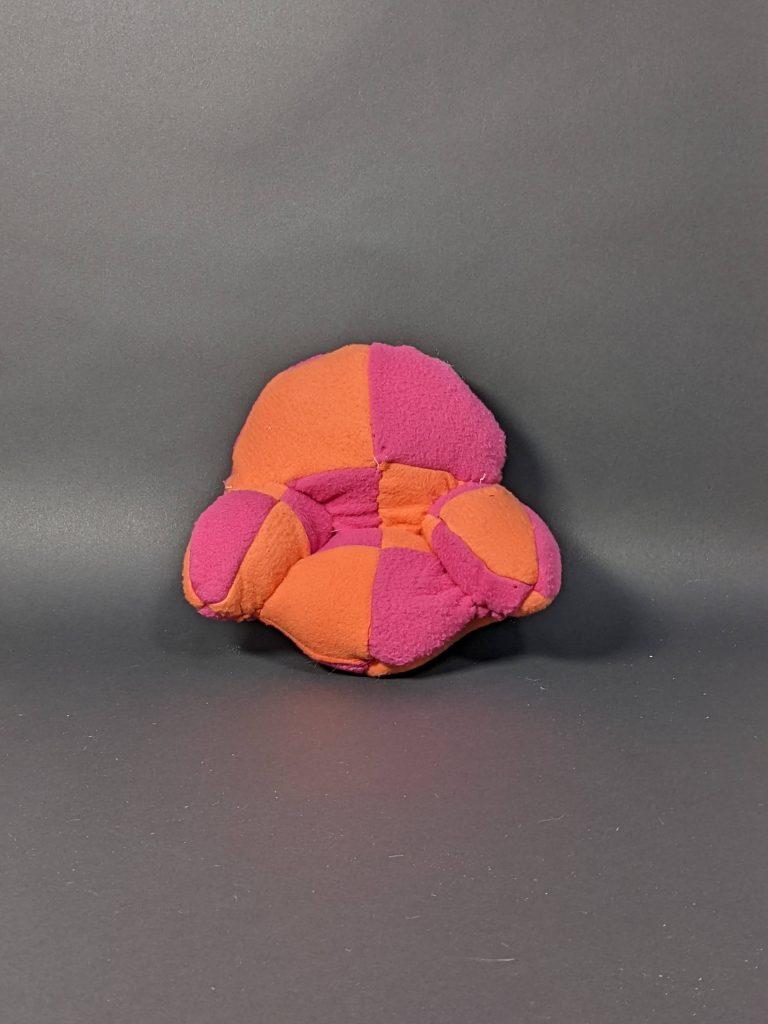
My last inflatable I wanted to play with primary colors and warping a more normal form like a cube. I started off with pinning and sewing together squares in a sort of haphazard order to create this new shape. Additionally, I used the technique shown in class with the circle that has slits cut in it in an attempt to create this shuttlecock shape that I sewed in the middle of one of the squares. The end result kind of reminded me of a seashell, arthropod ocean creature so I thought that it was kind of neat to have this little barnacle stuck to the side of it. Ultimately, the barnacle creature didn’t come out of as neat as I would have liked it to be so I left it at one instead of adding more. In this inflatable, I learned about how to join corners together as it was definitely a learning process for me to understand how to get the corners of this form crisp and some of them were slightly loose and I would have to go back and resew it closed. My friend also told me that he thought the form resembled the Pokemon Metapod which I’ve included a photo of below. 🙂