Categories
Gallery Independent Project

Independent Project – Making a Floral Lace with Textiles (Ron)

Machine-Cut Cotton
Various Cotton Fabrics, Cricut Maker
Ron Chew, 2021

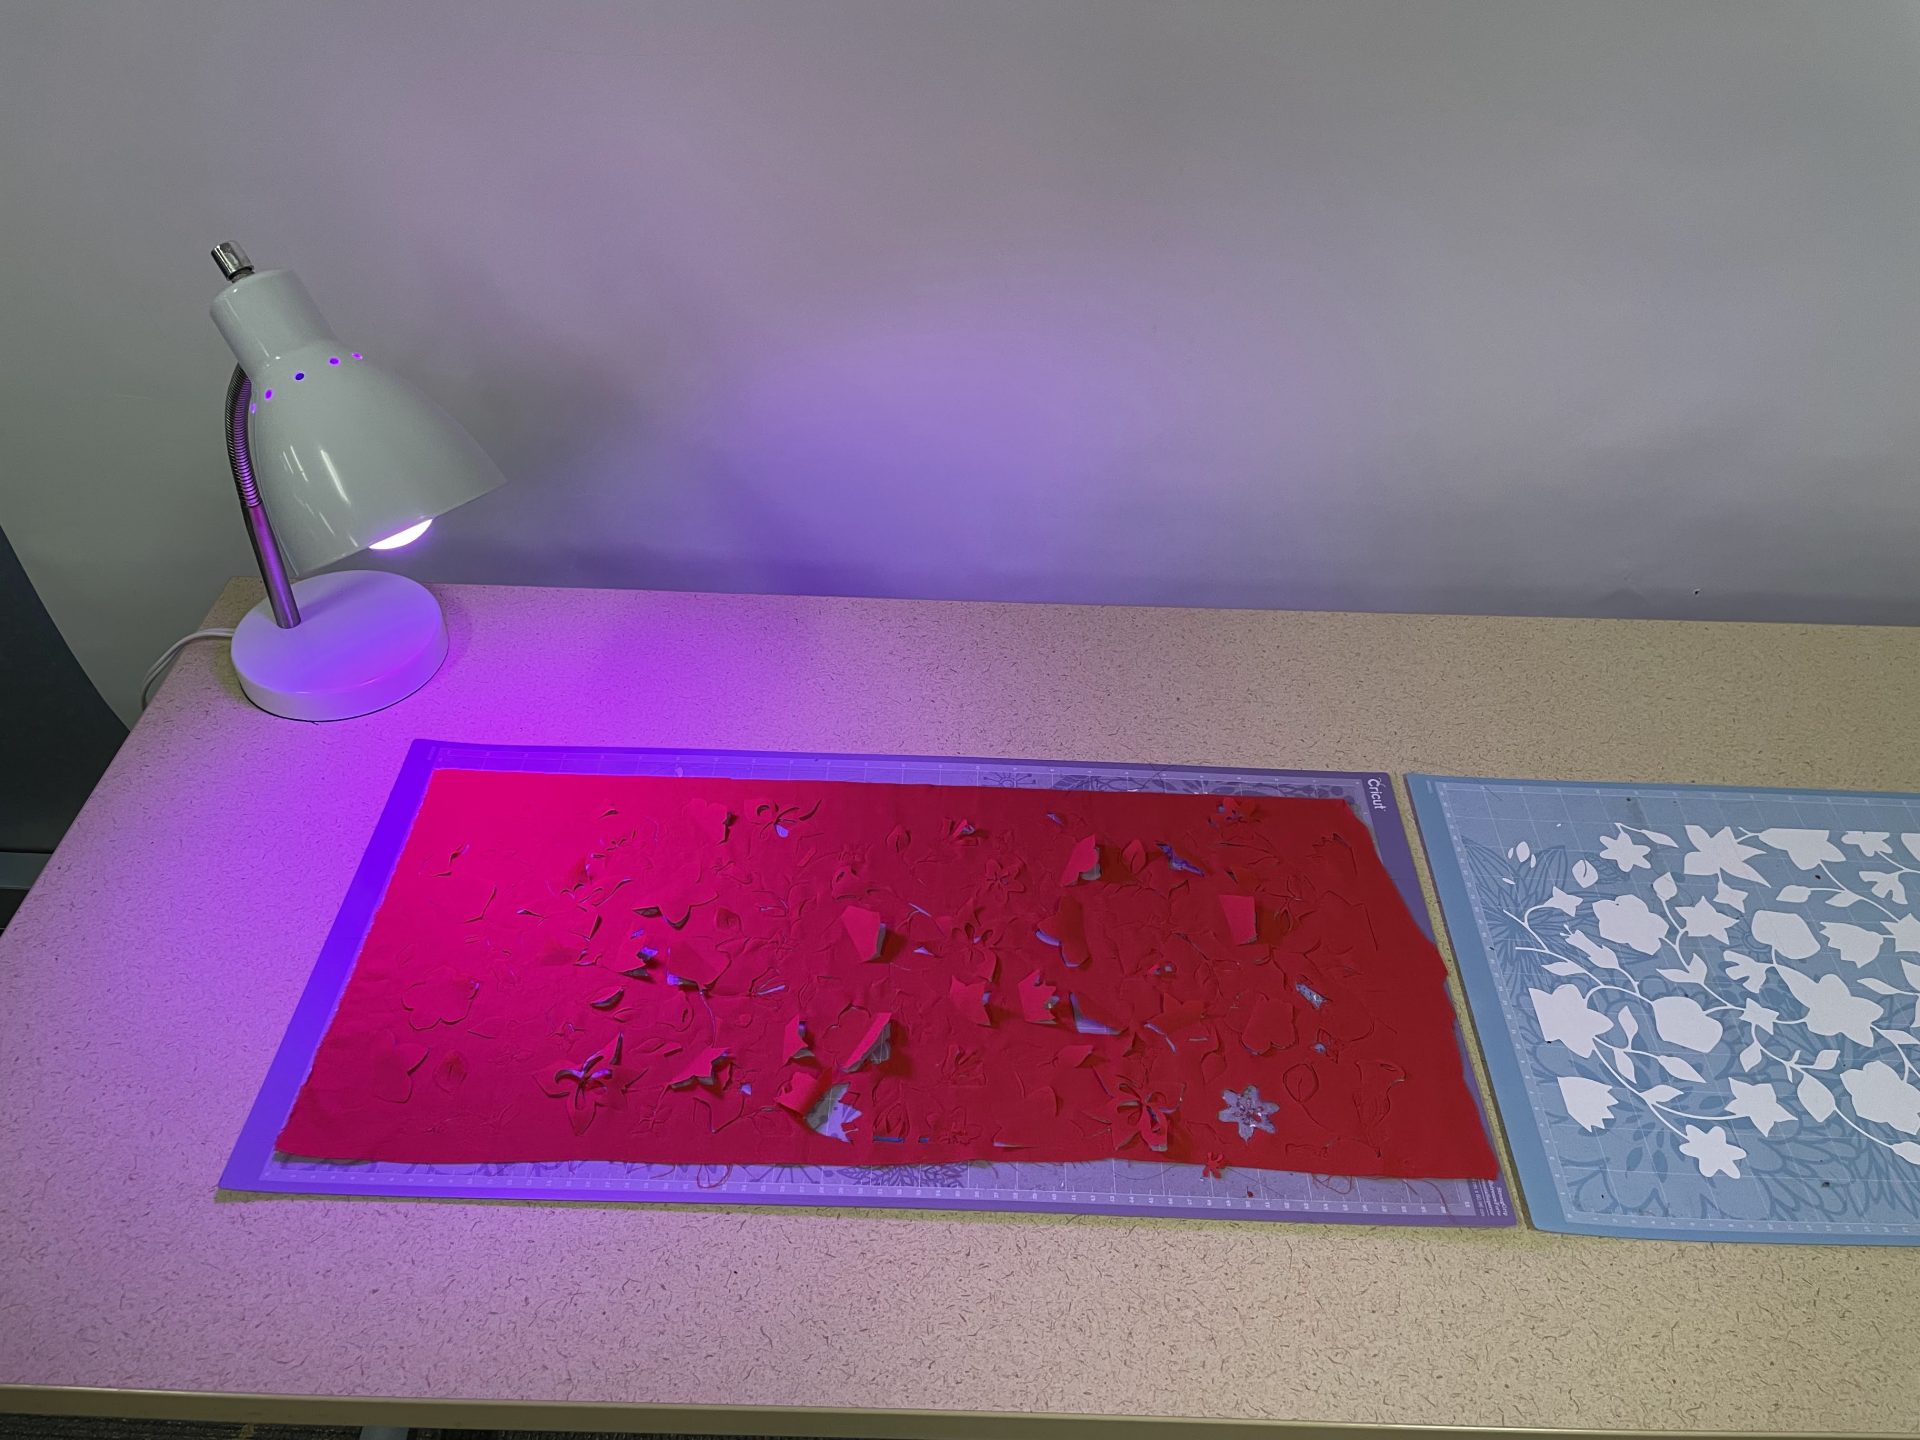
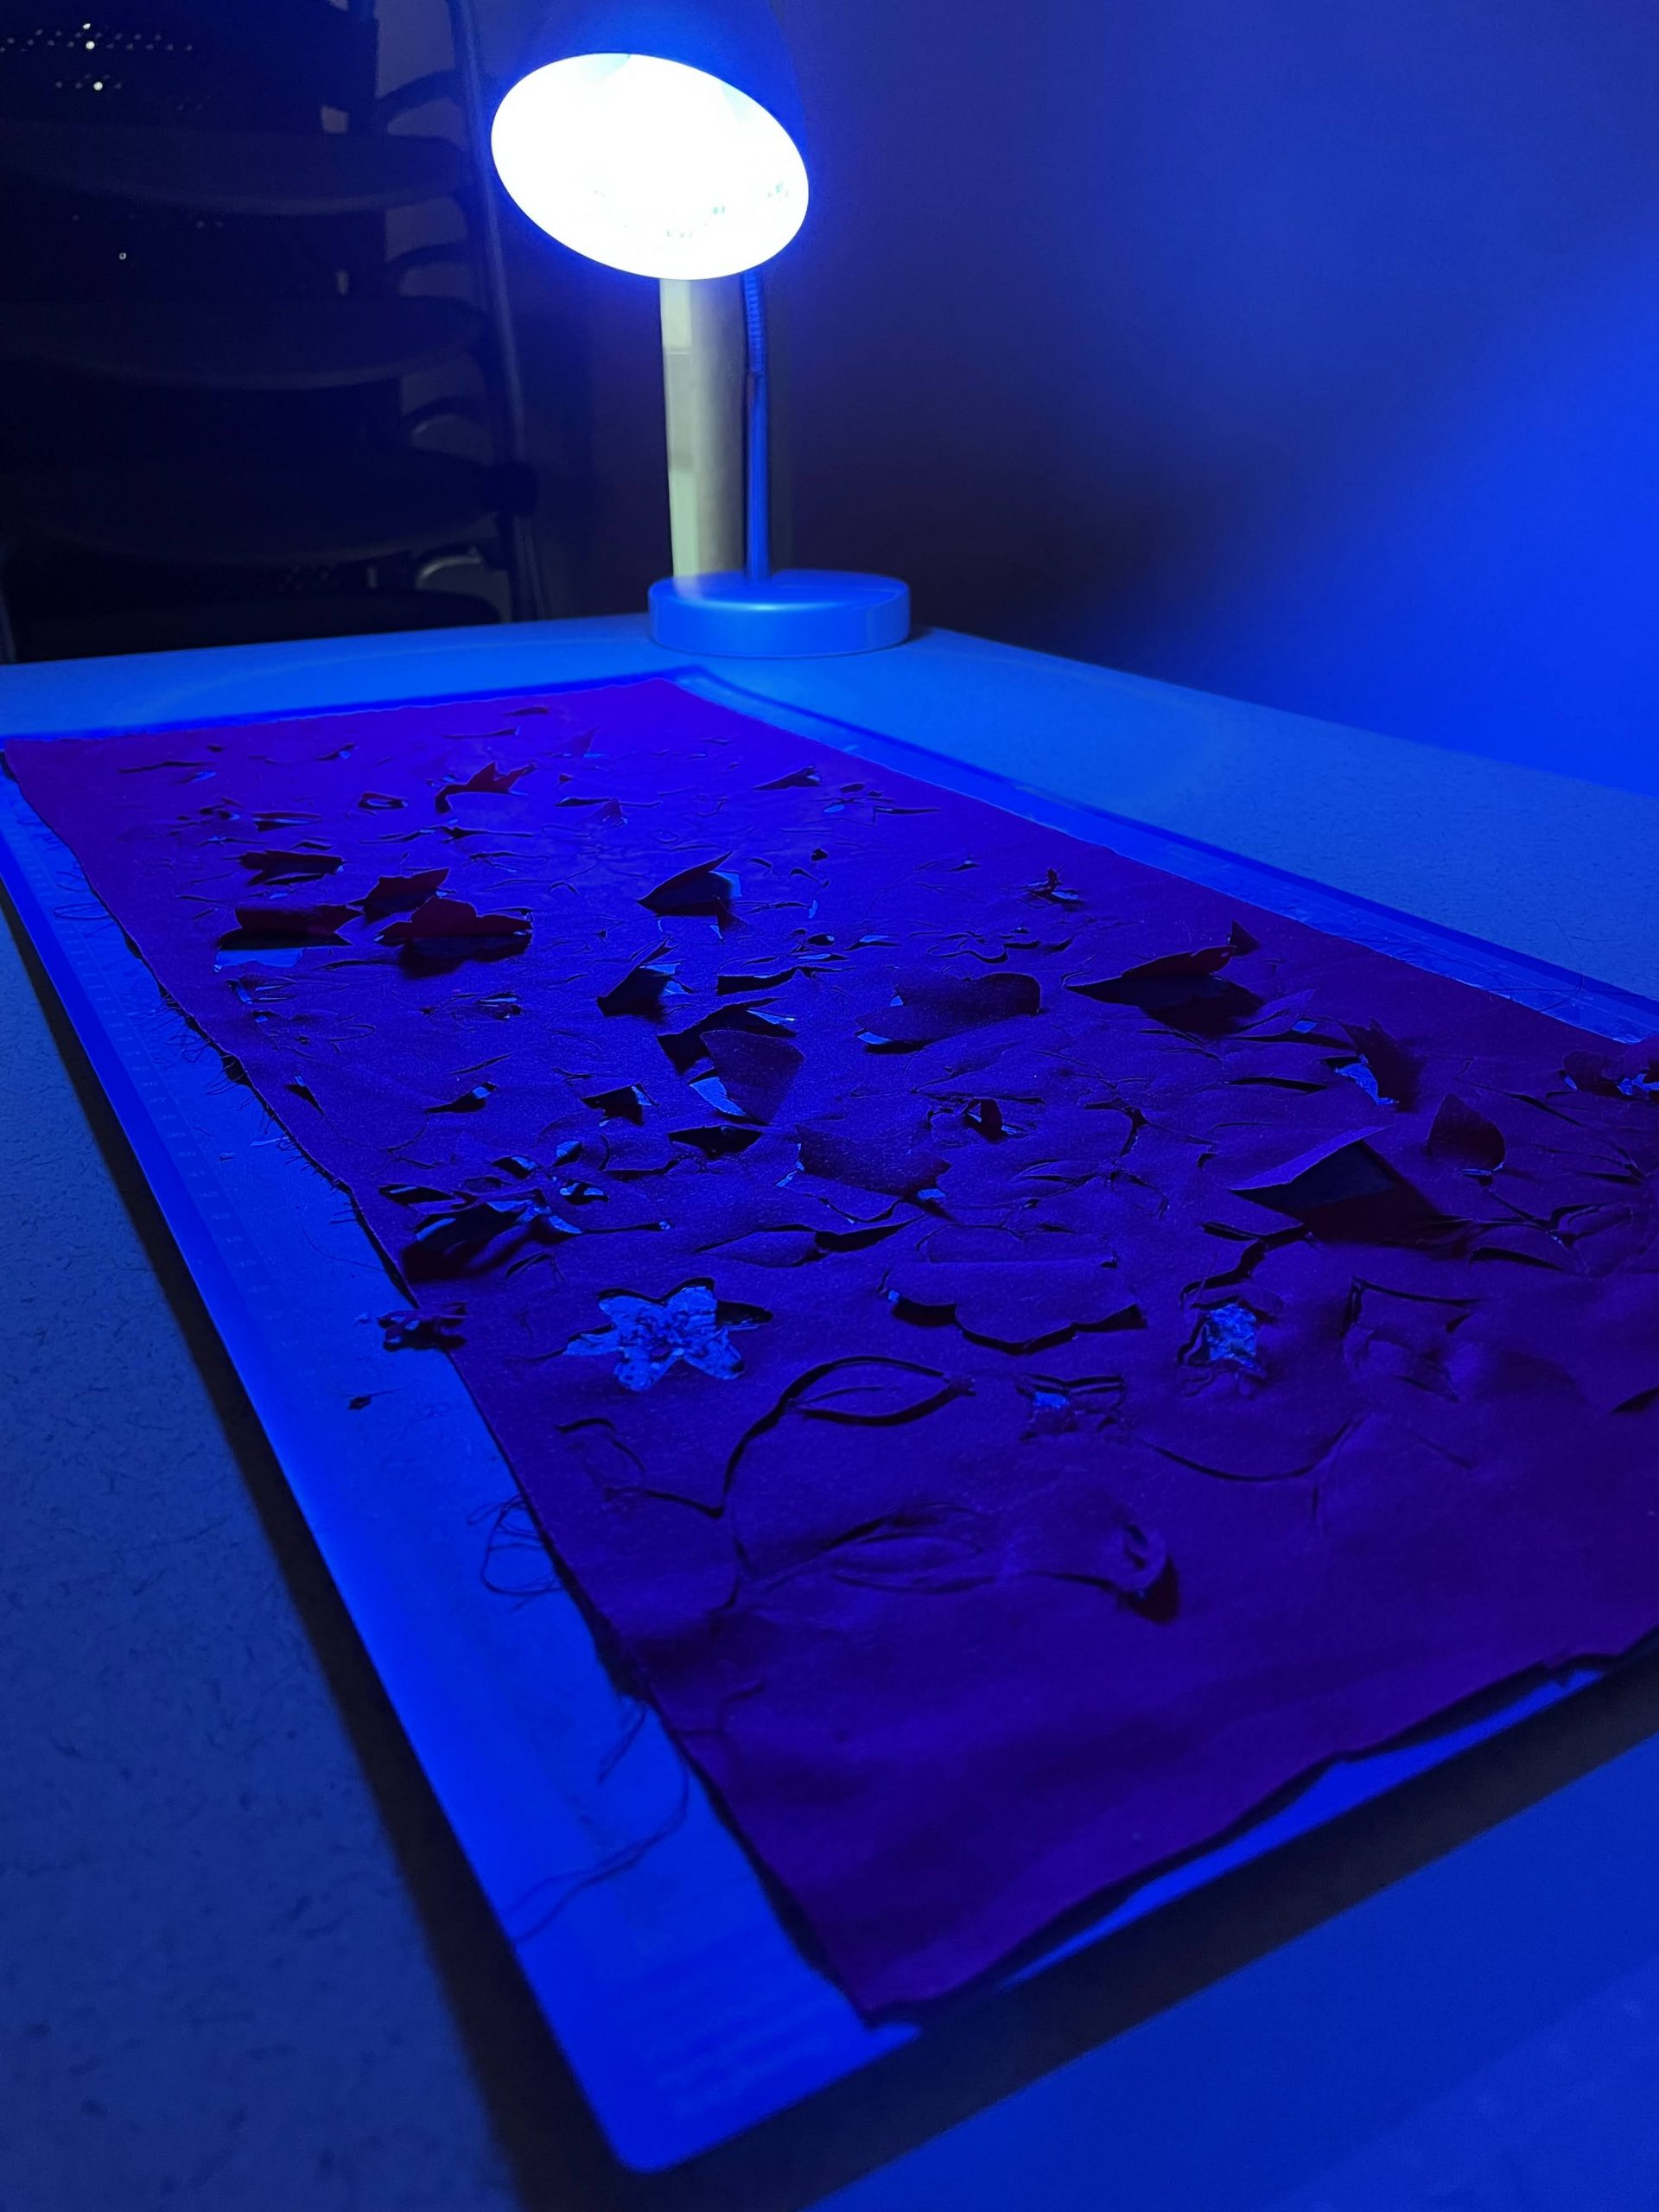
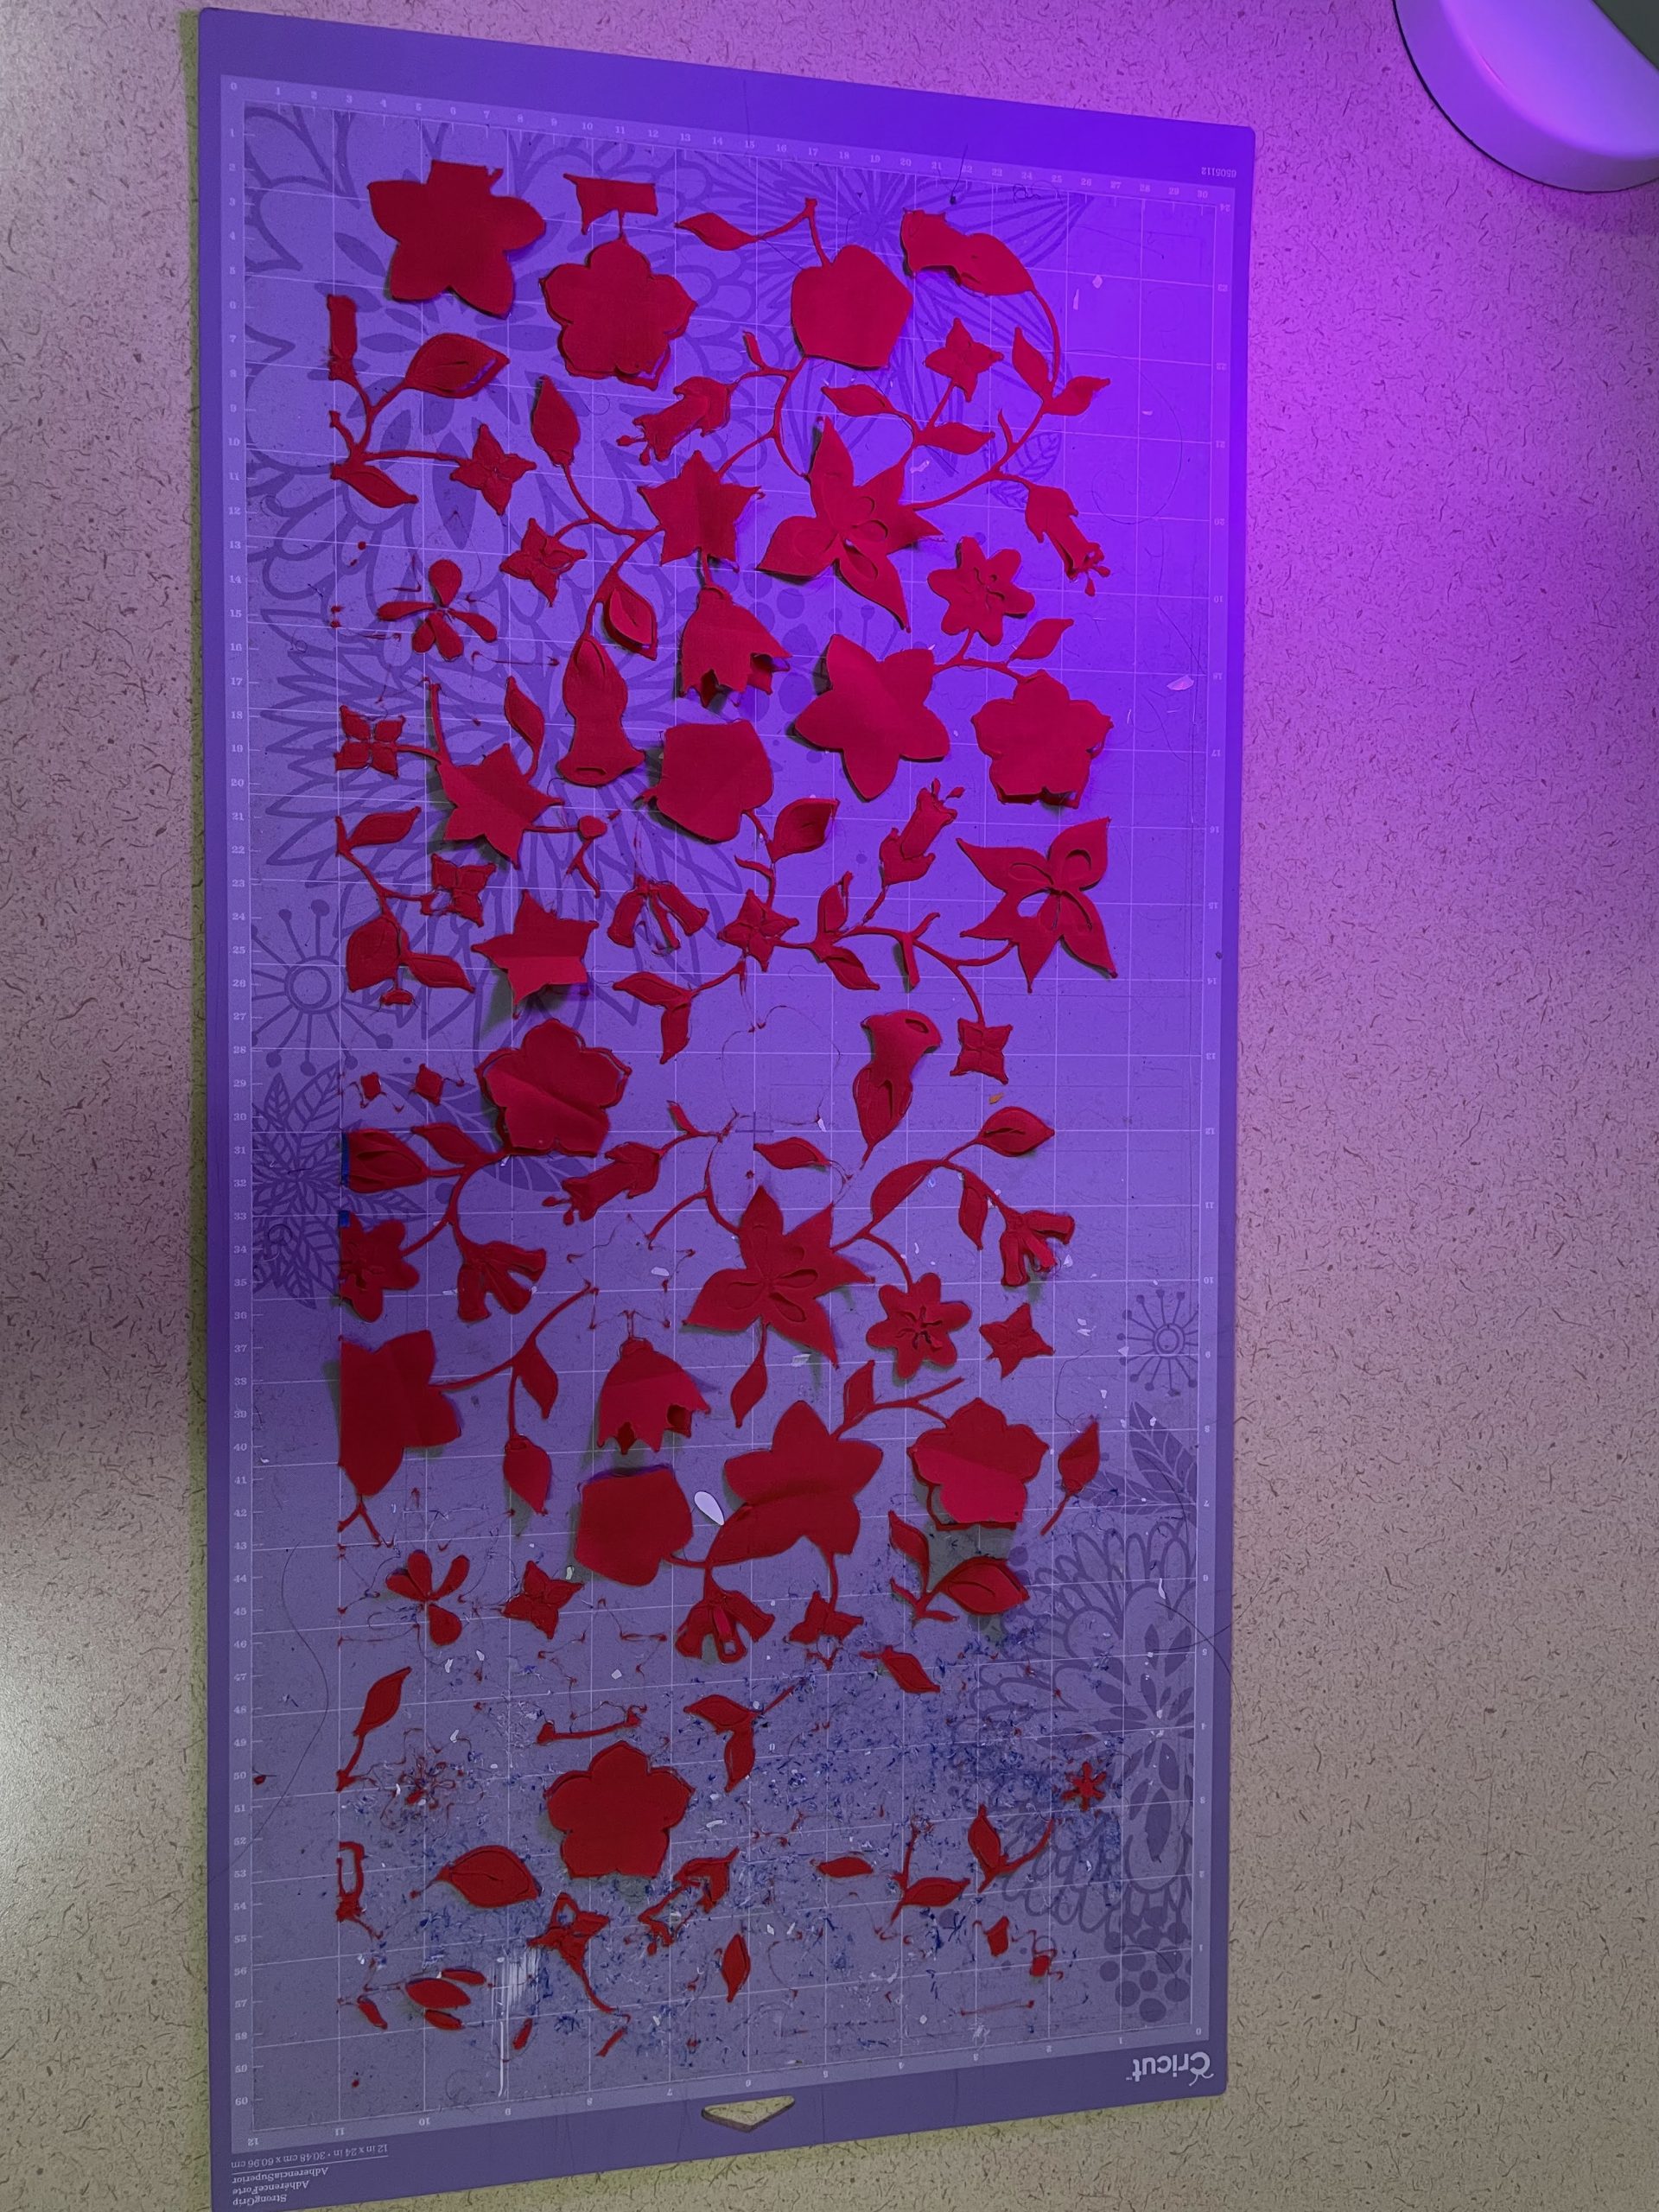
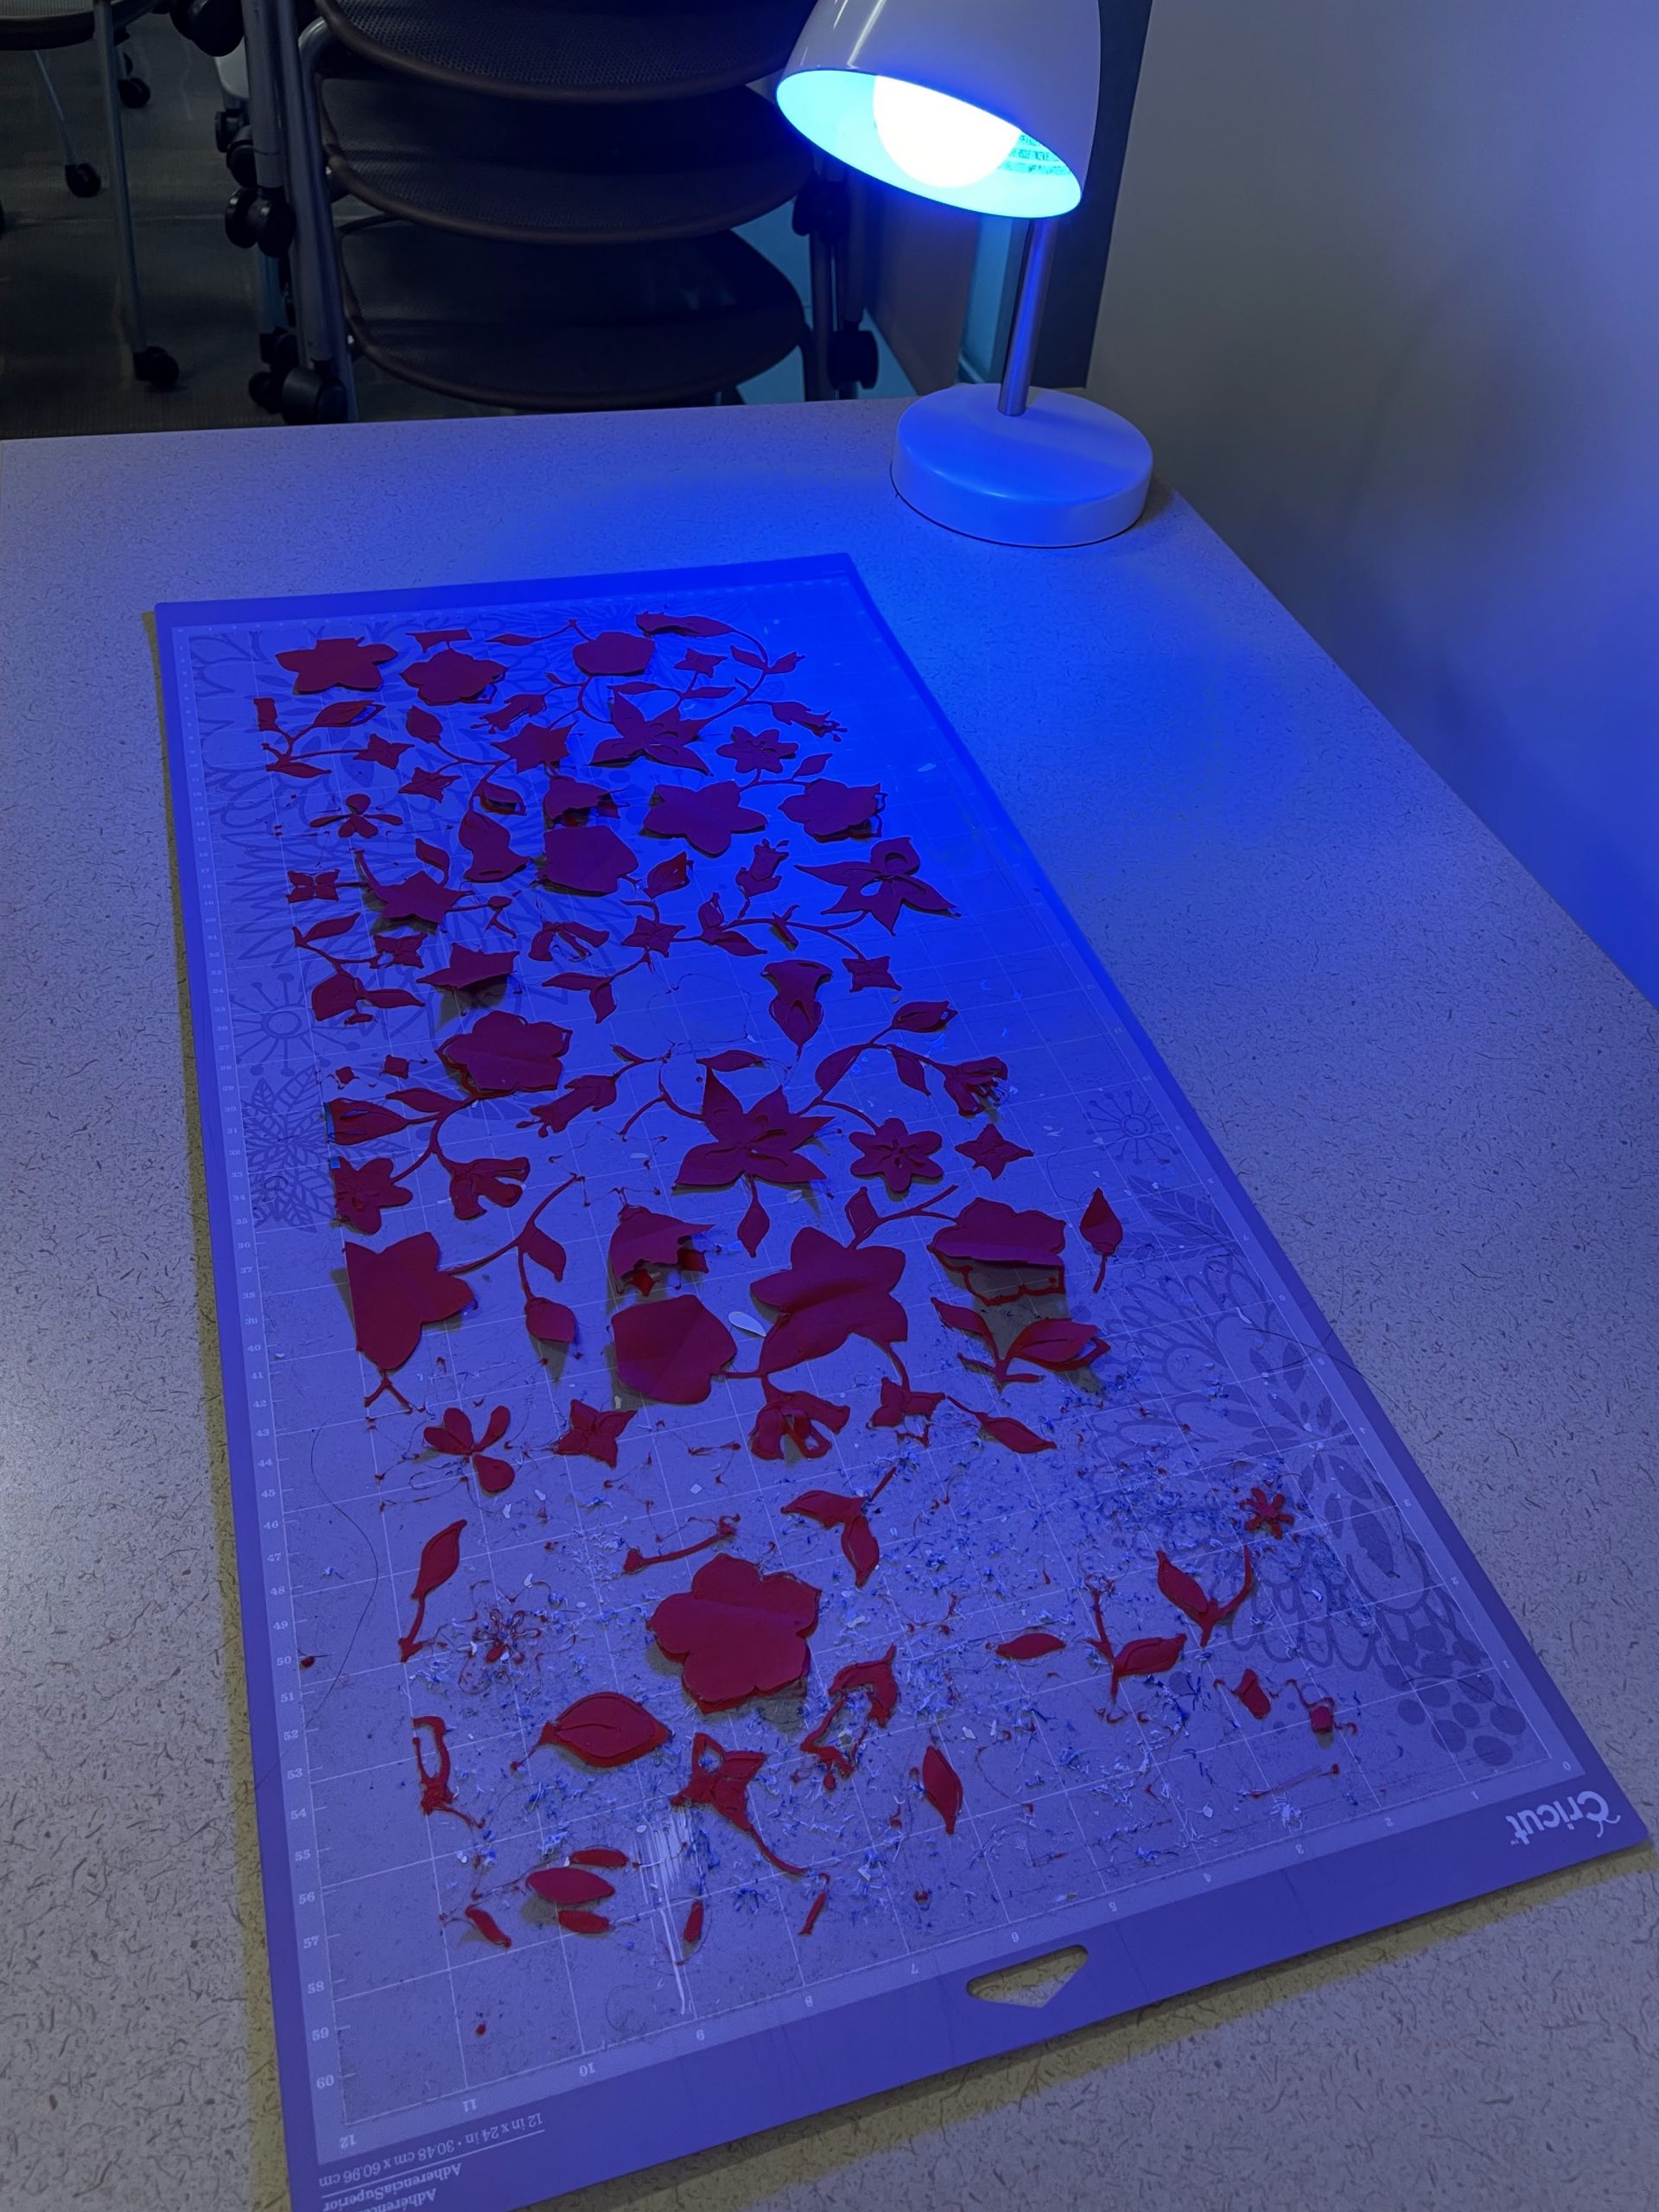
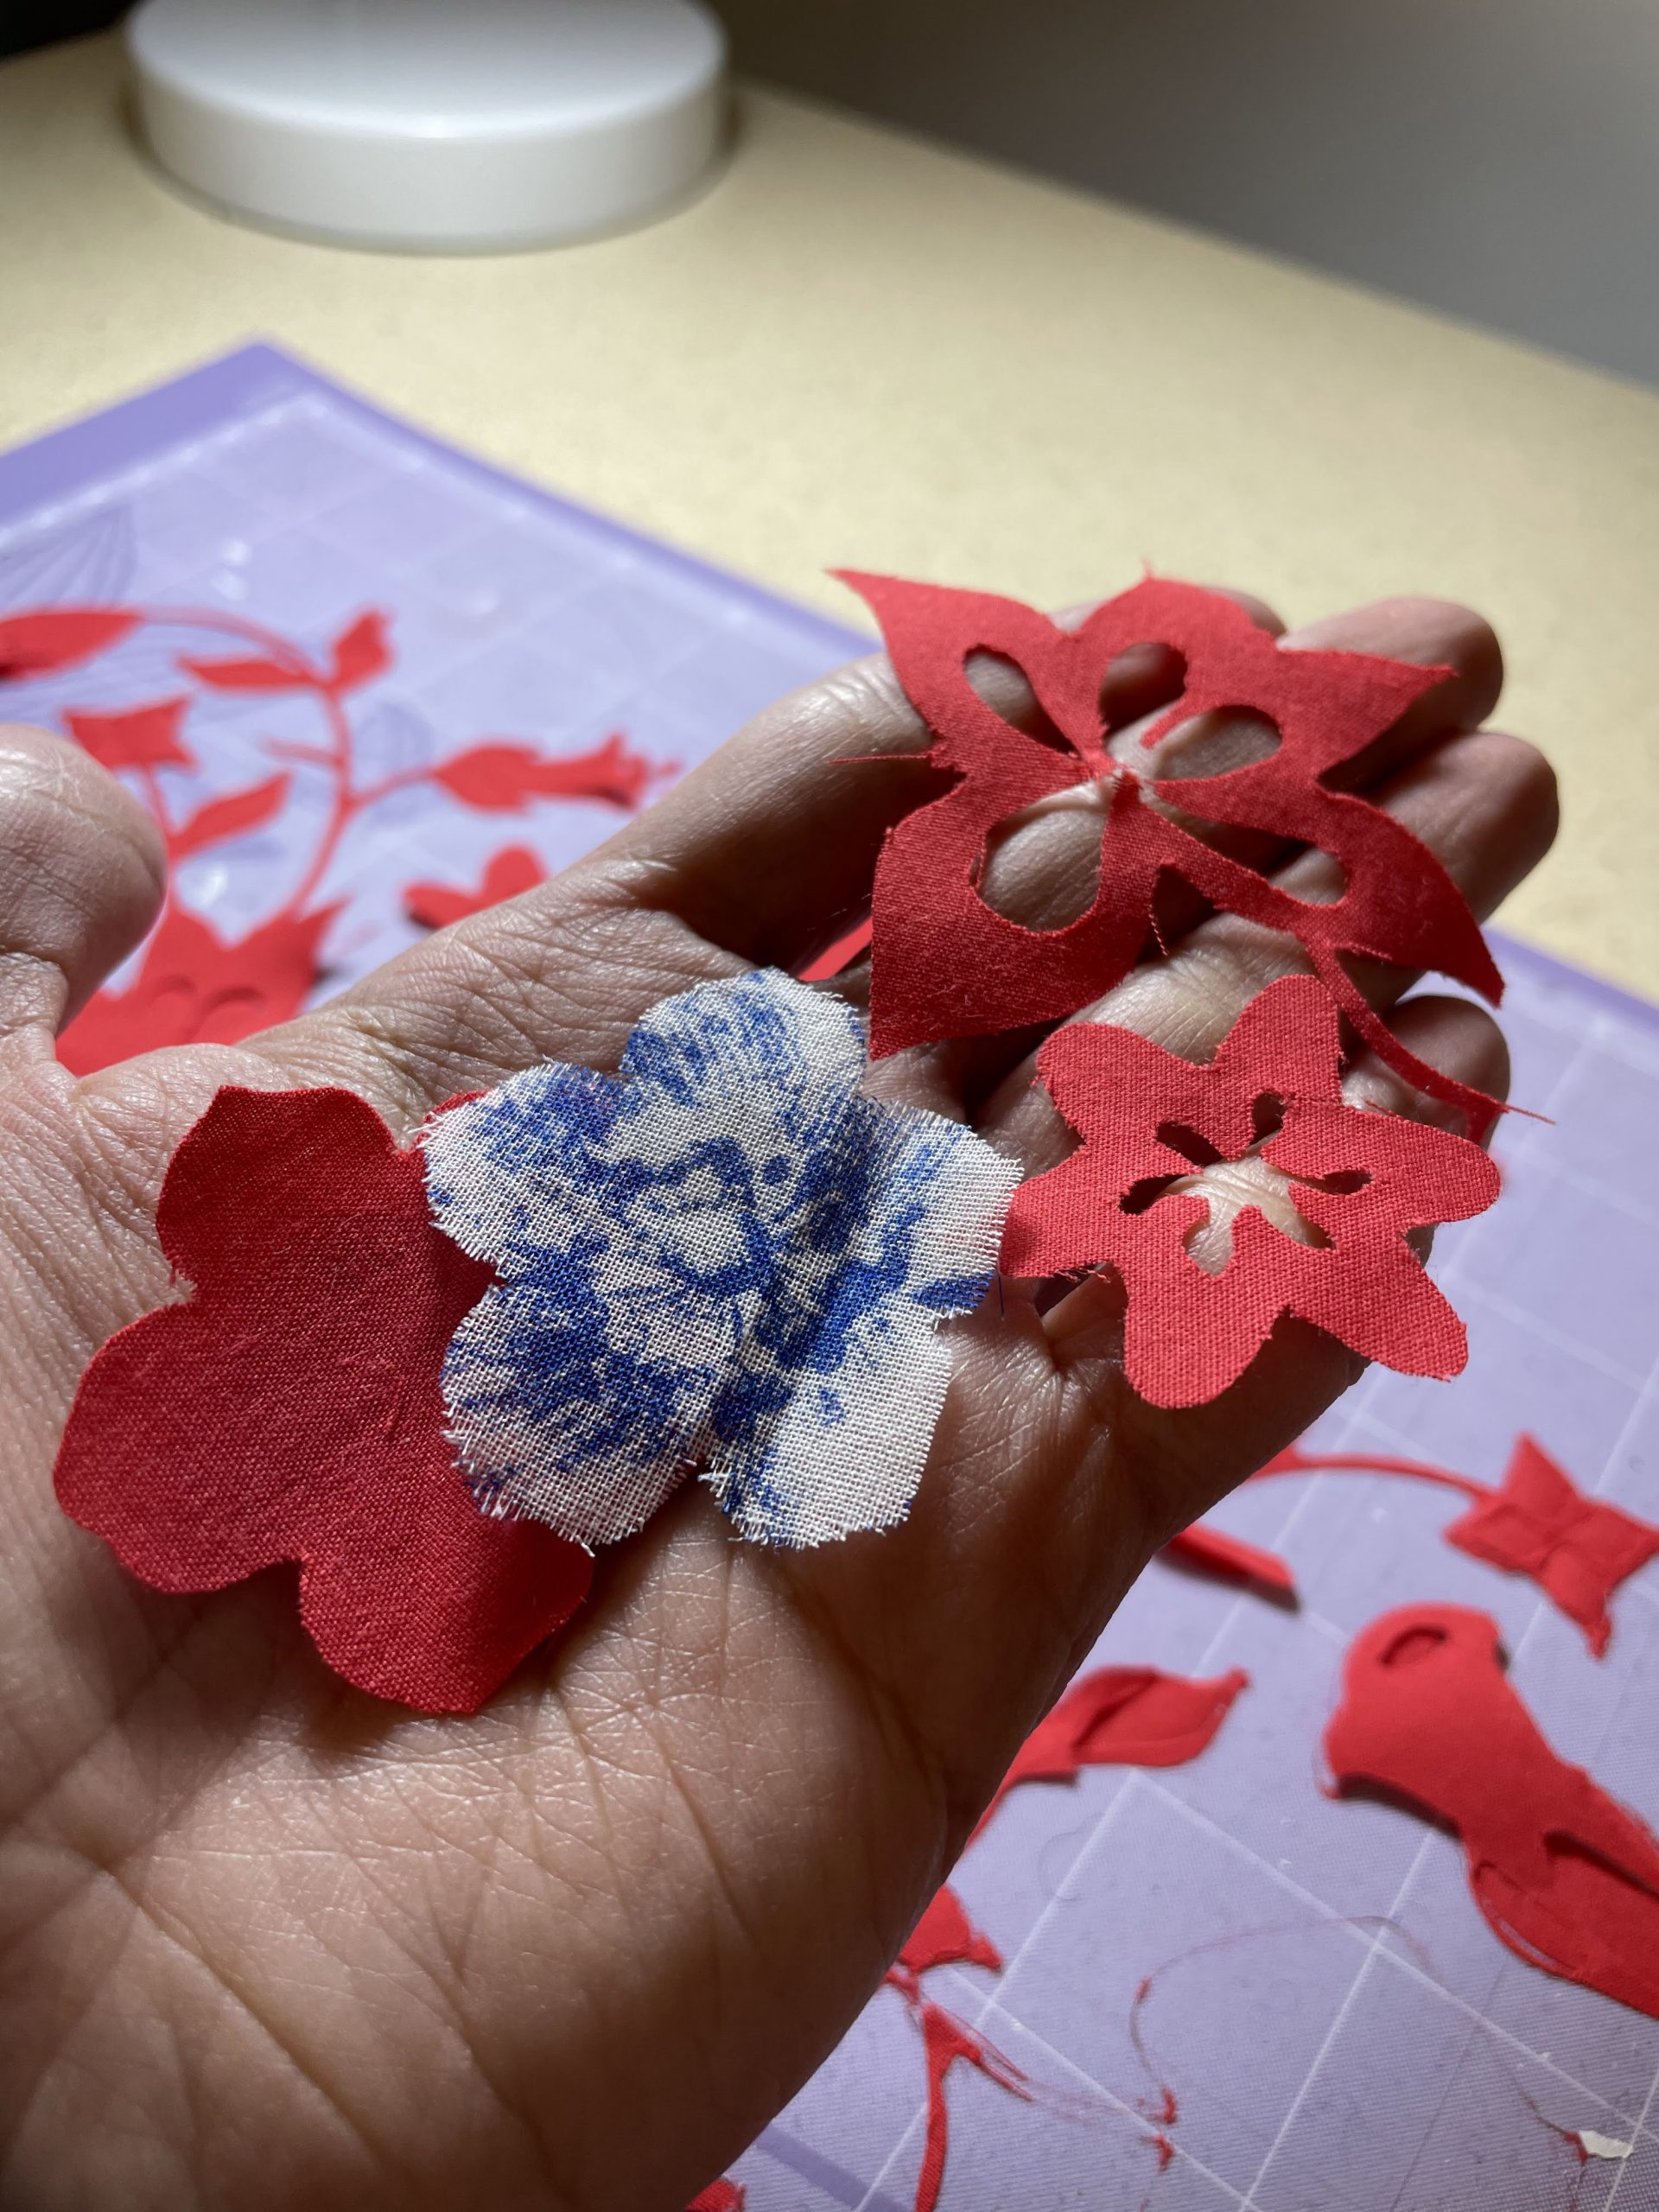
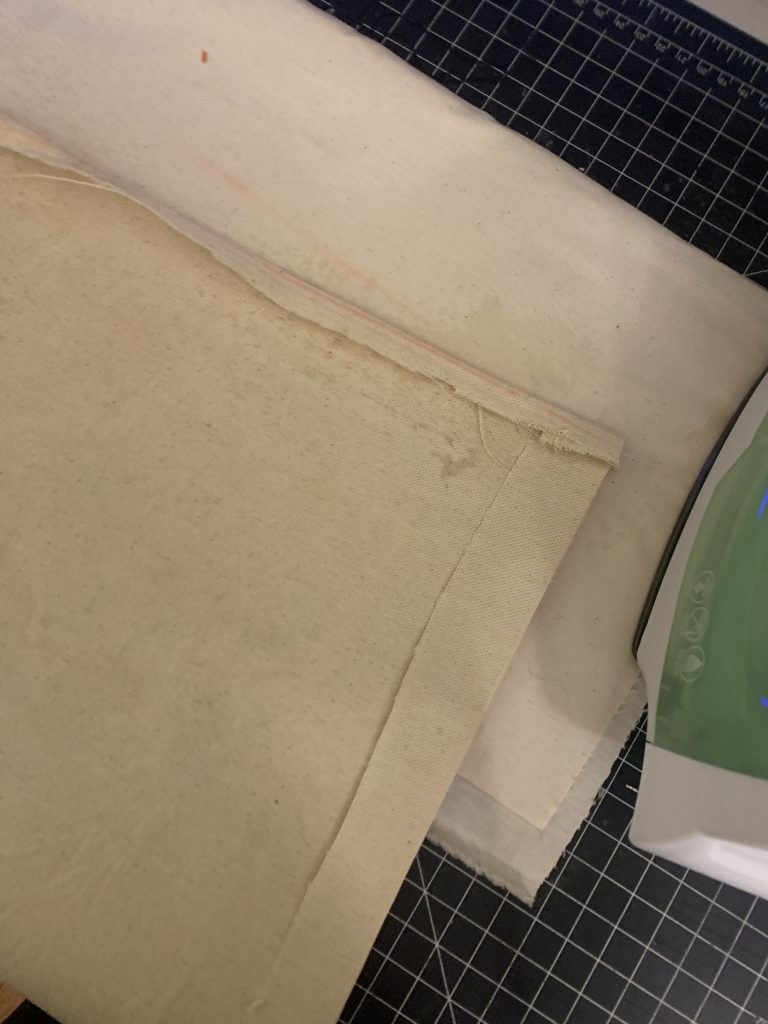
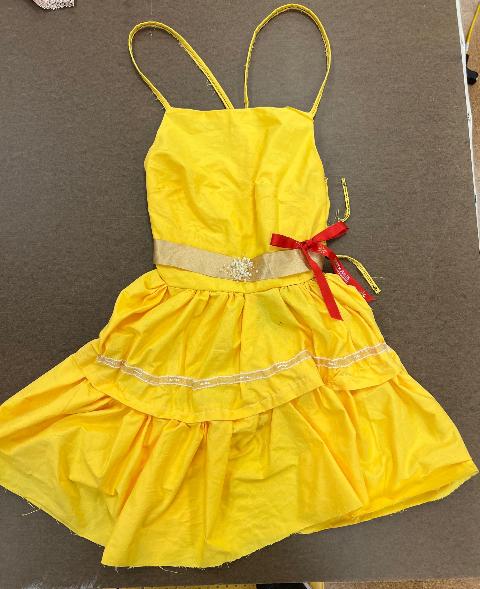
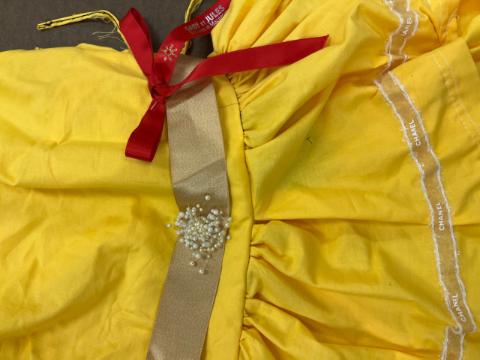
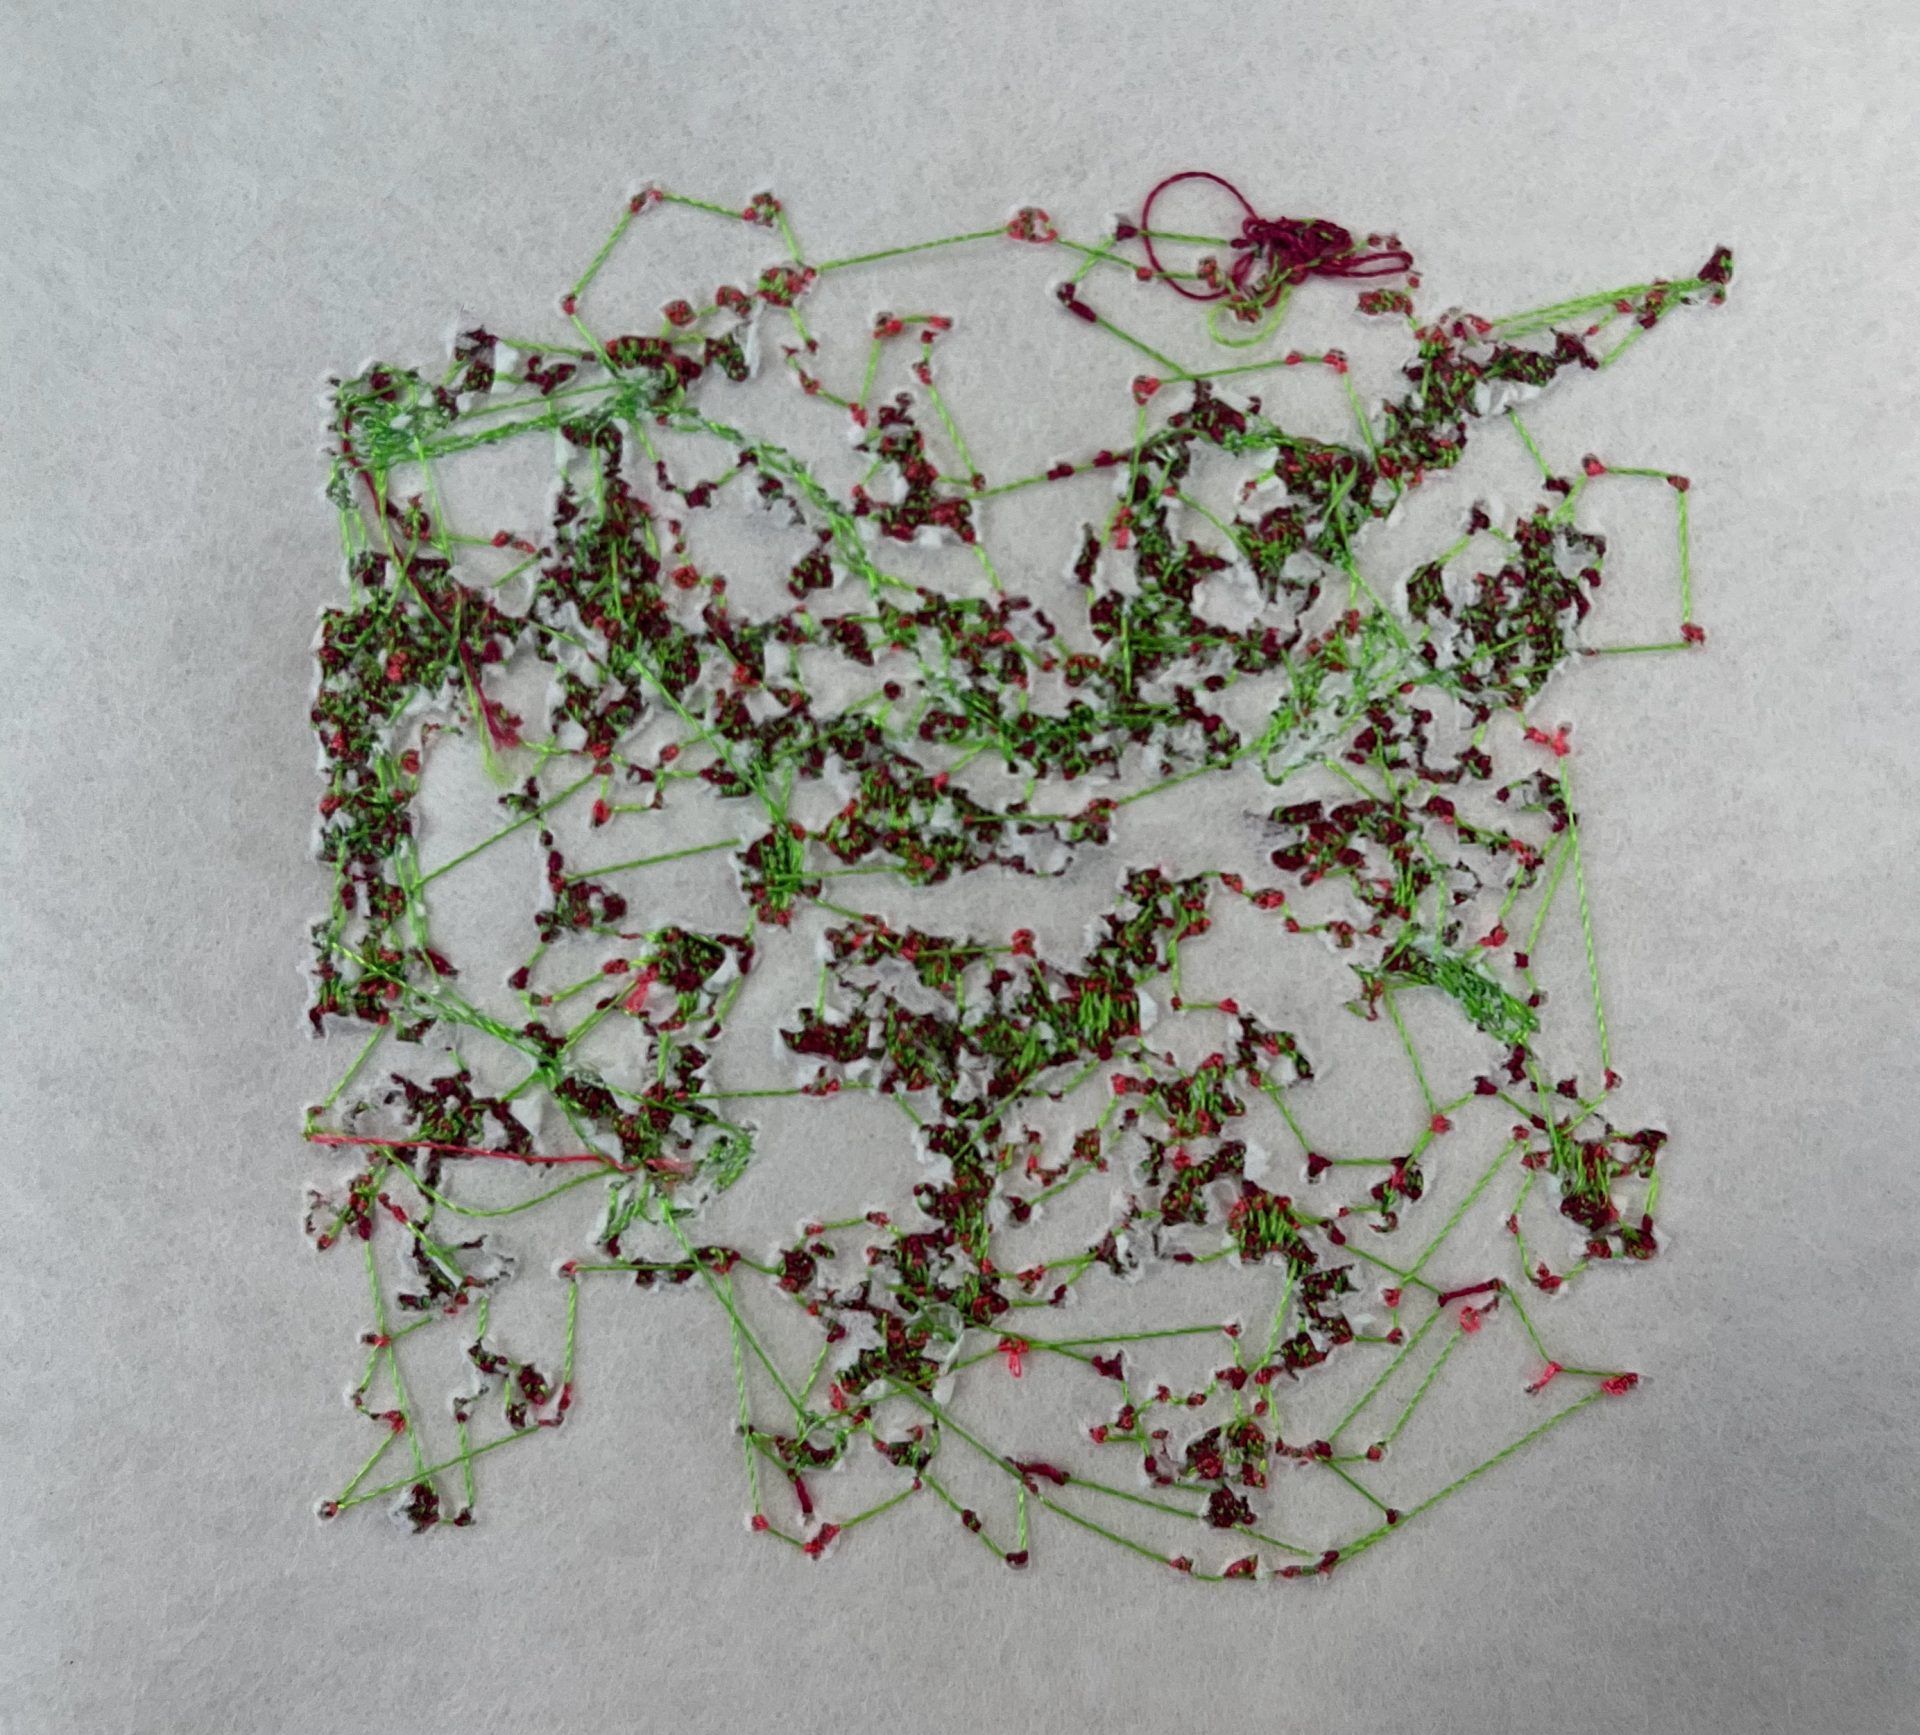
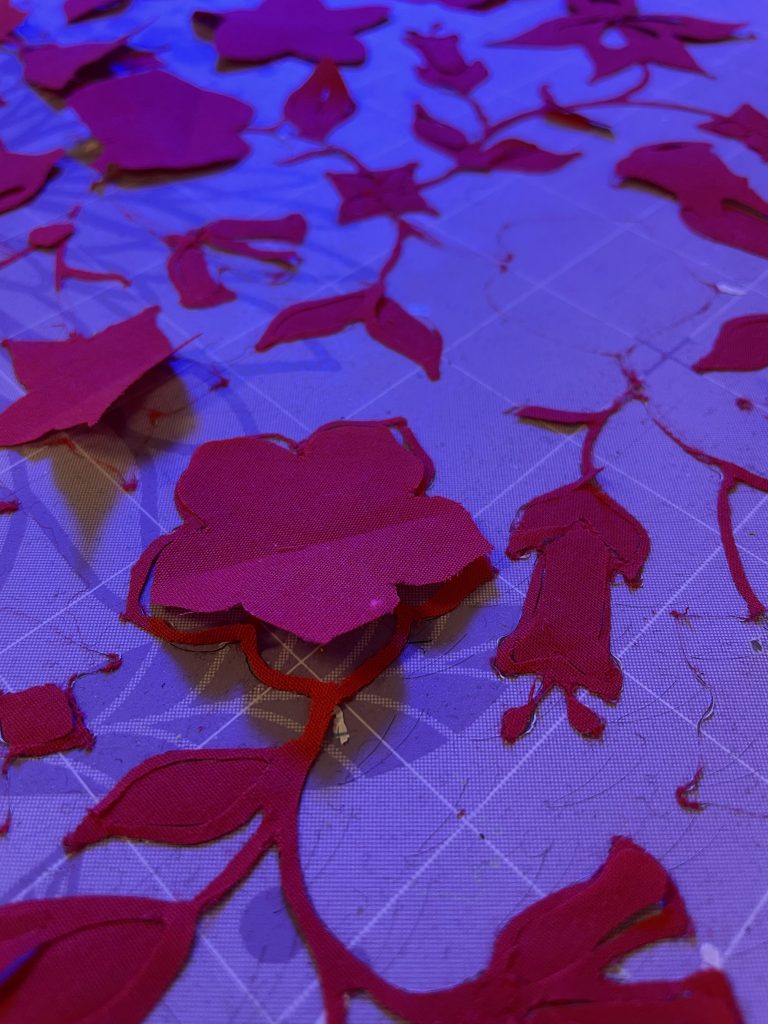
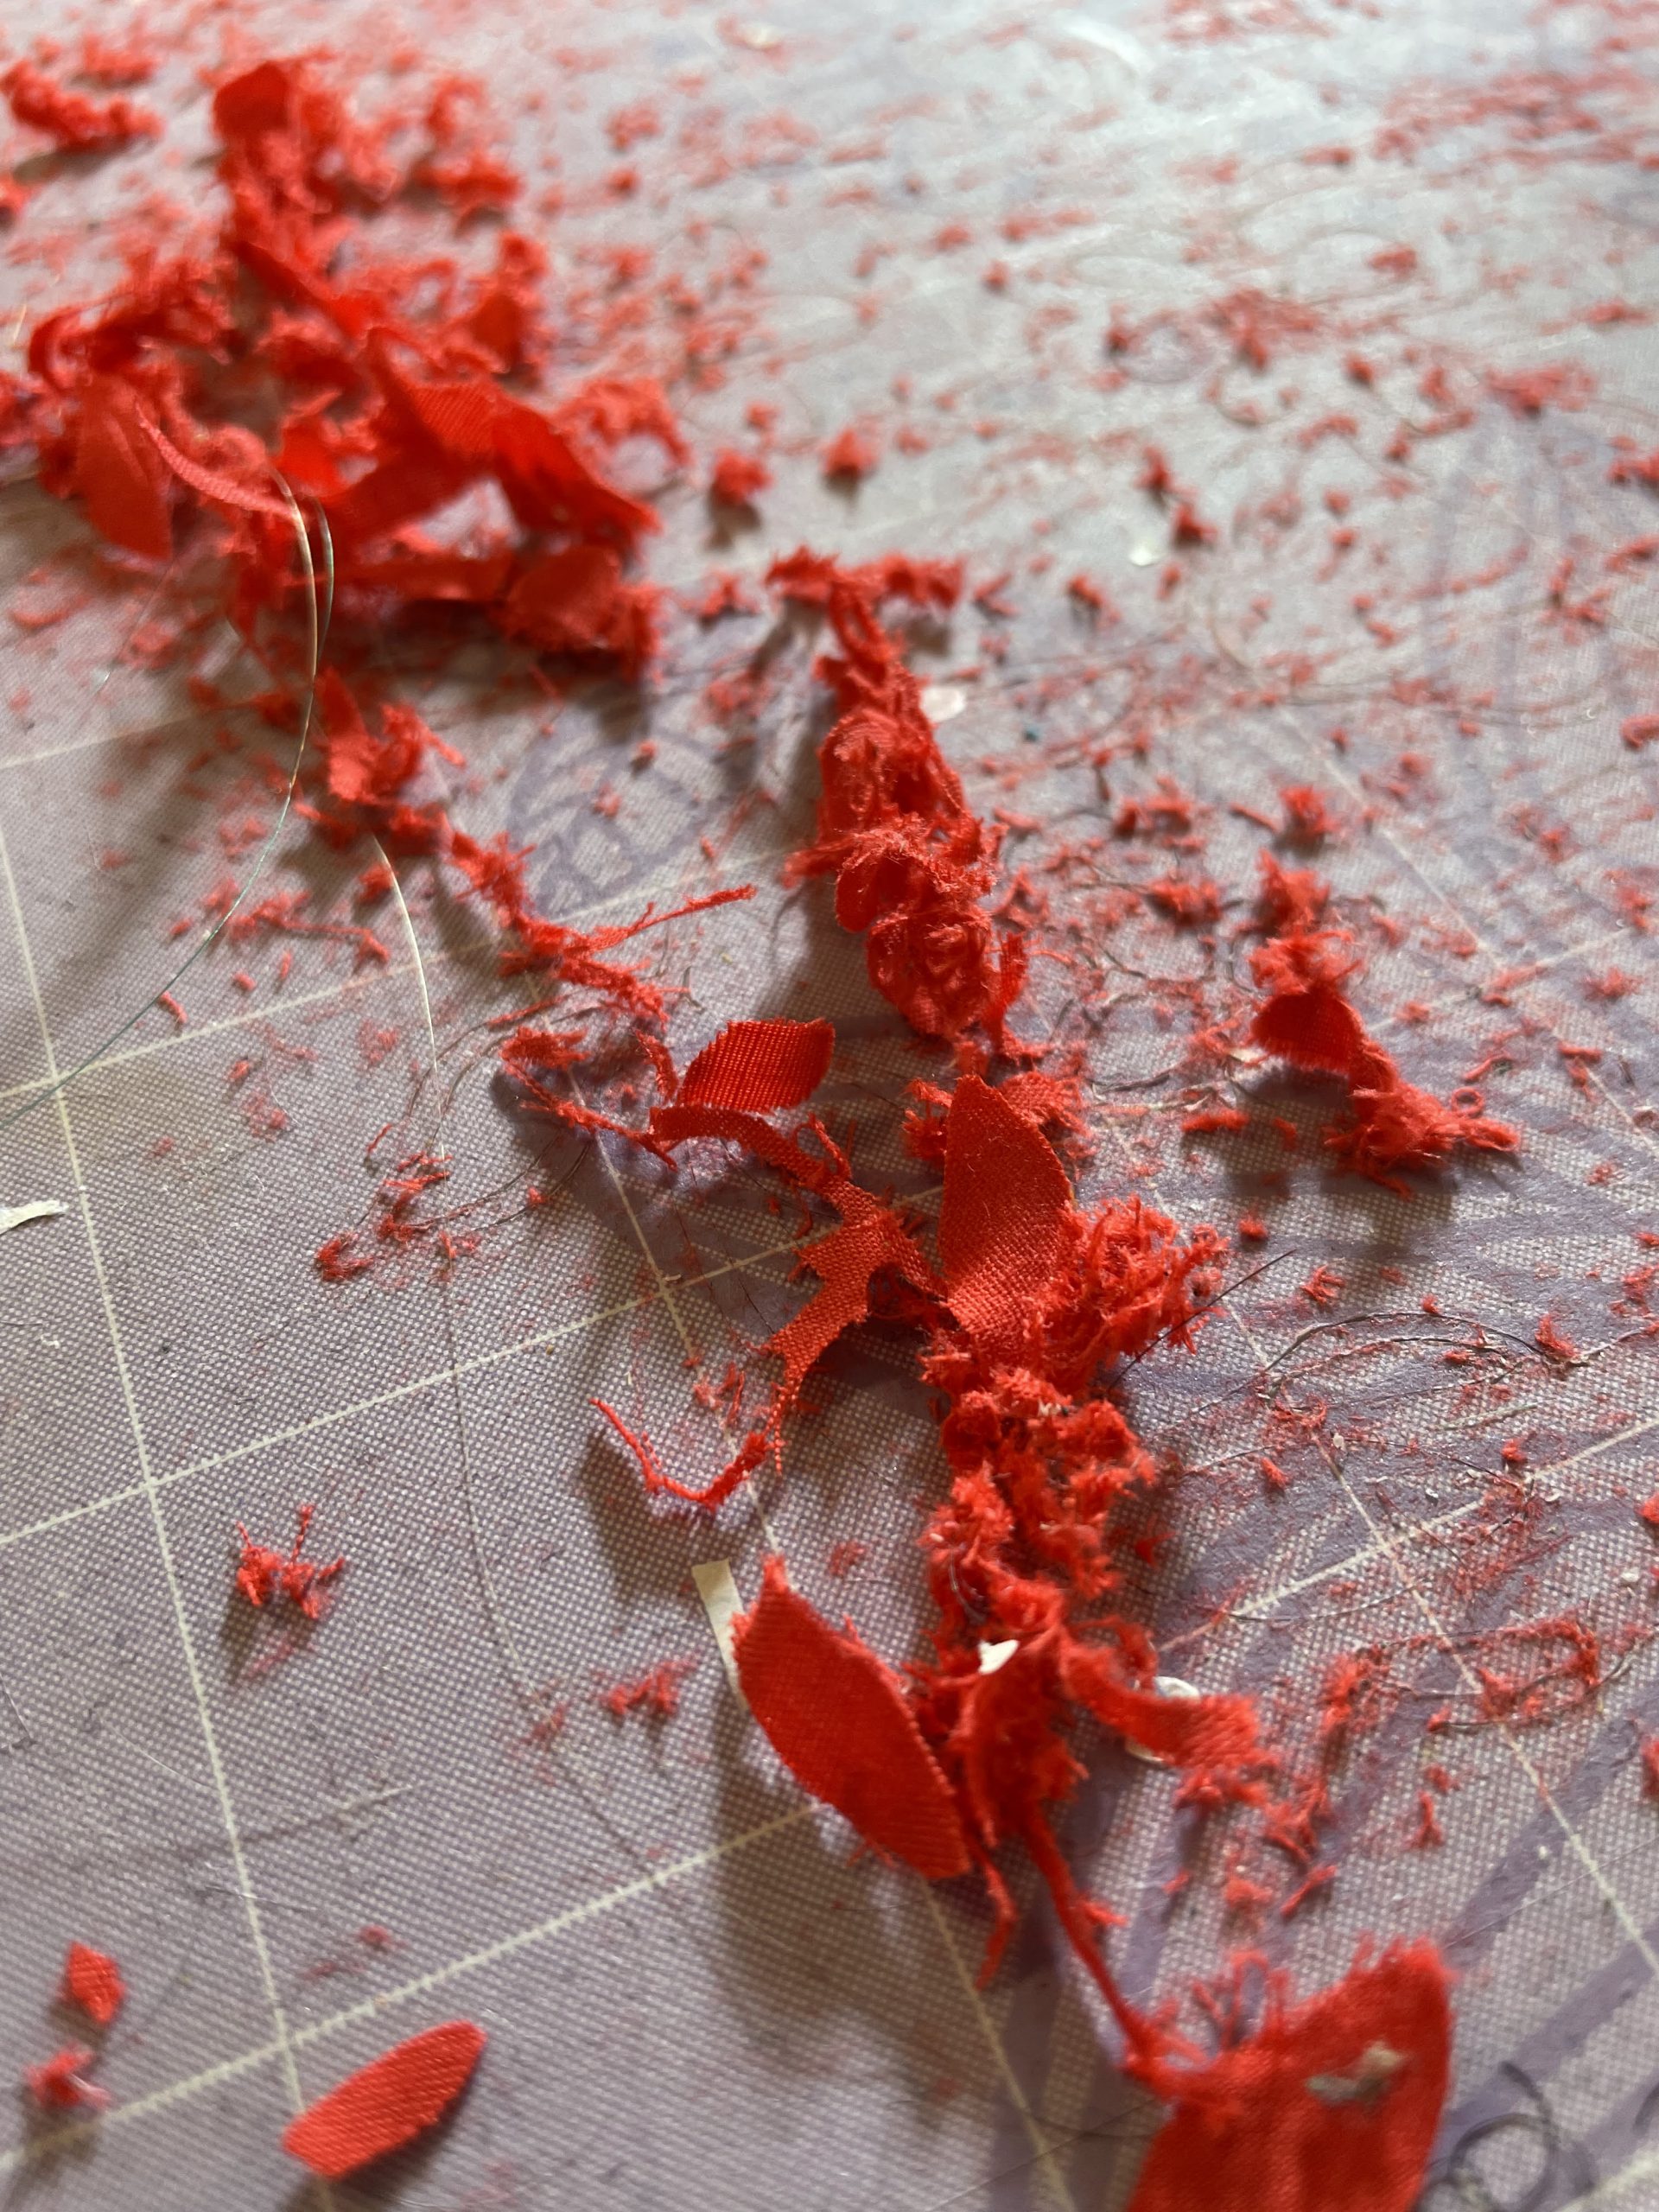
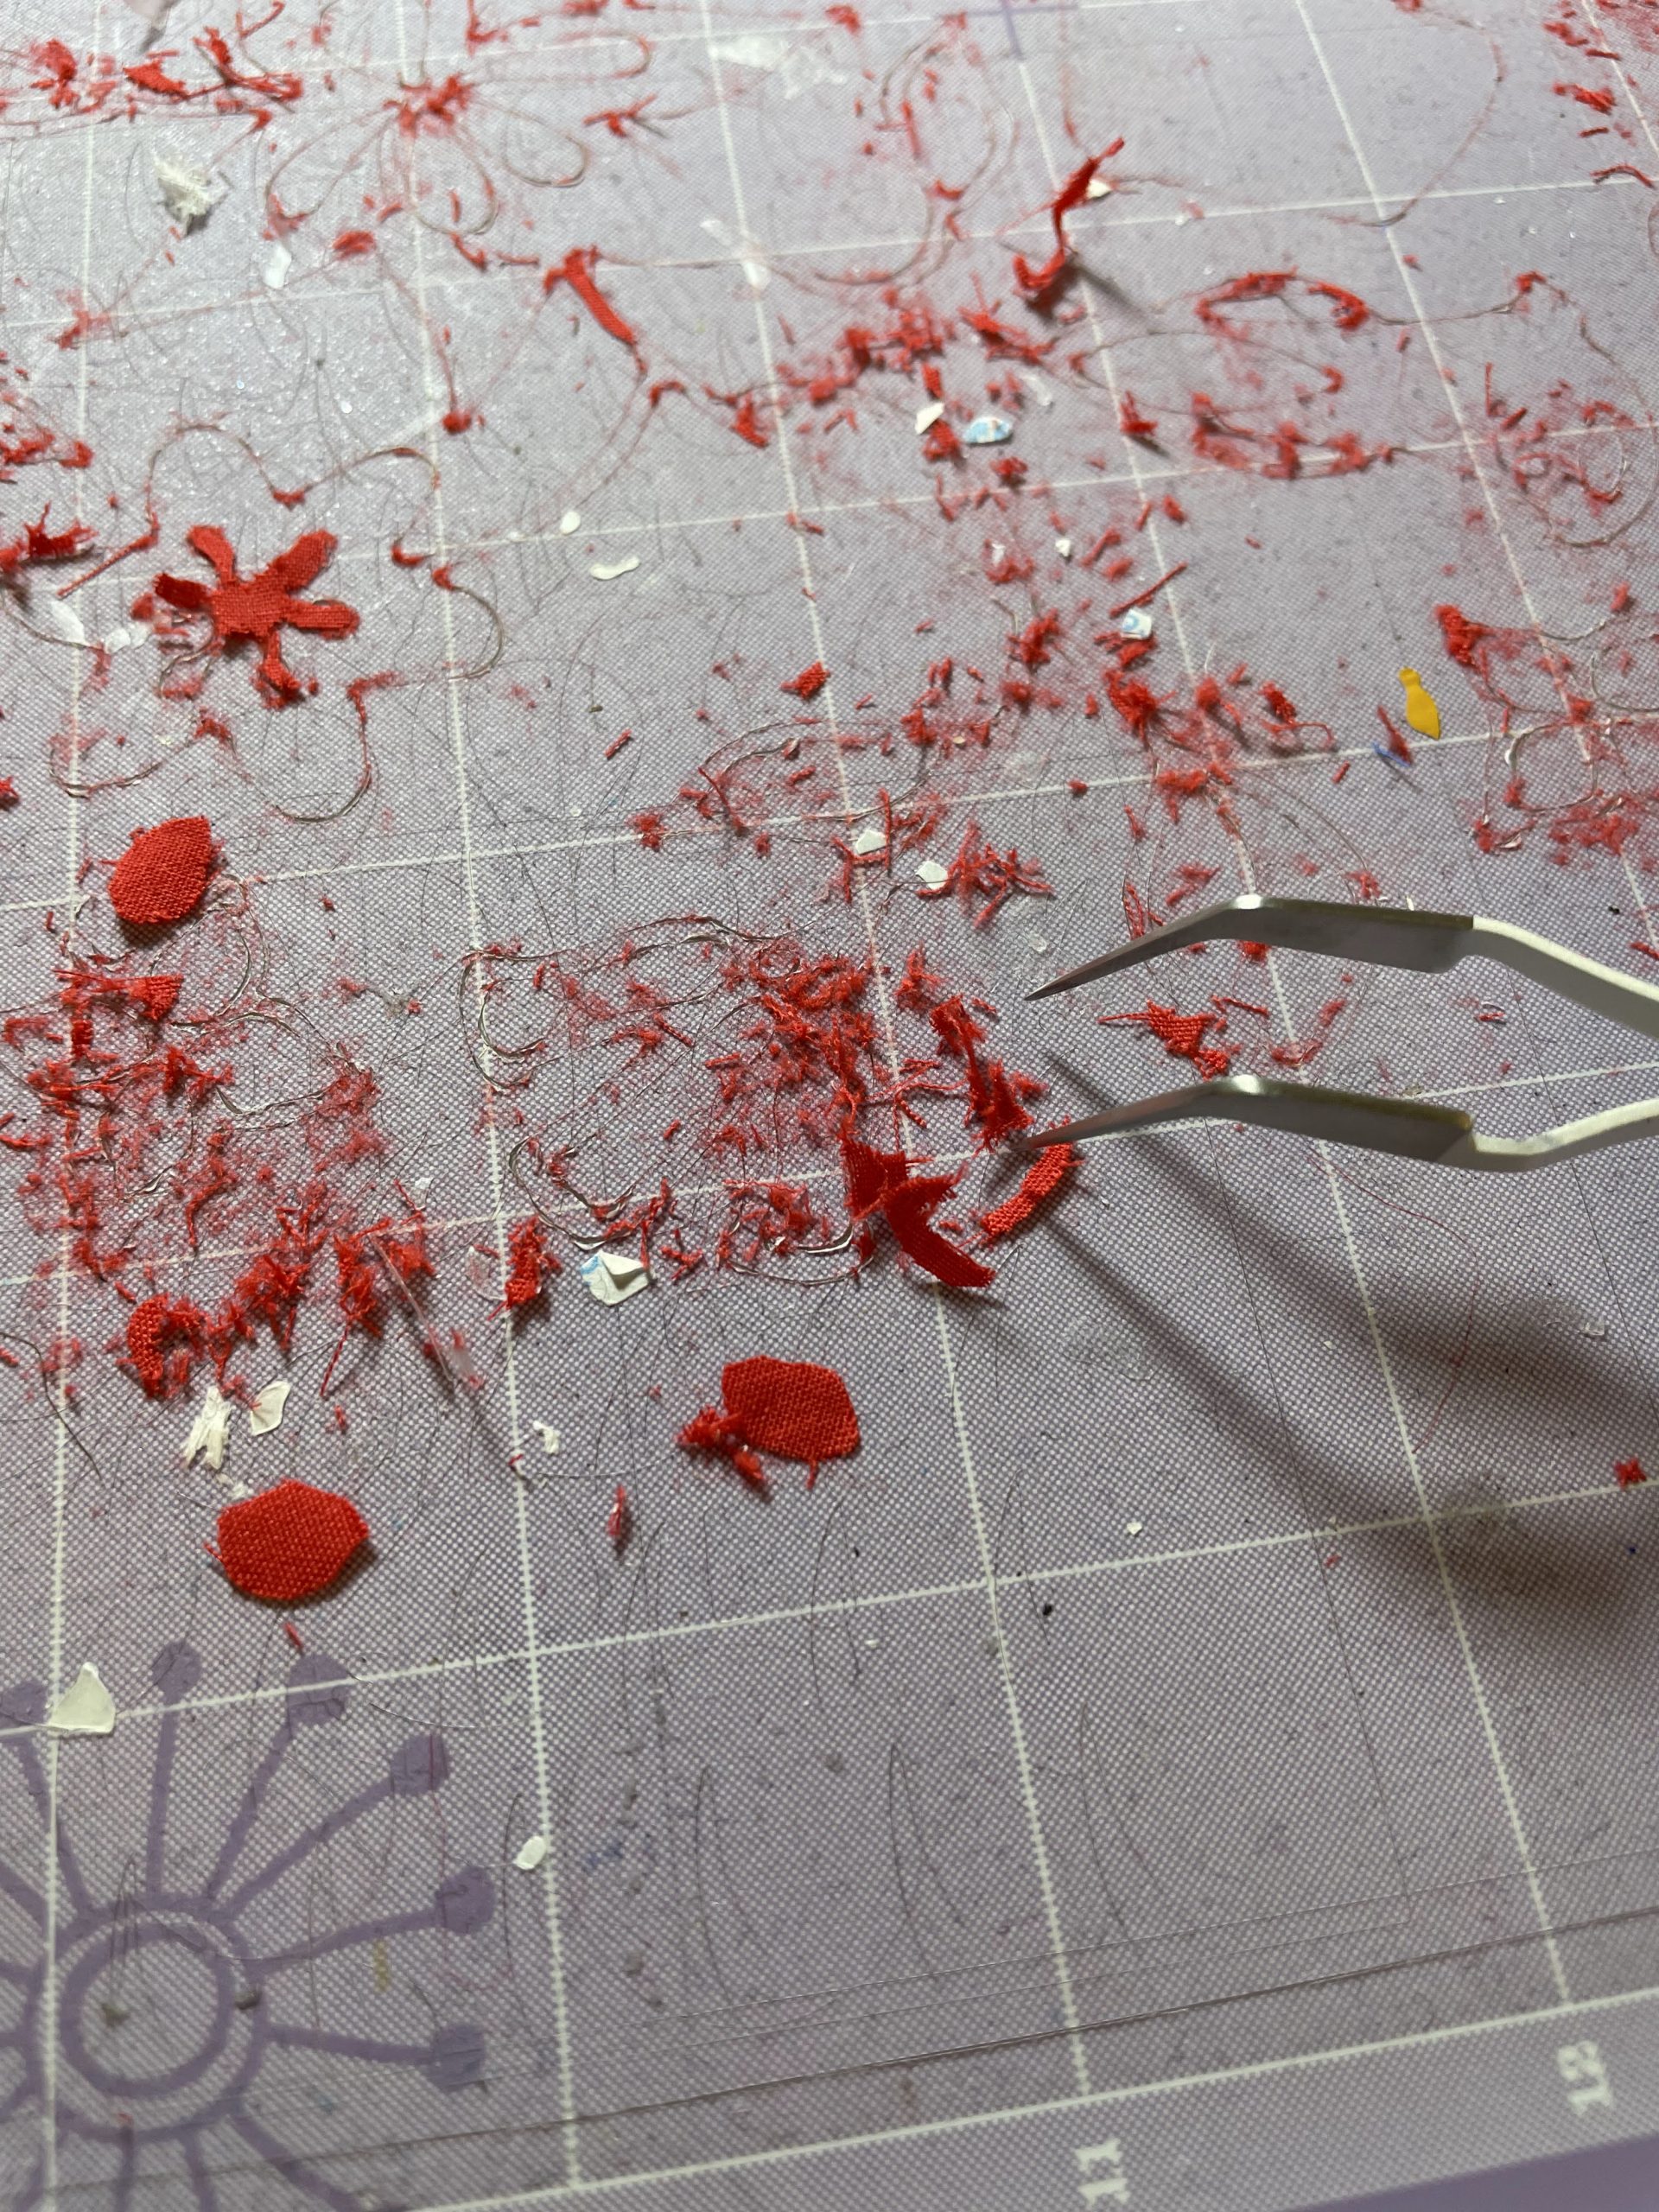
A fine yet rough trim of thin red fabric lays atop a lavender cutting board. Careful cuts of thin stems trace towards blooms of flowers in a seemingly random pattern. Bits and pieces of this cutting is torn and macerated, with fibers mashed into the adhesive backing underneath. A lone lamp illuminates the fabric in hues of red and blue, turning the fabric into shades of crimson and violet. It sits alongside a paper cousin, similarly neatly trimmed, but also as fragile and trapped in the same dilemma.

Intended Effects

The initial intention was to develop a sculpture that would involve two cordless office phone handsets. The phones would signify the connection between two locations: Pittsburgh and Singapore, that I experience as an international student, and the communication that I have between people of these two locations.

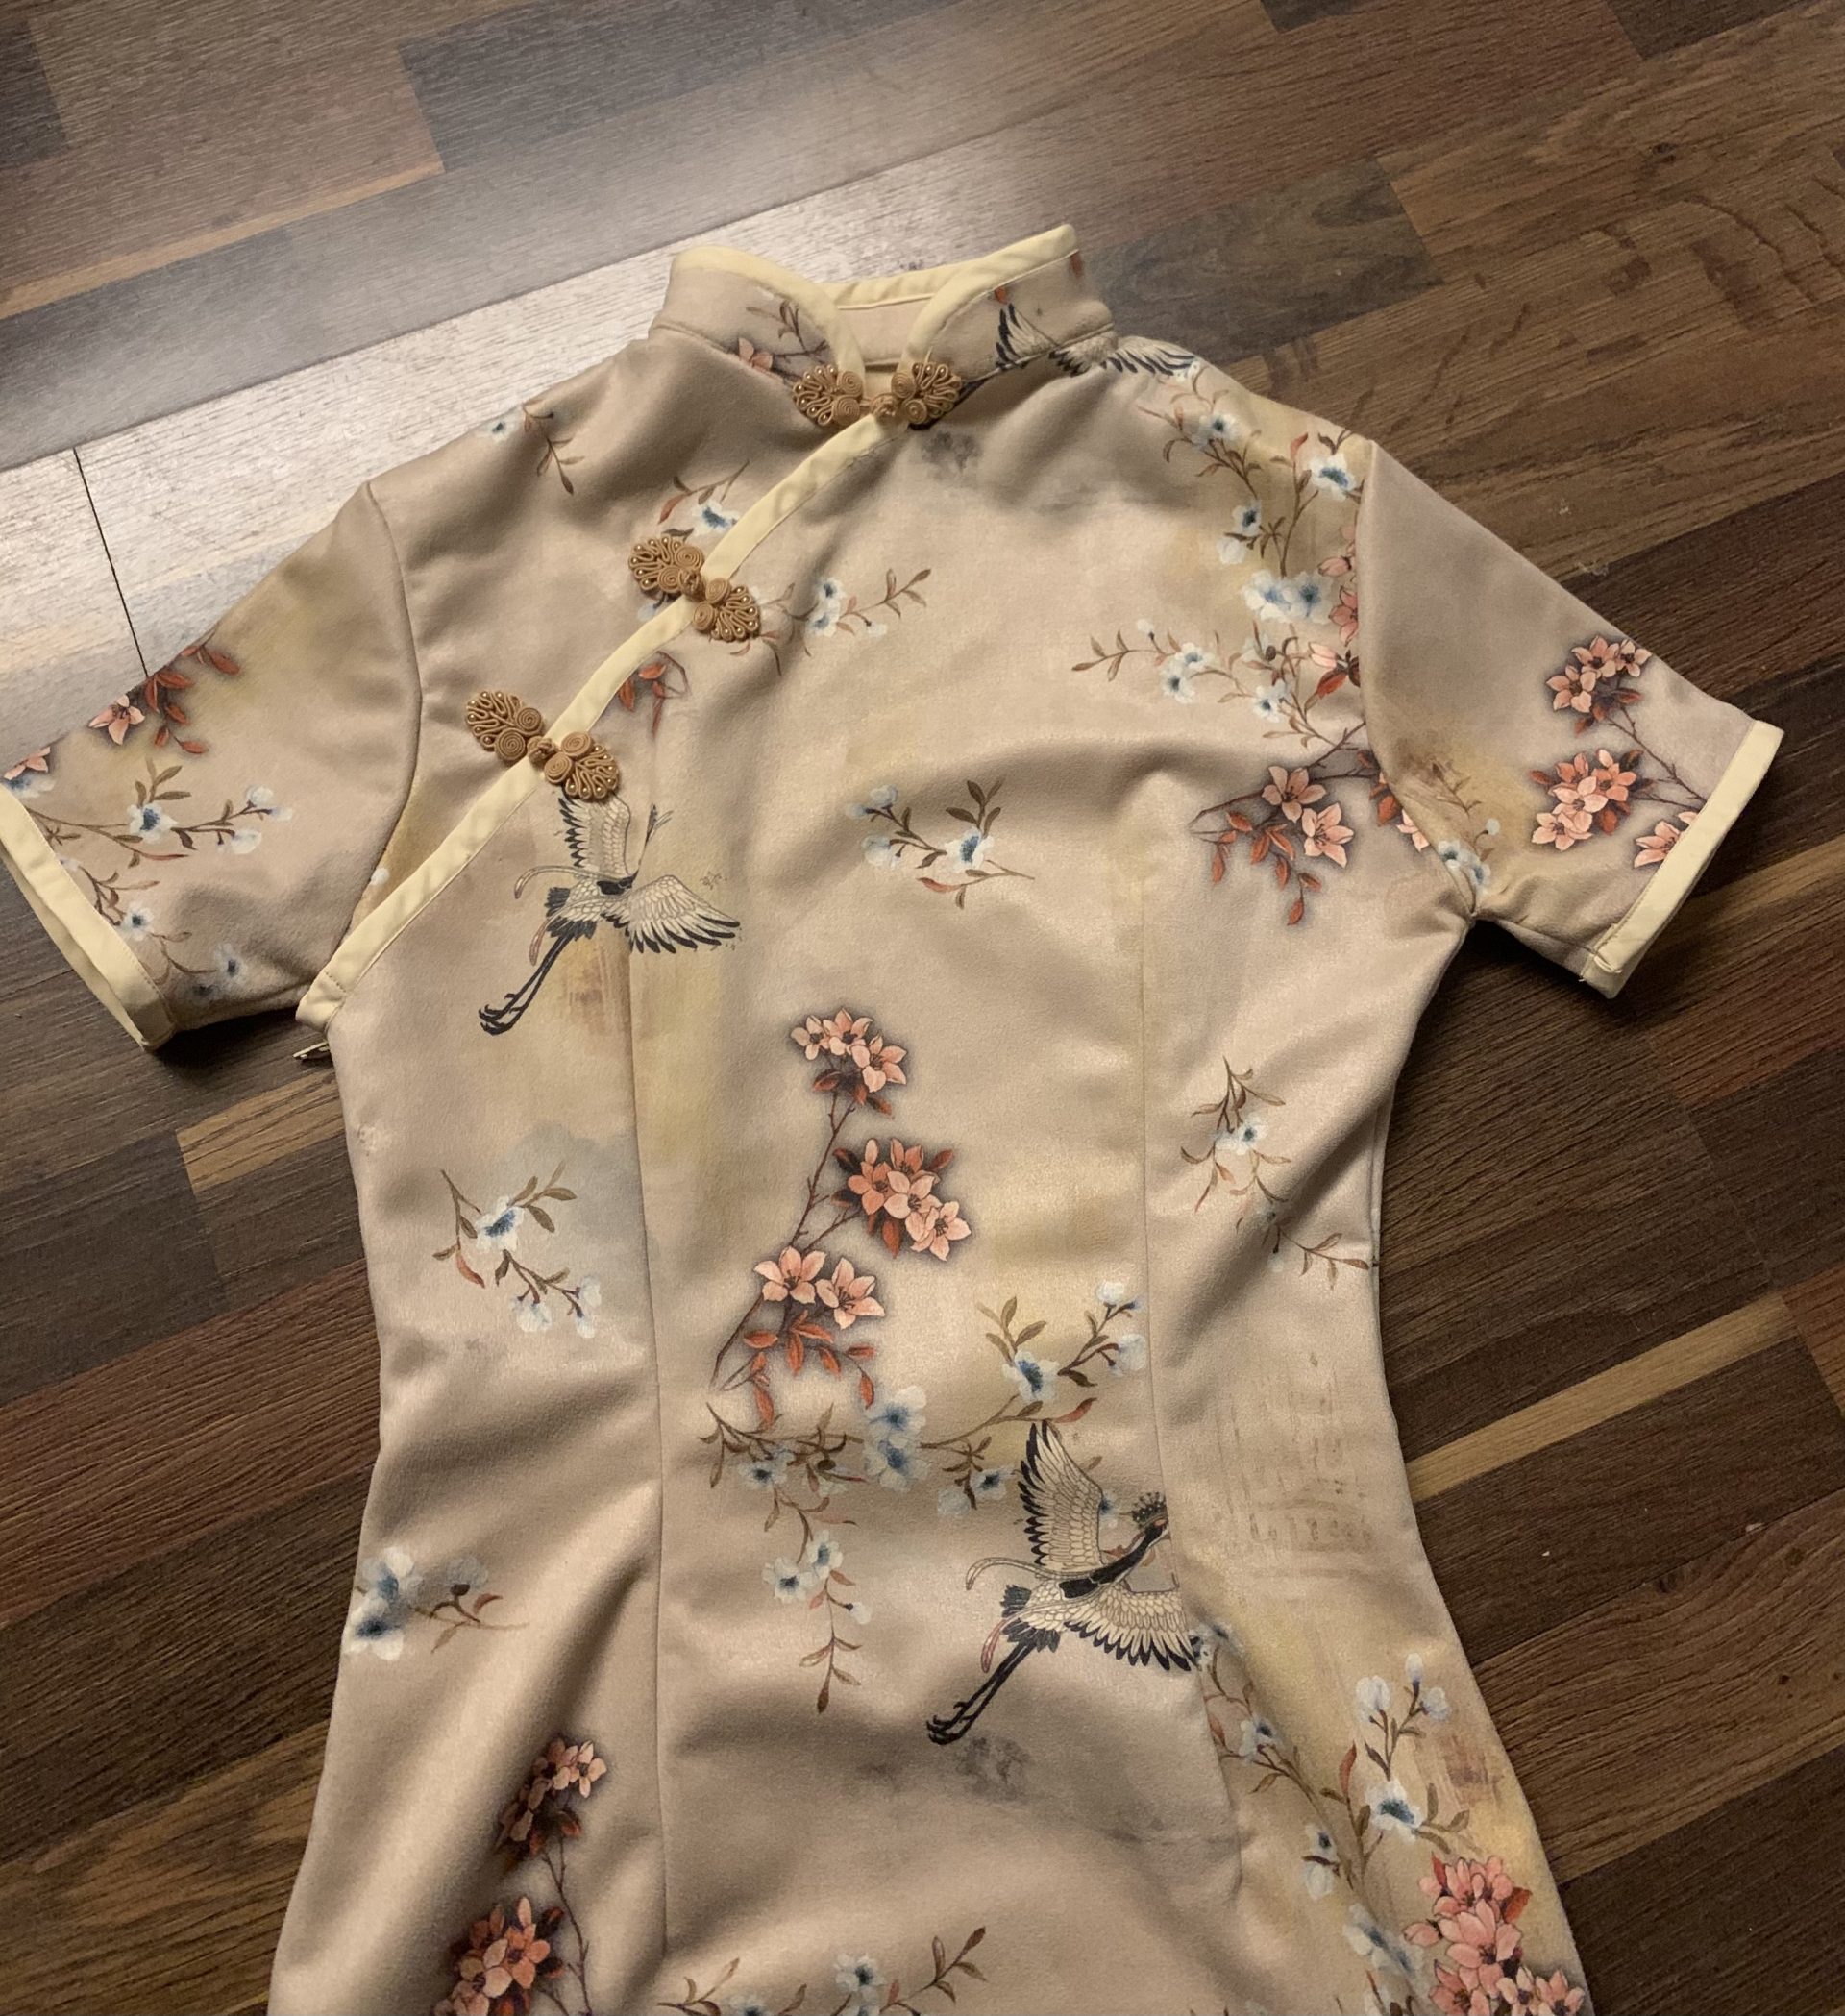
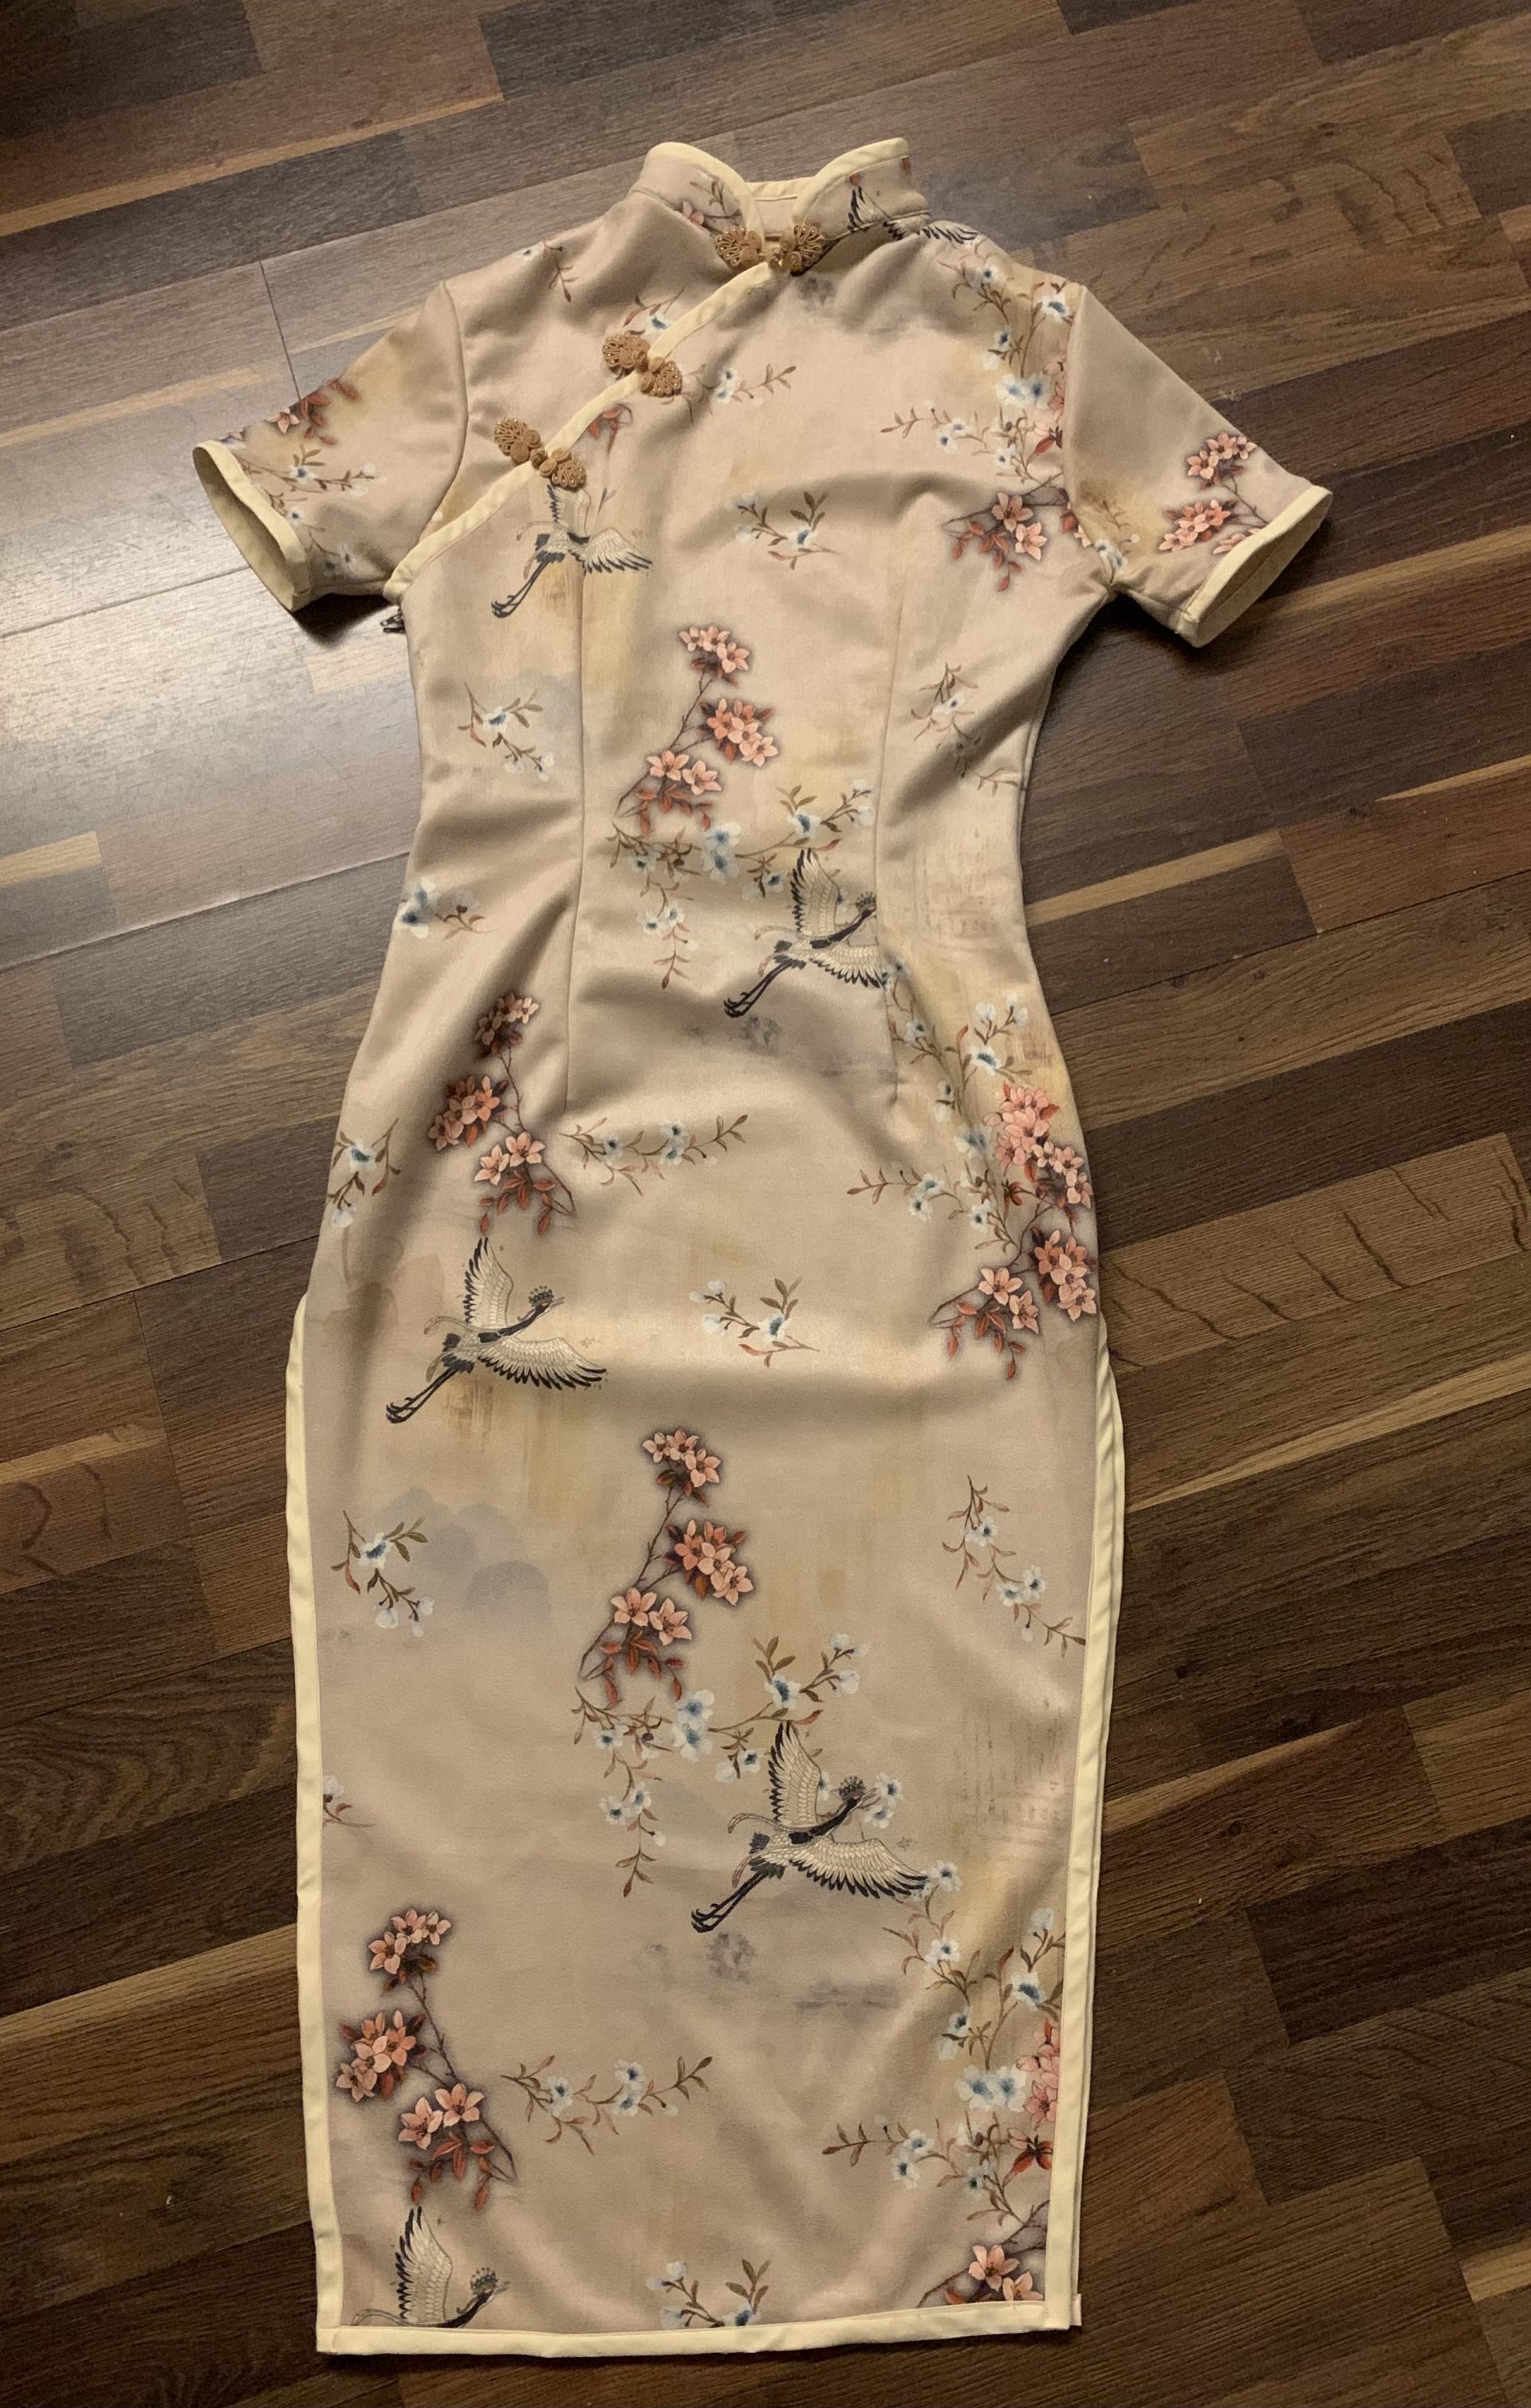
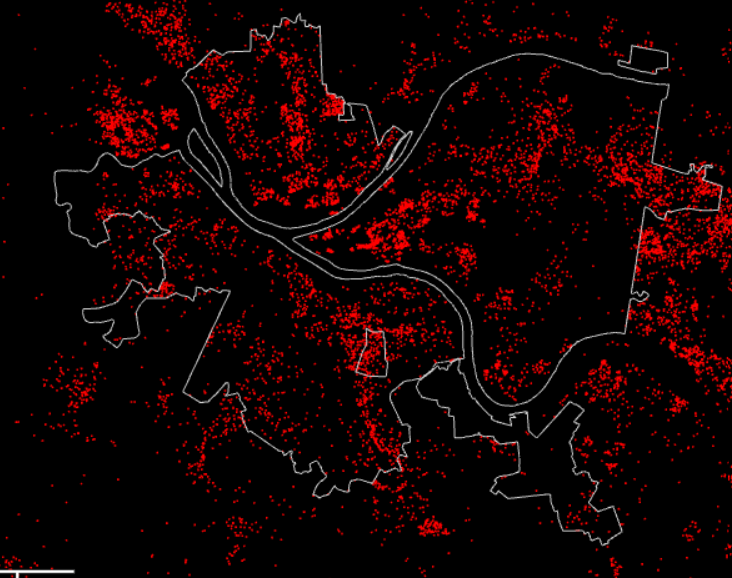
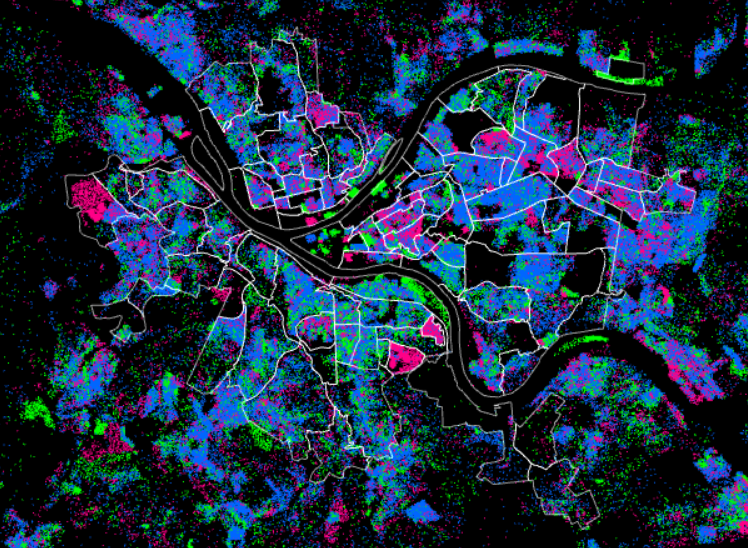
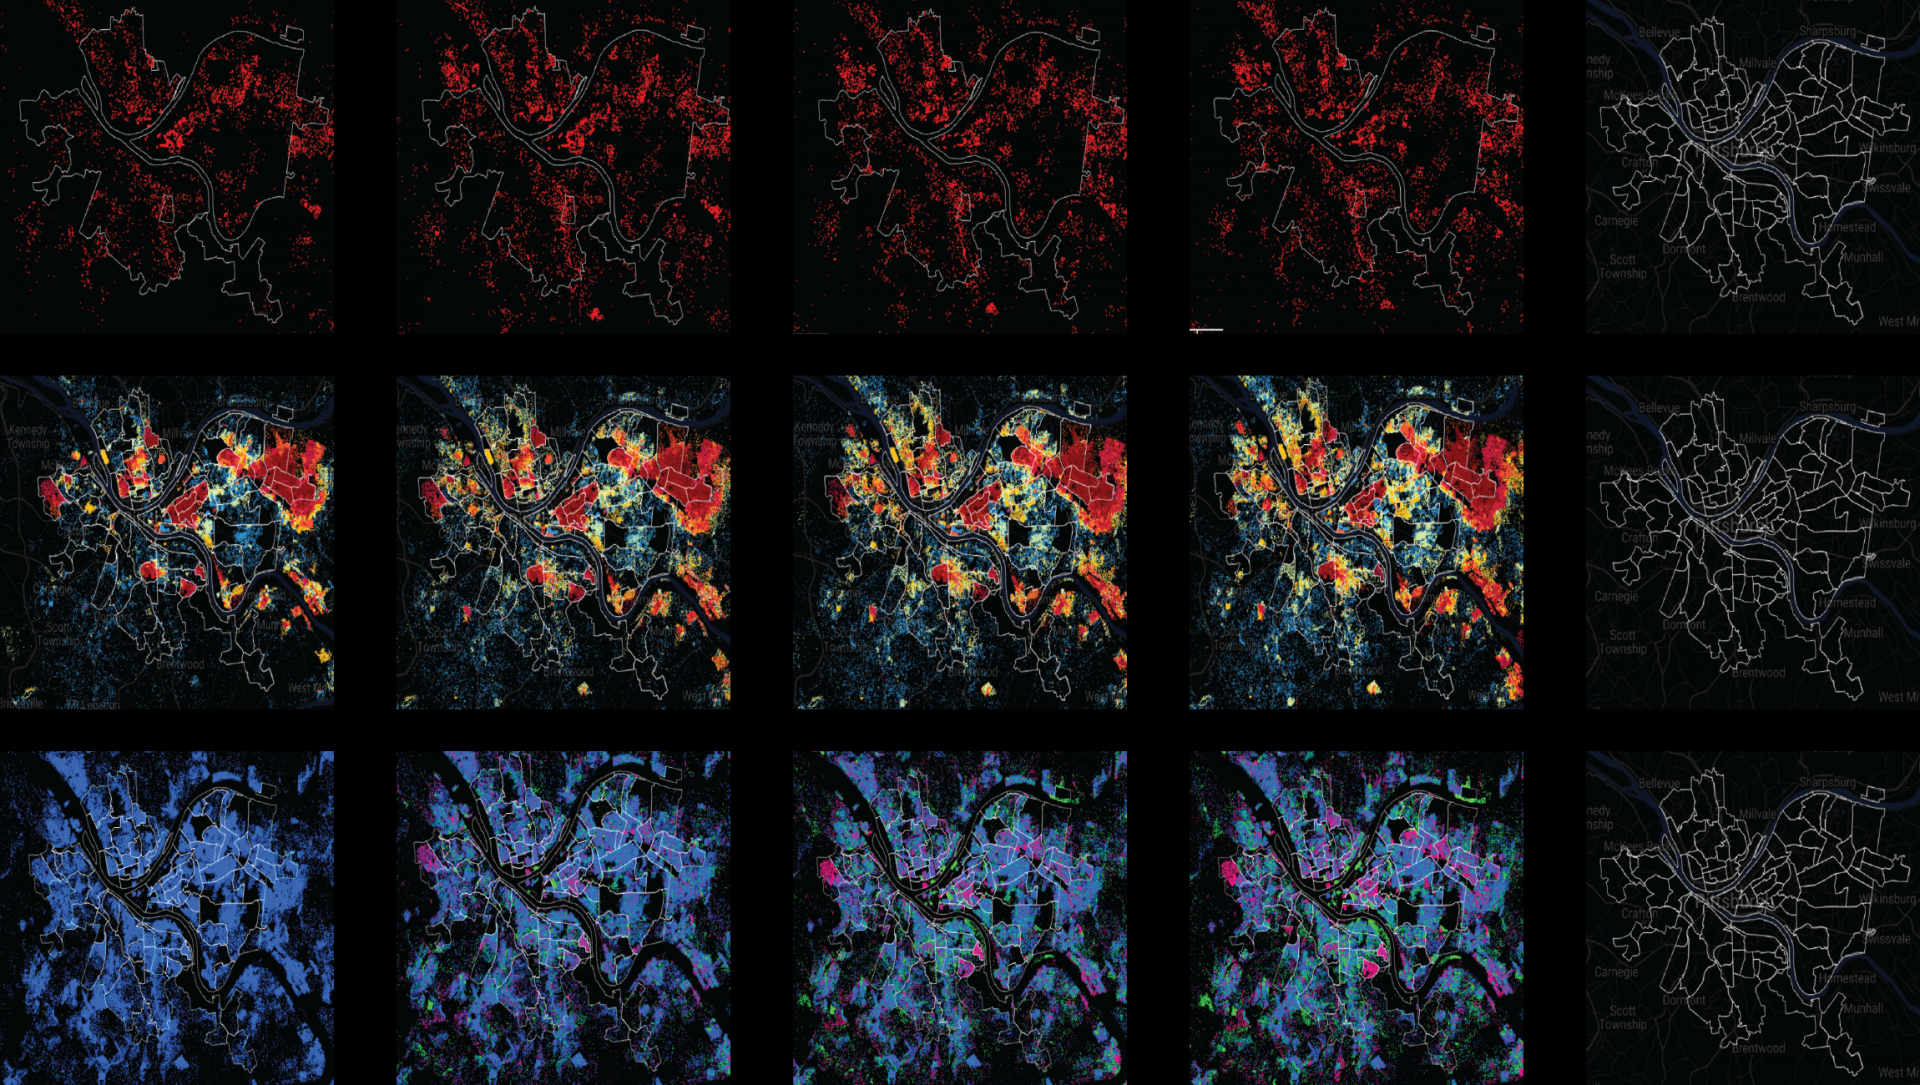
I would have a representation of maps of these two locations on the surface between these two upright phones, and additionally suspended lace of flowers (from the Singapore Airlines stewardess batik-style uniform), and perhaps of a native-american style print of triangles, symbols and other patterns.

Lighting from either under or above the sculpture would play with color theory to either emphasize or deemphasize the color of different items, showing changes in the communication.

Challenges

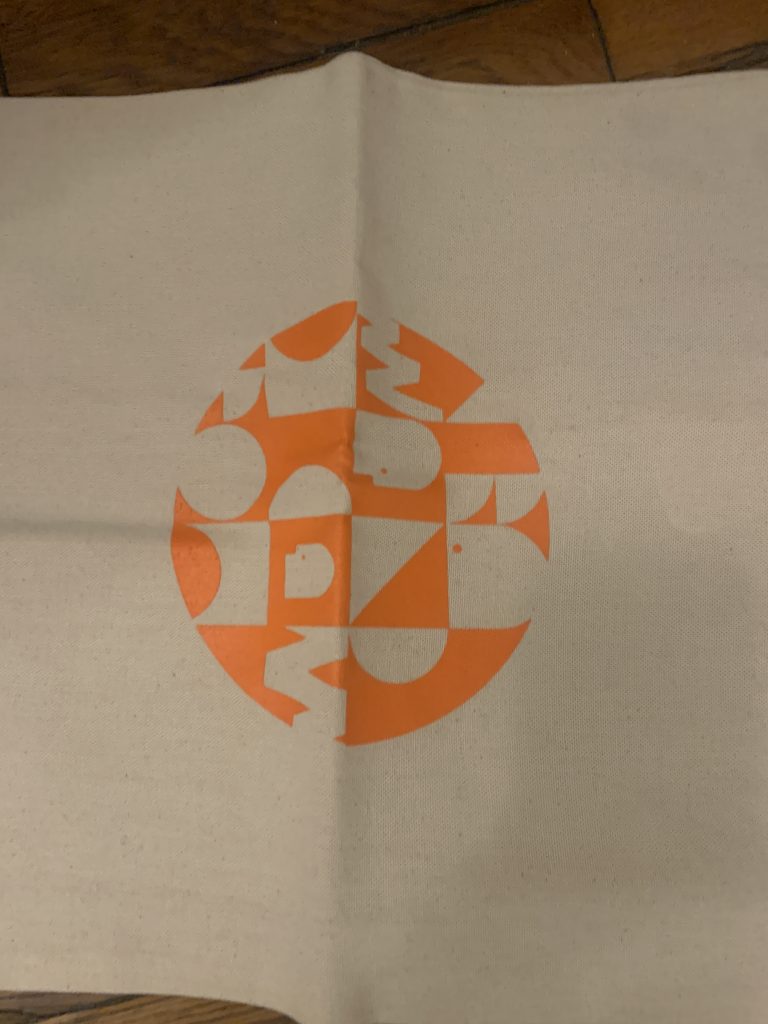
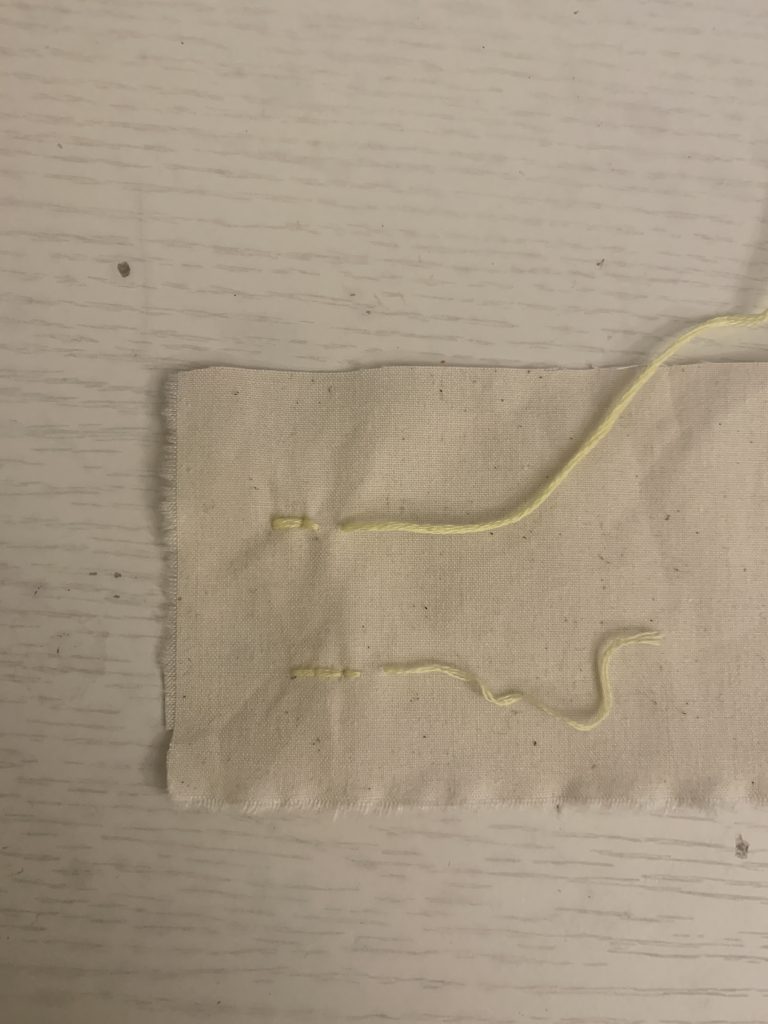
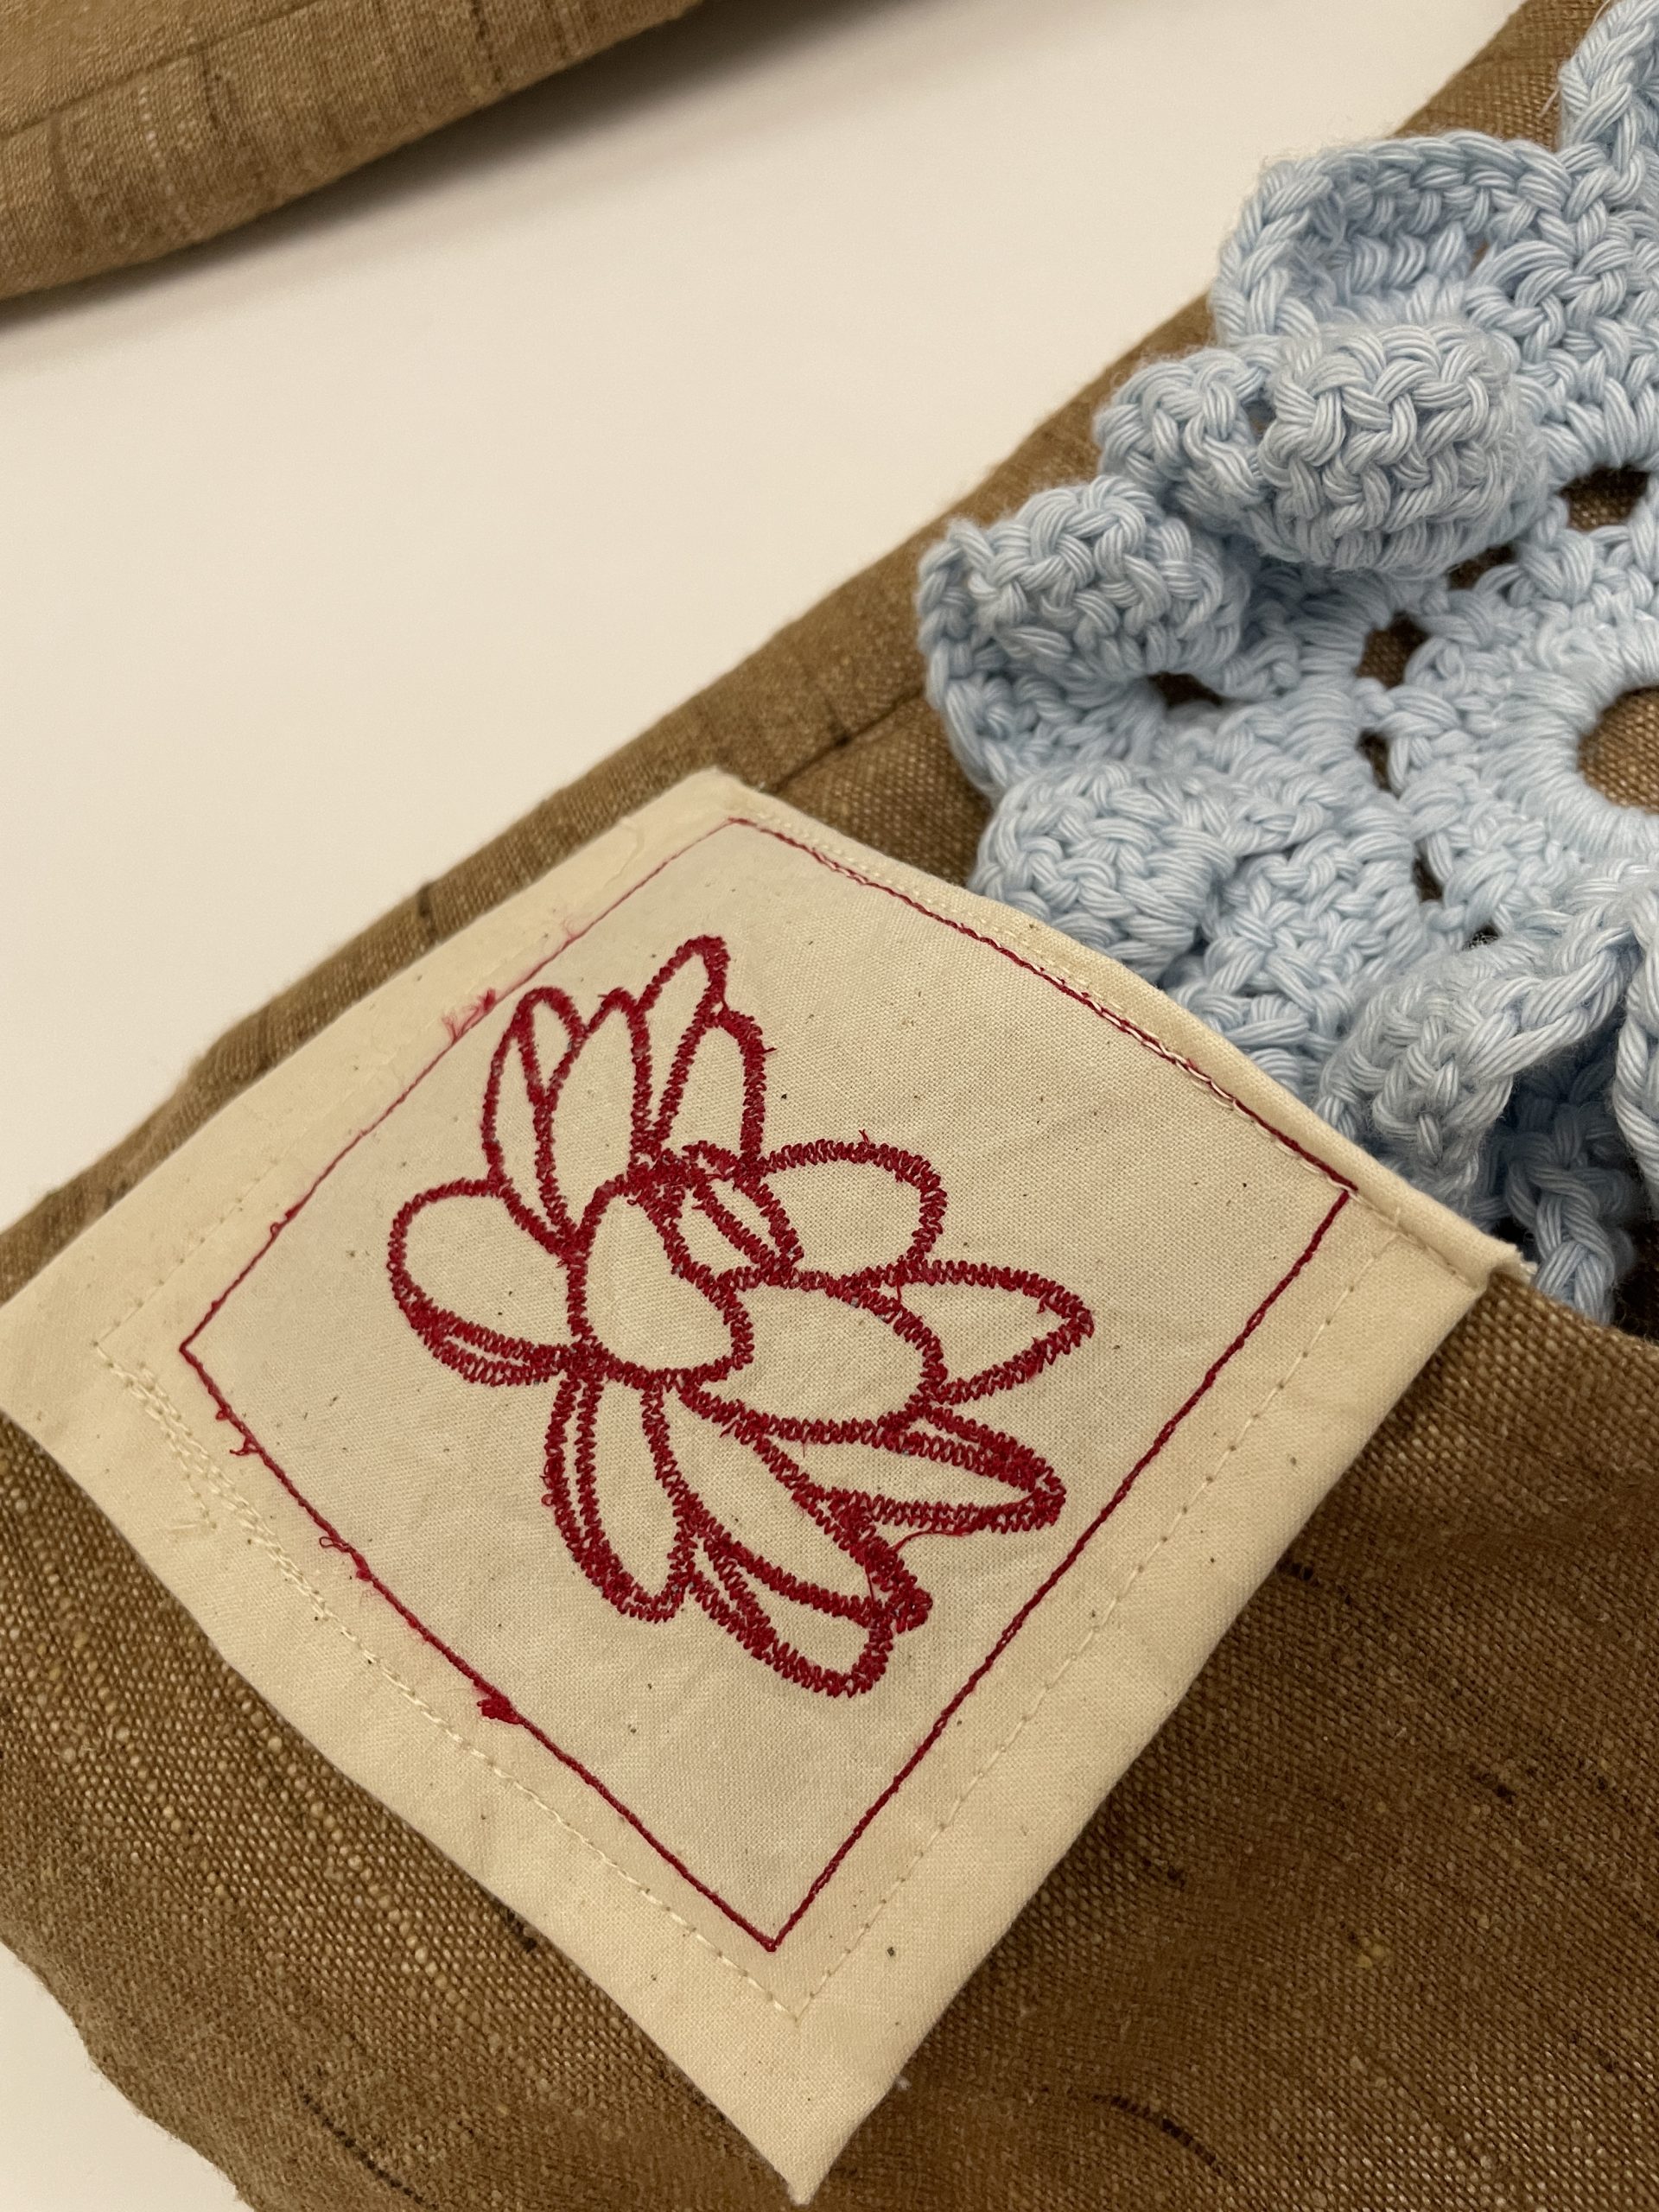
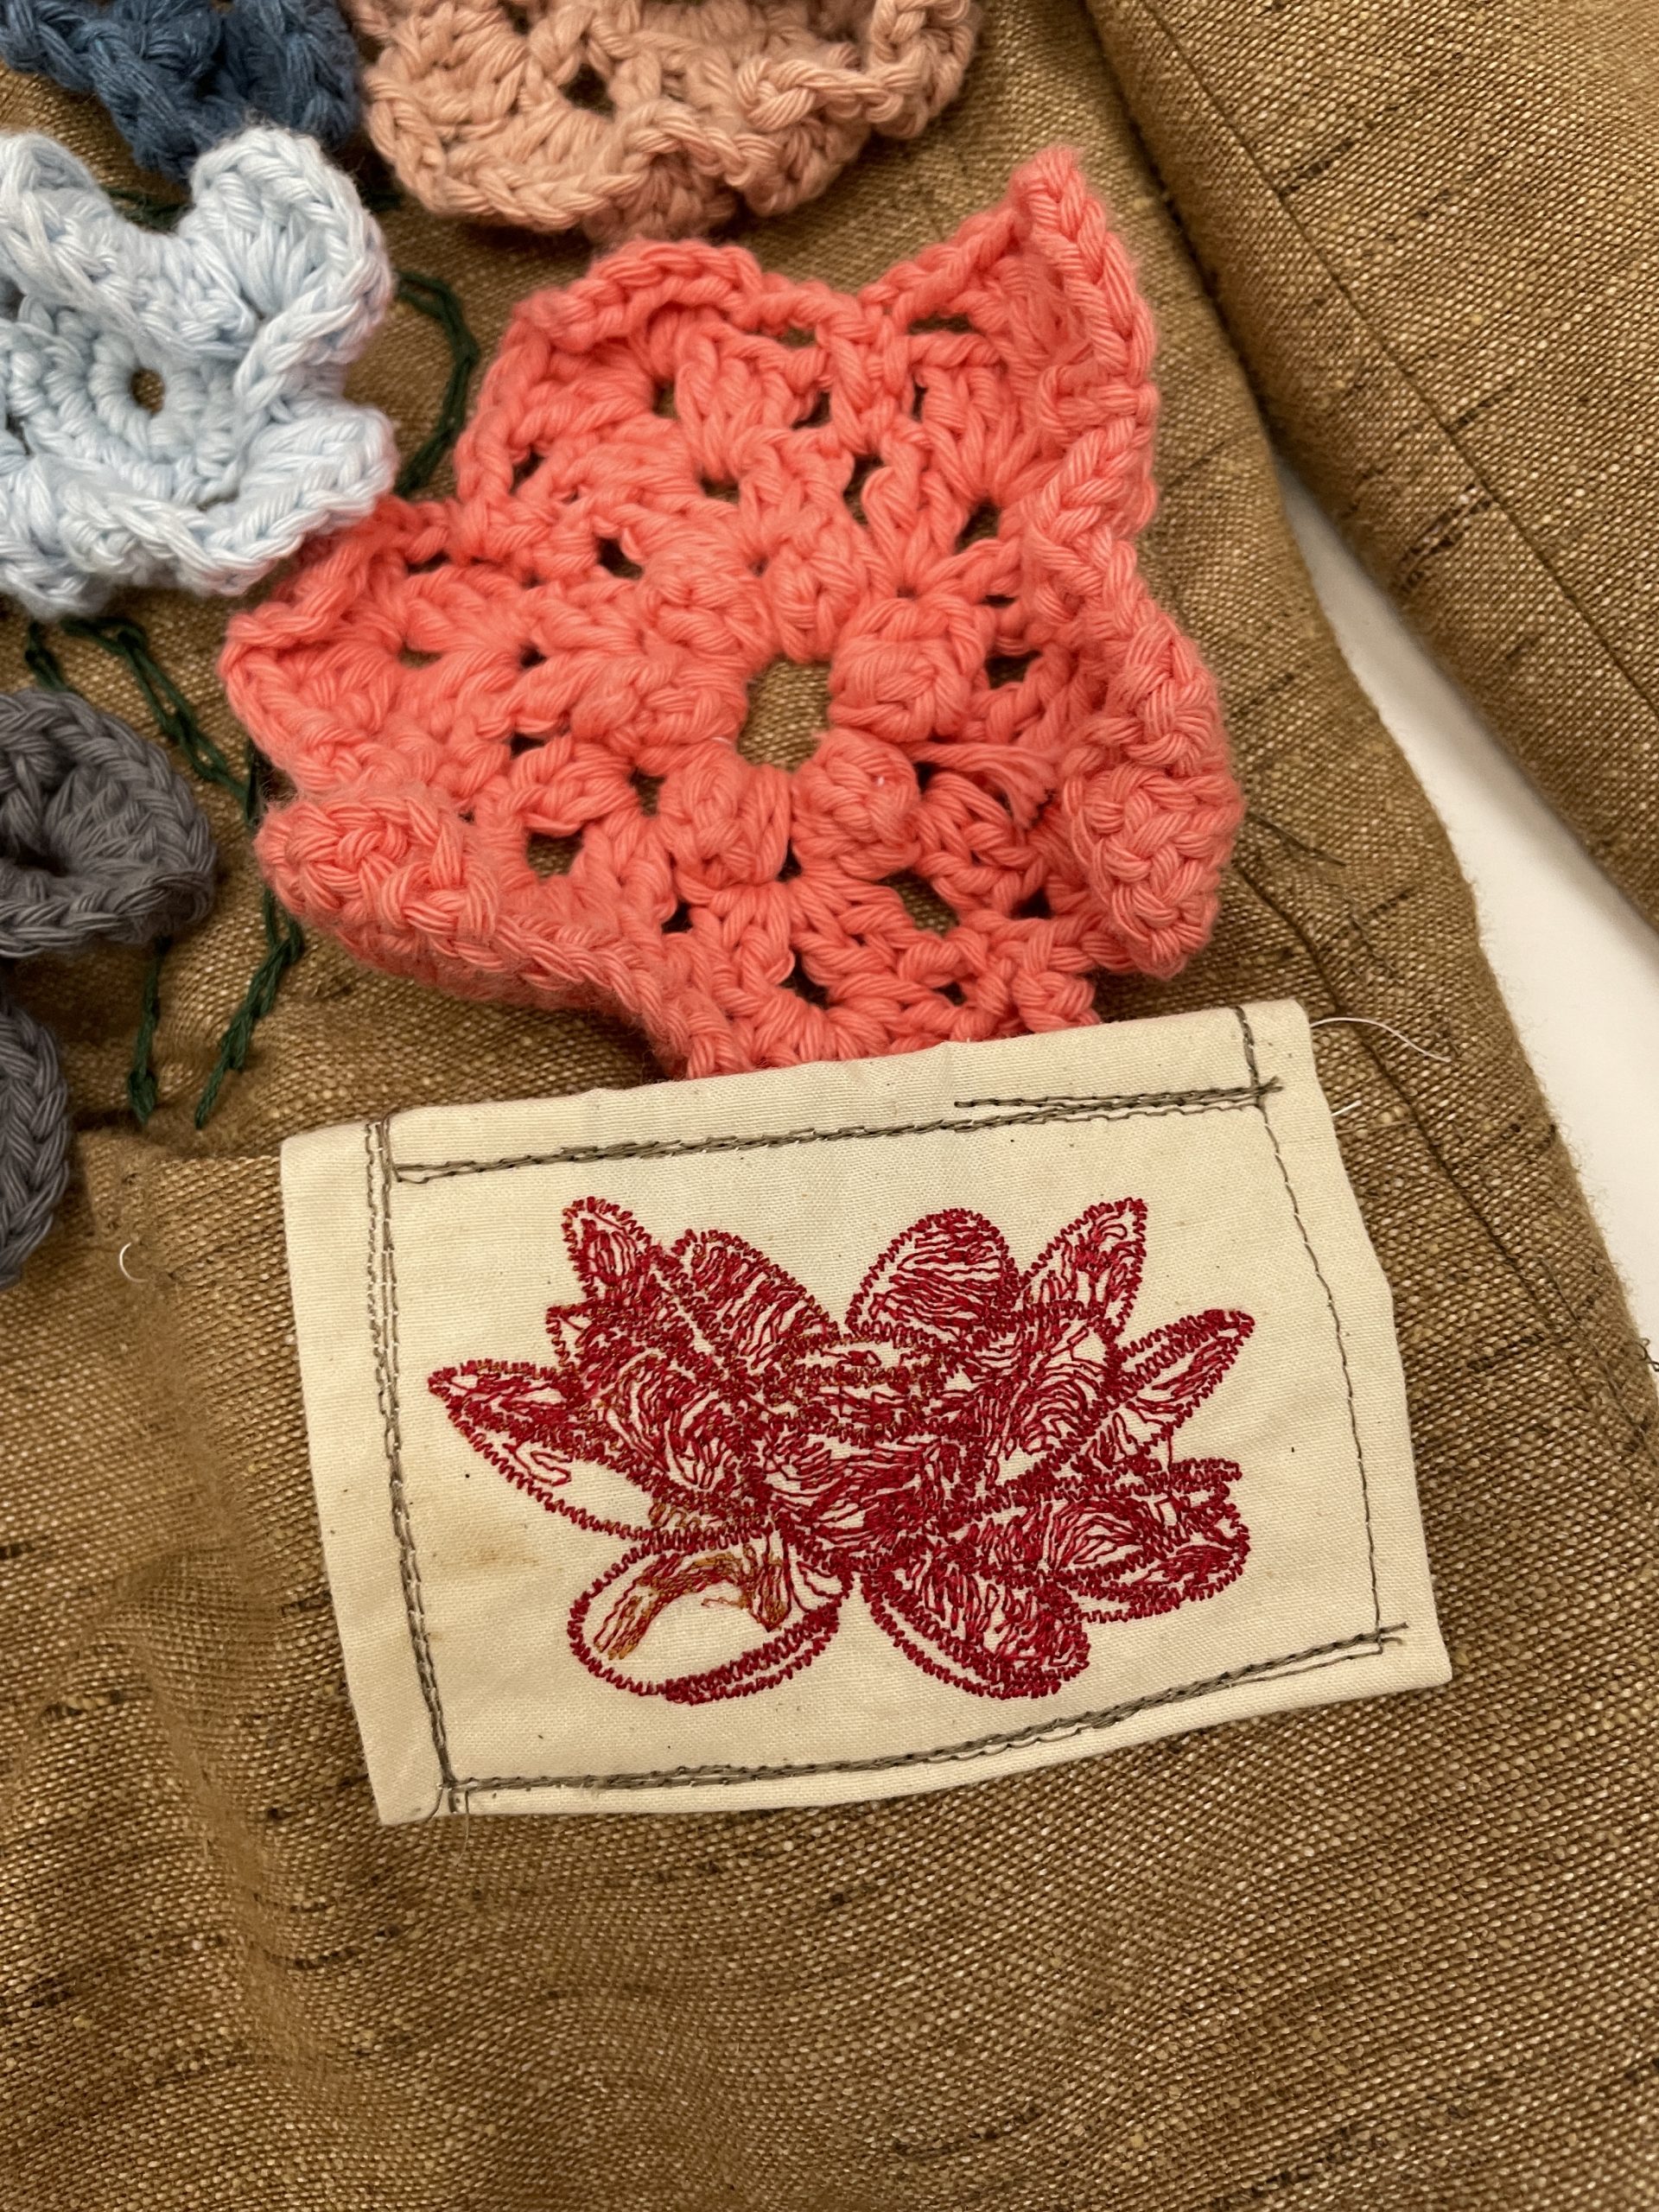
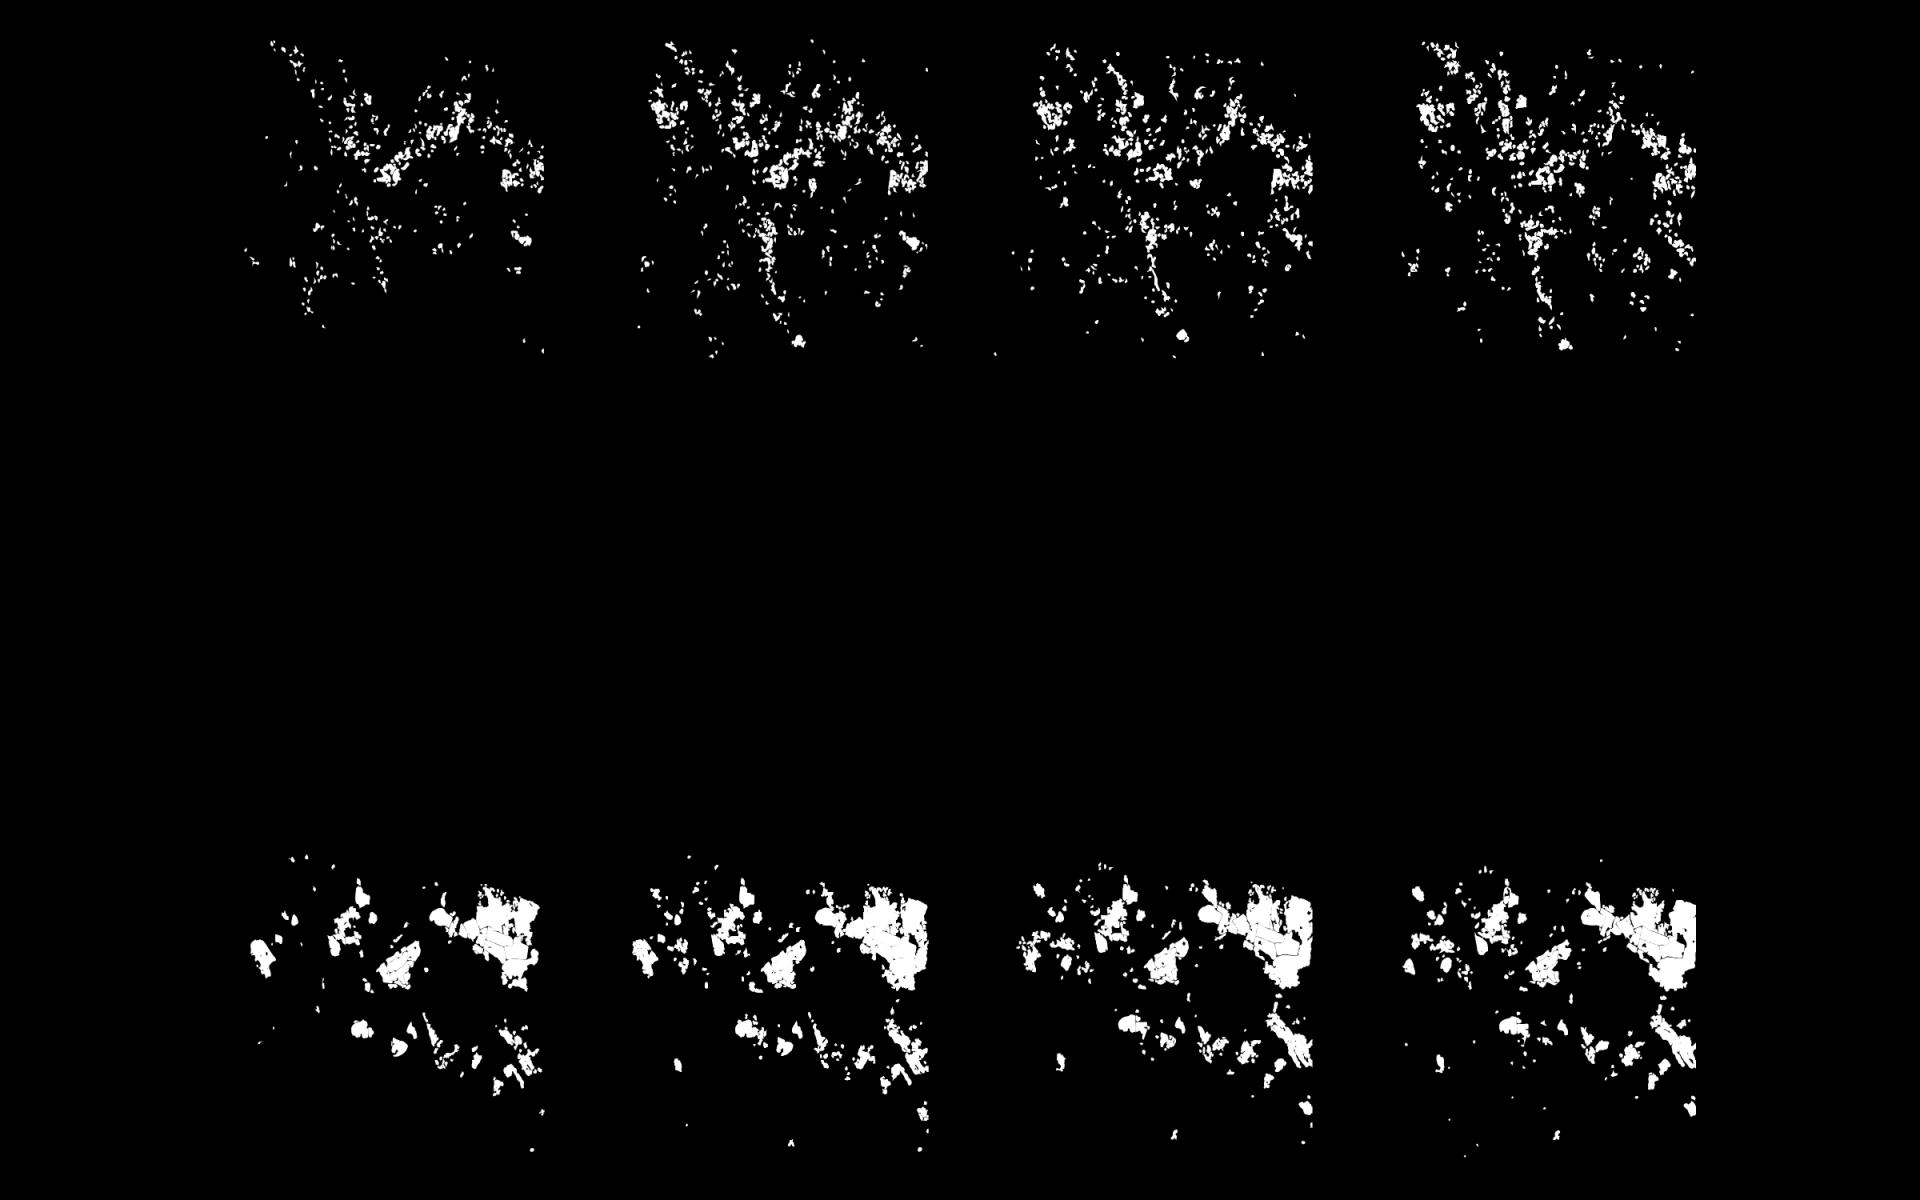
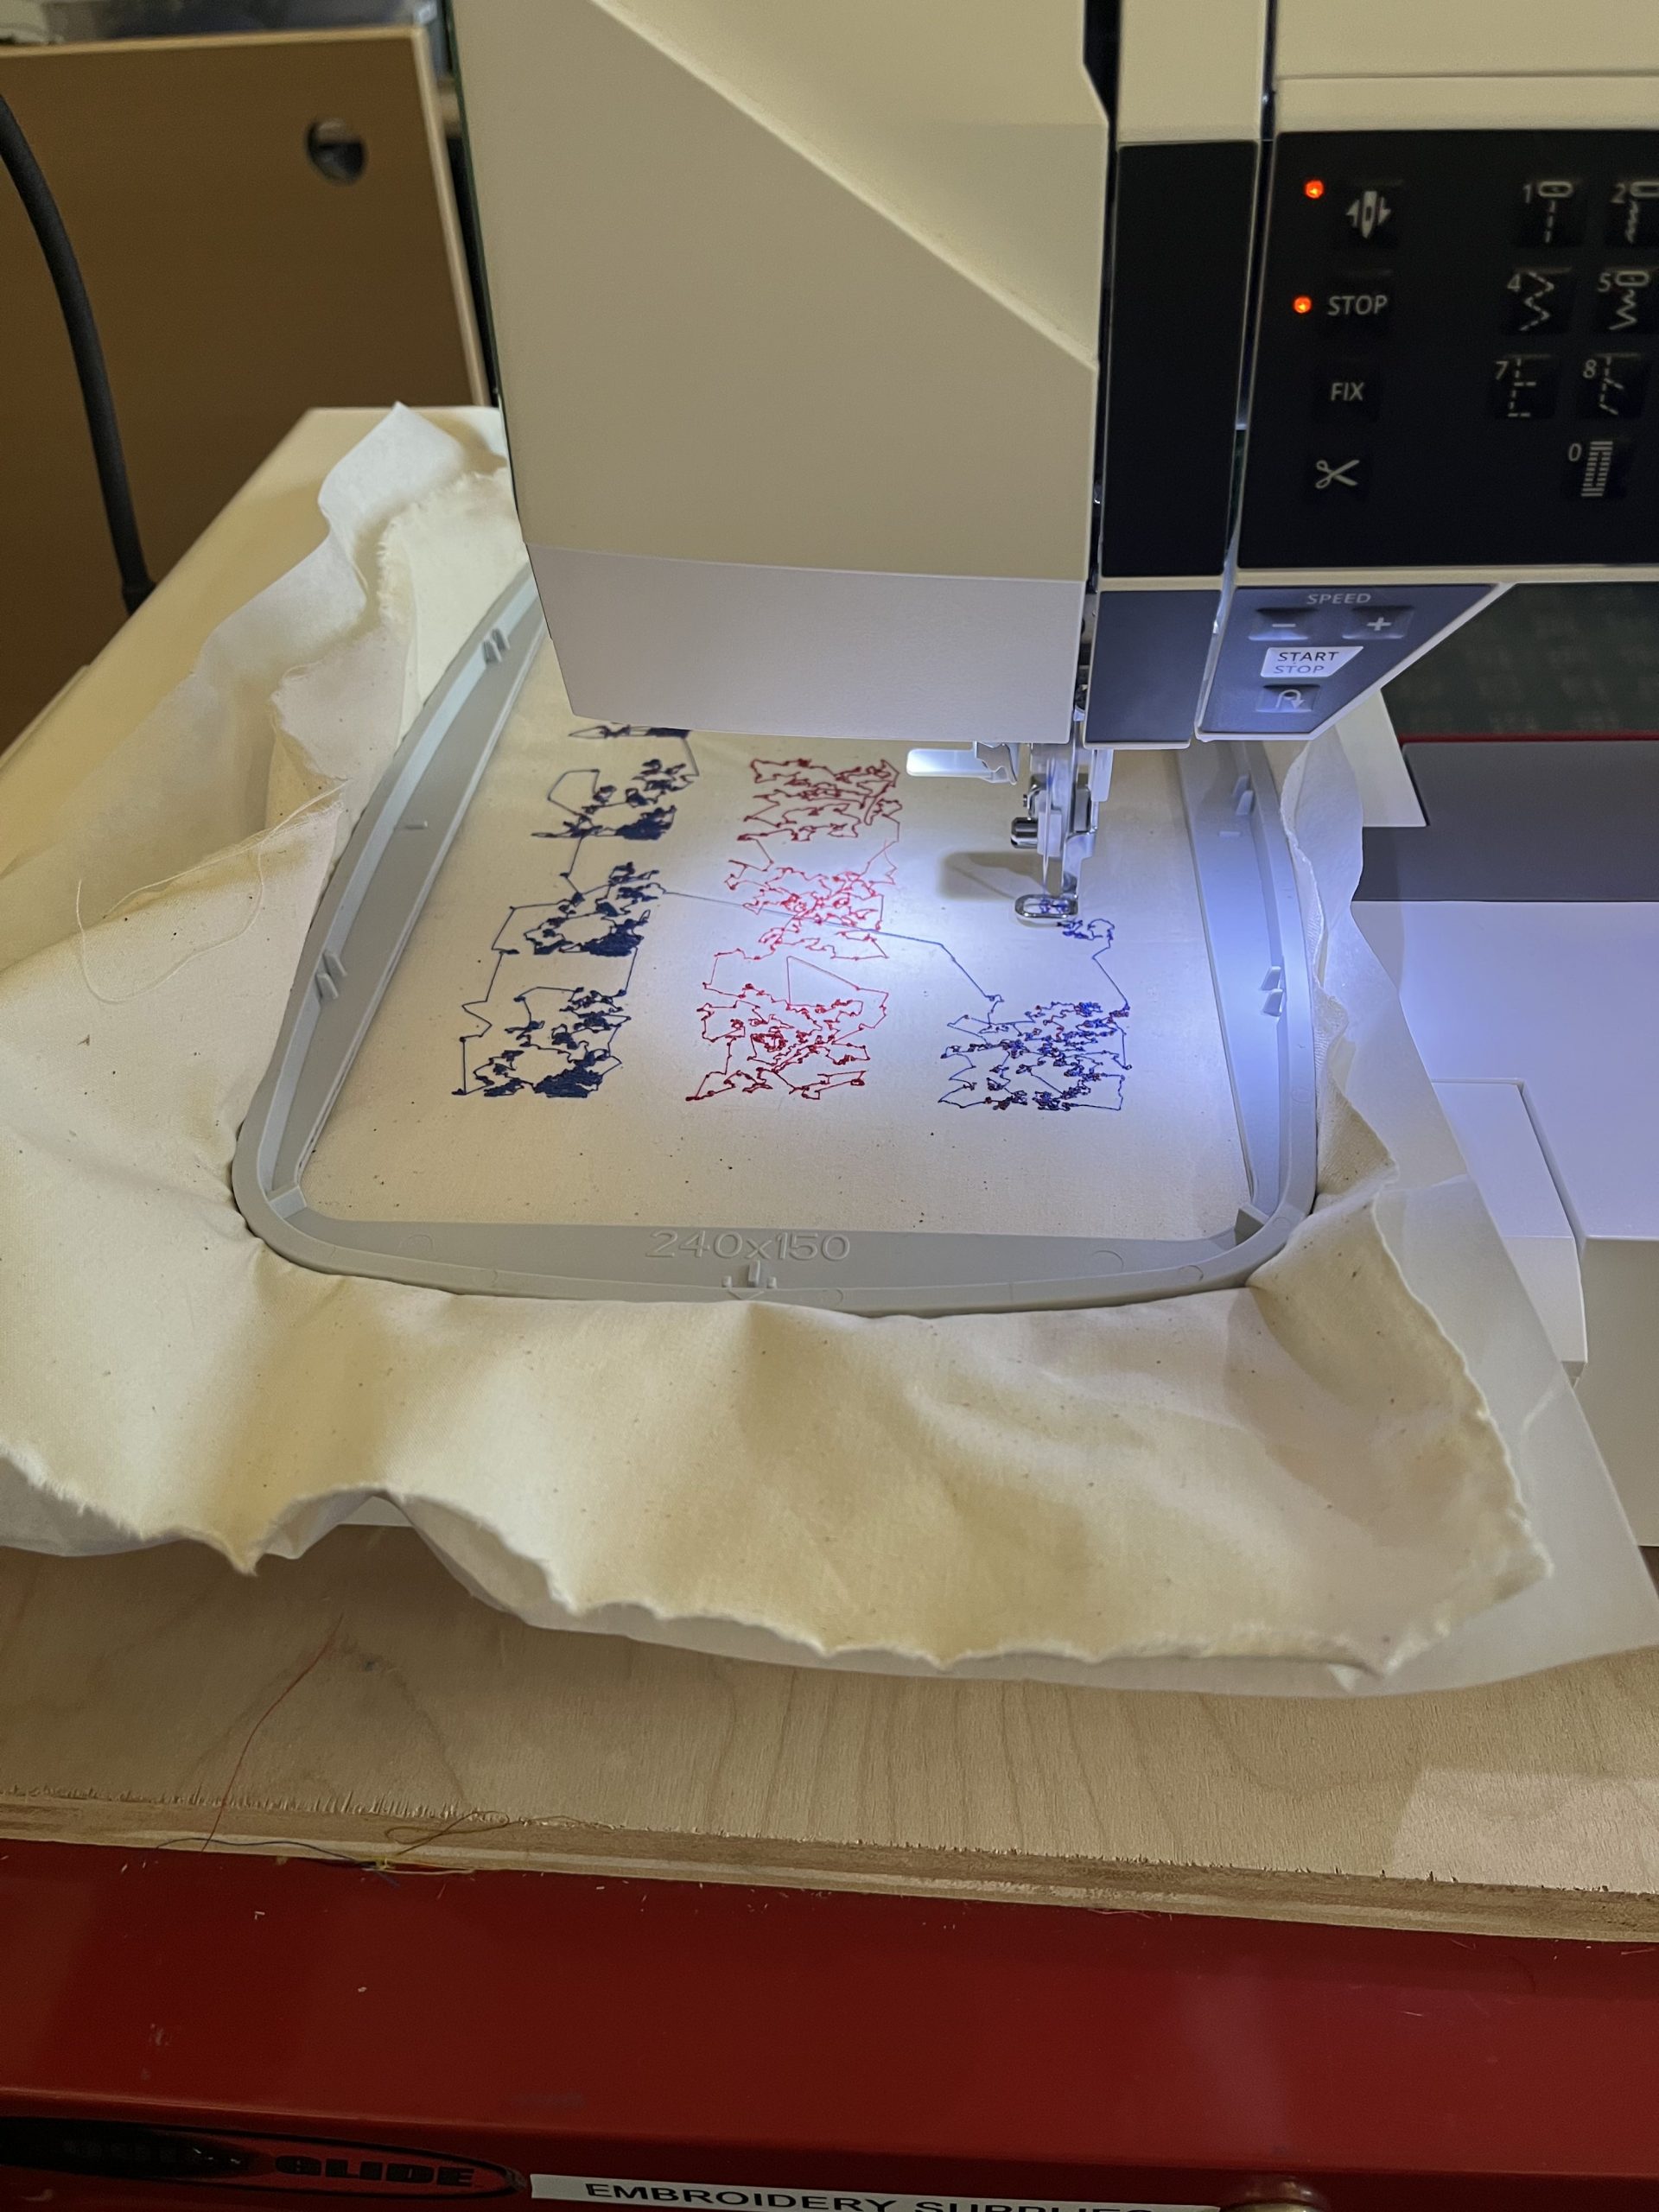
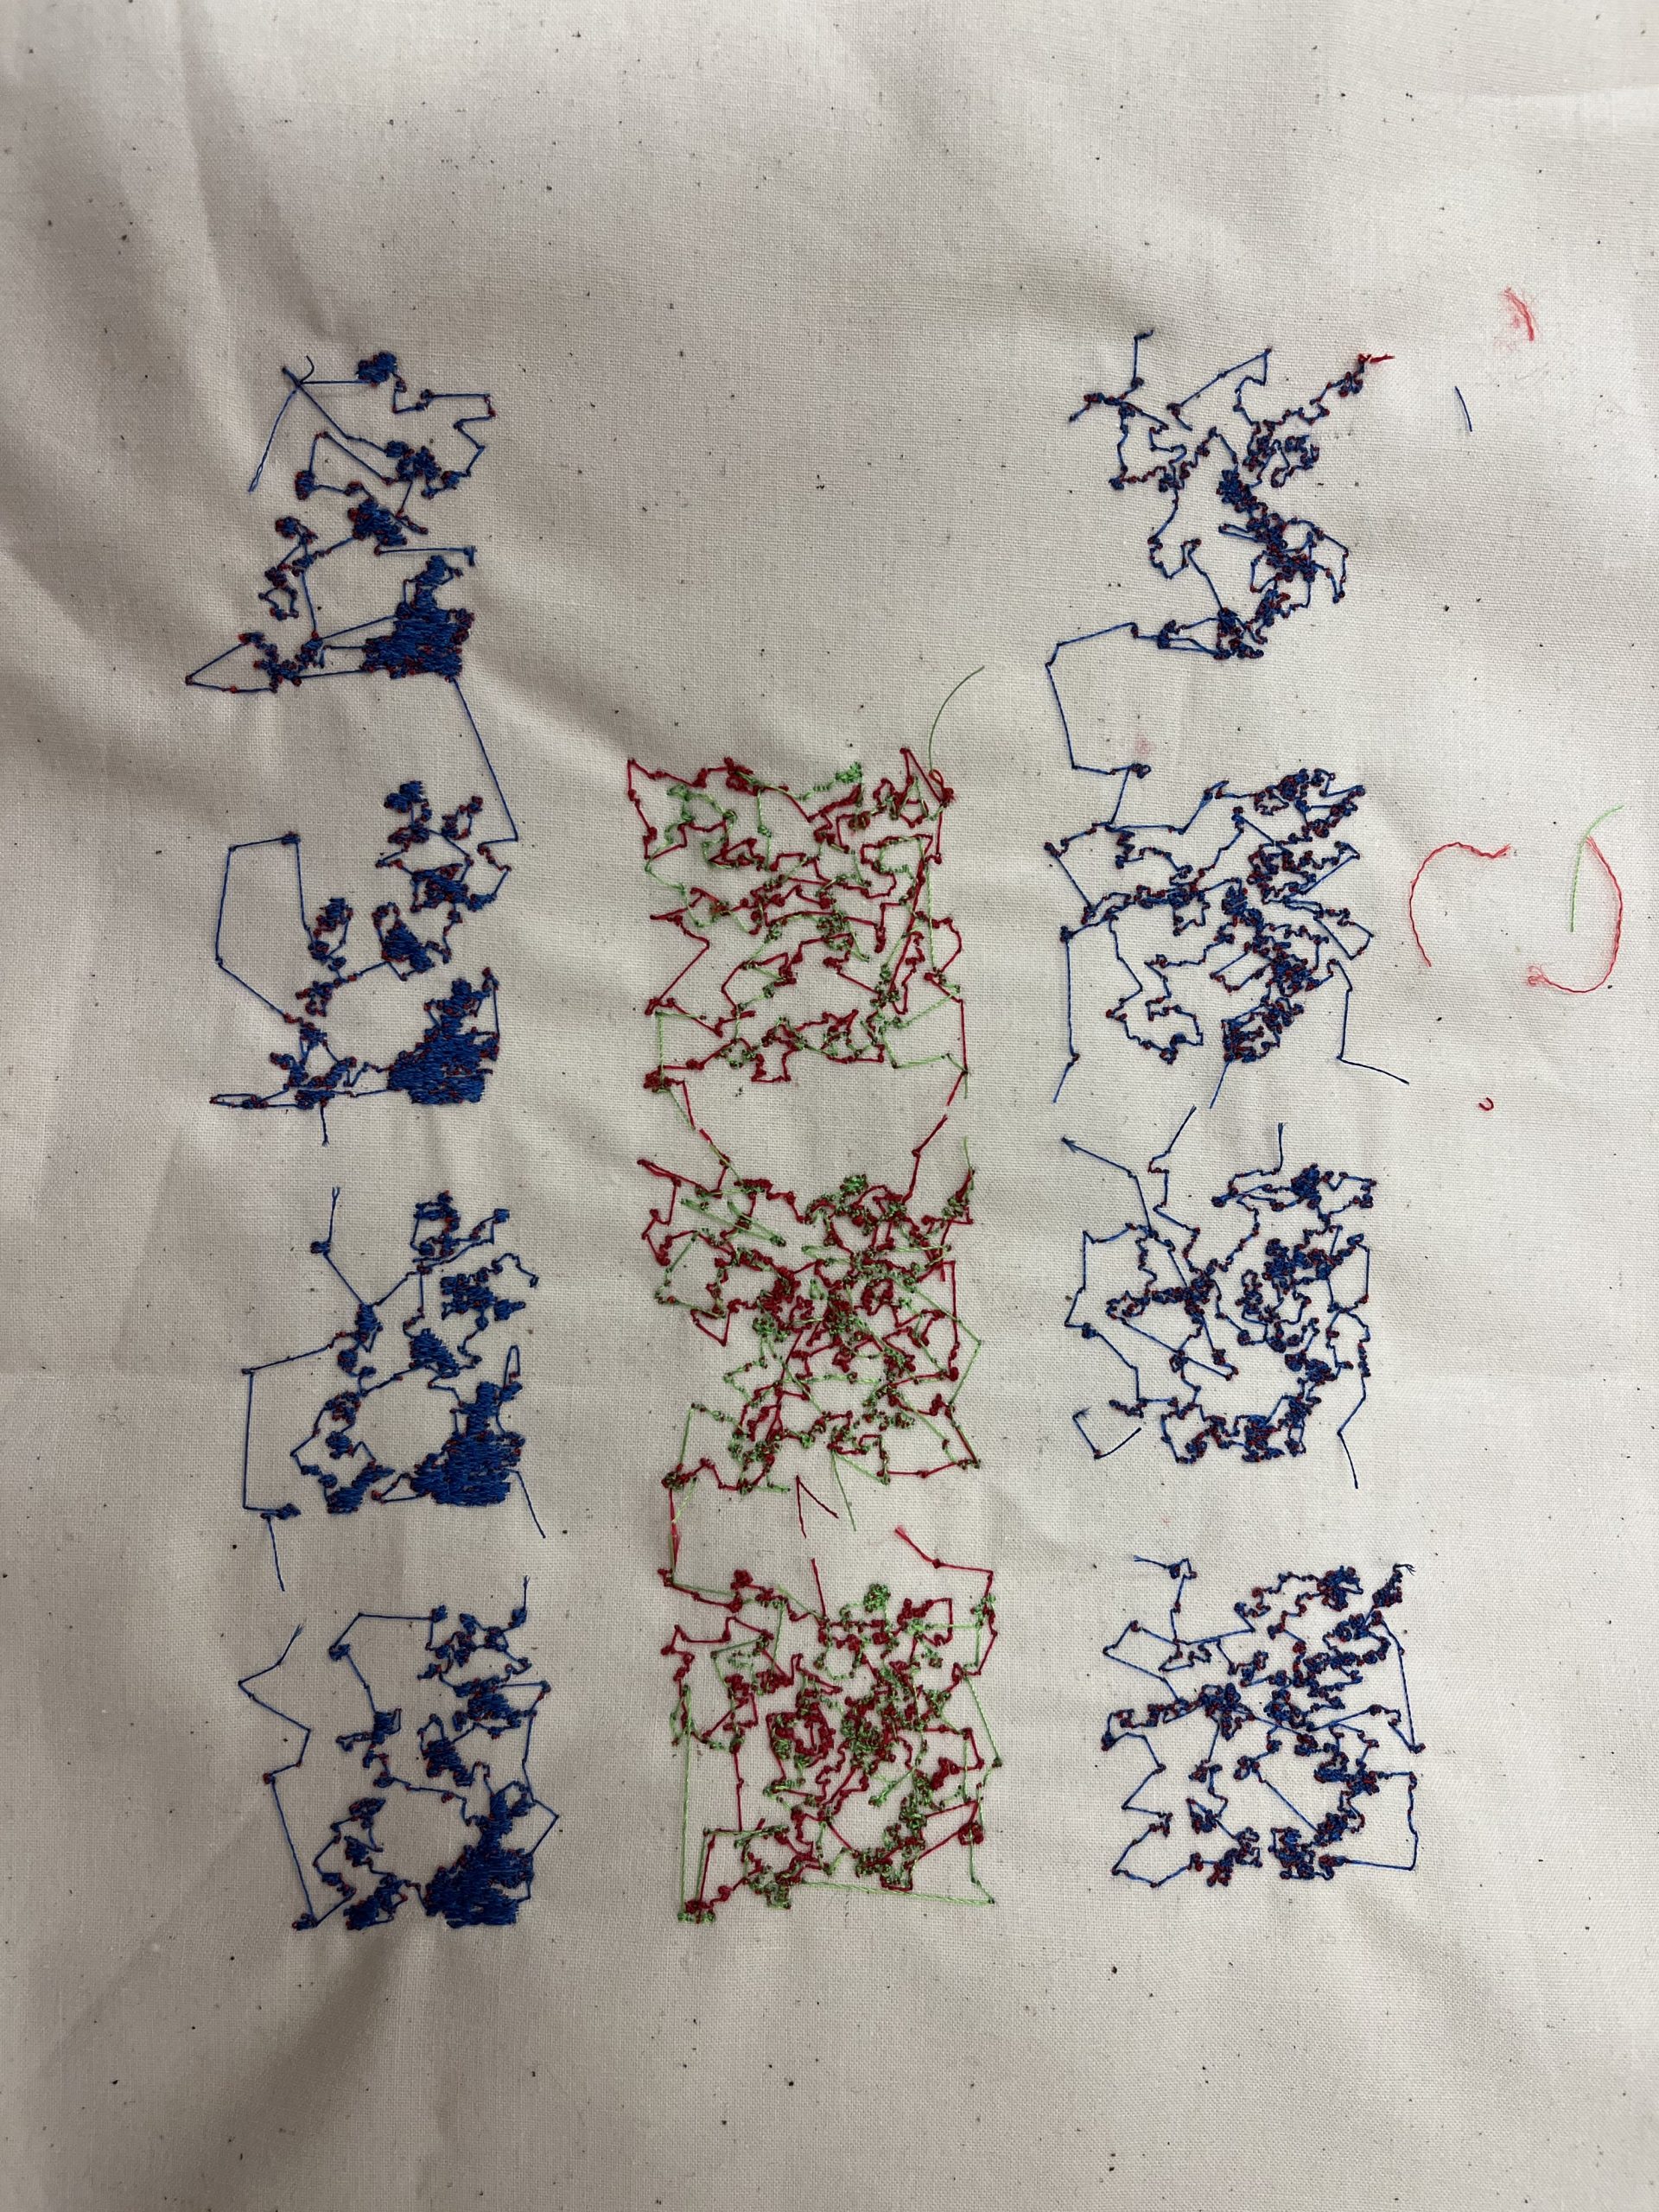
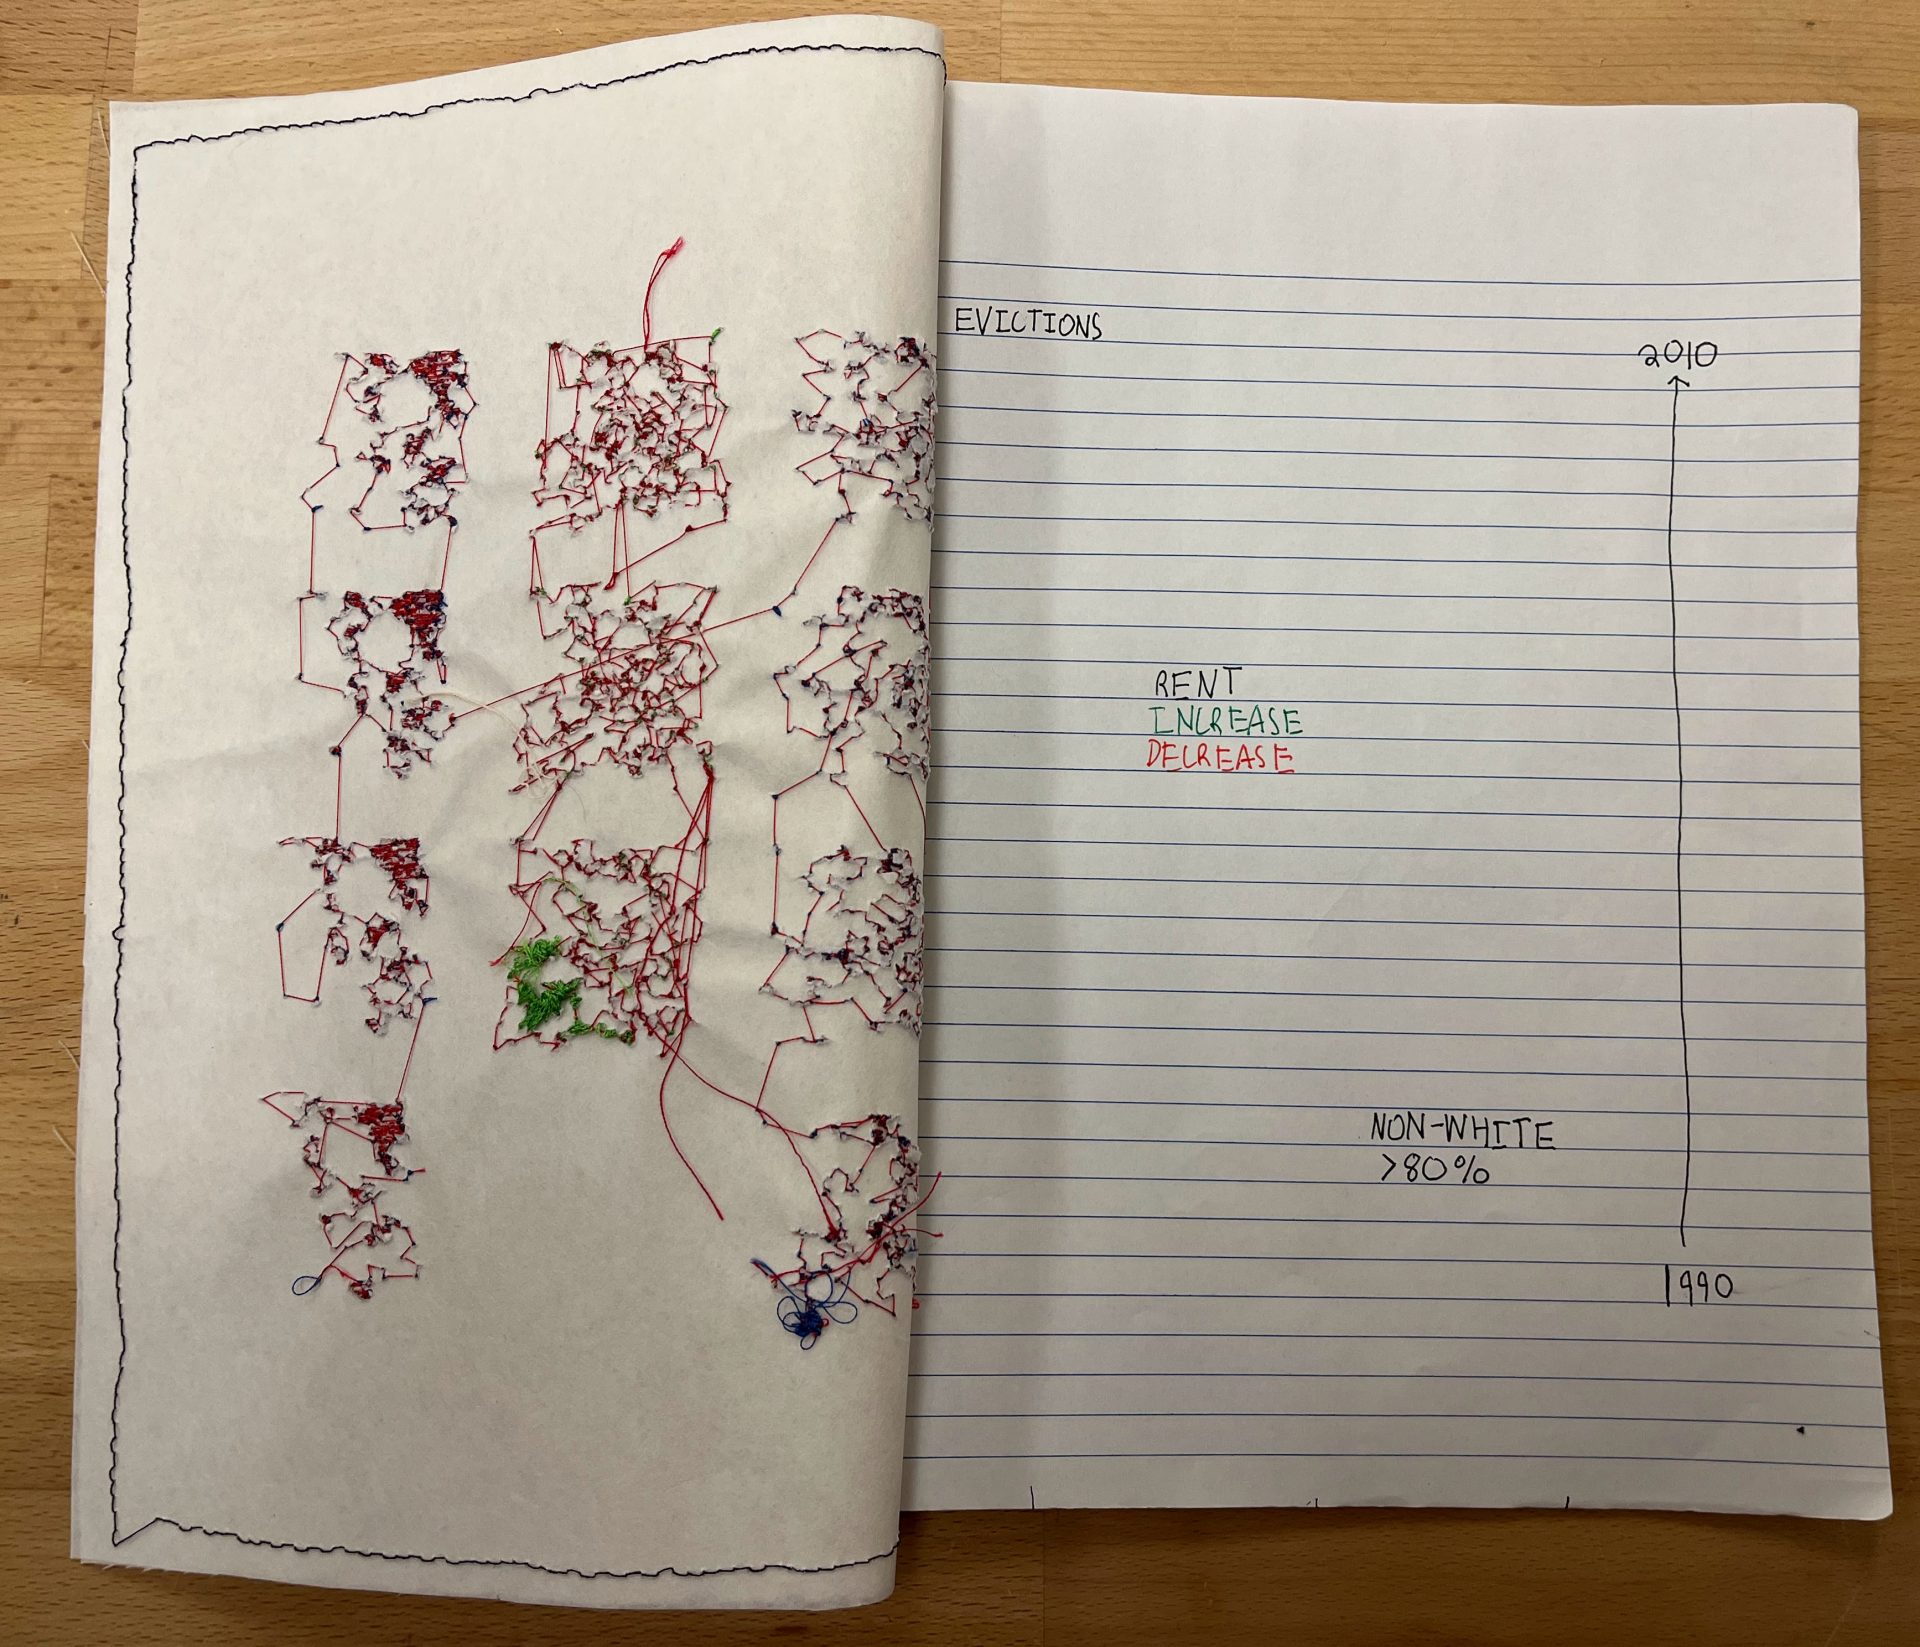
The initial idea was to implement the flower lace as a computer-embroidered element on dissolvable stabilizer backing, so that the lace can be clear and see through. The nature of the two threads of the embroidery would also allow each side of the lace to have a unique color. Using the vectorized pattern in Ink/Stitch did not work as it was too complex, however pEmbrioder worked just fine on the bitmapped image. A successful test was executed on the Husqvarna Viking Jade 35 machine, however I had realized too late that all the required stabilizer had been used up by other projects.

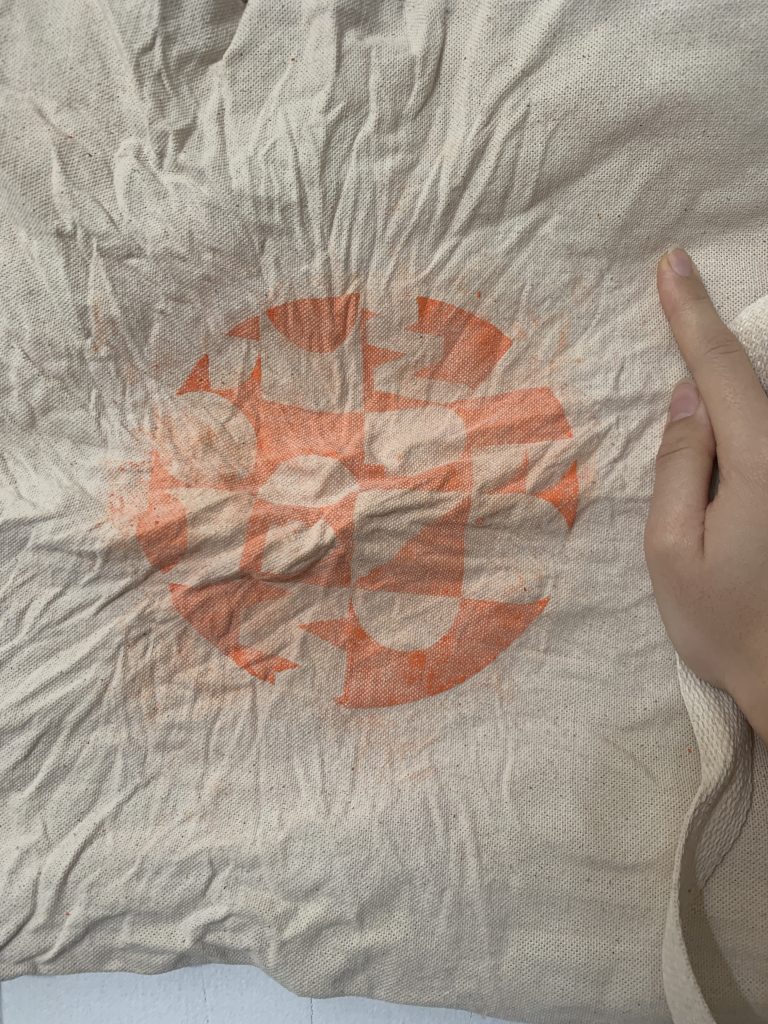
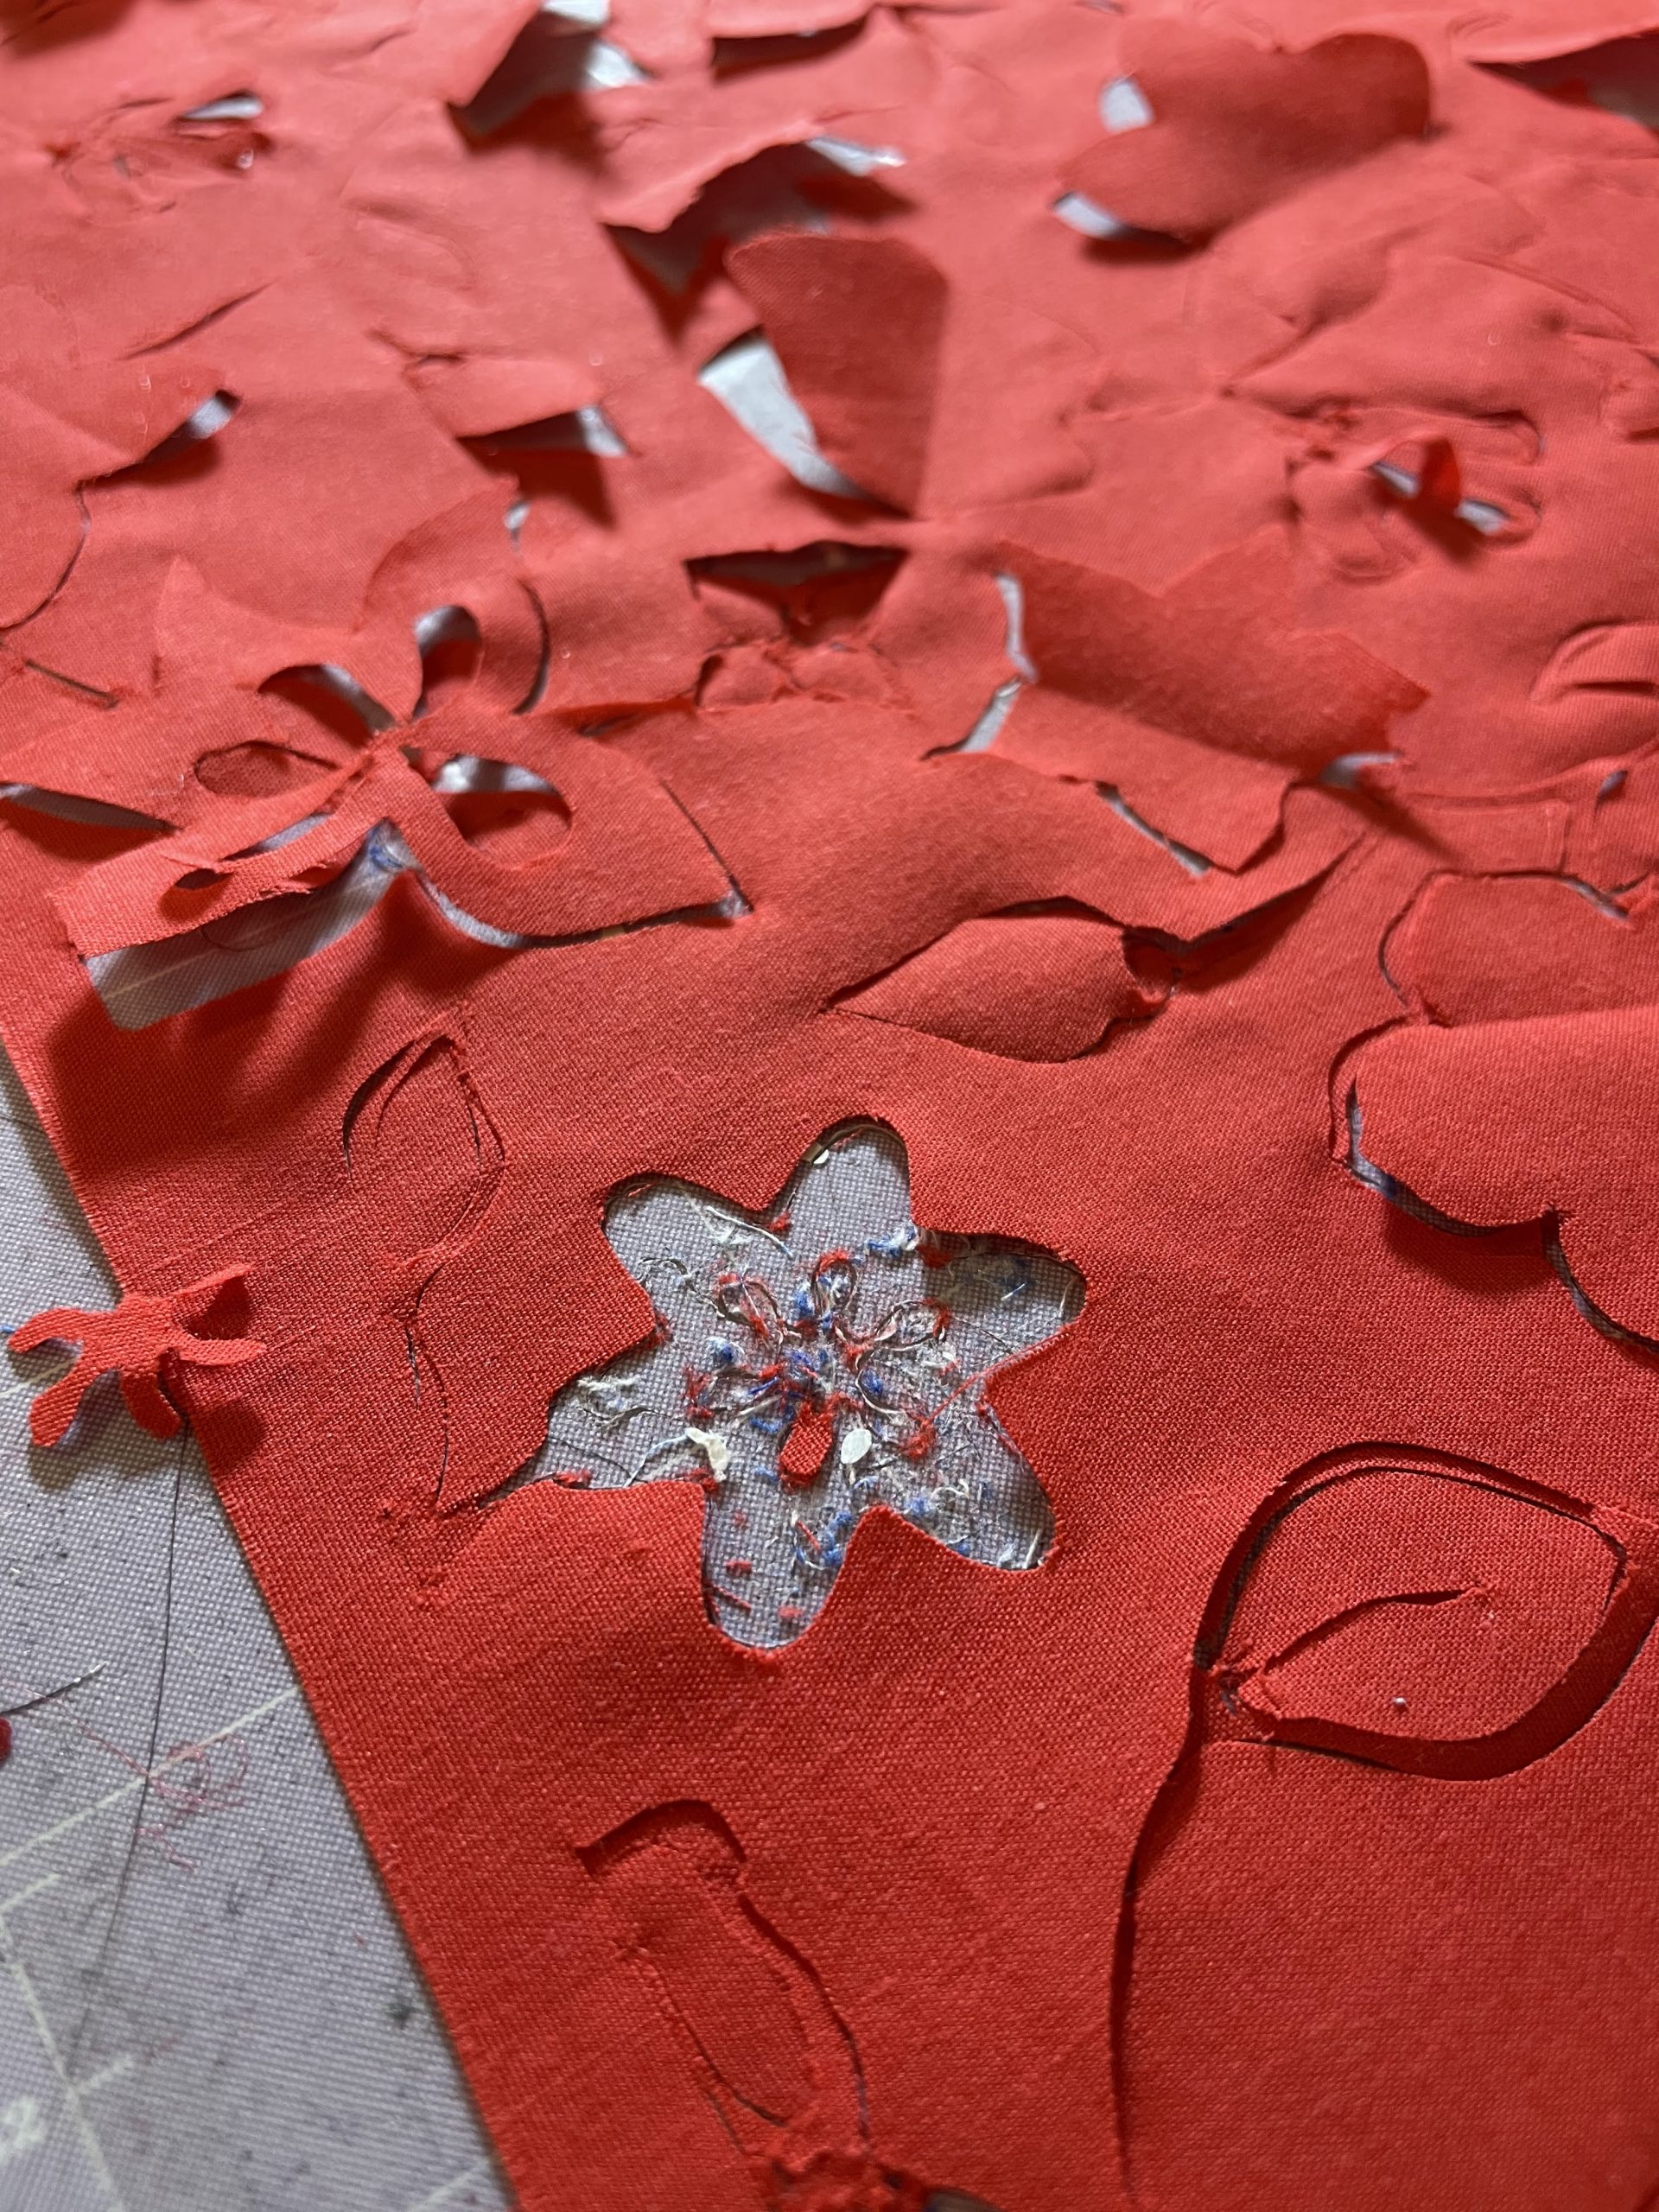
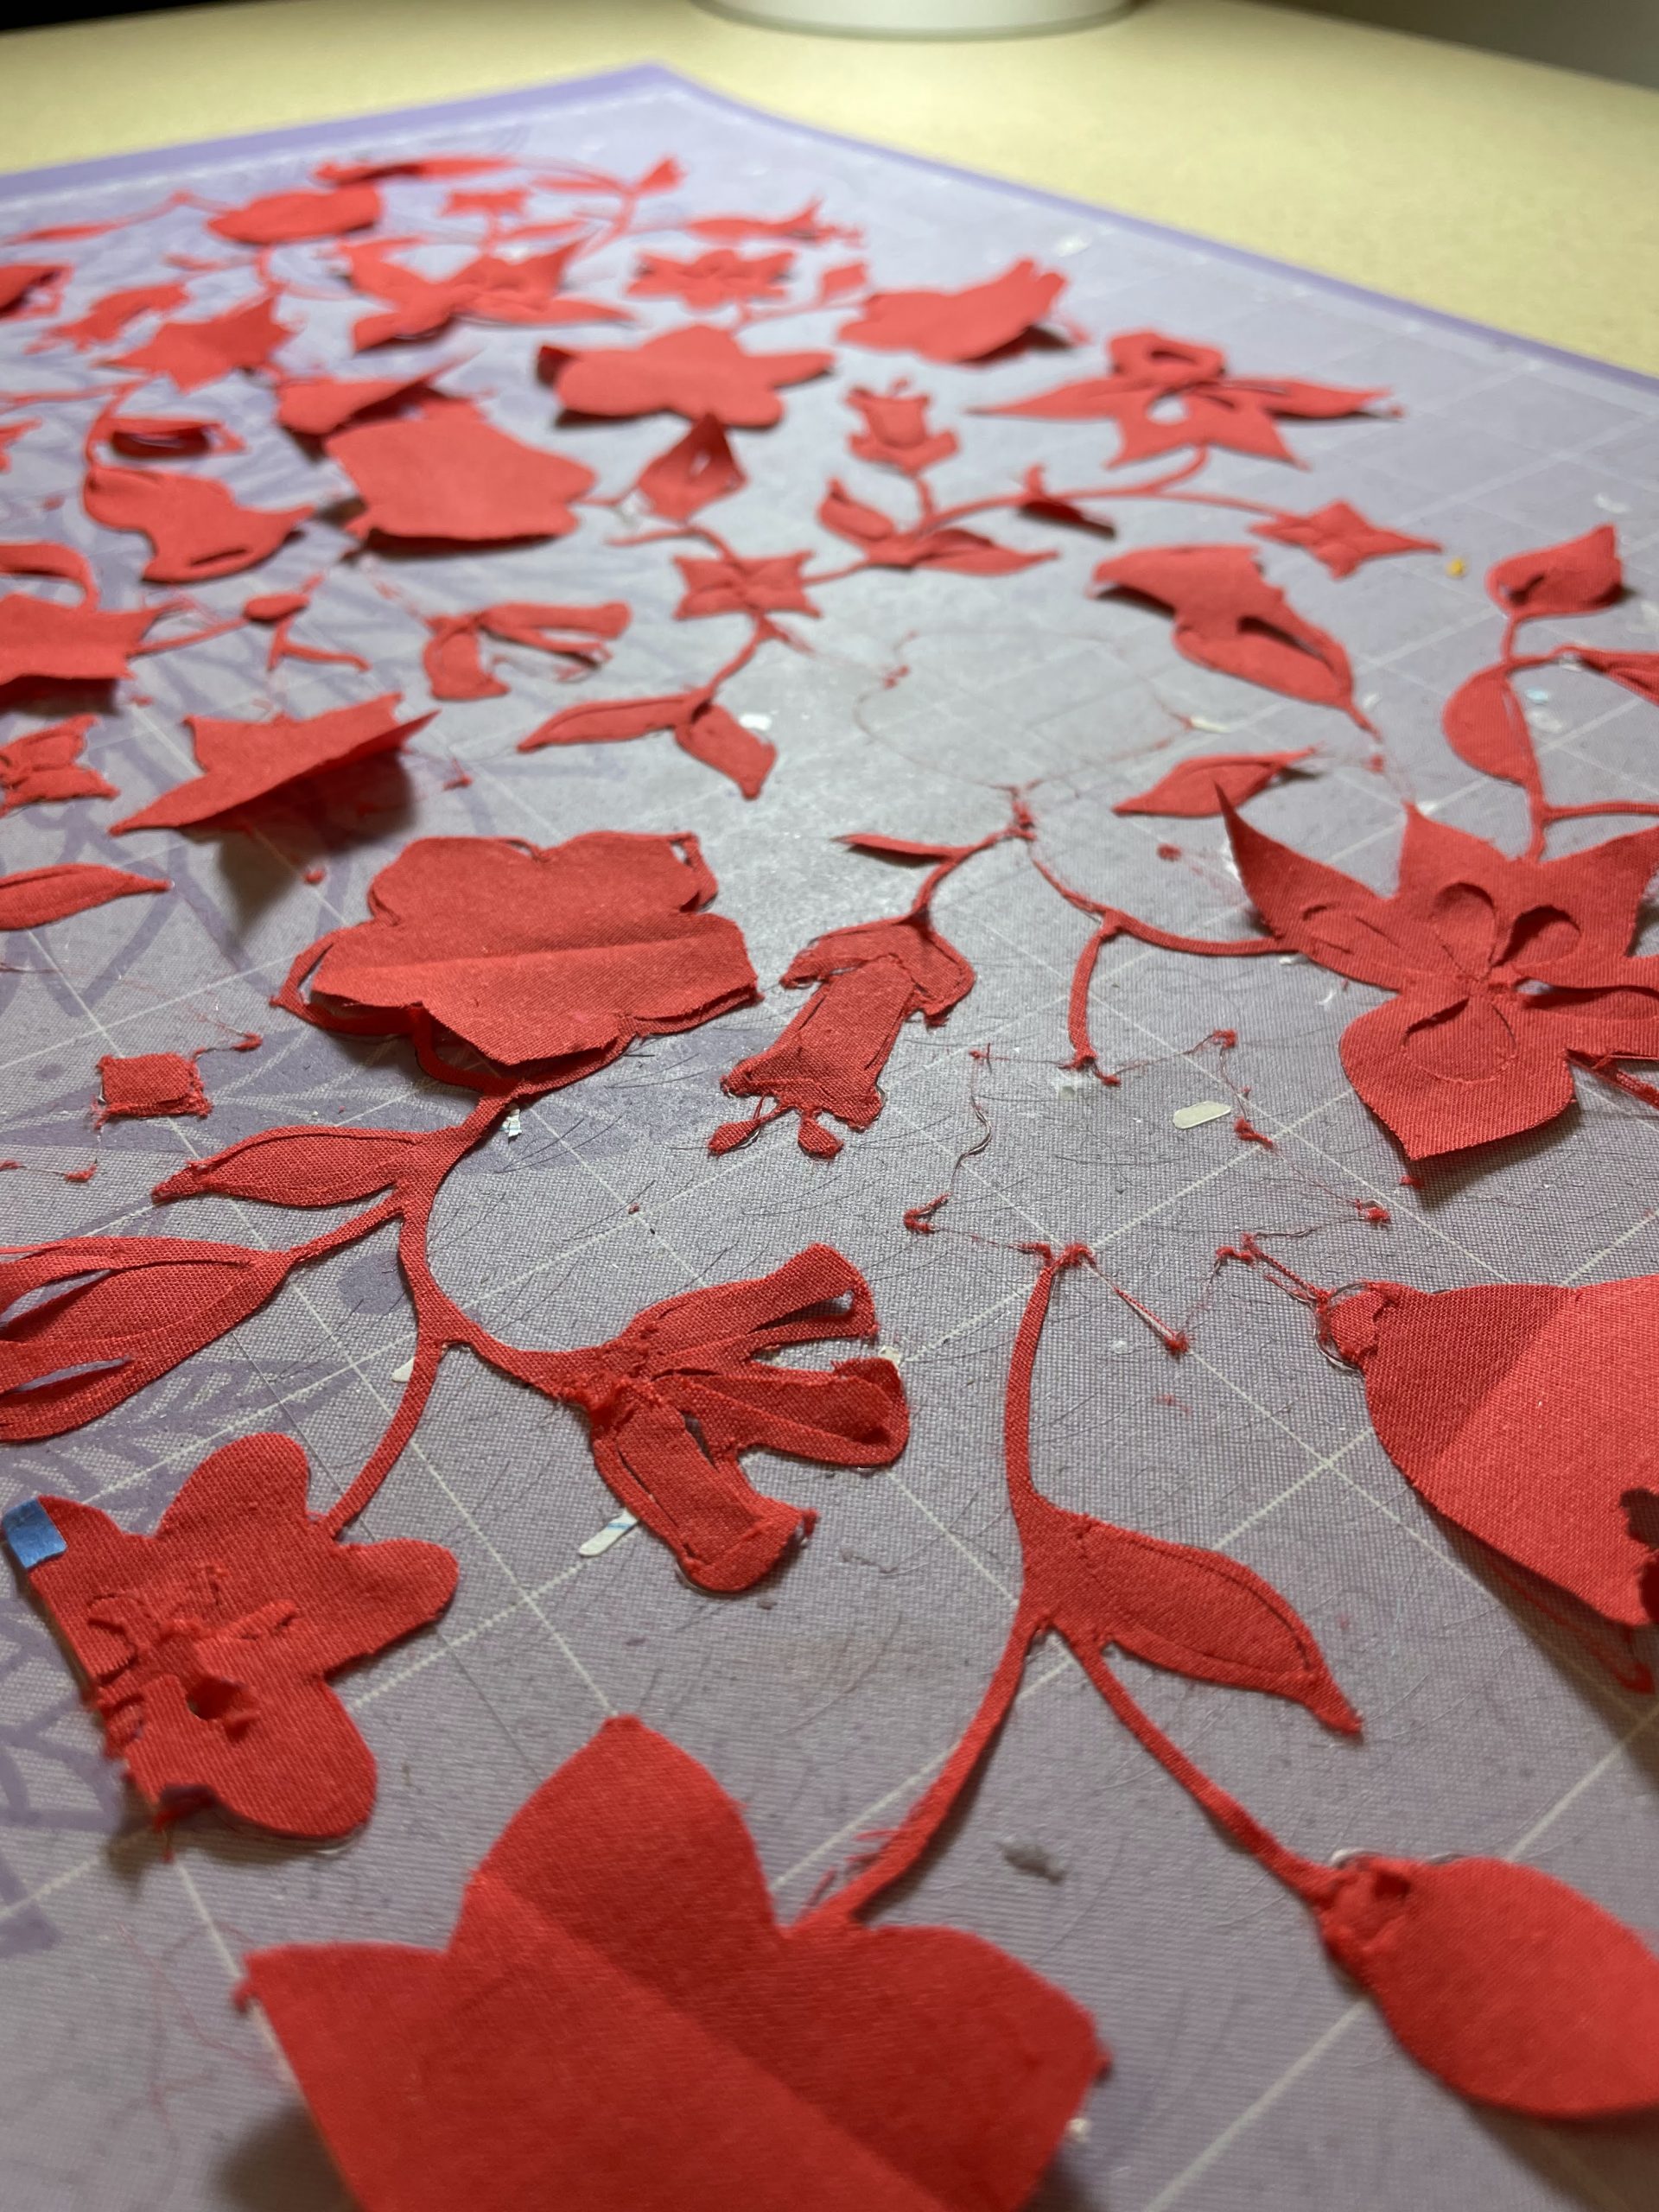
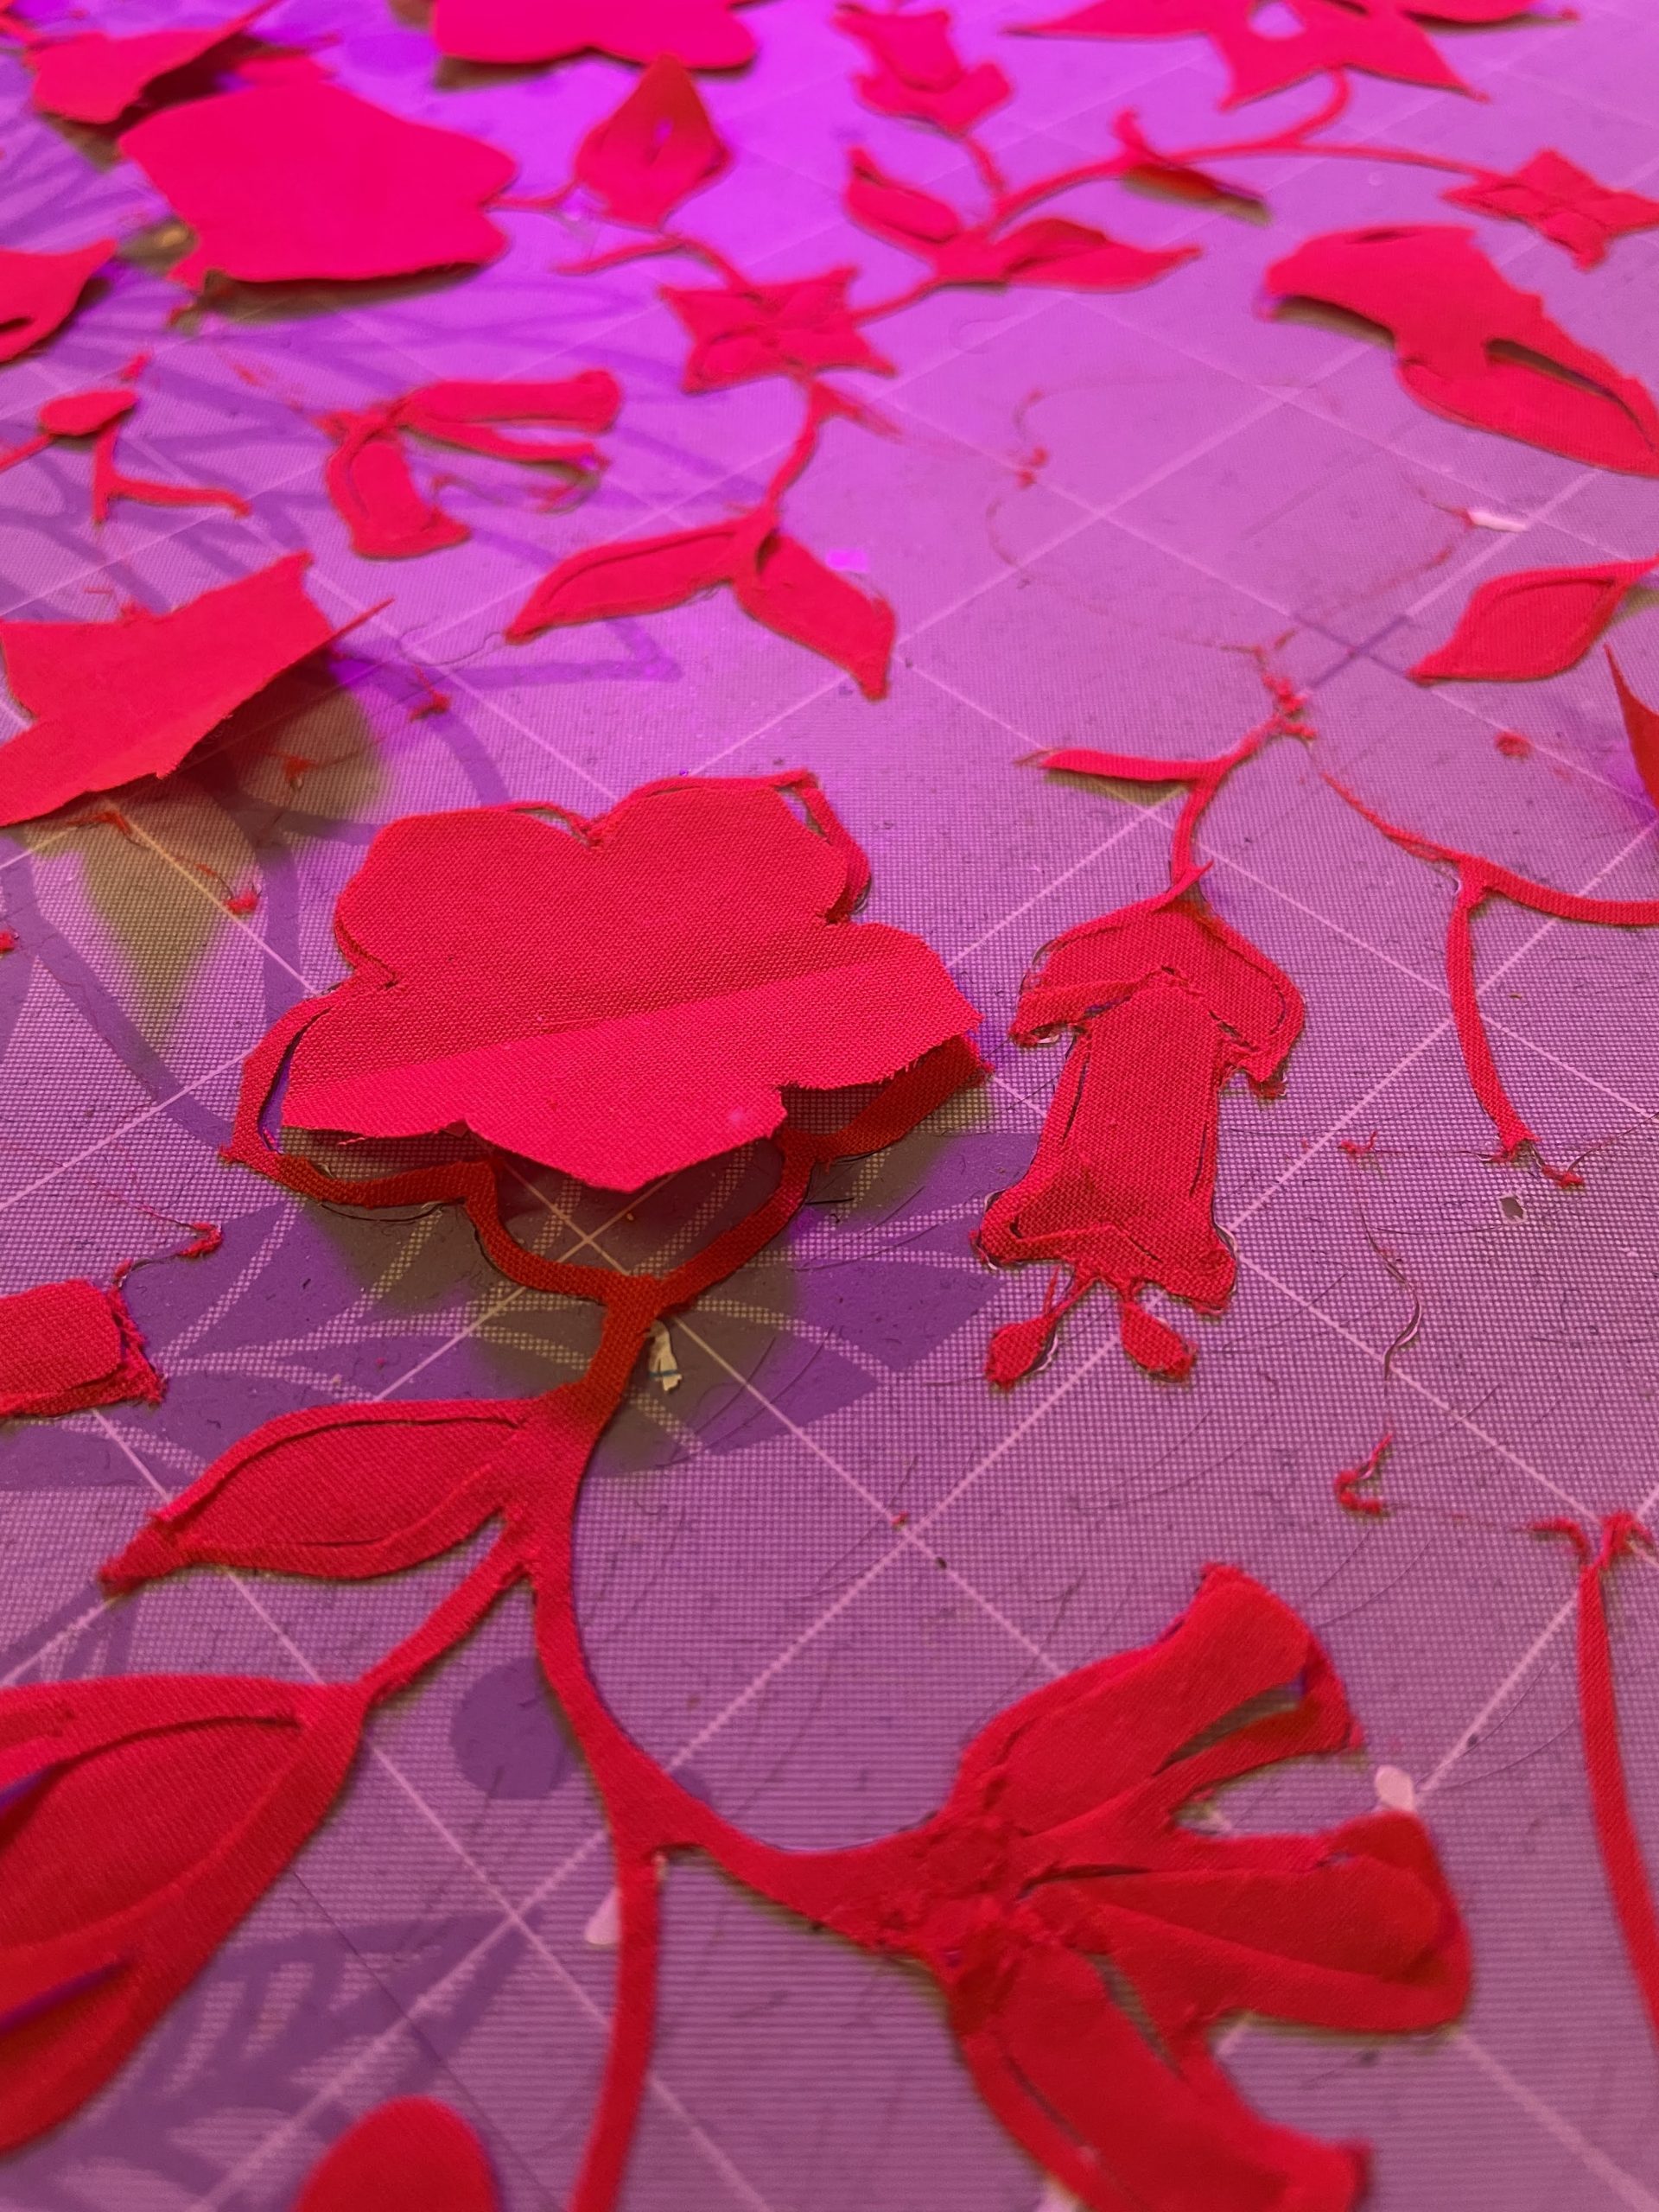
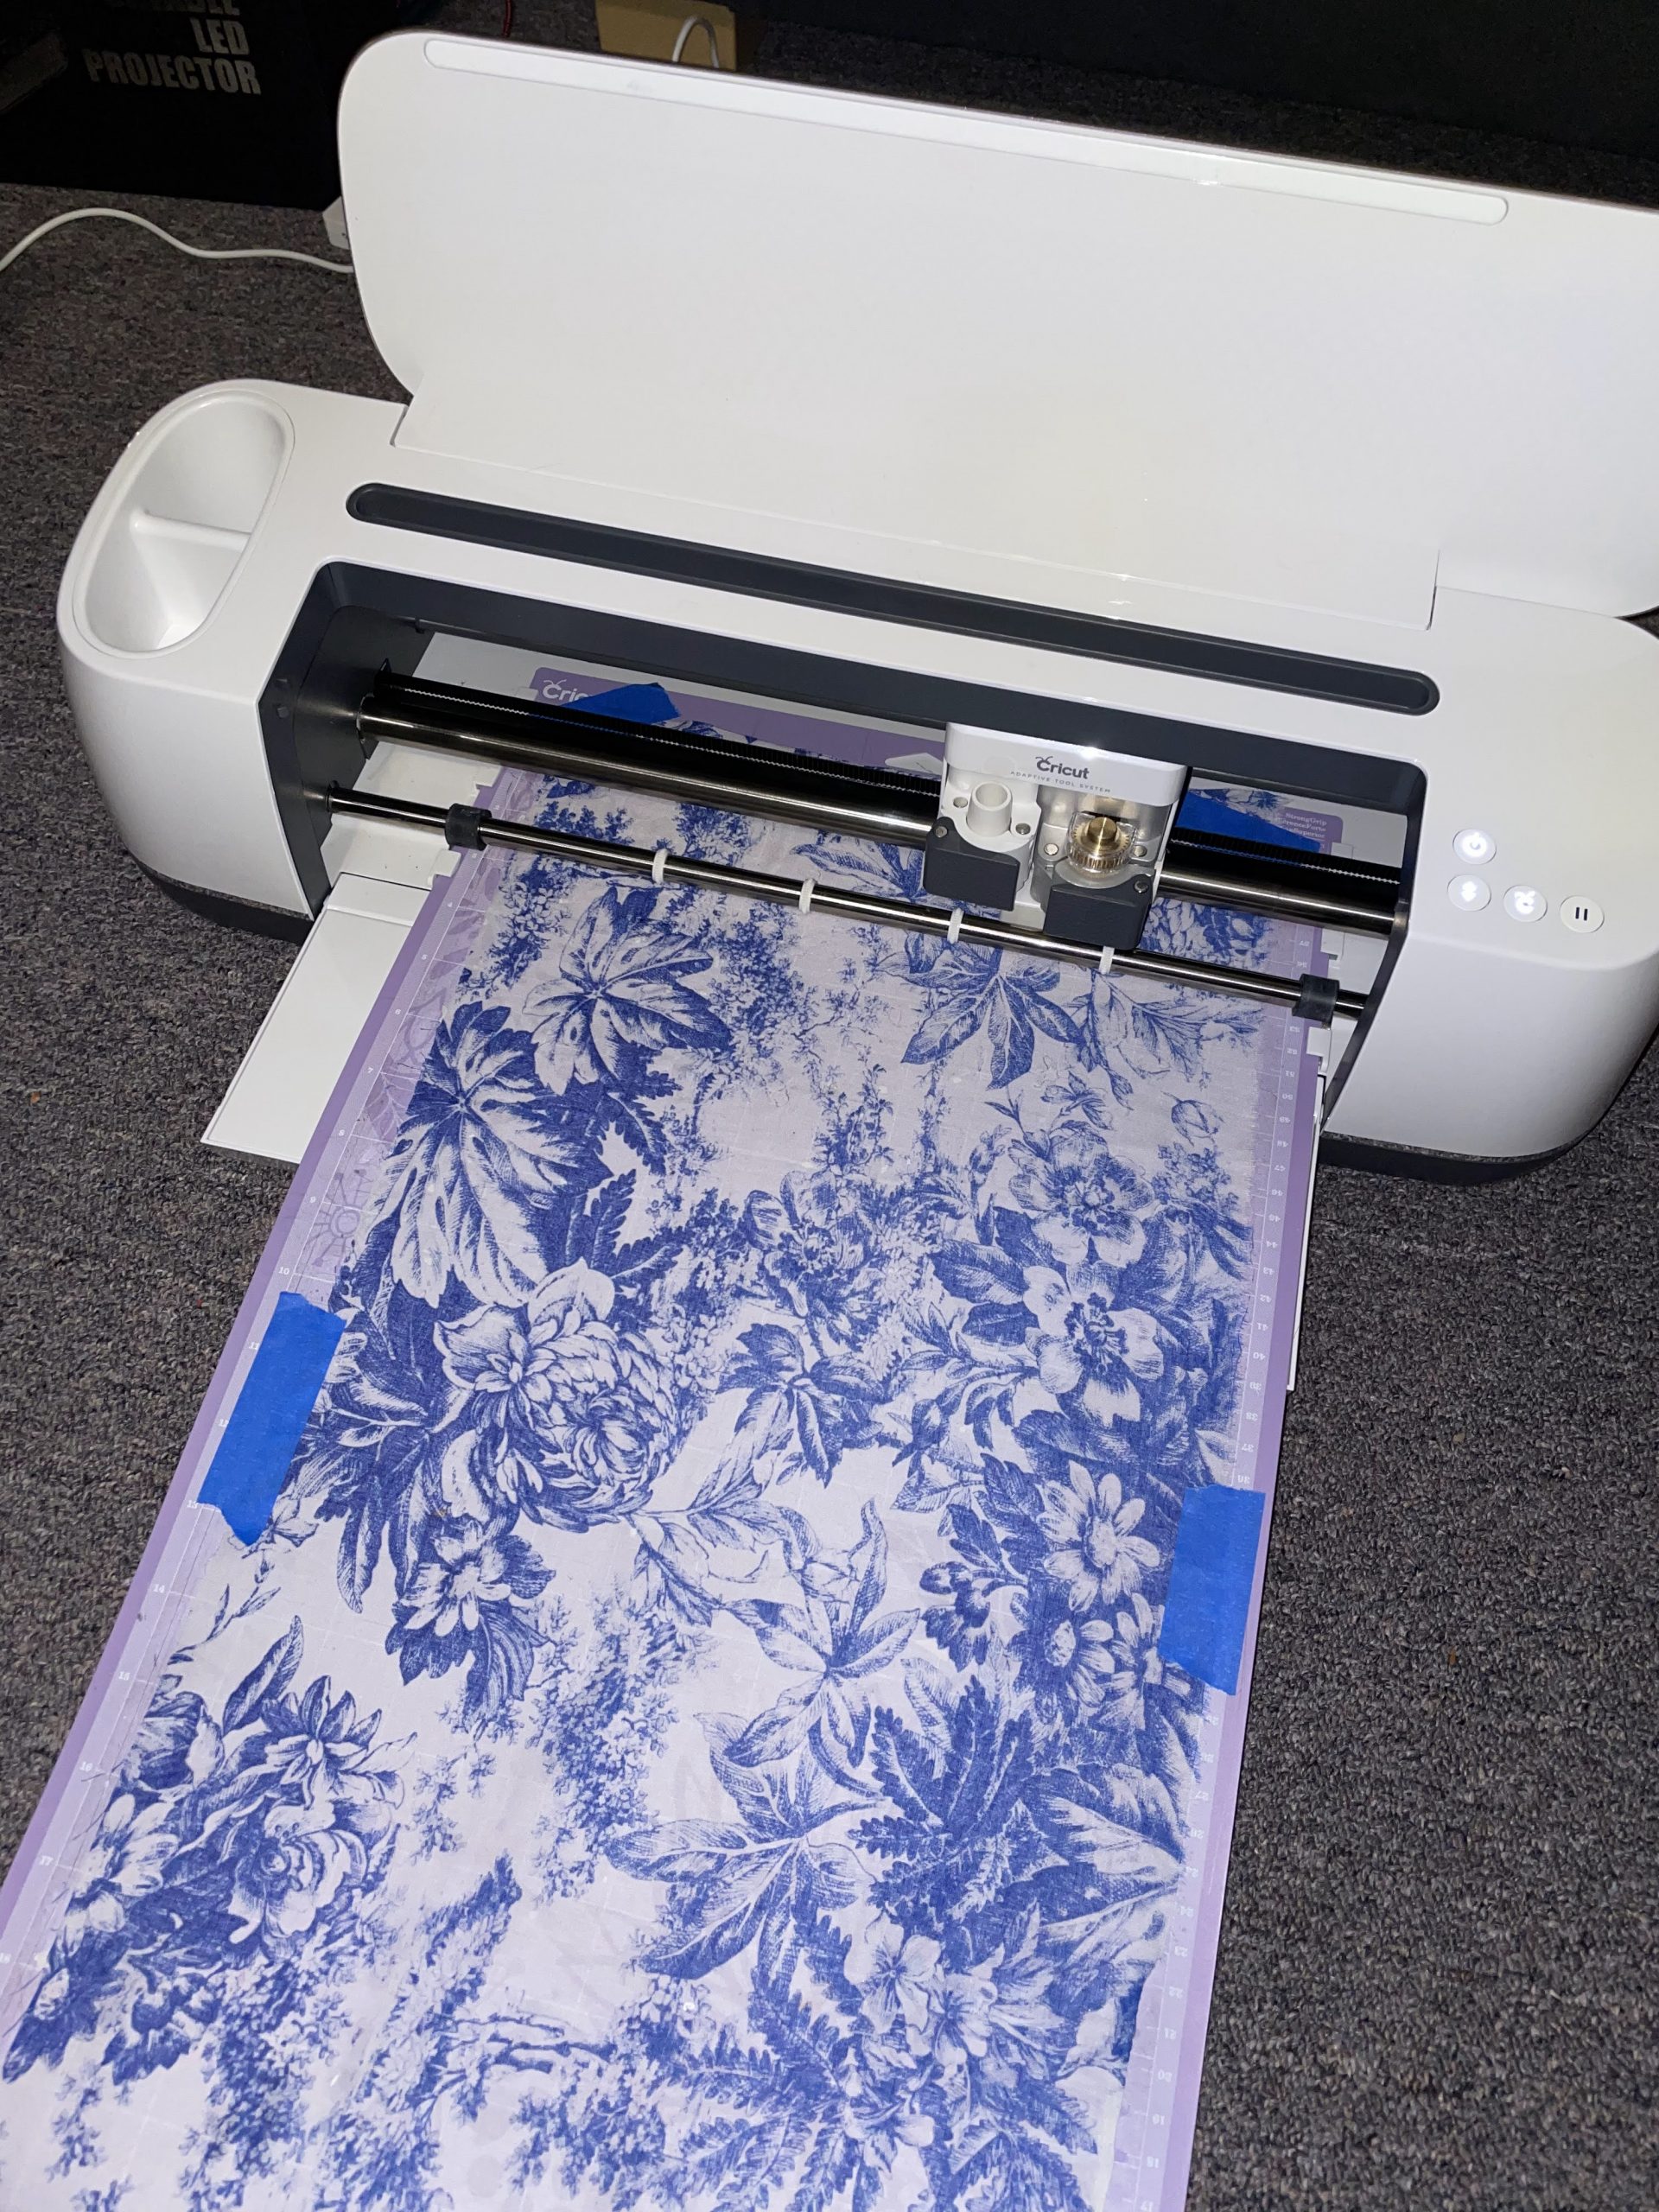
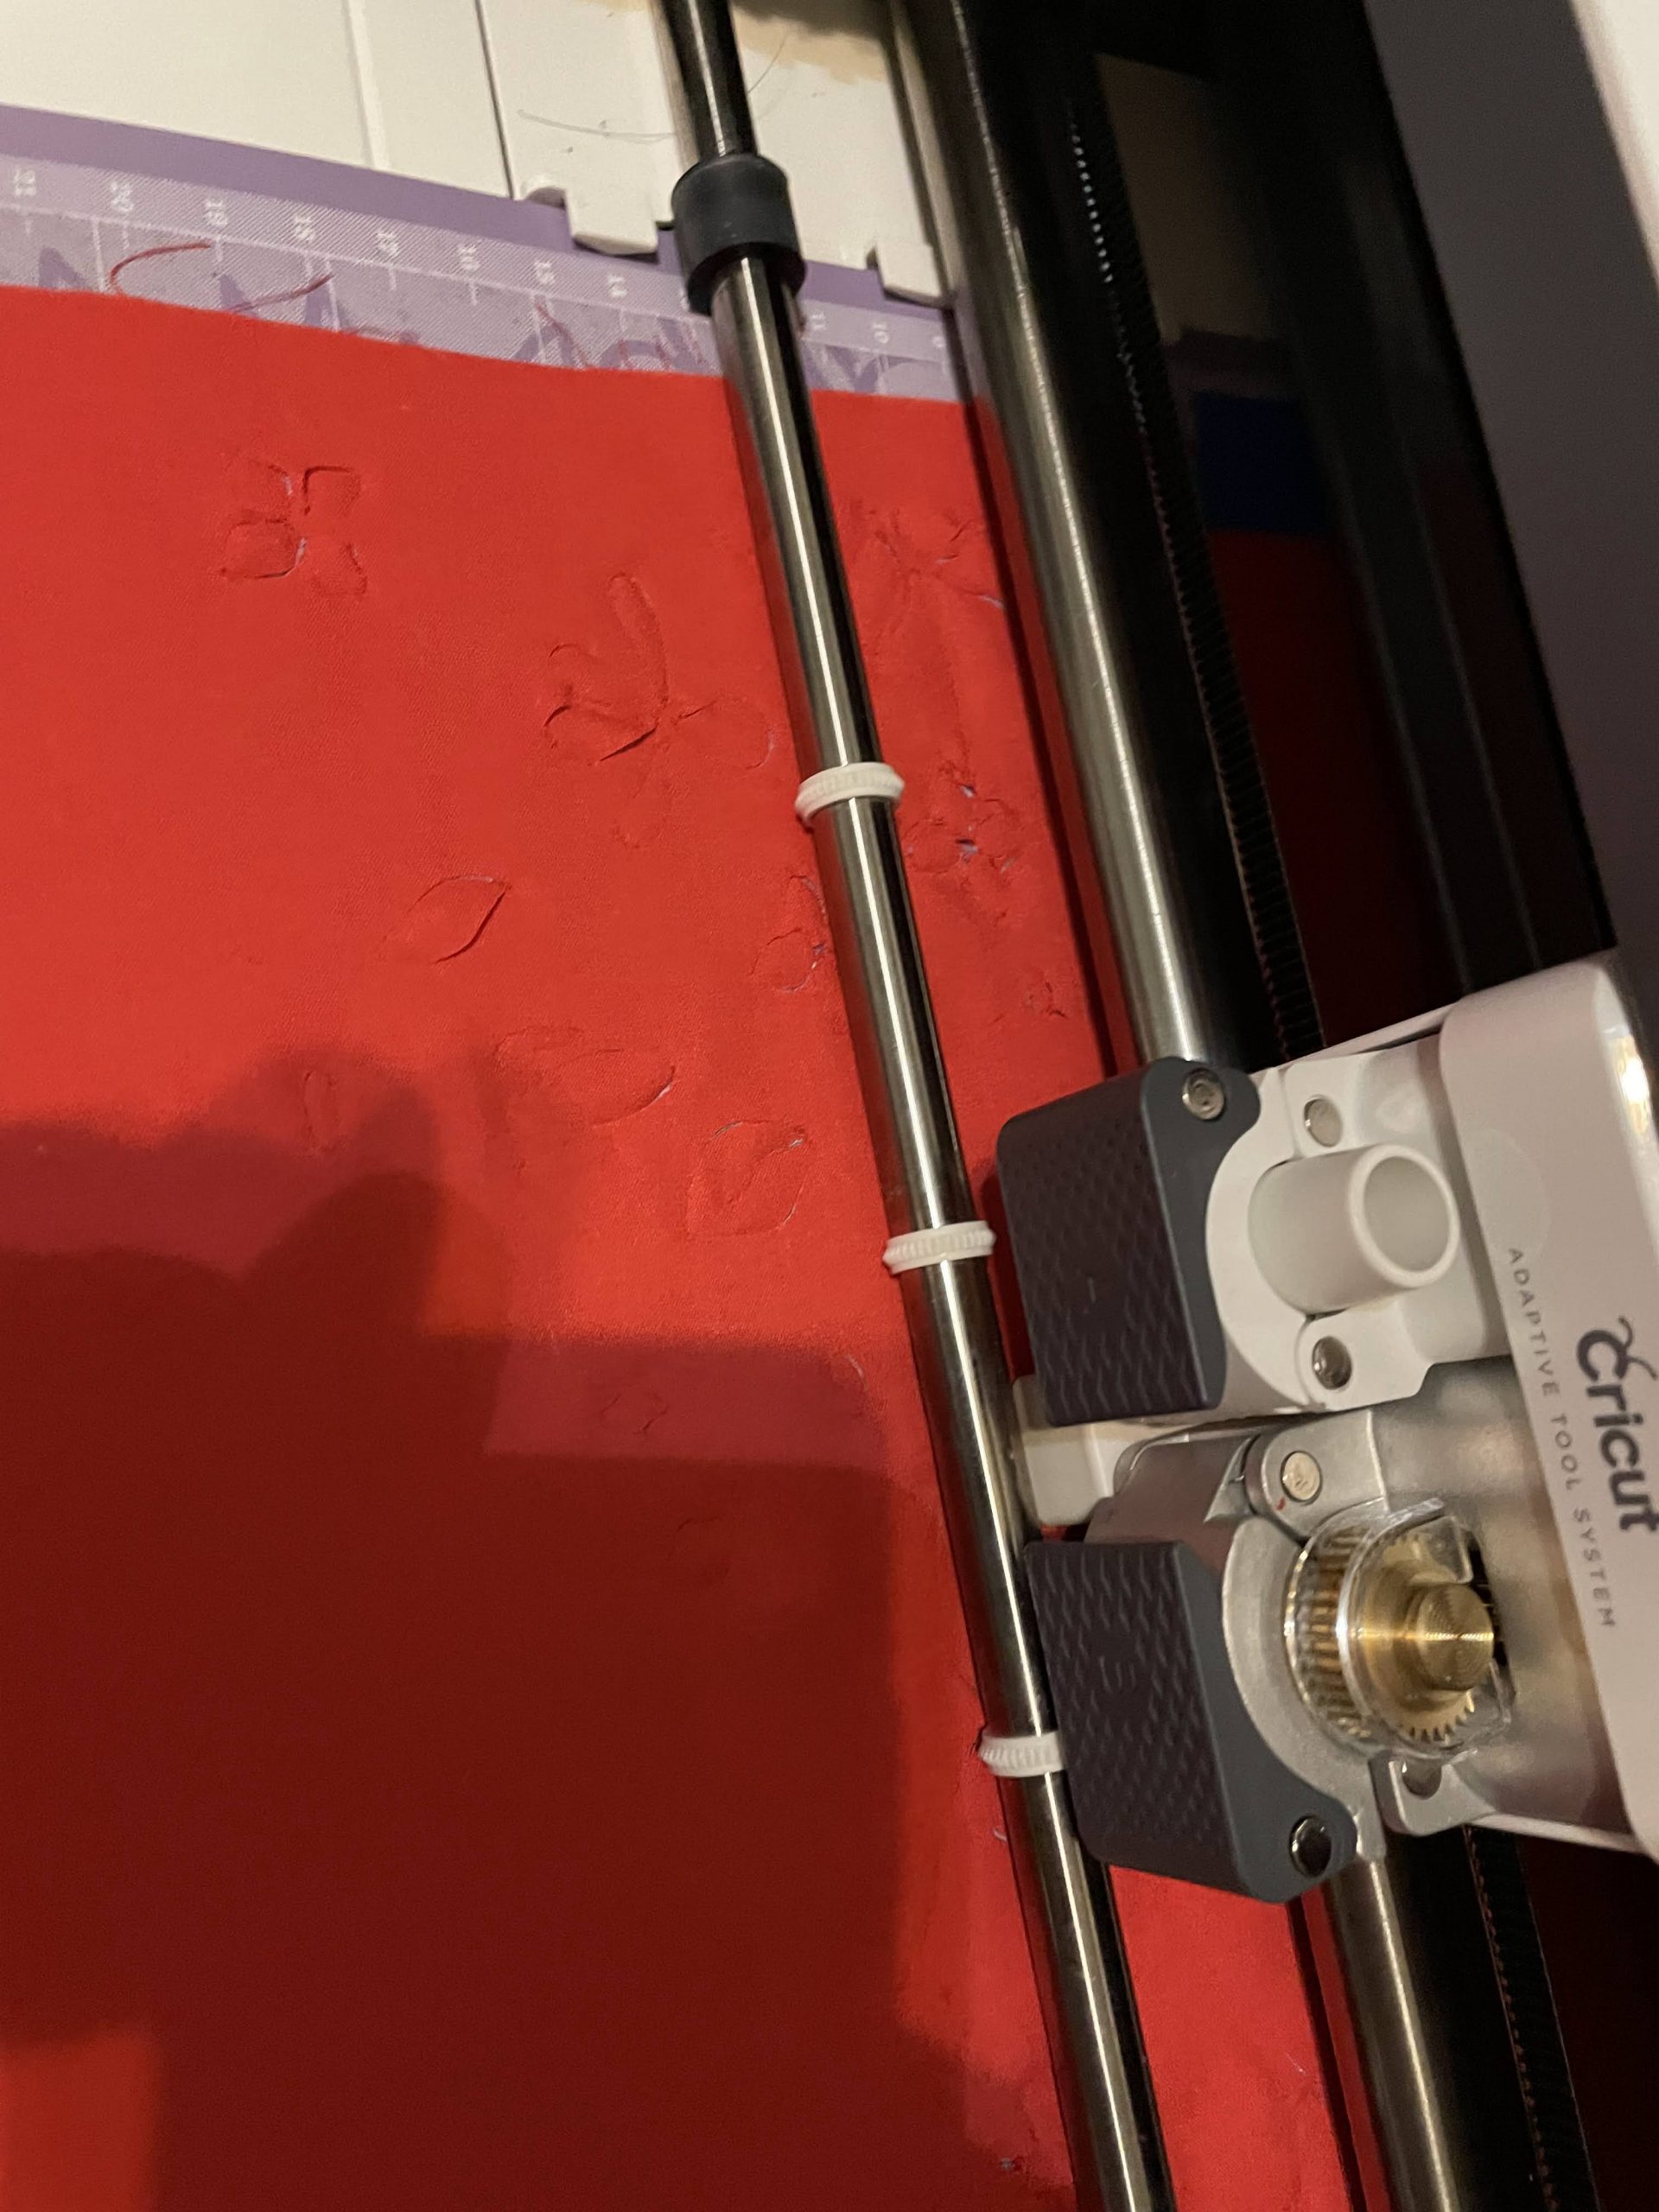
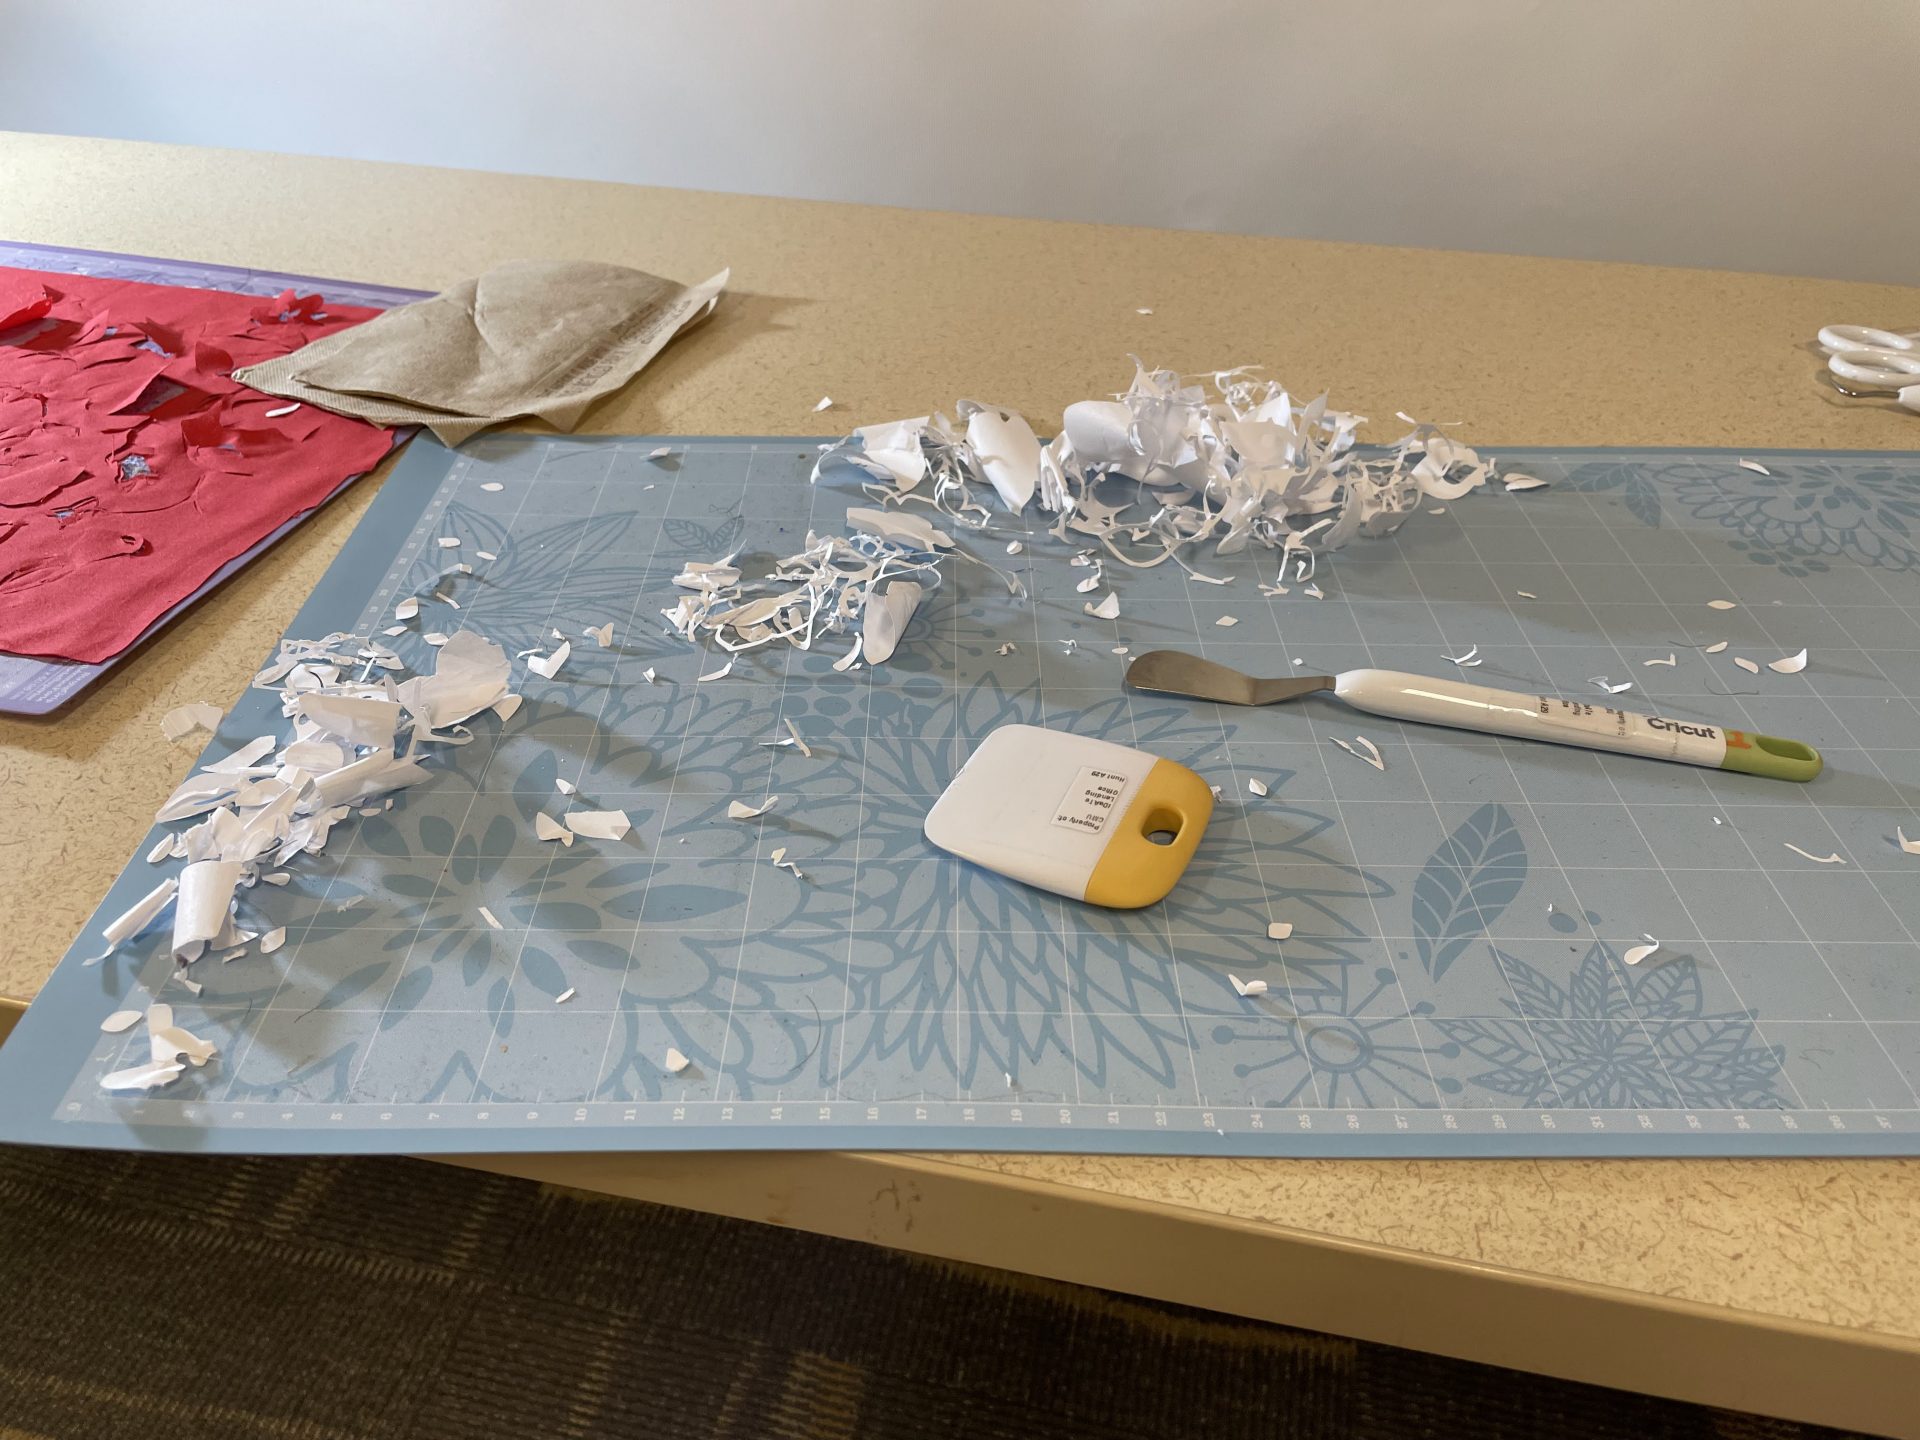
Instead, I pivoted to utilizing the Cricut Maker machine cutter to produce this element. This however proved to have its own challenges. The rotary cutter had to be used instead of the fine point blade for the cricut in order to work with the fabric, since the regular blade would drag the fabric off the adhesive and make a mess. However, the rotary cutter mode is much slower (by about 4x the amount of time) and sometimes would yield gaps in the cutting.

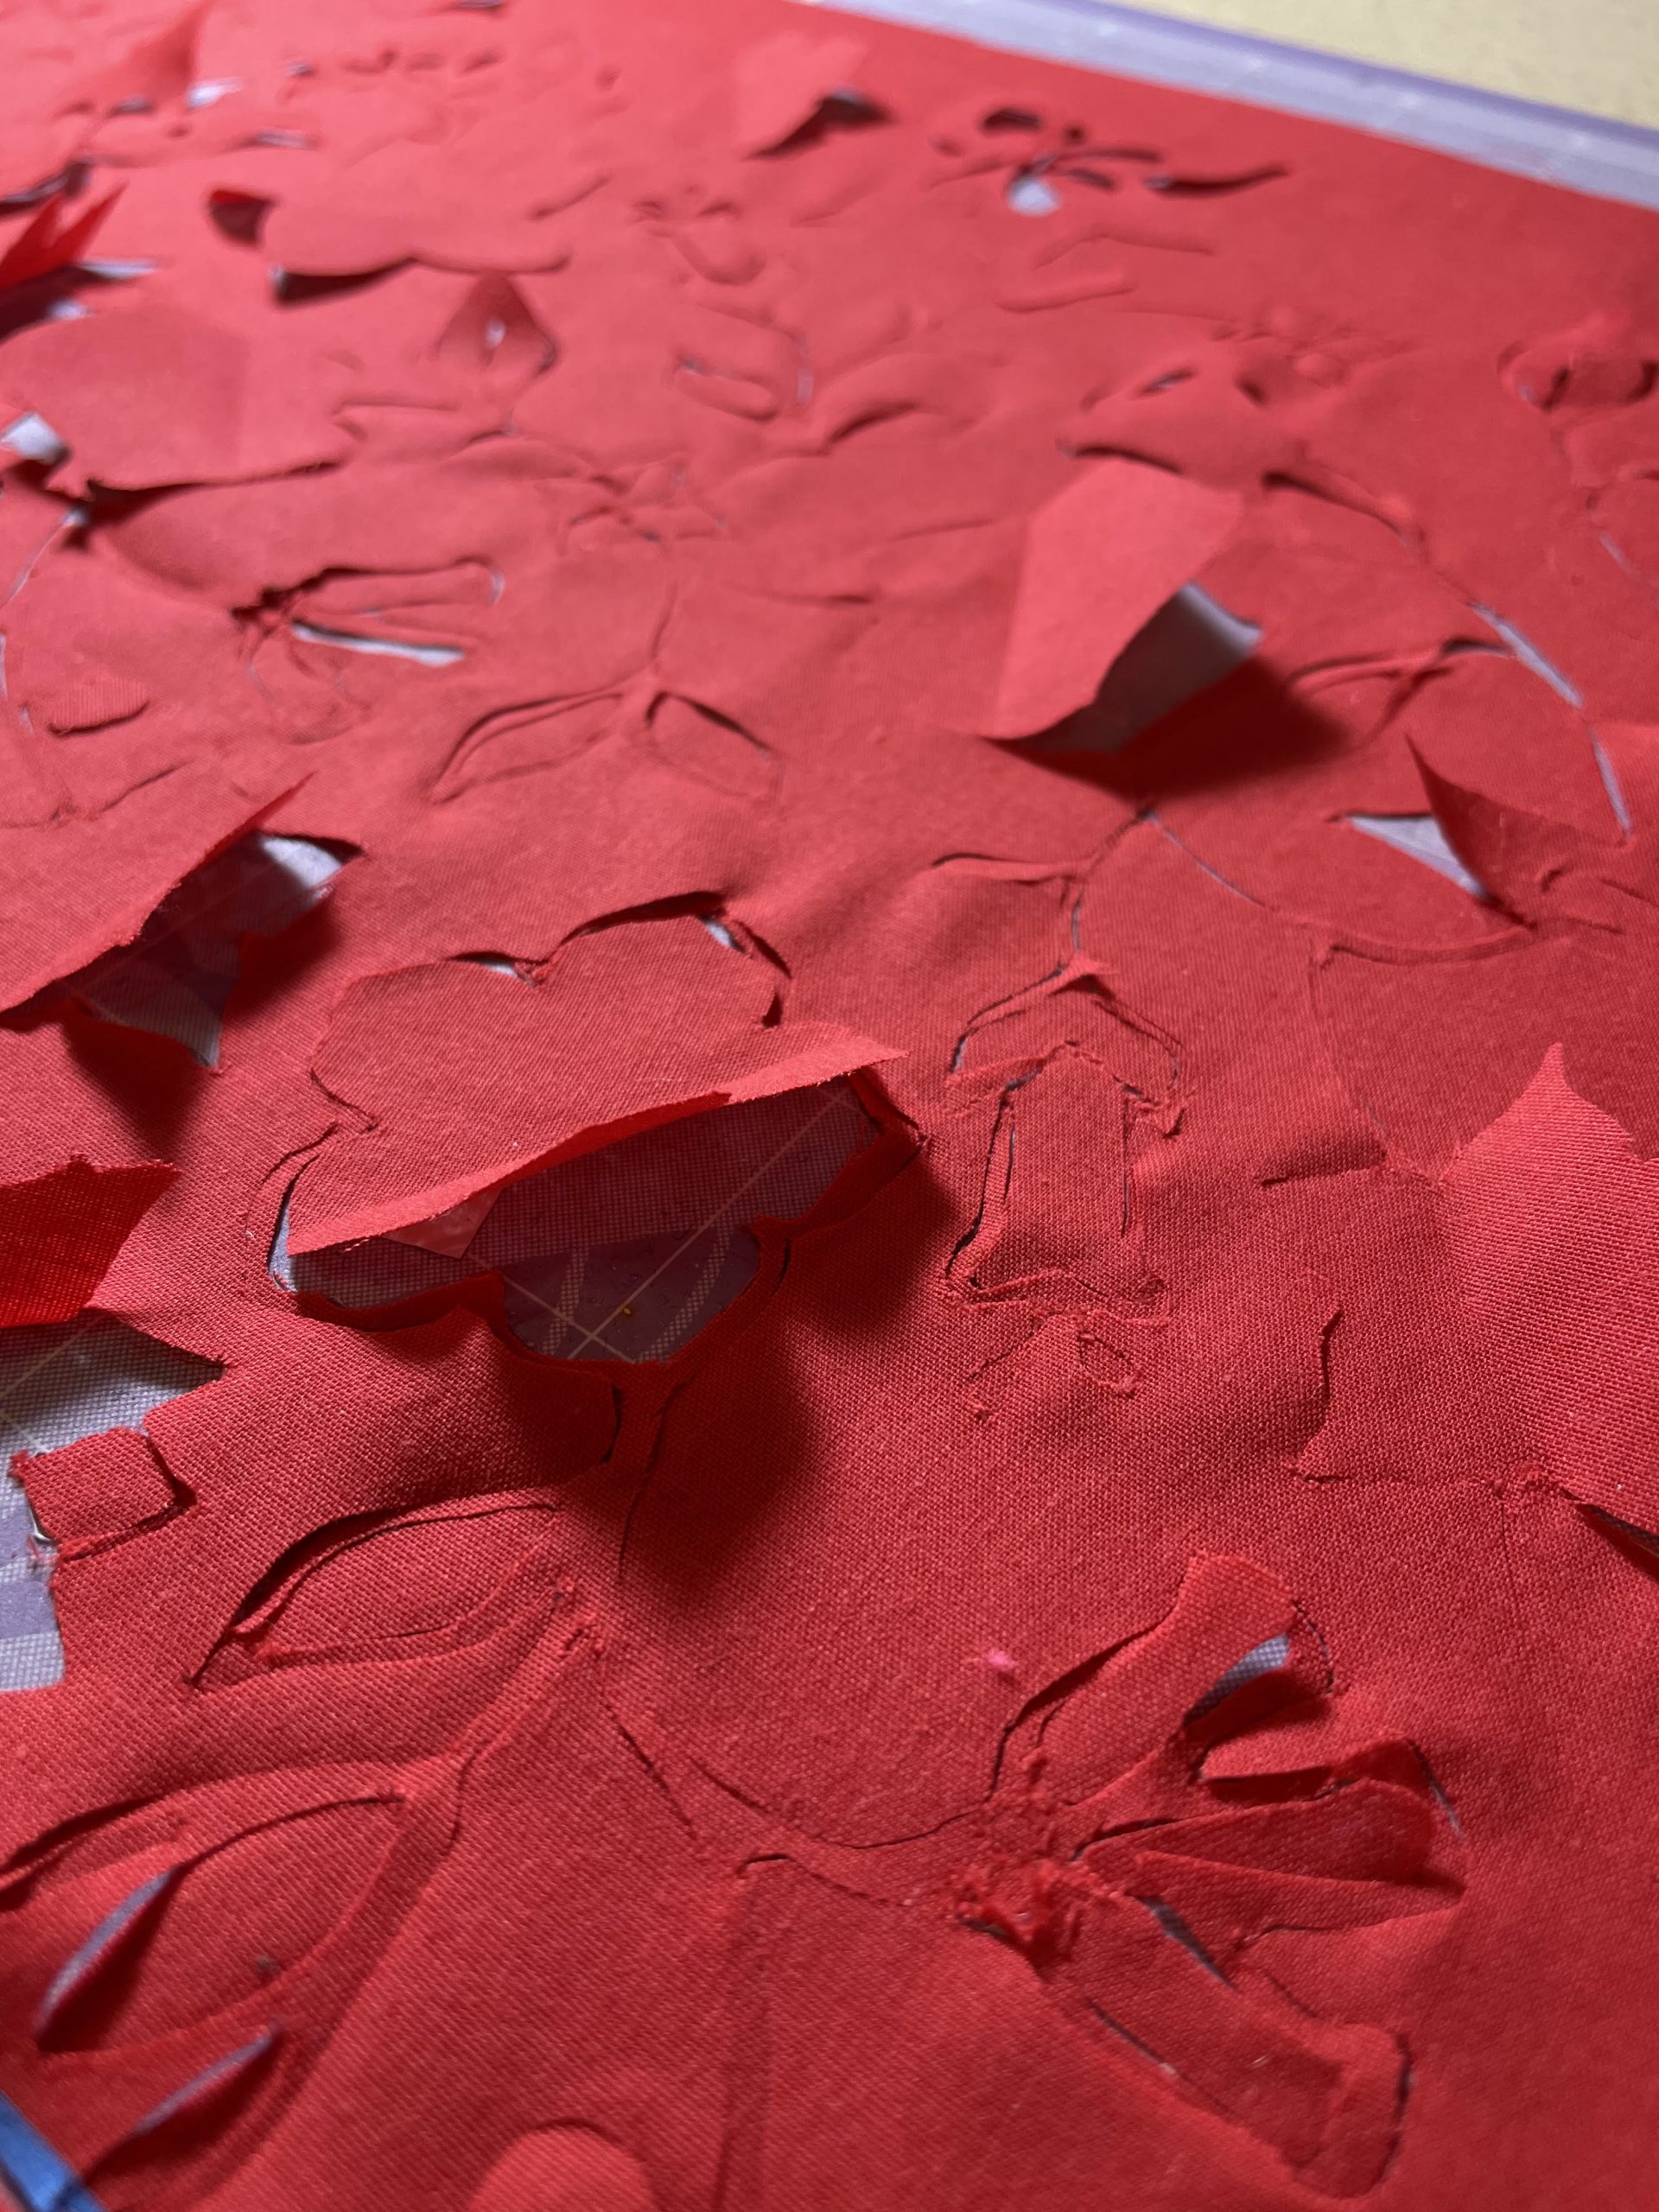
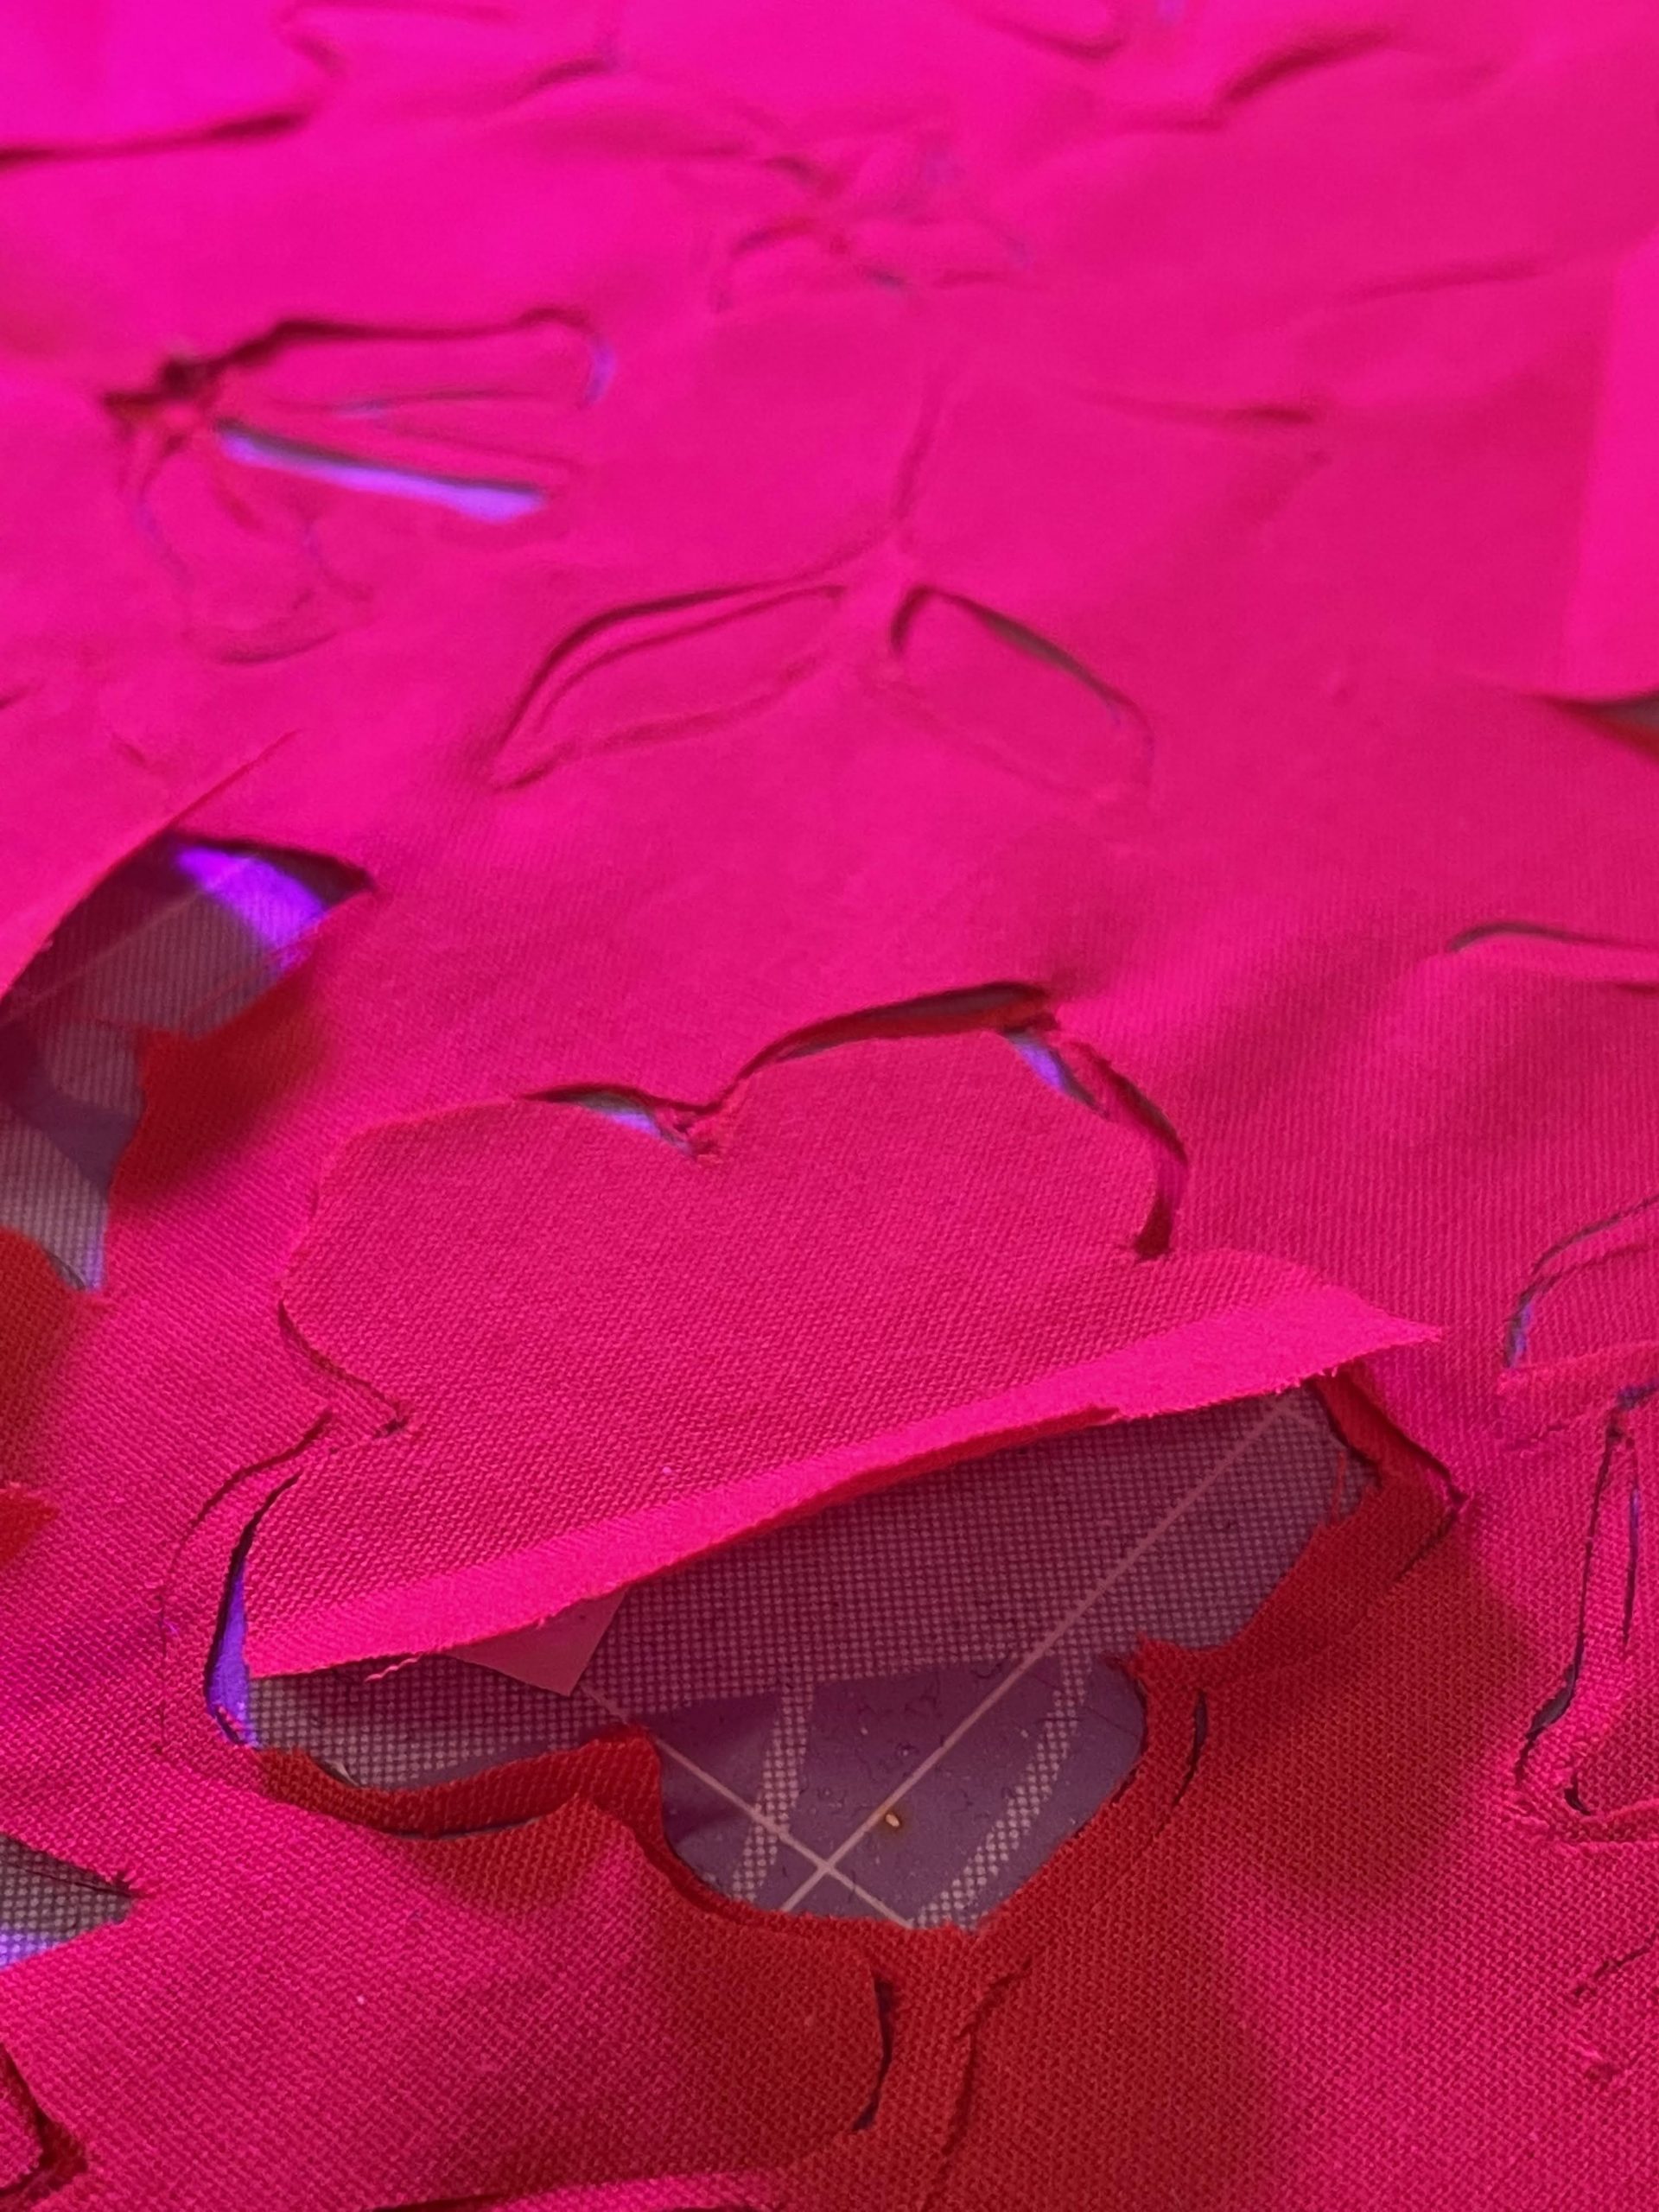
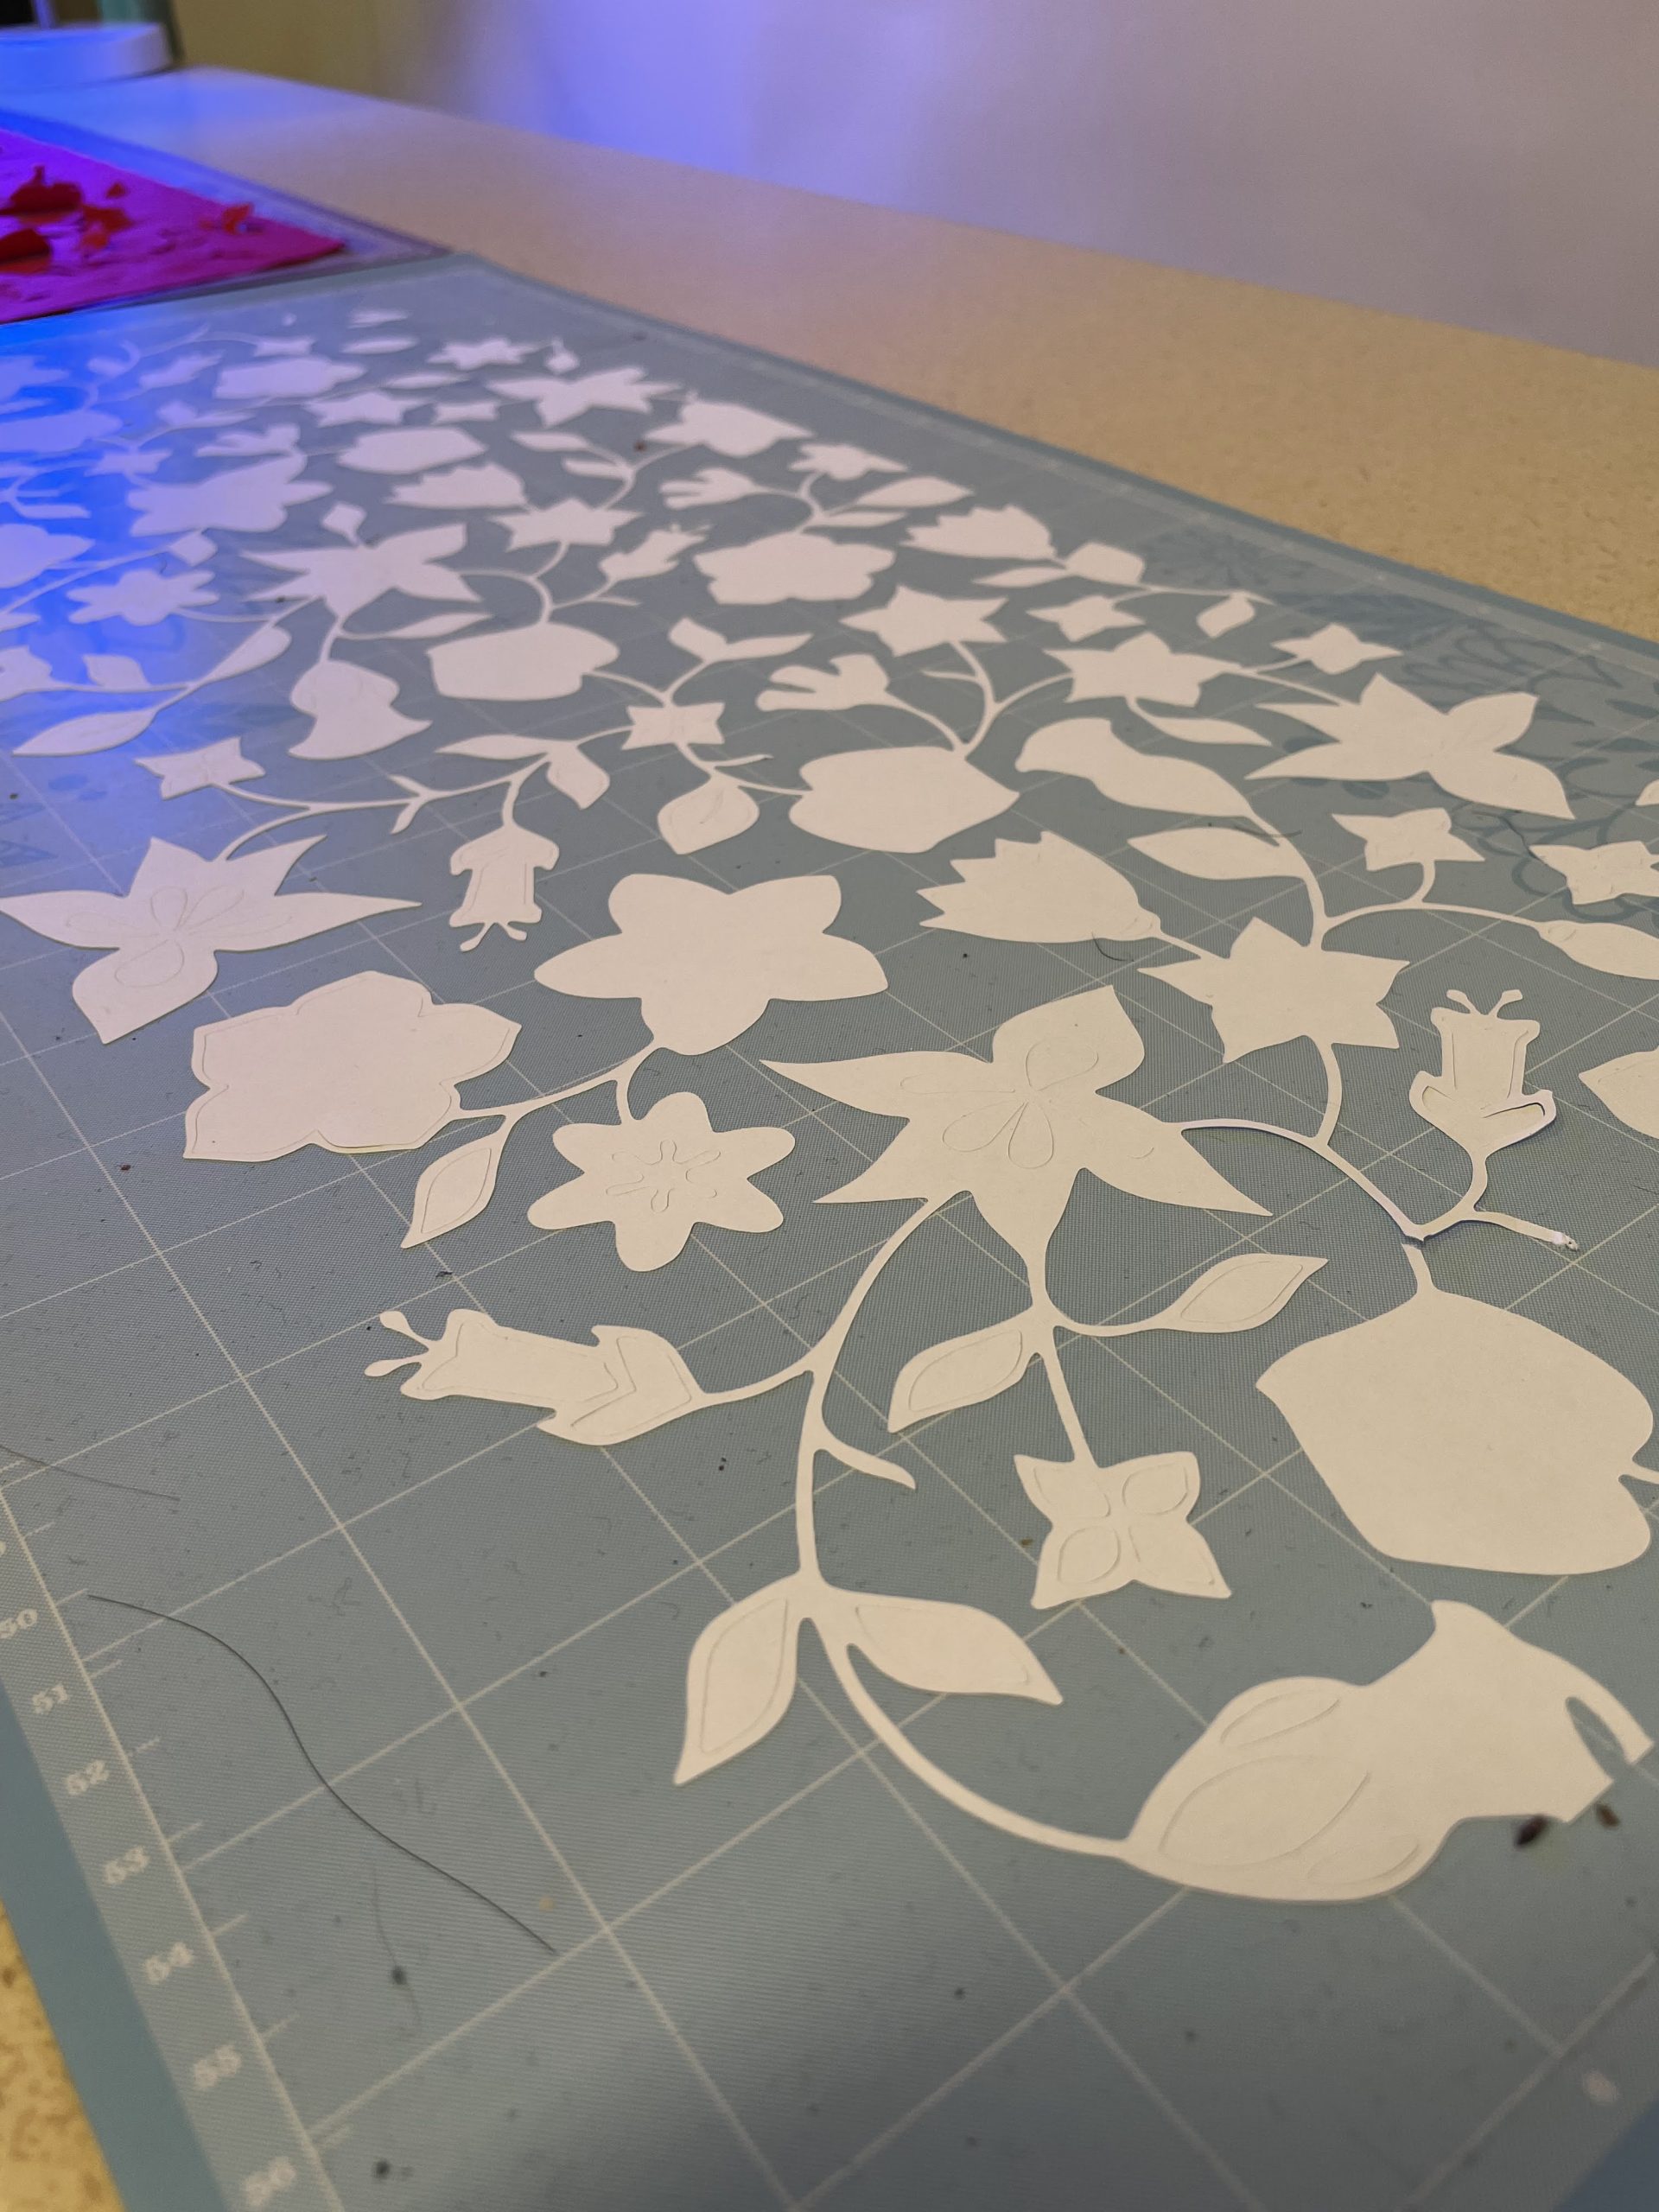
While using the machine cutter gave more space for the pattern to be extended, the original stems in the print were much too thin to produce a sturdy result when cut out. While the paper cutouts still looked sturdy, much of these points in the cotton fabric started to rip during the cutting. Additionally, it was not possible to remove a contiguous pattern without it tearing at these fragile points.

Successes

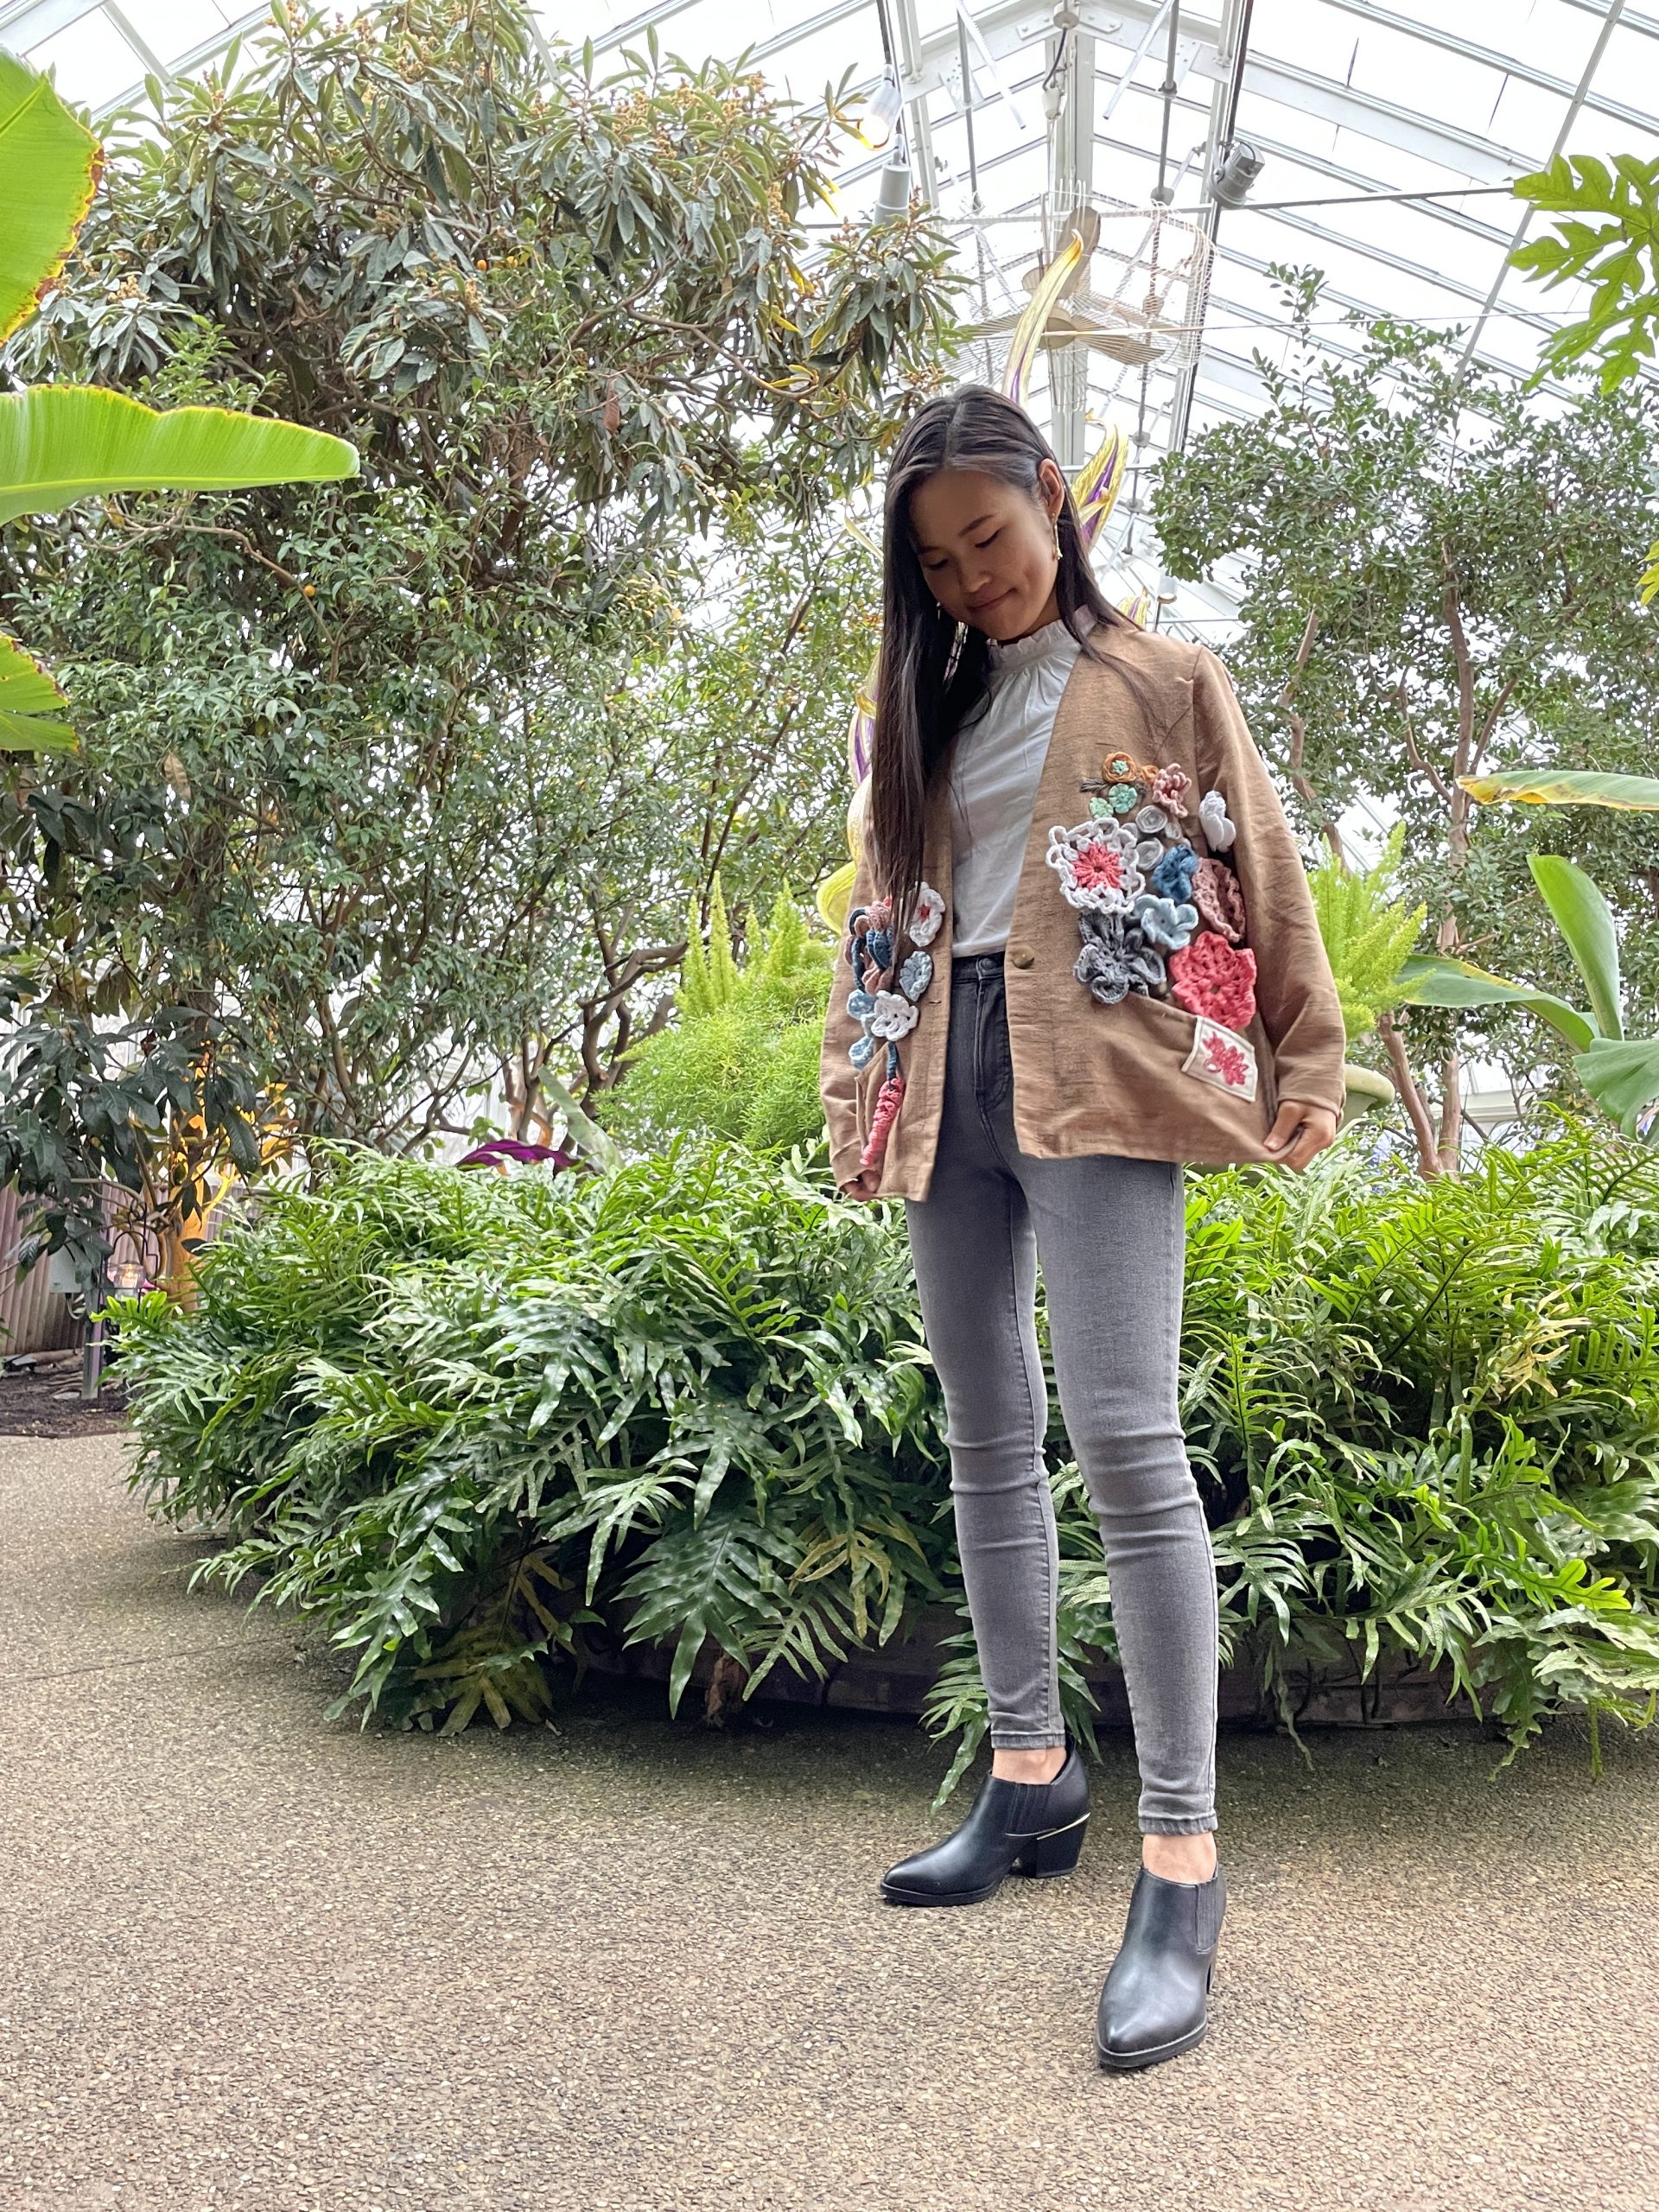
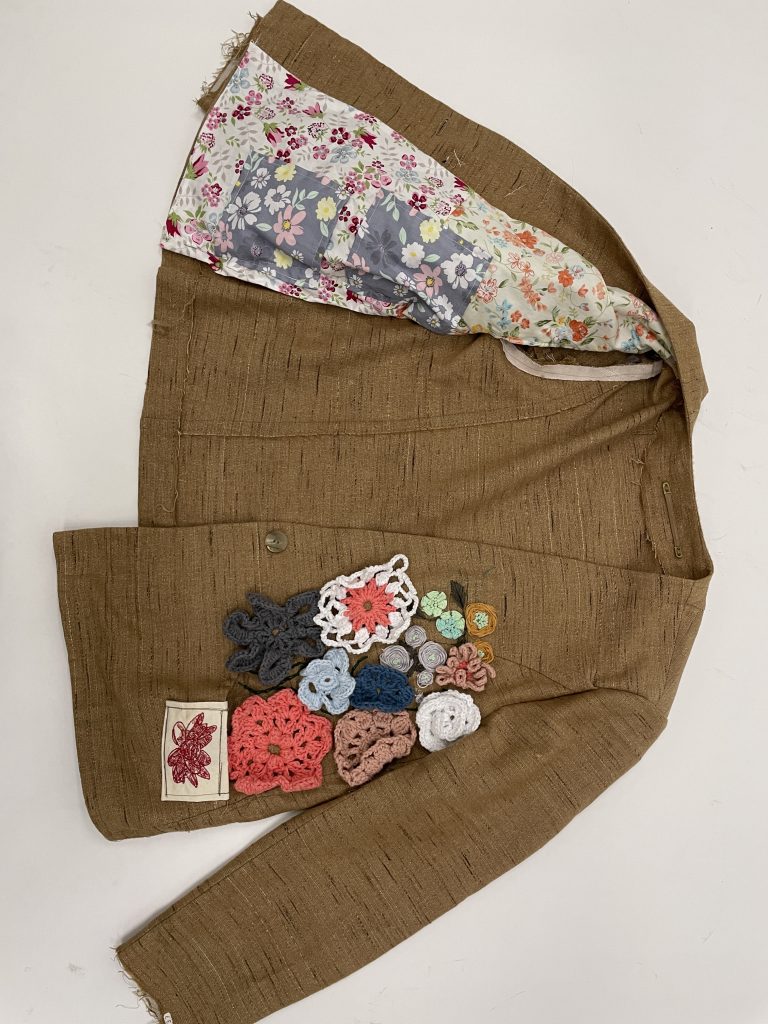
Due to these issues, I had to present the work as incomplete, still on the Cricut Board and in separate elements. However, I was still able to test ideas about the concept, including playing with elements of the lighting, shadow and shapes.

I appreciated how my fellow makers and students found thematic elements in the work despite its state, including ideas about being bonded and stuck to roots or culture, nature being messy instead of being literally clear-cut, and how we communicate with patterns and appliances. The exercise was certainly a good experiment to help me understand the nature of cutting fabric using a machine cutter. In a future iteration of this project, I would probably make changes to the pattern so that there are less thin and fine elements to reduce the possibility of splits and tears, and probably use a thicker piece of fabric.

Categories
Independent Project

Independent project final blog post-Claire Yoon

Final documentation

Intended effects

My original intention for my final project was to create a reversible tote bag made from my personal clothing that I no longer wear and would have otherwise donated. By repurposing my clothing I wanted to attach meaning to the clothing during this process. As a design student a lot of the projects I create are client based projects where each design choice is carefully thought out and has intent behind it and so for this project I wanted to do something more whimsical and focus on just what I enjoy and like. On one side of the tote I planned on screen printing the word Eggalicious on one side of the tote with material from an unused tote bag and material from a trench coat on the other side. On the flipped side I designed a fake egg log documenting how many eggs I had over the course of three weeks to computer embroider on the side made from the tote bag and the trench coat fabric on the other side.

Initial iterations

Final design

Challenges

After creating my design and was setting up the file I ended up taking out the numbers that symbolized the dates on the calendar as already just setting up the file was taking up too much time and I had too many intricate elements on my design already. But after seeing the end result I think it actually looks better without the numbers as it might look too clustered considering the size of the design as well.

In order to use this tote bag for my repurposed tote bag I realized I needed to remove this screen printing from the fabric and I was able to remove it by first rubbing the fabric with nail polish remover and an iron and a wet cloth.

Unfortunately, I had to pivot from my original design as I tested positive for Covid and was not granted campus access a few days before the submission deadline for this project. Therefore I was not able to screen print my Eggalicious logo and hand sewed the entire tote as I did not have a sewing machine at home. For the sewing, I practiced back stitching as I have never properly hand sewn something before and tested out different thicknesses for the yarn. Also I made the egg log design into a pocket and used an iron for the folds and extra needles as pins when sewing. When hand sewing, I struggled the most with sewing the straps as the material was a lot thicker and I had to make smaller stitches.

Successes

Despite the unexpected change of plans for my project, I am overall pleased with how my tote turned out and enjoyed hand stitching. I wish I was able to present my work in person and get feedback on my design but I still happy that I got to finish the tote. In the future, once I get access to a sewing machine again I would like to sew in the trench coat fabric on the inside and still be able to screen print my Eggalicious logo. I think this was a really fun hands on project and a great way to familiarize myself with embroidery.

Categories
Independent Project

Independent Project Final Documentation – Heeyun

Visual Portfolio, Posts & Image Gallery for WordPress

For my project, I wanted to make a bojagi tapestry as a way of reconnecting with my Korean heritage. Having lived in Chile ever since I was born, I didn’t have much exposure to Korean culture, traditions, and history, but through this course I was able to learn about bojagi. The geometric shapes and airy translucency of the fabrics used in many traditional bojagi caught my eye. The way the light shines through the cloth also reminded me of stained glass and how it historically was used as a decorative means of storytelling through intricate designs and various colors. I wanted to take that concept and apply it in the form of bojagi, as well as embrace the collage/scrapbook-like quality of the patchworking nature of this artform. 

I wanted the overall tapestry to look like separate but connected fragments of my memories of family and home, which I attempted to portray through faded old photos printed onto white fabric. The other pieces of fabric were similarly translucent and of varying “shades” of white or near-white colors. I had also saved a sheet of paper-like fabric with a traditional Korean print on it that, if I recall correctly, came from some sort of packaging for fruit. By including this paper fabric, it really felt as though I was creating a sort of scrapbook, where I decoratively put small artifacts or mementos as part of a whole collection of other memories.

Visual Portfolio, Posts & Image Gallery for WordPress

The embroidered portions were meant to be more like symbols as well as decorative. During my gap year in Korea this past year, I learned that Koreans have so many different ways of eating and preparing persimmons, and so there are multiple ways of calling the fruit. Persimmons are also one of the fruits that I associate with a lot of memories of my family, so I wanted to incorporate it onto the bojagi. The lotus roots also hold a lot of significance to me, specifically in the bond I have with my dad, whom I had had some trouble understanding and bonding with prior to my gap year in Korea. 

I wanted my tapestry to be larger, both in width and length, but due to time constraints I was unable to reach that size. I underestimated the time it took to assemble the entire bojagi, especially because I did not have a set plan or draft of how I wanted the overall layout to look like. I decided that I liked the more “do as you go” sort of methodology that is often done in scrapbooking. There was still a bit of planning because I had to make sure I spaced out the different fabrics well enough and because I had to make sure the rectangles of fabric would fit together nicely like puzzle pieces. Yet, I did not restrict myself by establishing a defined, detailed course of action in order to hone into the free and calm manner that memories come as they do. 

Using the embroidery machine for the first time was challenging, as it took me some time to learn about how and why certain problems arose, like the size of the pattern being embroidered would often cause the thread to break. I also faced a few issues when sewing the bojagi pieces together on the sewing machine. I had to sew very close to the edges, so sometimes I’d stray too far into the fabric or too far out and sew the air instead. Some seams also got too thick for the sewing machine to go through it or the folds of the fabric were not staying in place the way I wanted them to, so I had to hand-sew them. I liked this problem I faced, though, because it made me try out stitching it in the traditional way that bojagi is hand-sewn and also gives it a slightly different look, as part of the stitching becomes visible. 

Overall, I am very pleased with how my tapestry turned out. I was afraid I was not going to be able to achieve the airy and clean look that I associate bojagi with, but I was able to sew and piece the fabrics together. There were some wrinkles here and there that arose due to the way I sewed them on the machine, so I think that if I were to do it all by hand, I might not encounter the same issue as much. Or if I more meticulously planned and measured my pieces of fabric, I may have encountered fewer rough seams.

Visual Portfolio, Posts & Image Gallery for WordPress
Categories
Independent Project

Independent Project Final Update – Sophia

Visual Portfolio, Posts & Image Gallery for WordPress

Intended effects:

I wanted to make a more traditional long qipao where the zipper is on the side, the pattern is symbolic, tight-fitting, and has two slits on the bottom. I also wanted to do embroidery on the qipao so that the birds and flowers could stand out.

Challenges:

I referenced my previous sewing patterns to sew this qipao. However, because I want to make the qipao have more traditional elements, a challenge I had was remaking the patterns to reflect those elements. The slits and zipper on the side were extremely hard to put together at first. They also impacted many other parts of the qipao. For example, putting the zipper on the side makes it harder for the wearer to put their head through. To tackle this, I first increased the size of the collar area so that a head can fit through. However, after putting the collar and front pieces together, I realized that it is too big. I then decided to cut the collar smaller and change the curve of the bias tape area in the front to tuck in the extra bias tape that I used on the collar.

Another challenge I had was making the qipao tight fitting and adding darts. Because the fabric is really thick and stretchy, it causes a lot of large and visible wrinkles when making the darts. I also tried doing hand embroidery using the kit I got from Walmart. However, due to time constraints and the fear that the fabric would break after poking it with a needle too many times, I decided to not do embroidery.

Successes:

Overall, I think the qipao turned out well and it fits on my body. Although there were a lot of challenges, I was able to learn a lot through the process. My biggest takeaway was being able to reference an existing pattern (the pattern I made last semester) and adjusting things to make the changes I wanted. Another big takeaway is being able to learn how the different pieces of a garment can interact with each other and what strategy to use for the best outcome. Other than the structural changes, I also changed a lot of the techniques I used to sew. For example, in the more modern qipao, I made the collar first, flipped it inside out, added bias tape and then sewed it onto the garment. However, this time, I decided to cut and put together the collar (without flipping it inside out) and then sewing it to the garment where the garment (front/back pieces) are placed inside of the collar so that the seam allowance is not visible. And then I added bias tape all together. 

Categories
Independent Project

Independent Project Final Post – Susan

Visual Portfolio, Posts & Image Gallery for WordPress

Reflection

I created this dress with the intent to symbolize my younger self, who wore dresses often and would always be in peace and innocence without any stress from the ‘real-world’. A time when there were no worries, no crises, no COVID-19. I have always wanted to make a piece of clothing, specifically a dress, a pretty yet simple dress.

Yellow is a color which represents life and energy to me representing one’s youth. While working on the dress, I added prettier ribbons to accessorize the dress. One ribbon has Chanel labelled all over, and the other a bakery called Gaby et Jules, and to me these show how sometimes a brand is so powerful sticking a brand name to garment increases the value of the clothing a lot (in my case, just for fun). The red ribbon makes the overall dress more child-like.

I learned a lot making this dress, using a sewing machine, hand-sewing, figuring out straps and also straps. I hand-sewn the ribbons on, including the center popping-out pearl piece. The ruffles were a bit difficult as a line of yarn is supposed to be removed and the ruffles on the linen cloth is supposed to stay. But in my case, I had the ruffles added plucking a thread of yarn one by one to keep the ruffles and then machine-sewing them on. The back of the dress has shown stitches and also a more adjustable strap which I am also really proud of.

Overall, I learned a lot from creating my first piece of clothing. And I am impressed how pretty it looks, next time I will make it so it is comfortable and easy to wear and take-off (such as adding stretchier material), and iron it before displaying. Thank you!

Categories
Gallery Independent Project

Independent Project Final Update – Carol

Visual Portfolio, Posts & Image Gallery for WordPress

Intended Effects

The initial concept for this plush was the poro, a fluffy creature from the game League of Legends. I intended to create a fluffy white poro plush which would have a large, round body, eyes, horns, and a tongue.

Challenges

First, I decided to make the poro light pink instead of white due to the selection of available fabrics. Because the poro represents love and should be a joy to hold, a rose poro would be an appropriate change. I combined multiple tutorials, techniques, and experiments to create the final product, and experienced challenges relating to creating the body shape, horns, and integrating additional body parts. For the round body I used the four piece sphere pattern. For the horns I experimented and sewed three different horn shapes before settling on the most suitable one. Adding the tongue and eyes were a little challenging, but adding the horns to the body was much more challenging. Despite my hand sewing using thicker thread/yarn at the attachment area, the horns still have a tendency to pop out a little.

Successes

Overall I like the placement of the tongue and eyes (I had to redo the eye placement multiple times). The final horn shape is also nice. The poro is round, fluffy, and cute. If a person who played League looked at it, I believe they would be able to recognize it.

Categories
Gallery Independent Project

Jennifer- Final Independent project documentation

This project was an exploration of transforming paper ephemera into a nonephemeral soft sculpture. Thinking about how much we waste away little pieces of paper and stuff full of information and design, I wanted to memorialize the mundane and short-lived into something more special, tactile, and object-like. I have been collecting fruit stickers for that reason and also have attempted to hand embroider before. However, the scale of those stickers was so tiny that it was nearly impossible to recreate them by hand. So for this project, I wanted to try machine embroidery to achieve the details and precision that a hand embroidery might lack.


Learning the language of machine embroidery was definitely a challenge. It was hard for me to picture how the embroidery would render in a machine, and I realized how much more intuitive it is to embroider by hand. Numerous attempts were made. It was incredibly challenging having to start over whenever there was an error during embroidering since there was no go back button in an embroidery machine. Because I was working with such a complex but small design, I was disappointed to see details getting incomprehensible. Through this experience, I realized that even the machine cannot render perfect and precise embroidery, or at least I cannot. Also, the finishing process leaves something to be desired as there are a lot of loose threads.


Though there were multiple challenges on the way, I feel very accomplished with what I have made. I was able to make all the embroidered objects precisely the same size as the original. Also, as I was embroidering, I learned something new about the machine, the program, or the design each time, which makes me extremely excited to work more and perfect the technique. I am genuinely thrilled at the potential of this project. I want to make more of these.


I also learned that machine embroidery is a lot of work, different from hand embroidery, but still a lot of time, effort, and care. Previously, I thought machine embroidery was too clean and perfect looking, and it lacked the care and love that hand embroidery has. However, doing this project, I still found myself really caring about the embroidery, even though I was not making the stitches myself.

Categories
Independent Project

Independent Project Final Update – Lea Emerlyn

Intended Effects

For my final project, I wanted to explore different ways that floral can be embedded into a piece of clothing. I had a bland brown jacket that I purchased second-hand, and I thought that it can be an opportunity to revamp it.

At first, I want to only do embroidery on the jacket. I wanted to cover up the jacket with different types of flowers. This is also a way for me to learn more advanced skills in embroidery. Since we also learned computerized embroidery in class, I also thought about combining both machine and hand embroidery to show the difference and contrast between the two techniques.

I then realized that I could also crochet flowers, which also adds another technique to the jacket. Every single one of the flowers is different. I followed 15 different YouTube tutorials to learn these crochet patterns.

I also added a floral pattern lining to the jacket. I learned to sew pockets on to the liner. I feel like the floral cloth adds another floral element to the entire theme.

Overall, I intended this project to help me explore and learn several different techniques (hand embroidery, machine embroidery, crochet, and sewing). The end effect is like a walking garden because of the brown background, which looks like dirt. The variety of techniques, colors, and high-density placement of the florals was meant to be overwhelming.

Challenges

After attaching the crochet flowers and embroideries, I realized that the inside of the jacket is filled with threads that could potentially be caught in things. Therefore, I tried to add a liner to the inside of the jacket. This covers up all the loose threads and knots that I made. I found the floral cloth from the fabrication lab in Hunt Library. I also decided to add pockets to the inside because the outside pockets are really small, and things can easily fall out. Adding the lining is a huge challenge because I needed to find a way to hide the stitching. I did this by sewing it as close to existing seams as possible. It was also difficult to cut the fabric to match the shape of the jacket.

Another challenge I had was attaching the crochet to the jacket. I hand sewn most of the flowers on. However, I needed to reinforce a lot of the flowers. When I first attached them, they were very droopy due to the weight. I then sewed some of the pedals on the jacket so that the flowers would stand up. To fill in some of the gaps between the flowers, I used a chain stitch and a string of green embroidery floss to make it look like there is a vine background.

Success

I was able to learn several crochet techniques online. I started off with a very simple flower that only took around 25 minutes. After a couple more flowers, I was able to crochet a more complex flower that took 3 hours to make.

I also learned to use PEmbroider for machine embroidery. I explored different types of stitches available in the library. The two that I attached to the jacket consist of perpendicular stroke stitches and Perlin fill stitches.

Categories
Gallery Independent Project

Independent Project Final Blog Post – Aaron

To remember my first time cooking and inviting my friends over for a holiday, I created a textile version of our Thanksgiving plate. In addition to the plate, the final piece includes mashed potatoes, mac and cheese, asparagus, gravy, and roast turkey.

Thanksgiving plate with all the ingredients — mac and cheese, mashed potatoes, asparagus, gravy, and roast turkey.

Here’s a close-up and detailed description of each of the components:

Plate:

Visual Portfolio, Posts & Image Gallery for WordPress

The plate was assembled with a 3D component in mind. To achieve this, the full plate was split into five sections and individually stuffed with some wool to give it some perception of weight. The meeting points of the outer sections were slightly trimmed then sewn back together to elevate the plate’s edges.

Mac and Cheese:

Visual Portfolio, Posts & Image Gallery for WordPress

For the mac and cheese, each piece of mac was individually felted so that it curves in the direction that resembles a real mac. Together, they make up around a scoop to a scoop and a half of mac and cheese – almost exactly the amount each person took at the event.

Mashed Potatoes:

Visual Portfolio, Posts & Image Gallery for WordPress

The mashed potatoes were very simply felted together after individually felting two different-sized half-spheres then combining them together. The gravy added on top in the final piece adds another layer of depth to the ingredient.

Asparagus:

Visual Portfolio, Posts & Image Gallery for WordPress

The asparagus was put together by first trimming a piece of sponge to somewhat resemble asparagus, then gluing an outer piece of green paper to more closely match the real color, and finally the green strand to match the roughness of the vegetable on its top portion.

Roast Turkey:

Visual Portfolio, Posts & Image Gallery for WordPress

For the roast turkey, the material had to first be dyed using the reactive dye method with a 1:1:2.75 red: blue: yellow ratio after cutting out each piece individually. Each of the pieces was first sewn three-quarters of the way before the wool stuffing was added. The gaps were then sewn closed. After adding velcro and trimming off any excess cloth, the roast turkey was complete. The result is a felted/sewn turkey with detachable wings and drums!

Reflection

Overall, I was very happy with how the project turned out. All of the pieces came out very closely with how I imagined them to look, and I will definitely put this project somewhere visible in my room back home.

In terms of skills, I became much more comfortable with sewing towards the end of the project and the process became much less frustrating. I also have a newfound respect for artists who complete much larger projects because of the time and effort they must commit.

I laughed at how “deflated” the turkey turned out (I wasn’t very confident in the strength of the stitches and opted to lower the pressure), chucked at how I couldn’t think of a better way to represent semi-liquid gravy, and smiled at how well the plate’s 3-dimensional aspect came out to be. It’s been incredible working on this project, and I had a blast.

Categories
Gallery Independent Project

Independent Project Final Blog Post – Lukas

For my independent project, I gathered data from earthtime.org about Pittsburgh’s housing crisis. Specifically, I gathered snapshots between 1990-2010 of where evictions were filed, which areas saw rent increases and decreases, and the locations of areas with highest non-white populations. Then, using machine embroidery, I translated this data onto cloth. This was cut into an 8.5×11 sheet of “paper” and stapled to another sheet of notebook paper labeling and explaining the visualizations.

PEmbroider File Preparation

Visual Portfolio, Posts & Image Gallery for WordPress

Fabrication

Visual Portfolio, Posts & Image Gallery for WordPress

Reflection

Throughout this project, I familiarized myself with the relatively unintuitive PEmbroider and Adobe Illustrator software. Since I had little experience with both programs, initial work was slow. However, once I saw physical examples of some files and saw how the machine actually worked, I gained some more intuition and enjoyed the process more.

I’m happy with the final product, but if given more time would explore the topic more. I would like to see how layering data on top of each other (either on one piece of fabric or translucent layers that can be moved and arranged however you want) can further improve the visualization. I was surprised how manic the final product looked, almost unrecognizable as data. Finally, through using earthtime.org and PEmbroider (both created by CMU professors) to explore the housing crisis (an issue pushed along by gentrification encouraged by the spread of CMU), I think there’s an interesting level of irony in the piece.