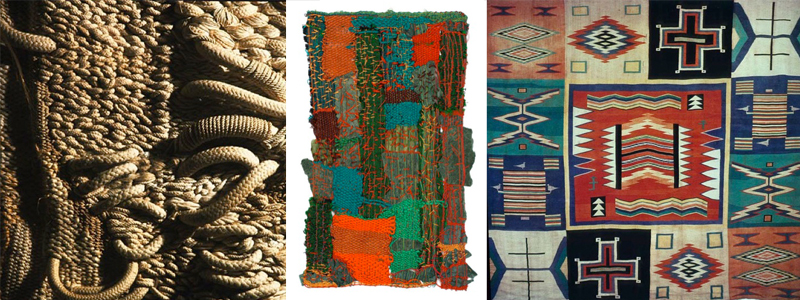
(images: Magdalena Abakanowicz, Sheila Hicks, Navajo weaving)
Weaving due for critique: Mon., Oct. 5
Weaving is one of the most ancient and enduring techniques for constructing cloth, or a planar textile surface. The basic principle of weaving is to interlace two sets of threads – the warp and the weft – at right angles to each other. The weft, sometimes called the ‘fill’, is drawn under and over the parallel warps. In tapestry, the weft covers the warp threads, creating a weft-faced fabric (meaning that you cannot see the warp threads). For this project, you will create a weaving sampler and weaving exploring several tapestry weaving techniques. Refer to the uploaded ‘Visual Glossary’ or other books and resources on weaving for guidance, ideas and inspiration.
1. For at least the first 15 inches (at least) of your weaving experiment with techniques and materials. Utilize the techniques below and make up your own. This first section will be your Weaving Sampler.
2. Horizontal lines: Weave several rows of one color for practice covering the warp and keeping even selvage. Then weave several rows of another color. Arc or bubble the filling across the warp to allow for take-up of weft as it interlaces over and under the warp ends. Pack the weft well using your fork. Repeat.
3. Vertical lines: Weave two contrasting colors to produce vertical lines. Do this by weaving a row of dark and a row of light, alternating for several rows.
4. Weave any shapes that utilize interlocking, dovetail and slit techniques. Try a shape that involves diagonal lines.
5. Experiment with a weaving technique that creates pile, such as soumak or rya knots.
6. Incorporate some alternative materials into the weaving. Experiment with yarns/threads/filaments of differing textures and weights.
7. In the second portion of your weaving, continue your experiements and trying ideas. You are welcome to incorporate alternative materials or other types of yarns into the weaving. Experiment with yarns/threads/filaments of differing textures and weights.
8. Retie your warp and create a Final Weaving. Continue experimenting with techniques/materials as well as build upon what you learned in the first portion of your weaving. Ultimately, your Tapestry Weaving must be at least 36” in length. Remove the weaving from the loom and finish the ends (You will be shown techniques for this in class).
*** Weave at least each week. We will do weekly in-progress check-ins and also we will have a few in-class weaving days. Bring your weavings to each class.
*** Record approximately how long it took you to complete this (record it in your journal/notebook). As you proceed with your weaving, reflect on whether you enjoy the process, or not, what aspects you find pleasing, or challenging. You may wish to record your thoughts in your journal. Enjoy!
TAPESTRY WEAVING RESOURCES
Tapestry Technique Online Resources:
- An awesome resource for beginner weavers! Fibers and Design
- Another technique resource: The Weaving Loom
- Very fundament weaving technique covered: Schacht Weaving
Tapestry Technique Handouts:
Tapestry Weaving Technique Videos
List of technique videos made for class:
- Weft Technique Video – part 1 – interlocking wefts
- Weft Technique Video – part 2 – Rya Knots (Pile)
- Weft Technique Video – part 3 – Leno (basic lace technique)
- Using a Pick-up Stick (to create floats and patterns)
- Stabilizing a “Window” – Using Sewing Thread
- Stabilizing a “Window” – Using Twining
- A series of videos on how to finish your weaving and taking your weaving off of your loom:
