Digital Repeat Pattern (Final) – Annie

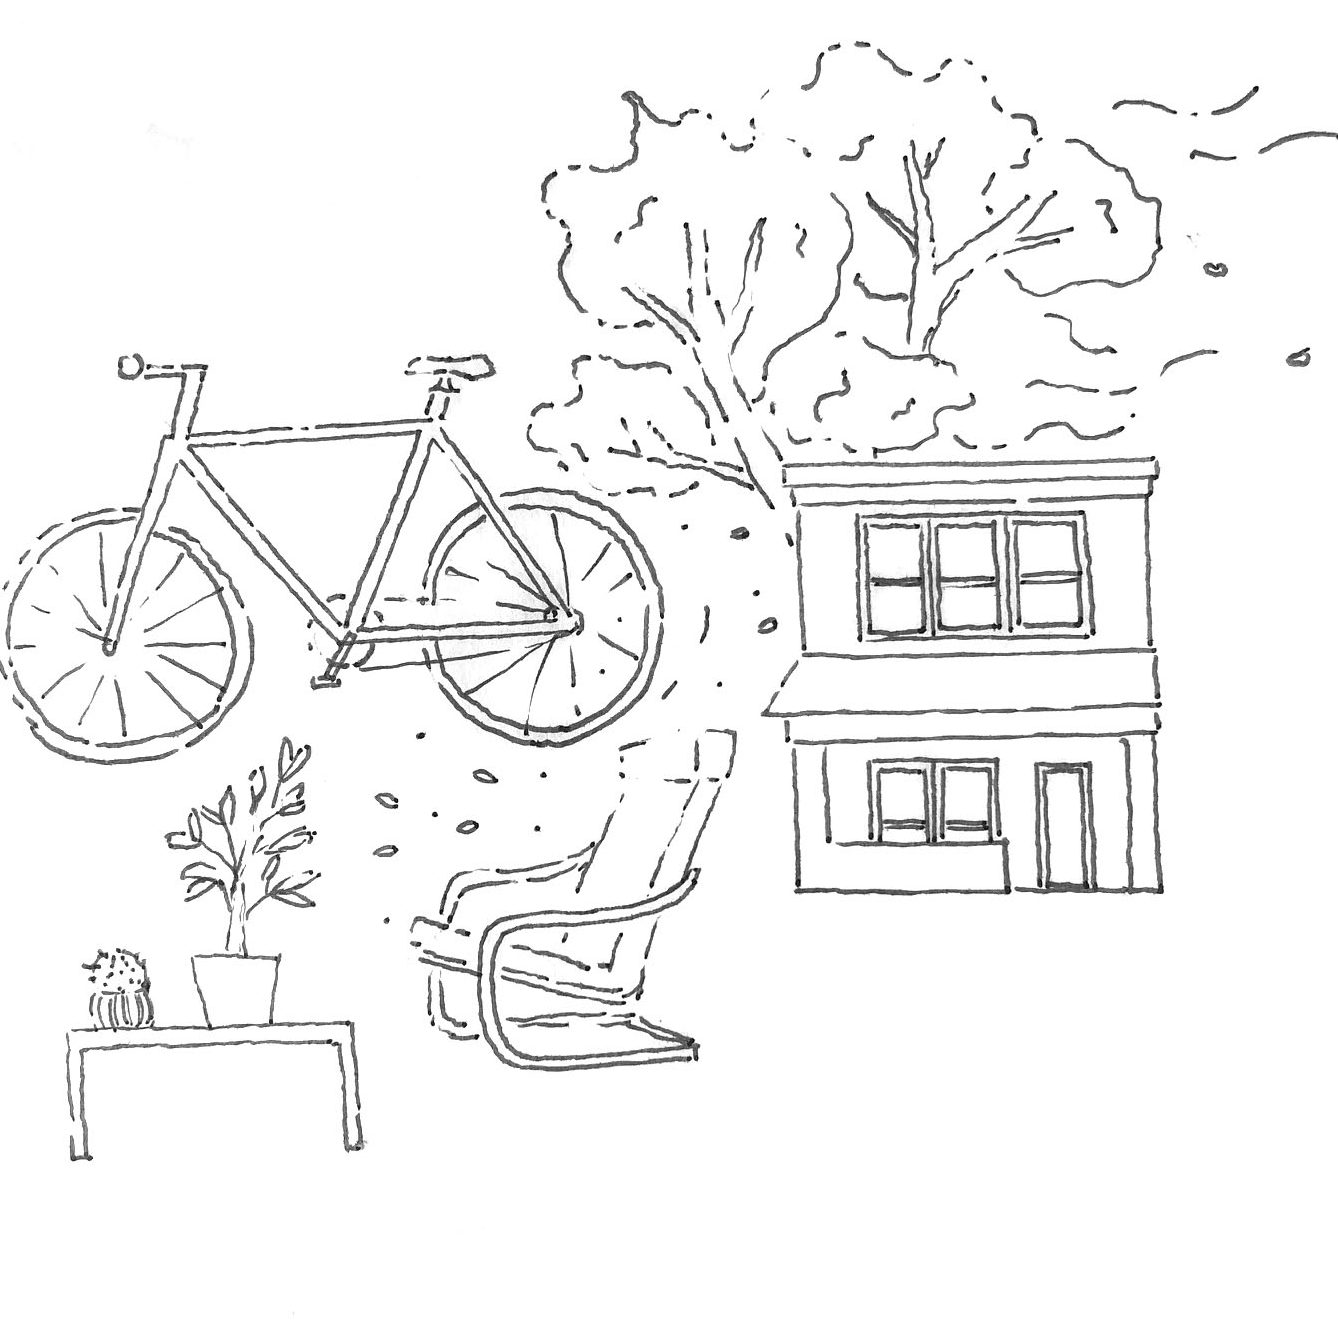
I had decided to go the third prompt: drawing from my surroundings. I had recently got a mechanical keyboard, and decided to base my ideas off of that. The fat cats are based off of cats of a youtuber who I was watching while doing this assignment.

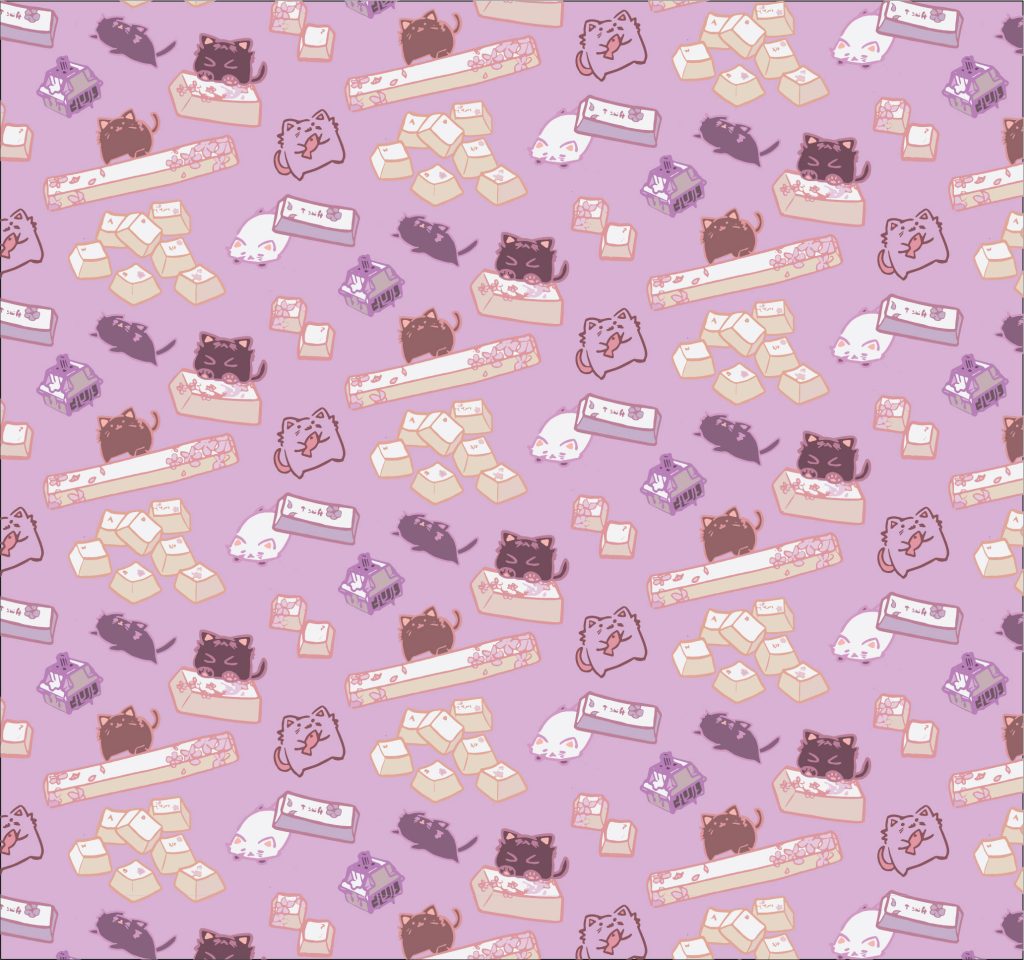
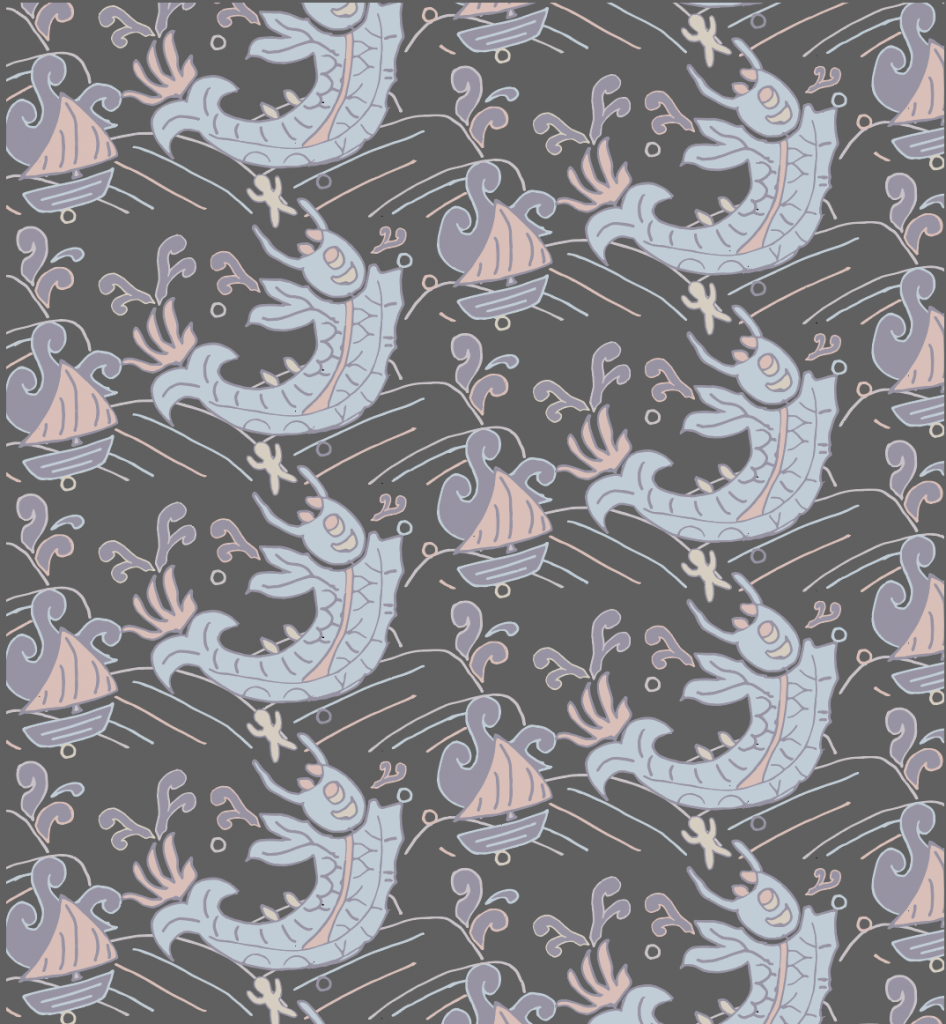
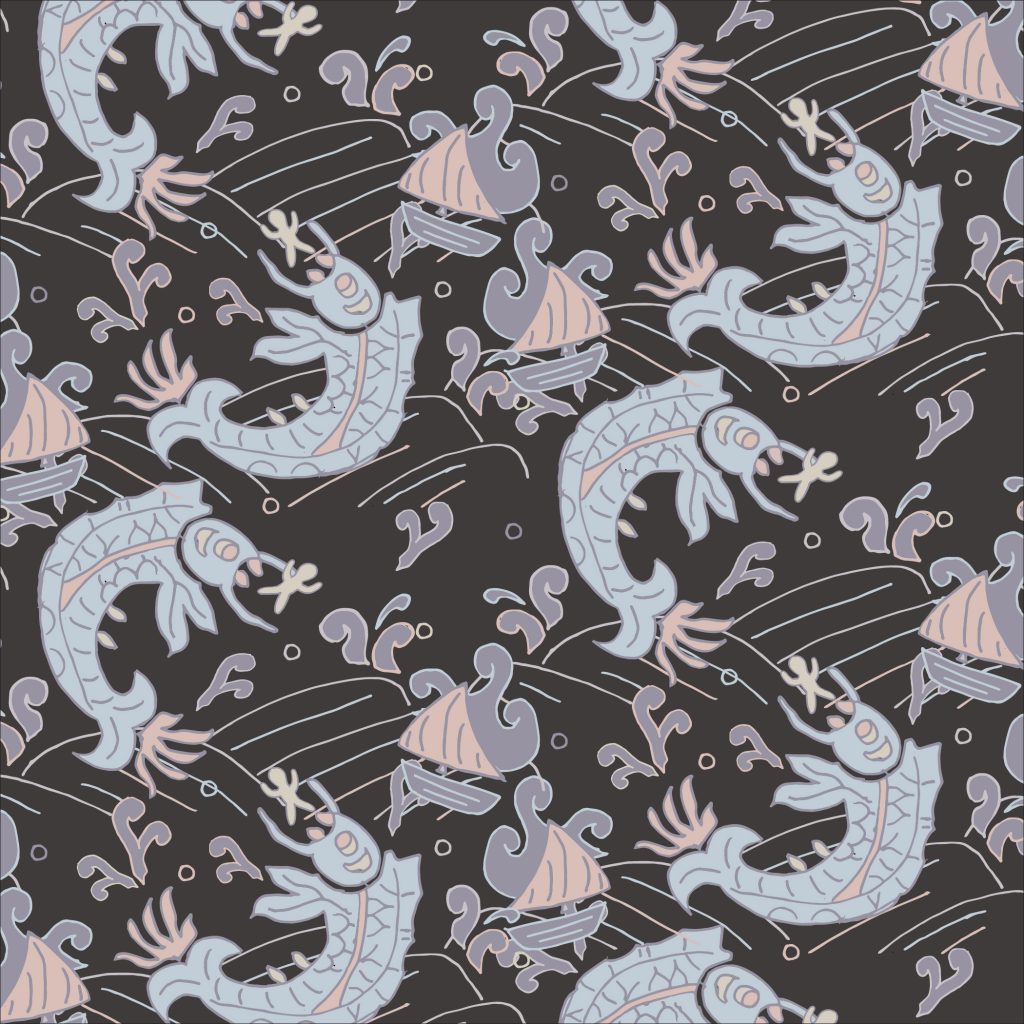
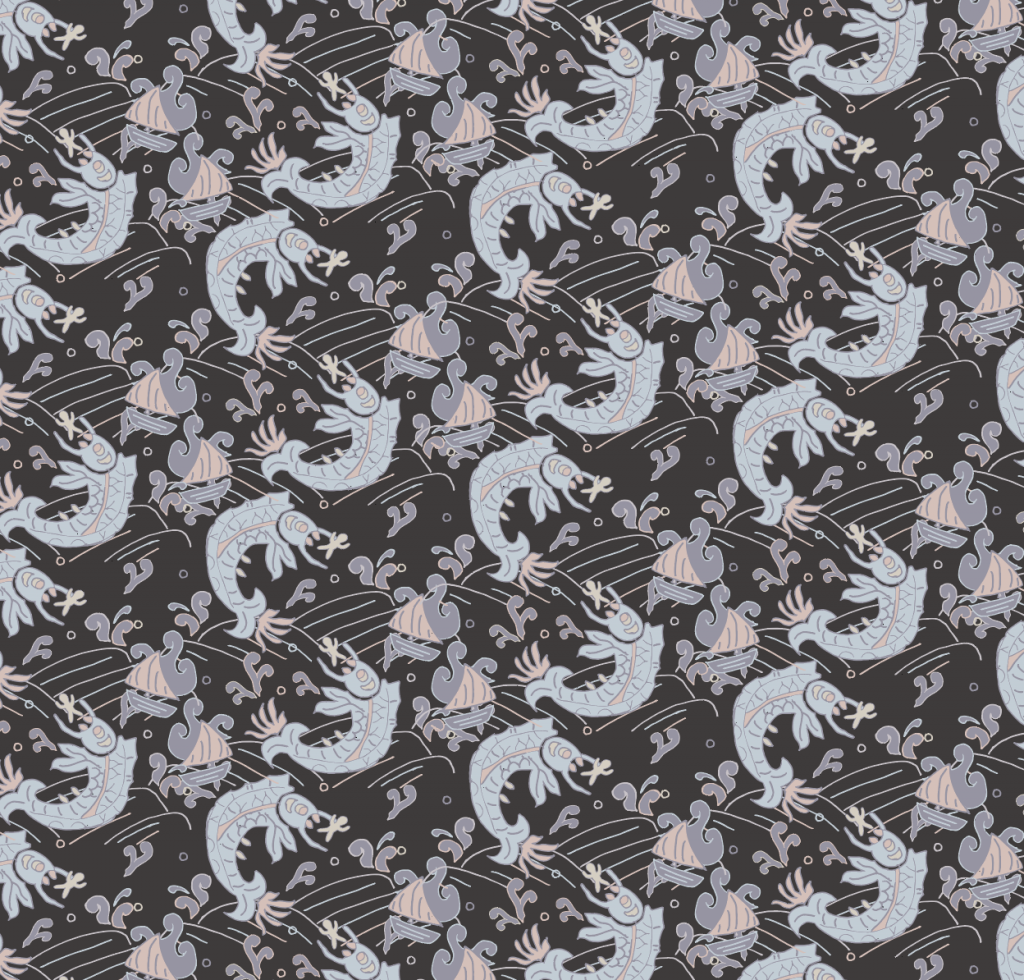
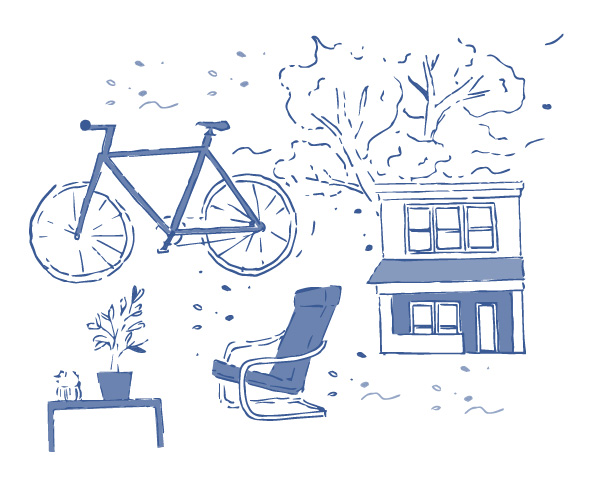
Choosing a color scheme was especially difficult, since I had wanted to make each cat unique in their own way, but I still wanted to stick to a bit more monotonous color scheme. I am a bit iffy about the shading though, since it was difficult to get certain patches colored in properly. I also wanted to give this a more cartoonish feel, so the line widths of the keys and the designs of the cats were chosen specifically to match that. I feel like overall, the calmer scheme of what I was aiming for definitely worked.

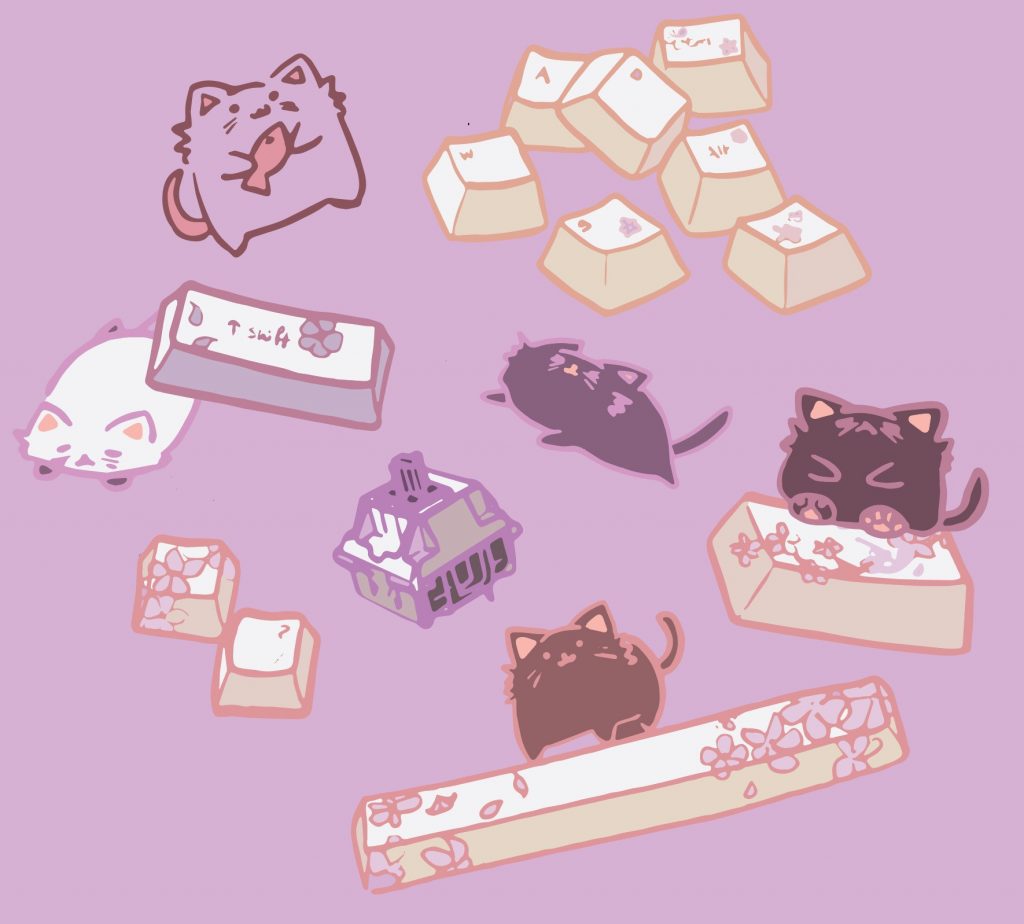
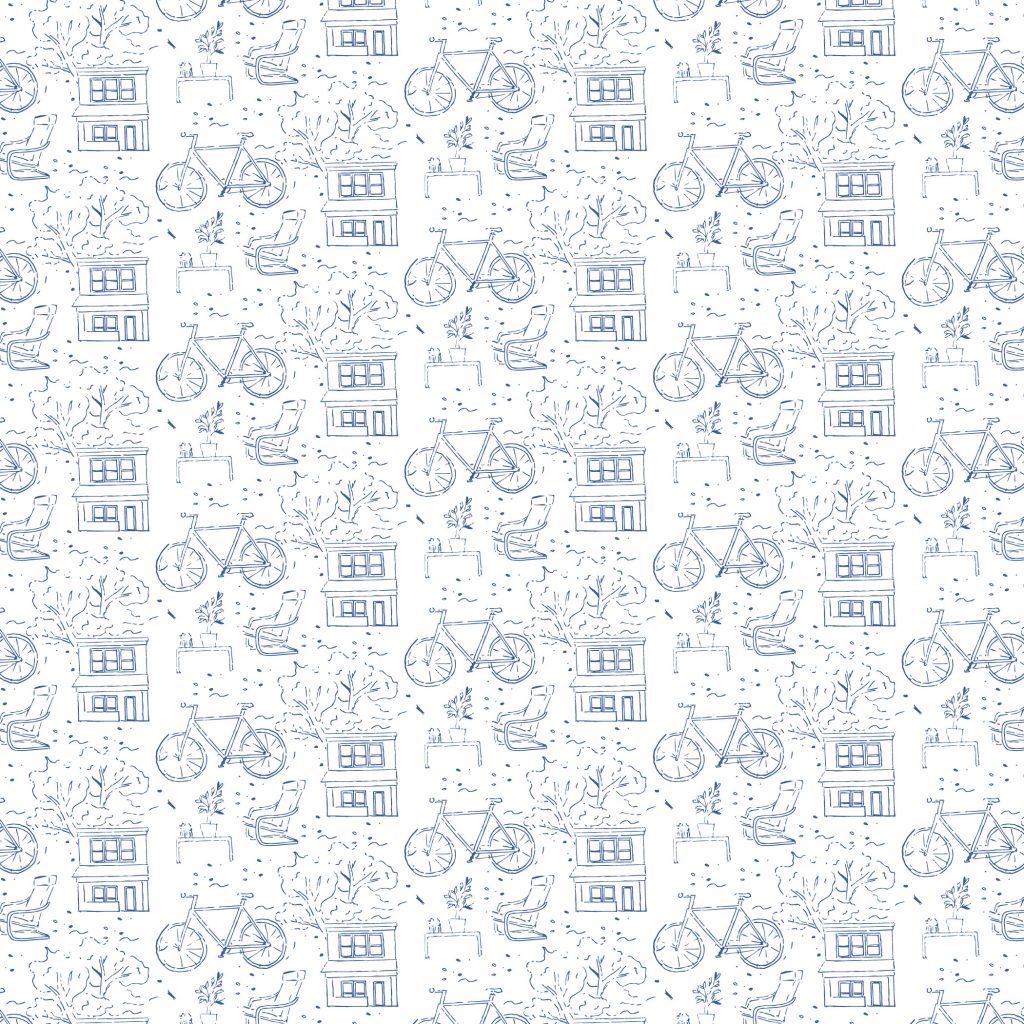
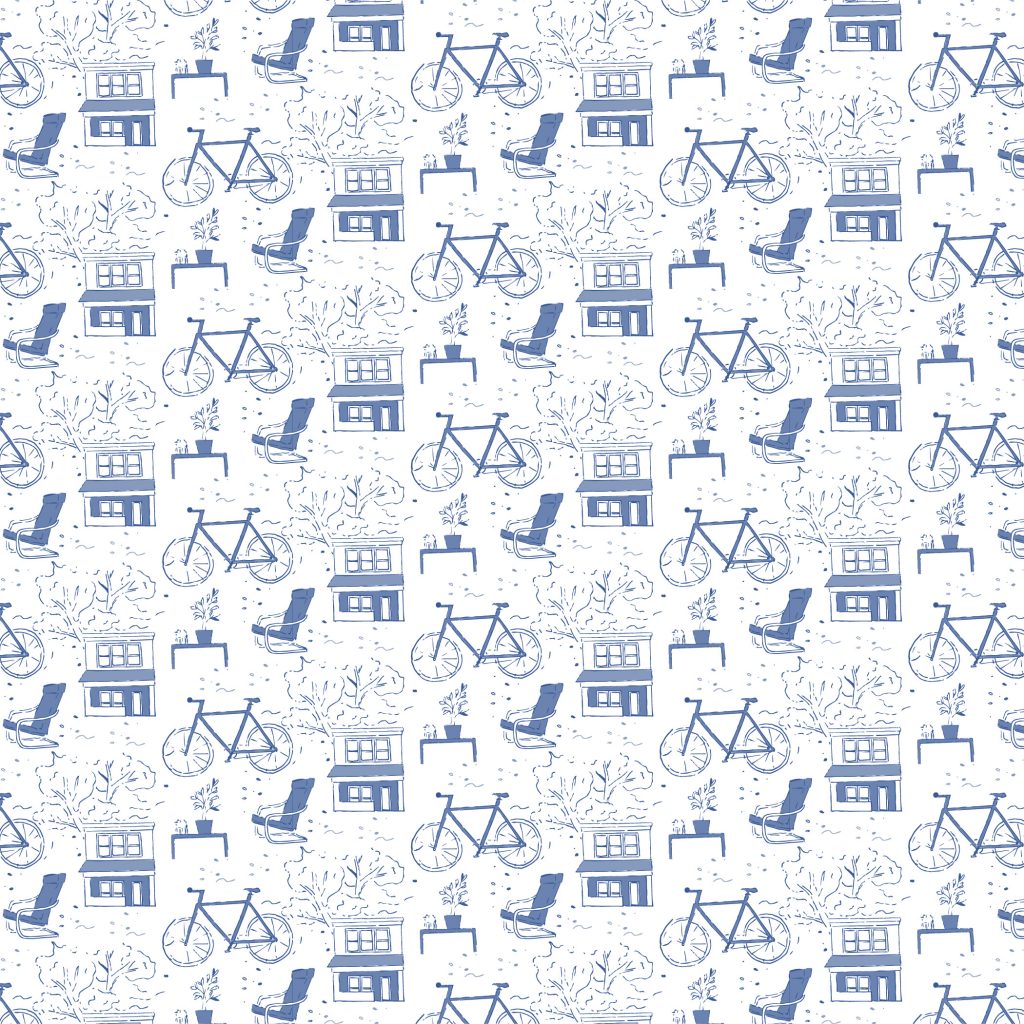
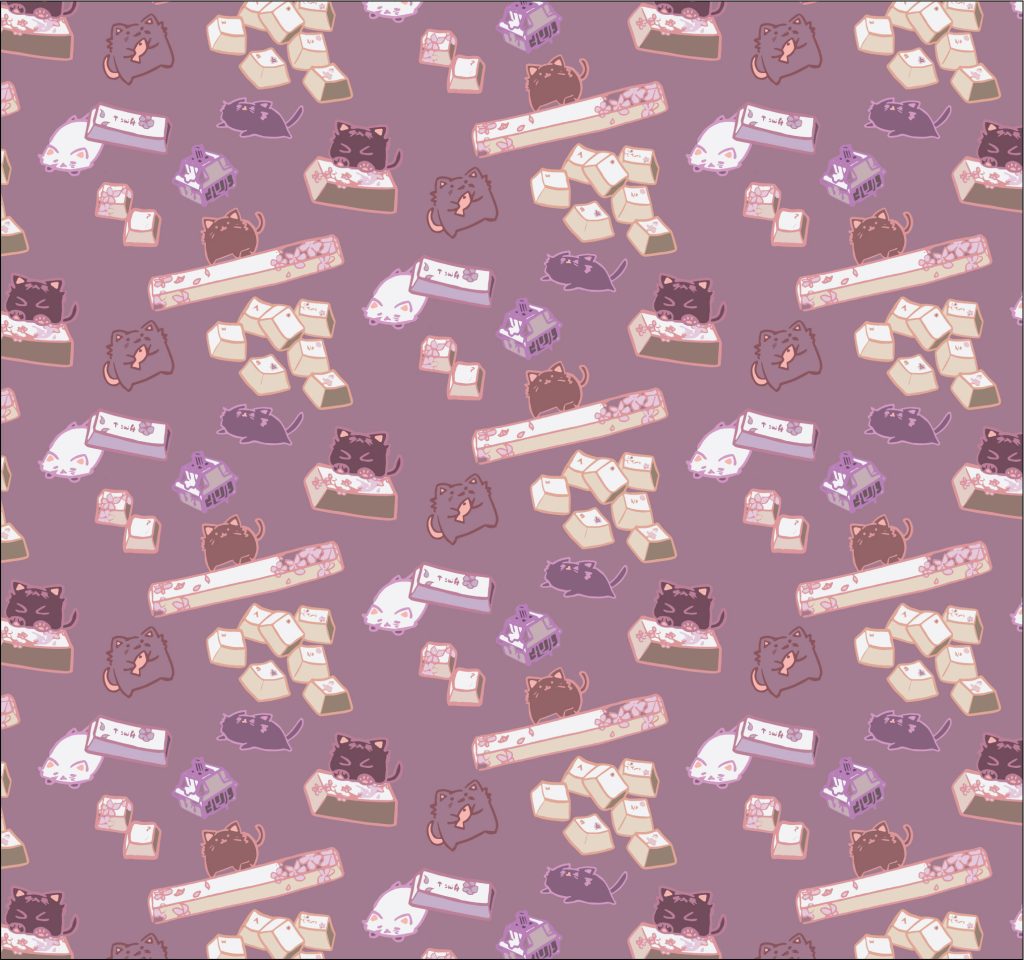
Since the review, I added a background color and integrated the cats and the keycaps a bit more. One of the color patterns is much more subdued and darker, with more shadows on the keys. Meanwhile, the other one is more lighthearted.

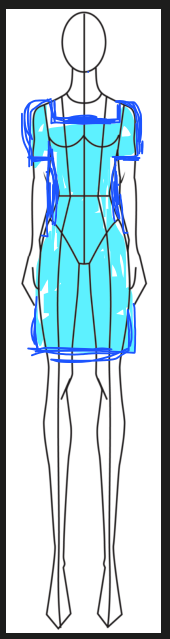
In terms of where I might see this, I think this would be really cool on the inside lining of a jacket, maybe on a mask.

Independent Project Proposal – Annie

With my final project, I want to explore childhood fantasies through embroidery on a denim jacket. Video gaming was a source of escapism for me when I was young, and this one game, Okami, really made an impact on me. Okami is a game which combines Japanese folklore and mythology, and you play as a a wolf goddess running around the country while wielding your powers through a brush. In this game, your drawings literally come to life and your power levels come from people’s faith. I wanted to convey those concepts, artistic freedom and self-belief, through this project, and so I took the one of the final weapons of the game and designed it so it would fit on the back of a jacket.

I’m planning on using an appliqued felt piece for the red circle (mostly since it would be very difficult to embroider something of that size and I’m running out of red thread), and embroidering the darker flames onto it. For the rest of the designs, I’m planning on using embroidery thread since I can create different textures and different thicknesses using those. Given that, I’m thinking of creating more elevated areas in the centers of the swirls.

Timeline

Week 1 (11/24-11/27): embroider red piece and applique it to jacket

Week 2 (11/27-12/4): embroider back of jacket

Week 3 (12/4 – due date): embroider sleeve

digital repeat pattern – maddie

Historical pattern

For my digital repeat pattern, I am interrupting a historical pattern. The pattern above, found in the Met collection, was the inspiration for my pattern. By taking central elements from this historical pattern, I was able to create a similar pattern.

This is the final swatch / block design for my pattern. To “interrupt” the historical pattern, I took key elements like the fish, the waves, and the splashes and added a boat and a person. I added a boat because of the history in mythology of giant sea creatures endangering fishermen and destroying boats.

For the final swatch, I combined these two patterns that I had previously created so that there is more variety throughout the pattern. The pattern on the left is featured essentially the same and the pattern on the right was partially mirrored to create more balance between the two.

sample for print

Once patterned, I put a darker background so that the light pastels pop more. I chose to use a light color scheme to mimic the original historic pattern. I didn’t make the waves a solid color so that the darkness could be seen more and bring out the contrast with the lightness much more.

larger scale of pattern

I wanted to make the two patterns more offset from each other, but I found that making the block offset did not work when I went to create a pattern. I also had a little bit of trouble trying to fill some of the blank space in the top right corner of the swatch. In the end, I added another little splash in the corner to fill the negative space. Overall, I am happy with how the pattern turned out :))

Independent Project Proposal – Rachel

For my independent project, I wanted to make a quilt about my time living in Pittsburgh. The centerpiece would be a map of Oakland-Squirrel Hill area, where I would document where I have lived, and my daily routes to school. I would also stitch on elevations of the houses and my studio spaces. Drawing in the streets would end up becoming the quilting method of sandwiching the cloth. For materials, I will use found fabric (unwanted fabrics and old bedsheets), and the filling we received. I will do a mix of handsewing, machine sewing, and some embroidery.

Initial Sketch
Map
Map with elevation of Margaret Morrison, my second home (studio), but will include elevations of other buildings as well

11/22 Proposal
Gather materials, sketch streets on fabric, make buildings?, start sewing streets
12/01 Update Post
Finish sewing streets, Handstitch red paths and dots for points of interest
12/08 Due Date

Project proposal – Maddie

Create a proposal about the direction you are your project.  Include in your proposals the following: three developed sketches or collages of your idea, a paragraph that states the core concept, a paragraph that articulates your choice of materials, and a practical timeline for your project. Create a blog post for your proposal for Nov. 24 in category labeled Independent Project.

For my final project, I plan to make small stuffed animals for my friends. I have asked each of them what their favorite animal is and sketched out concept drawings for a cat, a bunny, and a penguin. Since we are nearing Thanksgiving and the holiday season, I want to show my appreciation for my friends by making these and giving the stuffed animals as gifts to them. Throughout this project, I will learn how to design patterns for 3D objects, continue improving my machine and hand sewing skills, and learn about some methods of applique.

For materials, I will be using a variety of fabrics that I have on hand. The cat will use red and orange fabric for the main head and body, the bunny will use the bleached muslin fabric, pink felt for the ear details, and white yarn for the pompom tail, the penguin will use bleached muslin and blue fabric for the body as well as orange for the beak/nose. The black felt will be used to make eyes and other face details as well as black embroidery floss. Not pictured, I will also use some of the quilt batting to make the ears for the bunny and the arms for the penguin because it will add some structure without fully stuffing those parts.

Timeline:
11/30 – Finish patterns
12/6 – Finish main bodies
12/8 – Finish final details
12/8-12-10 – Final presentations / critiques

Digital Repeat Pattern – Rachel

My digital repeat pattern is of things drawn from my environment of my past couple of months being home. I have my house in Pittsburgh with the huge tree that blocks my window, my bike which I have been riding more since quarantine, and a lounge chair in front of a table of plants where I sit to work sometimes. This pattern is envisioned to be for wallpaper, or possibly someone’s (my) bedsheets?

Original hand sketch
Digital Swatches

There are three color patterns- the first two using the blue often found on fine China, and other of fall colors as my choice of color palettes but is easily adaptable. The pattern was designed for a brick pattern, that way the objects in the pattern fit together better. The leaves help fill in the gaps as well.

Looks like a sketch, not filled in for a more subtle look on walls
Objects starting to be filled in for a stronger pattern
Outline with fall colors, maybe the pattern for a notebook

Even though I had been using Adobe Illustrator for 4 years now, this was my first time making a pattern! It was not as hard as I thought it would be, and will be using this skill more often.

Render of the wallpaper pattern in a restaurant

Final Project

By Remi Adeoti

Create a proposal about the direction you are your project.  Include in your proposals the following: three developed sketches or collages of your idea, a paragraph that states the core concept, a paragraph that articulates your choice of materials, and a practical timeline for your project. Create a blog post for your proposal for Nov. 24 in category labeled Independent Project.

The core concept of the project is to imitate adire patterns created with Yoruba traditional indigo dyeing. I want to dye about 9 patches with 4 patterns that will be repeated. The ninth patch will have a pattern but its main function will be to highlight the names of my family members. My last name means “The crown that never fades” so I wanted to incorporate that by taking an aspect of the same tradition that is not as celebrated and making sure it doesn’t not fade by trying to honor it. To incorporate the names I plan to embroider them using a back hand stitch (most likely).

For my choice of materials I will use muslin, cotton batting, embroidery floss, and an indigo dye kit. I will be using muslin, because I know I will need a goof amount of it and its easier to obtain. I expect the dye to come by next week, which will provide everything I’ll need to set up. The color of my embroidery floss will be a blue that is not as rich as the indigo dye however I want it to stand out without contrasting. I want the names and the patterns/dyeing to feel like they are working together rather than separate.

Timeline:

11/29- Dyeing Process will be complete

12/2- embroidered names will be complete

12/6- Quilting of each piece will be done

12/8 – Pieces will be stitched together

12/10- Final Presentations

Independent Project – Erica Fu

This is something I made after the weaving unit, but I could explore the idea of an adjustable cloth more and make it into a usable product (not sure exactly what yet).

These are pleats I created to continue that idea of an adjustable or movable cloth, so I could potentially add color between the pleats to add an element of surprise.

Finally, I always wanted to try constructing a whole dress, and right now I am into the structured square neckline look.

Final Project Ideas – Jesse Wallace

After brainstorming and reflecting, my final project ideas are below:

  1. A full rigid loom project, using brand new techniques to make an abstract landscape 
    1. Specific techniques to learn: 
      1. New knotting techniques
      2. Blending colors 
      3. Different yarns on the rigid loom 
    2. Meaning: 
      1. Ive been practicing manifestation and working on improving my mentality about things through focusing on the good. I would like this project to be a switch from the bleak “Textiles from the Future” project and switch gears to a more hopeful visual and physical piece. 
  2. A digital print, building on my illustrator skills to produce a powerful and personal reflective piece
    1. Specific techniques to learn: 
      1. Get better at Illustrator. I want redemption! 
      2. Sketching and transferring the very real things in my life to a 2D plane. 
    2. Meaning: 
      1. I want to use this piece to look inwards and reflect on the physical and metaphysical aspects of my life, combining them into a colorful and bright pattern with energy that reflects who I am. 
  3. A big embroidery, with an intricate and personal pattern 
    1. Specific techniques to learn: 
      1. Creating symbols with my embroidery 
      2. More embroidery stitches 
    2. Meaning: 
      1. It would be intriguing to create a textile piece that represents this absolutely weird moment in time. Through a detailed embroidery, I am excited by the idea of building up a representation of life that is captured not by a photo but by a physical textile. 

More inspiration for a creative weaving project:

  1. Make a diary shadow box for different phases of your own life(with weavings) – make your own shadow boxes, press flowers, weave lil guys, put fabrics/objects in back as well
  2. Make a tech and weaving interaction – something that measures heartbeat?