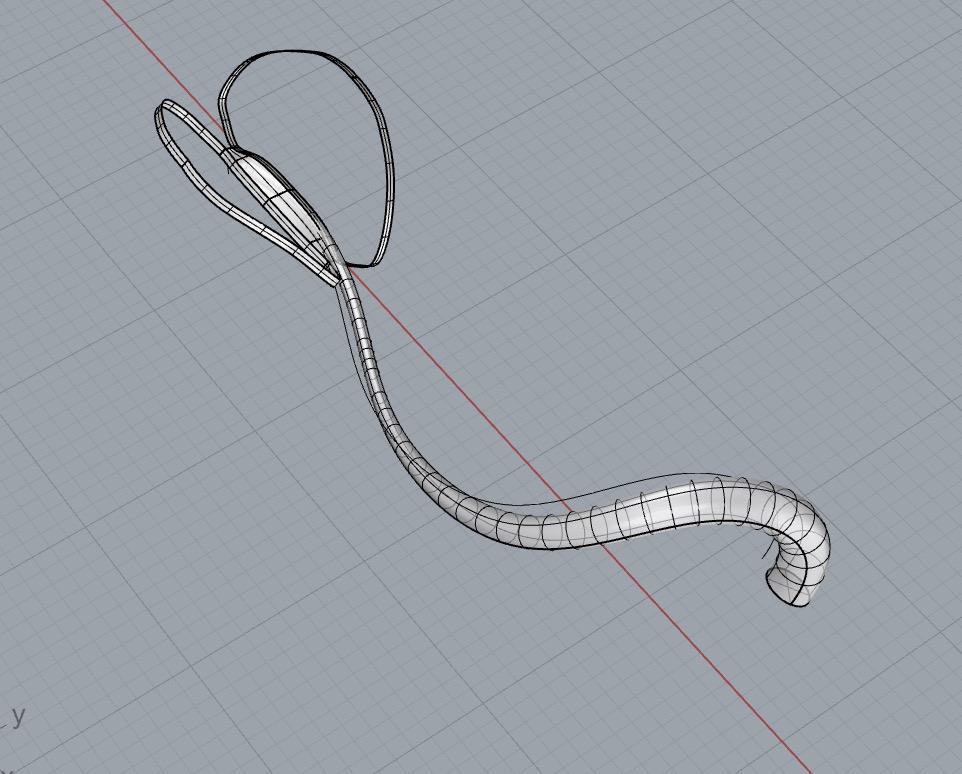
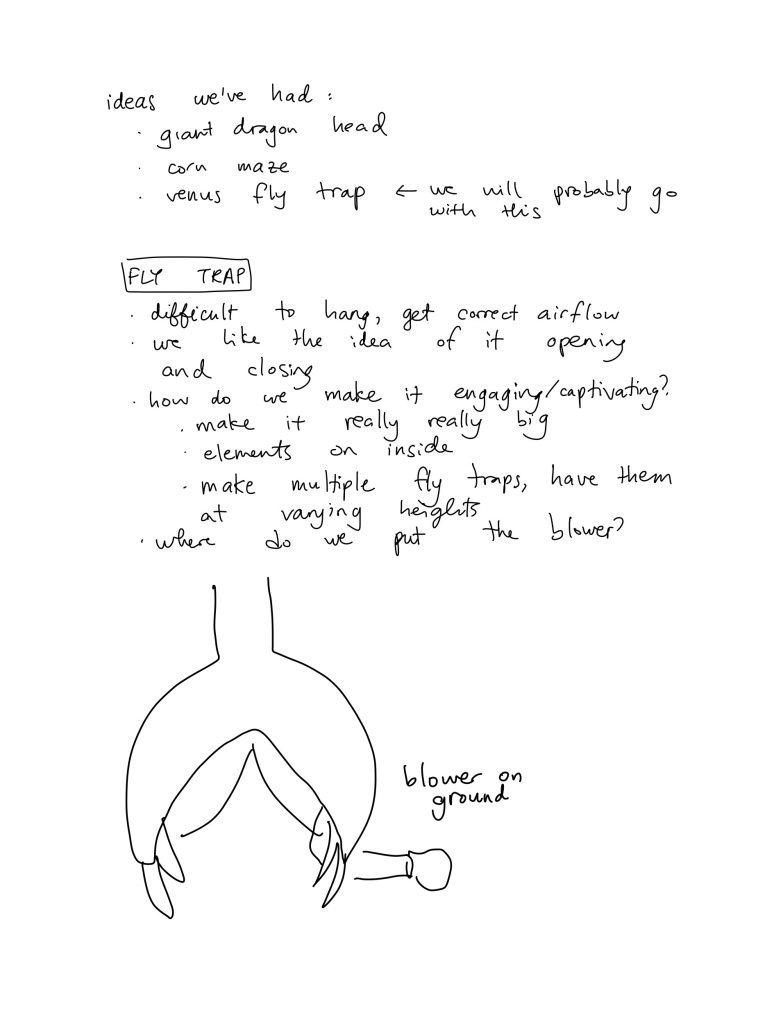
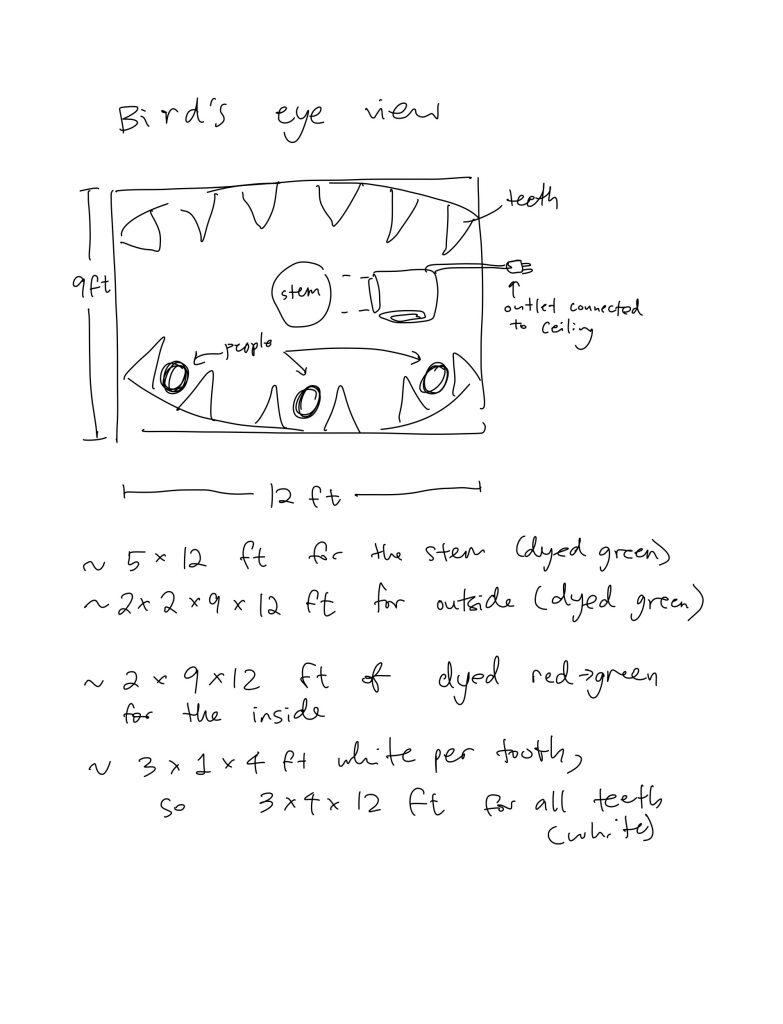
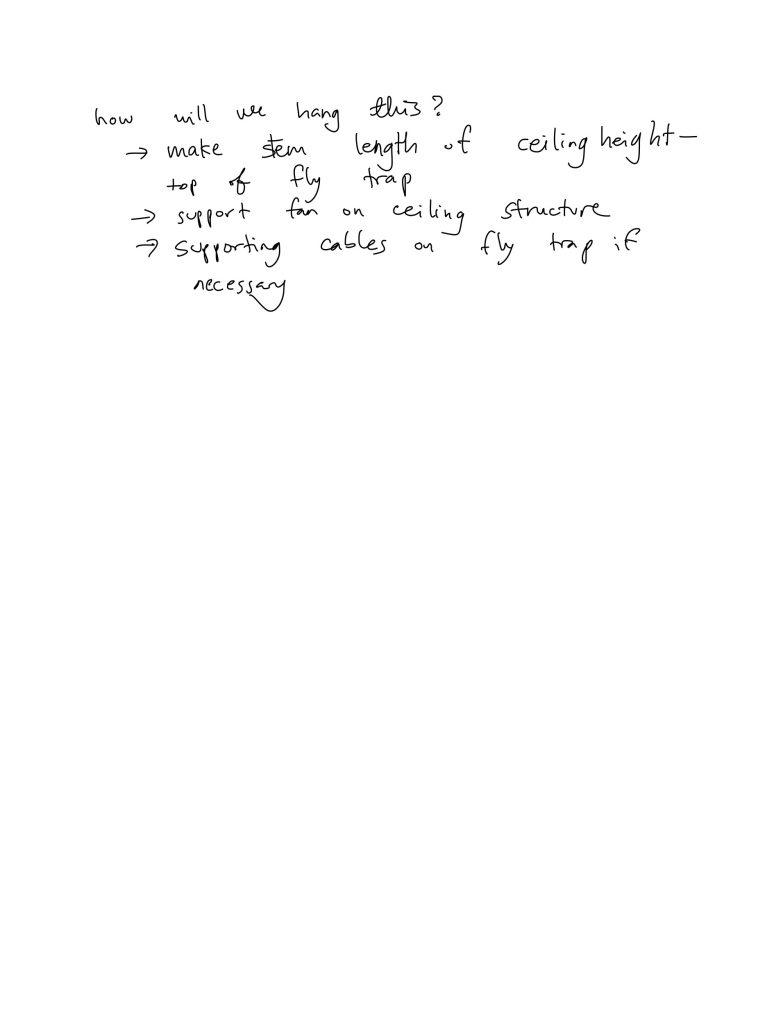
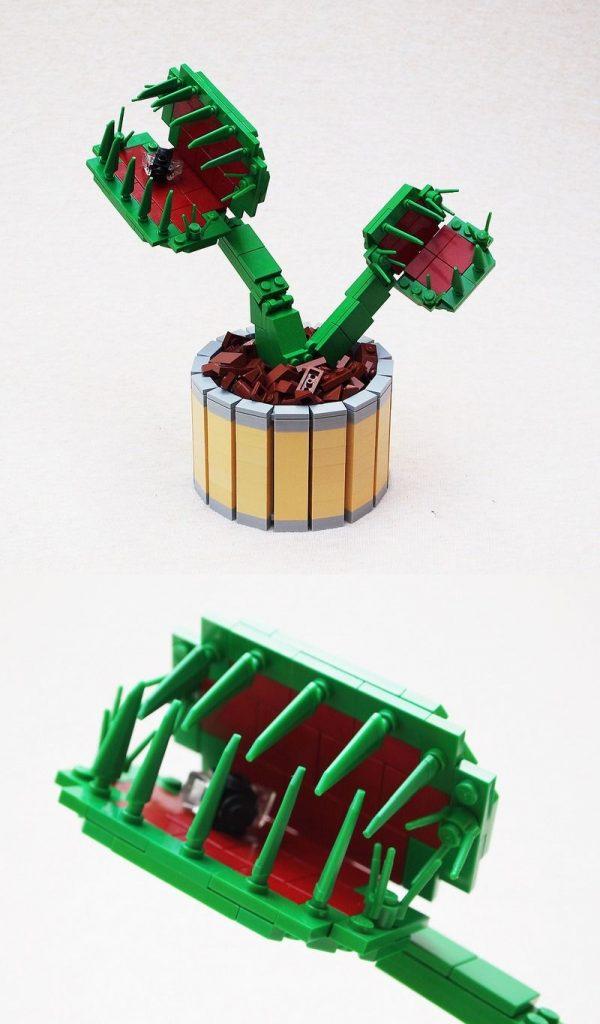
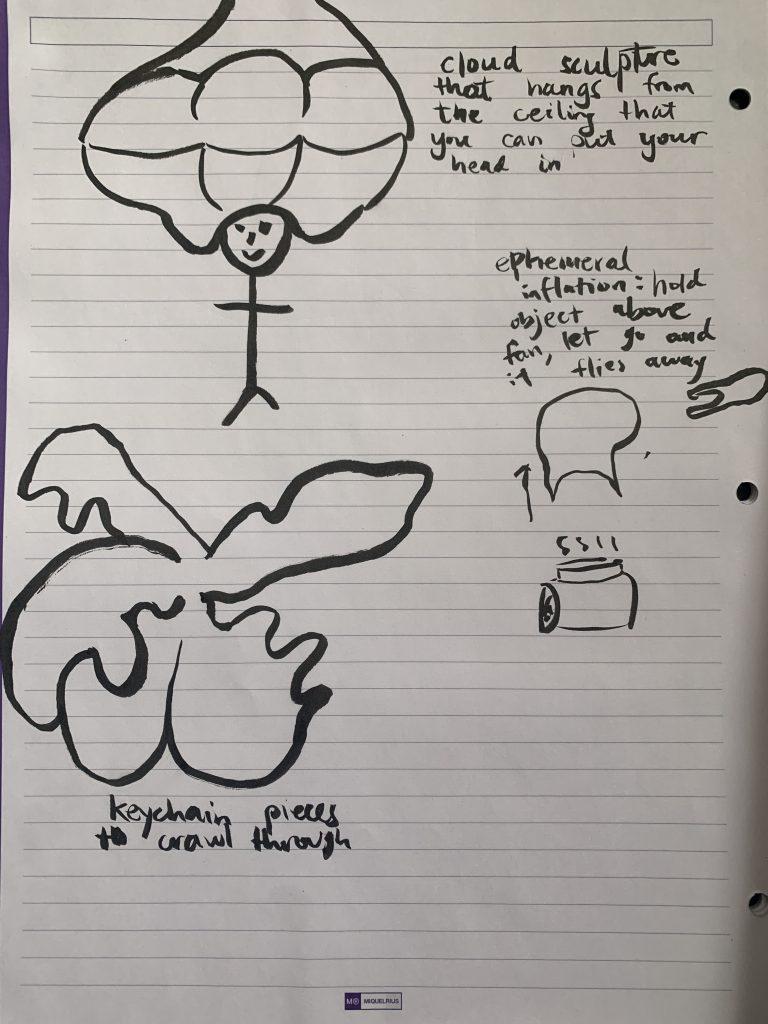
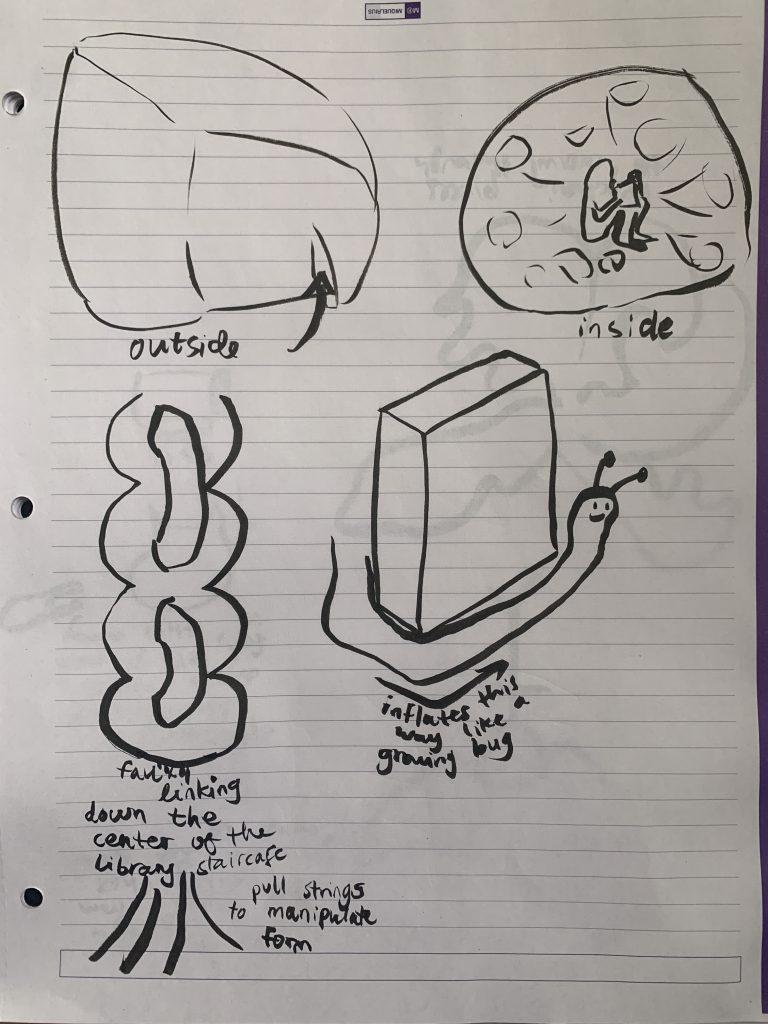
For our final project, we want to create a giant hanging venus fly trap. We intend to make the fly trap big enough for several people to enter it at once. We want to create a space that allows people to interact with one another and enter a transformative space. A standing person would have anywhere from the waist up to just their head in the fly trap, and a person sitting in a wheelchair would be able to put their head in. People would either be able to walk through the fly trap or stand between the teeth. We want to be able to open and close the fly trap. The stem of the fly trap will be connected to the fan blower, attached to the ceiling. We intend to dye our own fabric: the stem and the outer layer would be green, and the inner fabric would be a gradient from red to green. The animation could be projected onto the inside of the fly trap, the ground underneath, or the outside of the fly trap.
After discussing our proposal with the class, we decided it would be best to begin the project by making the body of the fly trap first, then seeing if we have time to hang it. If not, an alternative final product would be putting the fly trap on the ground.
(click the link above to view a video of the inside – I cannot directly embed a video)
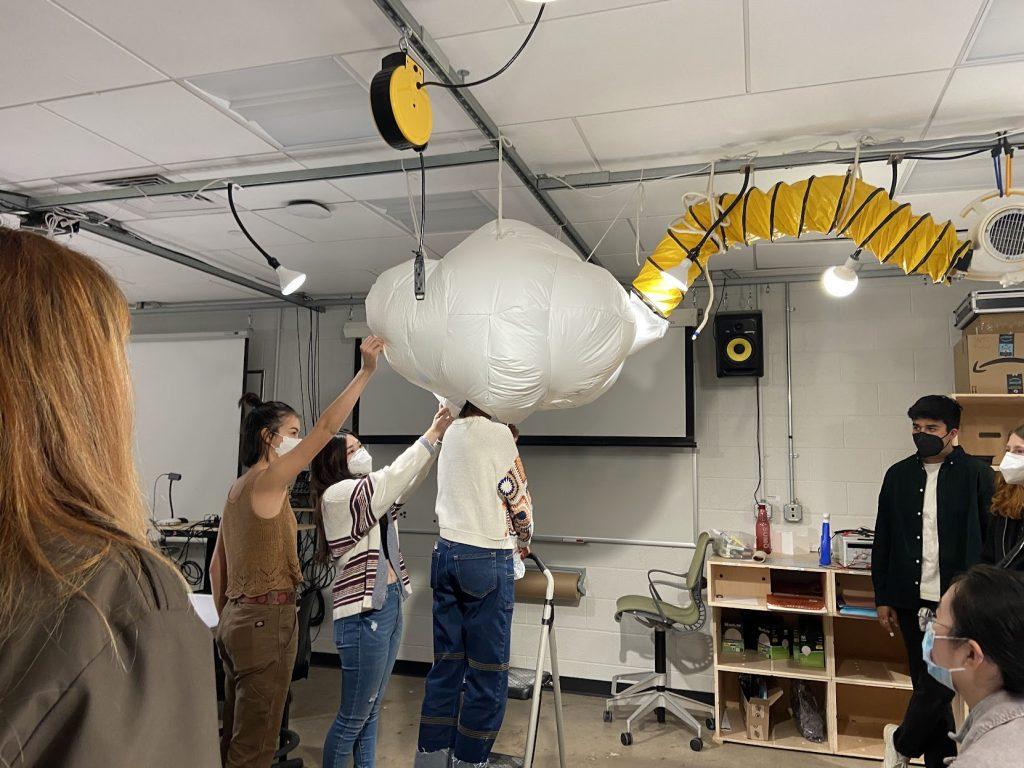
We began work on this project by discussing how we could combine our inflatables. We ended up deciding on a combination of Jennifer’s cloud vase, Charlotte’s bacteria thing, and Sandy’s decorative elements. We wanted to create a physical manifestation of “head in the clouds”. We modeled the cloud in Rhino, which proved to have many difficulties – the doubly-curved surfaces wouldn’t squish properly, and when they did squish they broke into many small pieces that were difficult to assemble. Despite these issues, splitting the project up into smaller chunks was helpful because we could each individually work asynchronously on our own pieces. We wanted viewers to be able to put their head in the cloud, so we just cut a slit at the bottom of the cloud. We were worried that too much air would leak through it and the cloud would deflate, but we were happily surprised to find that there was enough airflow to keep the cloud inflated with a head-sized slit. We were also worried that the decorations inside would swing around too much and become tangled, but they mostly just gently moved. The feedback from the class was good to hear and very helpful. We especially liked the commentary on how there are two experiences a viewer can have with the cloud. Being inside the cloud is transformative, bright, and calming; being outside the cloud is funny to see someone put only their head in an object. If we were to expand on this project, we would make it bigger and add more slits so the inside experience could be a social one.
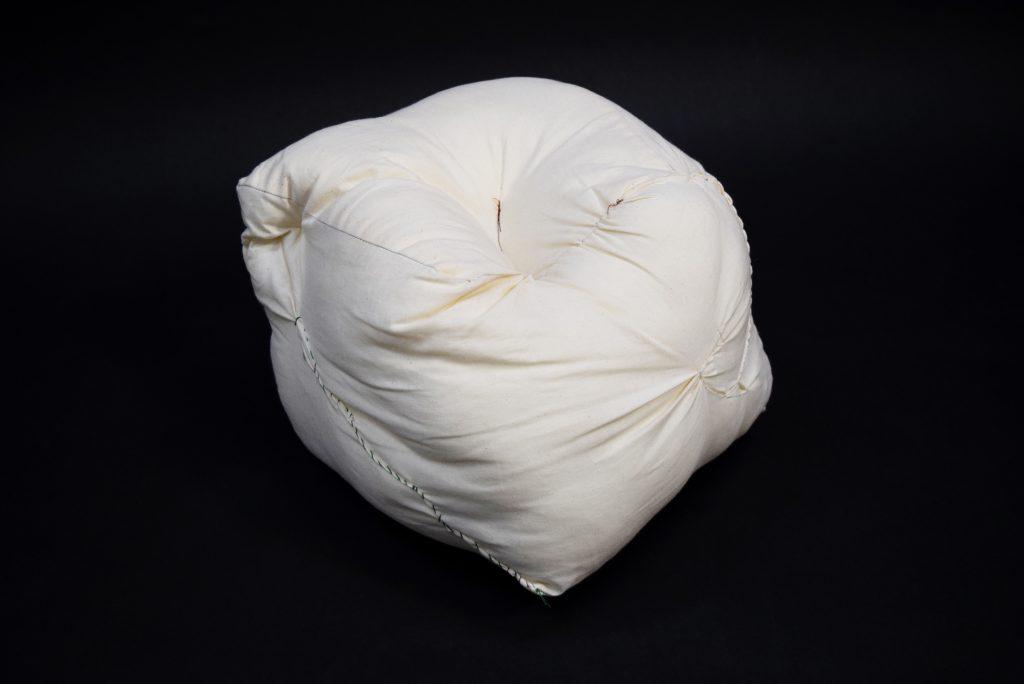
I used my first inflatable as an opportunity to get situated with some of the basic techniques. Object 1 is just a cube with a few added features – baffling using thread once the form was stuffed, a plane of fabric inside the cube also acting as a baffle, and some stitching on the outside to cinch the fabric and add texture. I liked the secrecy of the plane inside the cube, and the thoughtfulness it required when assembling the form.
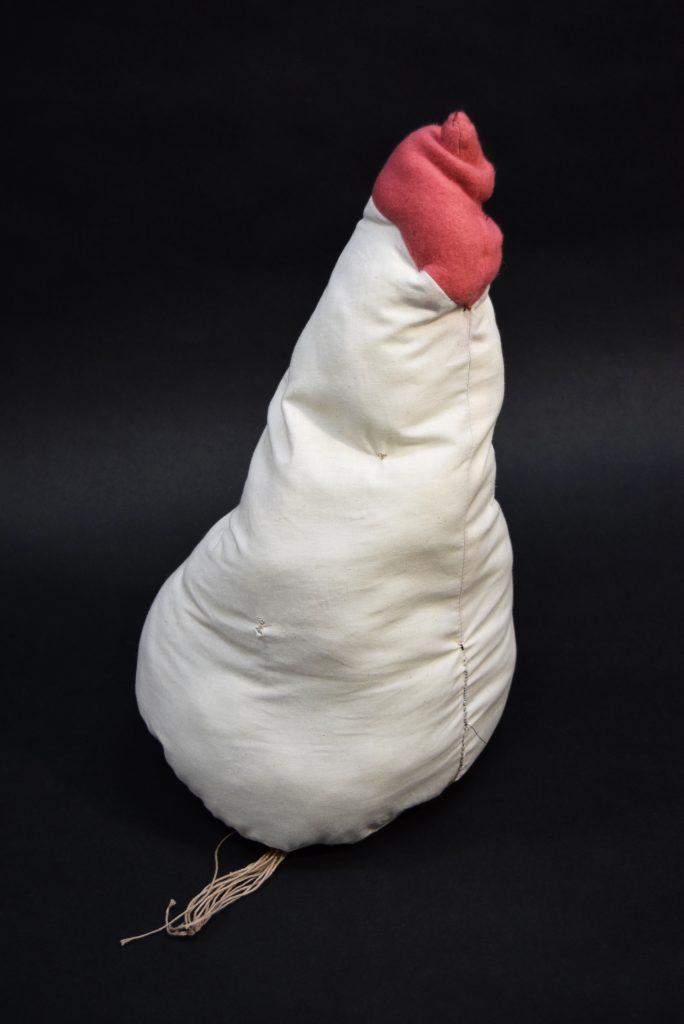
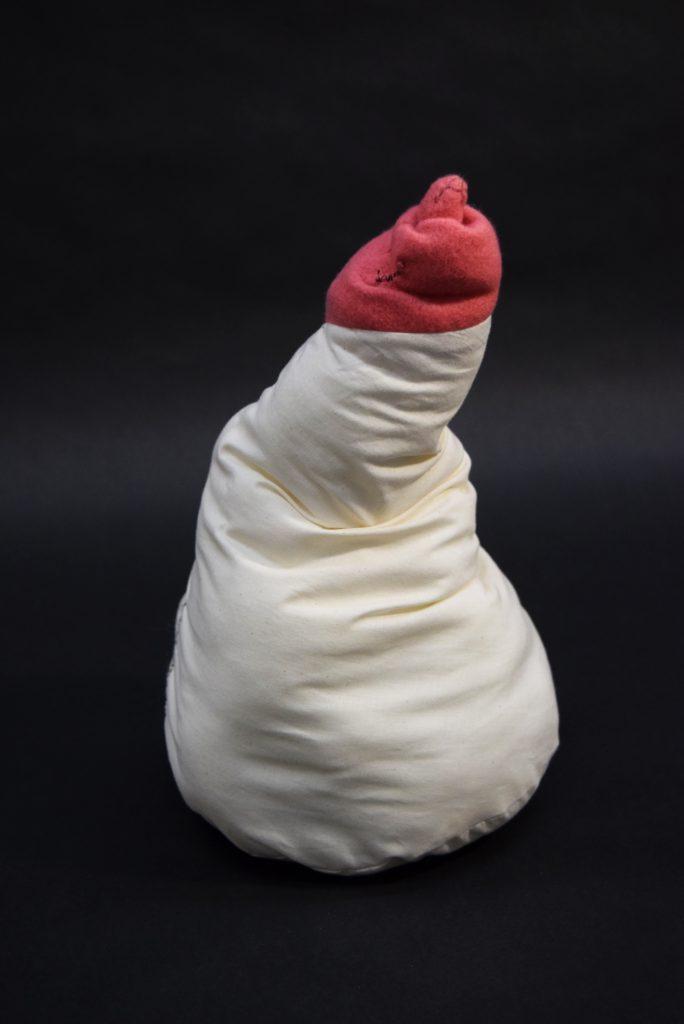
Object 2: Cone Breast
I wanted to construct my second object with a little more intention, so I created a manipulatable cone-shaped breast. My inspiration came from women’s style in the ’50s, when cone-shaped breasts were popular. I was also thinking about how women are constantly manipulating their bodies in order to meet society’s beauty standards. First, I constructed the basic cone shape. Then, I partially filled it, and attached strings to the wall of the cone. I cut holes in the wall so I could tie the string around the fabric (sewing the string in seemed too challenging). Then, I routed the threat out of the inflatable via a hole in the bottom of the cone. When you hold the cone from the bottom and pull on the strings, the cone collapses. Thinking technically about this piece, I enjoyed the interactive feature but also the idea of having elements that are both inside and outside of the object.
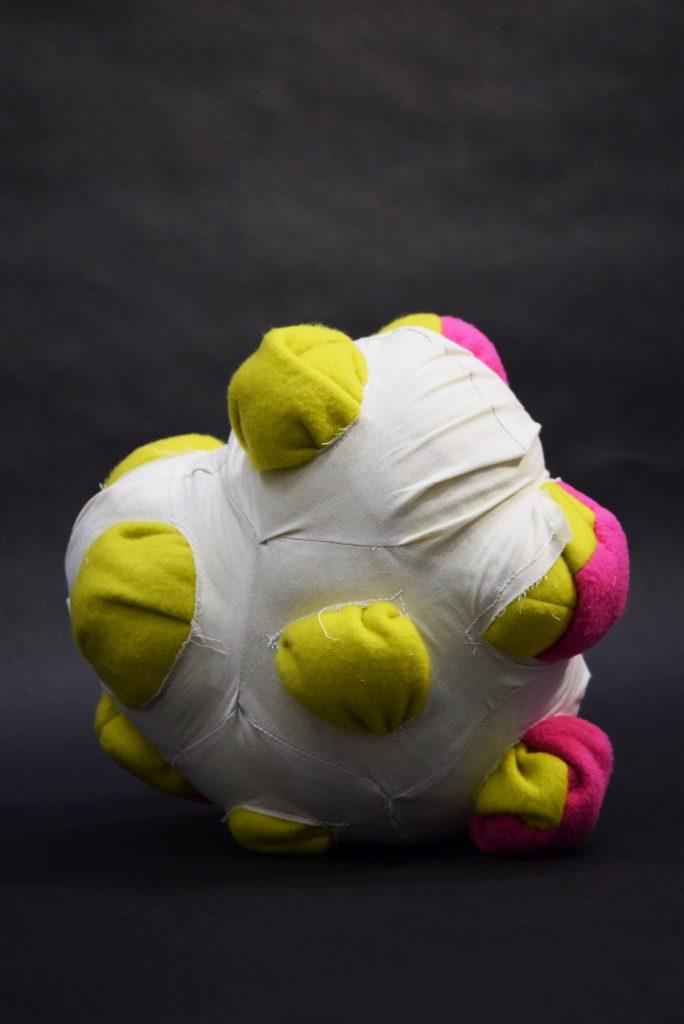
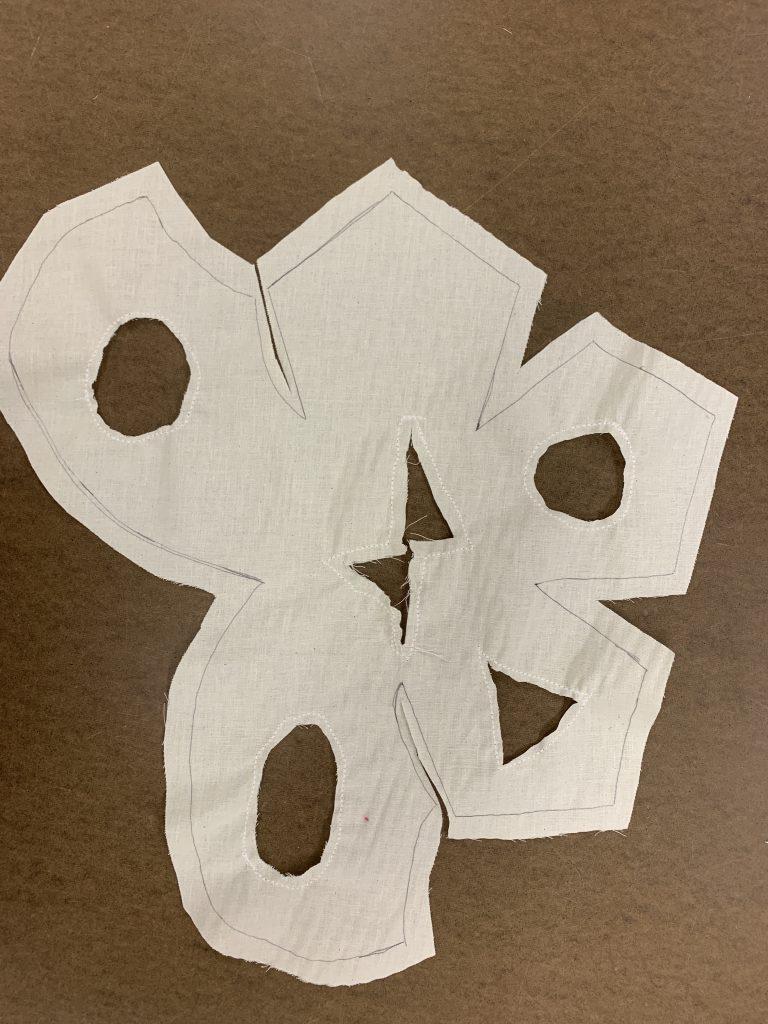
Object 3 – Sphere in a sphere
For this object, I wanted to try out the slash and spread technique and also think about how one form can constrict another. I had recently rewatched Vihart’s spherical snowflake video and wanted to expand on the idea. First, I made the pattern for the outer sphere. I made this one out of muslin, because it is a more rigid fabric that I thought would be able to nicely constrict whatever was inside. I then sewed a hole into each of the “pentagons”, and mostly assembled the distorted sphere. Then, I constructed a felt sphere with a larger pattern, stuffed the felt into the muslin sphere, and then stuffed the inner sphere. I chose to use felt for the inner sphere because it would stretch and then bulge out of the holes. I had to do some manual manipulating of the felt and poly-fil to make sure that the inner sphere bulged out of the outer sphere, but once everything was filled and sewn I was happy to observe that the object retained its lumpy shape.
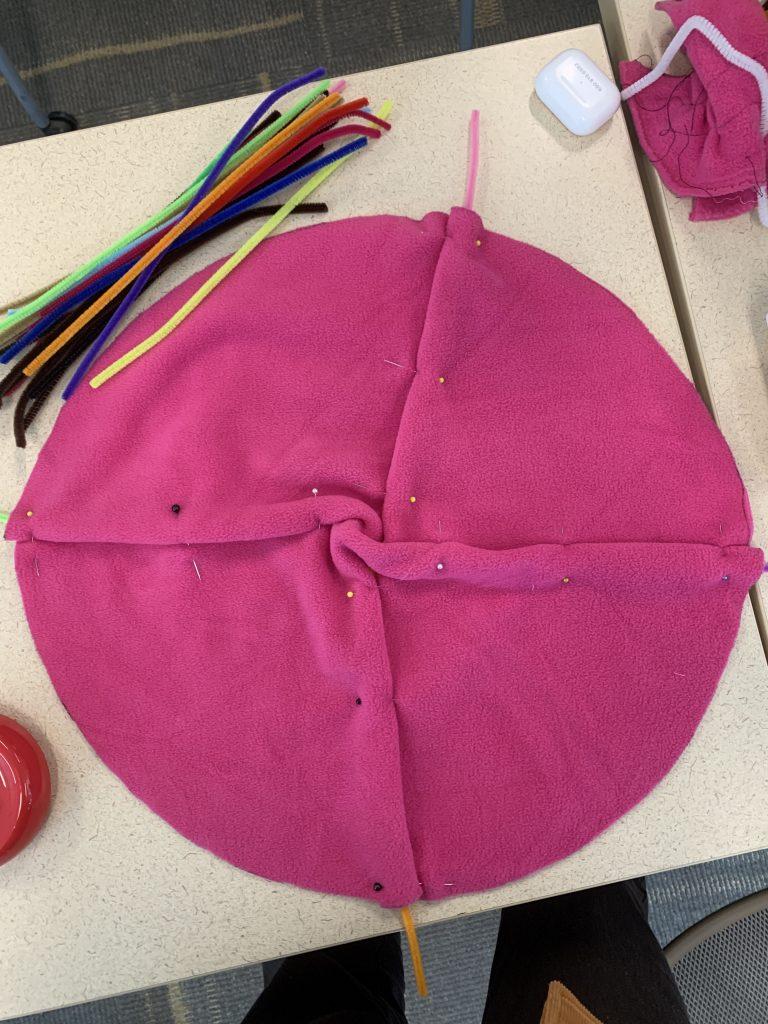
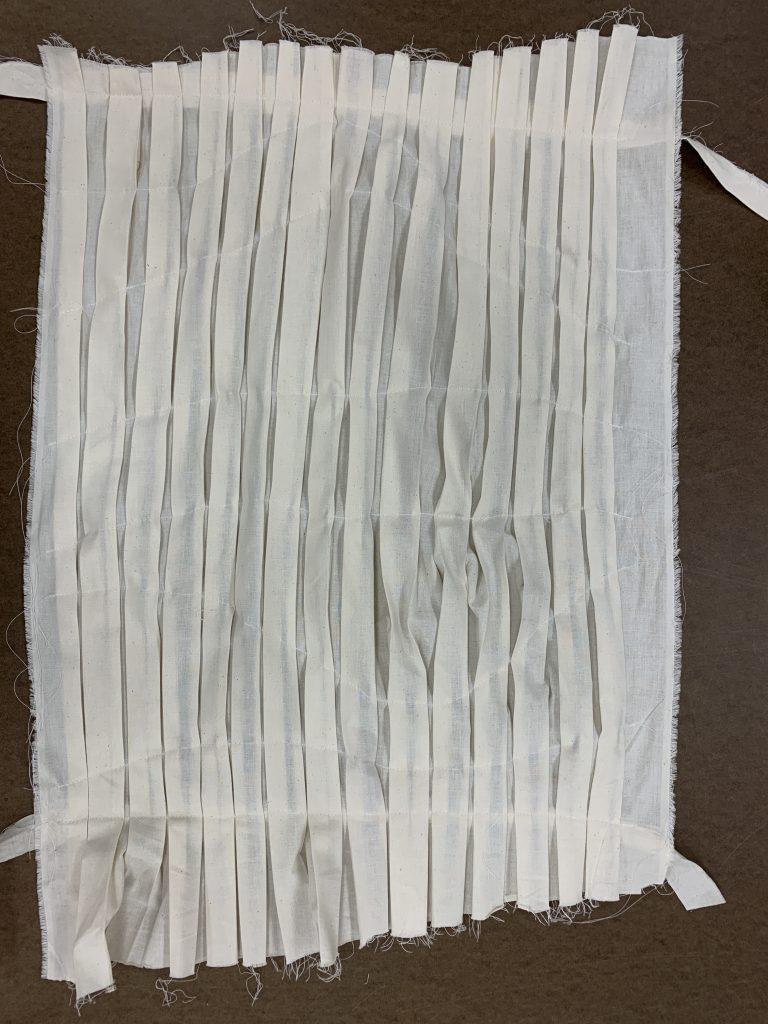
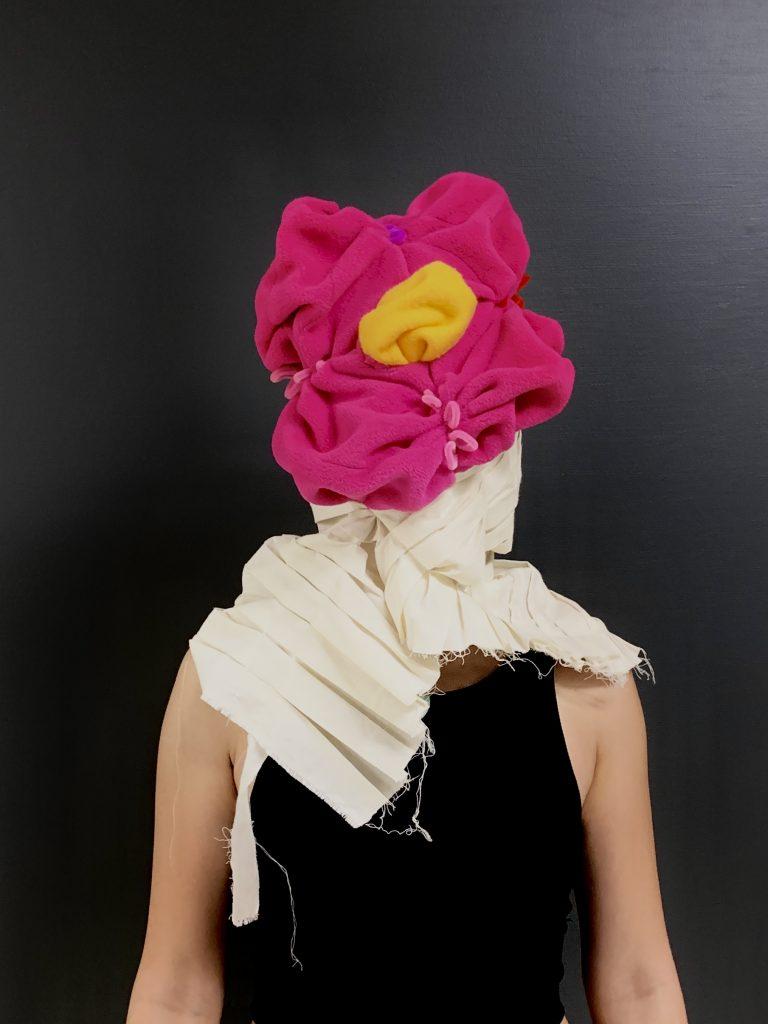
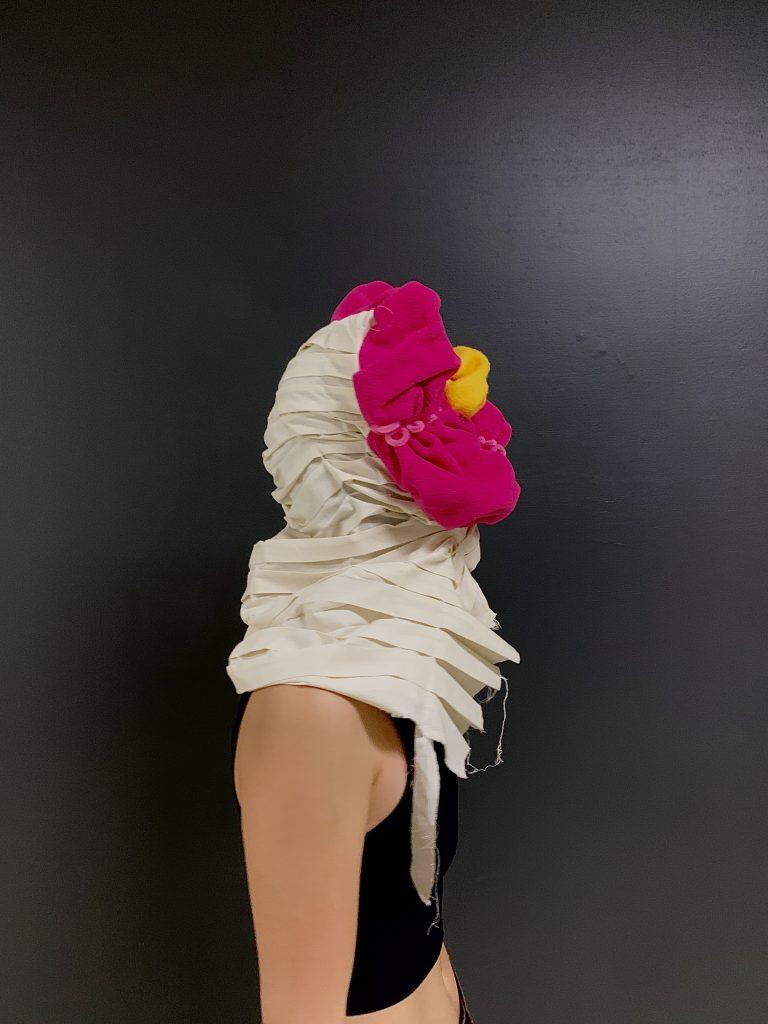
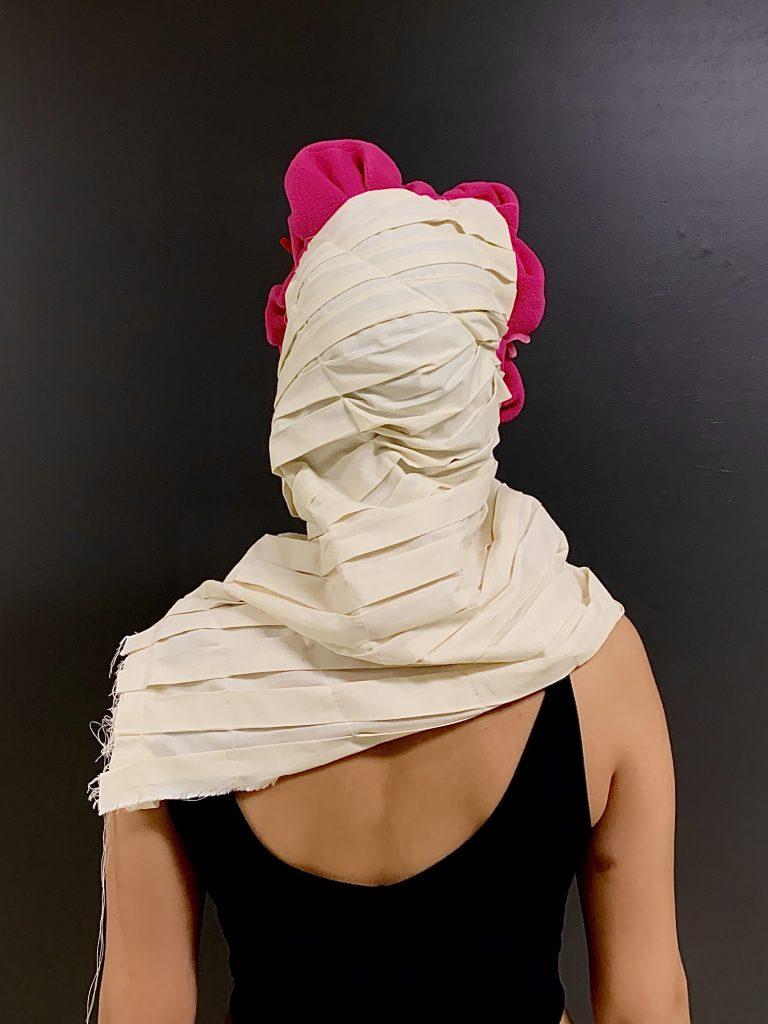
Object 4 – Flower headpiece
My final object replaced the CAD assignment, so I wanted to create something that reflected my choice not to use CAD. This object was entirely improvisational. I started by sewing pipe cleaners into a felt circle so I could pull the loose parts to cinch the fabric together. When I did so, it looked sort of flower-ish so I added a yellow circle to the center. I knew I wanted to try out box pleating, so I made a sheet of box pleated muslin. I sewed curving lines across the pleats to pin them down in places so the whole sheet wouldn’t just unfold. I found that these curving lines result in the pleats inflating in unusual and unexpected ways – this is something I’d love to explore more in future projects. Once this sheet was completed, I sewed the flower onto the pleated muslin and it just happened to create something that looked like it would fit great on my head. It did fit on my head, so I decided this object would not be stuffed with polyfil. It didn’t much need it anyways – the flower sort of self-inflated because of all the cinching and pleating. I pleated the yellow circle so it would fit in the hole I cut in the pink felt, and I also pleated the pink felt when I sewed it to the muslin. All of this constriction ended up giving the felt some structure. Felt also seems to retain its shape semi-nicely anyways, so that was a nice feature of the fabric that I enjoyed with this project.
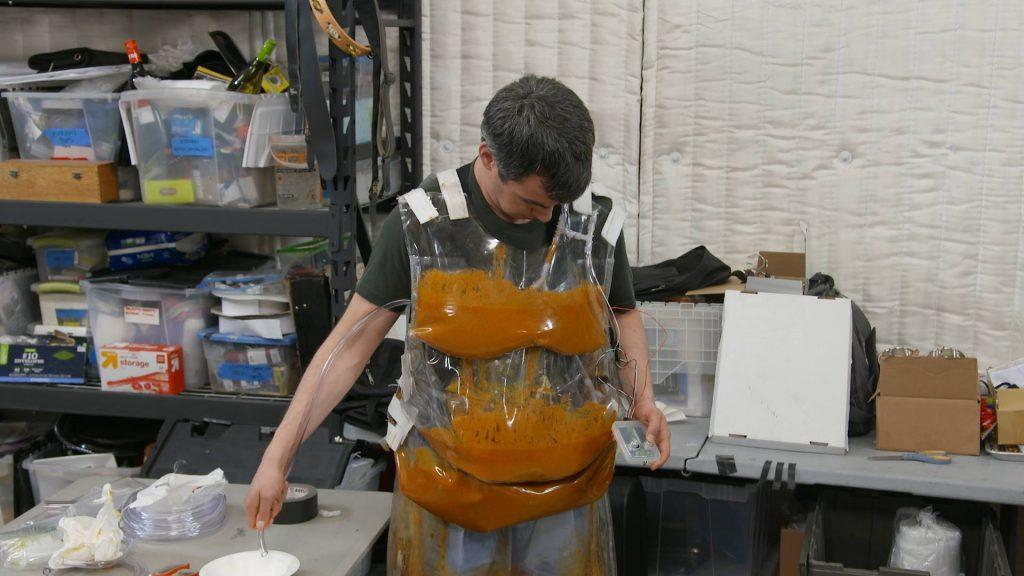
I wasn’t sure if our examples had to be art, but I think you could argue this is art in a way. My example is Nathan Fielder’s chili suit (season 4 episode 2). In the episode, Nathan creates an inflatable suit which he fills with chili. The suit is fitted with a pump for dispensing the chili. He then wears the suit into a baseball stadium with clothes on top to disguise the suit, and sells chili discreetly out of it. While this is a pretty silly concept, I actually think it’s genius for a few reasons. First of all, I like the idea of inflating with unconventional material. I like that it is functional and wearable. I like that there is a mechanism for moving stuff out of the inflatable. I think these ideas can be taken further in other contexts. What if we thought of the inflatable as a system, with materials entering and exiting?
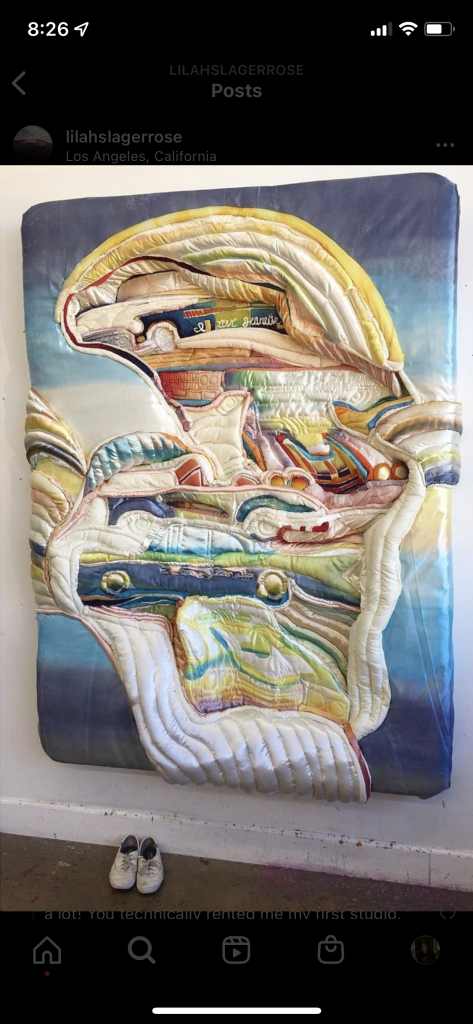
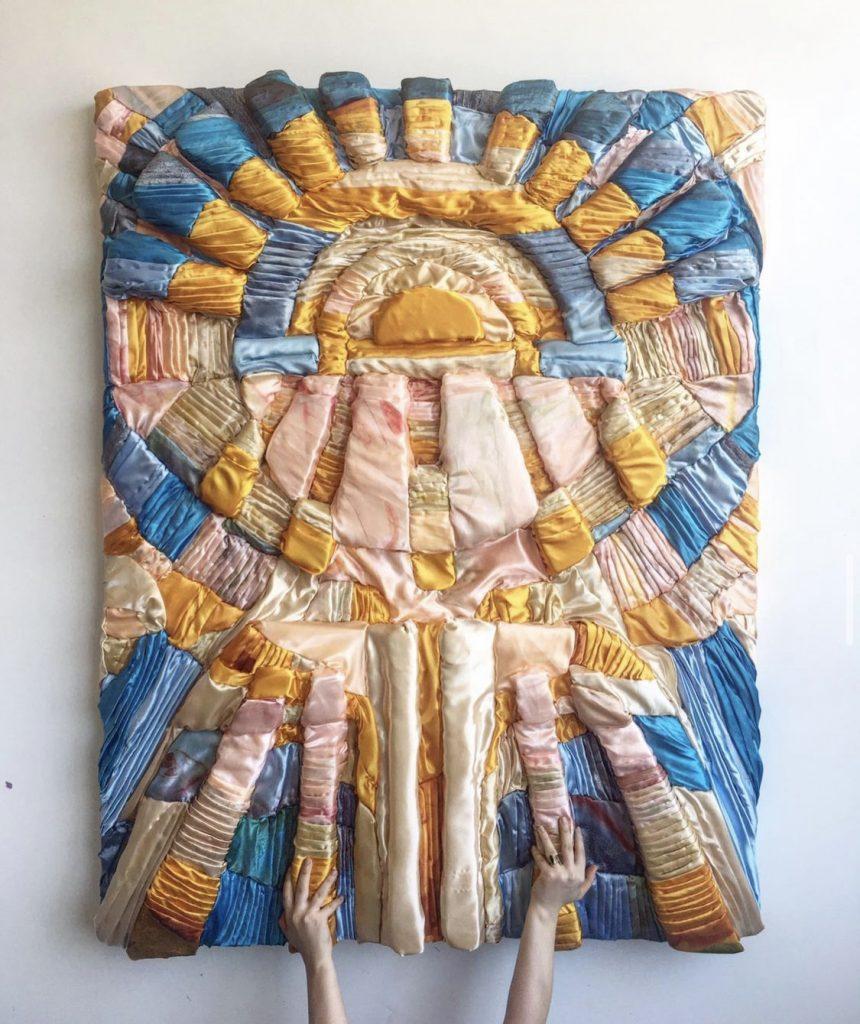
Okay I actually just remembered an artist who works with inflatables that I really do respect and is less silly than Nathan’s work. Lilah Rose is a soft sculpture artist from LA. Here’s what she has to say about her work: “I make soft sculpture, and I specifically make work that I hope will play well off the other elements of someone’s home. I want it to feel almost like a piece of furniture that lives on the wall. Something you could cuddle with. The home is such a precious place, and it’s very striking when you understand that the space you’re in is both functional and beautiful. The border between the art and its surroundings is there, but it starts to blur. I encourage people to approach me as an artist that will design something specifically for them and their house if they’ll let me. It flatters and serves us both, and it helps me associate with my work more as a form of portraiture.”
I got to see her work in a gallery in Berkeley last year. I love the materials she uses (often some sort of shiny fabric) and the colors (very dreamy and pearly). The pleating she does in some of her pieces is also so cool!!
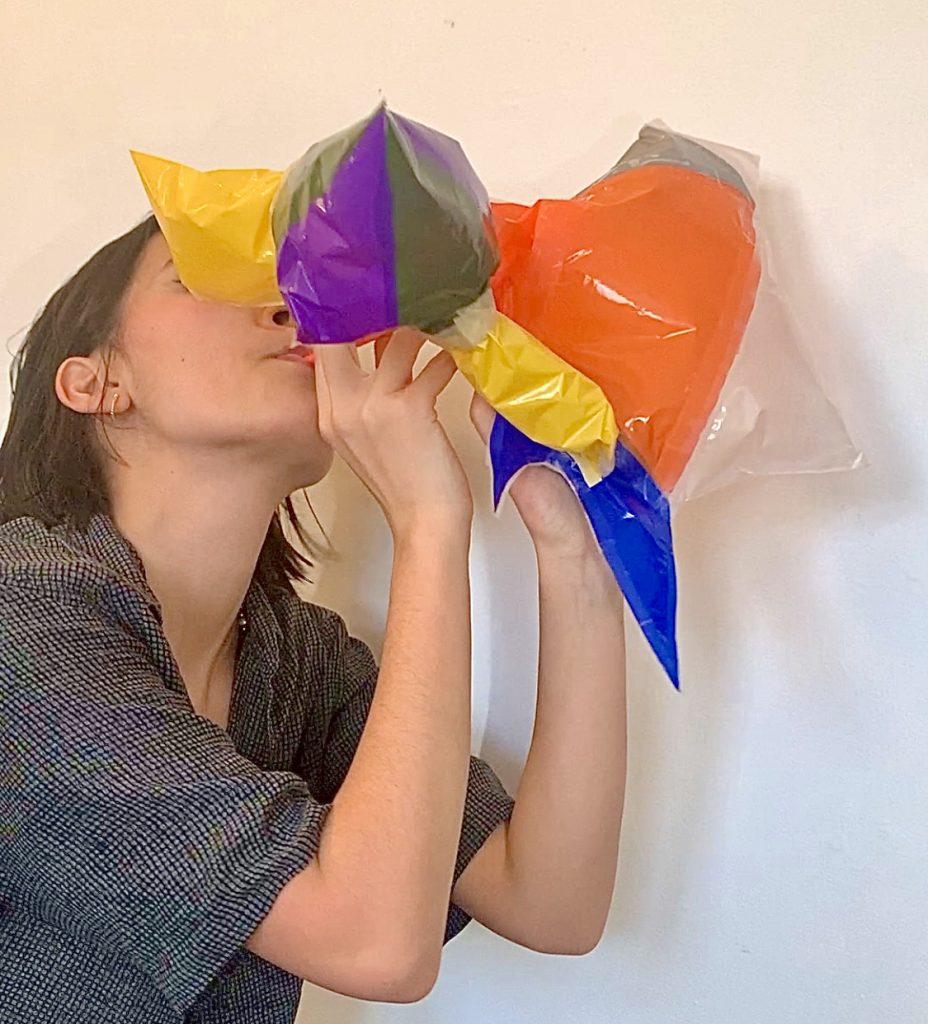
First I made this green and purple inflatable. I wasn’t sure how much trouble I would have wrangling the tape and plastic so I kept it simple with some angular shapes. It was helpful to use the corners and sides of the bags as edges because I didn’t have to tape them together, but I was expecting much more angularity from them than I really got. It seems like it is quite difficult to get hard straight edges with inflatables, but you can get soft edges and pretty good points.
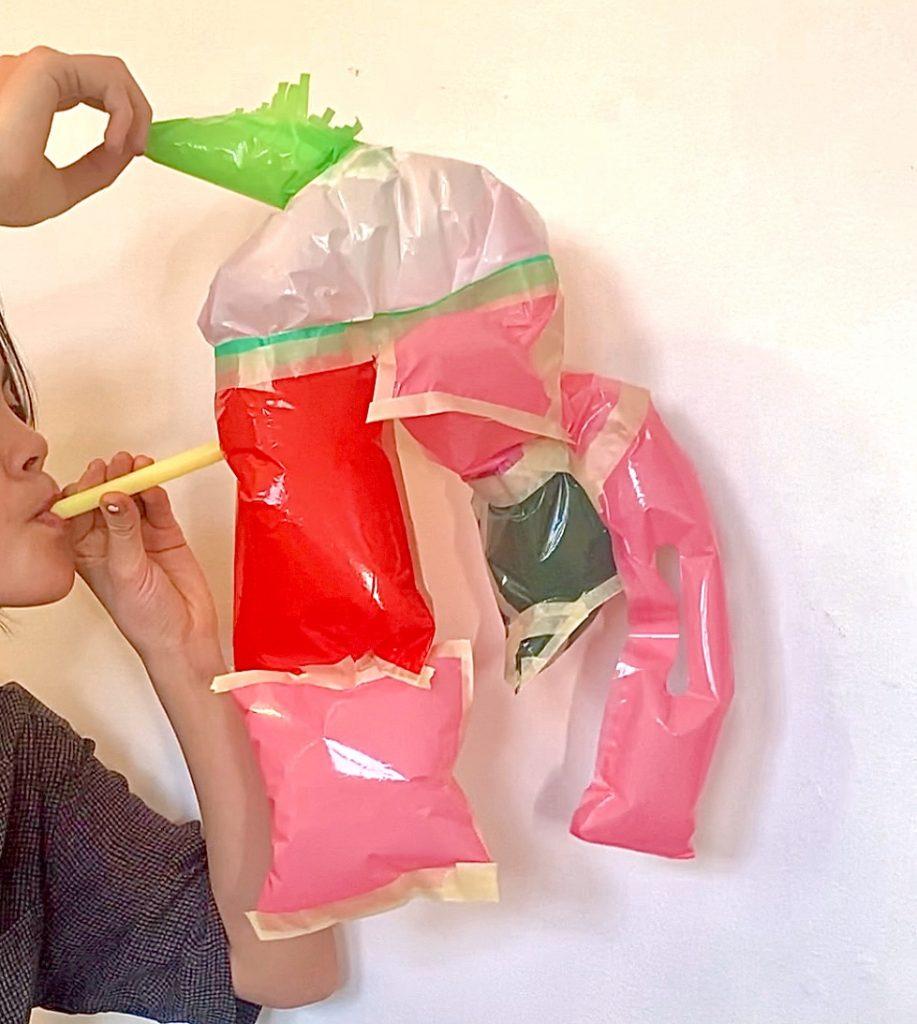
For my next inflatable I wanted to start with something round. I cut a piece of the white plastic into a circle, then ripped off a long piece of tape. I put the edge of the circle at the lefthand side of the tape, then went around the edge of the circle pleating and connecting the pieces to the tape. Once I was finished pleating, I connected the two ends of the tape. This piece looked sort of like a dome, but I was wondering what would happen if you connected two sides of the circle at a small point in between. Looking from the opening of the dome to the very top of it, it looked like the number 8. I thought it would make a cool shape, but when inflated the dome had too many gaps caused by the pleating for it to fully expand and show this shape. In the future, I would like to experiment more with this idea with better understanding of how it would work. The left “leg” of the inflatable was constructed by connecting two basic square shapes but only by part of one edge. By doing this, the shapes can more freely twist about. I thought this was cool. On the other “leg” of the inflatable, I was mostly just trying to practice taping cleanly. I was interested in what would happen if I used the handle of the bag. Again, too much air was escaping for it to fully inflate, but I still think more could have been done here. What about other shapes looping through that hole? Like an inflatable chain? Or an inflatable knot? There is certainly more to explore.
For the last inflatable I constructed, I was thinking a little more about what it would look like in the end. I also tried to be more conscious about the shapes I was cutting out; before, I cut the shapes one by one and tried to make them all fit together. I found that using this method made connecting the last few joints really difficult. I liked the little blue piece at the bottom. It was a little tricky to tape but I love playing with curves and points… and I suppose that’s most of what you can do with things that inflate.