Last Update- Ribcage

Visual Portfolio, Posts & Image Gallery for WordPress

Group

  • How did you generate the idea and starting point for the project?

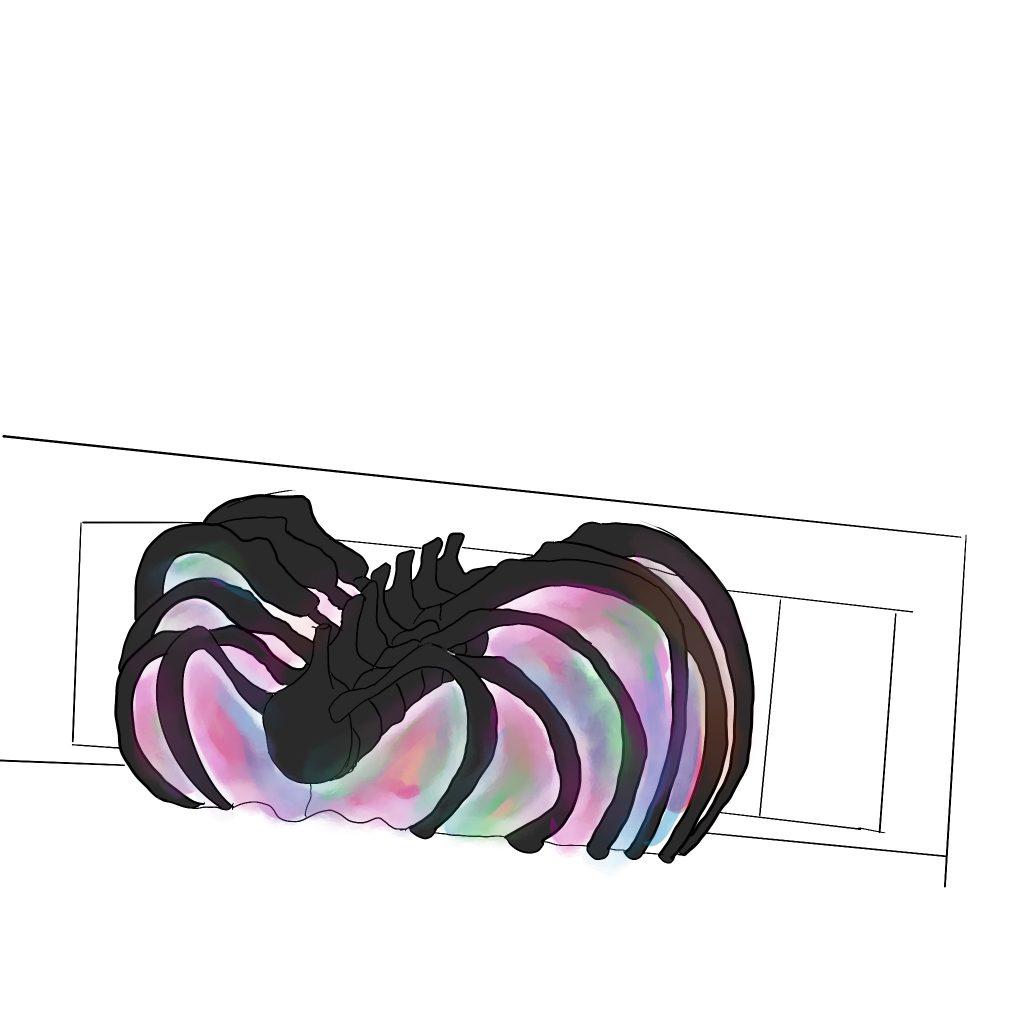
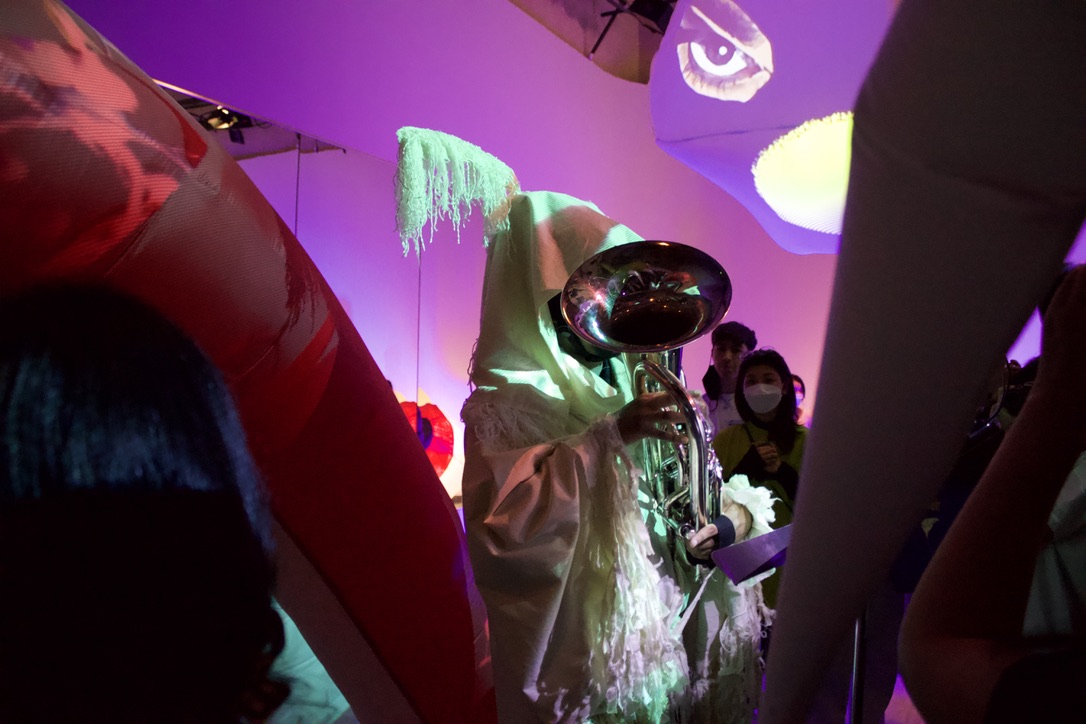
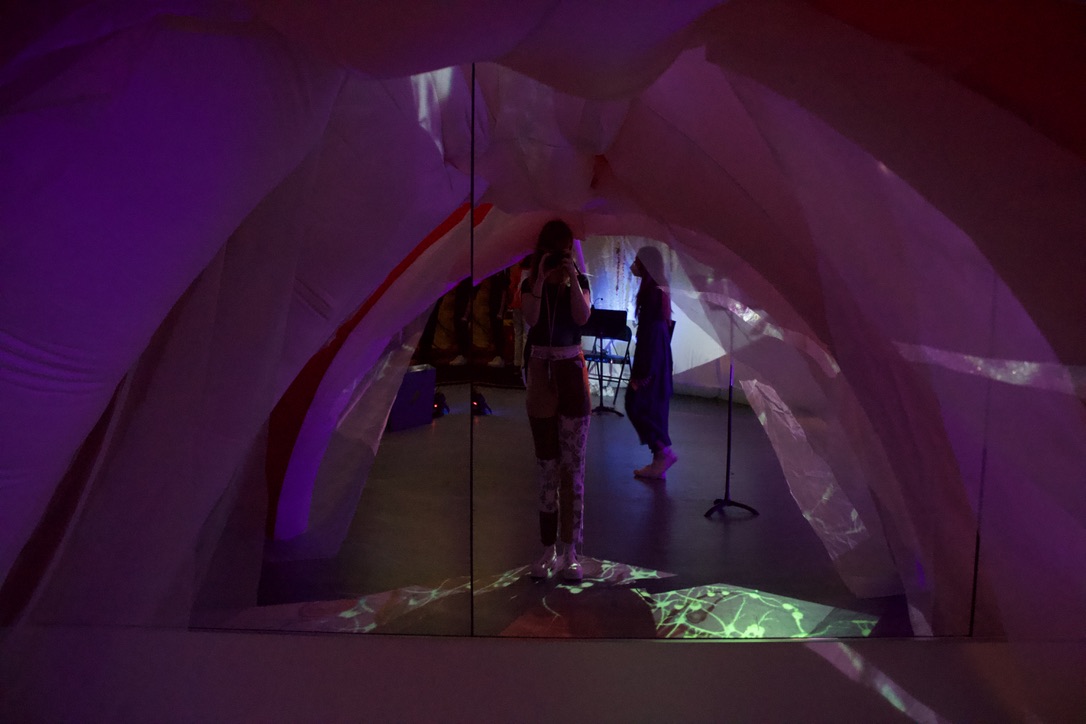
I think our idea started with hallucinations. When at WQED I had told Jiyeon and Asad that I thought it would be cool if we did something around that idea. I think once getting into the space, Jiyeon thought of having a dome or some sort of space to walk into, and we all enjoyed the idea of it. With hallucinations still in mind, the mirror really struck us as a prop that we could use to further that idea of a weird space, and along the way of drawing I kind of ended up turning it into anatomy, and a place that would just be super weird.

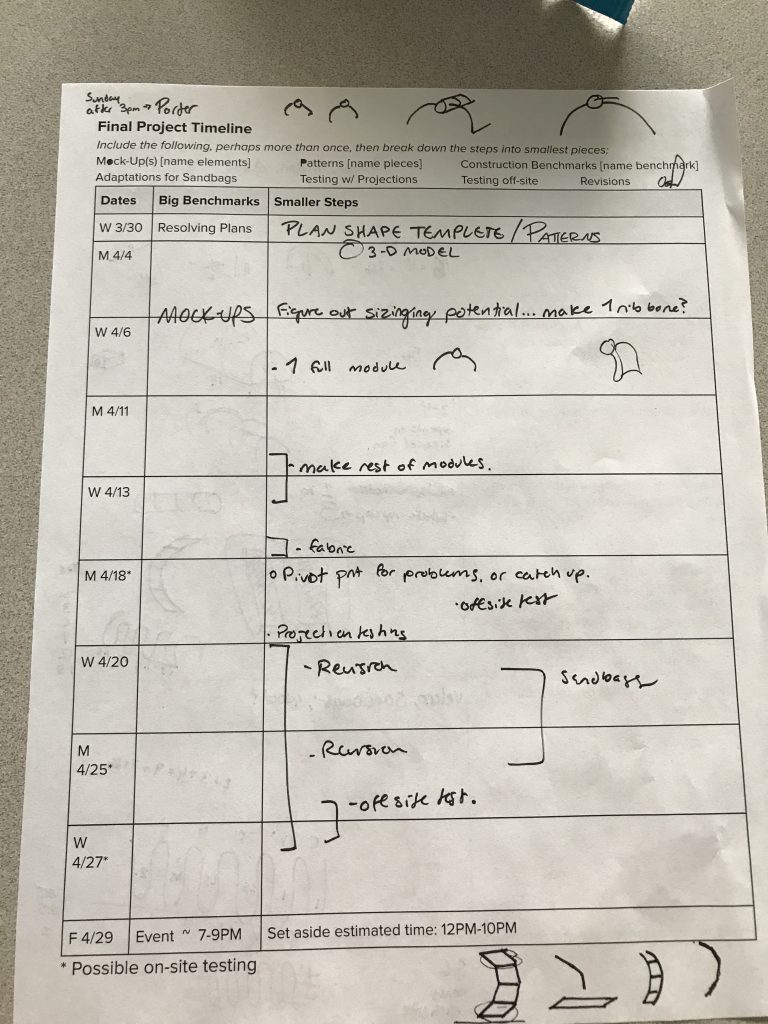
  • What was the path that you took from beginning to end to accomplish the project? Please upload 5-10 photos to illustrate your story.

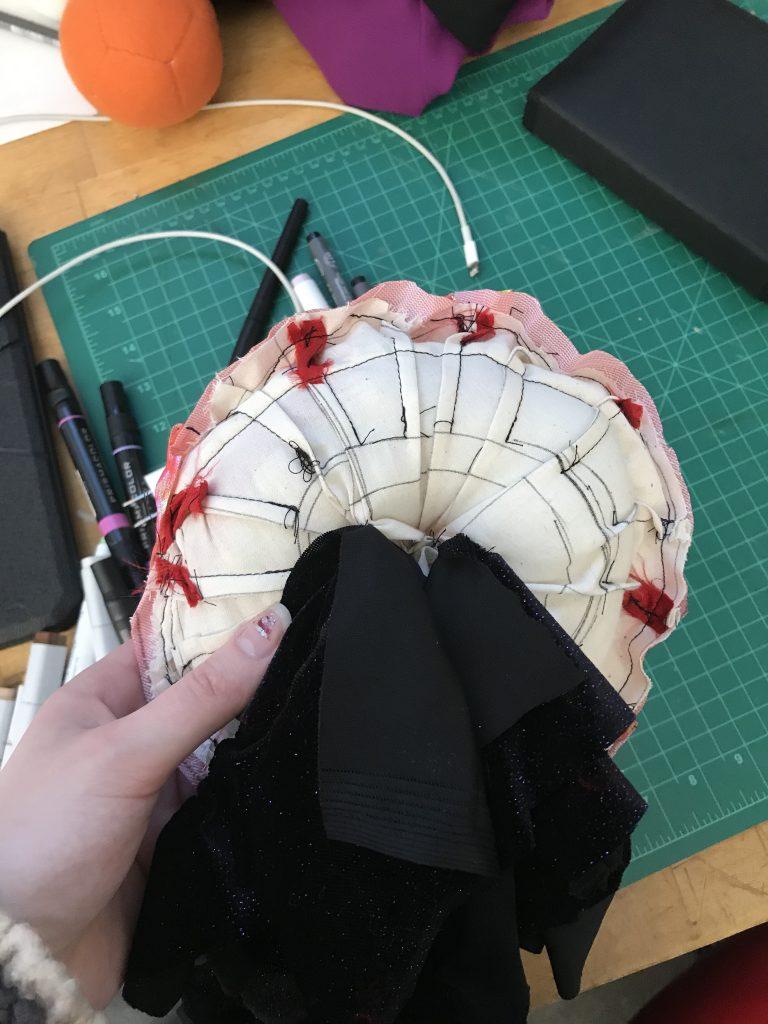
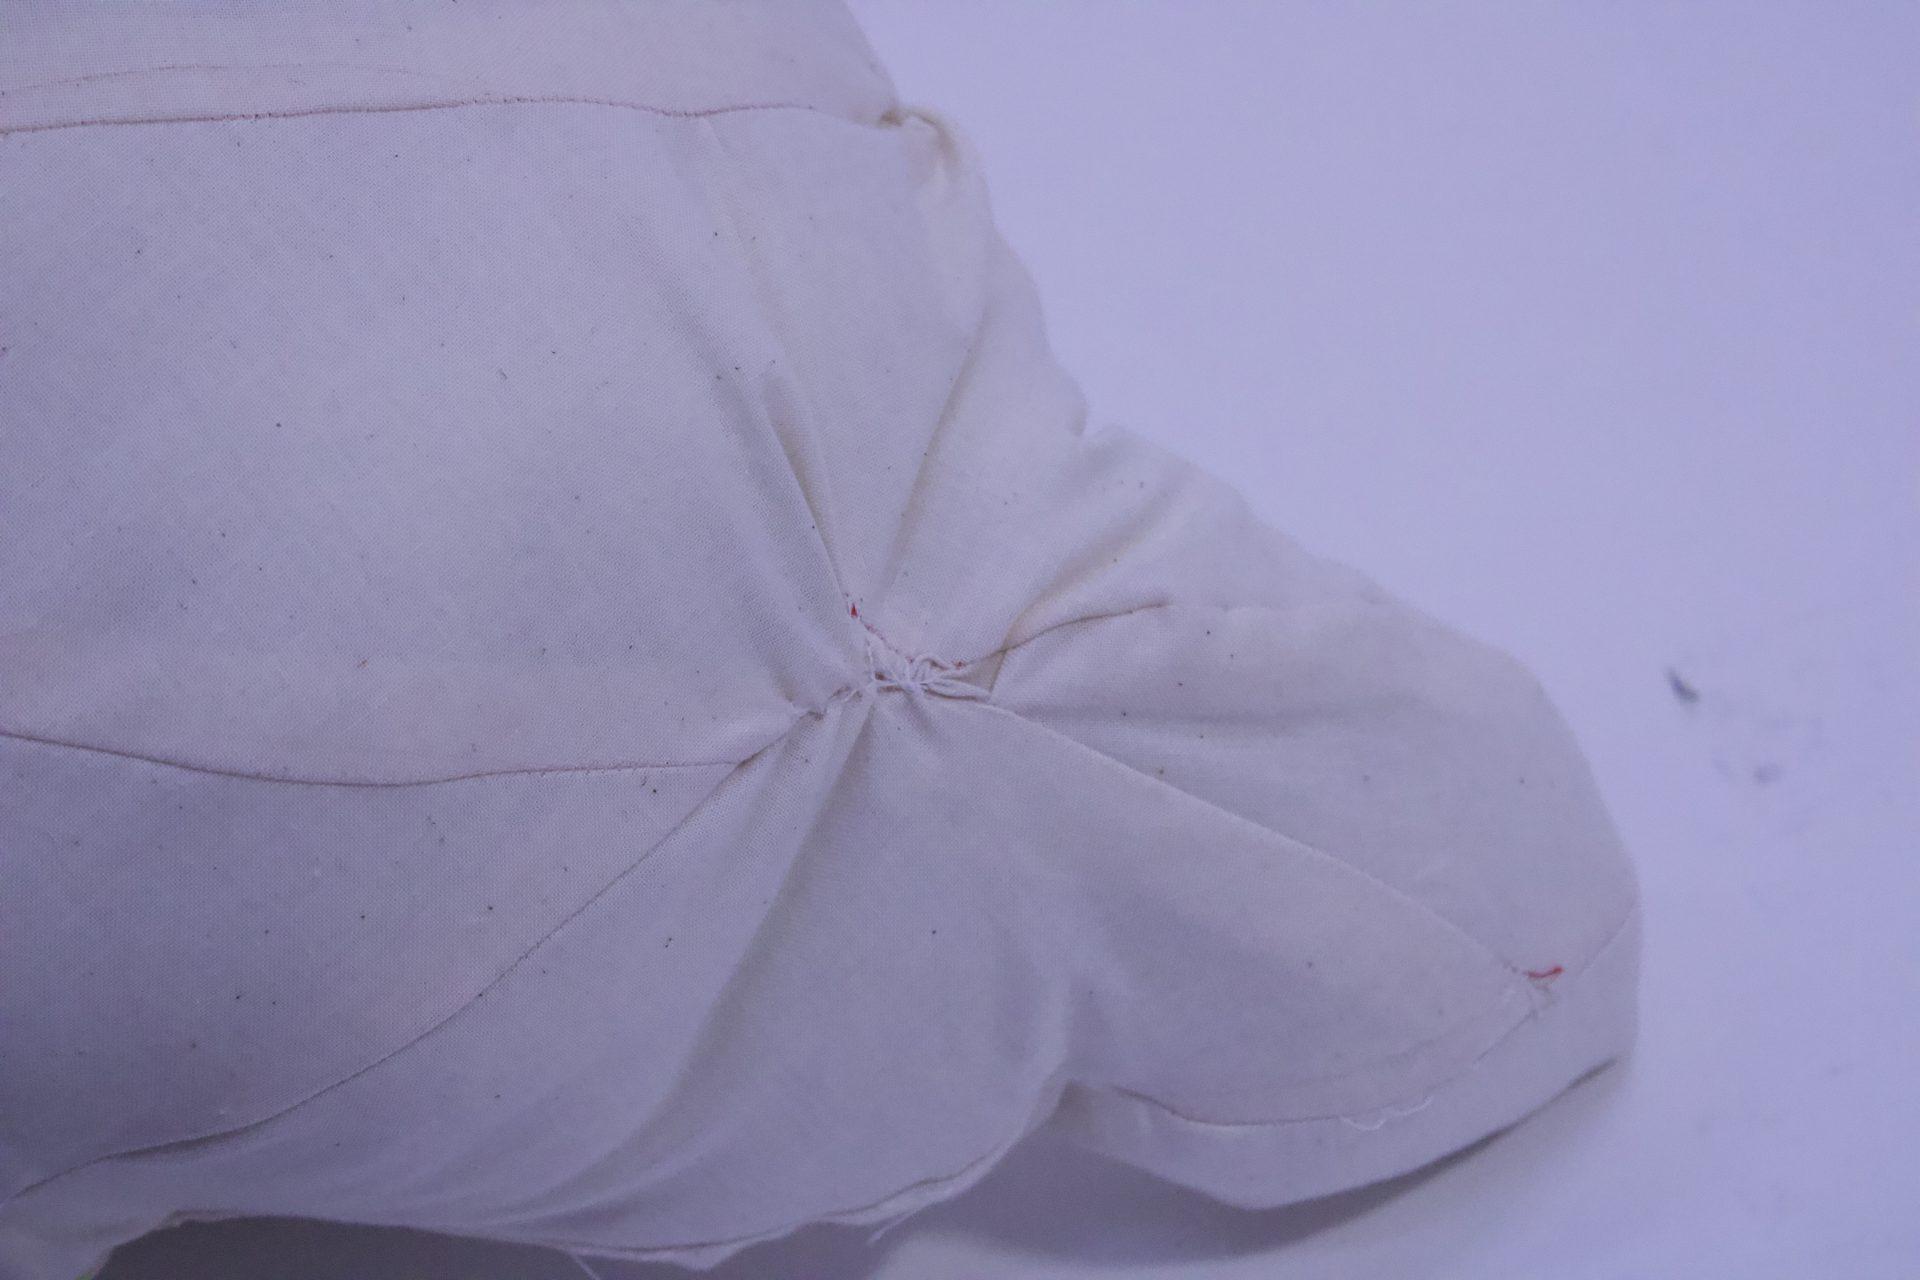
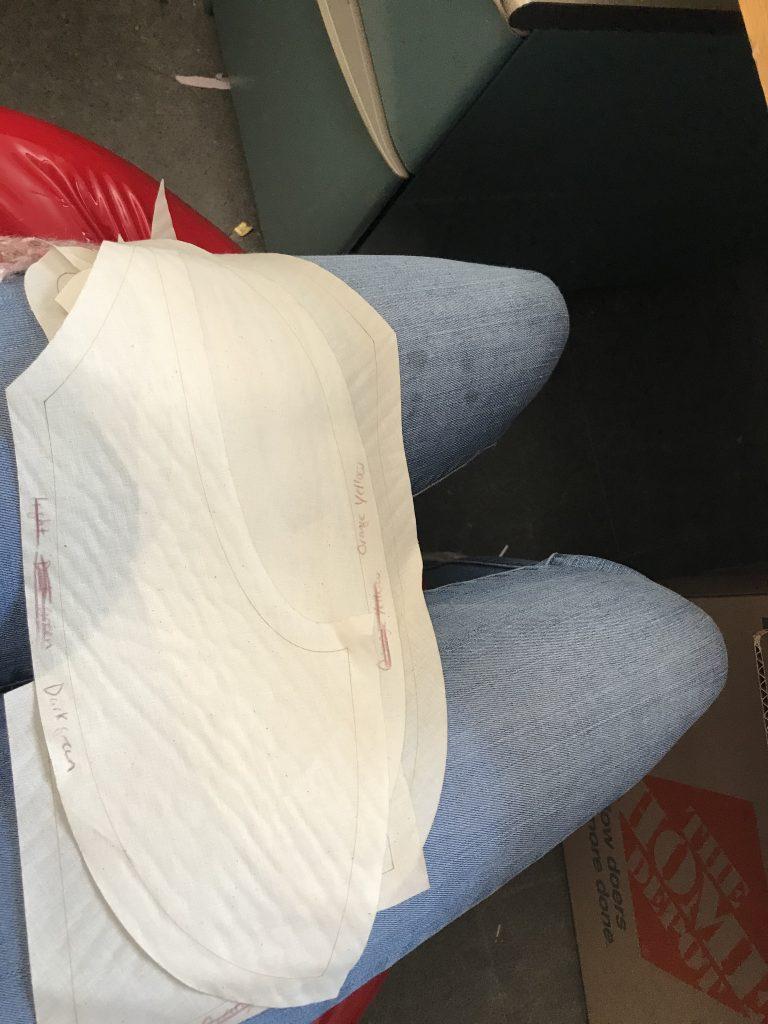
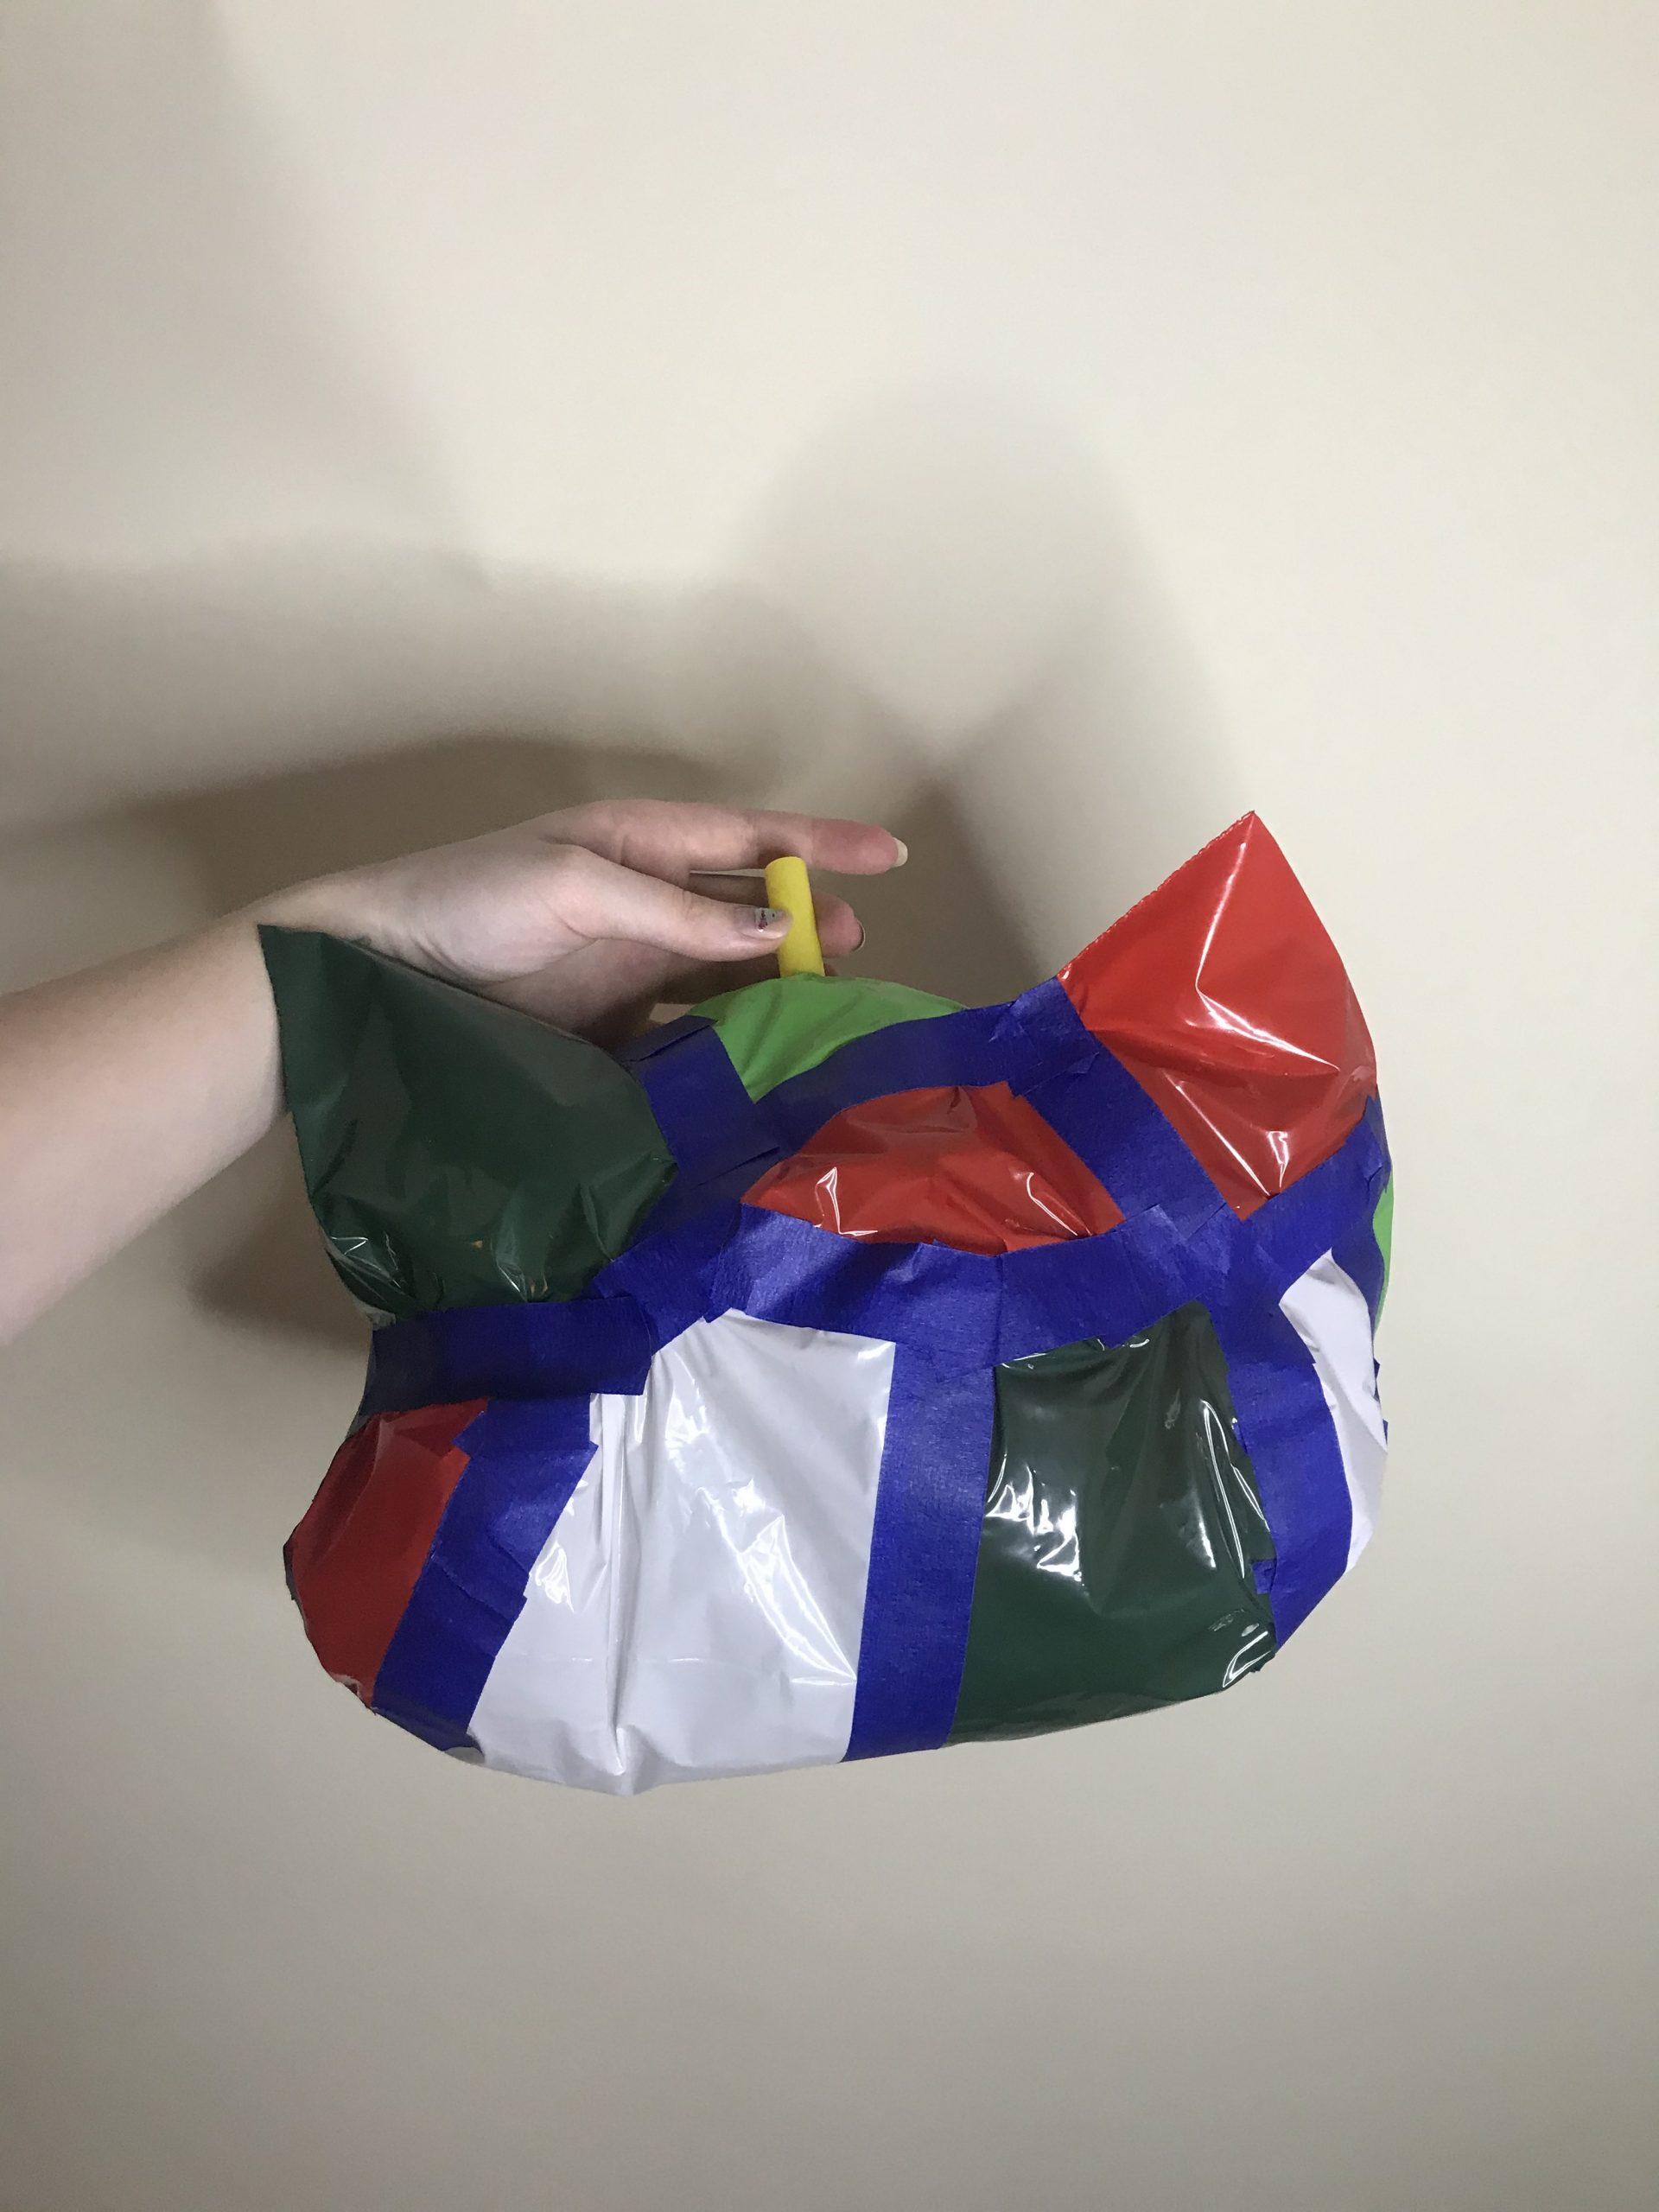
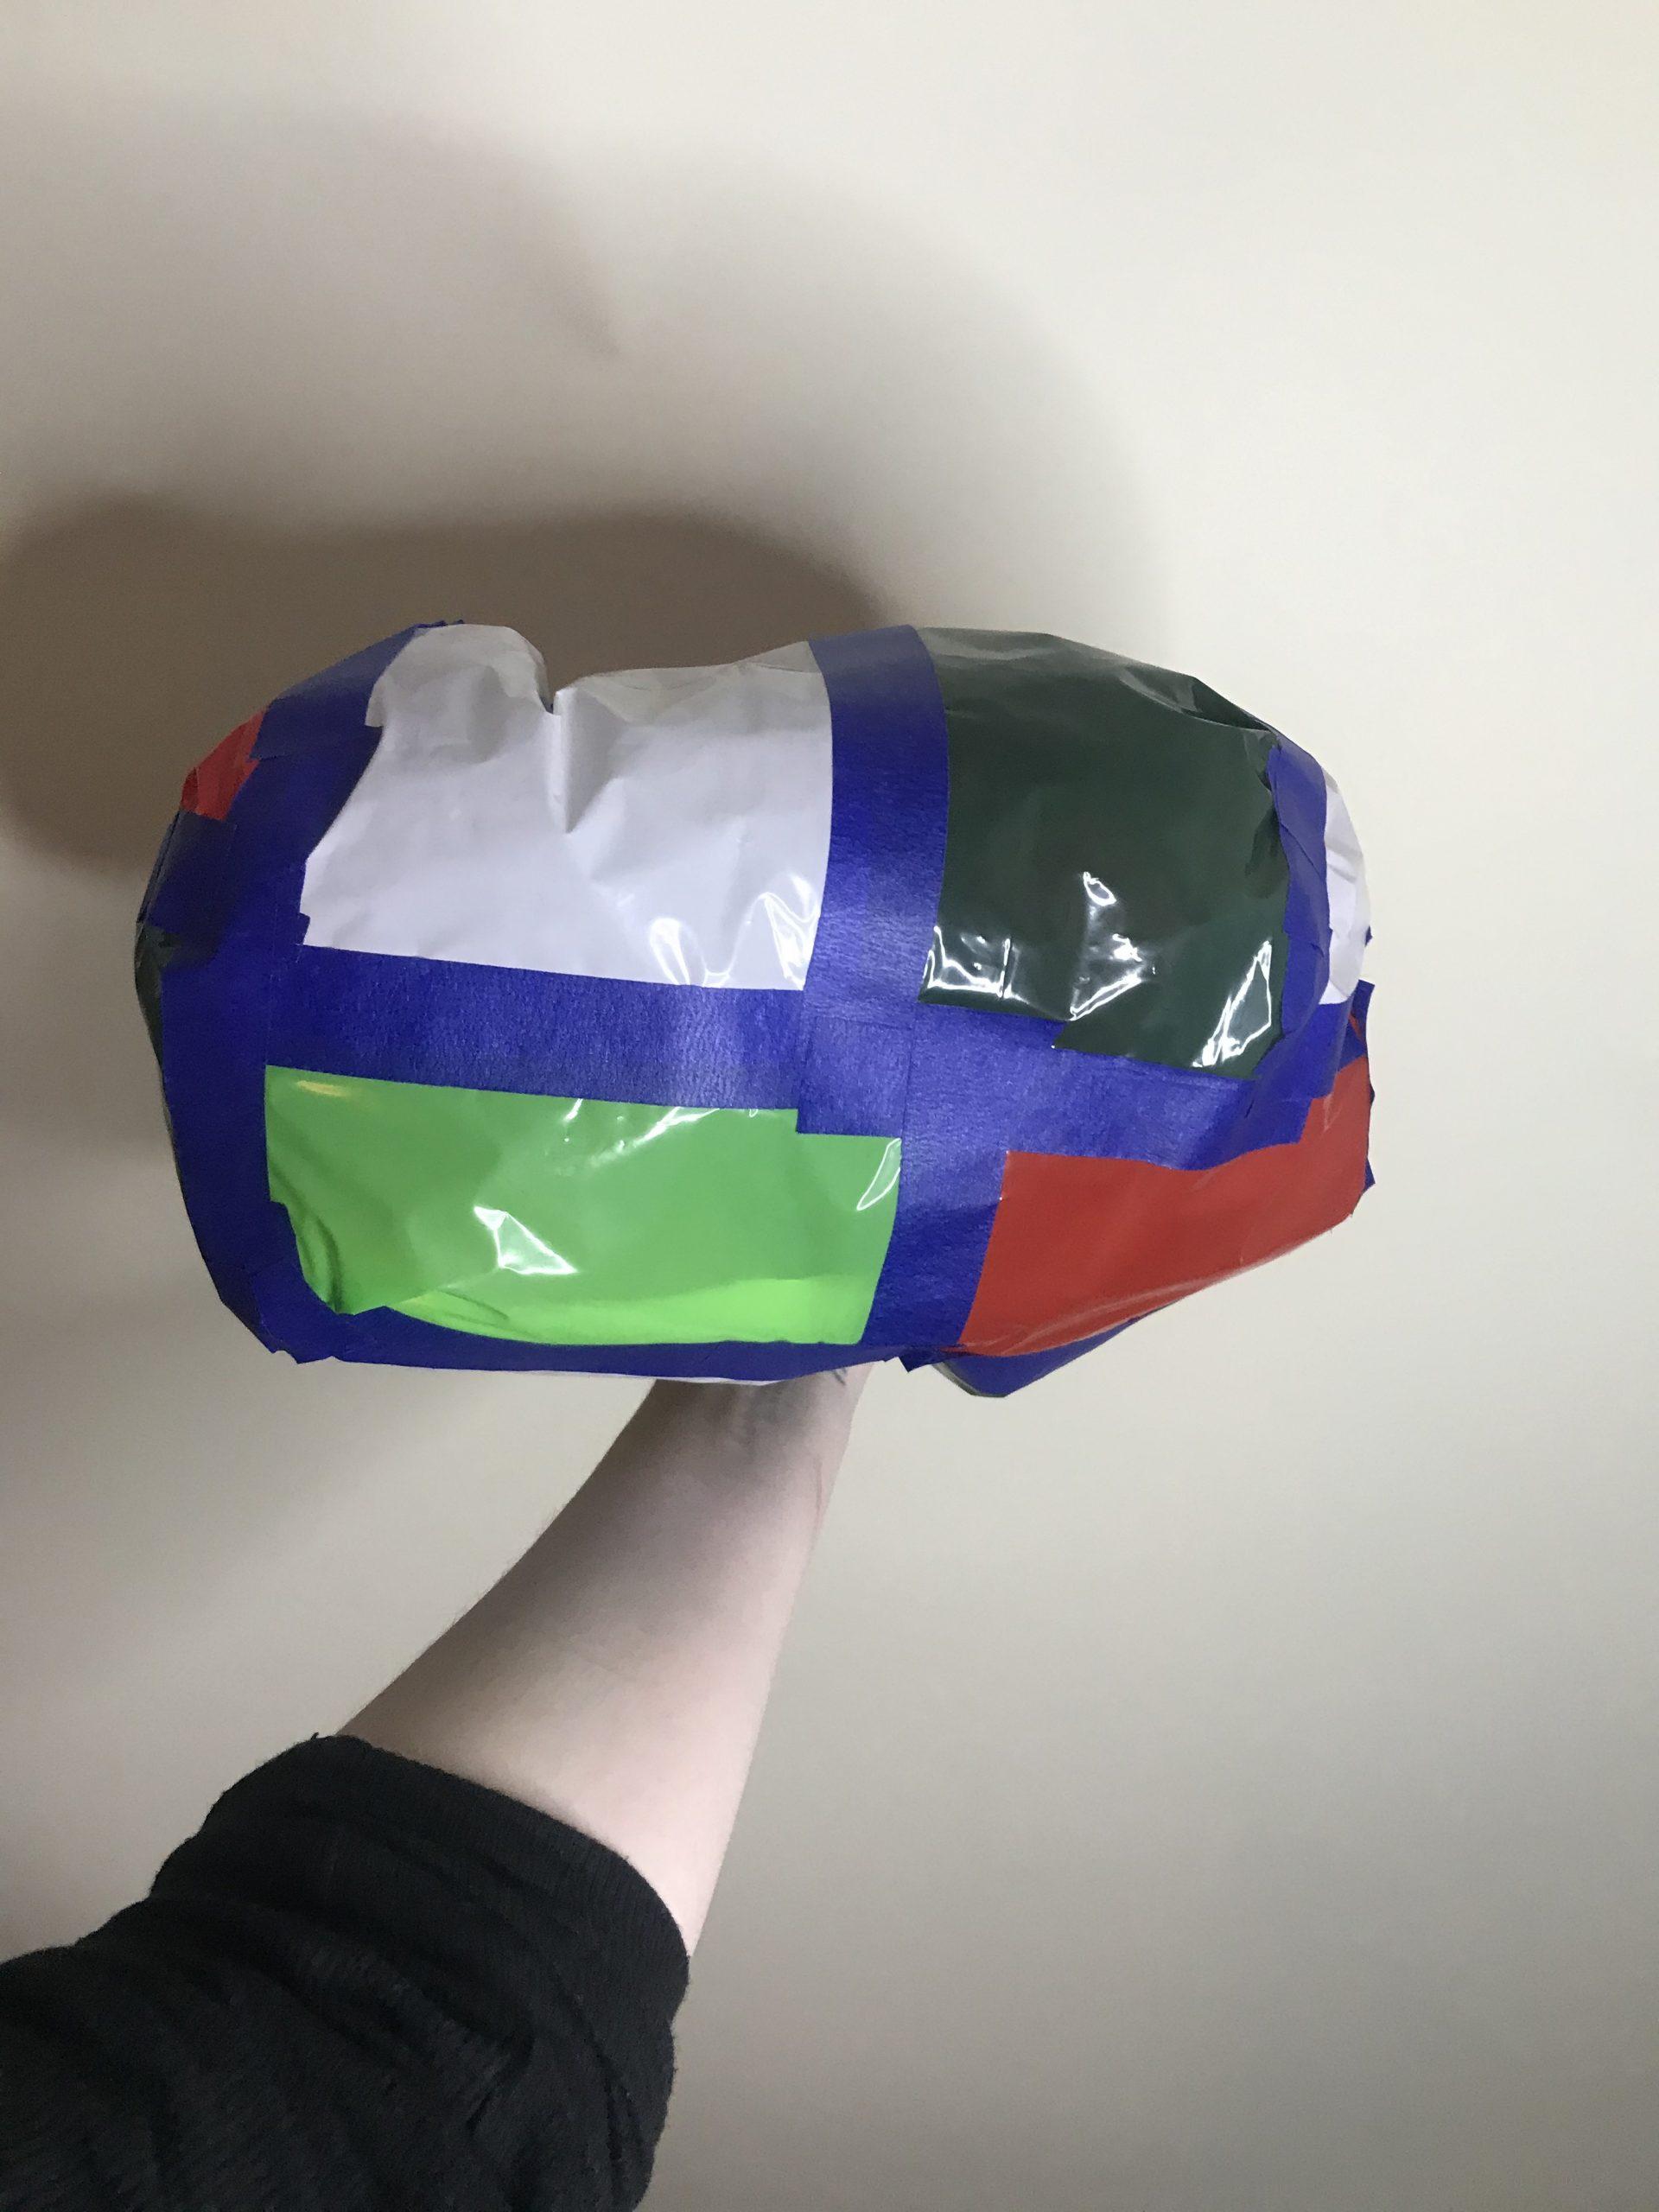
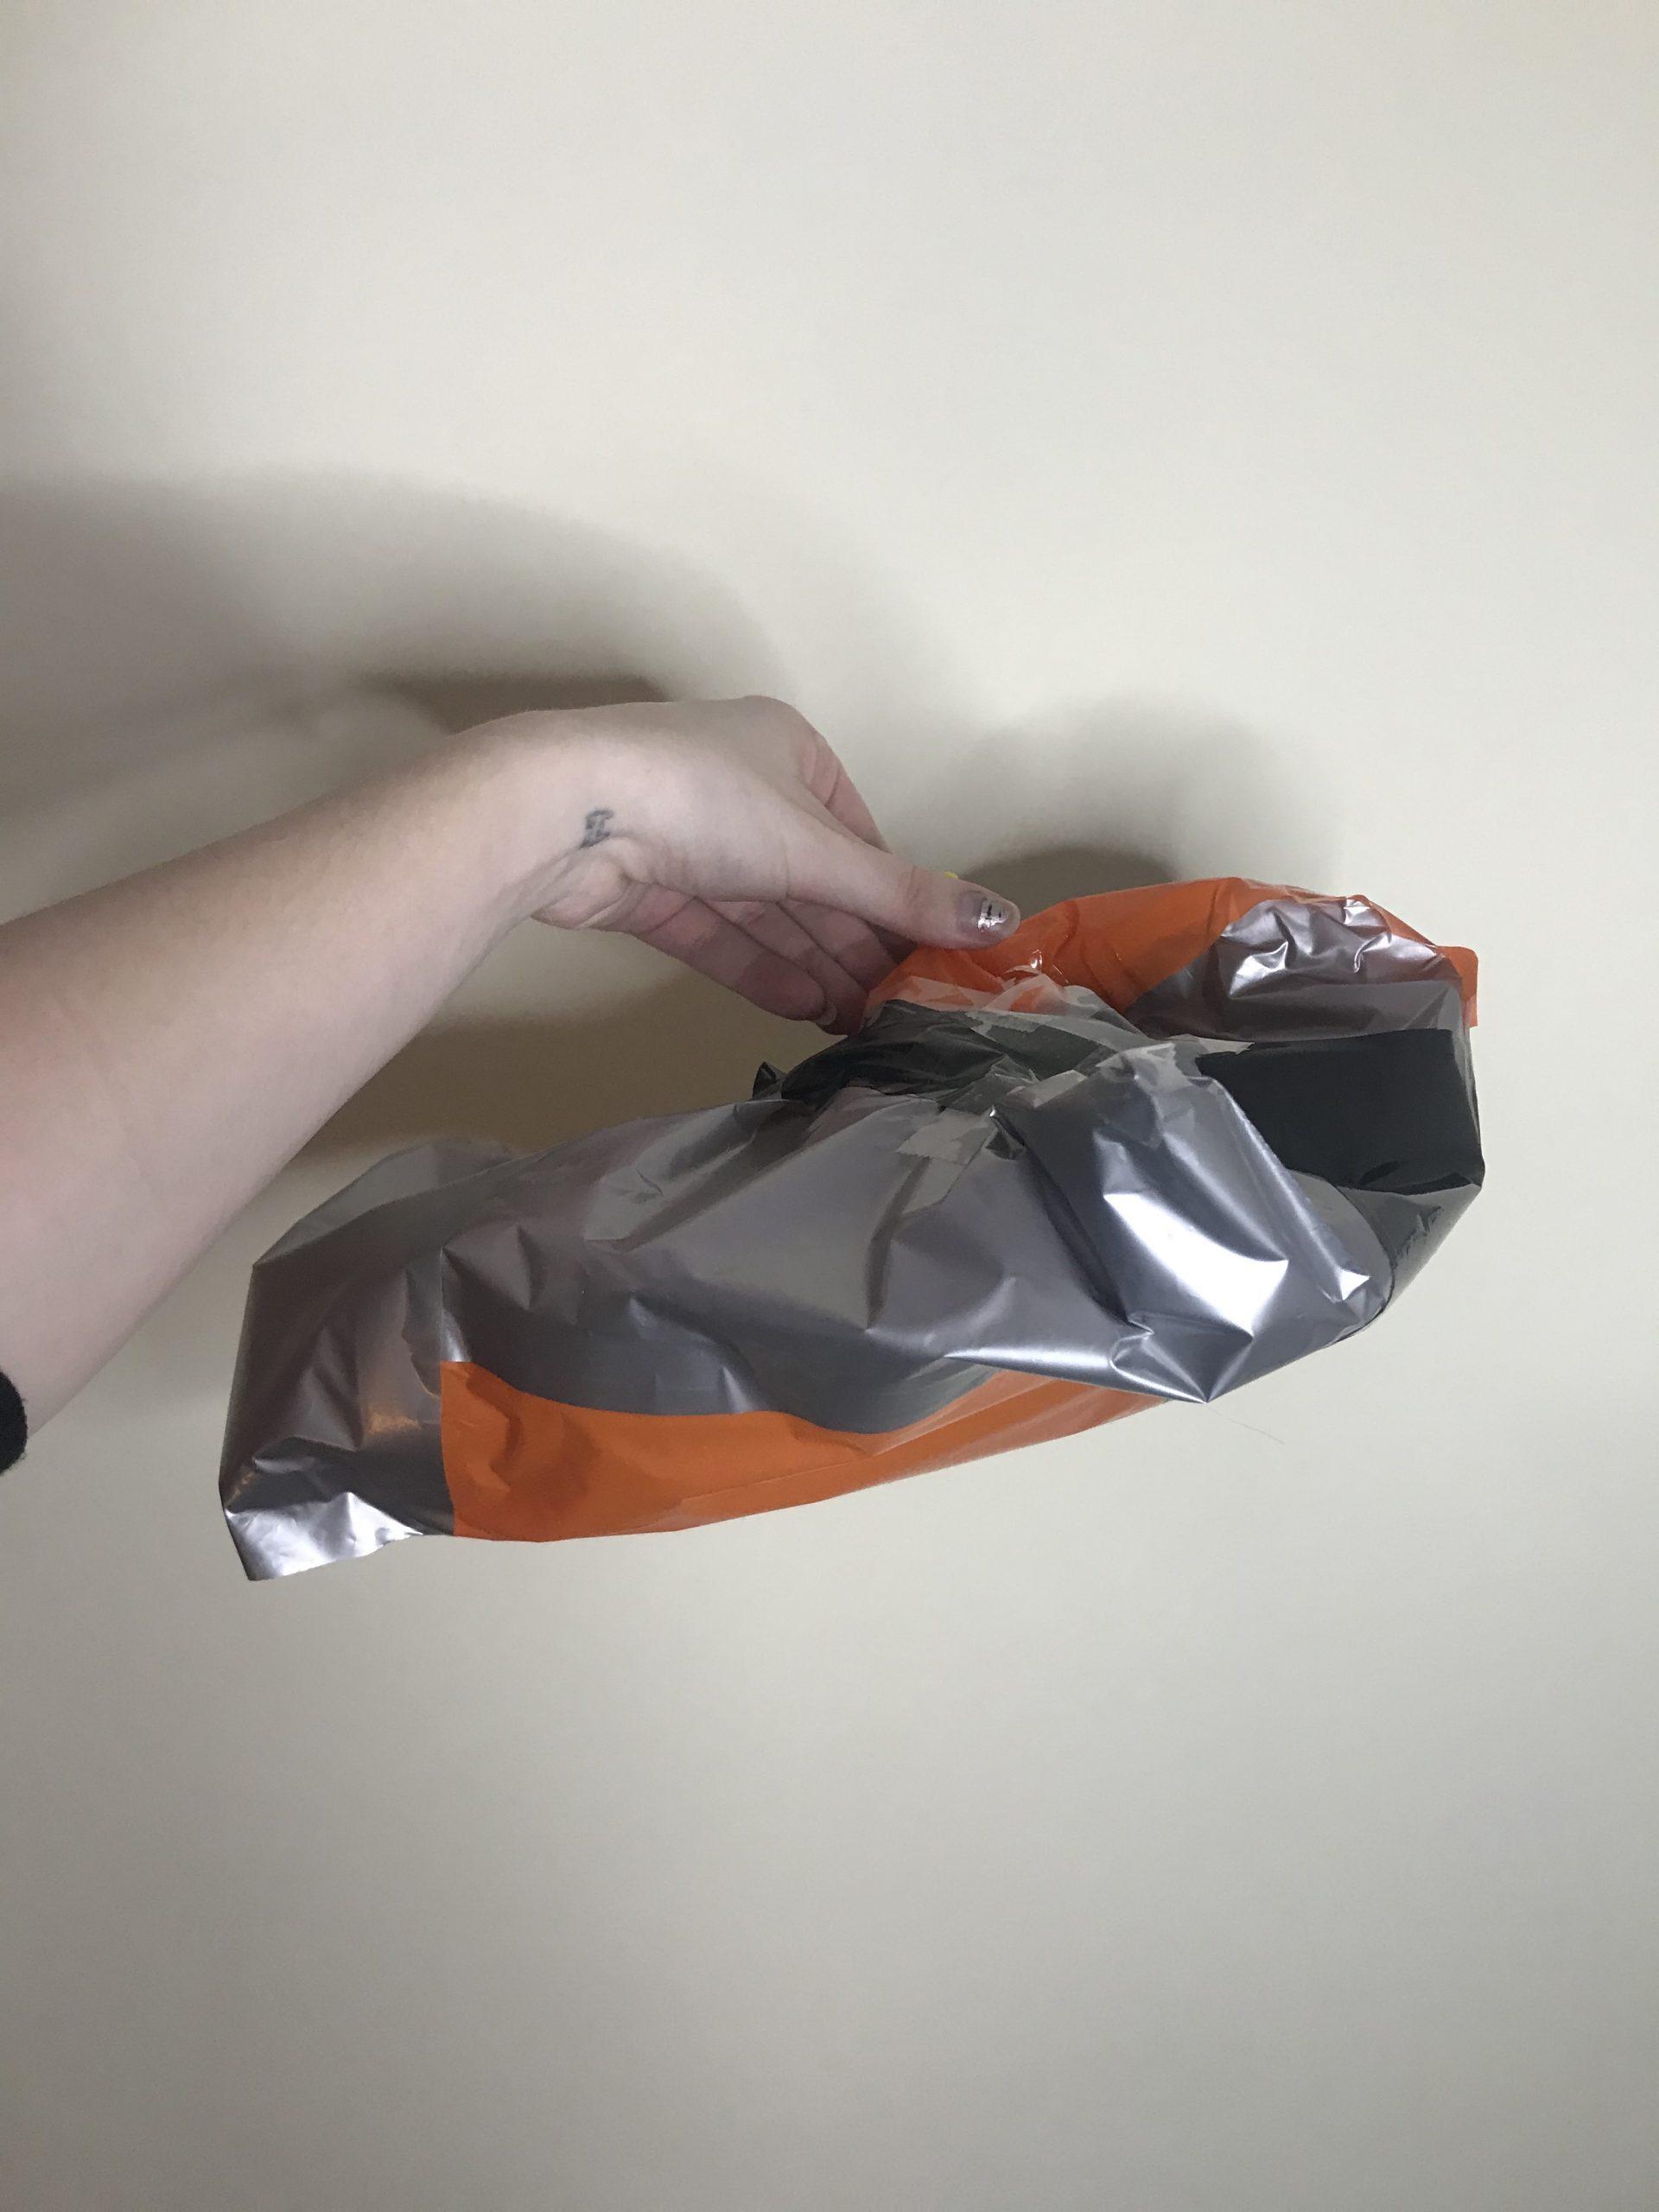
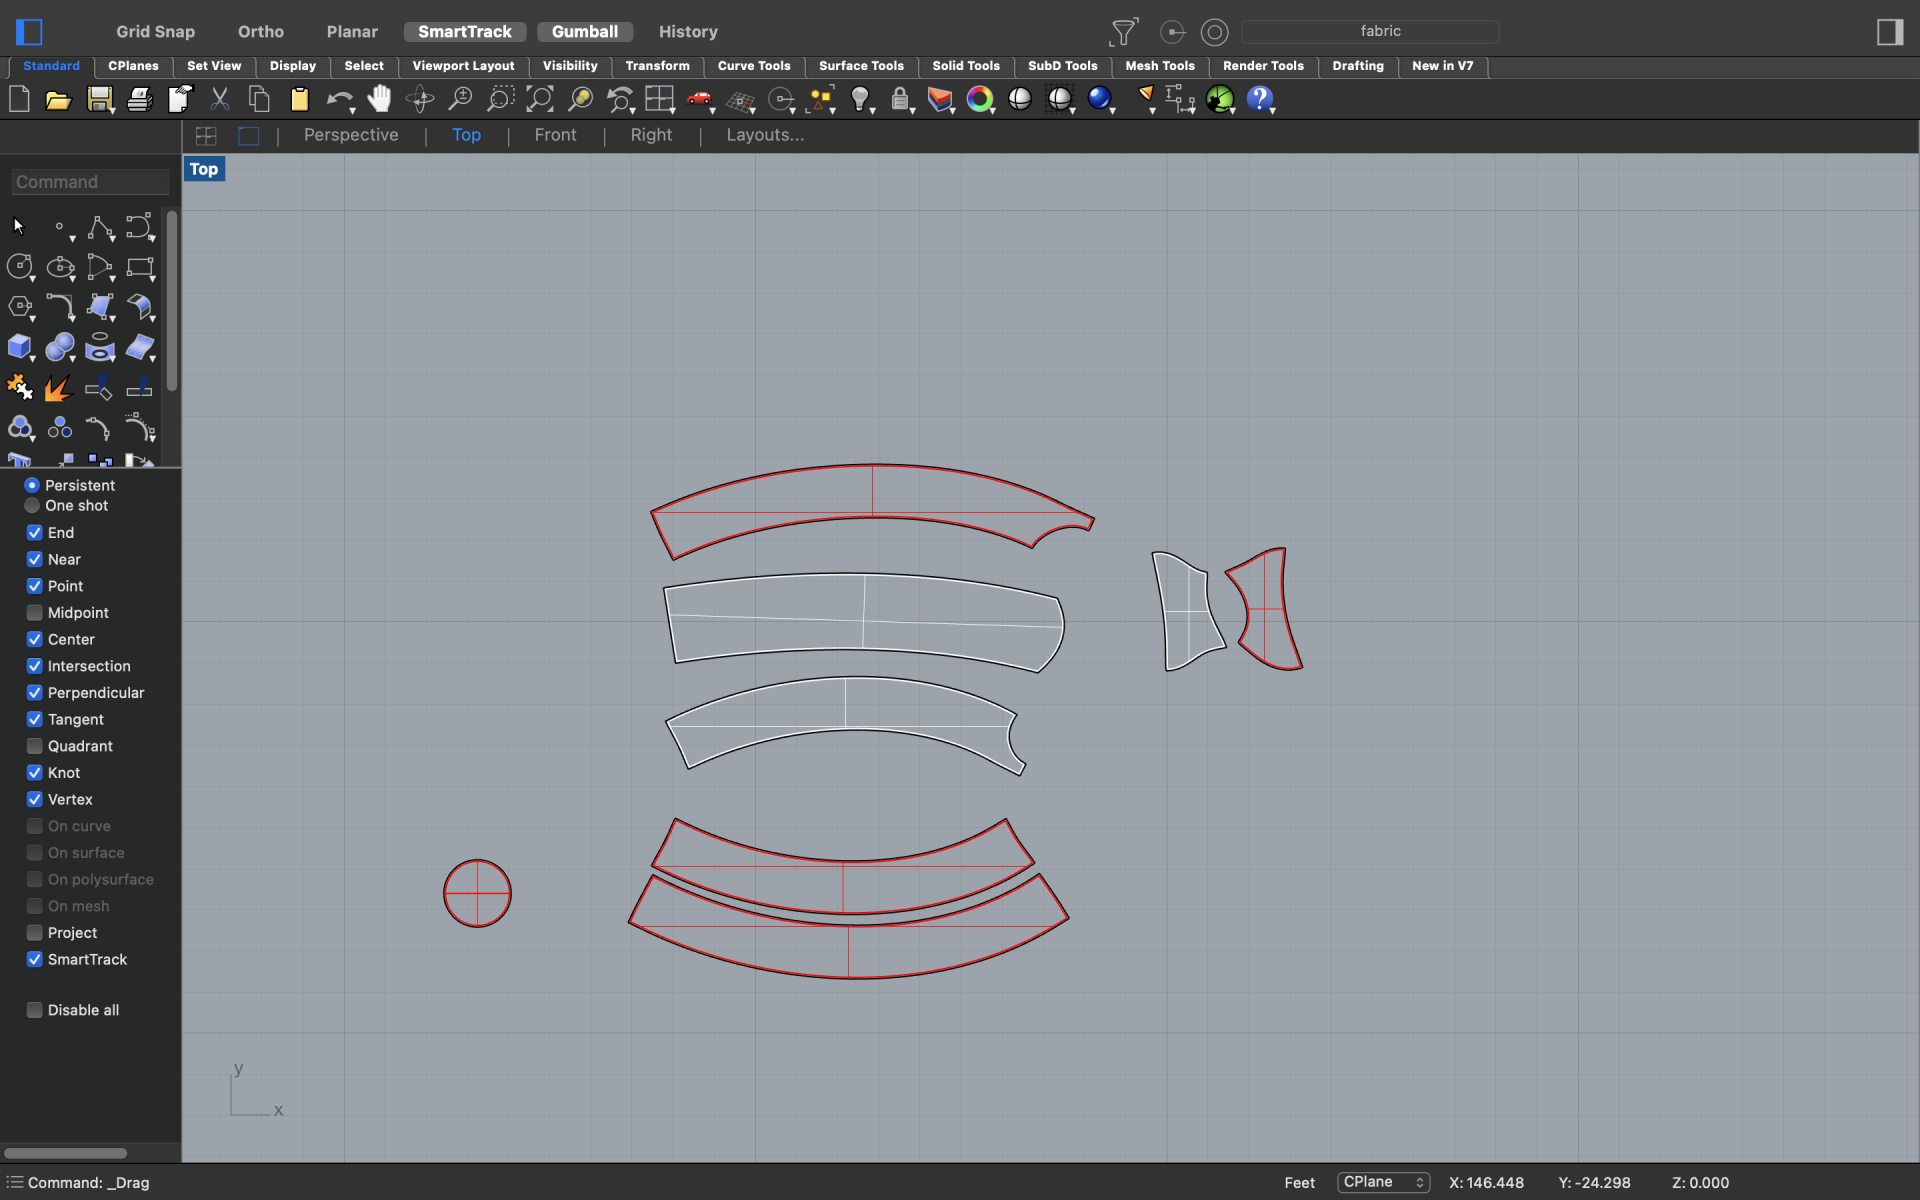
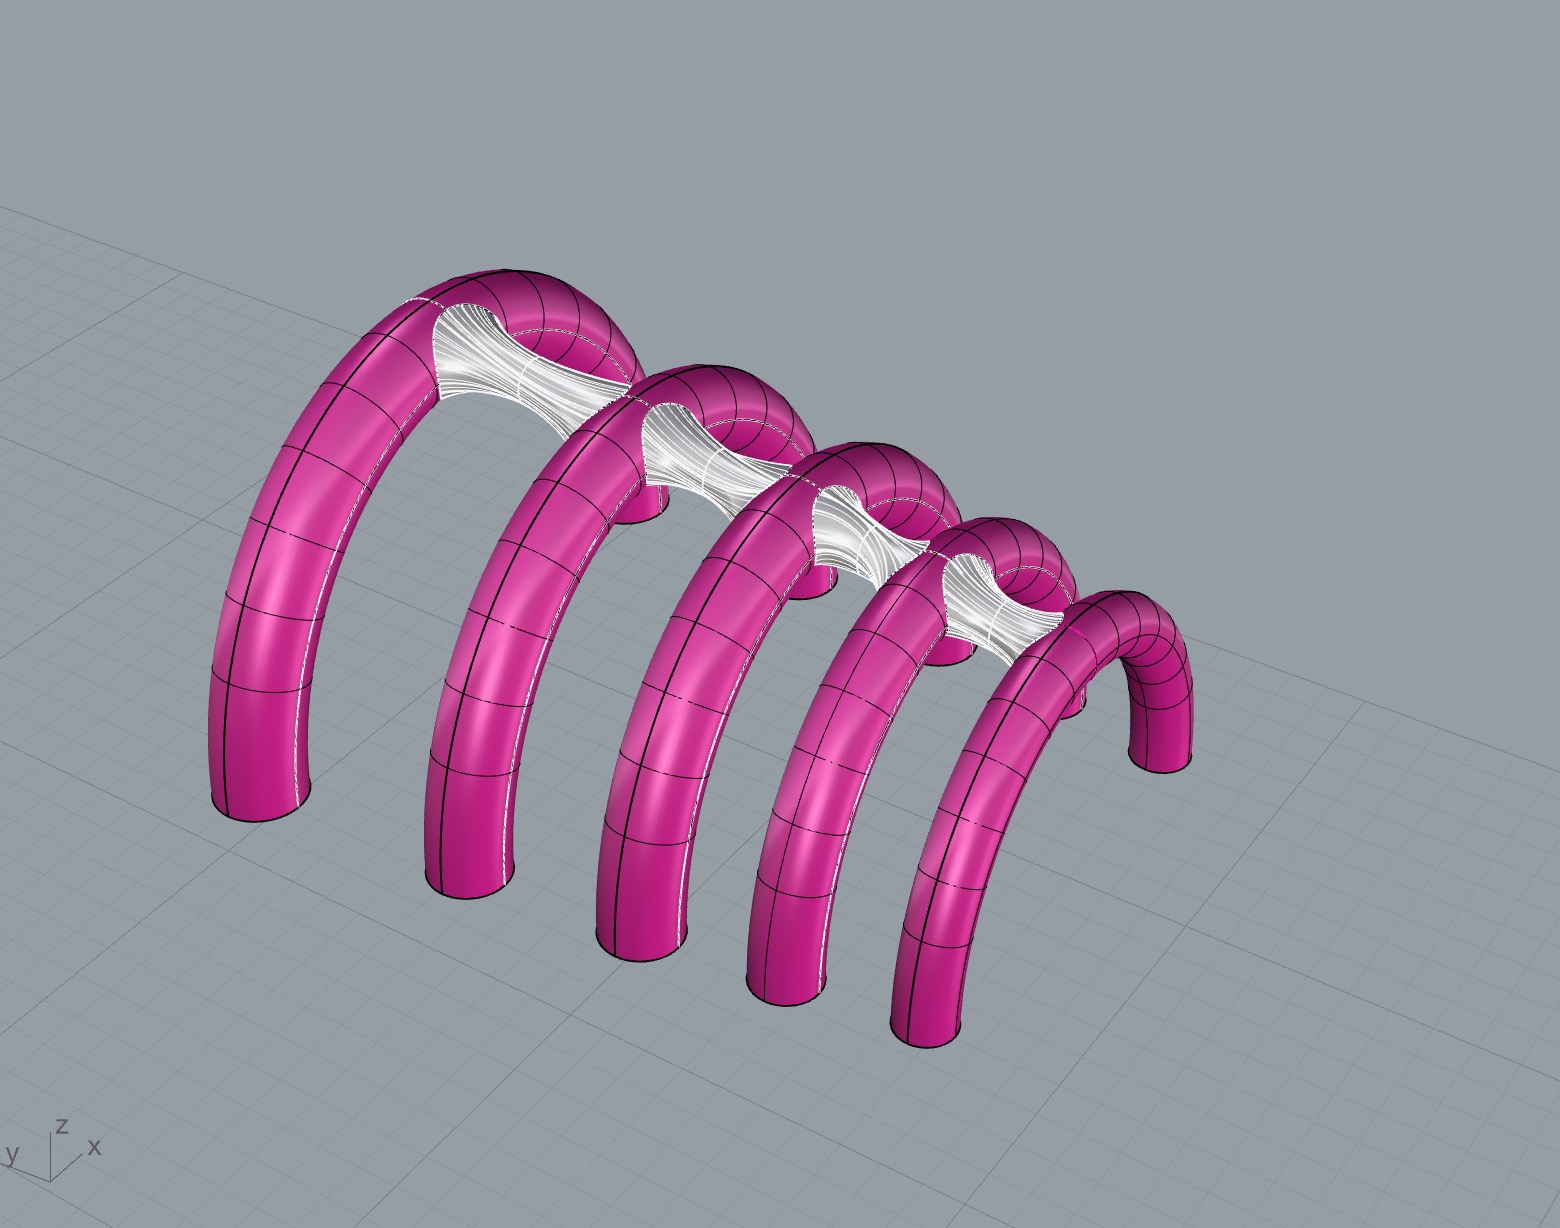
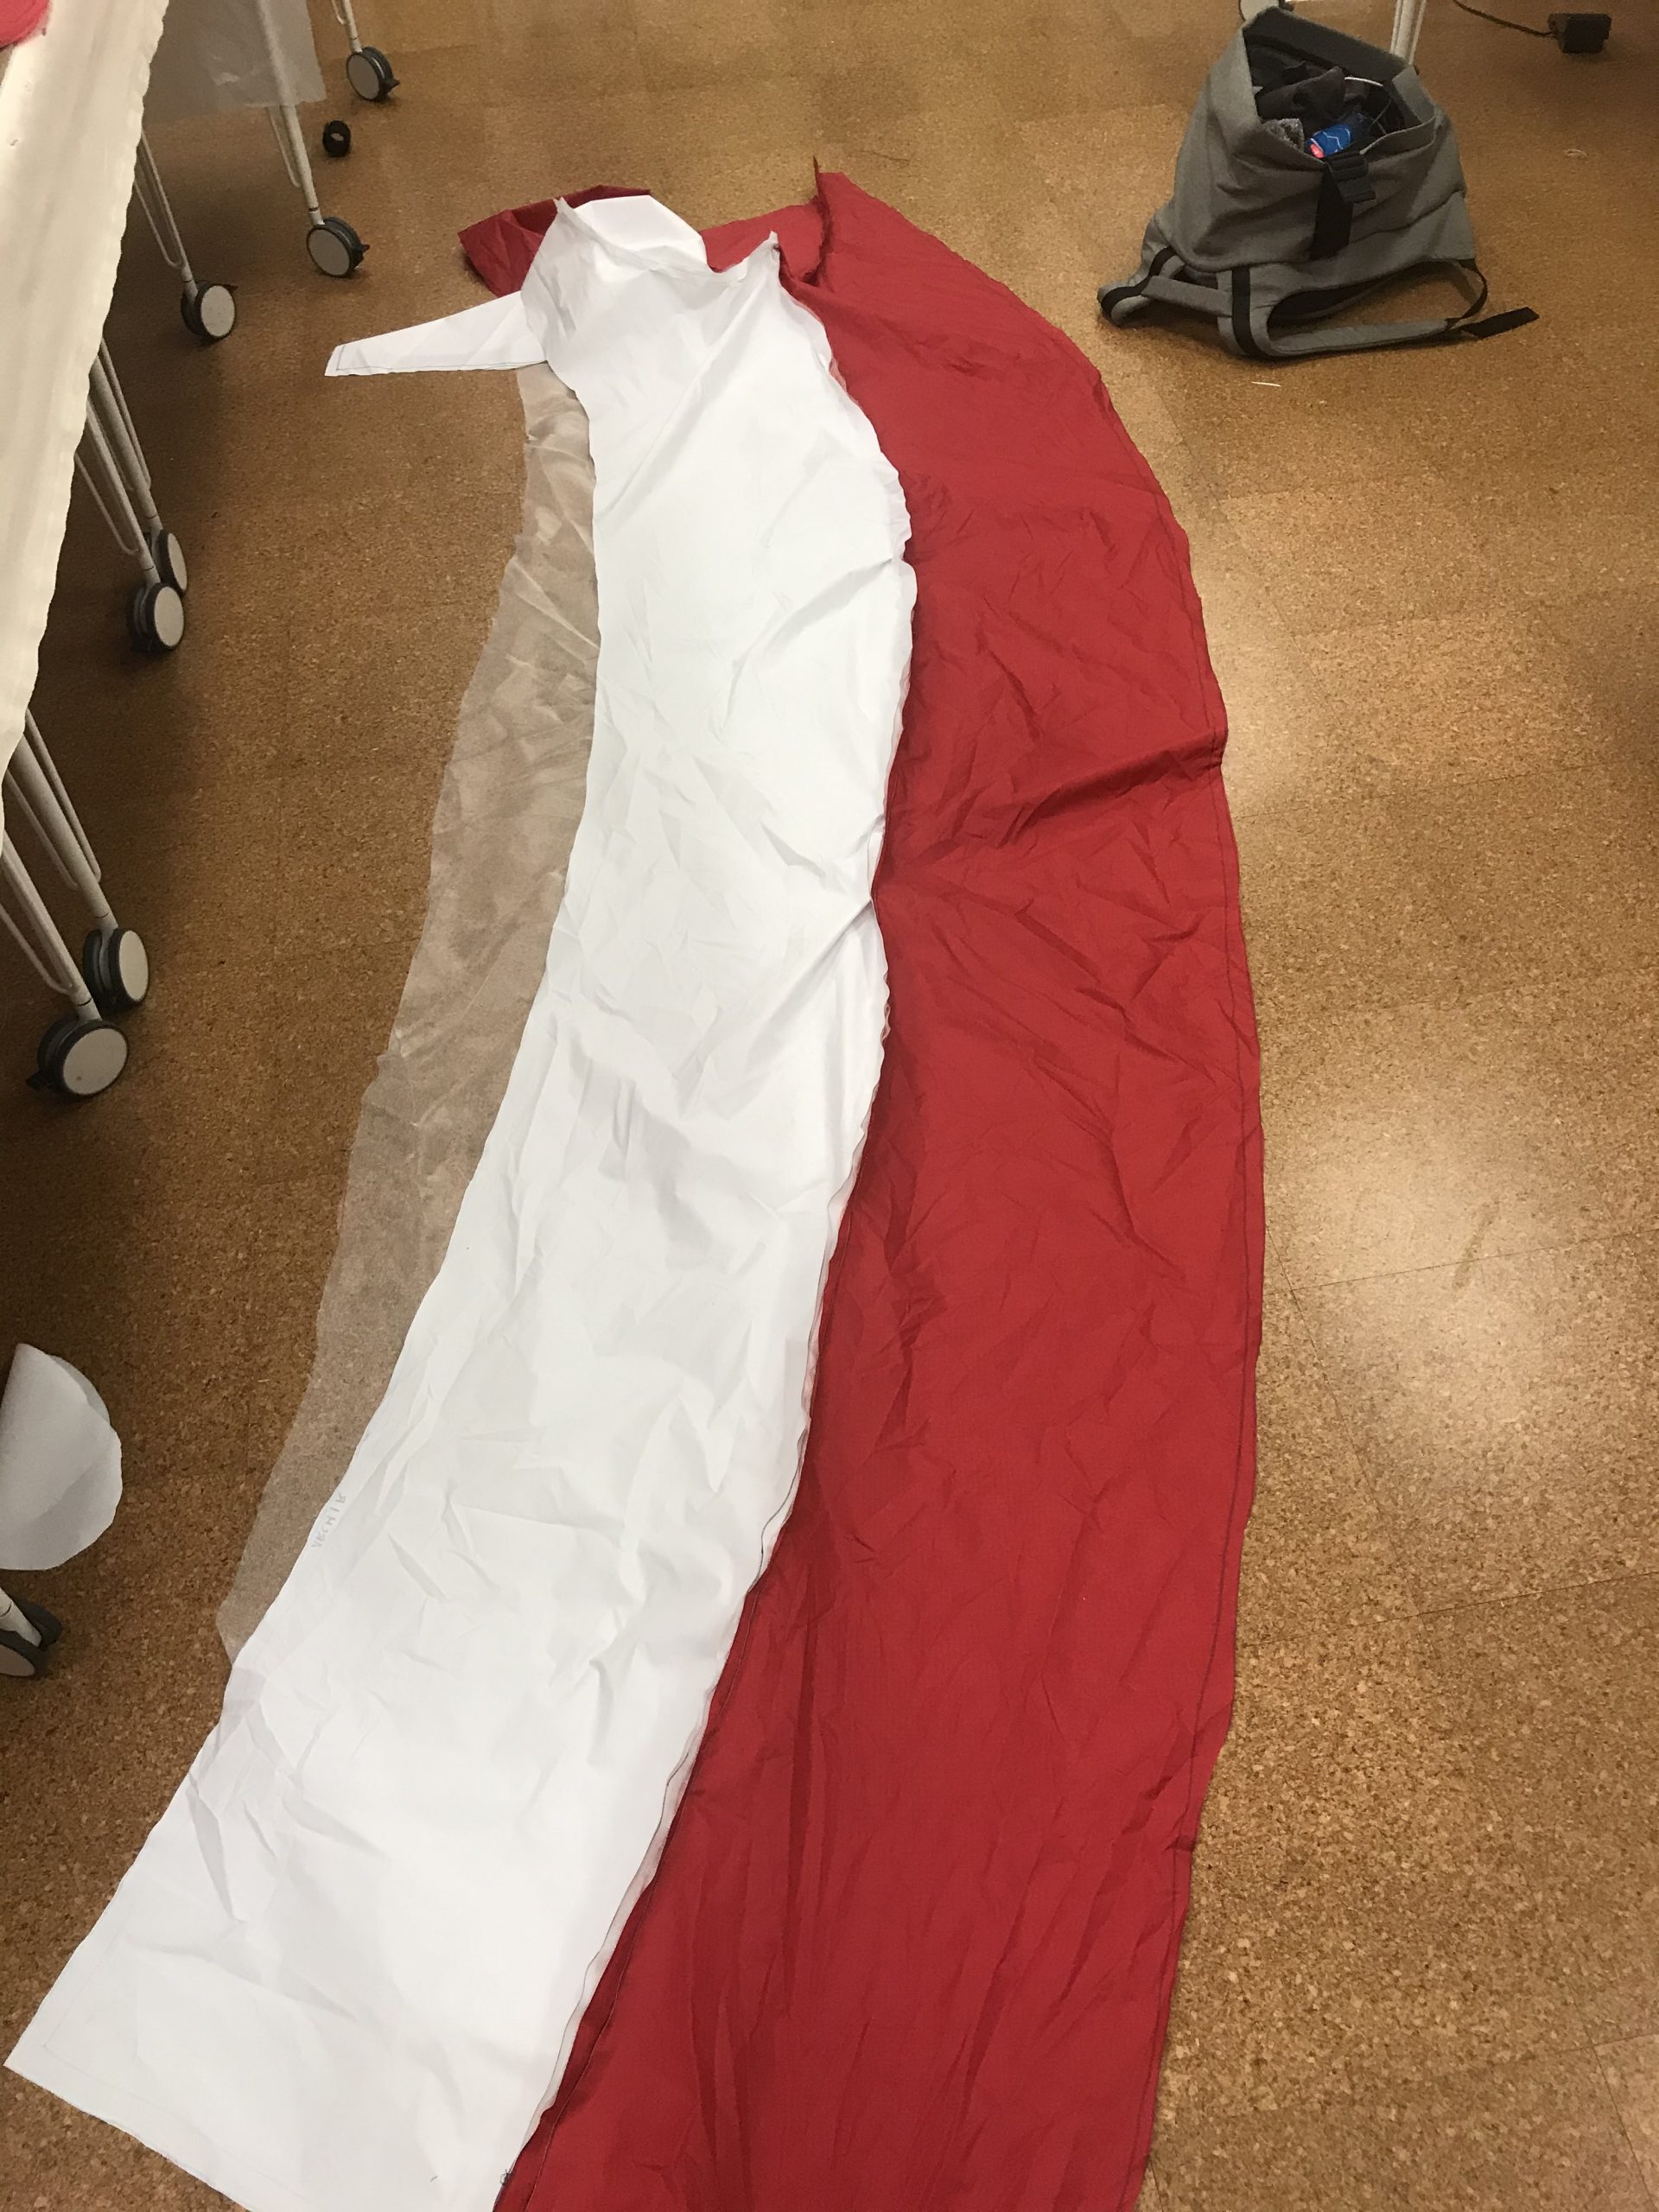
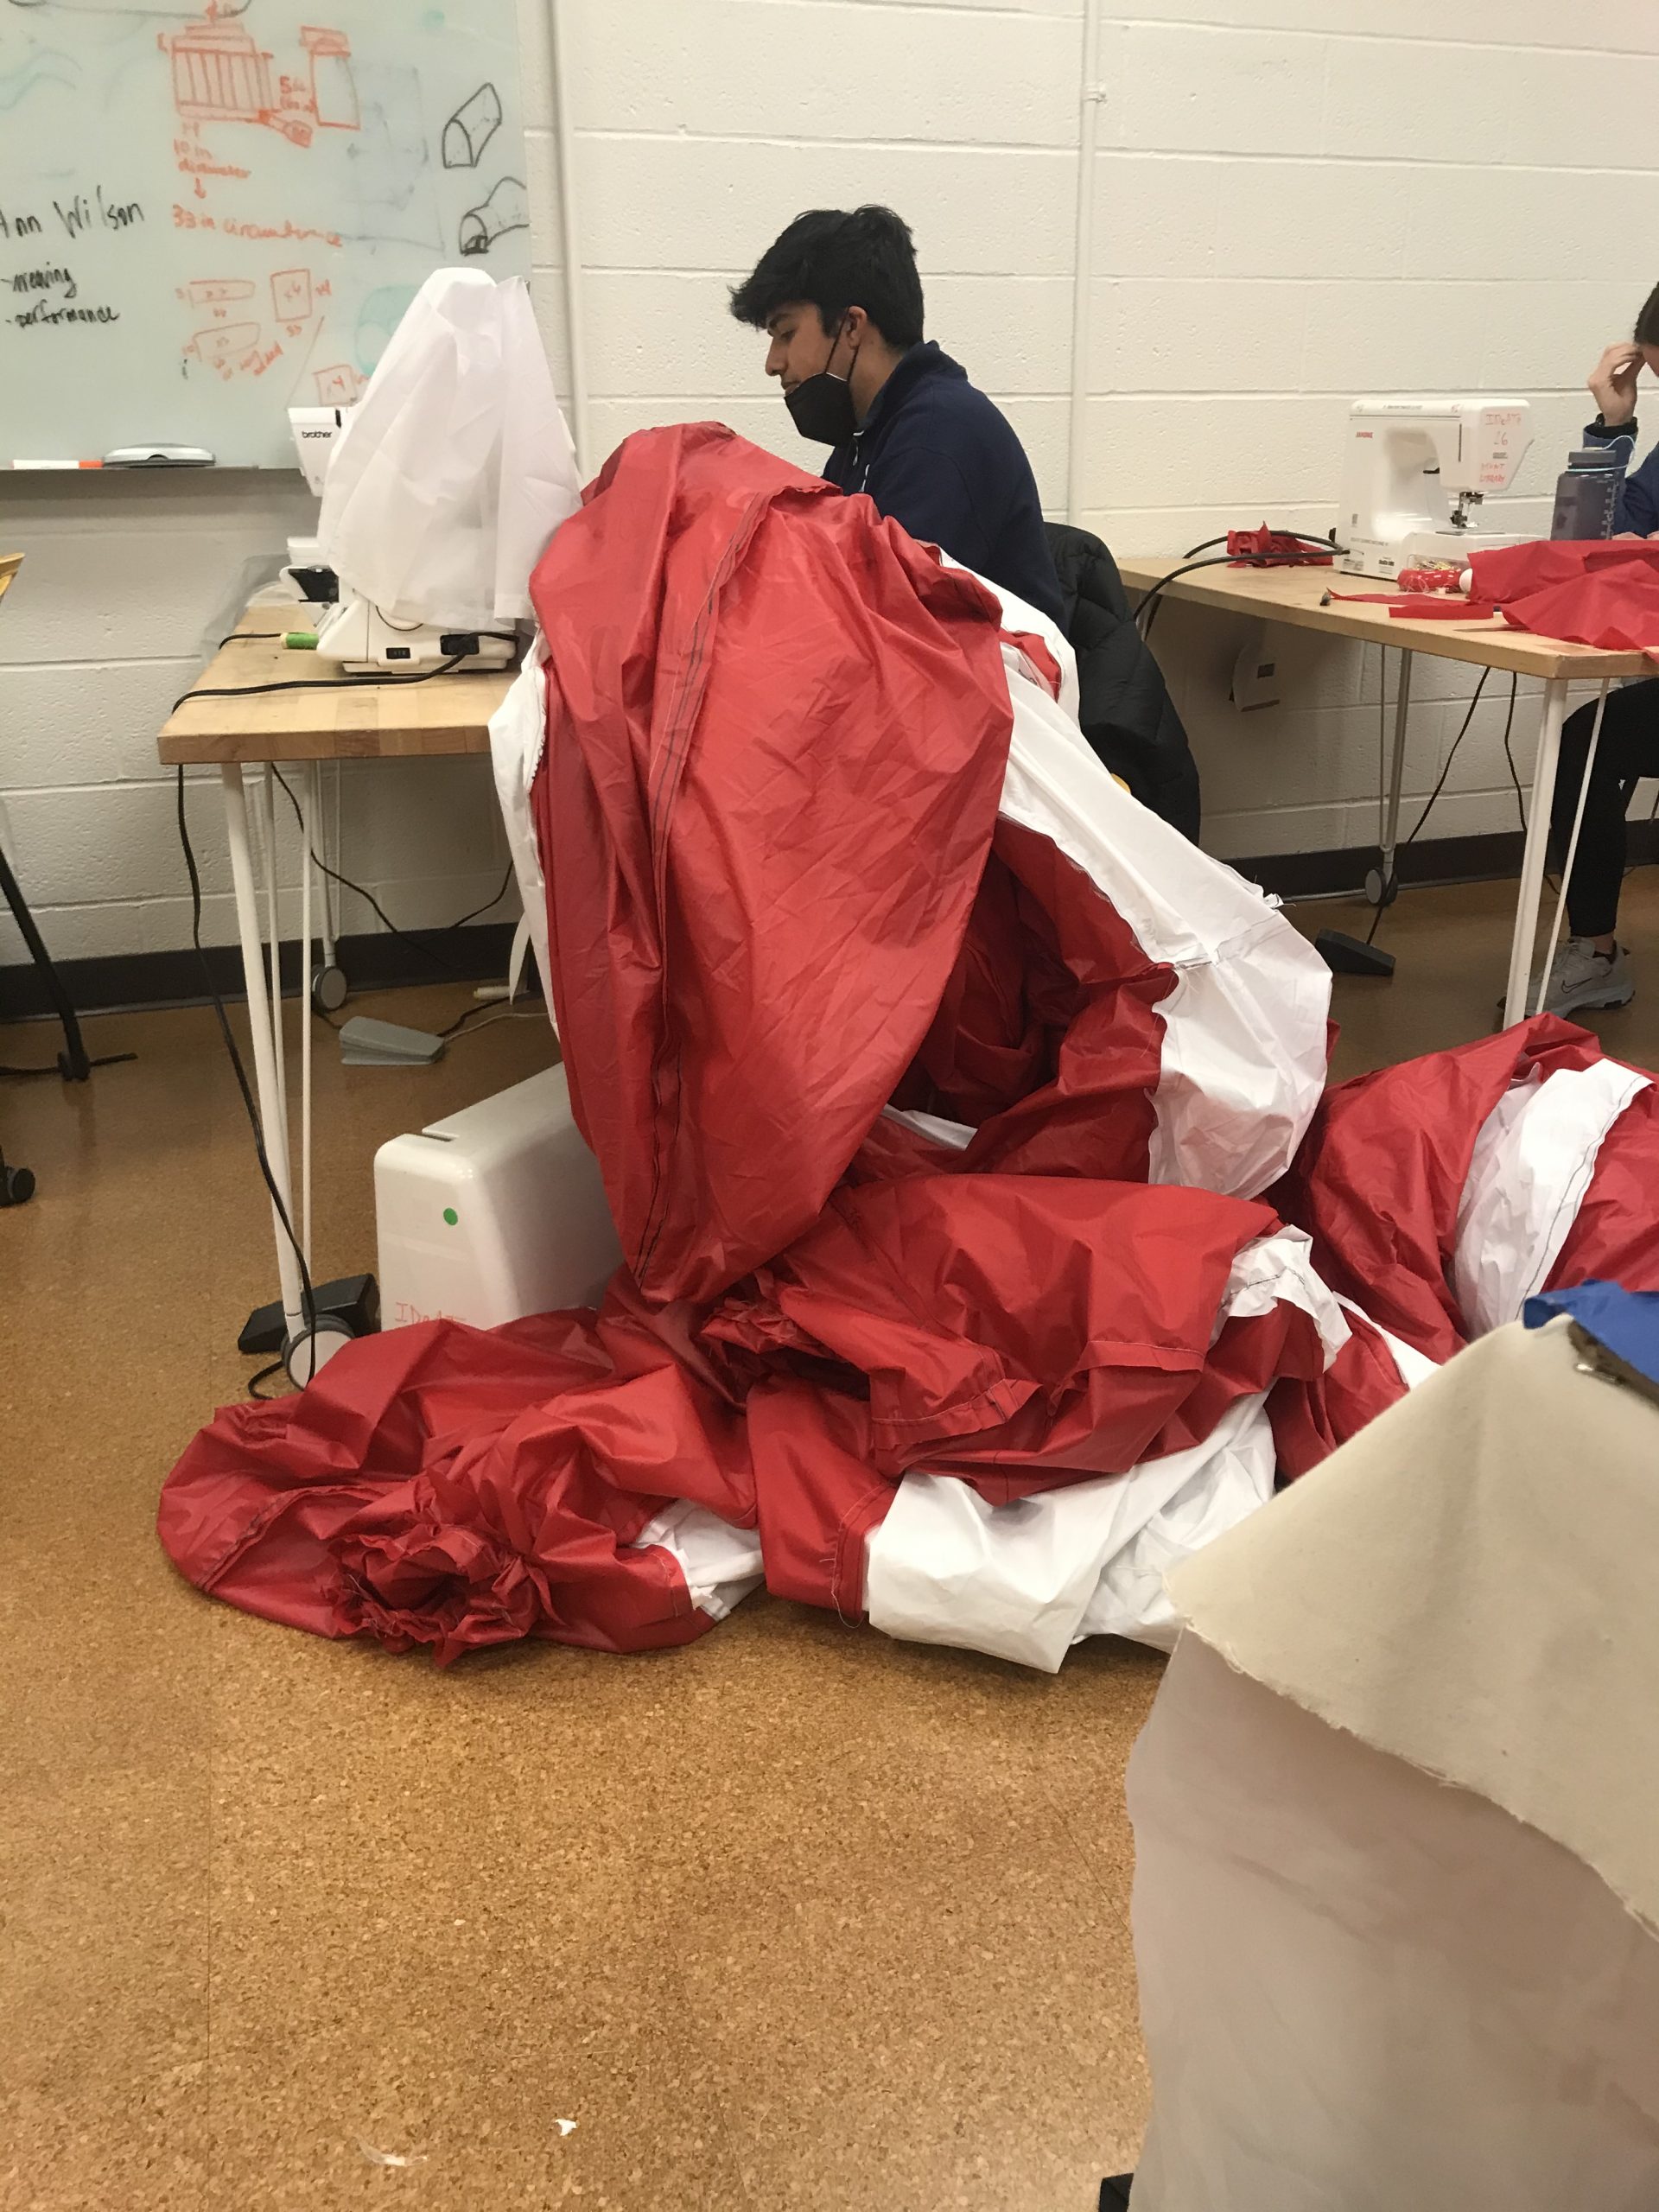
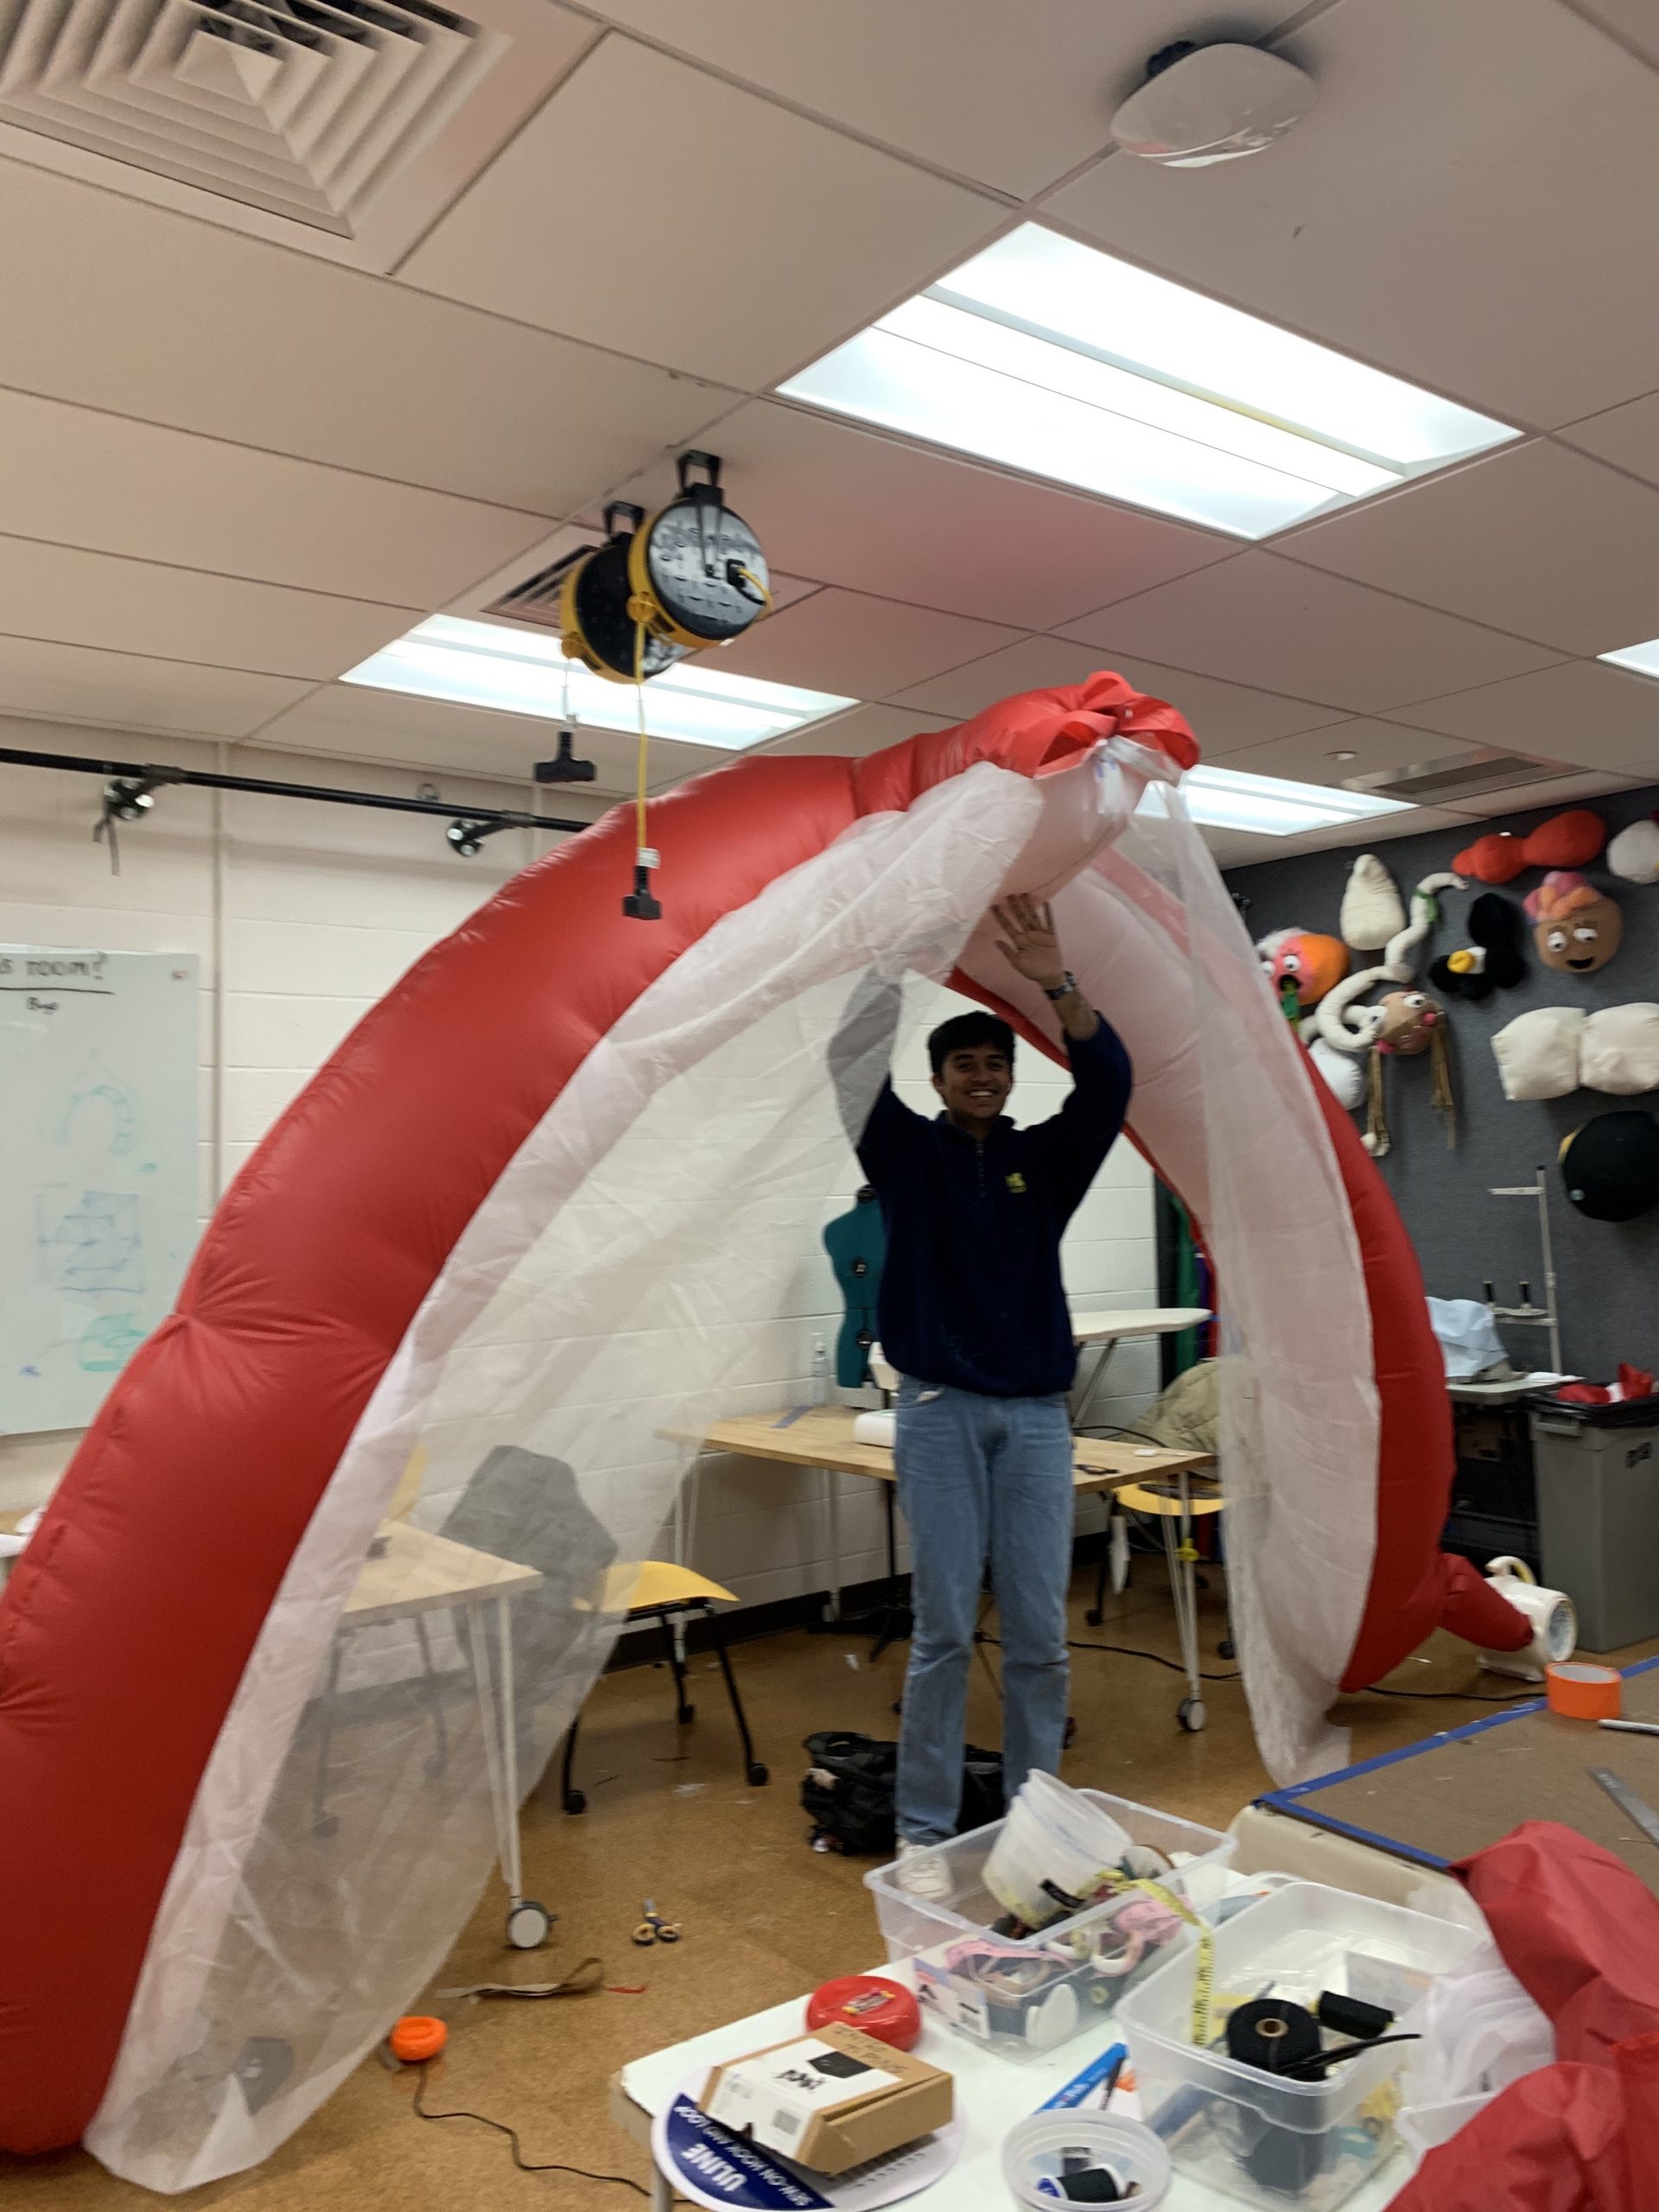
I mean first, we started with Rhino, which took us a while. Once we had most of the pieces squished we were able to start cutting pieces.  We started to cut pieces using the projector and cut and sew pretty much until we finished. 

  • What were the challenges you encountered and how do your team overcome them?

There were a couple of challenges we encountered along the way. There were issues with projectors – we first struggled with getting comfortable with the setup so that we could trace all of our pieces. There were also issues with lending as there were multiple times where we weren’t able to get access to the resources we needed. We overcame this by regularly communicating with Olivia to make sure we did have access to lending resources.

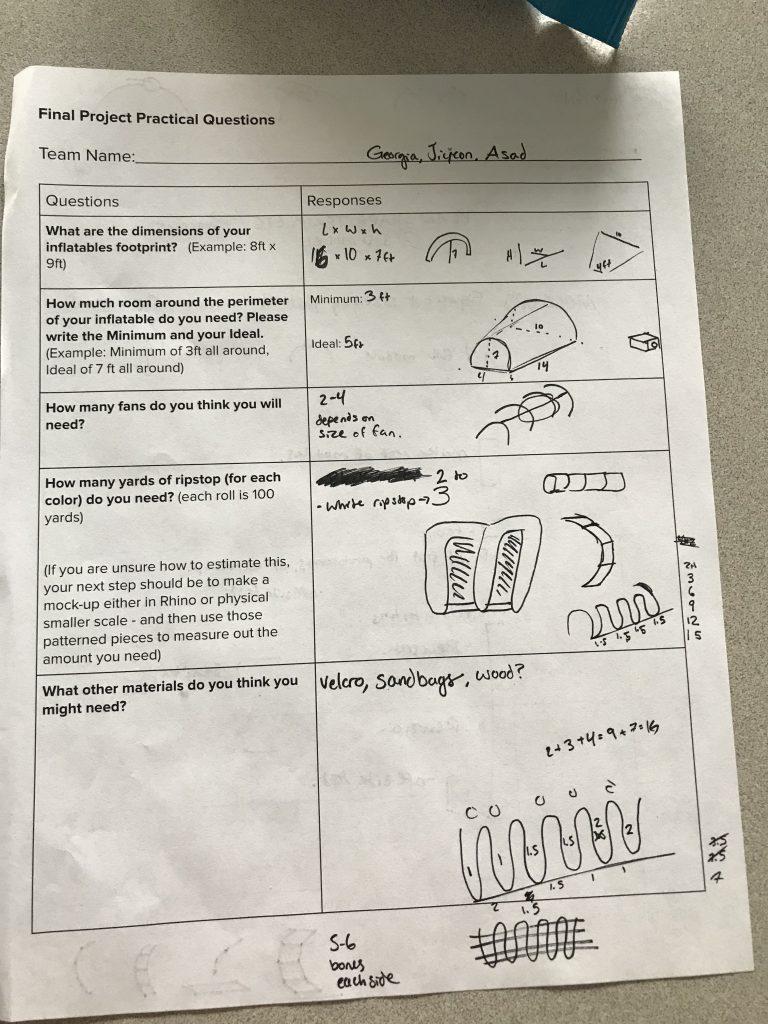
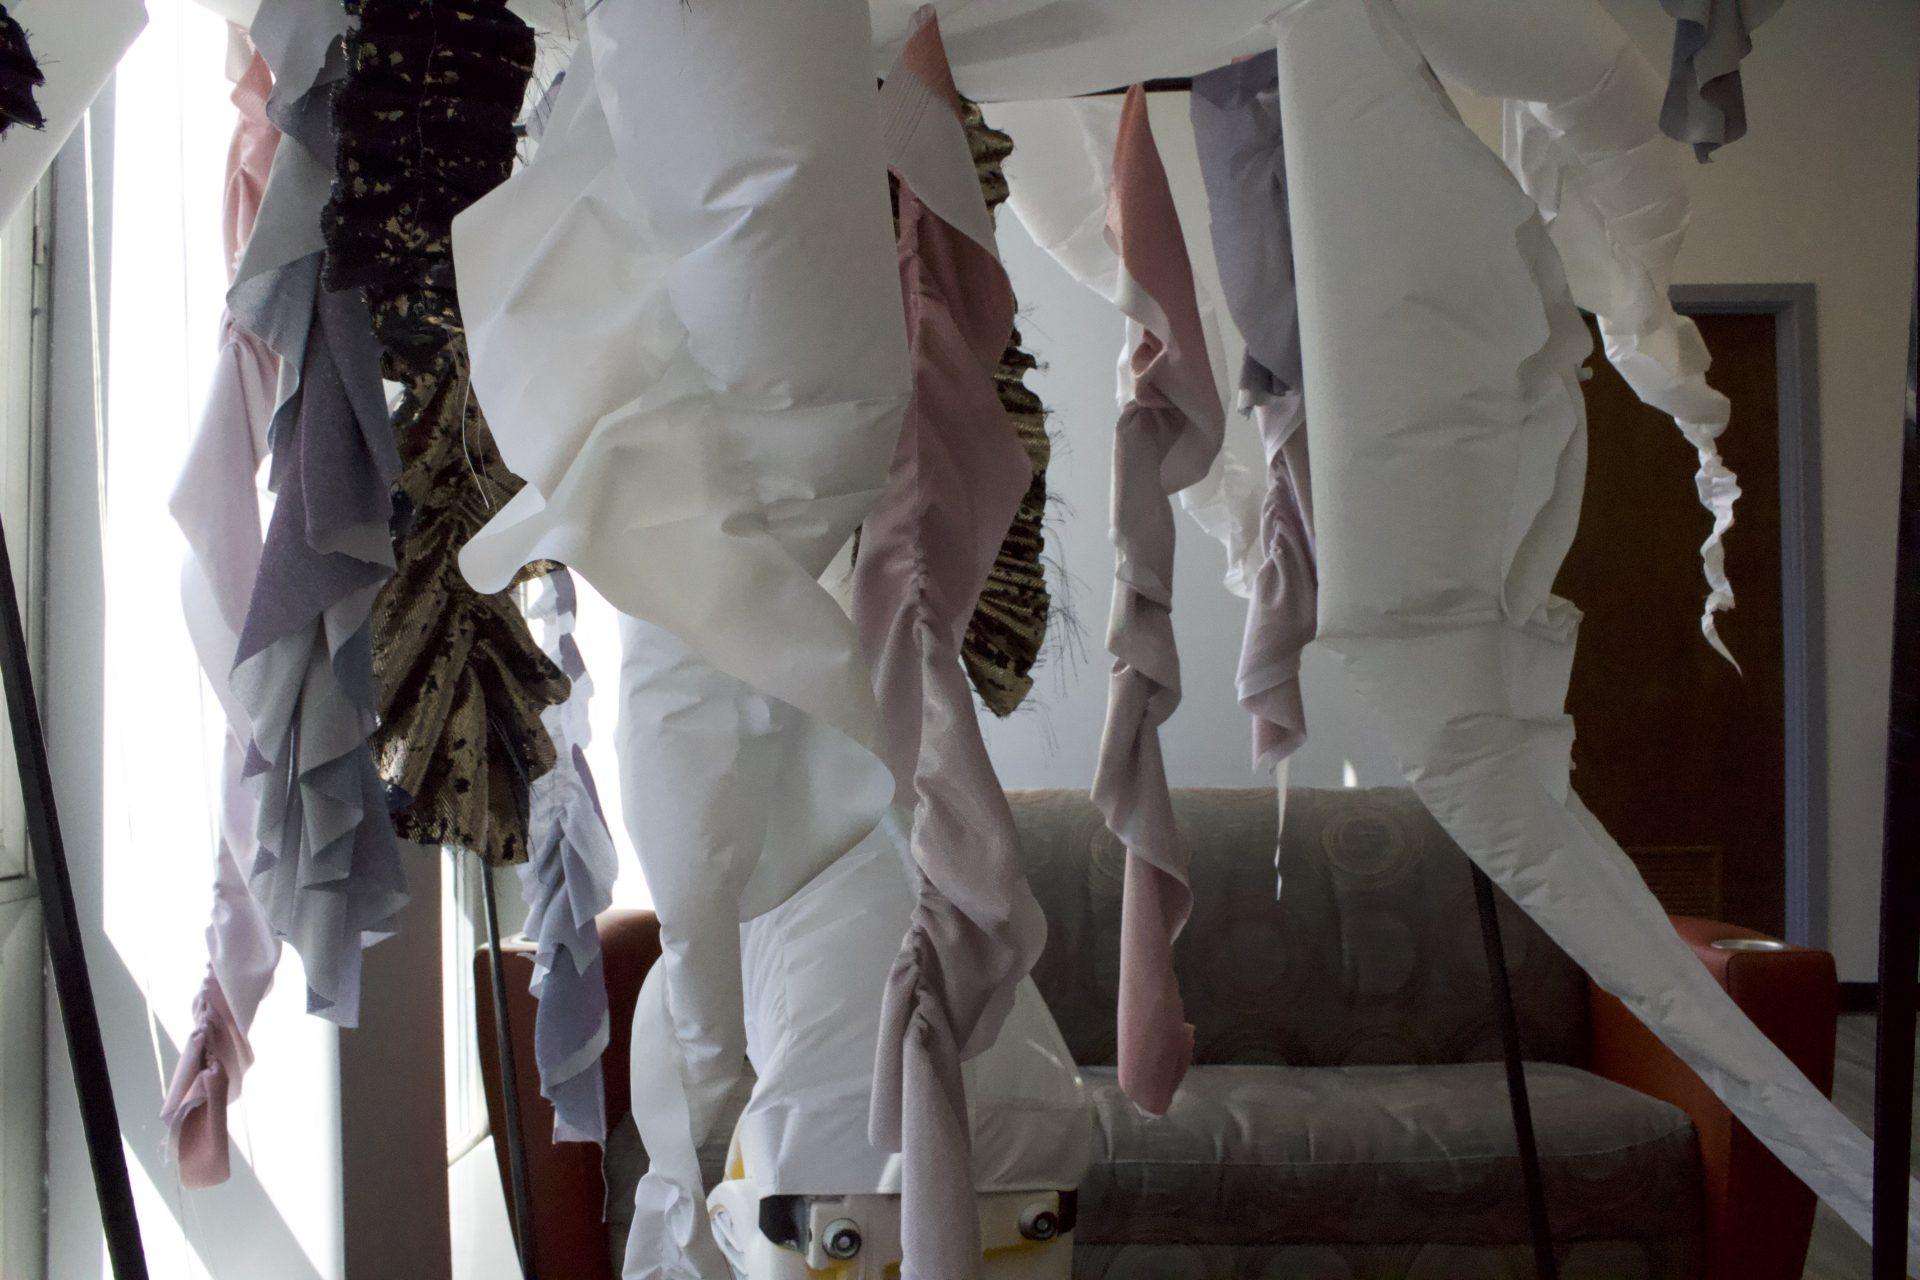
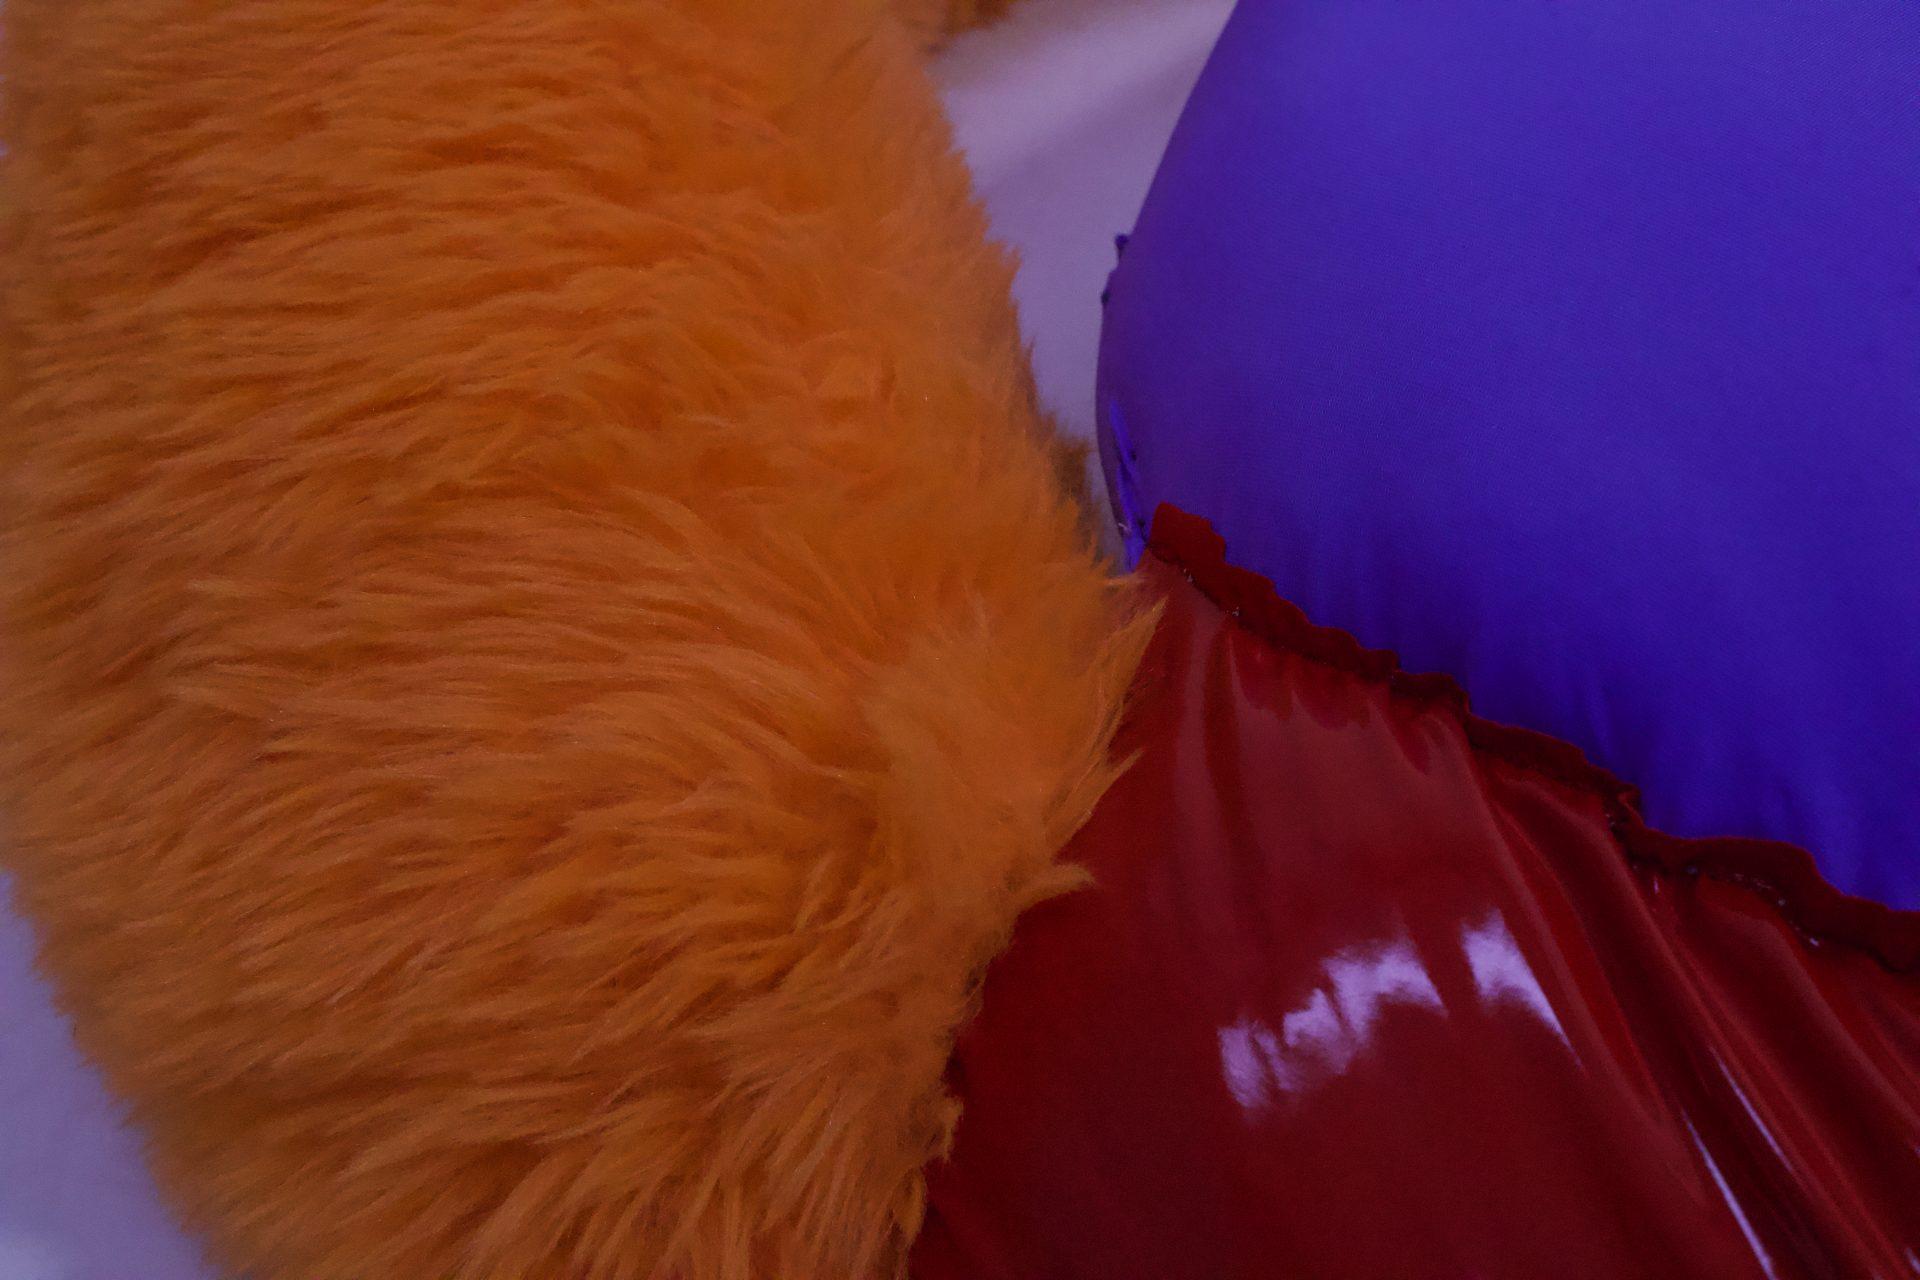
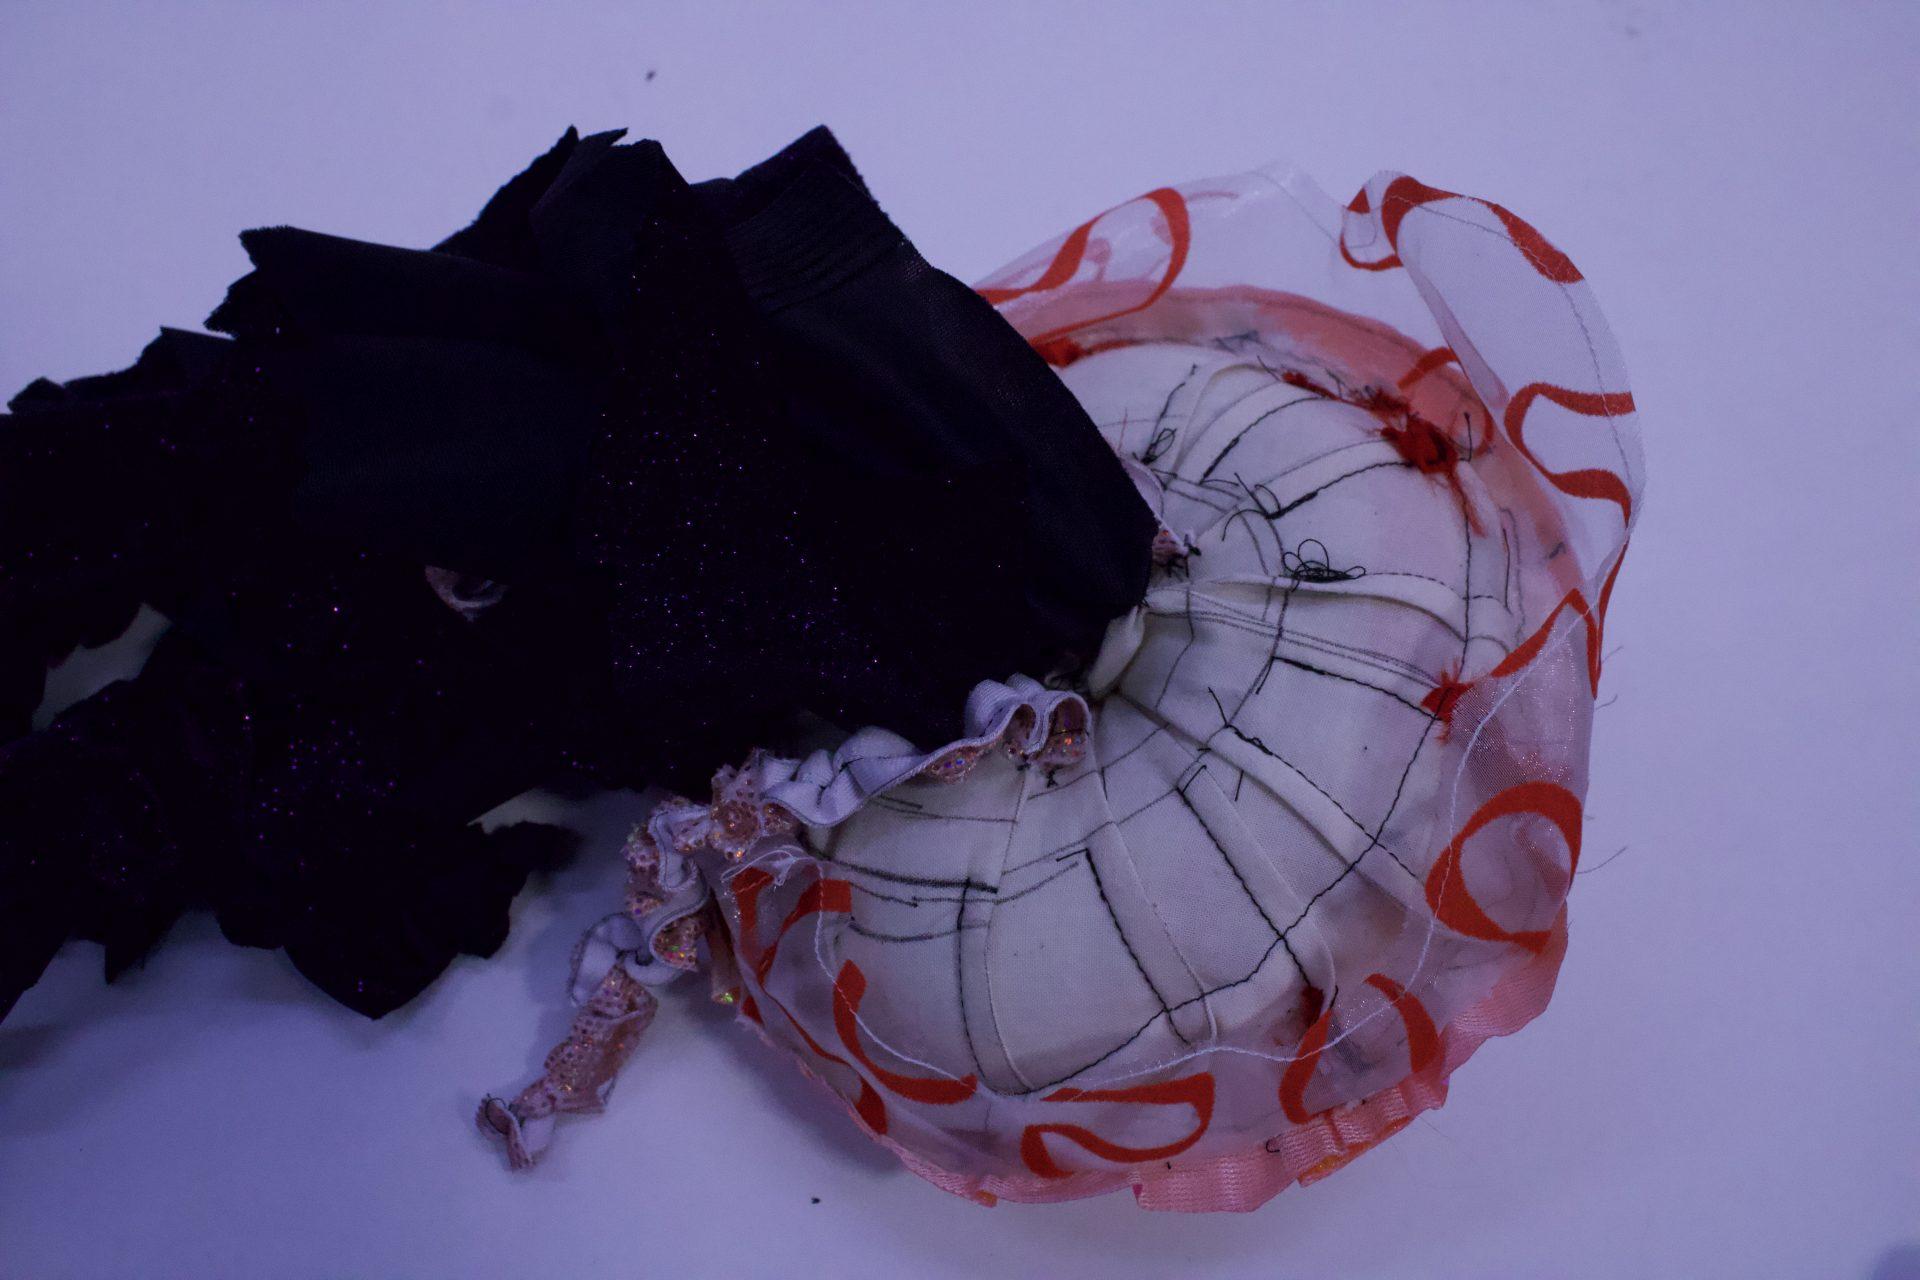
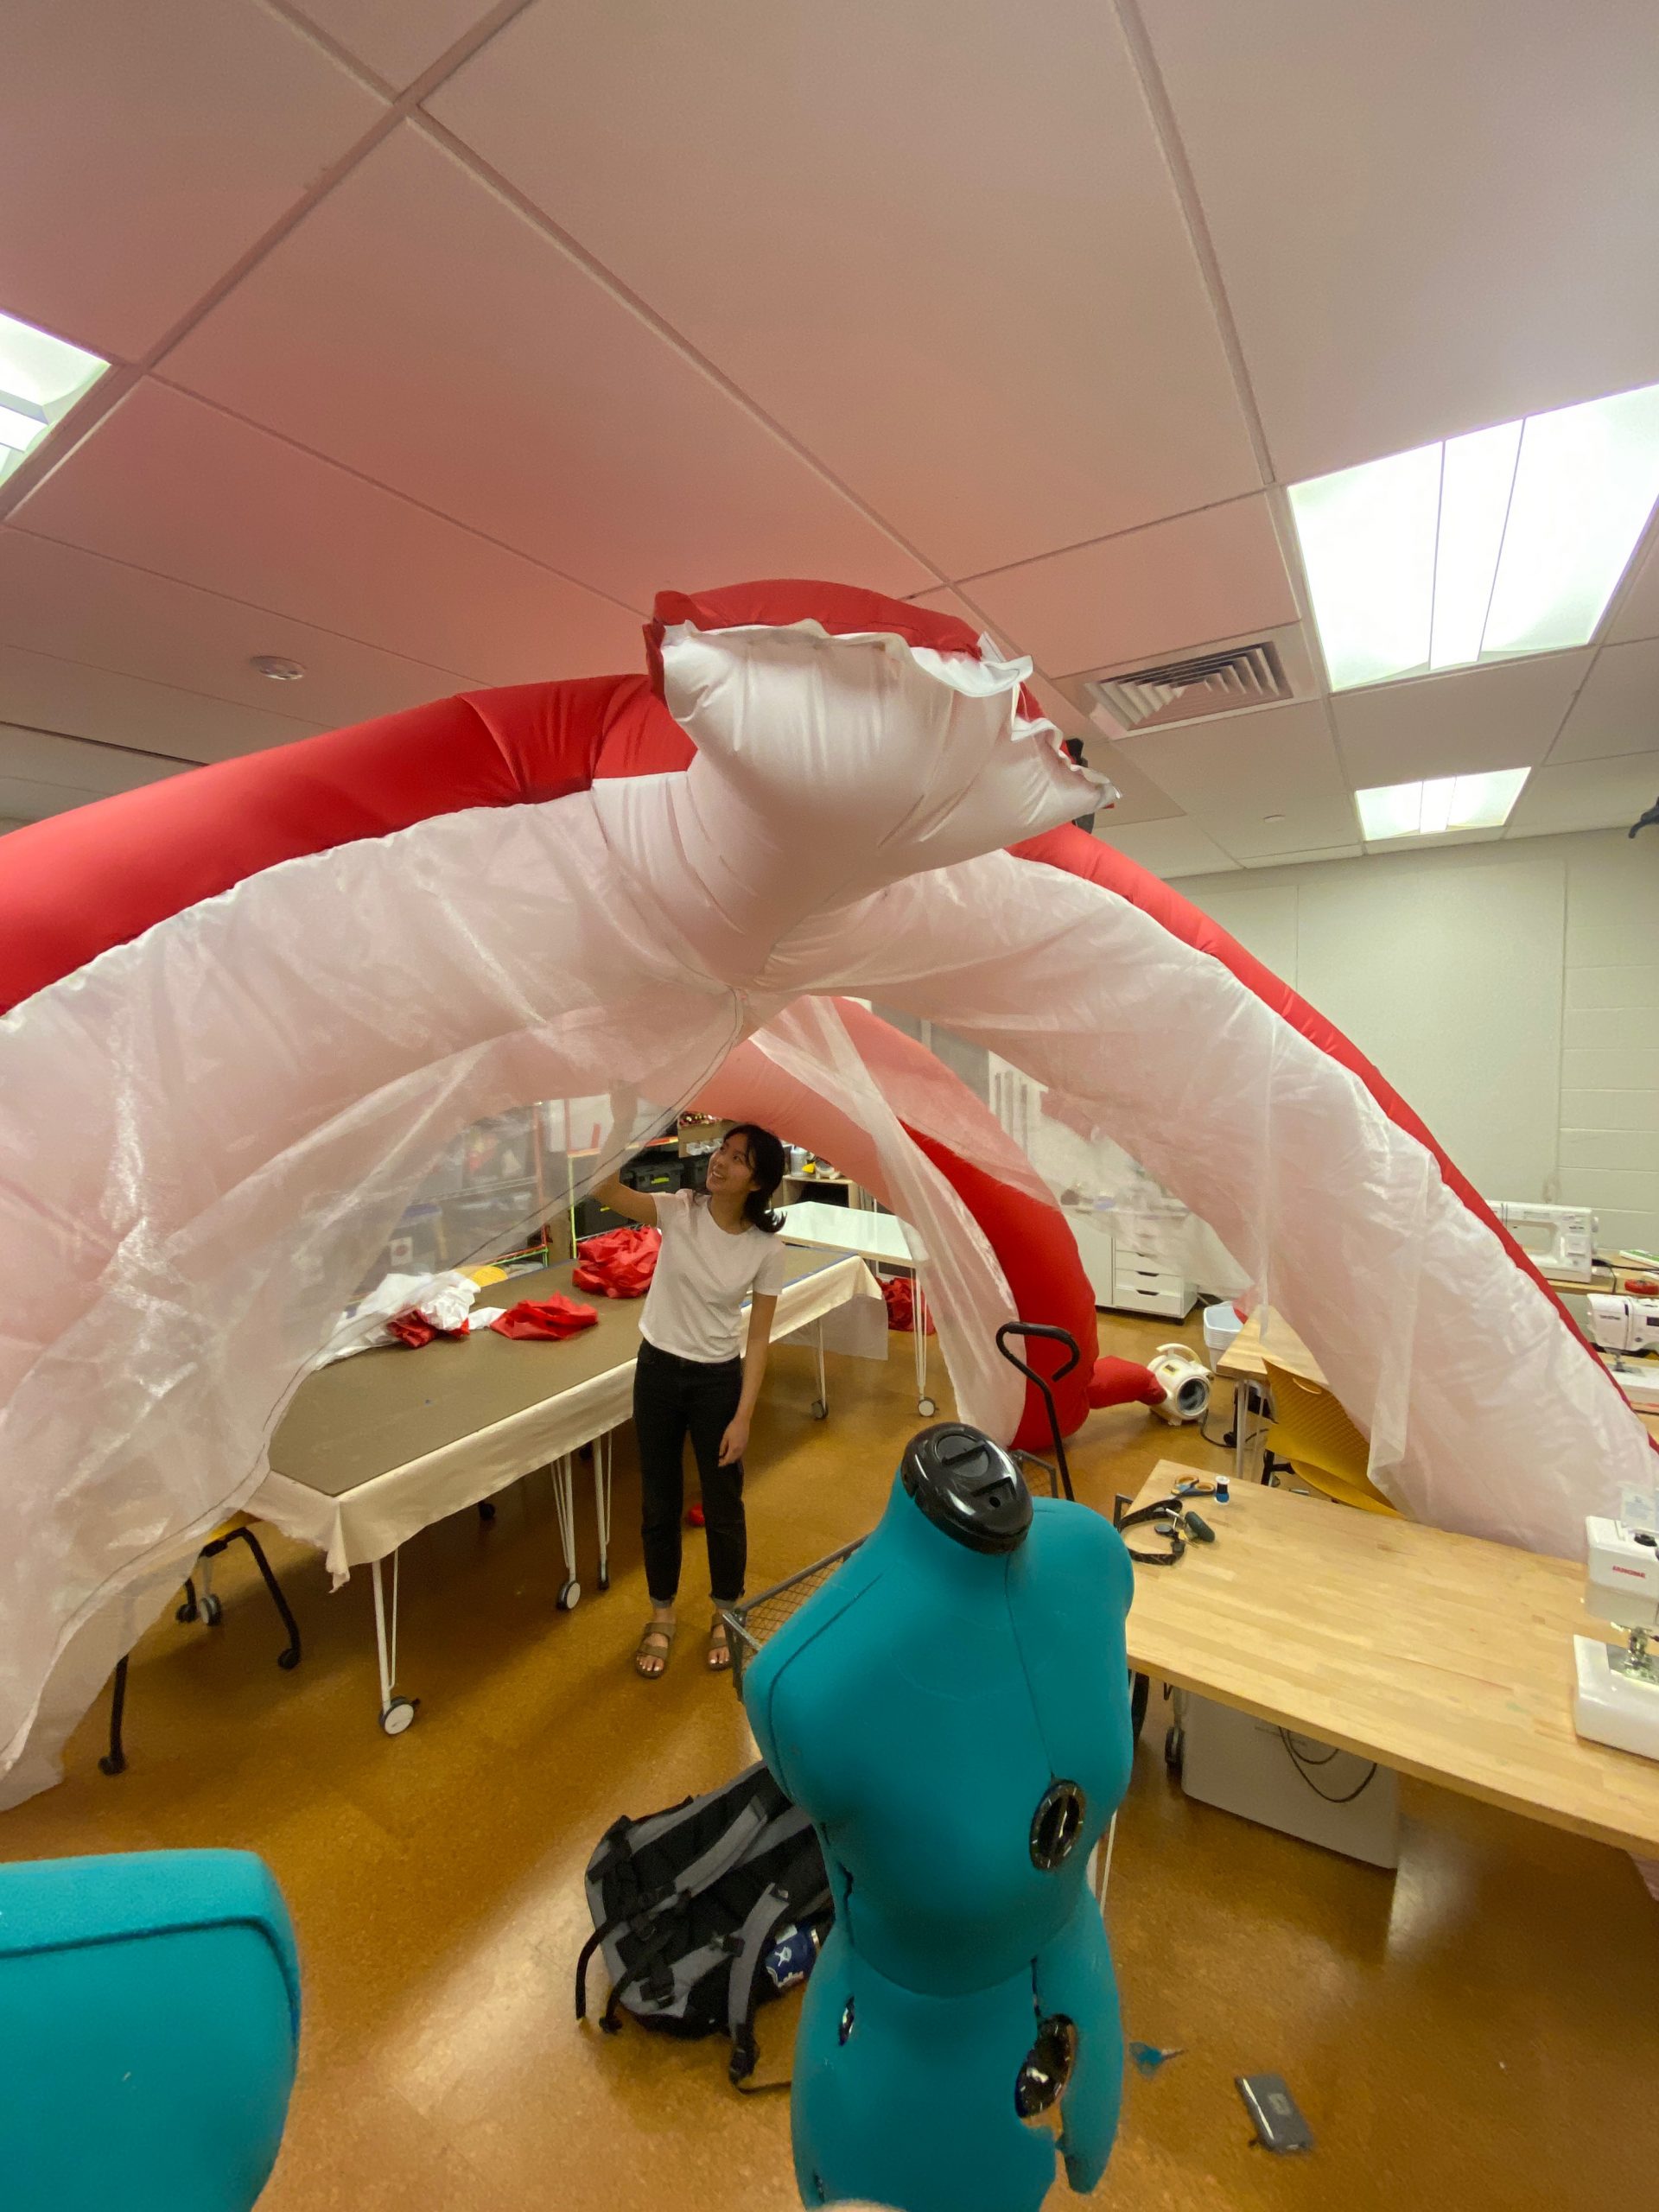
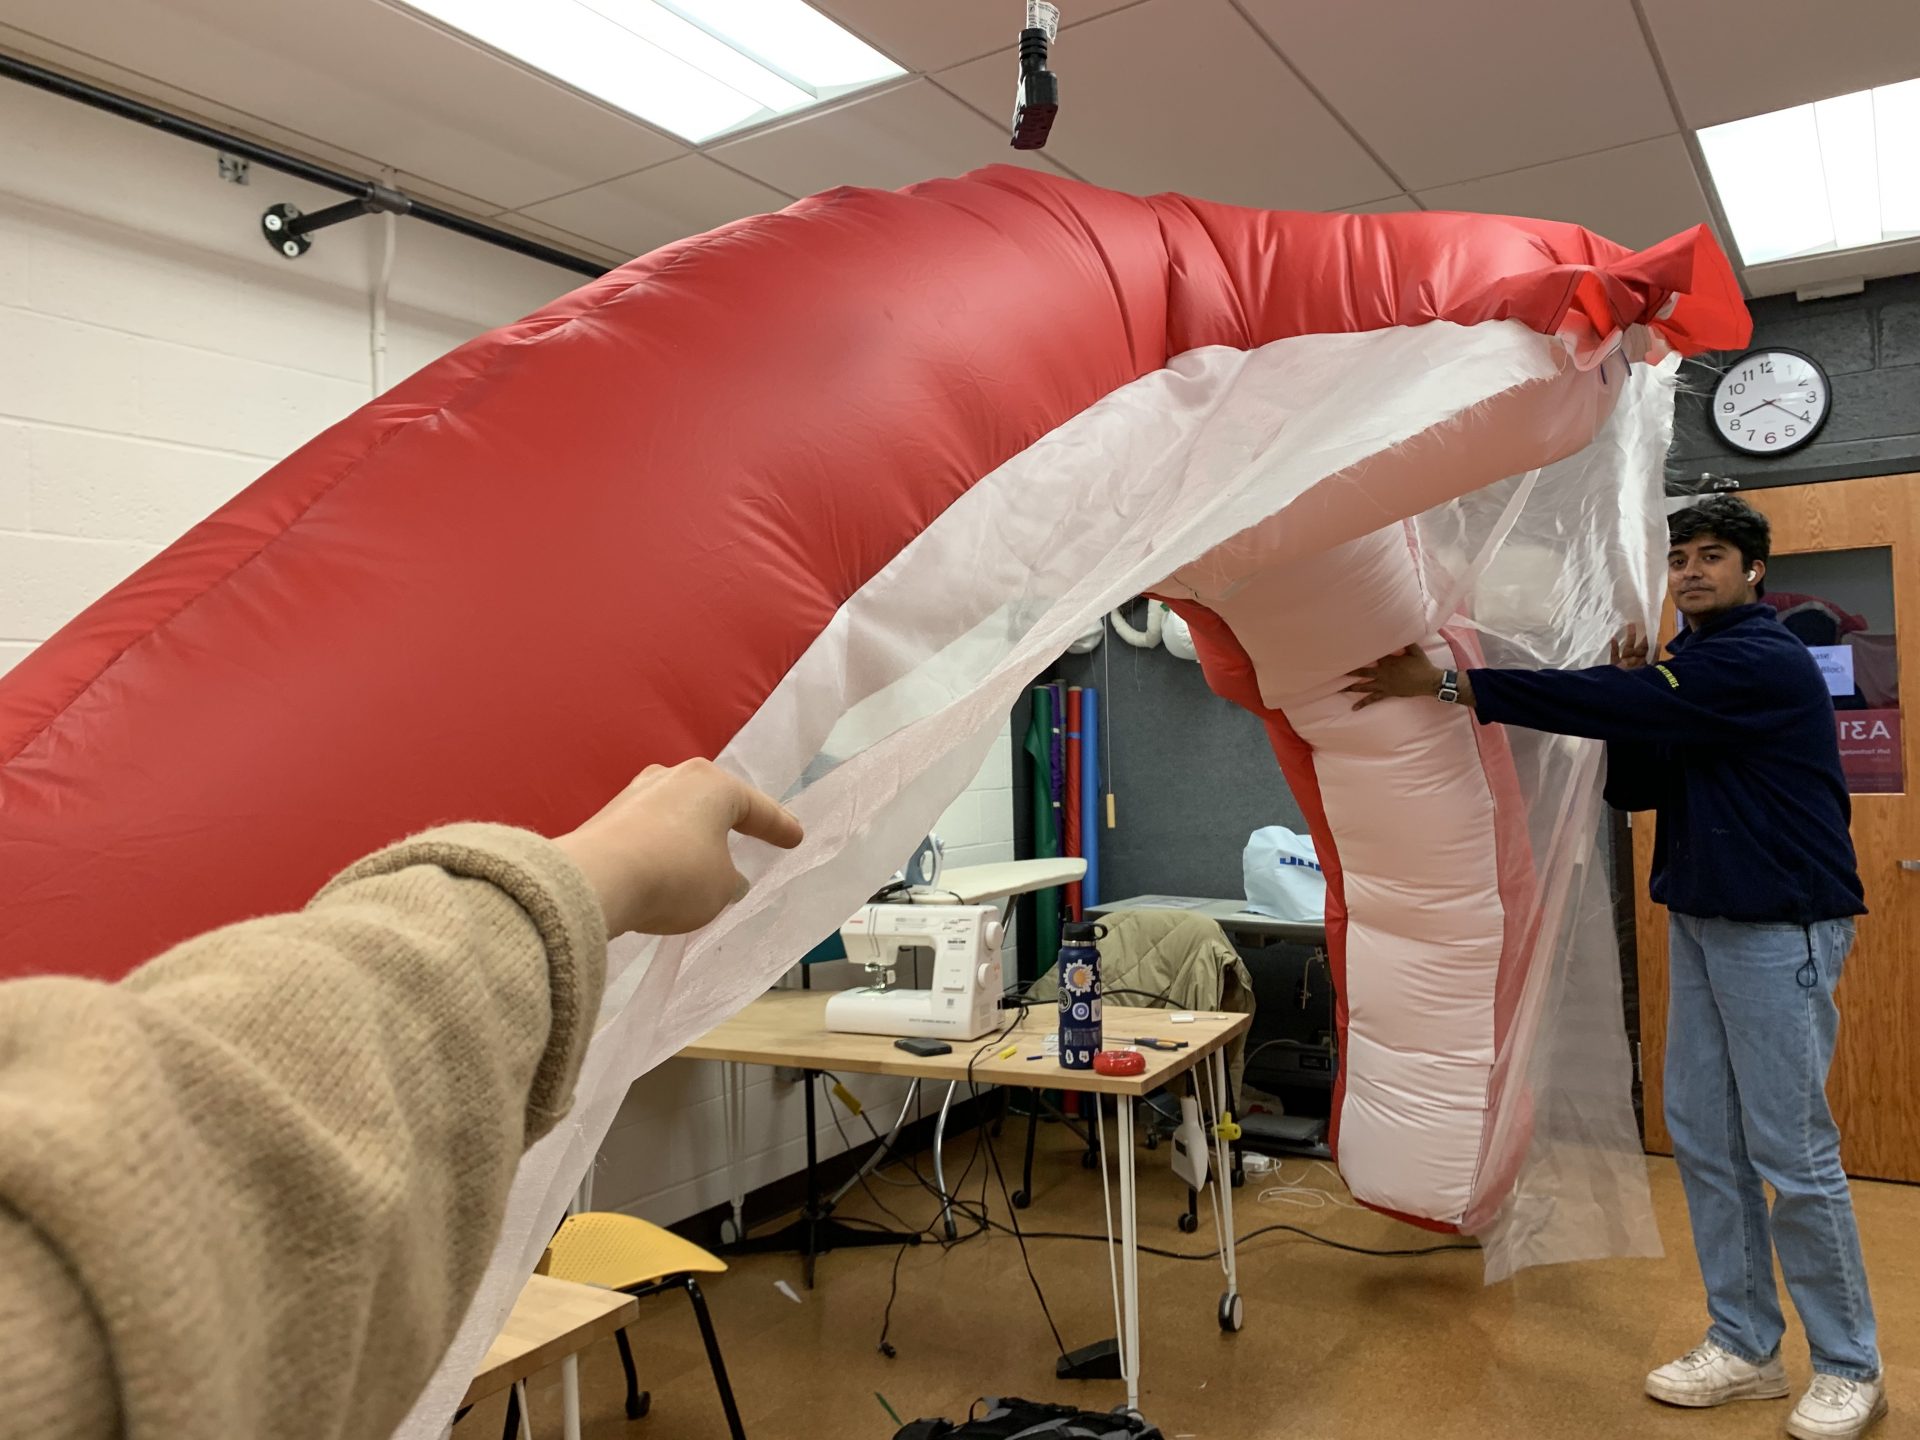
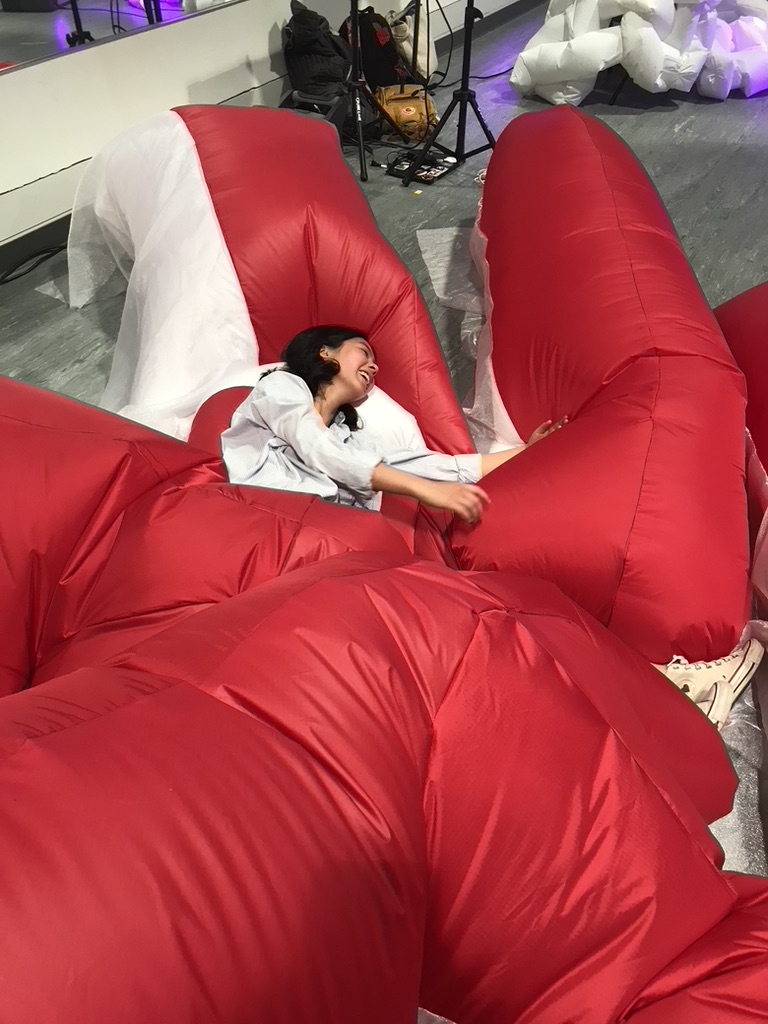
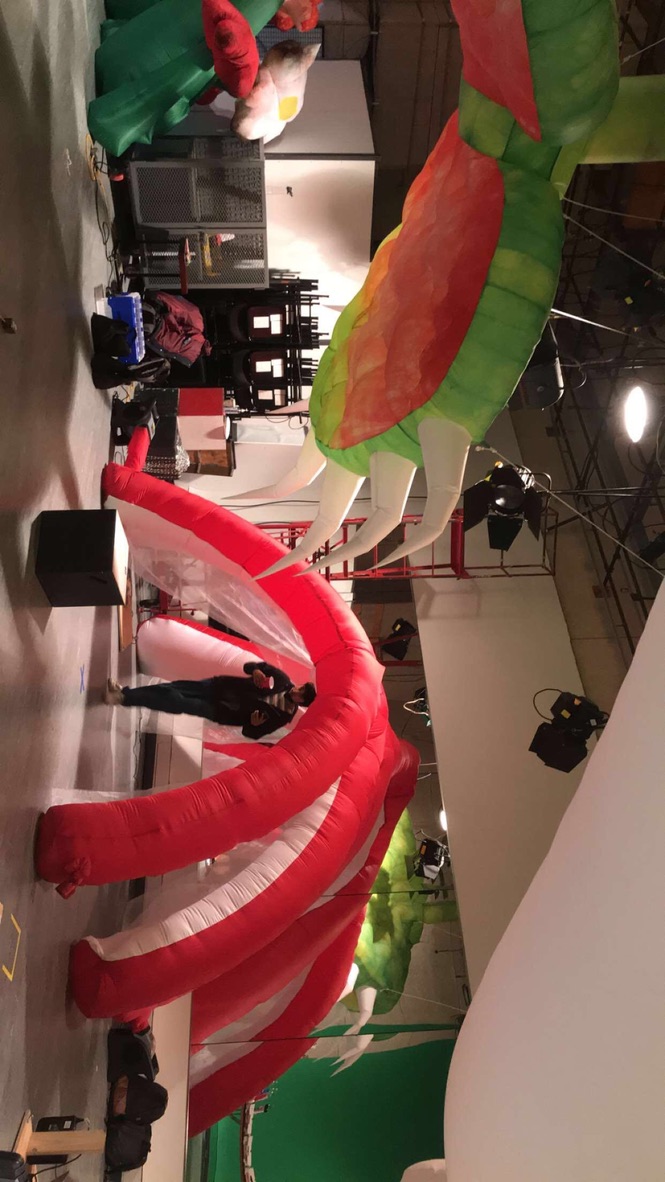
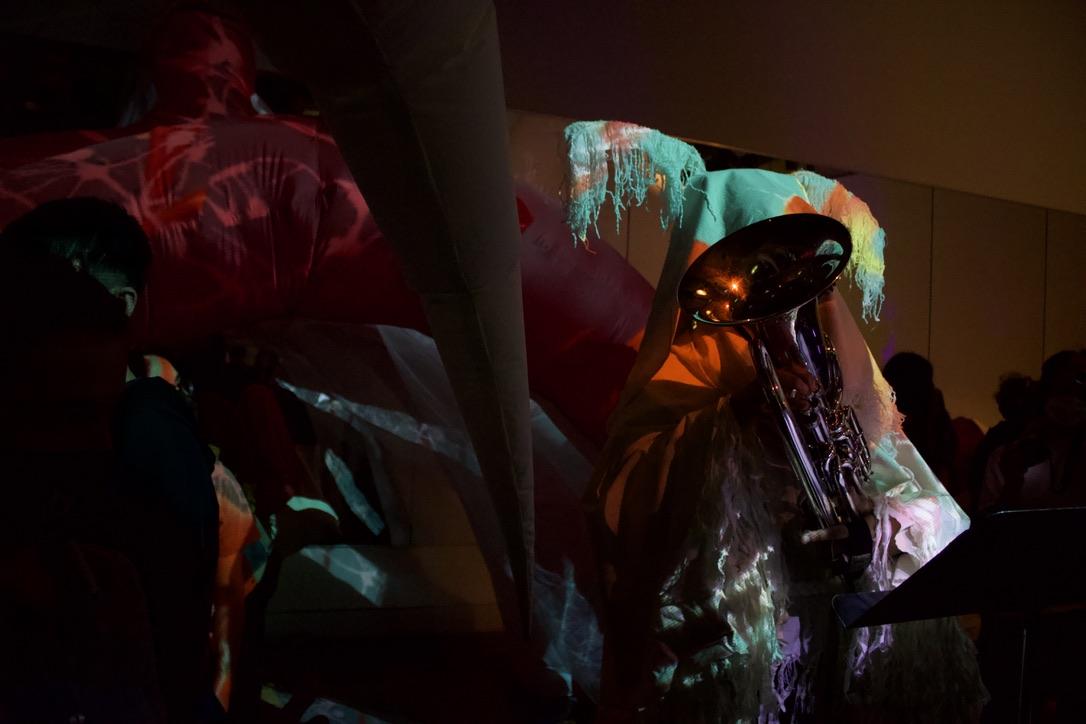
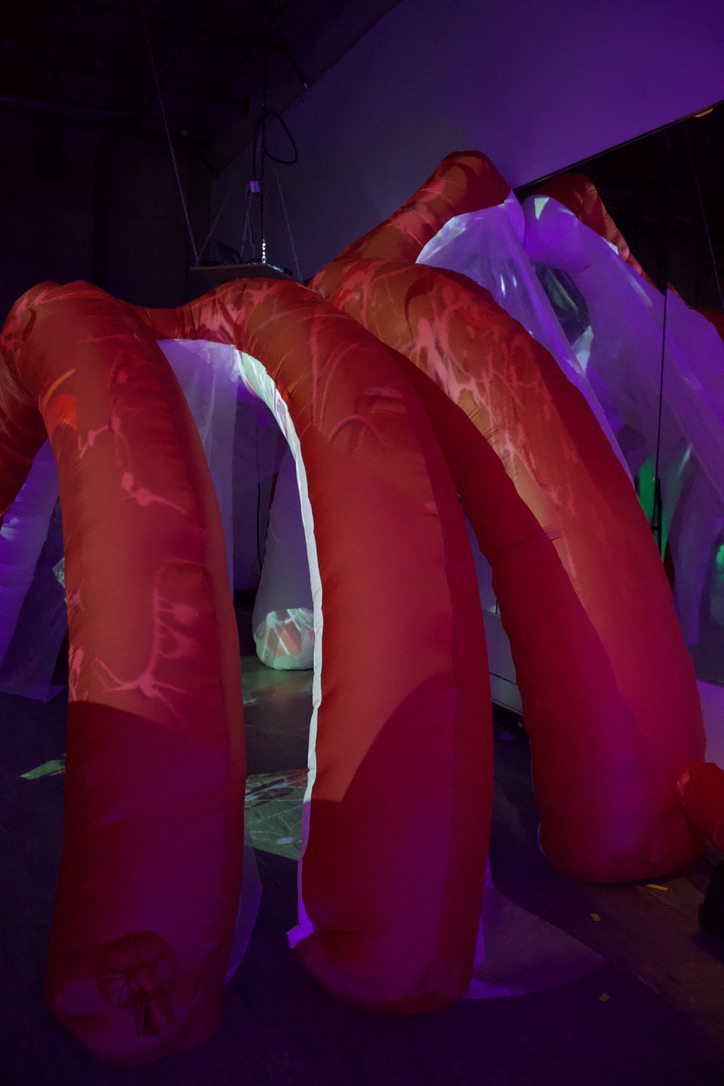
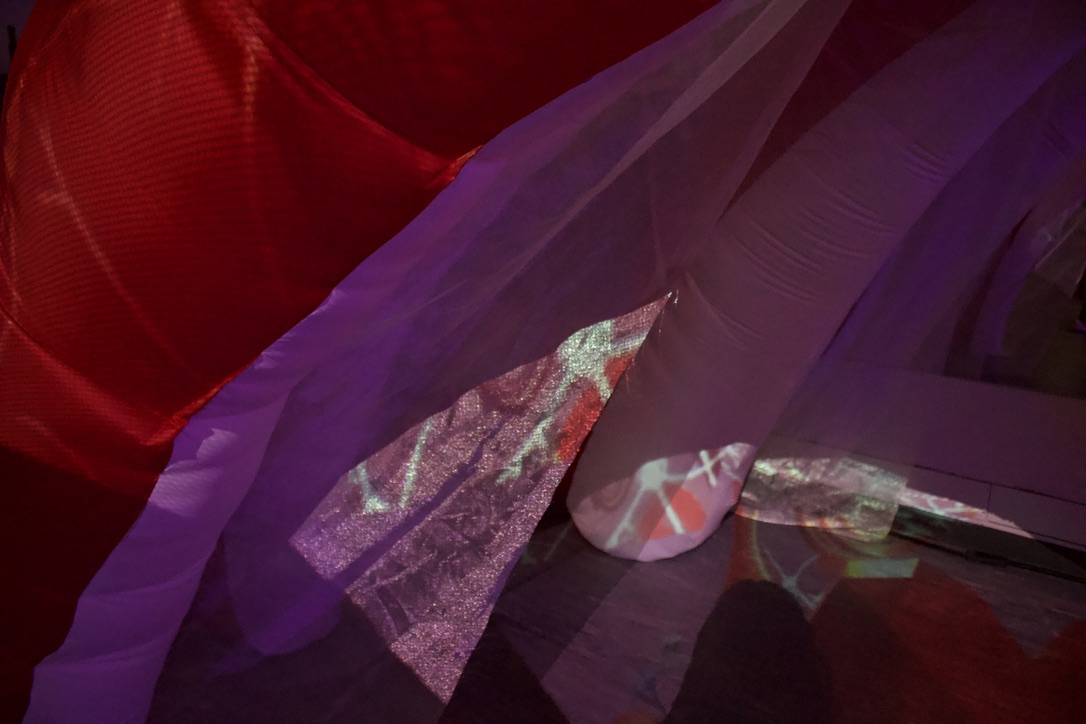
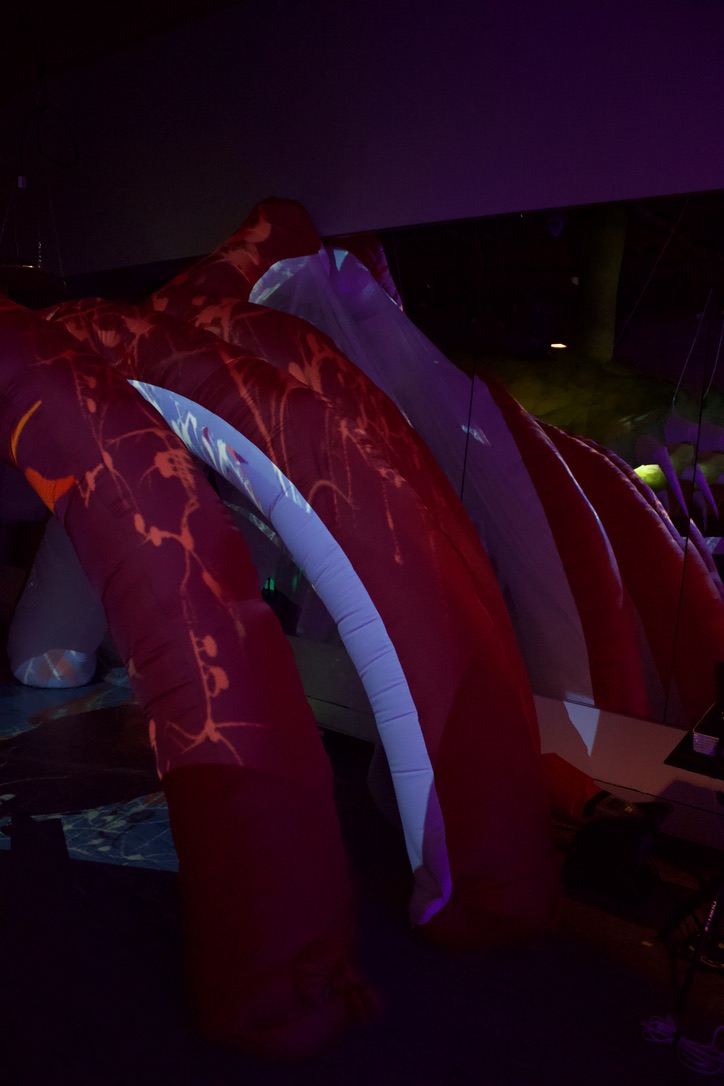
We also struggled with fabric availability. There wasn’t enough white ripstop for our project so we had to resort to using red on the outside of the ribcage and white on the inside so that we were still able to create that experience on the inside that we intended.

We had some issues with availability – we were constantly asking ourselves who was free all the time. We found that using a google sheet to write down our availability was super helpful in knowing when our schedules overlapped.

  • What were the “happy accidents” that you encountered along the way?

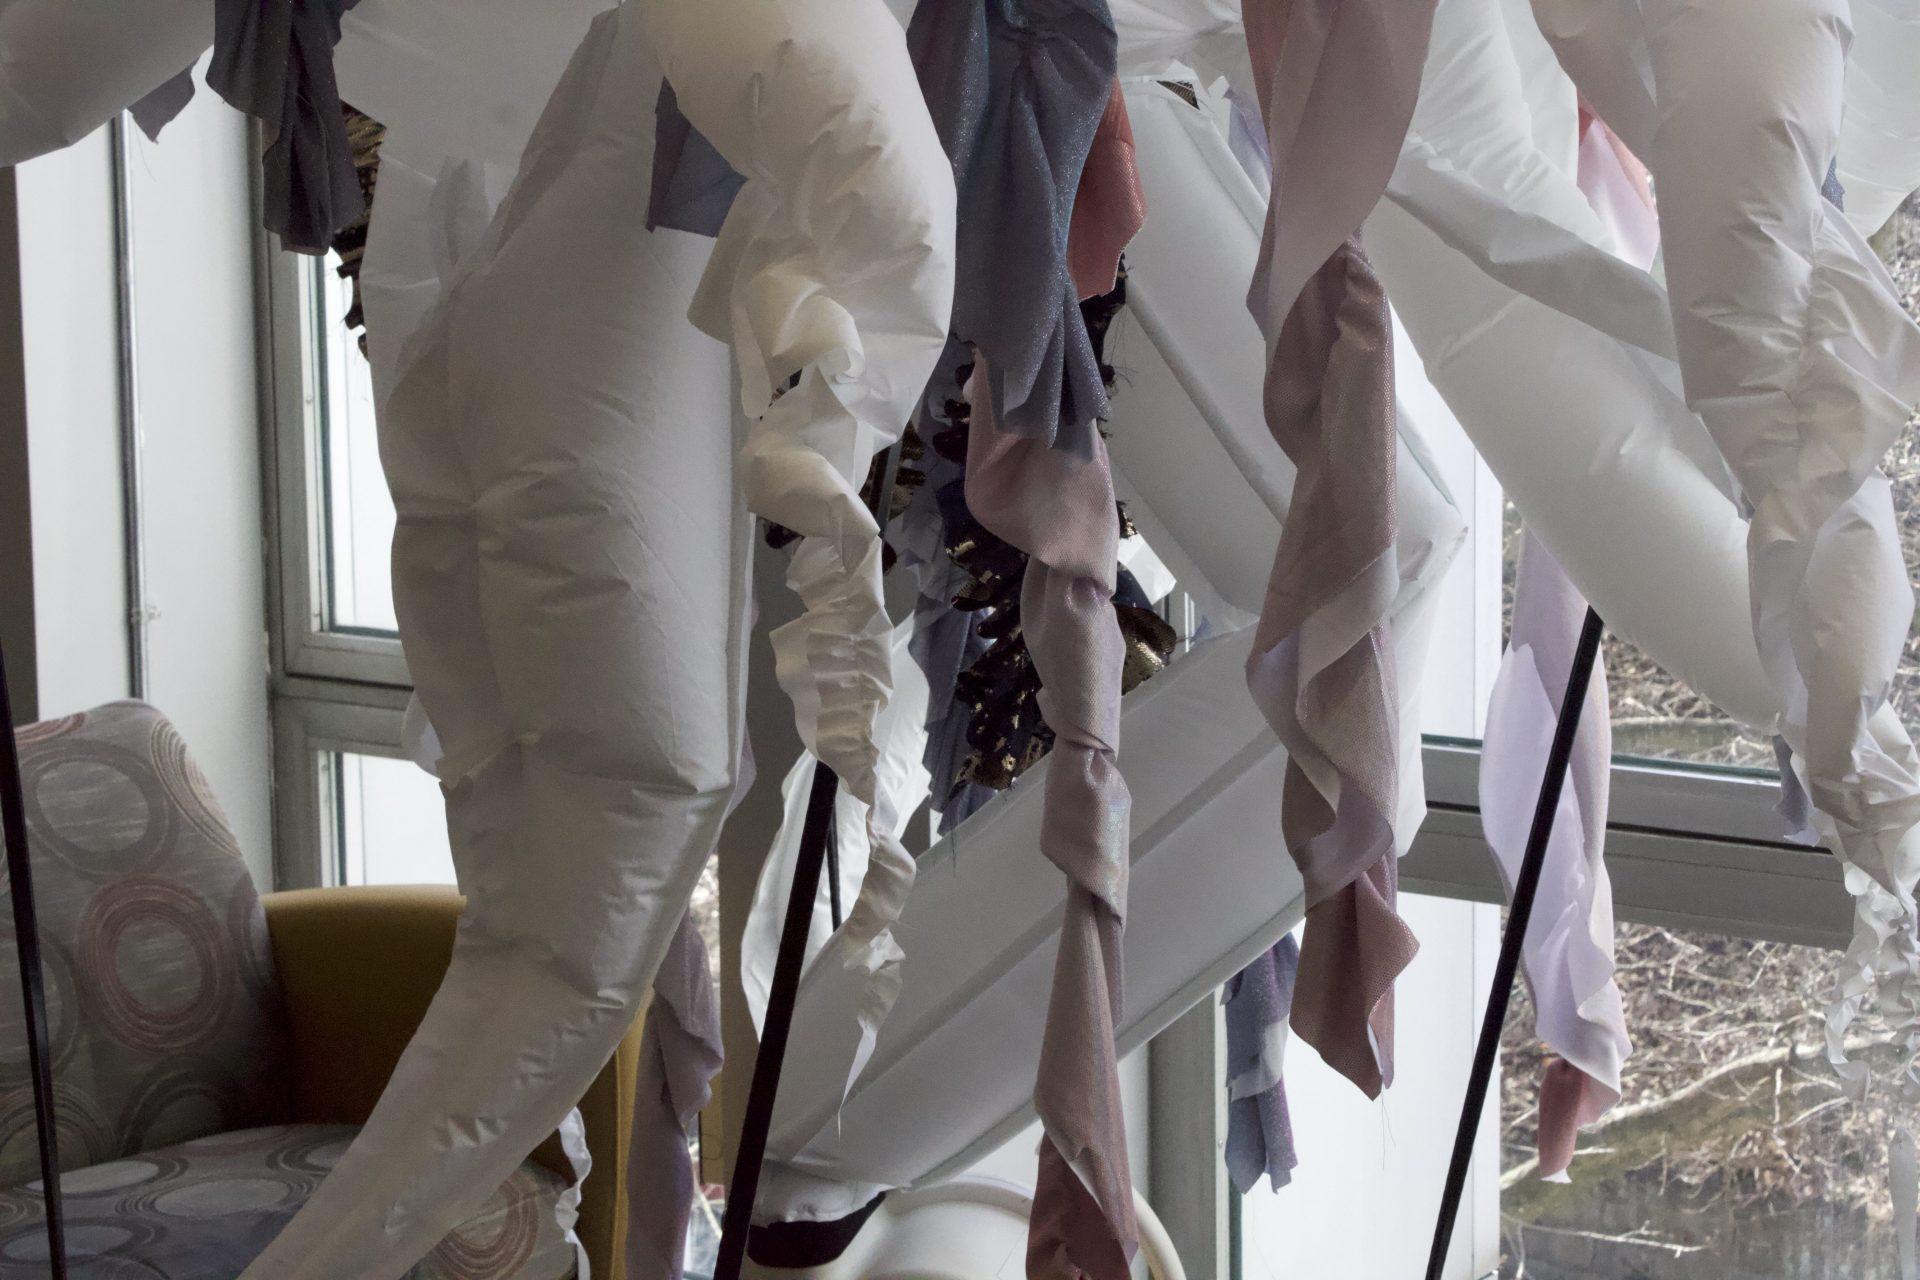
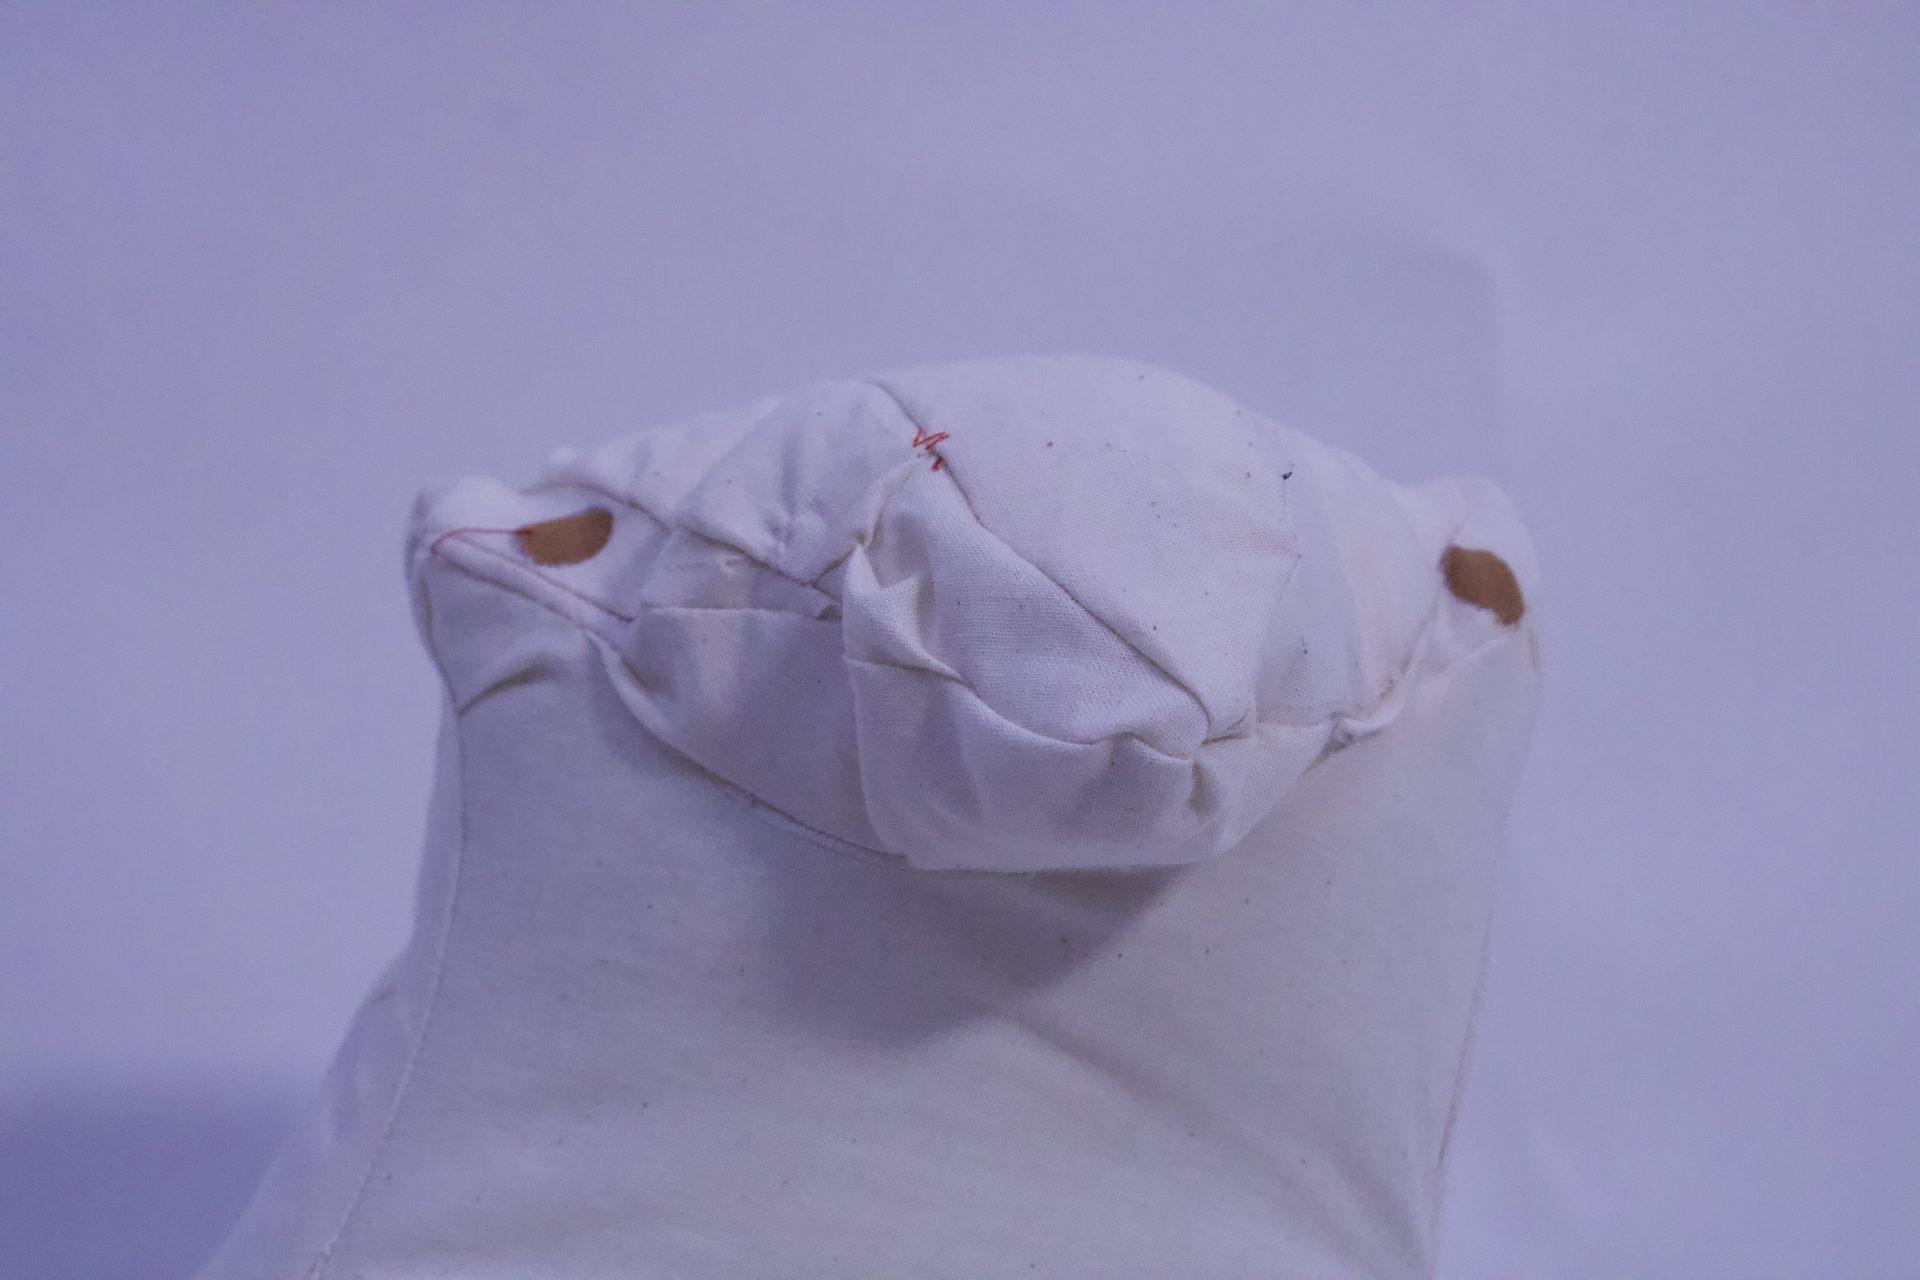
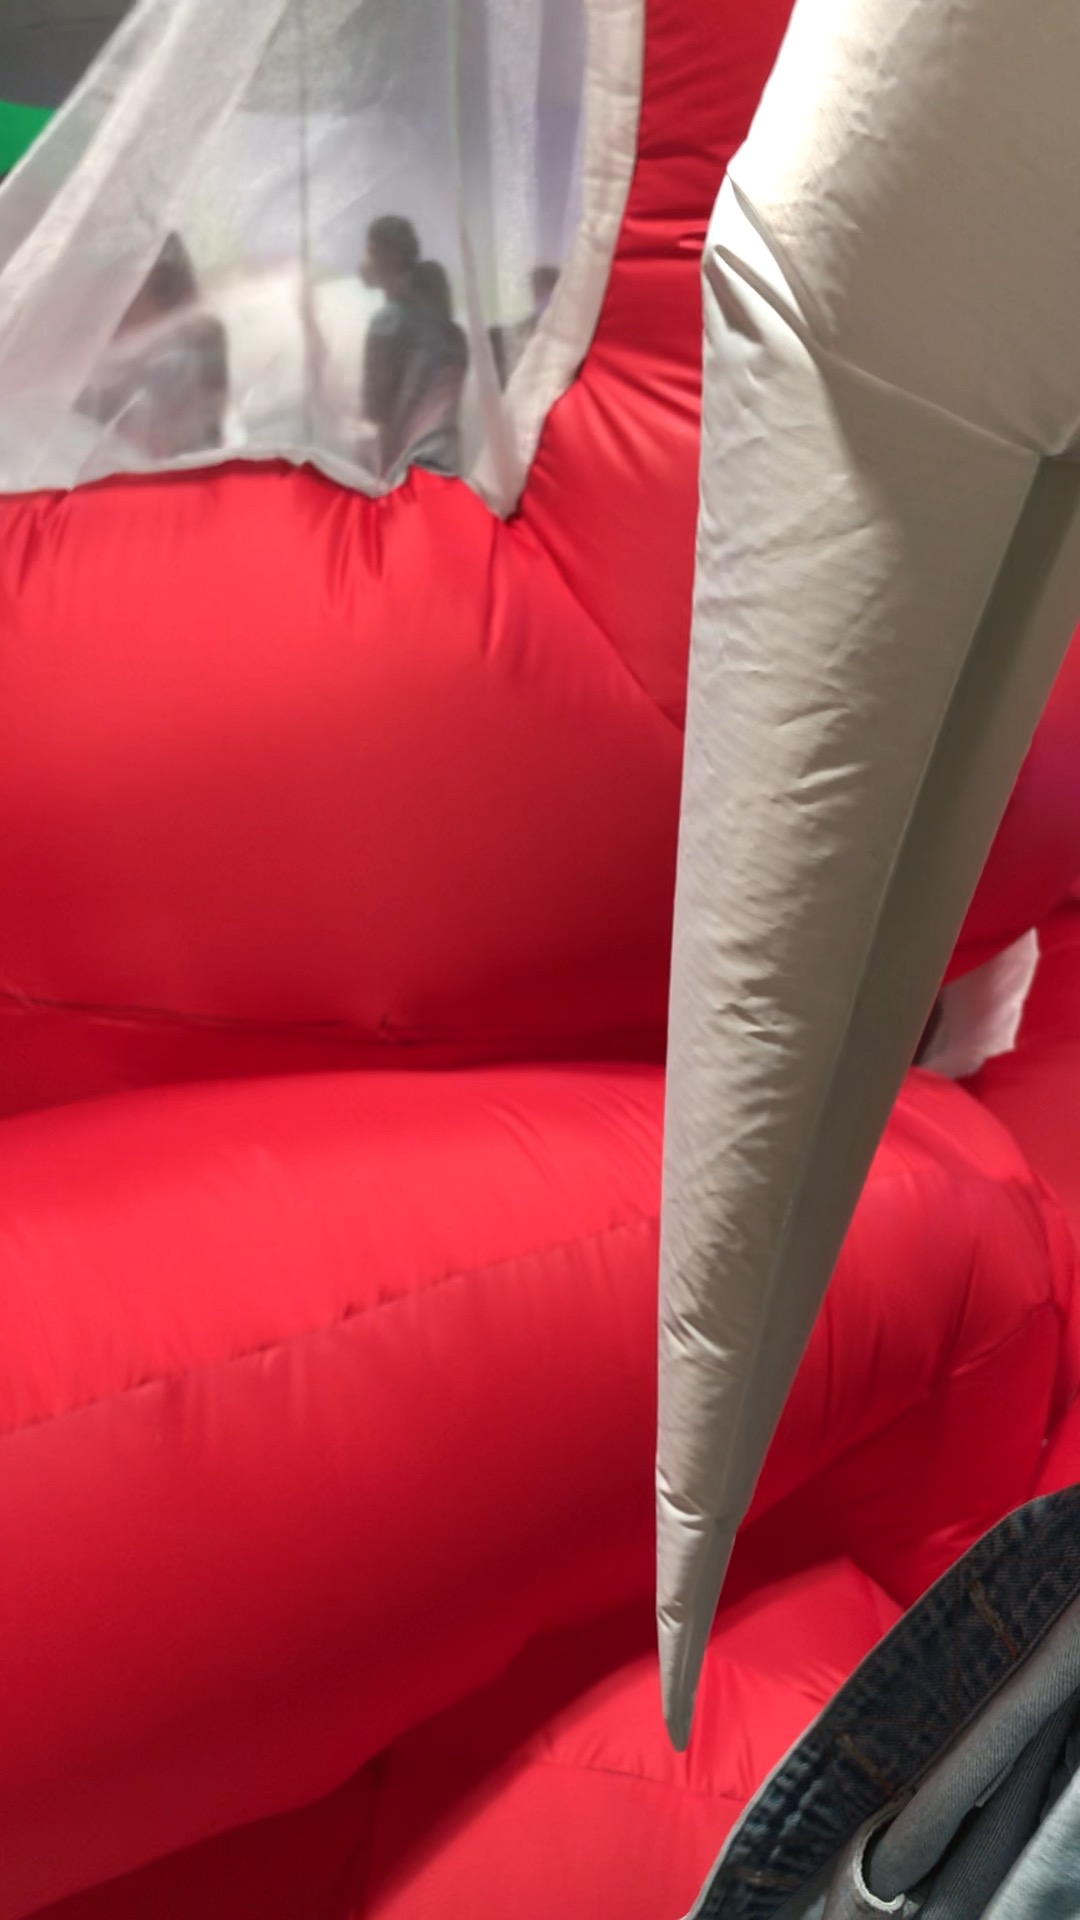
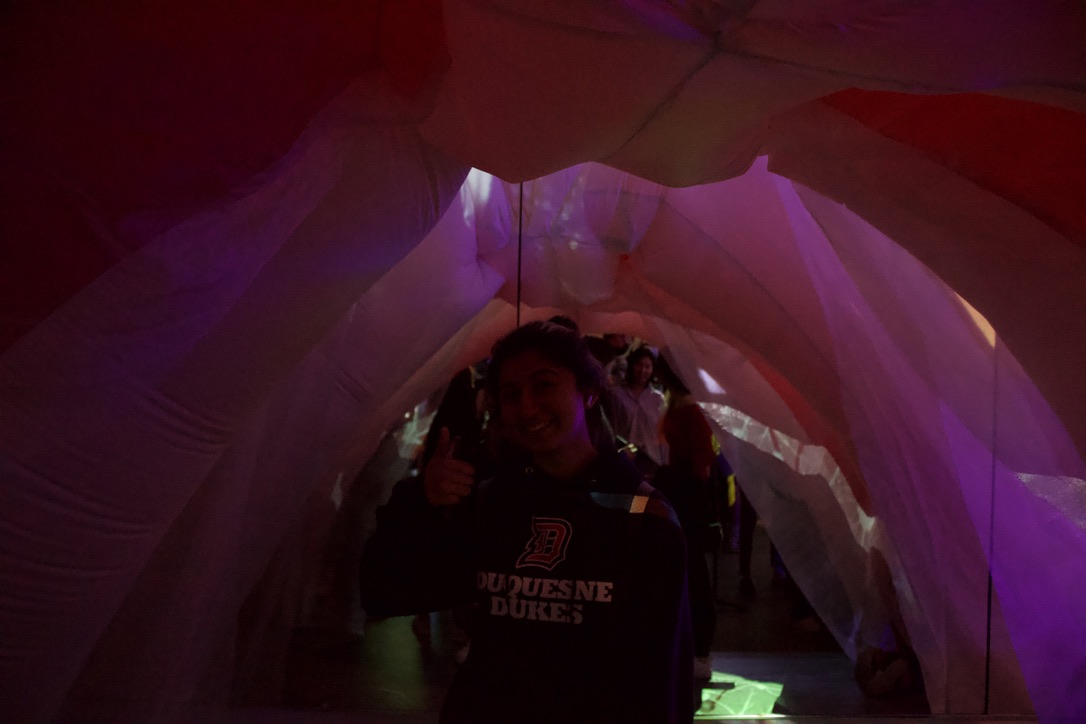
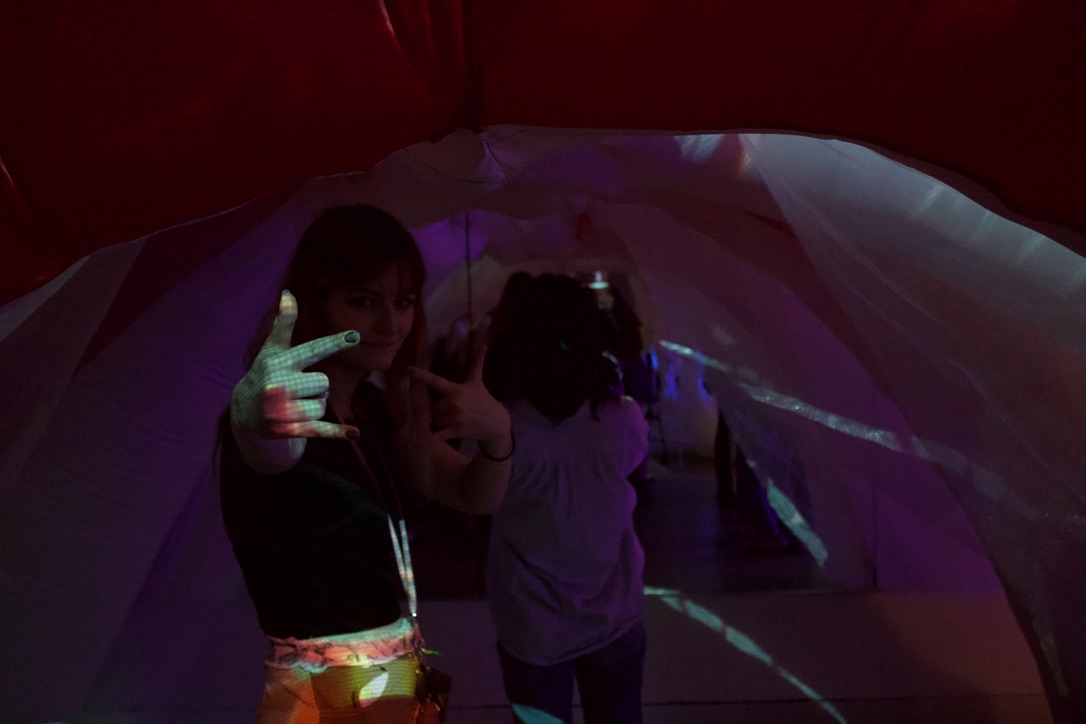
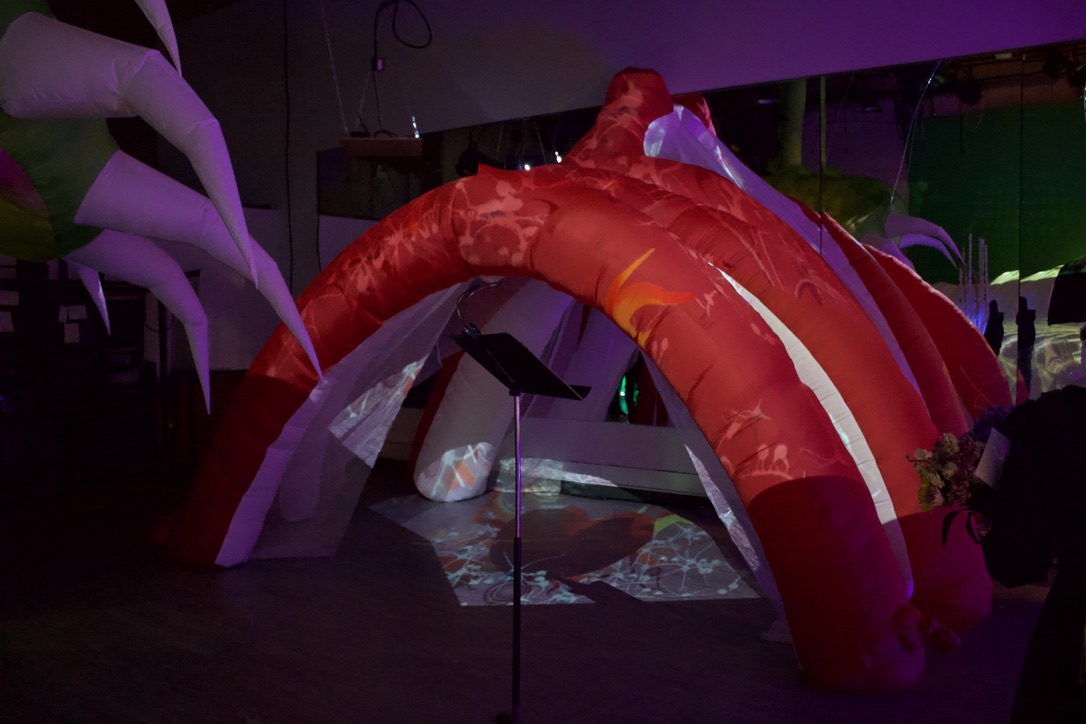
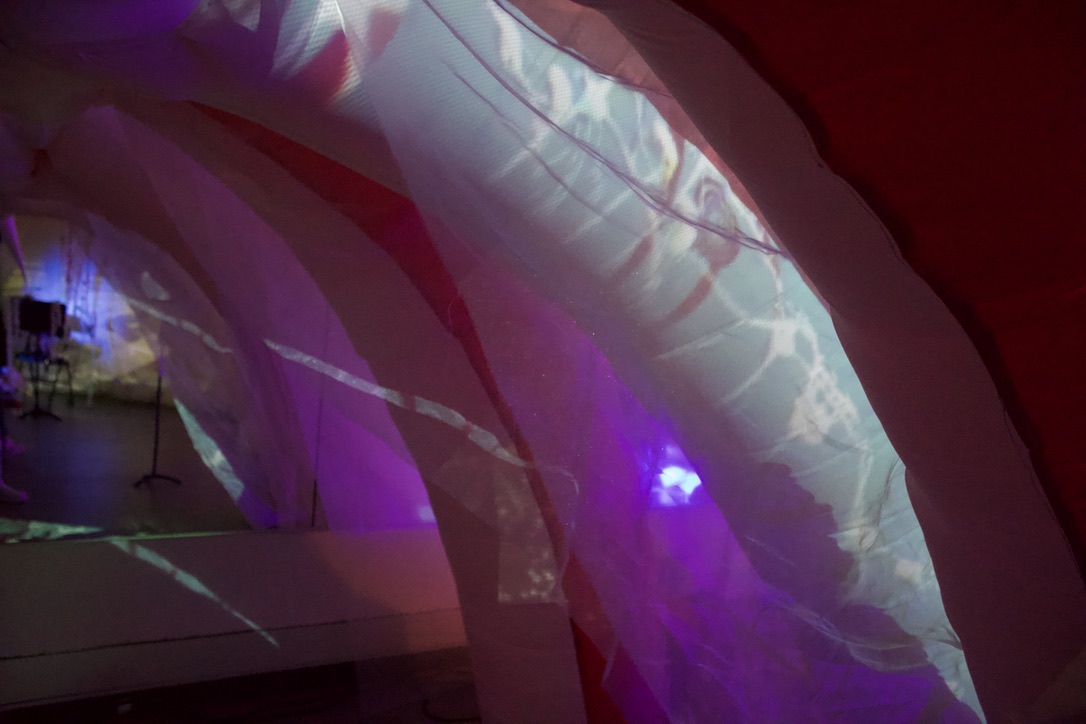
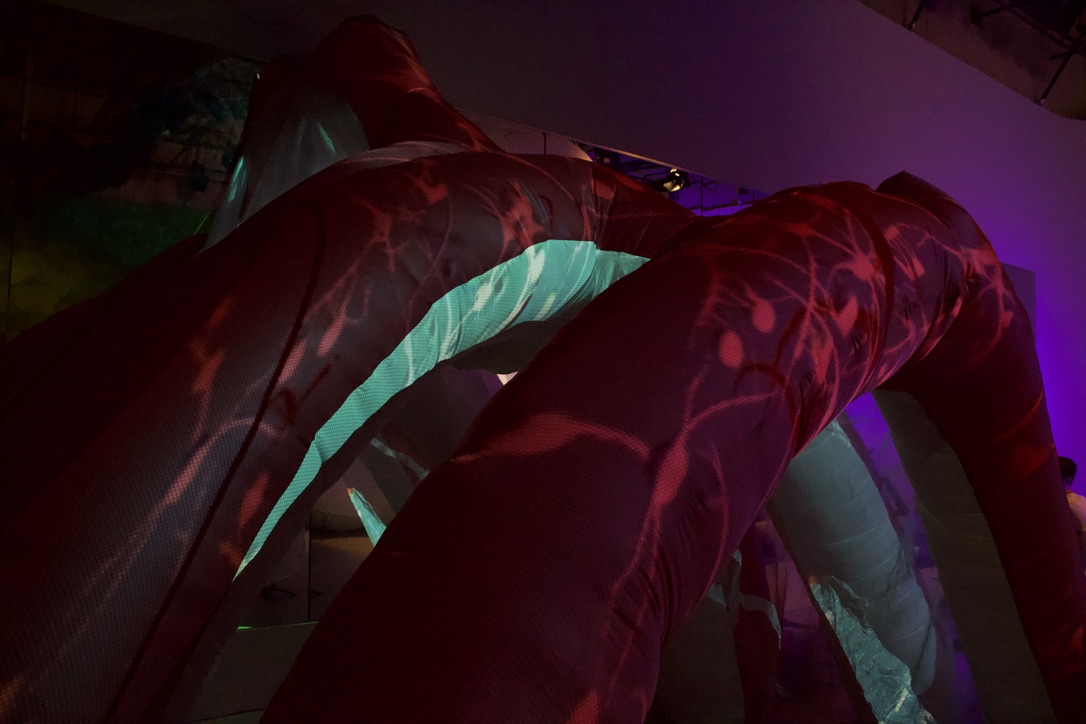
I think we had a few things work out. In one case I had accidentally had Asad sew some pieces the wrong way, but because of how our rhino file was made, we were able to use them for another part of the arch, which was awesome cause we did not have to seam rip. We also were unable to have our skrim be on both sides sewn in, it was just too hard to think through and be able to turn things inside out. I think this worked out because it added a breathing element to our piece, and when the show was packed it allowed for people to travel in around the pieces and not just from the arch whi9ch was cool. I think another happy accident was the animation team. I am not in love with the animation(@ georgia), but I think it being the heart instead of something hallucinogenic allowed people coming in to better read our piece as a ribcage, because their was a heart in it.

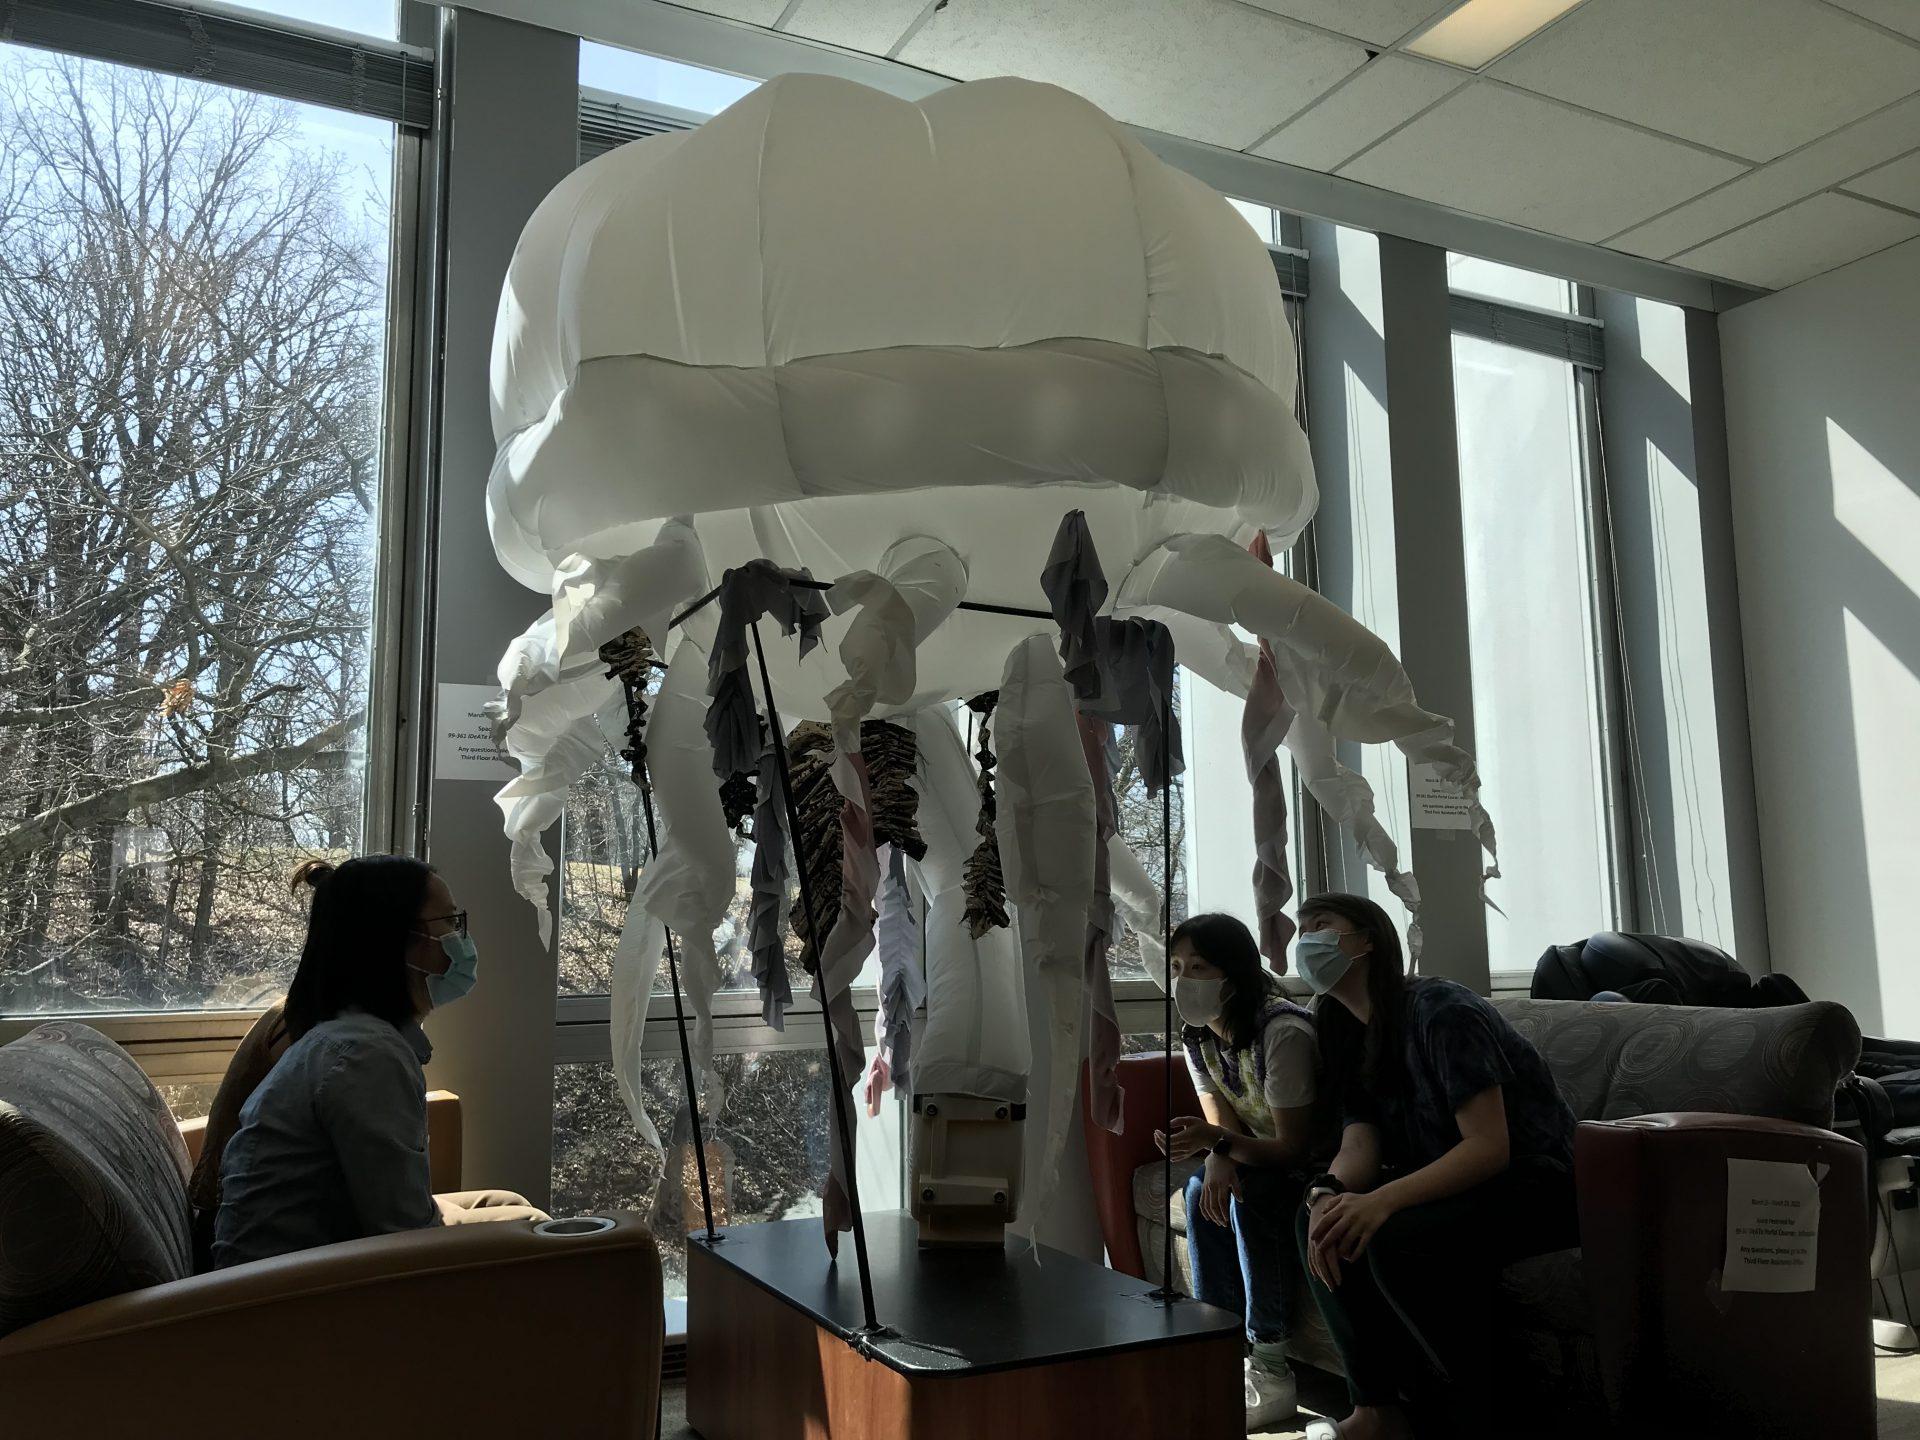
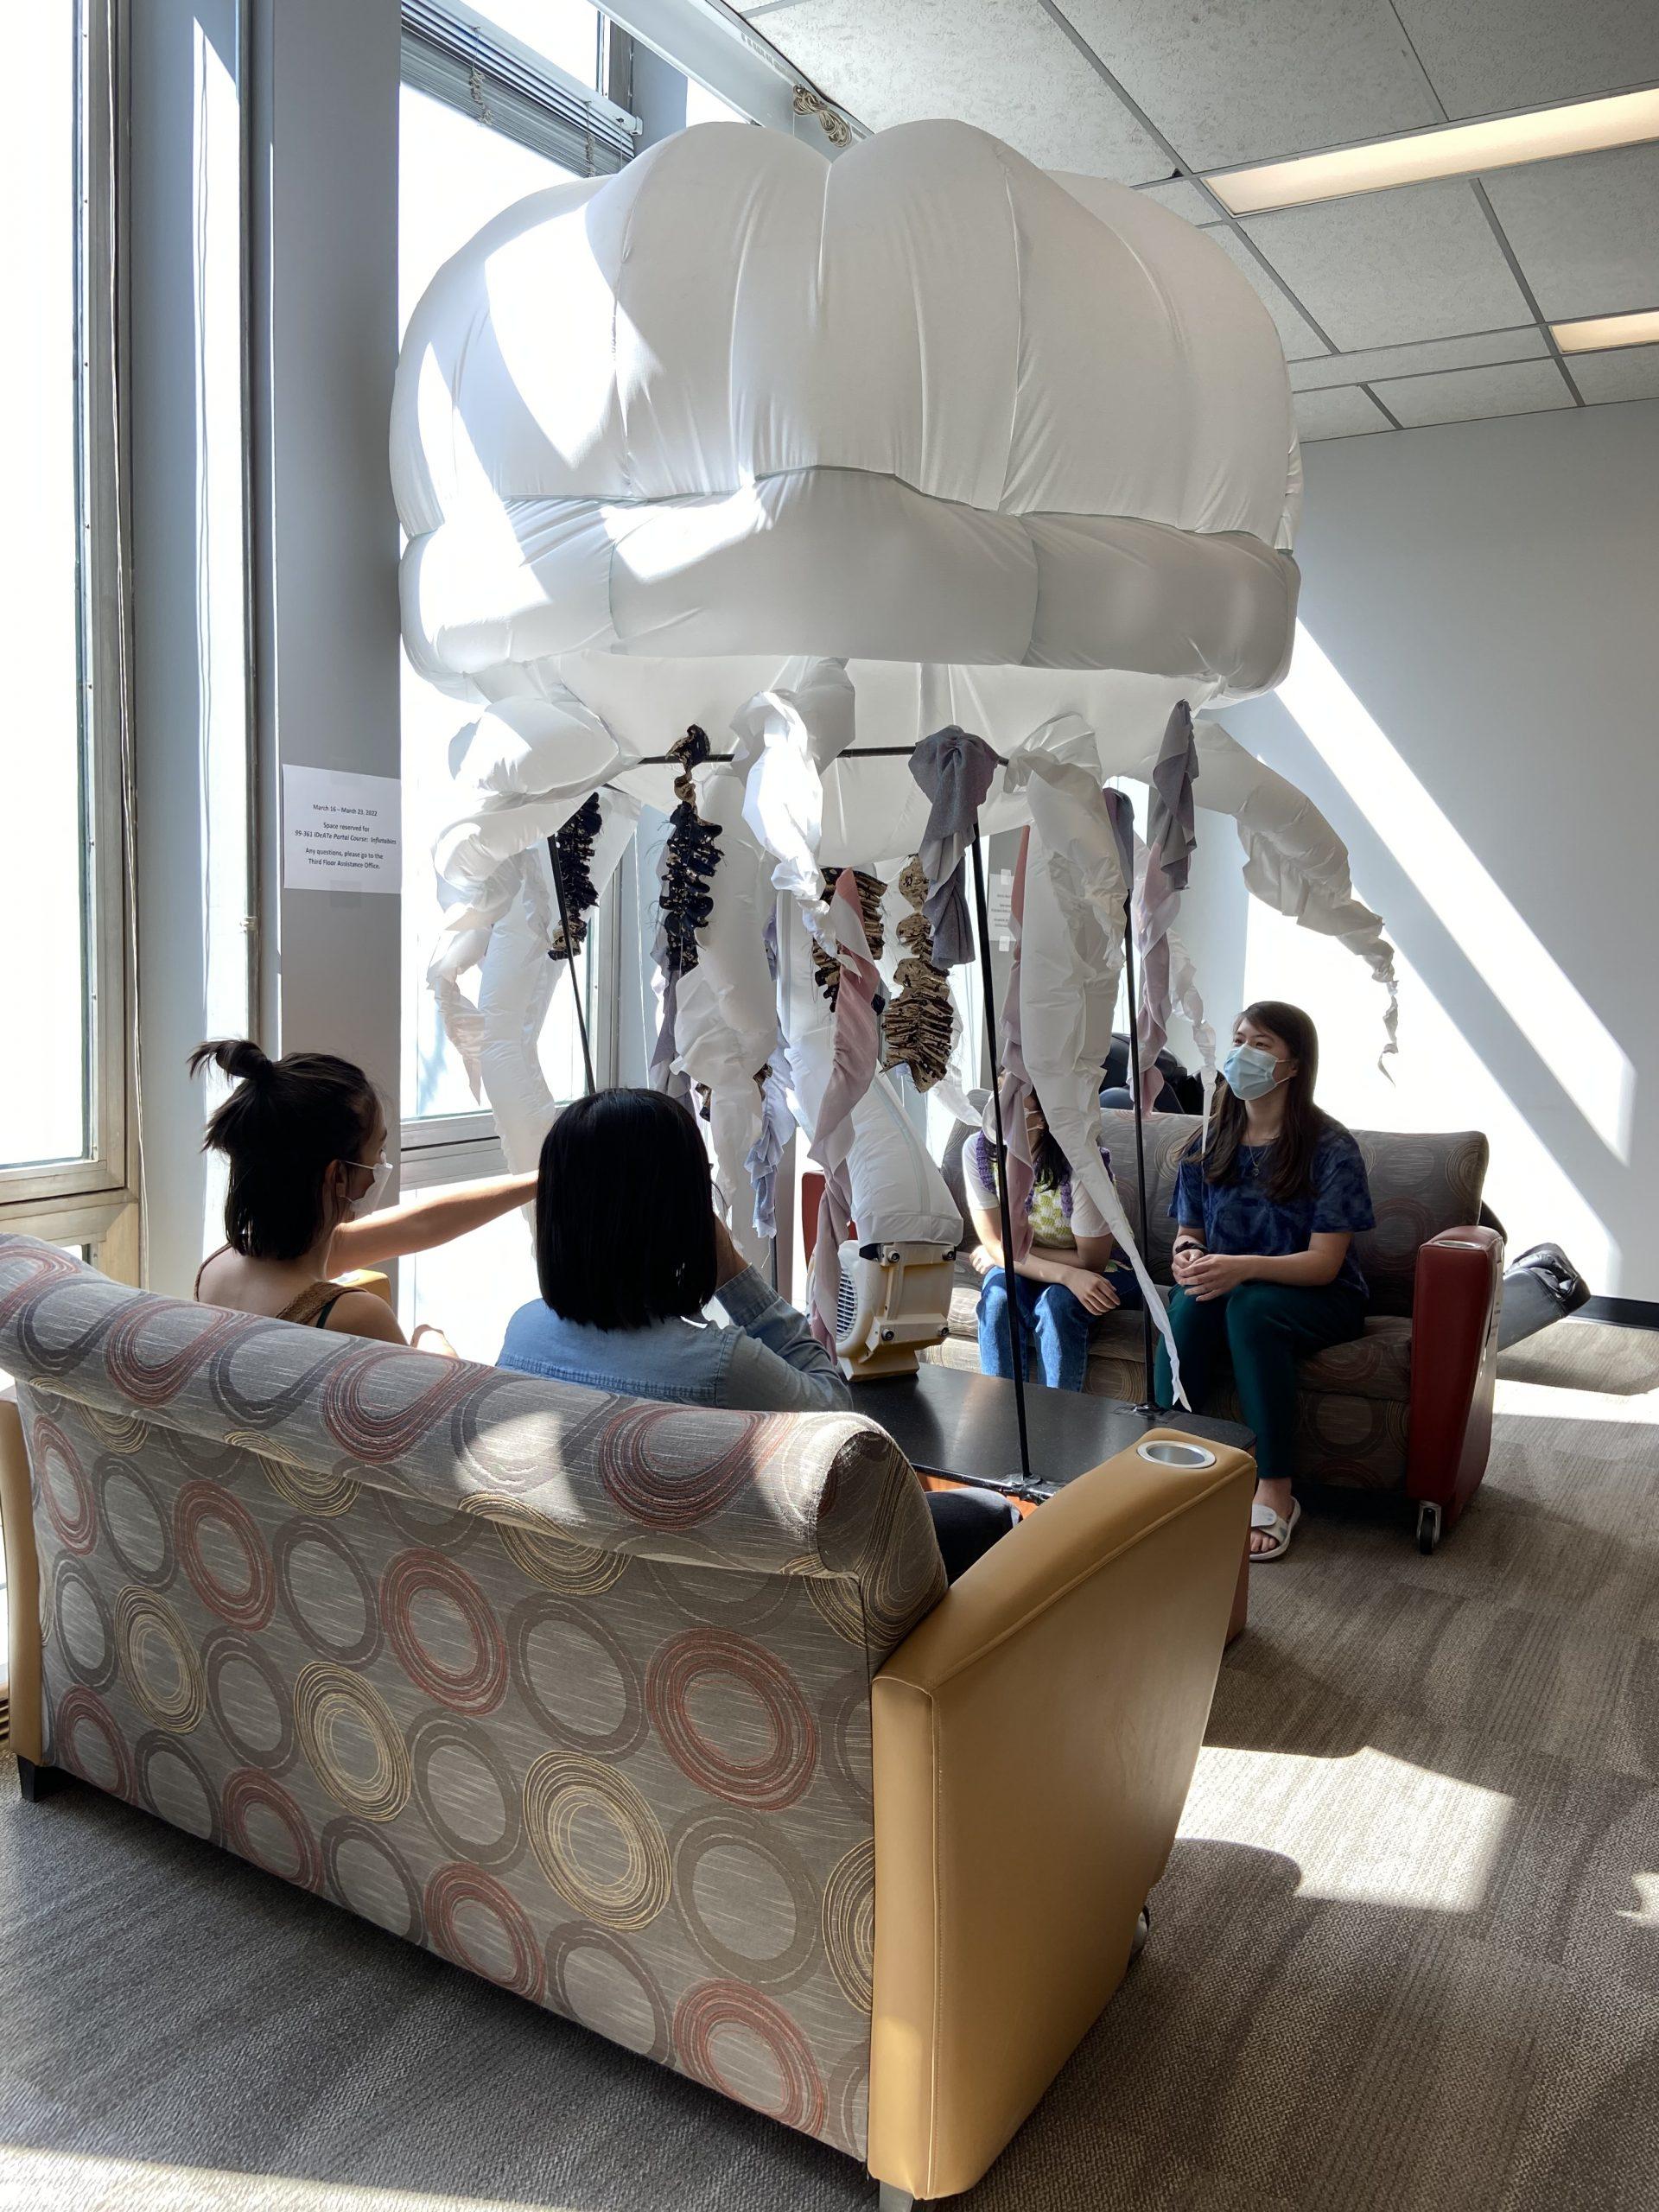
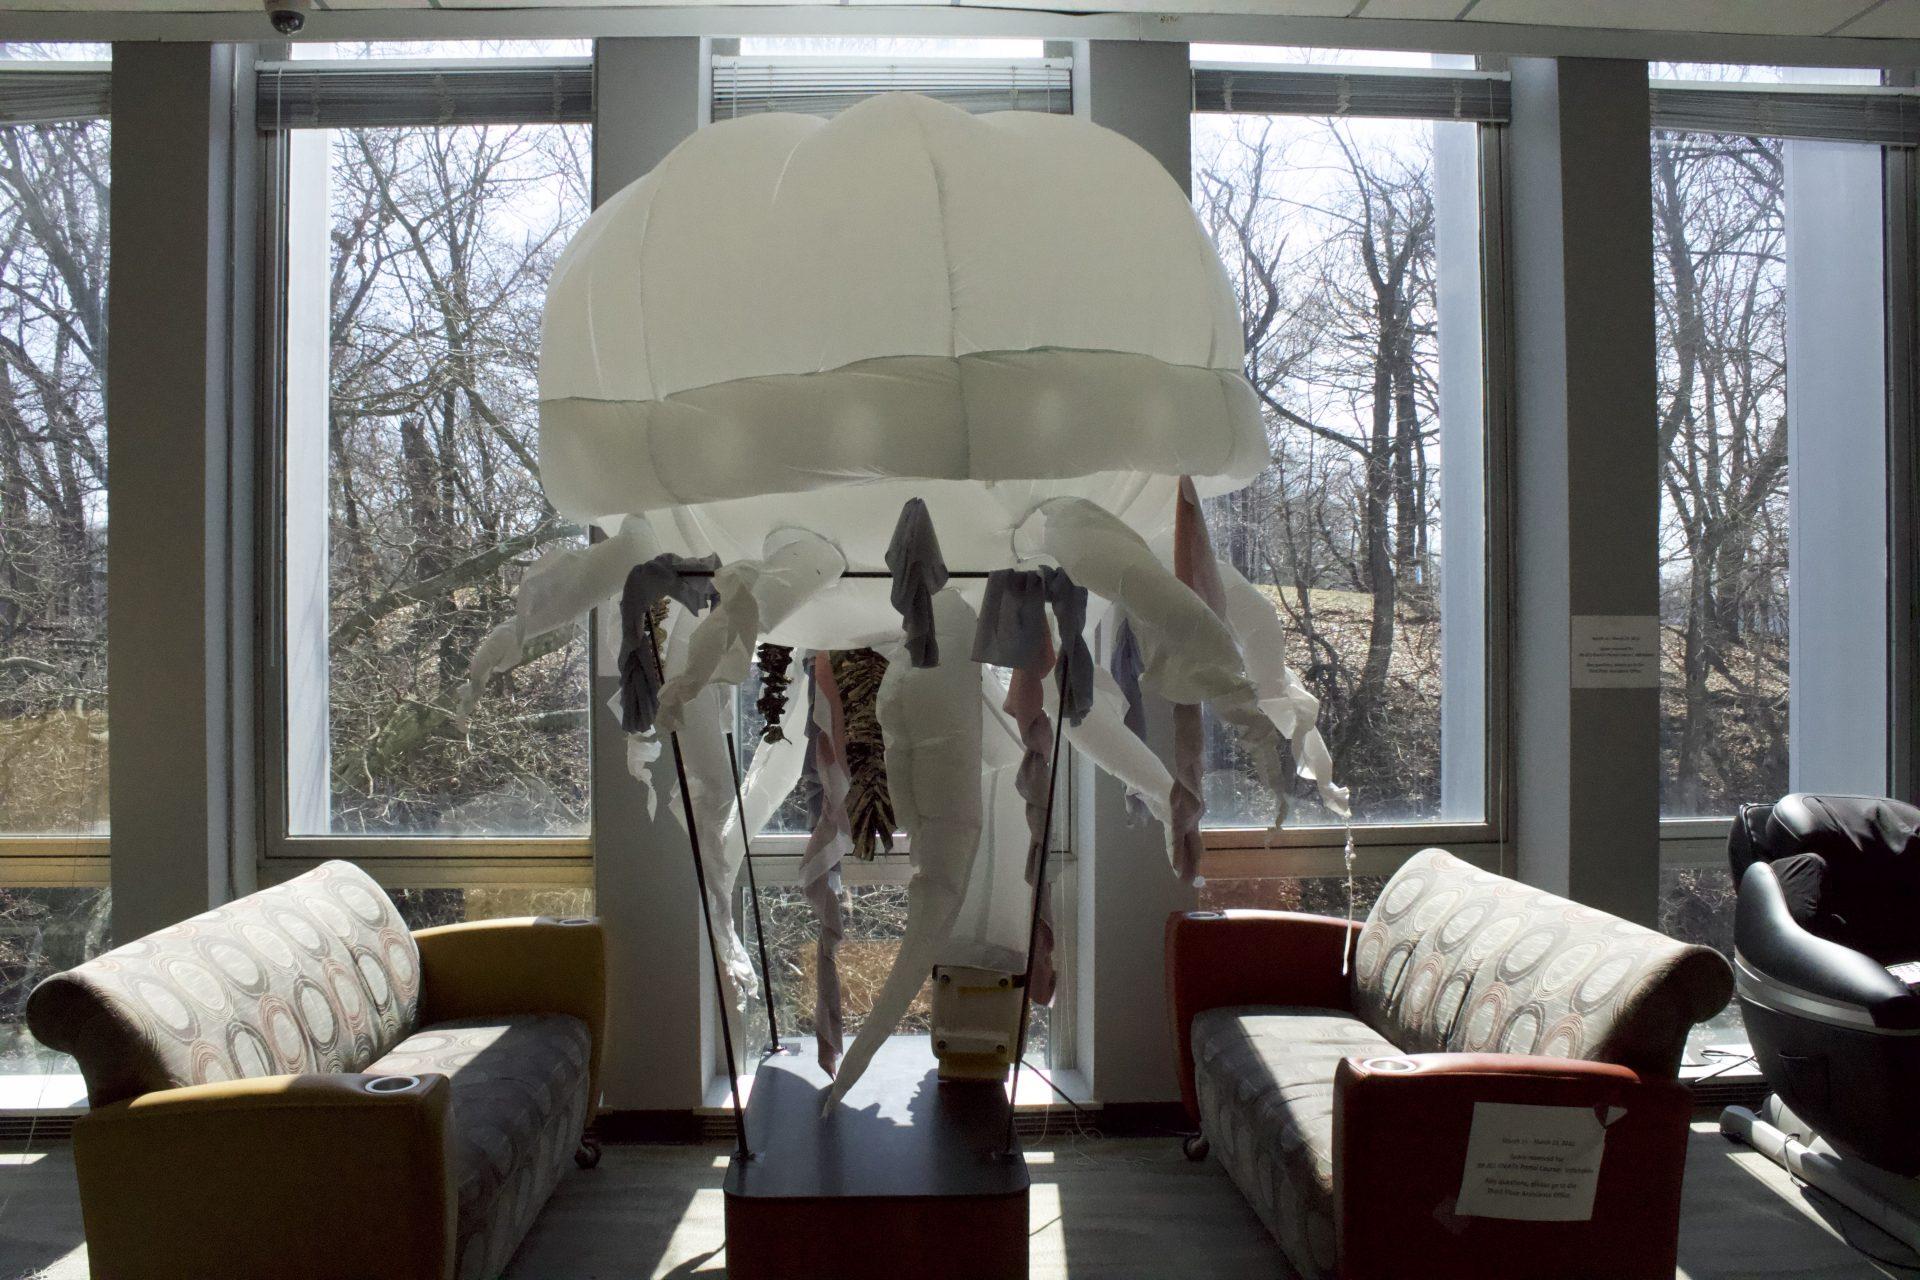
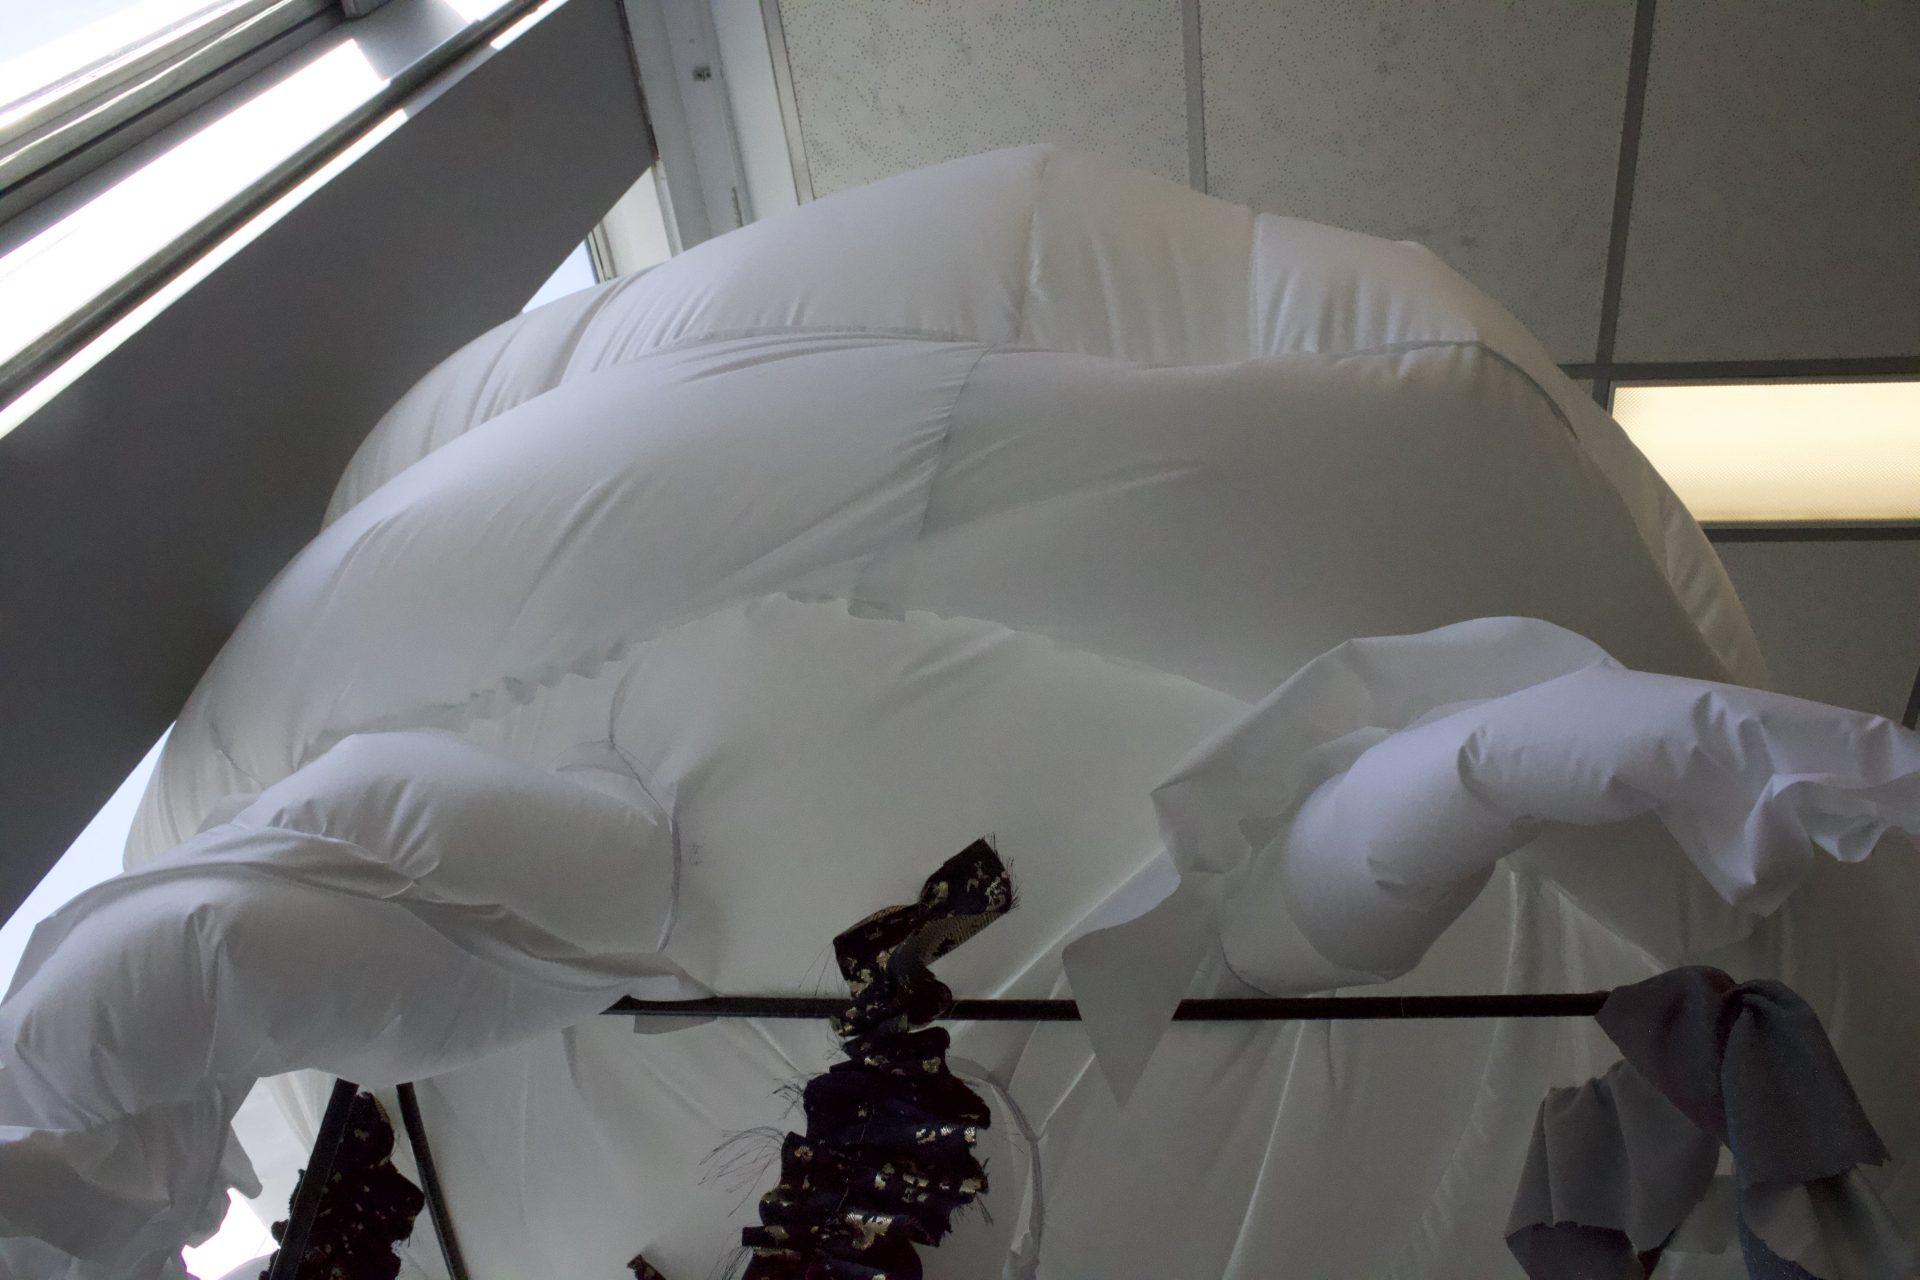
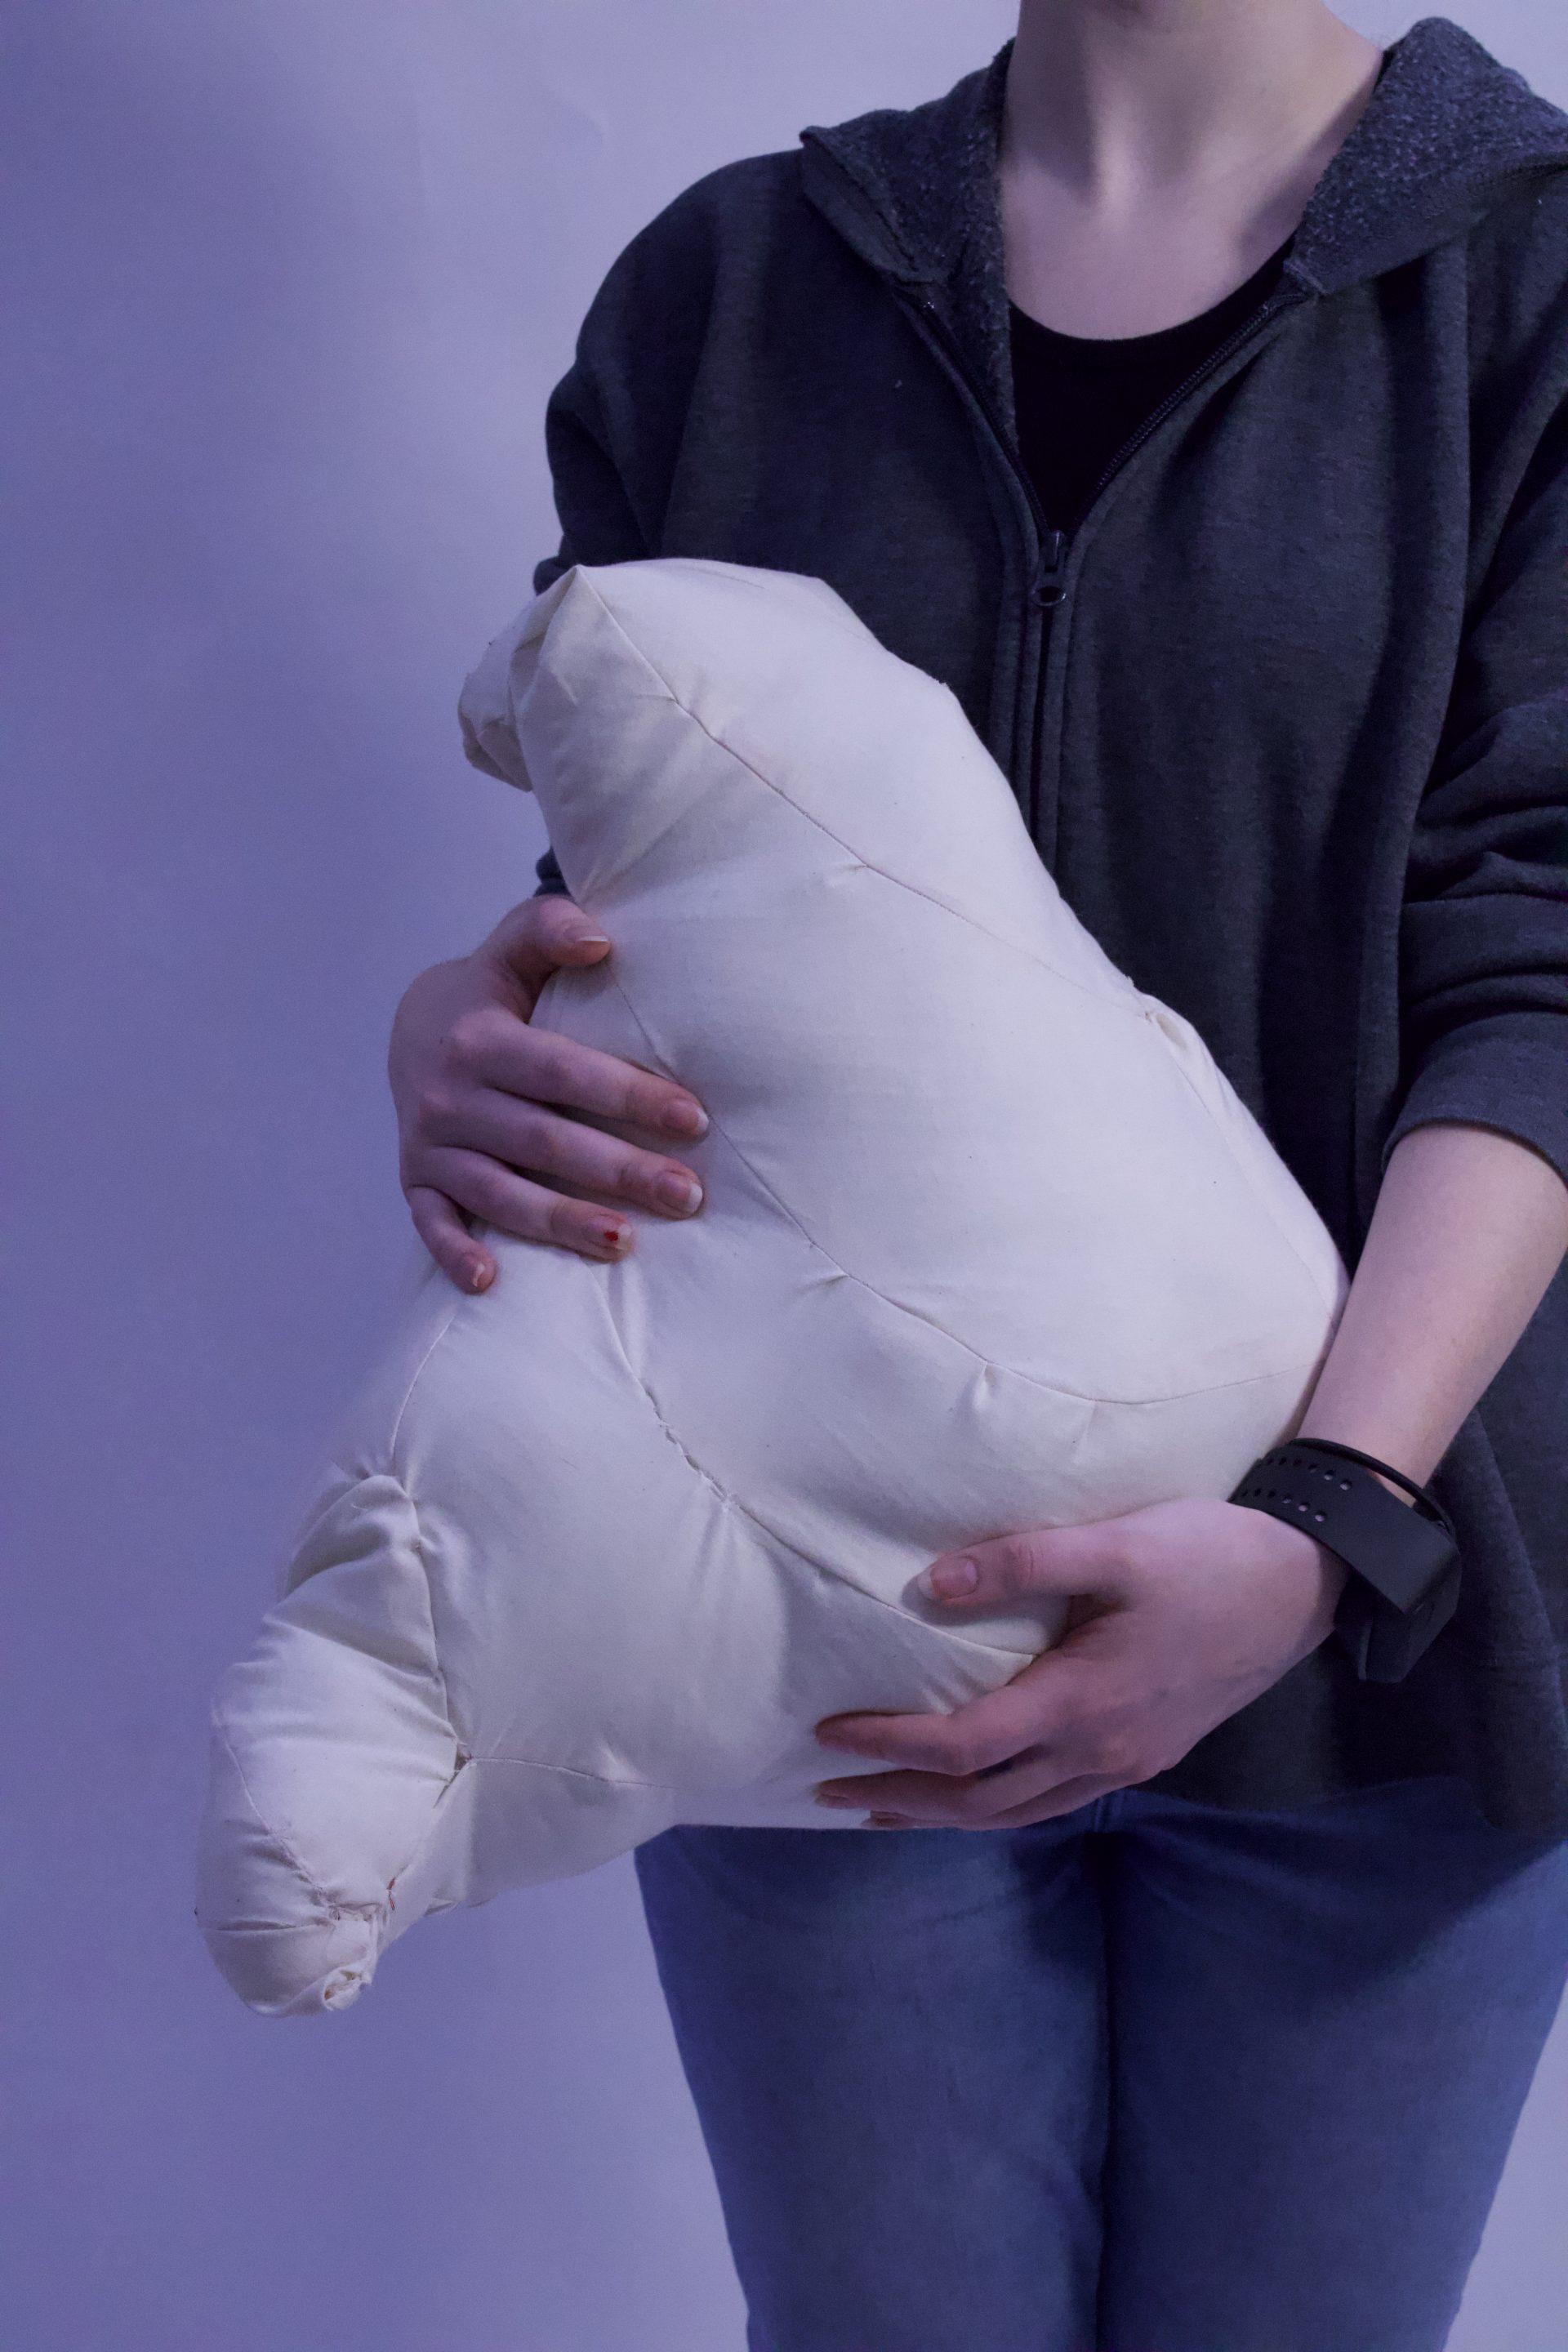
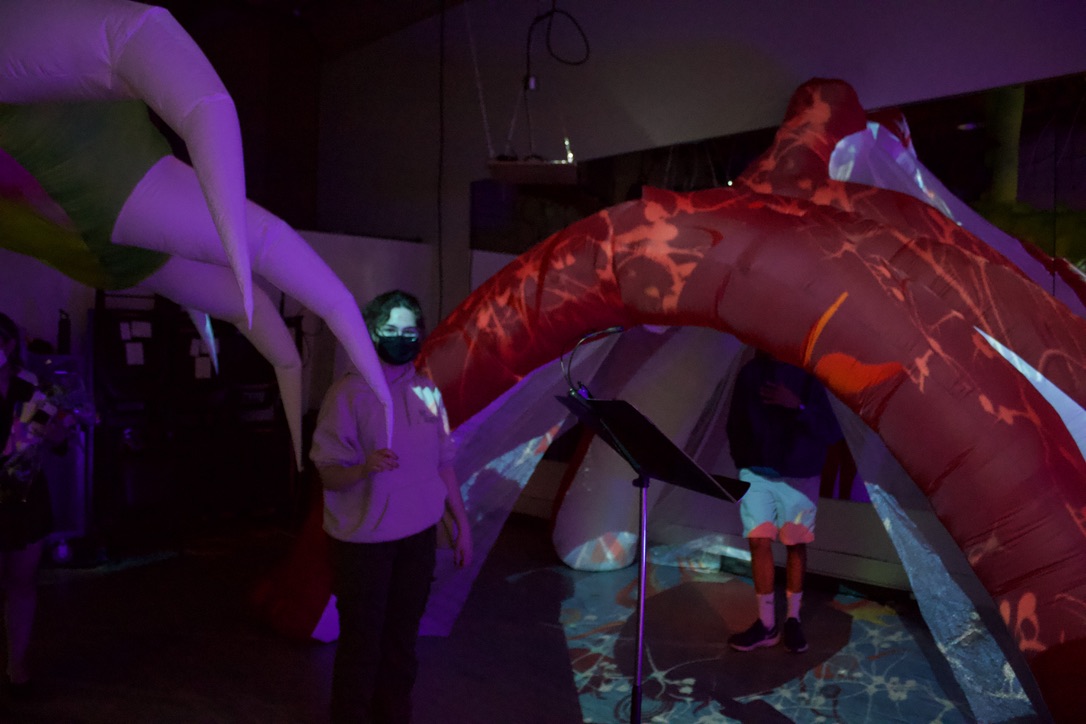
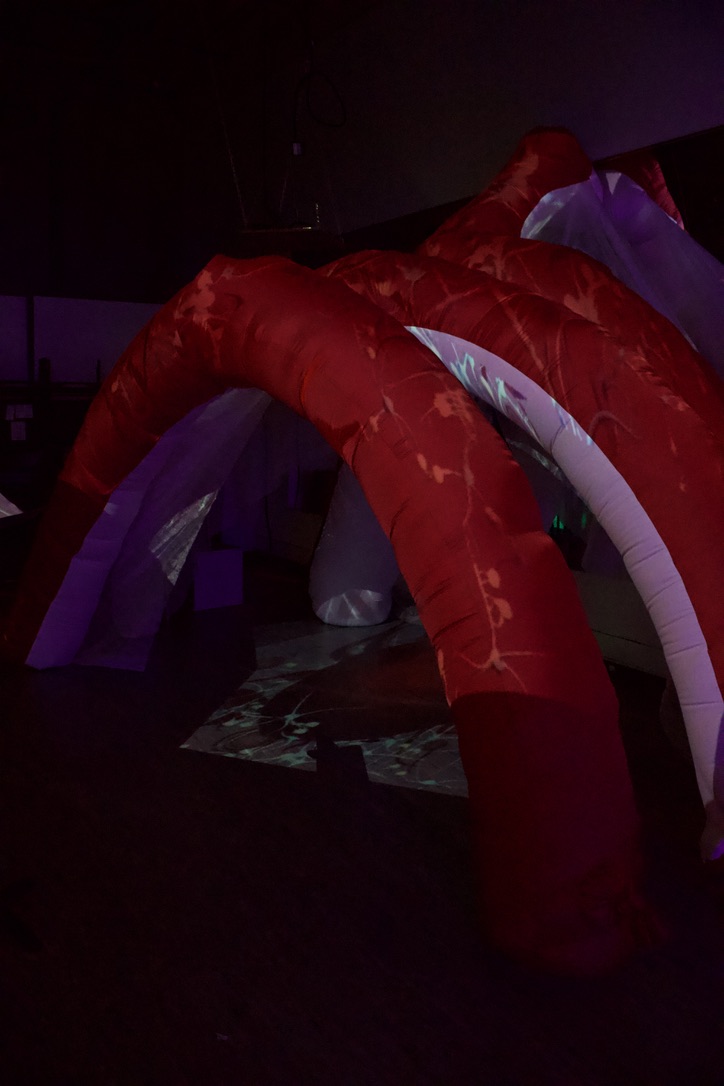
  • Final Project: please upload 5-10 photos of your final project and 3 sentences that describe what your final project is (not what you intended, but what it is now that it is finished).

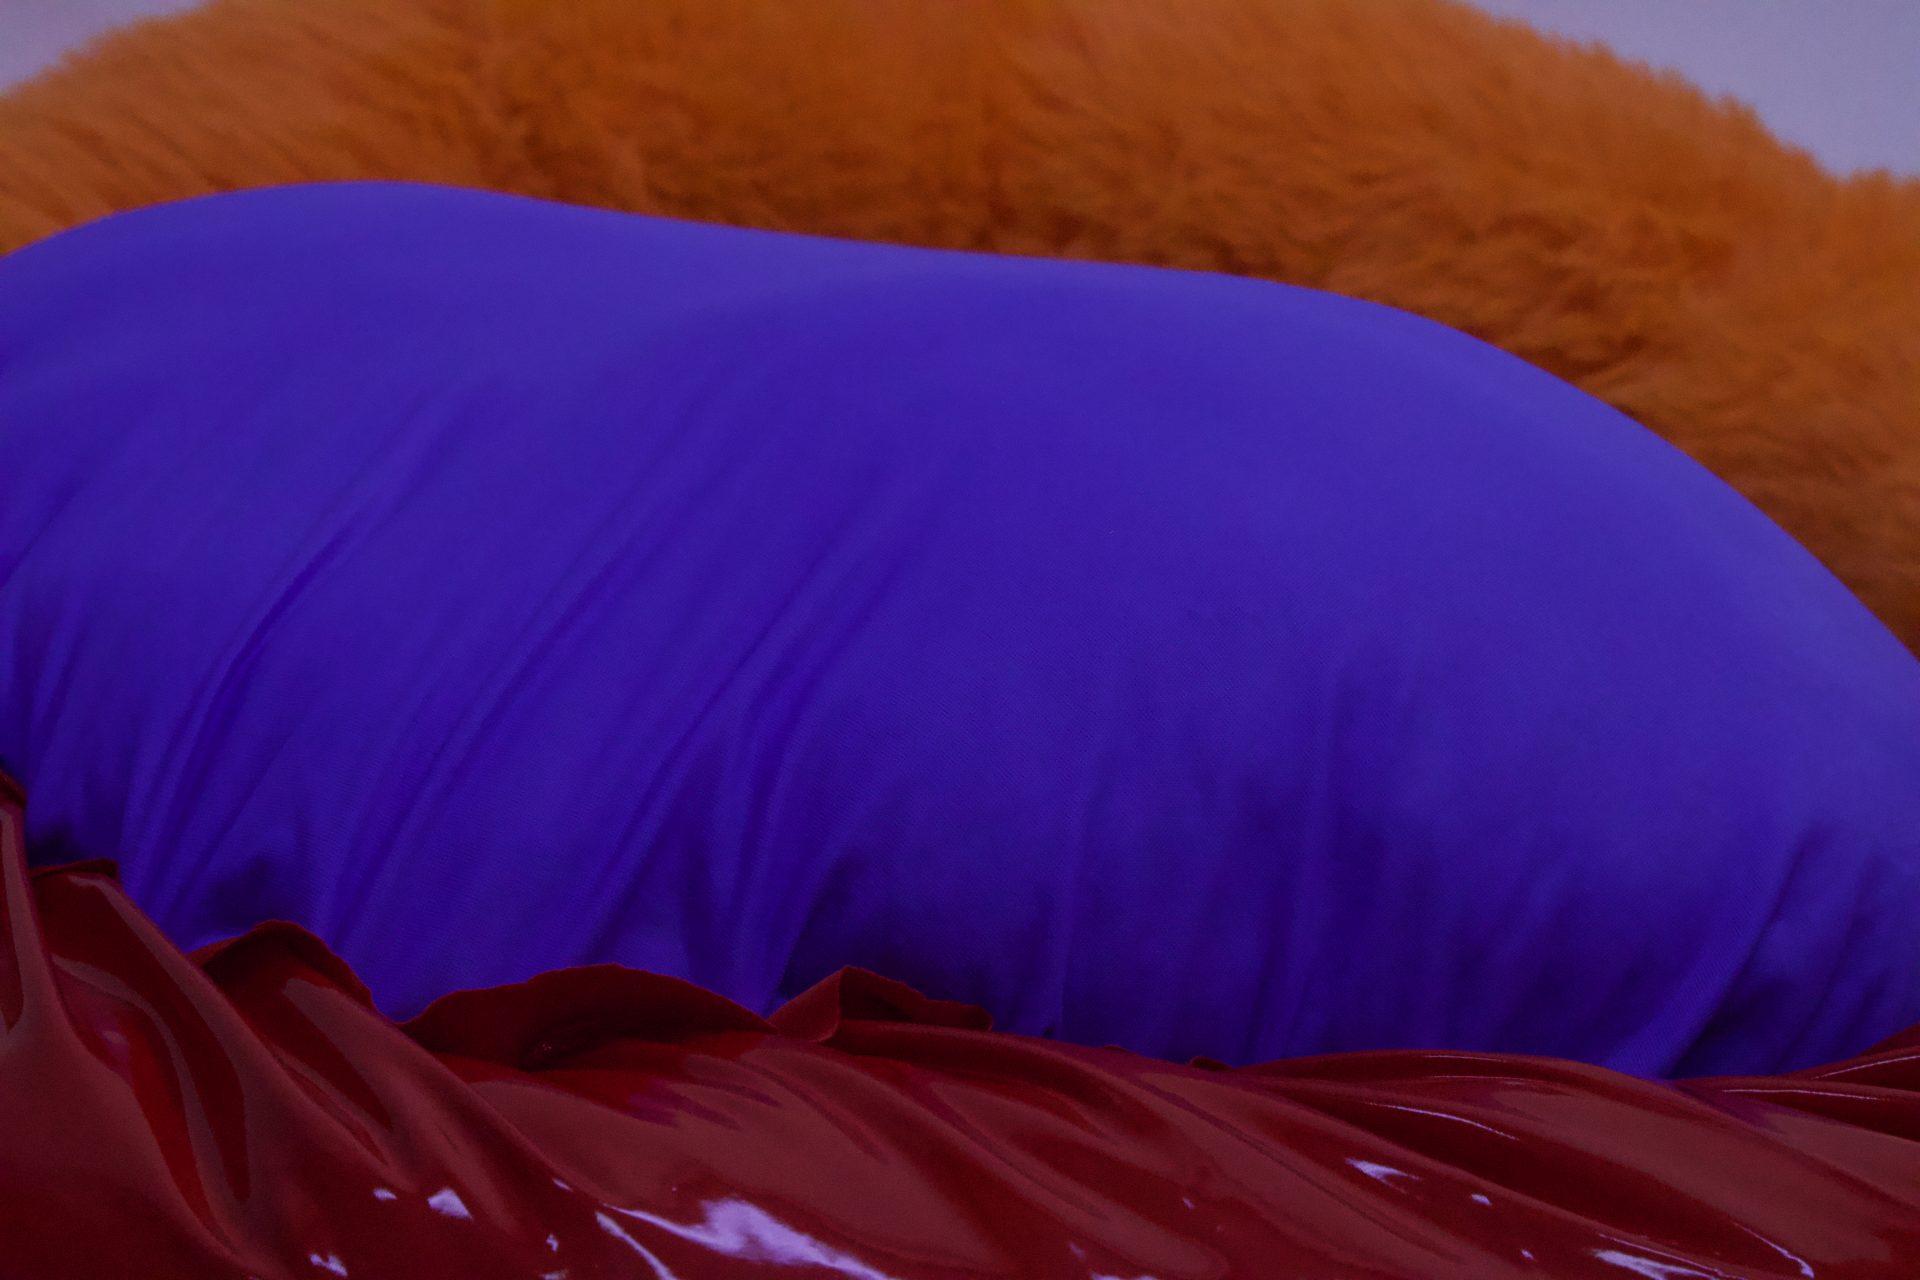
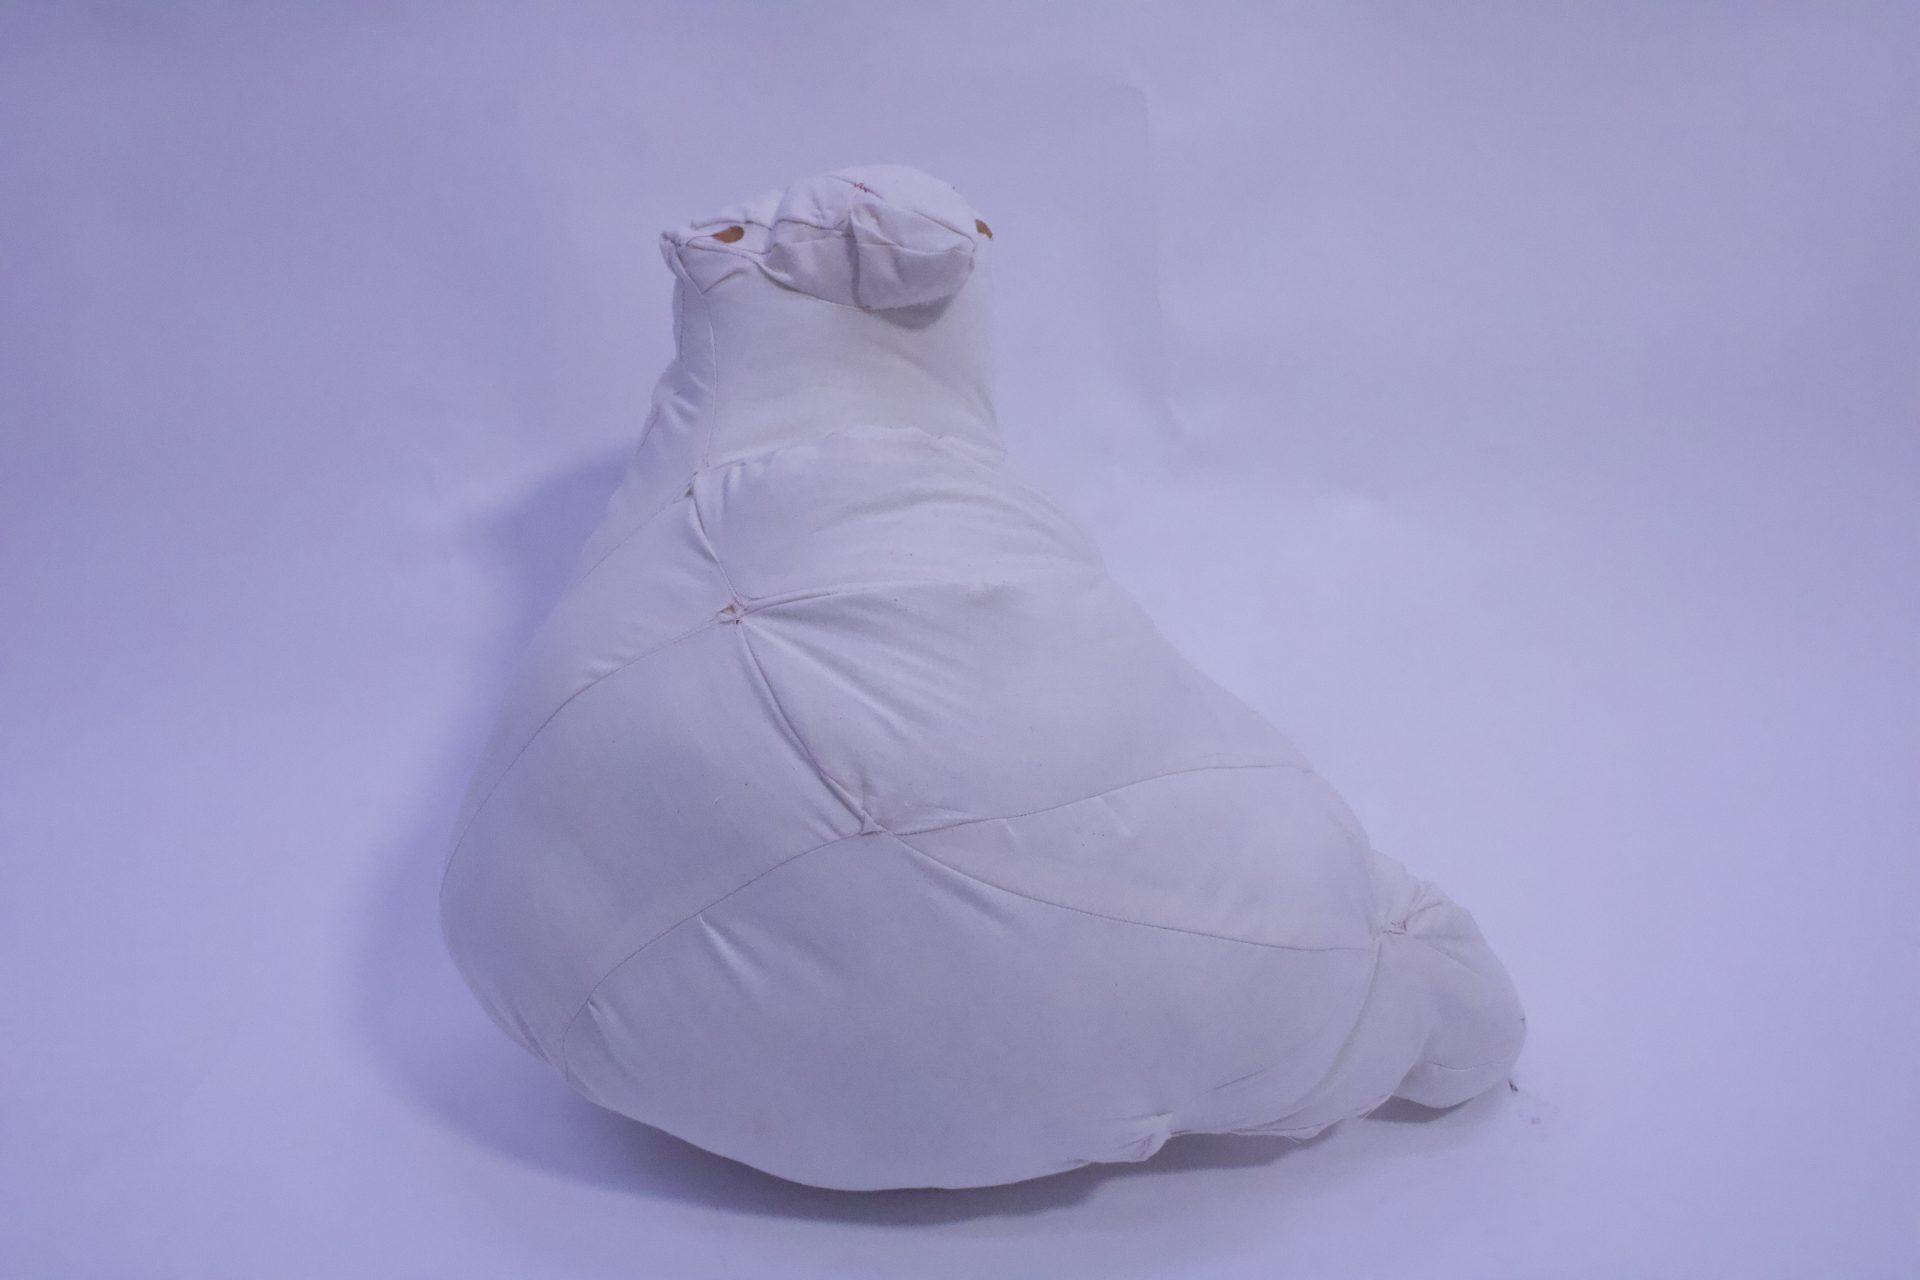
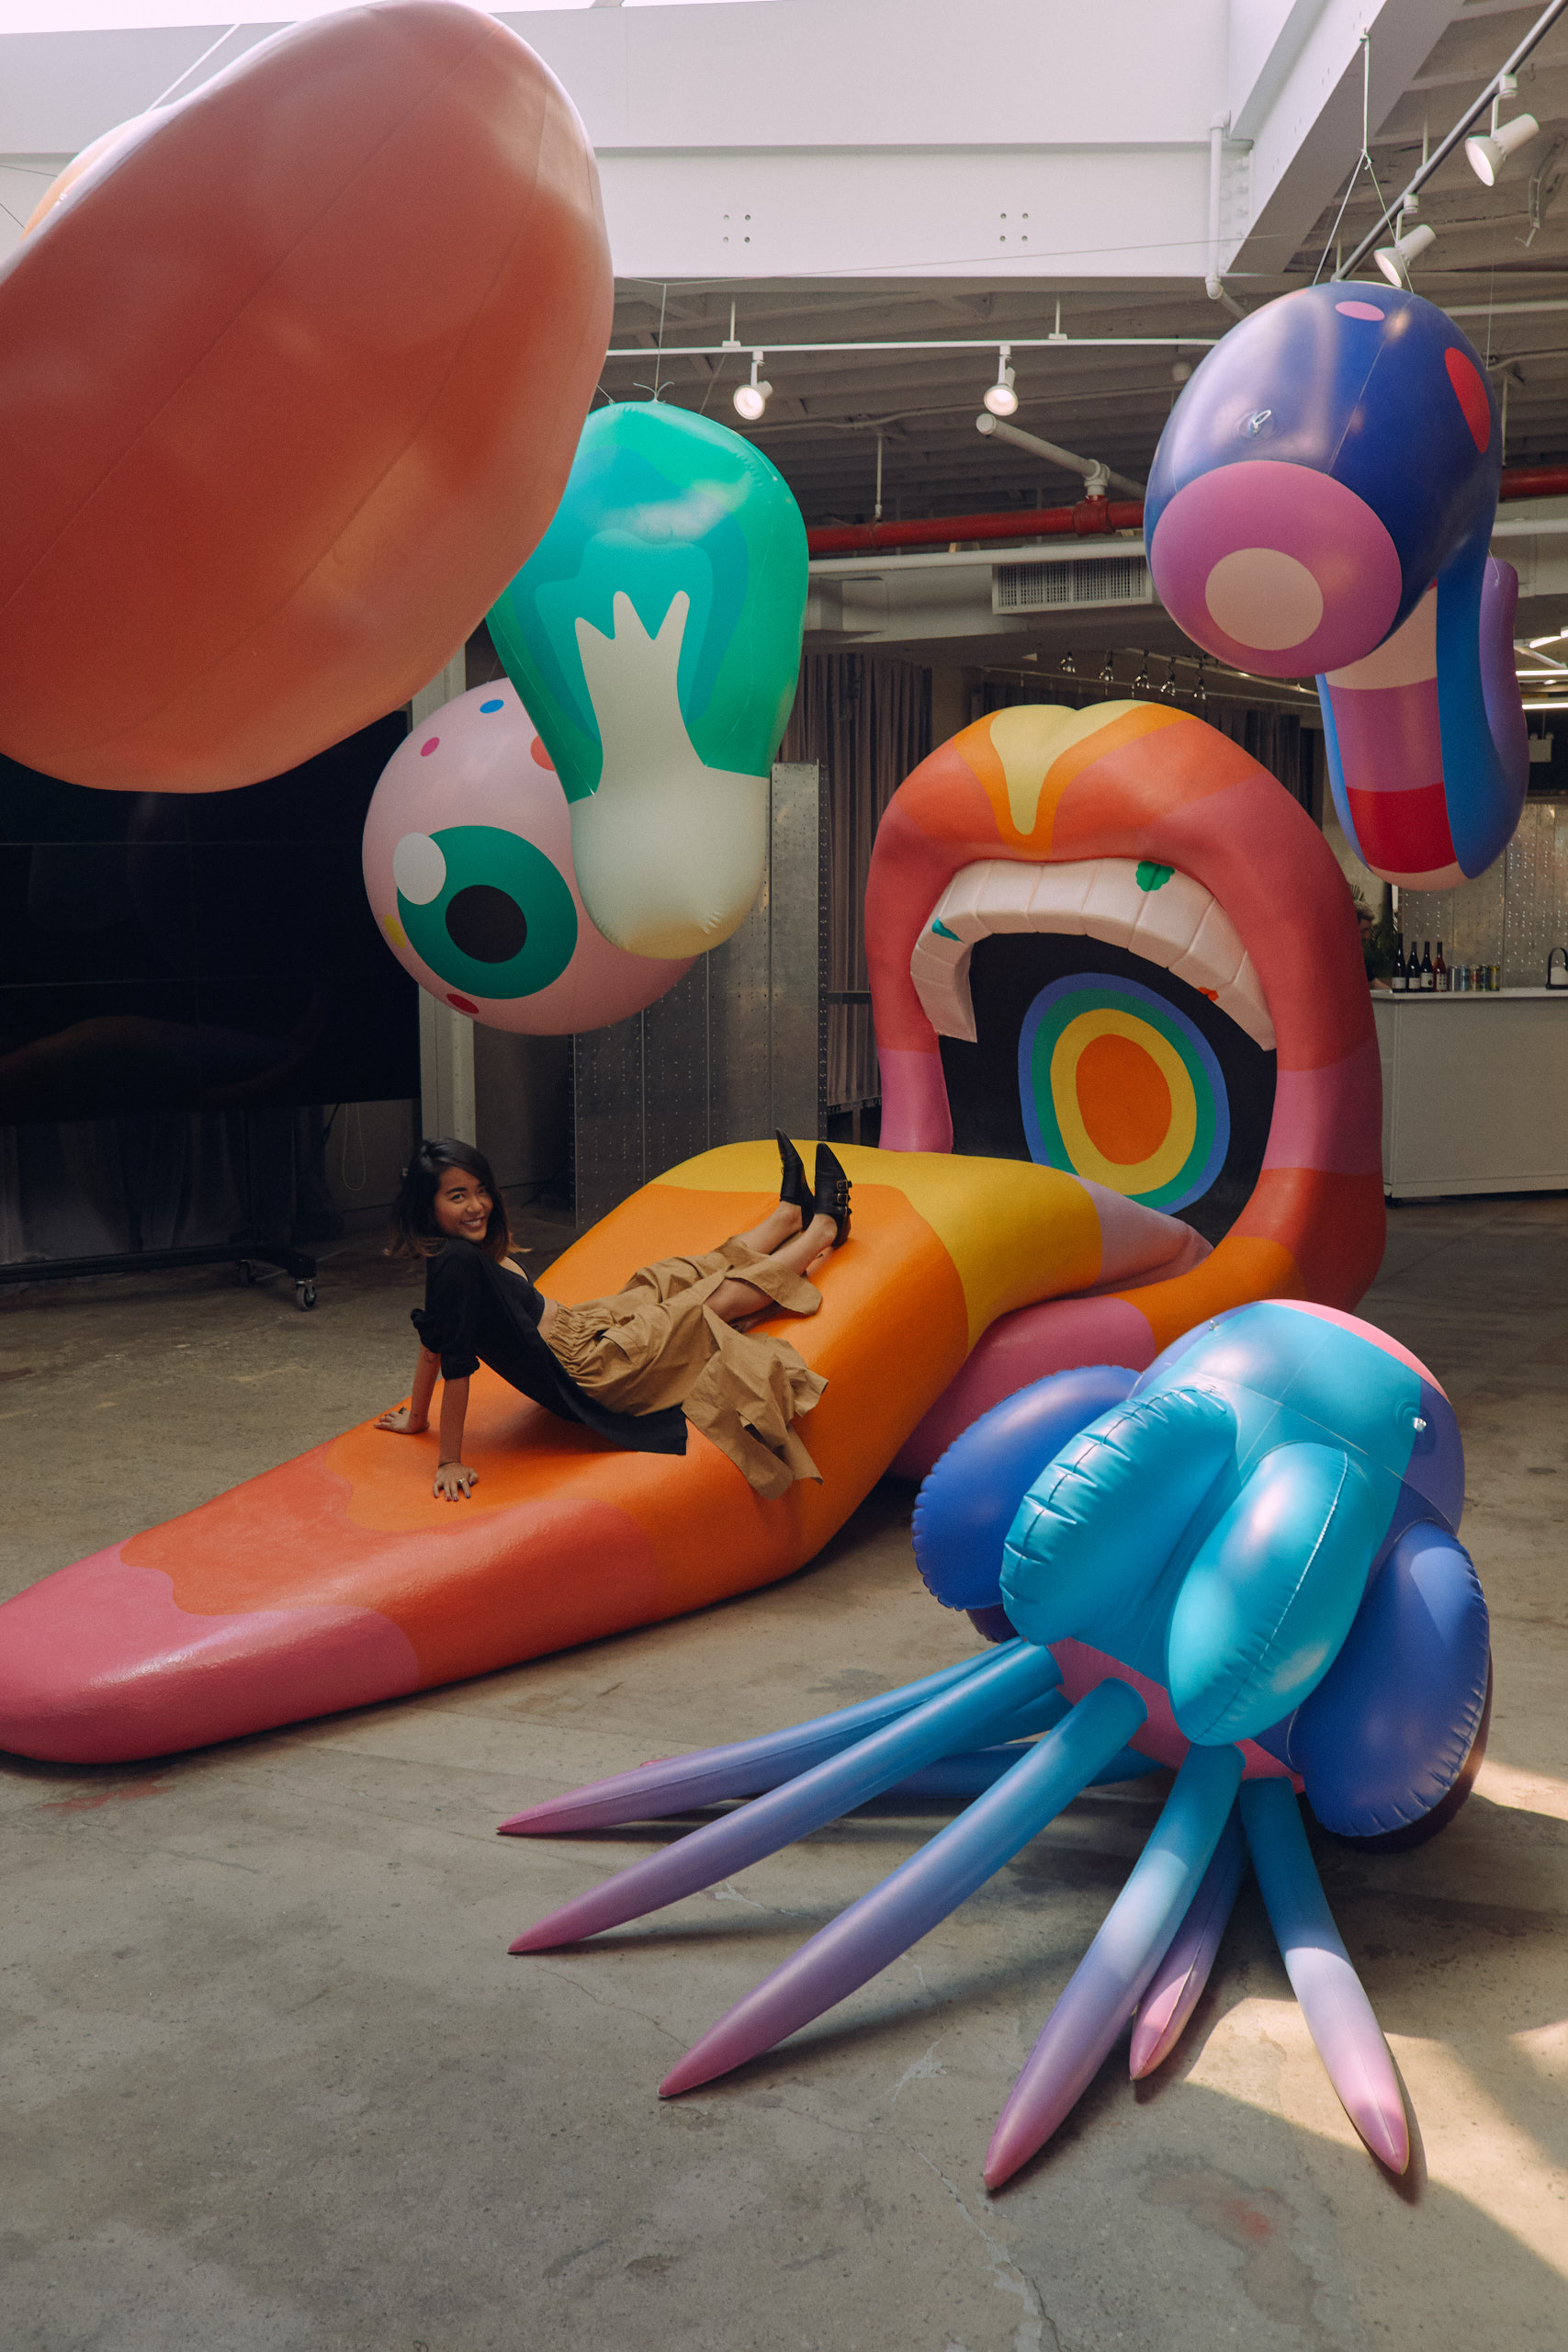
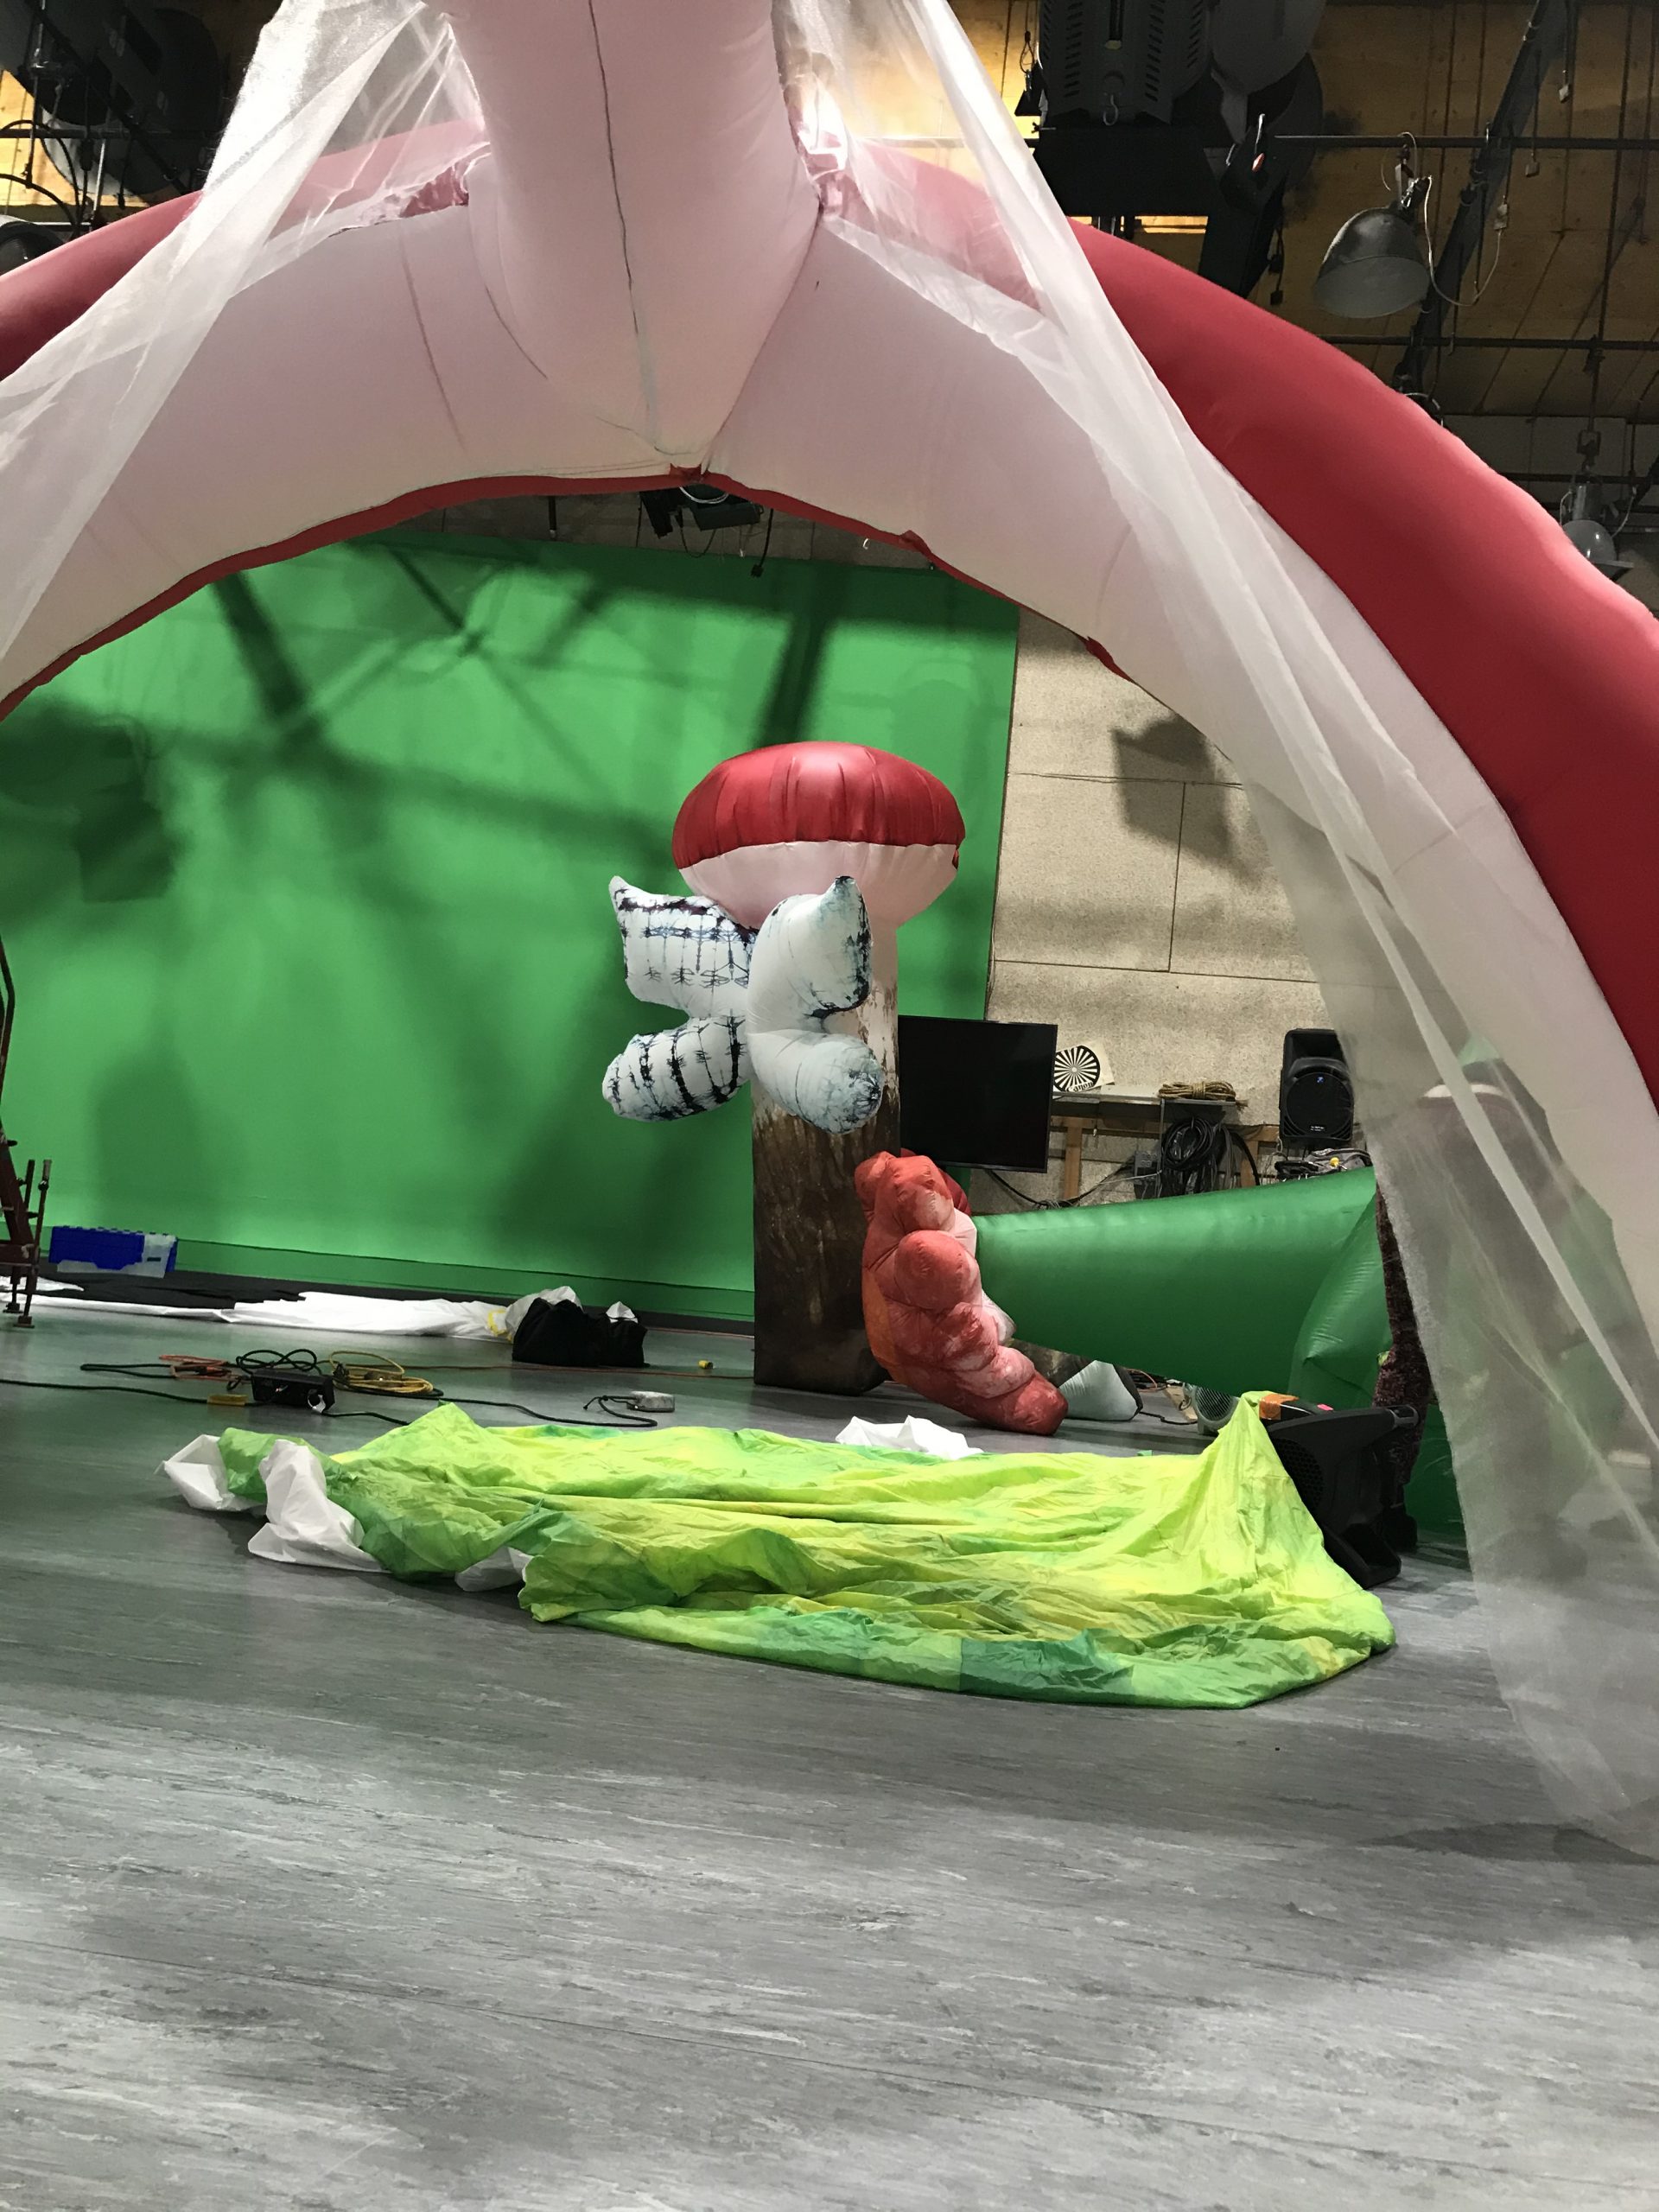
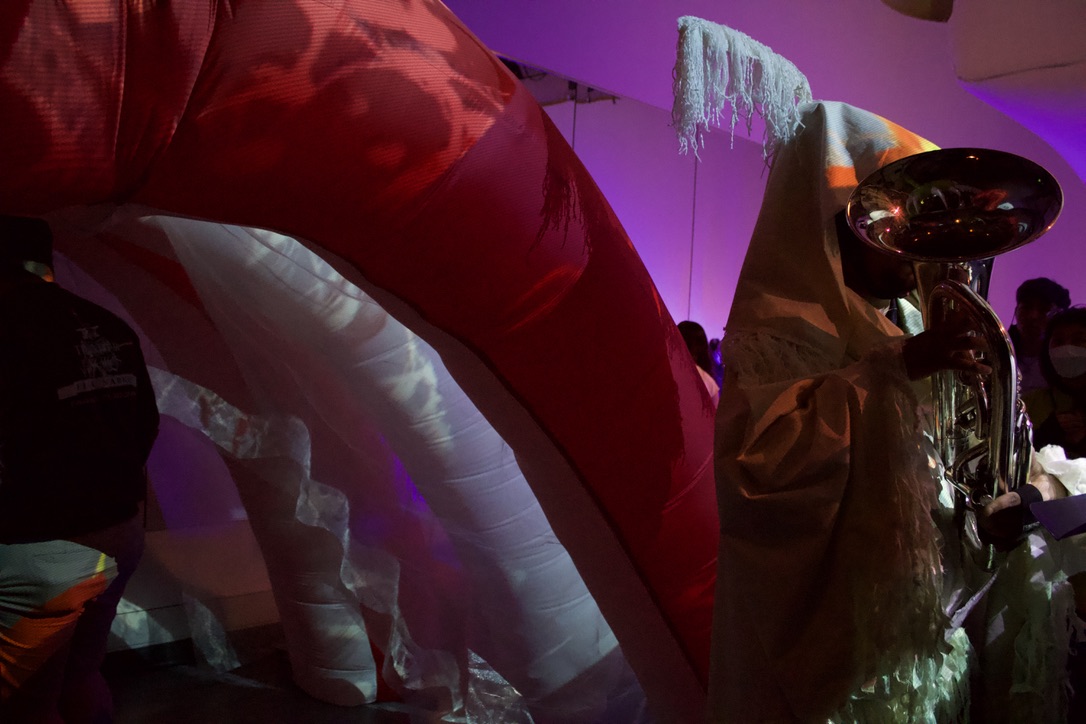
Our final project is about entering a space both outside and inside your body and anatomical structure and finding out what lies there. Our reflections elongate the journey through the ribs and allow you to pass through and see yourself… inside yourself. It is both an adventure of a few steps, but potentially a space to relax in your body and be either comforted or relaxed by feeling that you are in a ribcage.

ASAD:

  • What aspects of your project or process were most successful?
    • Being so meticulous about our planning in Rhino really helped us stay organized and assemble the arches smoothly. Getting help from Sean was also super crucial in making sure we squished the design in the best way possible so that we had to cut as few pieces as possible.
  • What were a few of the challenges you encountered and how did you overcome them?
    • One challenge we had was after we had sewn the first arch and were ready to attach the second one, we couldn’t figure out how to attach the scrim from the first arch to the second arch. We decided instead to then let the scrim stay open and create a sort of gill-like effect with the ribcage. We also had to deal with running out of white fabric, so we instead switched to red for the top of the ribcage and kept the white on the inside.
  • What are the three top things you learned from this experience that you will take with you into future project experiences?
      • 3-dimensional thinking: understanding how to model in 3D and think about assembling a 3D shape from 2D pieces
      • Organization of a large scale project: Making sure we keep pieces organized, how do we communicate what progress we made if we were not working synchronously, version control of rhino files
      • Confidence in creativity: Being able to stick up for your creative vision and making sure that you aren’t compromising to the point where you are losing the intention of your creation.
  • What have you observed in yourself regarding your collaboration with teammates who bring different skills and experiences to the creative process?
    • We did a really good job of delegating specific tasks between team members based on their strengths. I did a lot of the actual sewing work, while Georgia helped organize and pin pieces together, and Jiyeon did a lot of the preliminary work in Rhino.
  • What is your number one piece of advice you would give to future students in this course?
    • Don’t think too practically – it’s ok if you have no clue how your archway will stand up or how you will even assemble pieces to make something. Make something you are excited about and the rest will all fall into place.

GEORGIA:

  • What aspects of your project or process were most successful?

I think our rhino file was really helpful in the end to cut pieces with the projector. We had some material issues however with running out of white ripstock and red which also ended up being why our arch ended up being 3 instead of 5. I think for the work flow what was really successful was being able to work with Asad to sew everything. I kind of ended up being the master of putting the thing to gether based on the rhino file, I was kindof the only one who knew how all the pieces fit together. So it worked really well when I met up with asad and I ended up pinning everything and feeding it to him on the sewing machine. We were able to work with a good rhythm this way.

  • What were a few of the challenges you encountered and how did you overcome them?

We had quite a few challenges. I think what ended up being the worst was our problems with lending projectors and running out of fabric to use. I could list out an entire list of things that went wrong, it was a lot. We were able to work through them by compromising and making schedules so two people could always work together because working on this individually proved to be challenging. I think from the start we were a little behind because of mine and Asad’s involvement in the carnival. I think once we got the rhino file done we were excited to get started. We had some roadblocks on our first time tracing because the projector was too close to the wall, but we were able to fix that quickly and back up the projector. To finish the last arch we also had to sew together scrap pieces that Jiyeon found to be able to complete our long arch shapes, I think when doing this is when we realized doing the other arch was perhaps too much.

  • What are the three top things you learned from this experience that you will take with you into future project experiences?

I think what helped us was being able to work well in rhythm and having people have certain roles in the project. It made it so everyone knew what they were getting into when we were working. I think one thing I would change about how we worked together was time. I get really antsy and take deadlines really seriously, I got a bit mad when I was free to work, but I couldn’t because my partners were busy. I think although we had good rhythm when working together, I would have appreciated if everyone knew how to put the pieces together, so that I did not need to be there every time a person wanted to sew, or so if I had free time I could go in myself and vis versa, and get stuff done. I think another thing I learned in conjunction with this, is that I can really push people a lot with projects, but sometimes it’s not necessary if, in the end, we get it done. I think that’s something I can work on as a peer, to be more understanding of other people’s limitations, because they are not the same as mine.

  • What have you observed in yourself regarding your collaboration with teammates who bring different skills and experiences to the creative process?

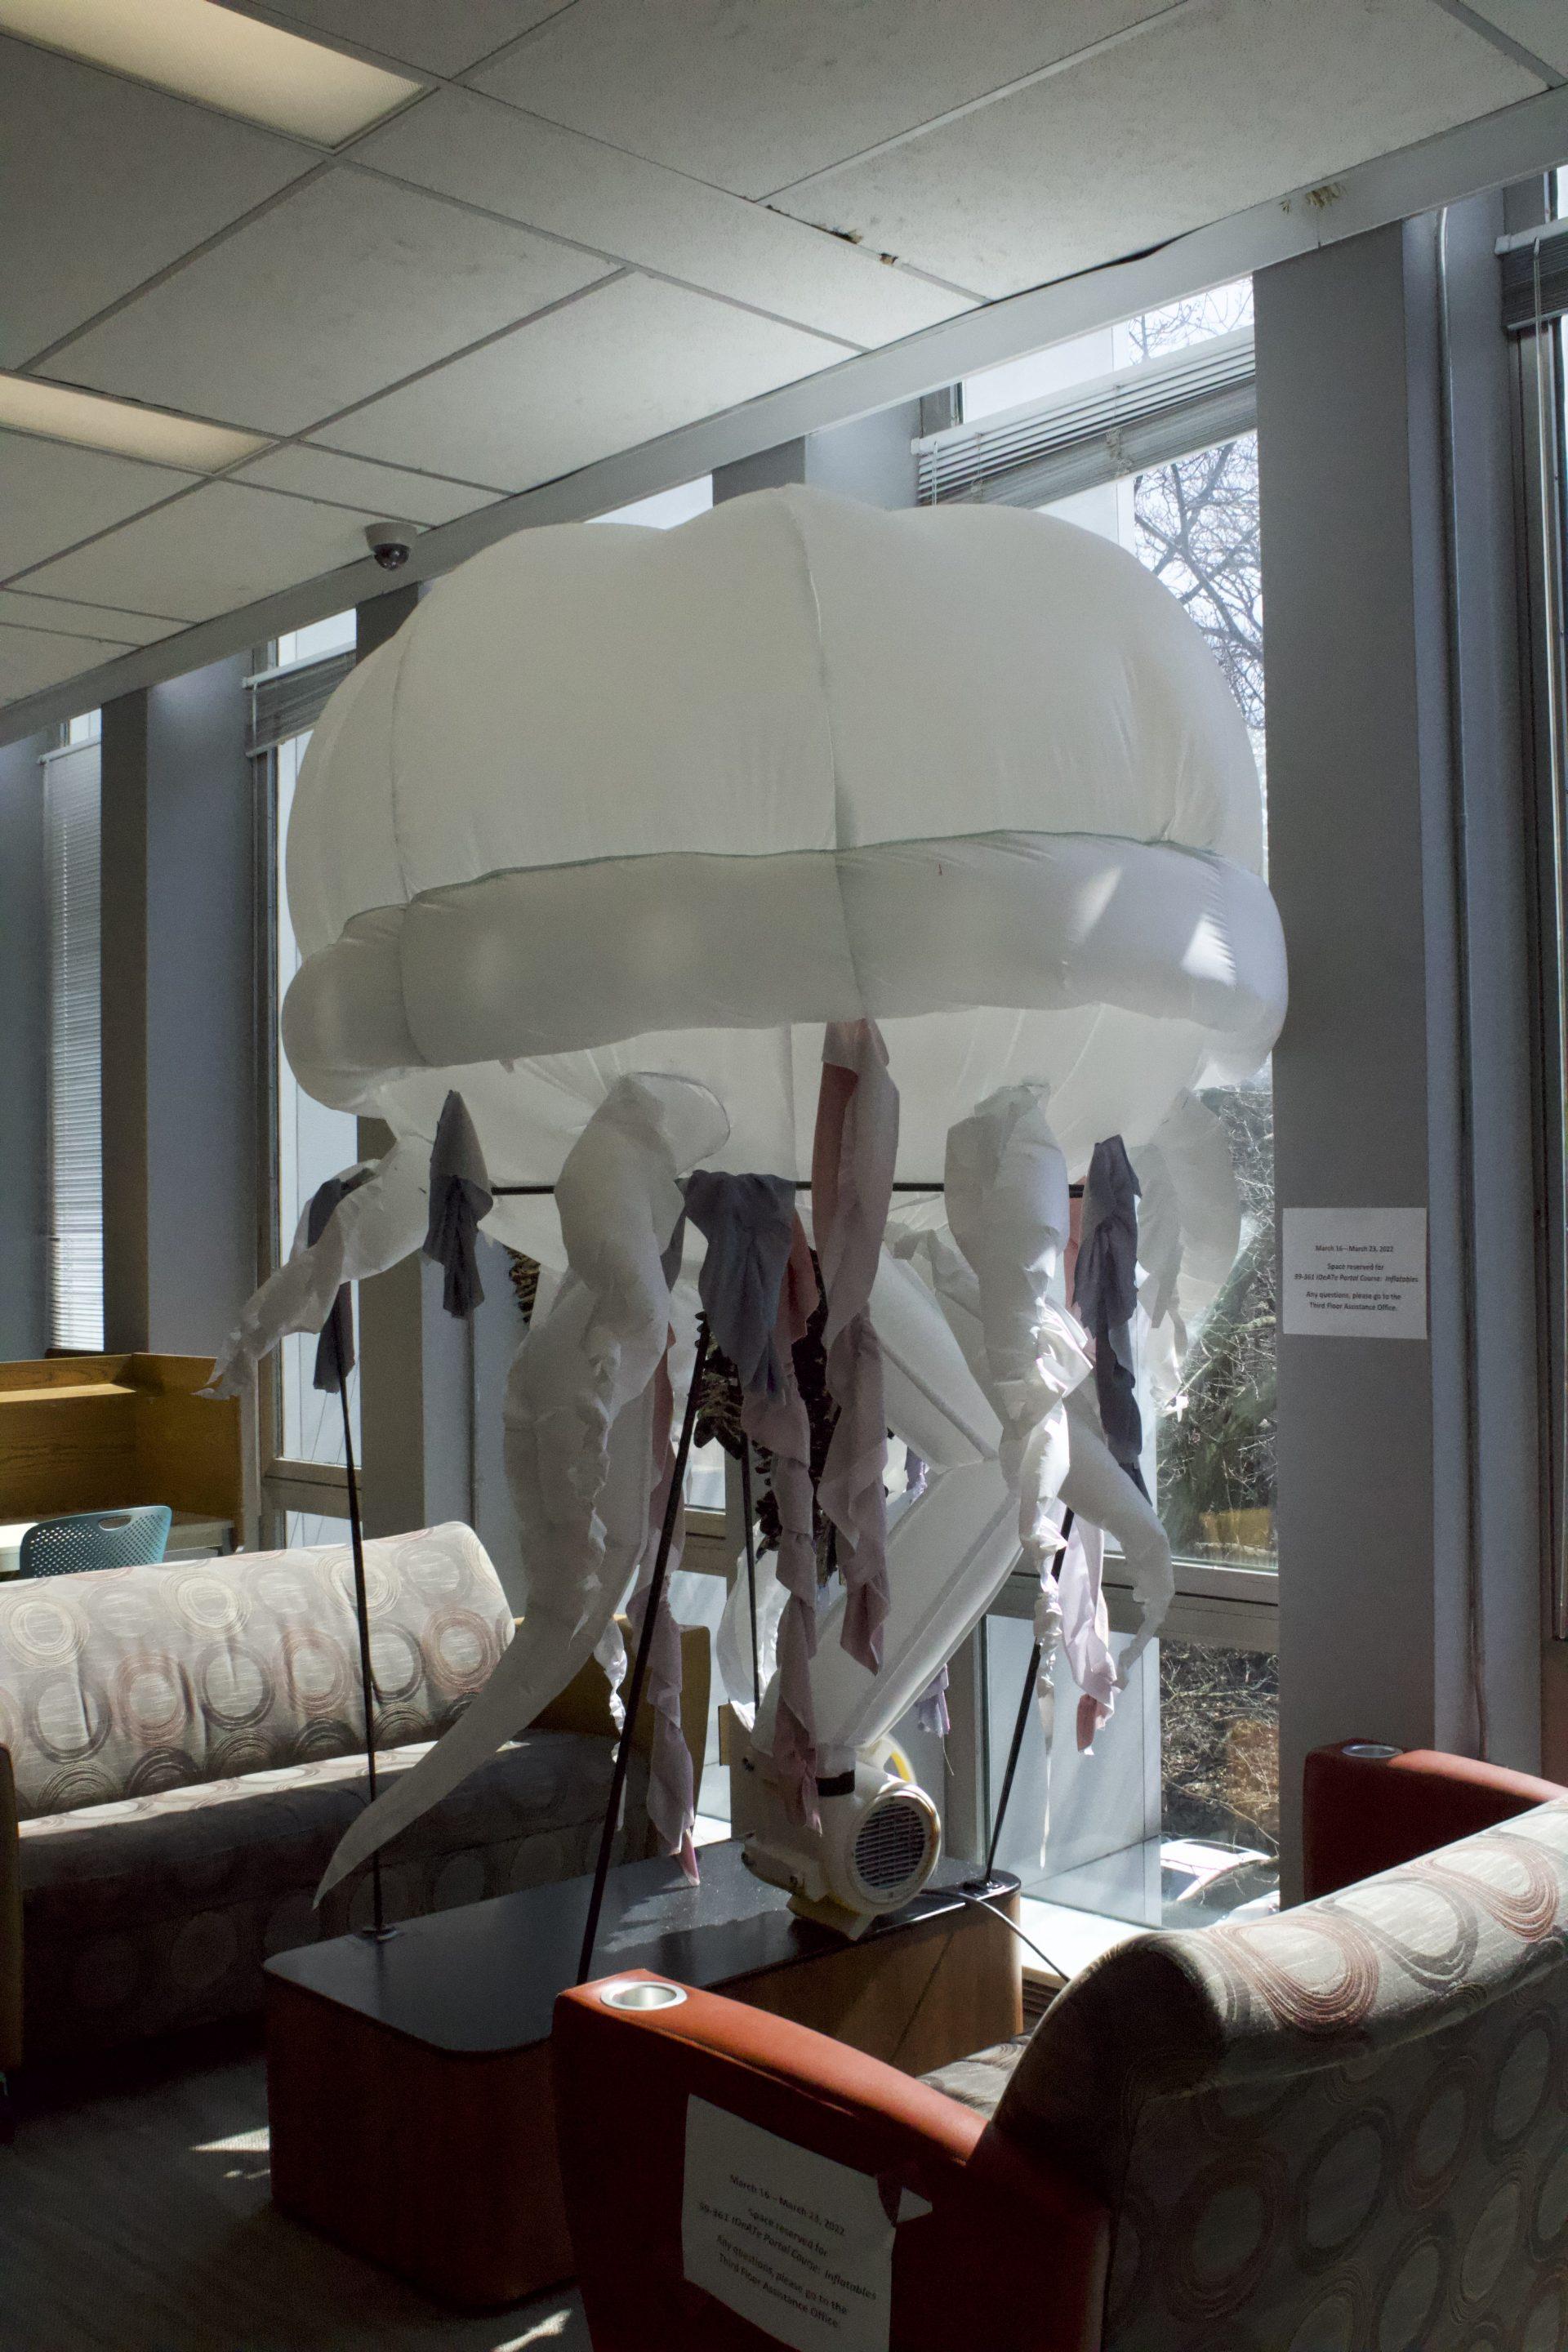
I think it was really cool to work with different people, both for the Jellyfish and the Ribcage. I think in both scenarios we figured out how to collaborate with each other in different ways. I think when working with Heeyun I really liked to way we worked together, where we made the idea together, separated for a little bit, and got to work together in the end and go full circle. I think this worked really well for both of us because our free time at the start of the project did not match, but because of the extension, we were able to really work together and surprise each other. I think the fact that I knew both my partners out of class changed things for the last project, I knew their skill sets more and was able to see what area we all would be working in. It was different working on this project because for cutting and sewing we either needed two people or it was helpful to have someone else to work with, I think this was new for me, where I usually work separately and then collaborate in the end.

  • What is your number one piece of advice you would give to future students in this course?

When people ask me about this course I always like to tell them that it is really fun, and you get to make a lot of amazing things, but you do have to be aware that the class is a bit of a time commitment. Especially because A lot of my friends are people who always do studio courses, to us this is like another studio, and You have to be willing to put in that amount of time while doing other crafting projects. 

Final Project Proposals & Updates-Georgia, Jiyeon, Asad

For today, we have finished our rough outline. We hope to make a small model soon to work out the stability of our project, we have not decided what we will make it out of, but we want to figure out what shapes we will need to create to make our piece.

For us specifically, our outline is very much a suggestion, as Asad and Georgia are part of SCC and have a busy week this week. But any slack we have in our plan we will pick up afterward. Our main goal is to have what we need to get done, done before the dates when we can go to WQEB and test our inflatable in the space there.

We have figured out the sizes that we want the inflatable to be, including the sizing and space between the ribs. We have also decided to use all white rib stock because we want to see the effect of color from the inside will travel through the white pieces and give a dream-like look both inside and out.

old drawing

Push-pull 2 – Georgia and Heeyun

Visual Portfolio, Posts & Image Gallery for WordPress

At first, we weren’t able to meet up and work on our giant jellyfish inflatable together, so we split up the work: Georgia focused on the main body while Heeyun made the tentacles. We had decided to make the main body be a dome with a “donut” ring going around it, all of which would be around 6 ft by 6 ft. The tentacles would be of varying lengths, but ideally all of them would be suspended above the ground/table to make it look like it was floating in air. 

For the main body I decided to use a beach ball pattern. I had to do some math to figureout how long the pattern should be, especially since we were cutting the pattern in half to make dome shape rather than a ball. I indeed up making 8 giant dome pieces to sew together. They ended up being about 56 inches long which was a feat to put all the long pieces together. I was constantly concerned that the bobbin would run out of thread in the middle of sewing these pieces because how large they were. After I had gotten all the pieces sewn together I left one part open and didn’t completely close the shape together. I did this in order to add the donut, I thought it would be easier to leave this open when adding it. For the donut I cut out 8 rectangular shapes that were 16 inches long and sewed them on to the dome pieces, but I only left 8 inches to the bottom of the dome so that when it inflated it would inflate outward in a circular shape. Next I ended up cutting out circles in the original beach ball pattern for the air flow to get into the rectangles that would be the donuts. After this I sewed up the rest of the beach ball pattern. And asked Heeyun to cut out the last part of the top which would be the 6 by 6 foot circle.

For the tentacles, it was hard to make them at first because we wanted to include the ruffled texture from the fabric tentacles that Georgia had made for one of her push/pull 1 objects. The first few tentacles were improvised curvy tapered shapes, sewn together like pillows. Using some scrap triangular pieces of fabric, I decided to ruffle up the longest side of the triangle and then sew that end together to the next long side. Serendipitously, the ruffled edge spiraled around the overall conical shape of the structure, which is what we had wanted to make initially but were unsure how. 

I ended up making the ruffled pieces of fabric like my last project, this was quite easy. I ended up putting them on while our piece was inflated so I could see where they needd to go. For Heeyun and I we got together to attach the tentacles(inflatable ones) to the circular base I had asked her to make. We ended up measuring her tentacles and cutting out circles for them to fit into in the circle. Sewing these on was a lot of fabric going everywhere. We had about 11 tentacles to sew on so after cutting the pieces out of the big main circle it looked like we had just cut out pokadots. After getting the tentacles attached, we added the big circle to the beach ball pattern, and then moved on to inflate.

When we finally assembled the jellyfish together, we both didn’t anticipate that the main body would be so much larger and rounder than the rest of the structure. If we were to make future iterations of this project, we would definitely consider the proportions of all the pieces more carefully. Moreover, a challenge we faced was getting the jellyfish to stay upright but also make it seem like it was floating in air. The center tube where it was connected to the fan was definitely not enough to keep the jellyfish from toppling over to the sides; the weight was not balanced enough, nor was it light enough to stay up with only the “support” from the constant inflow of air. As such, we improvised a “stand” made of sticks wrapped in attached together with electrical tape. After carefully balancing the jellyfish on this stand and against the wall, we managed to keep the jellyfish upright. This was a bit of a fix since we could not hang the piece as we originally intended. 

From outside

Push and Pull Pt. 1 -georgia

Visual Portfolio, Posts & Image Gallery for WordPress

Object one: Purse/ Accidental chair cushion

I had originally had drawn this design out to be more of a connected tube to the big circle in the middle. I put together to circle shapes out of fabric to make the big center circle and then made a very long skinny rectangle of the two other fabrics to make the rest of the shape. I had other things I wanted to add to this piece, but this one took me much more time than I thought it would. I had wanted the model to be colorful and different textures, but with my new sewing knowledge using these materials was a give and take and process so it probably took me much longer to do than it should have.

I do really enjoy the relationship between the red and blue fabrics. There is this push and pull dynamic and this stretch of fabric which I find really adds to the form and texture and extenuates the light off the latex red. I tried to learn from this piece and sew better for my next one and develop beyond the basic shapes.

Visual Portfolio, Posts & Image Gallery for WordPress

Object 2: JellyFish

Once again I continued to try to use different materials. I ended up making more mistakes in this and ended up ripping a lot of material off either because it was too fragile with the thin strips or just did not look right. For this one I tried to go in a different direction and try different methods of sewing. I made pleats on the circle to try to bring in the shape and I ended up leaving it exposed. The top where it is the pink material I actually have 3 fabrics below it. What happened was when I was doing the pleats on the same fabric as the lower one it ended up looking really weird. I tried to add a sheer piece that I had sewen on tip to help but it still was not right so I sewed the pink on top and attached it and stuffed the circular shape. I think my fix worked well, but it was definitely a learning experience for me to figure out what worked best.

I had cut some thin red fabric pieces next and hung them from the outside. I cut them very thin and when cutting them I realized I should have used a felt fabric because they were falling apart in my hands. I attached them anyways hoping that the problem would go away, but when I looked at the strips after it was not working so I removed them after I spent a ton of time individually hand sewing them on.

You can see here where I ripped off the red strips.

Next I went on to make the black and pink pieces that come from the bottom of the jellyfish. I sewed the middle of some cut rectangular strips on the sewing machine not closing them and then pulled the string to make the fabric bunch together. There was also a learning curve on this because sometimes I would pull too hard and the string would snap. All these pieces had to be sewen on I think I sewed on 7 total. After I had done this, it still looked incomplete. So this is where I grabbed the mesh piece and cut it in this wavy pattern to put on the top. I learned from my messed up red strips to sew the fabric at the end of my cut so that it would not fall apart. I am really happy that I did this and I think following my curvy cut helped me be more precise with sewing on the sewing machine. At this point in time I also realized that I had been sewing with my lines being quite separated and making them closer really helped me when I moved on to attaching all my laser cut pieces.

Visual Portfolio, Posts & Image Gallery for WordPress

Object 3: an accidental seal?

This was the piece I did on Rhino. I had probably around 30 cut pieces of the laser cutter. What I first started with was matching my pieces up to the colors I gave them in rhino and marking that on the fabric so I would know what went where. I then started to put them together and sew them piece by piece. I think this is where I made my mistake sewing. The shape ended up getting weird in a few spots and I think I can contribute it to me sewing it on piece by piece instead of sewing the pieces that went linearly down my shape together and then piece strips of them together to mack the complete shape. I think my other mistake was in choosing this material instead of felt. This material is much more movable, and when laser cutting my guide lines for sewing the corners got burnt out so I ended up sewing rips up everywhere. I think in the future I would be interested in trying this again with a new sewing idea with attaching pieces differently and using felt.

I think rhino will also be more helpful with pieces a bit more simplistic than what I did. My piece was a weird shape so to scrunch it down in rhino I had to make so many separate pieces and I think that was unrealistic of me to have so many components. I did enjoy taking the time to better my sewing with this piece, but I definitely want to try to do something in rhino again. I would much rather take hours pinning together laser cut pieces rather than cutting out the shapes by fabric and maybe not knowing what the outcome will be even if you want something specific.

Rhino Pieces

Out in the World – Georgia Miller

  • Shawna X
A video of her inflatable
WNW MAGAZINE – Fuck Your Manners: Shawna X Critiques the Western Gaze in  Multimedia Exhibit
ADO x Shawna X - Fuck Your Manners - WNW
Inflatables from this multimedium project are hanging and in front of the mouth sculpture.

I think When finding Shawna X’s work, I was drawn to her use of color. This is actually the only inflatable work she has done, but her exhibit’s meaning drew me in further. She wanted to display the differences in eating and manners in western cultures vs asian cultures. I thought that her inflatables(not the mouth) spoke to her message and her meaning which has a lot of relatability.

The shapes of her inflatables go from the simple eye which is a ball, to the complexity in the jellyfish structure with many tubes. The whole thing just looks so clean. Seeing where the inflatables meet each other, yet look so purposeful pertains to what we are learning about how to attach our materials together to get the shapes that we want.

I find it really interesting how many of her shapes stay cylindrical but taper at the end and hold an S like shape, if you look to her piece on the top right. Thats something I haven’t really seen before and it gives a very child-like whimsical look to it.

https://magazine.workingnotworking.com/magazine/2018/6/6/fuck-your-manners-shawna-x-critiques-the-western-gaze-in-multimedia-exhibit

Link to Where you can read about Shawna X’s Fuck Your Manners Exhibit

https://shawna-x.com/

Her website

Improvisation Inflatables

Visual Portfolio, Posts & Image Gallery for WordPress

My blue and yellow and clear inflatable was the first one I did. I did not go in thinking about what I was going to make, I only tried to match my colors. I ended up cutting a lot of pieces that were small, so I did a lot of work taping and fitting pieces together. I made lots of long rectangular shapes and squares as well as half circles. I tried to keep some of the bag angles from the original bag to make spikes. My first model ended up having air leaks but it was still able to inflate. I noticed how the tightness of me pulling and taping my pieces together in this model made it look like it had a cinched waist. (I was not able to get a photo for this one, but the reflection of it hanging in the sun is very pretty)

For my second model which is the orange black and silver one, I ended up doing similar random cutting but decided to use scotch tape instead and to hide my tape inside the form instead of displaying outside. For some reason after my form began to move from flat to having angles when I added rounded pieces, it became difficult to tape the inside, so especially around the top there is visible tape. This one ended up turning more round. I think it was because I used some bigger pieces and did not make or use any hard edges. Once again this one had some inflating difficulties like the last, but the form still inflated almost all the way.

For my last piece (the one that looks like a cat) I wanted to try another tape I had, which was painters tape. This help my piece together and ended up helping with my air problems. This piece became very symmetrical when I was doing it and I put two rounded shapes on the corners of what I am calling the cats cheeks which allowed my shape to round there. When doing it I did not realize that the top spikes would end up looking like ears, but I think it is a happy accident.

The one thing that I did really struggle with was actually cutting the plastic pieces, I do not know if all my scissors are dull, but I ended up tearing a good amount of plastic because it would not cut.