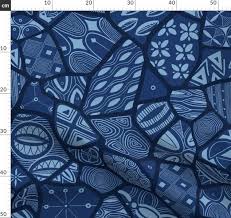
The textile tradition I wanted to focus on was Adire of the Yoruba tribe in Nigeria. This textile tradition are cloths that are dyed using indigo and traditionally worn by women as wrappers but also were began to be used as textiles for other garments.
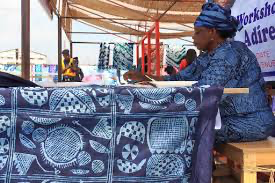
The dying process would usually include indigo from leaves that were locally grown or grains that were imported. The leaves are collected and left to ferment. The dying was done in large pots that are sunken into the ground. The cloth was dipped and then given time to oxidize until it turned blue. If a sheen effect was intended it would be beaten with a mallet.
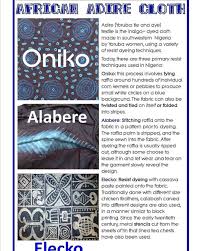
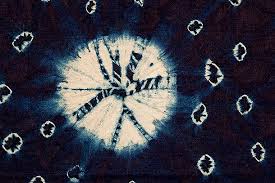
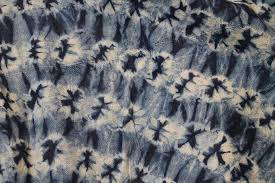
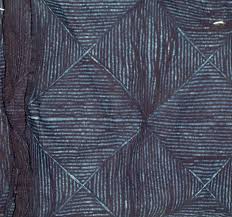
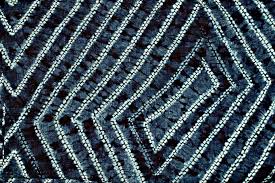
Adire Oniko is a type of Adire traditional dying that uses raffia as resists. There are specific patterns that have names but those names would range from town to town. Other resists were used to create patterns like Adire Alabere (stitch resists), Adire Eleko (starch resists), and the practice of hand painting which used chicken feathers, palm leaves, and match sticks.
Adire production was most popular in Ibadan. There is even a pattern to celebrate the city called, Ibadun dun (“Ibadun is good”.)
Adire Oniko
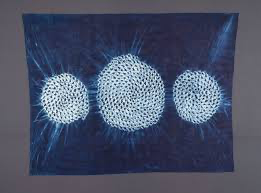
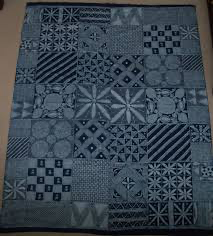
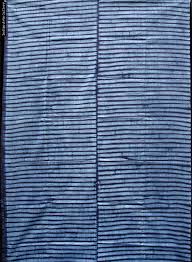
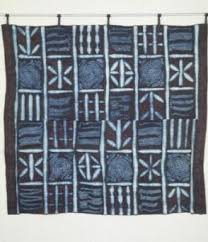
Adire Eleko
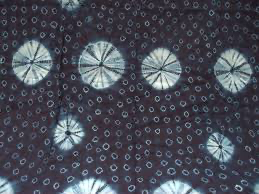
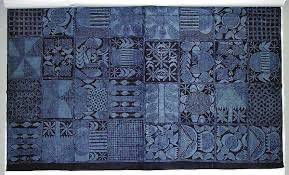
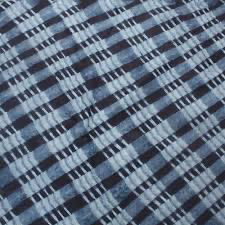
Adire Alabere
I chose this tradition because I’m Yoruba, so seeing the name got me interested because of connection to the tribe. Then looking at the textiles, I realized that the name and methods to get the intended textile were unfamiliar but the cloth itself was not. I’ve seen Adire cloths in closets at home, old family pictures and at parties/gatherings. I got my information from the Victoria and Albert Museum.
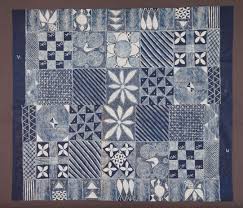
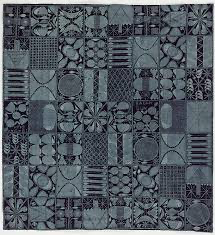
“A jogakbo is a style of patchwork, traditionally used to create domestic wrapping cloths (known as bojagi) from scraps of left-over fabrics. The art of making wrapping cloths has enjoyed a long history in Korea. During the Joseon dynasty (1392–1910), women, living in a male-dominated society and excluded from formal education, concentrated on domestic tasks such as weaving and embroidery. They produced costumes, beddings, and wrapping cloths for the whole household. Following the ideas of frugality and simplicity advocated during the dynasty, the left-over fabrics were not discarded, but would be used to create a jogakbo by patching those scraps together into larger squares or rectangles.
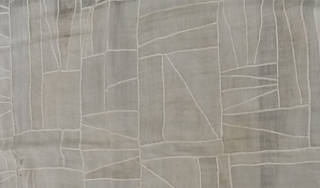
A jogakbo is comprised of scraps of one type of fabric, such as cotton, silk or ramie (a plant fibre native to eastern Asia which has a particularly lustrous appearance), hemp or even paper. The scraps are sewn together using a triple-stitched seaming technique known as gekki, which results in a sealed, flat seam and gives the jogakbo their distinctive ‘window pane’ appearance. Patches are joined into squares and extended in an irregular, improvisatory fashion until a cloth reaches the required size. The jogakbo can include several colours composing a modern abstract pattern, or be made of one single-colour…” Source: Victoria & Albert Museum, London (https://www.vam.ac.uk)
Jogakbo is Korean traditional patchwork known for its beauty in composition and colour balance – all from leftover bits of fabric. Jogak means piece and bo means wrapping cloth; it’s wrapping cloth made from fabric pieces.
Just like quilting traditions in other cultures, jogakbo was born out of the frugal hands of women who were able to find beauty in just about everything they touched.
Many Koreans reminisce about the times when their mothers and grandmothers would get together for an evening of patchwork which would flow into the small hours of the night with endless chatter about all matters of heart. The fruit of their labour, with their sighs and laughters in every stitch, was then passed down from mothers to daughters like a family heirloom.
Huh Dong-hwa exhibited his collection at the Museum of Korean Embroidery. He calls jogakbo the equivalent to a family portrait before photography was invented, containing the life of the woman who stitched it- the red and yellow scraps from the dress she wore for her wedding, blue pieces from her husband’s official uniform, and multicolored pieces might come from her children’s clothes.
“I think jogakbo is similar to geometric abstract art by Piet Mondrian or Paul Klee. Bojagi is a part of daily life in Korea and it is difficult for us to discover artistic values in it, but when exhibited overseas, foreigners easily find the aesthetic beauty of jogakbo. Maybe that is why those jogakbo are exhibited among my collection mostly overseas.” -Huh Dong-hwa
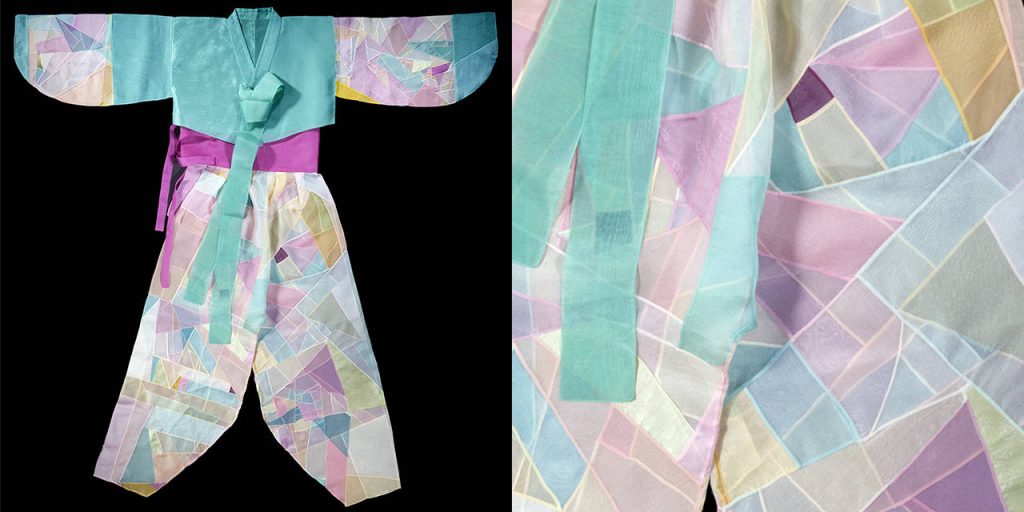
Above is a hanbok, the traditional Korean clothing, with jogakbo style applied to it.
I chose this tradition because I really admire the upcycling of textiles to create new ones, and the beauty of using scraps to make something that is different but still beautiful by hand. You look at it and you know that there is a story behind it, where each piece of fabric came from. As someone who loves to make things by hand, it makes me want to start patching together all of my old clothes, to make textiles like this.
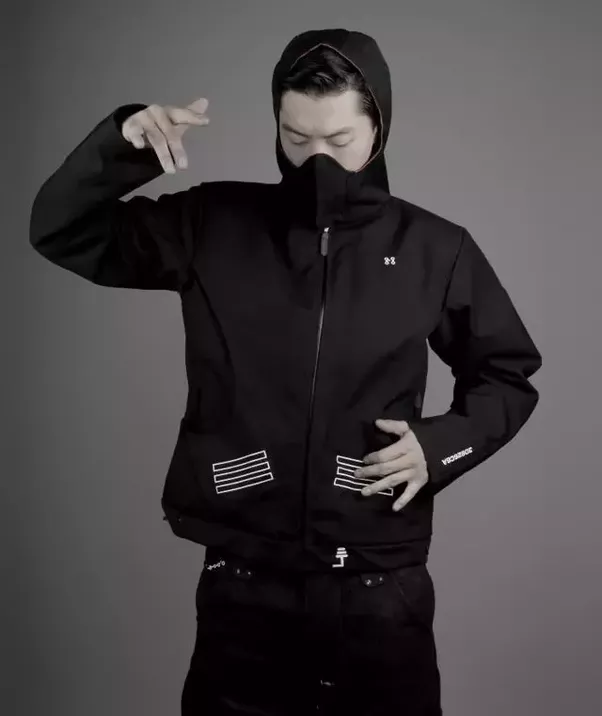
Smart textiles are able to sense and respond to changes in their environment. They are also known as smart textiles or e-textiles. There are many emerging companies all around the world experimenting how we can implement technology into fabrics to create a more technologically advanced world.
Smart textiles are often used for aesthetic purposes. These smart textiles are primarily used in the fashion industry and usually light up or change color.
Zendaya at the 2019 Met Gala
Models at the CuteCricut runway show (models used mobile phones to light up their garments)
Smart textiles can also be used for performance enhancement, focusing on function over fashion. Using technology embedded in the fabrics, these textiles can regulate body temperature, reduce wind and water resistance, guard against radiation, minimize the effects of space travel, and control the vibration of muscles.
Smart textiles is a growing industry. Although few products have been successful in reaching consumers, with the increase of production and improvement of products, it will soon be a useful technology that can improve our health and safety and prove unique visuals and activities that were not possible before. I chose this topic because I am always interested in seeing how technology and art can intersect.
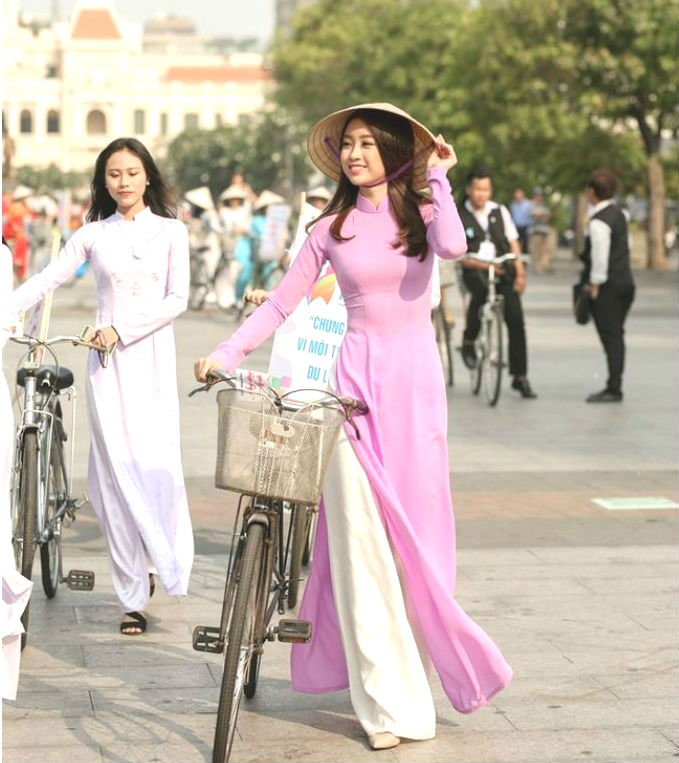
The textile tradition that I chose to talk about was the traditional dress in Vietnamese culture. The traditional dress for women was the female version of the ao dai (pronounced like ow-ee-yai) which is typically a silk tunic that flows down to the ankles and white silk trousers or a long skirt underneath, depending on which region of Vietnam. In the past, the color of the ao dai often reflected class and status. For example, those of the upper class often had gold details and royalty often had intricate gold embroidery of dragons.
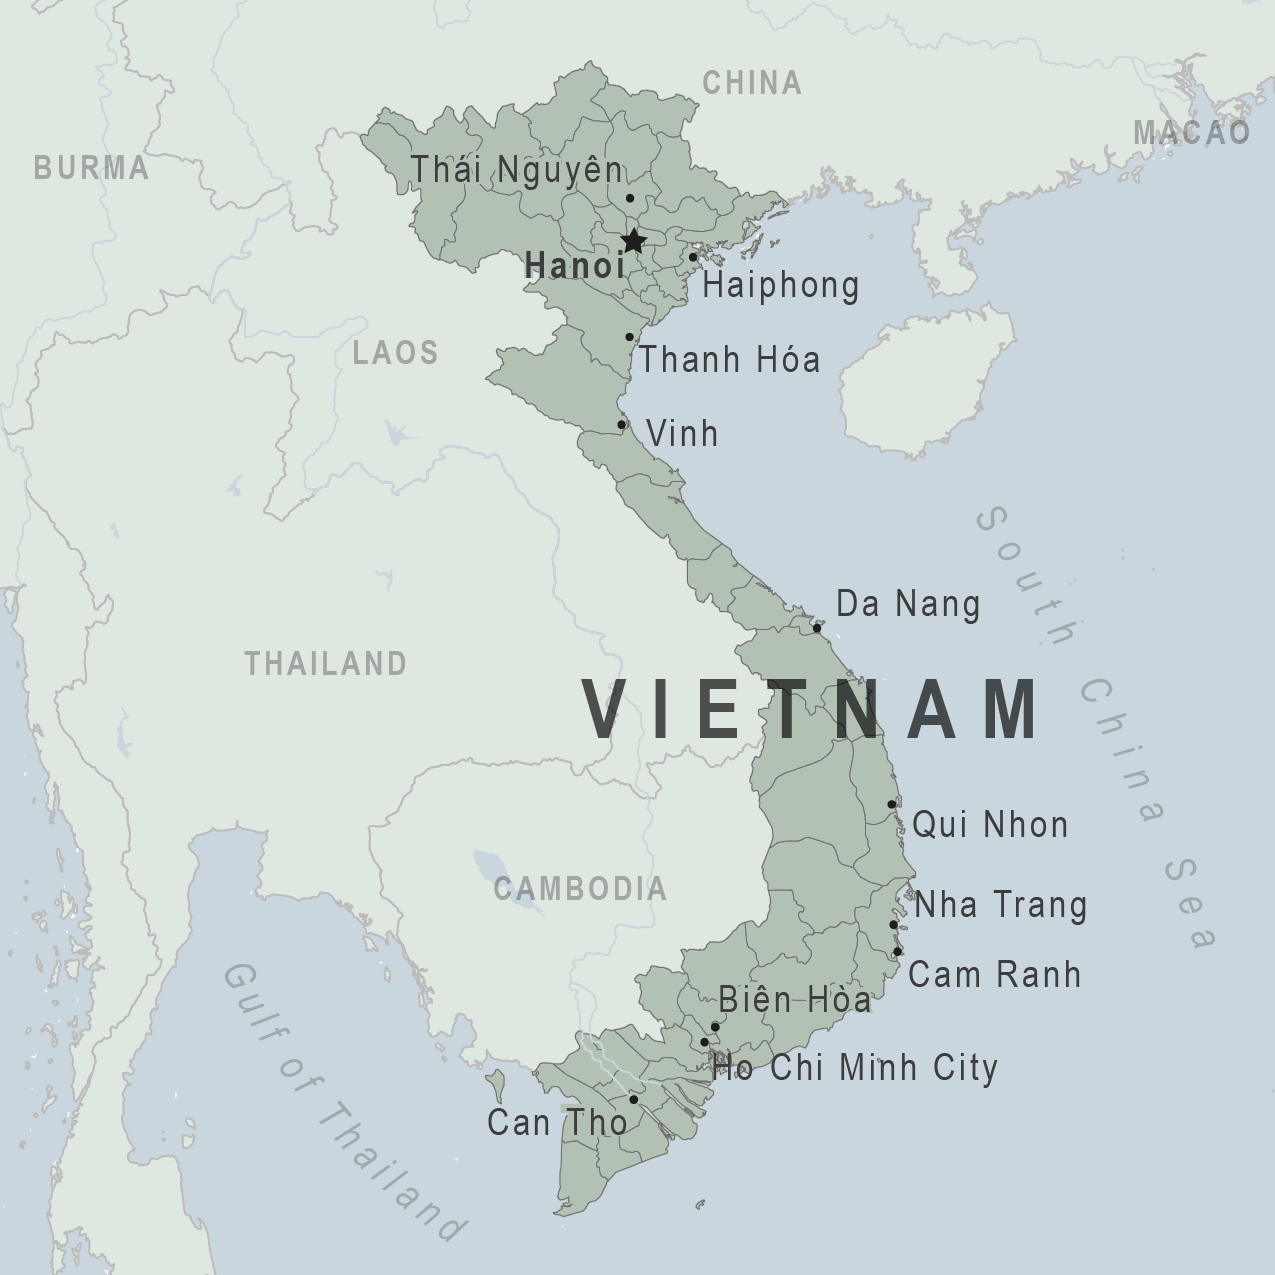
The origin of ao dais is said to be in Hanoi, the capital of Vietnam, but no one knows when it really sprouted its roots. There has been a lot of evolution of the style of ao dais as is laid out in the video below. The first clear evidence of the ao dai was in the late 1700s, in the North, the northern lords of Hanoi forced subjects to wear ao giao linh (ow-yow-lin), which was essentially a front buttoned gown and skirt. In the South, members were demanded to wear gowns and trousers. Later we saw the northern version begin to evolve into the current image of the ao dai by shifting to differentiate between social classes. In the early/mid 20th century, when French colonization took over in Vietnam, Hanoian artist, Cat Tuong varied the ao dai into many different silhouettes, taking inspiration from Western fashion. Many of the designs were considered too scandalous for traditional Vietnamese culture, so the ao dai evolved to be made of 2 flaps, tight to the body, and closed at the neck. In the late 1950s when the US replaced the French occupying forces, there was a controversial fashion statement made by the wife of the President’s chief advisor that resulted in a ban on the style of ao dai. However, this created even more popularity for the ao dai, especially in Southern Vietnam when Saigon designer Dung Dakao revolutionized the dress again. In the 1980s, ao dais began to be made with lighter materials, vivid colors, patterns of plants, flowers, and geometric shapes. In the 21st century, the ao dai was worn less on a daily basis but remains as a symbol of cultural pride, grace, beauty, and creativity.
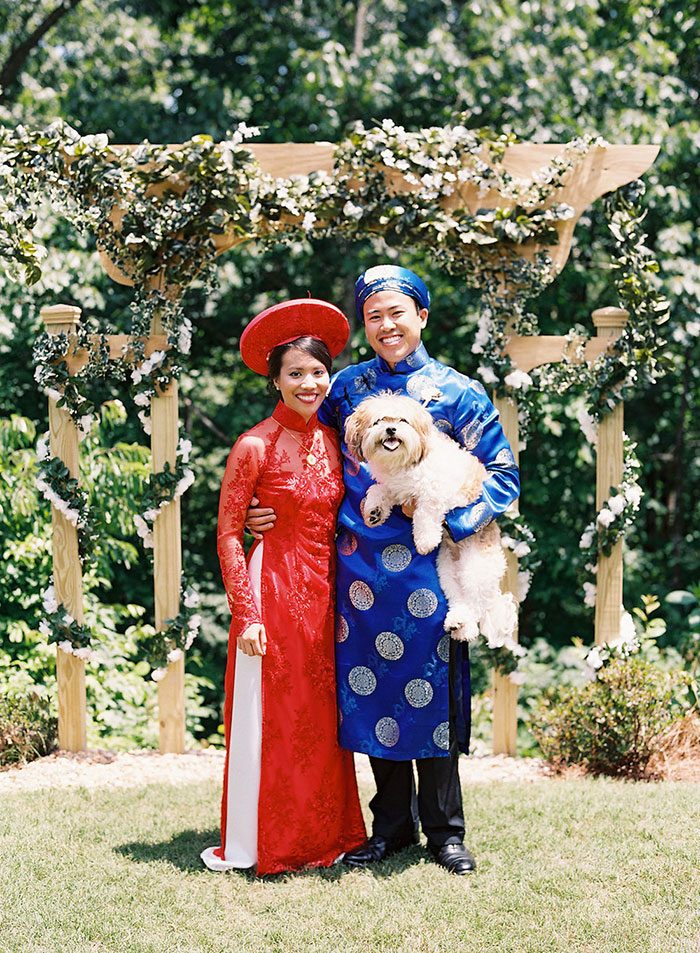
In today’s society, ao dai are most commonly seen at Vietnamese weddings, as can be seen in the third image at the top. The bride will traditionally wear red and the groom will wear either blue or red. Guests at the wedding will also wear an ao dai.
The image quality is kind of bad but here is a picture of me at my uncle’s wedding wearing an ao dai :)) I chose to research this topic because my dad’s side of the family is from Vietnam and I have been wanting to get an ao dai custom made for myself so it is very exciting to learn about the history of the ao dai. This is part of my family’s culture and it is important to learn 🙂
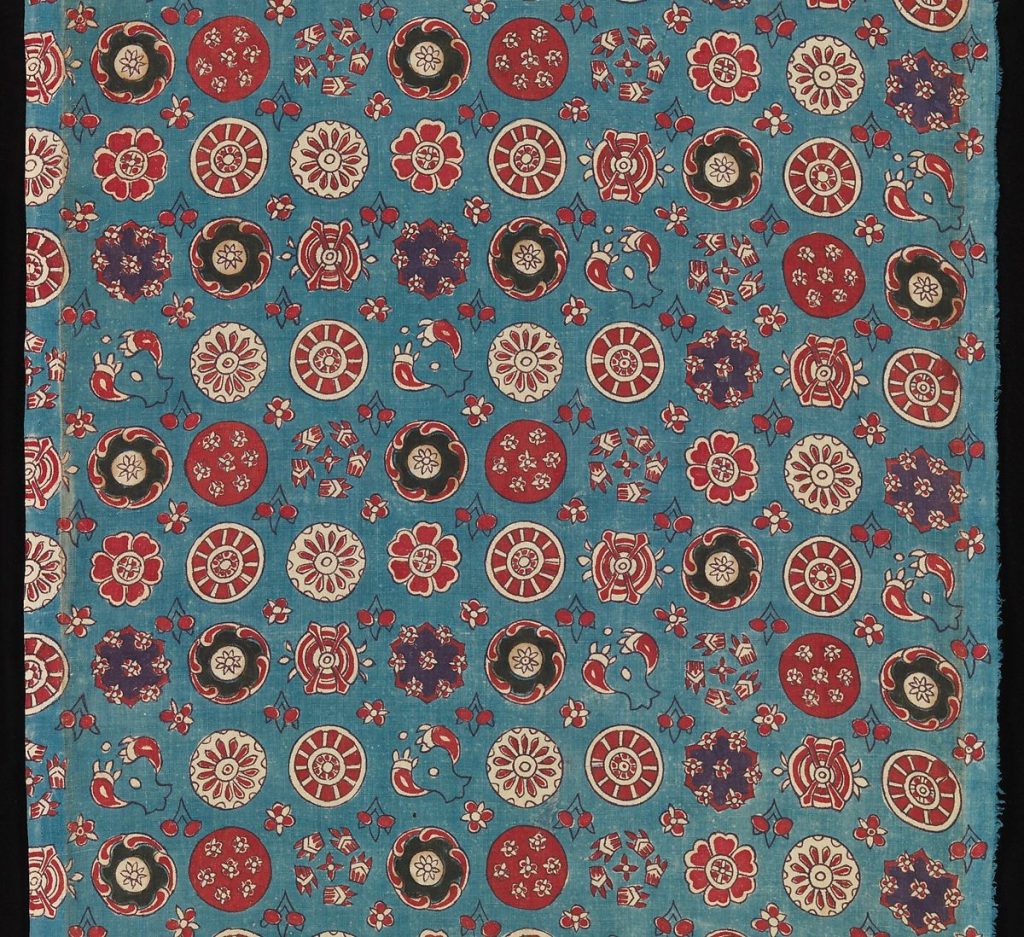
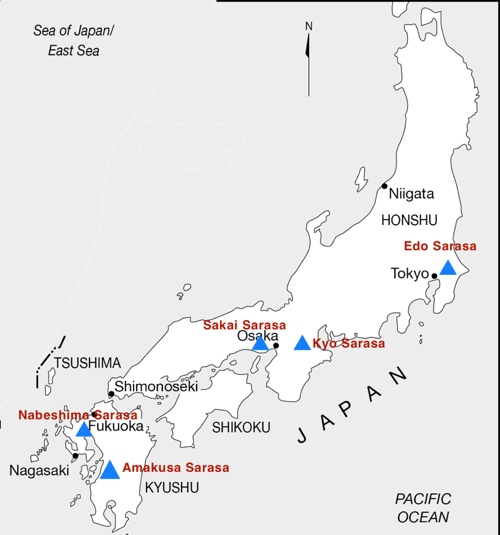
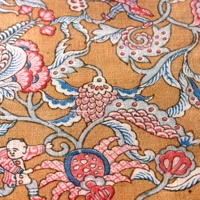
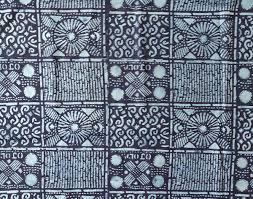
Sarasa has its origins in the early Edo Period (1603 to 1868) of Japan when Portuguese seafaring traders introduced cotton calicos or chintz they acquired in India. Imported Indian calicos were exceedingly expensive and too high-priced to be making into kimonos.
Production of domestic sarasa began in the late 1600s when Japanese dye workers found a method to replicate the designs of Indian calicos from their own style and production techniques. Master Japanese textile makers applied their indigenous katazome textile printing skills into making sarasa (rice paste resist dyeing with washi paper stencils “katagami”). In addition to katazome printing, a few dye works employed woodblock stamping to produce sarasa patterns on fabric.
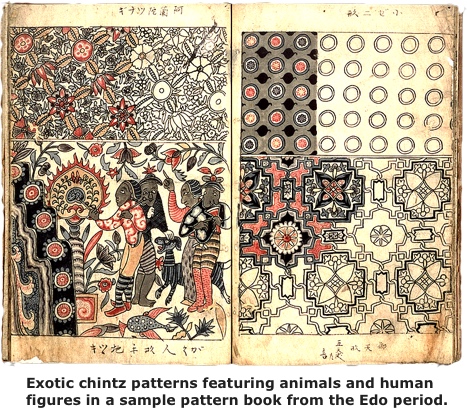
Production of domestic sarasa began in the late 1600s when Japanese dye workers found a method to replicate the designs of Indian calicos from their own style and production techniques. Master Japanese textile makers applied their indigenous katazome textile printing skills into making sarasa (rice paste resist dyeing with washi paper stencils “katagami”). In addition to katazome printing, a few dye works employed woodblock stamping to produce sarasa patterns on fabric. And the dye maker somtimes also hand painted colors on the fabric.
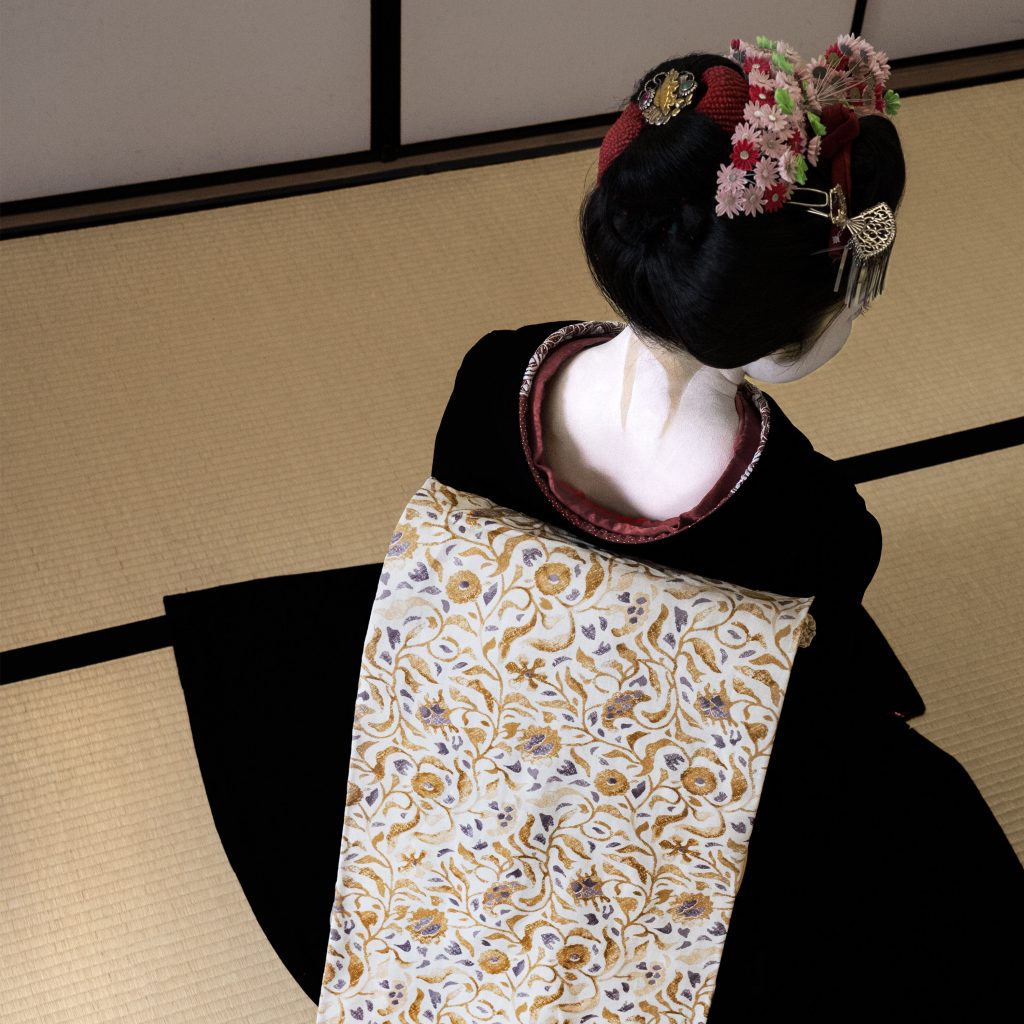
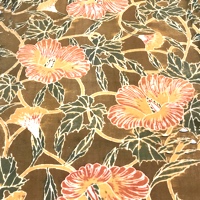
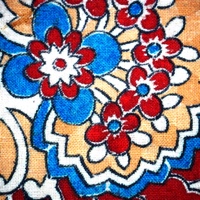
These were characterized by distinctive floral and animal designs with geometric shapes favored by the Japanese. Madder dye derived from the native akaso plant provided Japanese dye masters with the desired red and brown colors favored for producing sarasa prints. The hitherto dominate Japanese indigo blue played a minor role in sarasa colors.
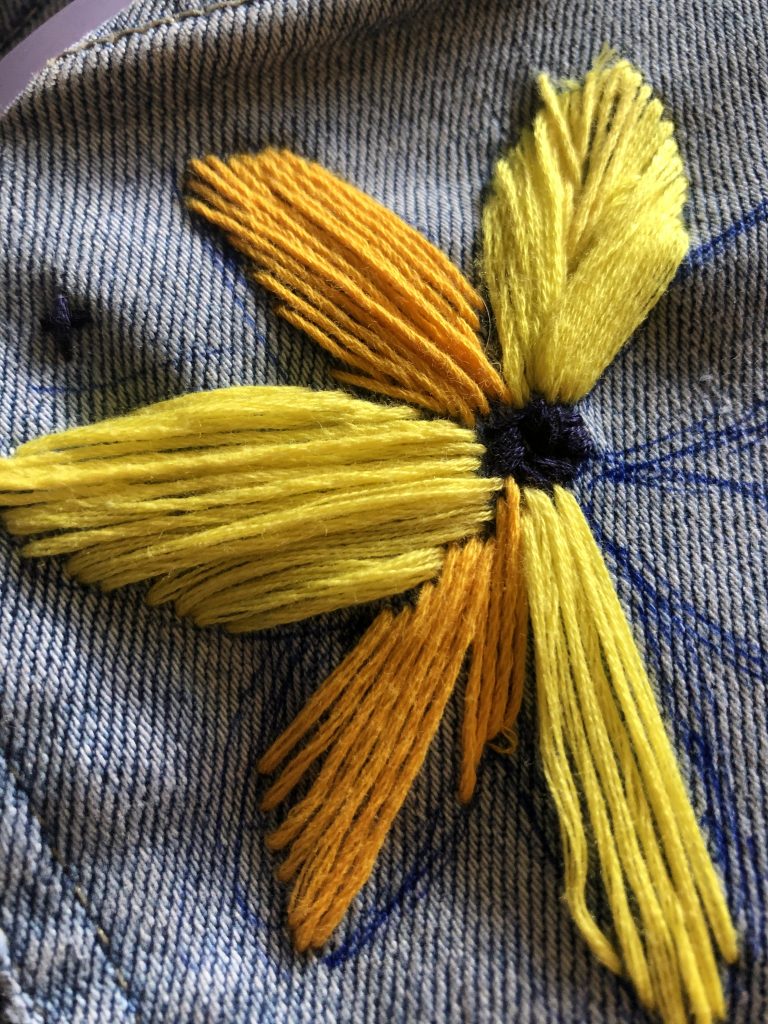
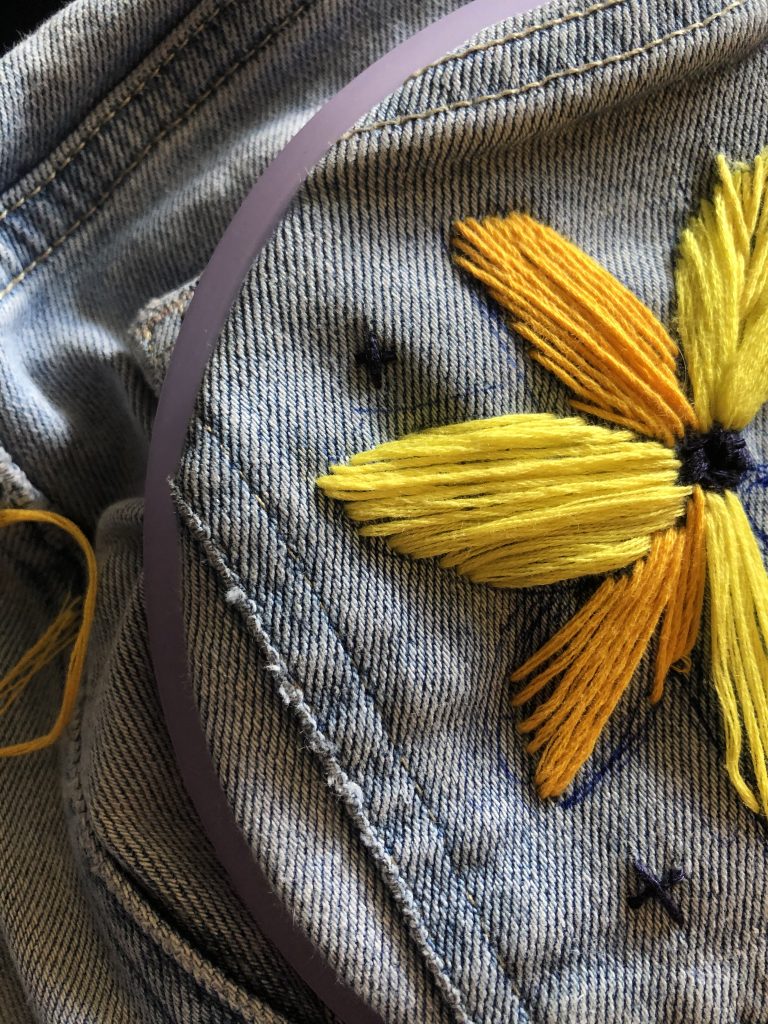
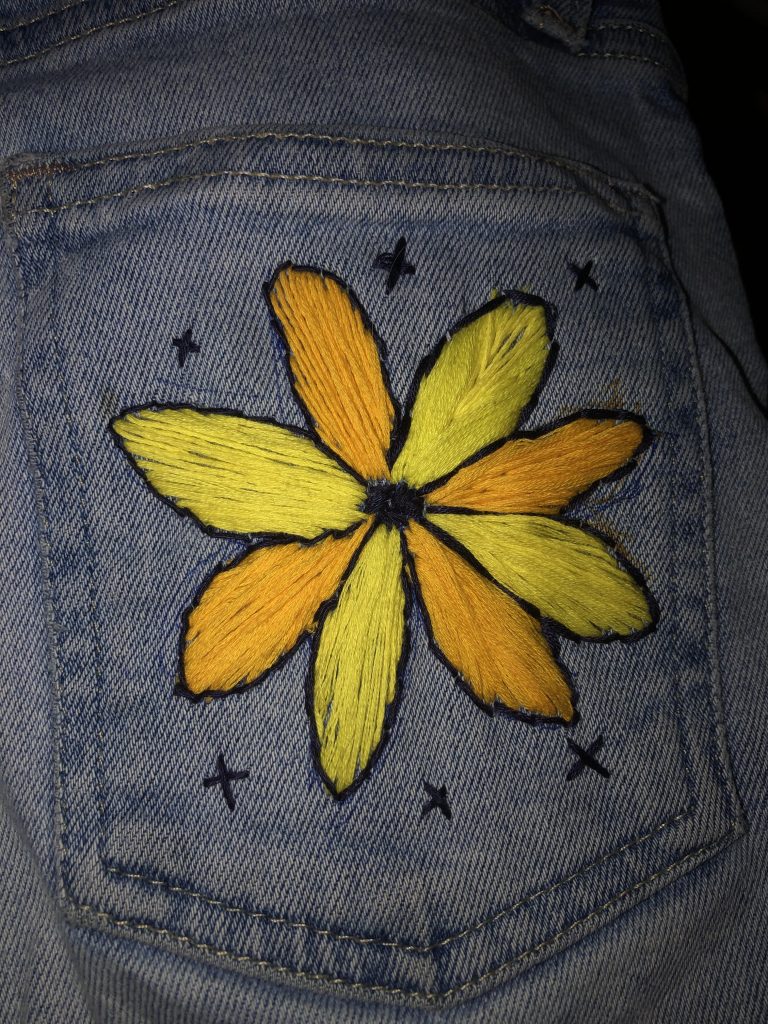
I am finishing up the sunflower and attempting to add different colors to the petals. It’s fun to add texture to the pants through the thick layers I am putting on each petal.
My final product is shown below! I am really happy with how the textures came out and how this old pair of jeans has a new life.
Finally, here is my current second tapestry that I embroidered on!
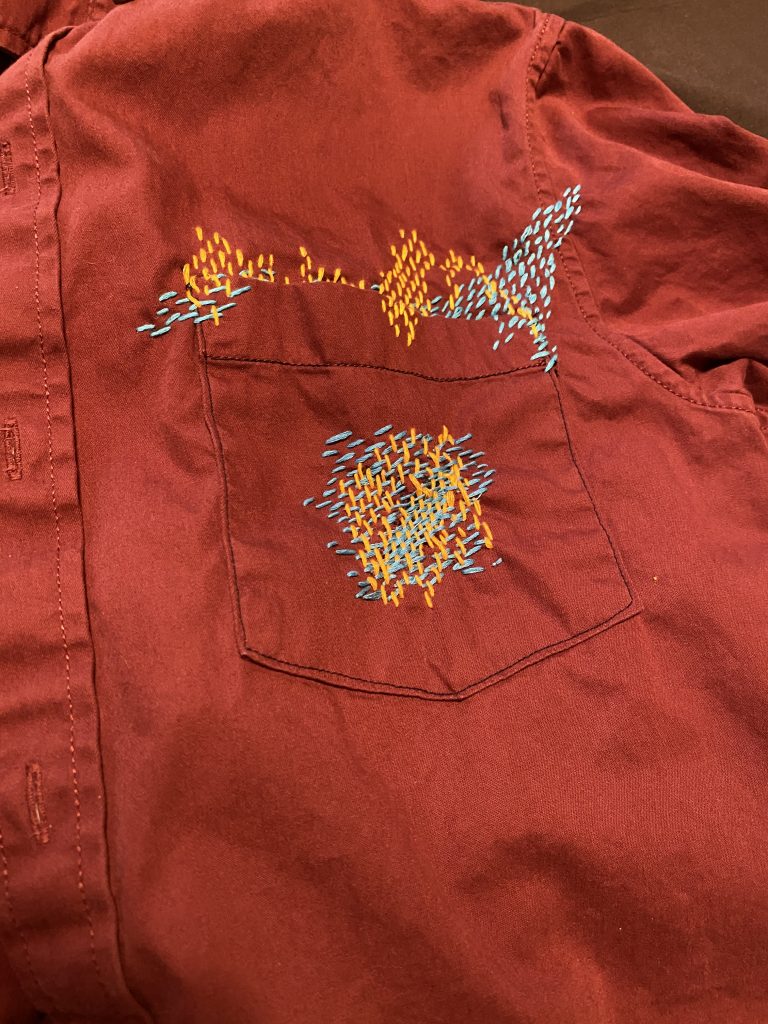
I continued on with my mending of the pocket, mending the sides of the pocket to reinforce the structure. Since I originally undid and resewed the pocket on my sewing machine when experimenting, the pocket was extremely loose and was starting to rip. I used the same blue and yellow threads to create a pattern of similar direction and purpose, but different shape. I think that created a very interesting effect as it added direction and movement to the cloth and the originally very static and boxy shape of the jacket.
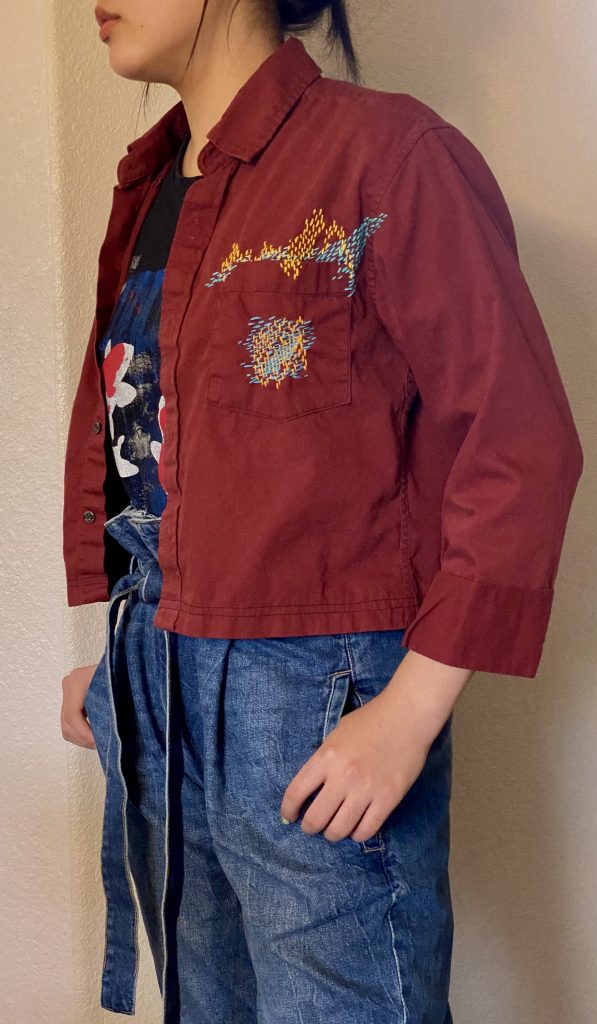
However, I do wish that I planned more before weaving. Originally my goal was to just reinforce the pocket so I did plan to extend the blue and yellow threads onto the side of the jacket as well. Because of this, the weaving is quite low on the shoulder, reaching near the armpit and creasing which covers up a lot of my work. Next time, I will be sure to think about how this 2d fabric would translate when put on a 3d shape.
Overall, this was extremely fun and rewarding and I now love how the colors made the jacket look a little more retro with pops of color which reflects my current style more.
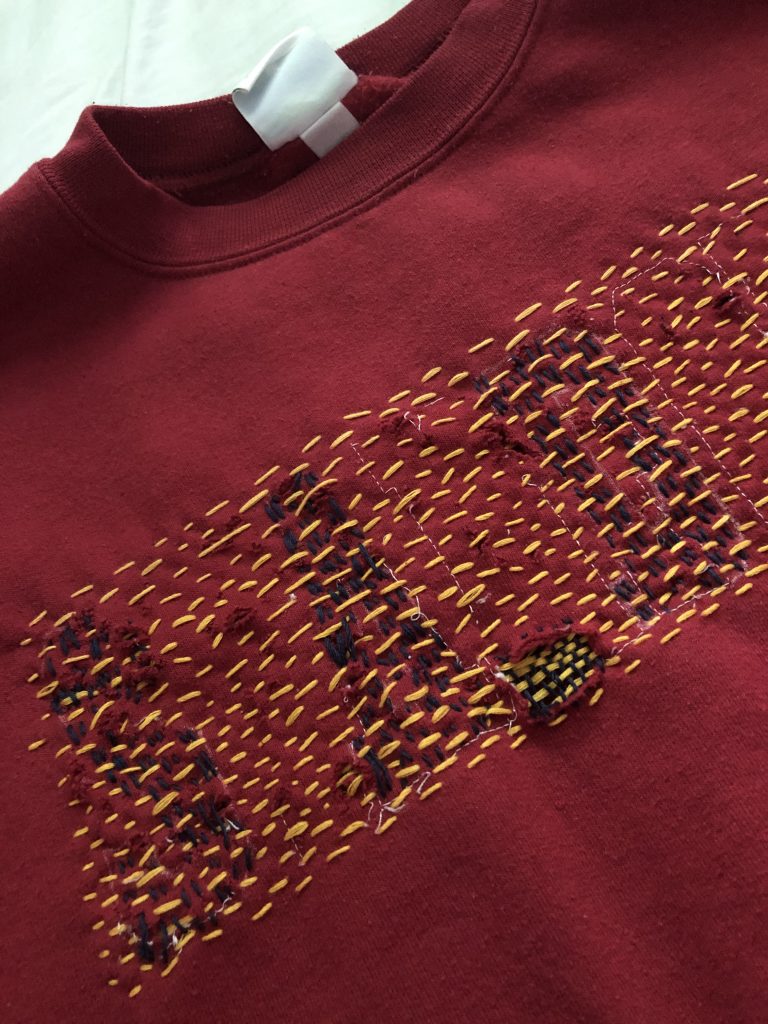
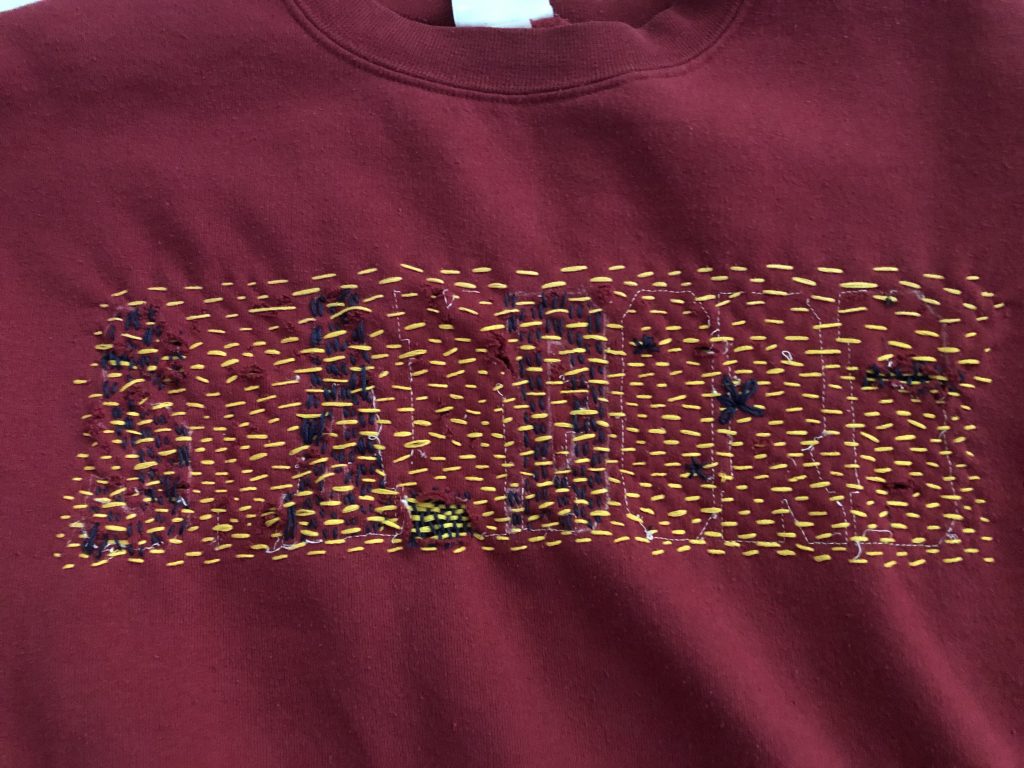
For this mending assignment, I chose to mend my boyfriend’s old Stanford sweater that he wore a lot in high school. When he came to CMU, he ended up roughly tearing off the letters with an x-acto knife, and left holes and a ghost remnant of what used to be. I like how there now exists a lineage of alterations to this sweater with time and attitude.
I did a horizontal running stitch along where the word used to be, filling in a lot of small holes that were there. It made the sweater feel a lot sturdier than before. Then I did vertical ones to fill in letters to spell out “SAD,” as well as filling in some larger holes. It is actually quite hard to see what it spells out, unless you look for a long time. But I like that it is quite subtle.
However, I do regret doing such a large piece, that I was unable to experiment as much as, and ran out of time. I have started adding embroidery such as french knots and lazy daisies, but I will work more on this after!
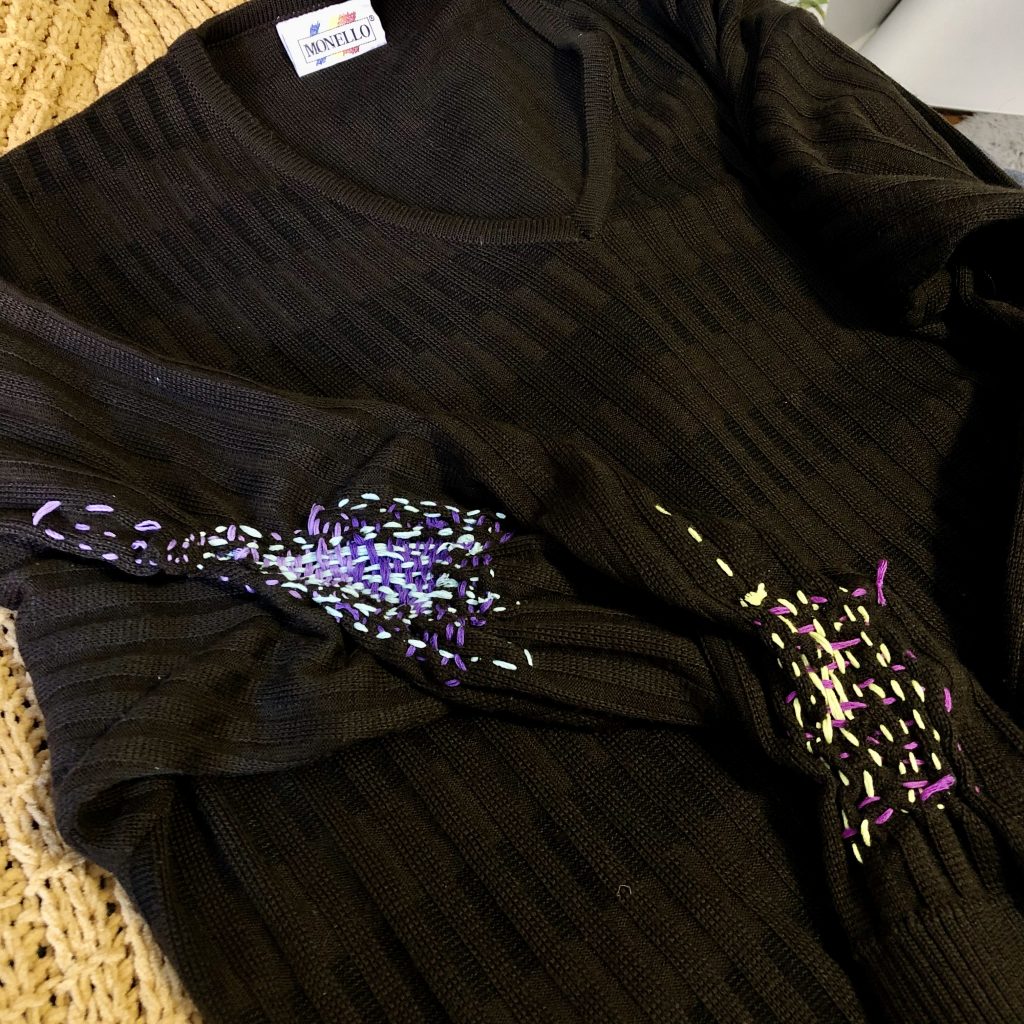
Transforming my plain brown sweater with mending is still an ongoing project, but I’m learning more and more along the way. When considering the placement for the second hole, I thought about how I use sweaters and about which areas tend to experience the most wear and tear. Even though I am the one fabricating the holes to mend, I’ve decided to strategically place them in spaces that emphasize the sweater’s functionality.
I put the sweater on and lived in it for a little bit, and I marked areas that I found received the most action either through tugging, bunching, or rubbing with a sharpie. Some of these included my elbow, sleeve cuff, shoulder, and left hip. I want to highlight each of these areas with darning to give them personality, and so for my second mending, I went for a larger elbow patch.
Mended elbow and sleeve with embroidery floss
I stuck with using embroidery floss because that worked well, and I experimented with threading different string counts through my needle to make thinner stitches. I also played with changing color halfway through the patch to attempt to create a subtle gradient. I like the visual effect a dark purple running stitch transitioning into a lighter purple as the shape of the patch narrows.
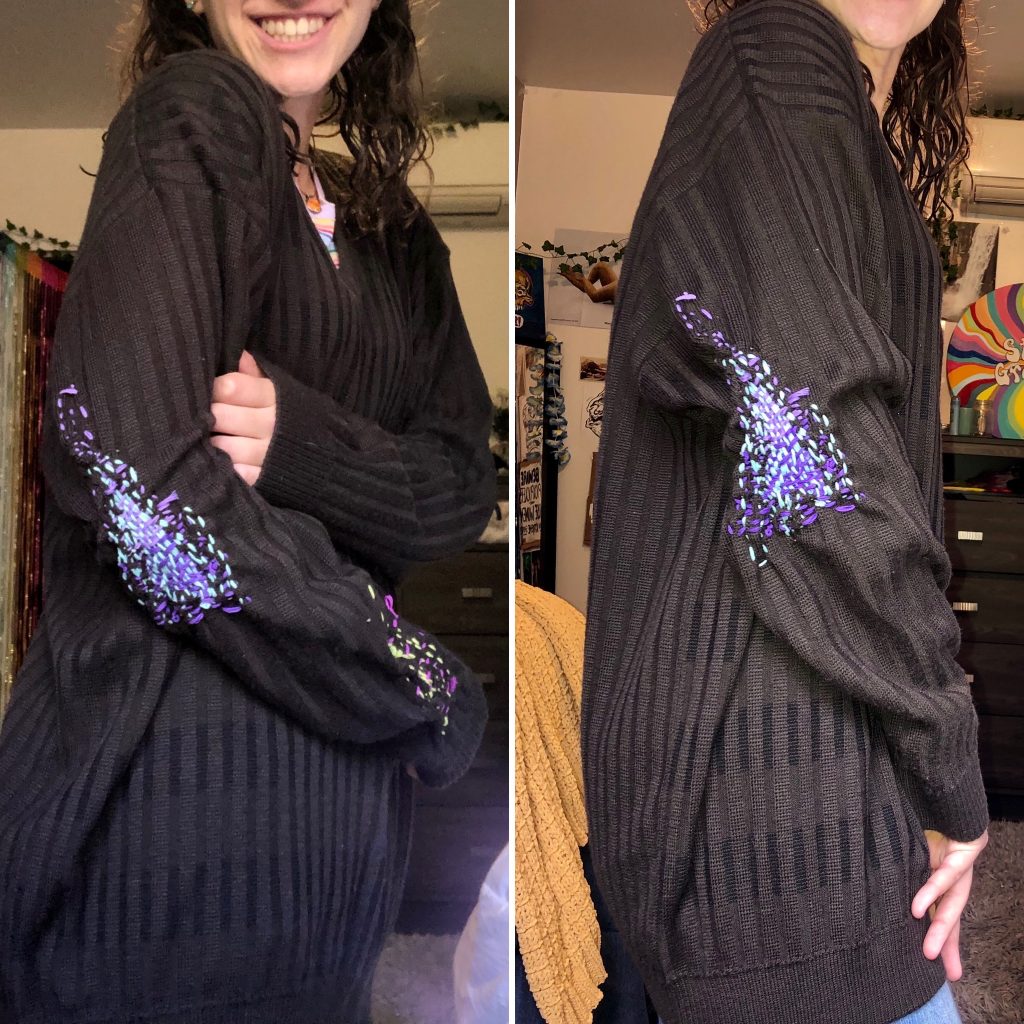
I am sticking with choosing colors that starkly contrast the dark brown sweater, and I enjoy the texture darning provides. It is still challenging to hold the fabric in place while running stitches, and I might find a better way to keep the shape that doesn’t involve sticking a mason jar in the sleeve. This will be especially helpful as I move into other areas of the sweater.
I was surprised by the organic feeling and quality of the mended patches. I’ve found that they move and morph into the rest of the fabric in very interesting ways. Their appearance changes while I wear the sweater, and it will be exciting to see how my view changes over time.
For this part of the assignment, I continued my mending from last time.
Mending from Tuesday 10/6/20.
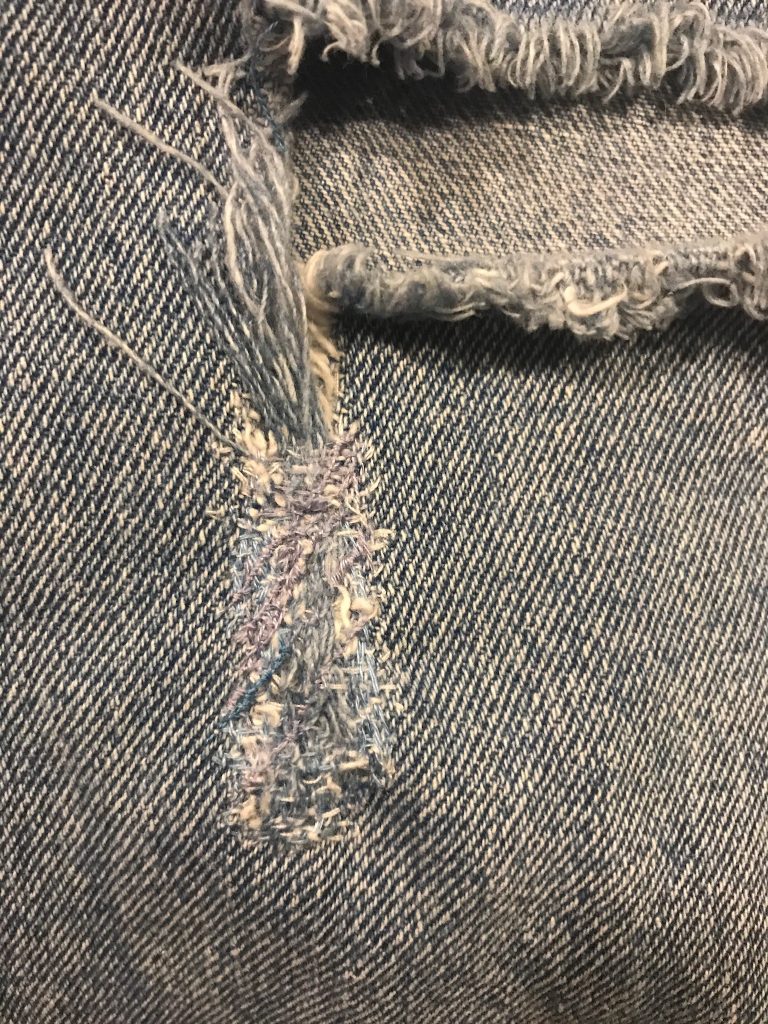
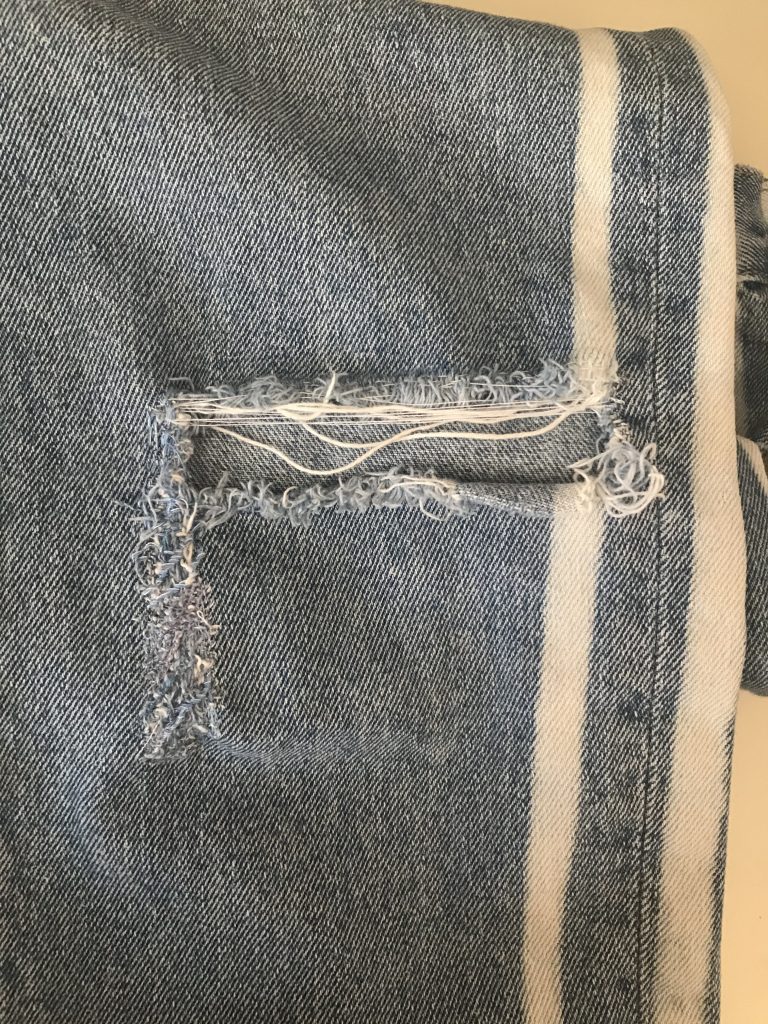
I continued to use the same techniques, fixing the rips in the fabric by creating more wefts, and then layering diagonal stitches on top to help it blend back into the denim. I experimented with using a thicker needle and blending the strands of thread together. Previously, I used one thread color at a time. This time, I twisted 2 strands of blue thread, and 1 strand of white thread together, creating a thread that is slightly thinner than embroidery floss. While the colors did seem to help the alterations blend into the original pants. it was a bit harder to match the weave of the fabric, due to the thickness of the tread.
Mending Progress 10/8/20
I also finished up by stitching around the perimeter of the rip. This allowed me to reinforce the sides, and prevent more of the weave from coming loose. I added more white weft threads in order to be able to hold up the original loose weft threads (coming from the right side). I also finished weaving in the original loose threads, so the loose-ends now look completely alike. Going up the left side of the rip with the new blended thread allowed me to make the mending look a little more cohesive.
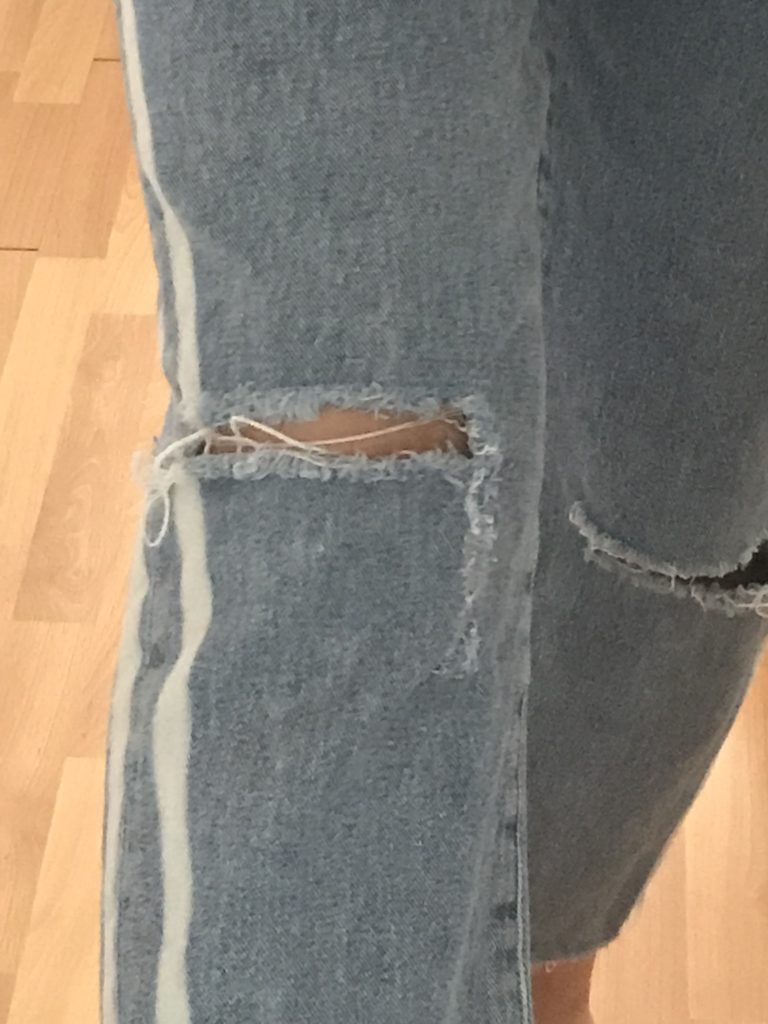
Mended jeans when worn
The mended area blends in pretty well from far away, and when worn. Up close, it is possible to see all the little threads and patterns that don’t match quite right, but I am pretty happy with the result. I do think that the strategy of using one thread at a time was slightly more successful than blending the colors, but it was very time-consuming. There is a bit of a trade-off between the two stratgies, but I think using them together, I was able to create a nice result.


.jpg)