

Video of the piece being deflated:
Process:
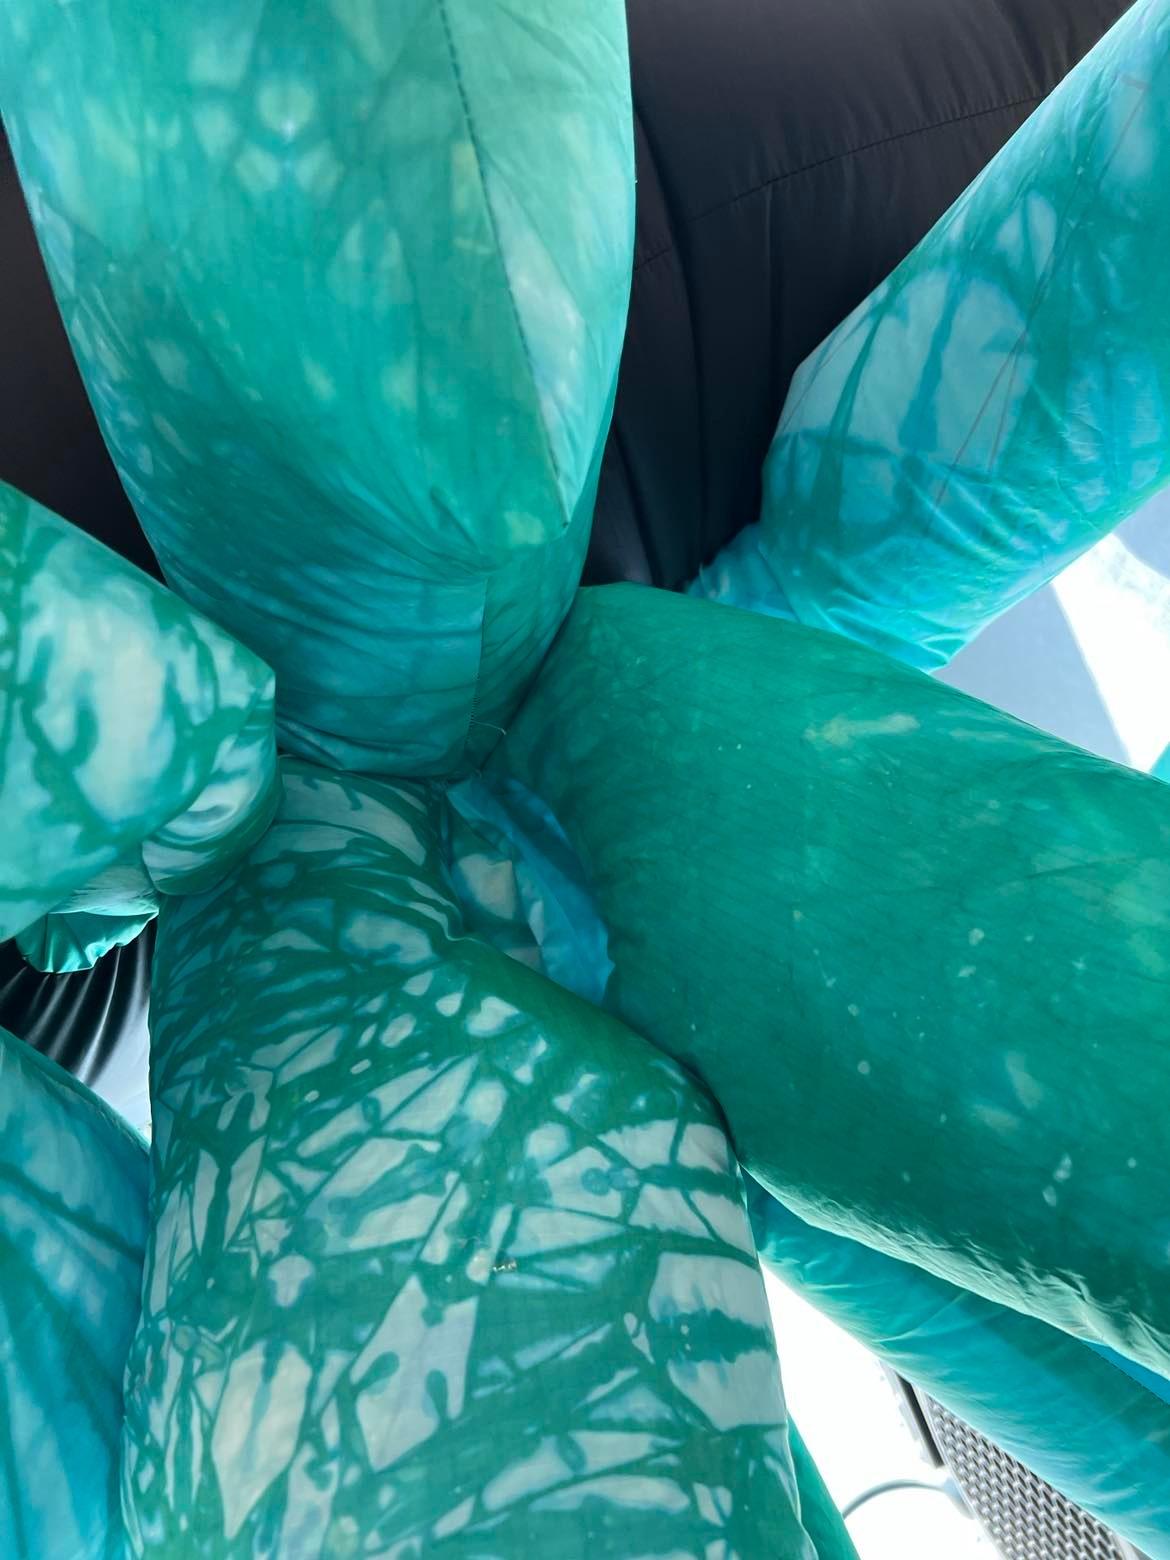
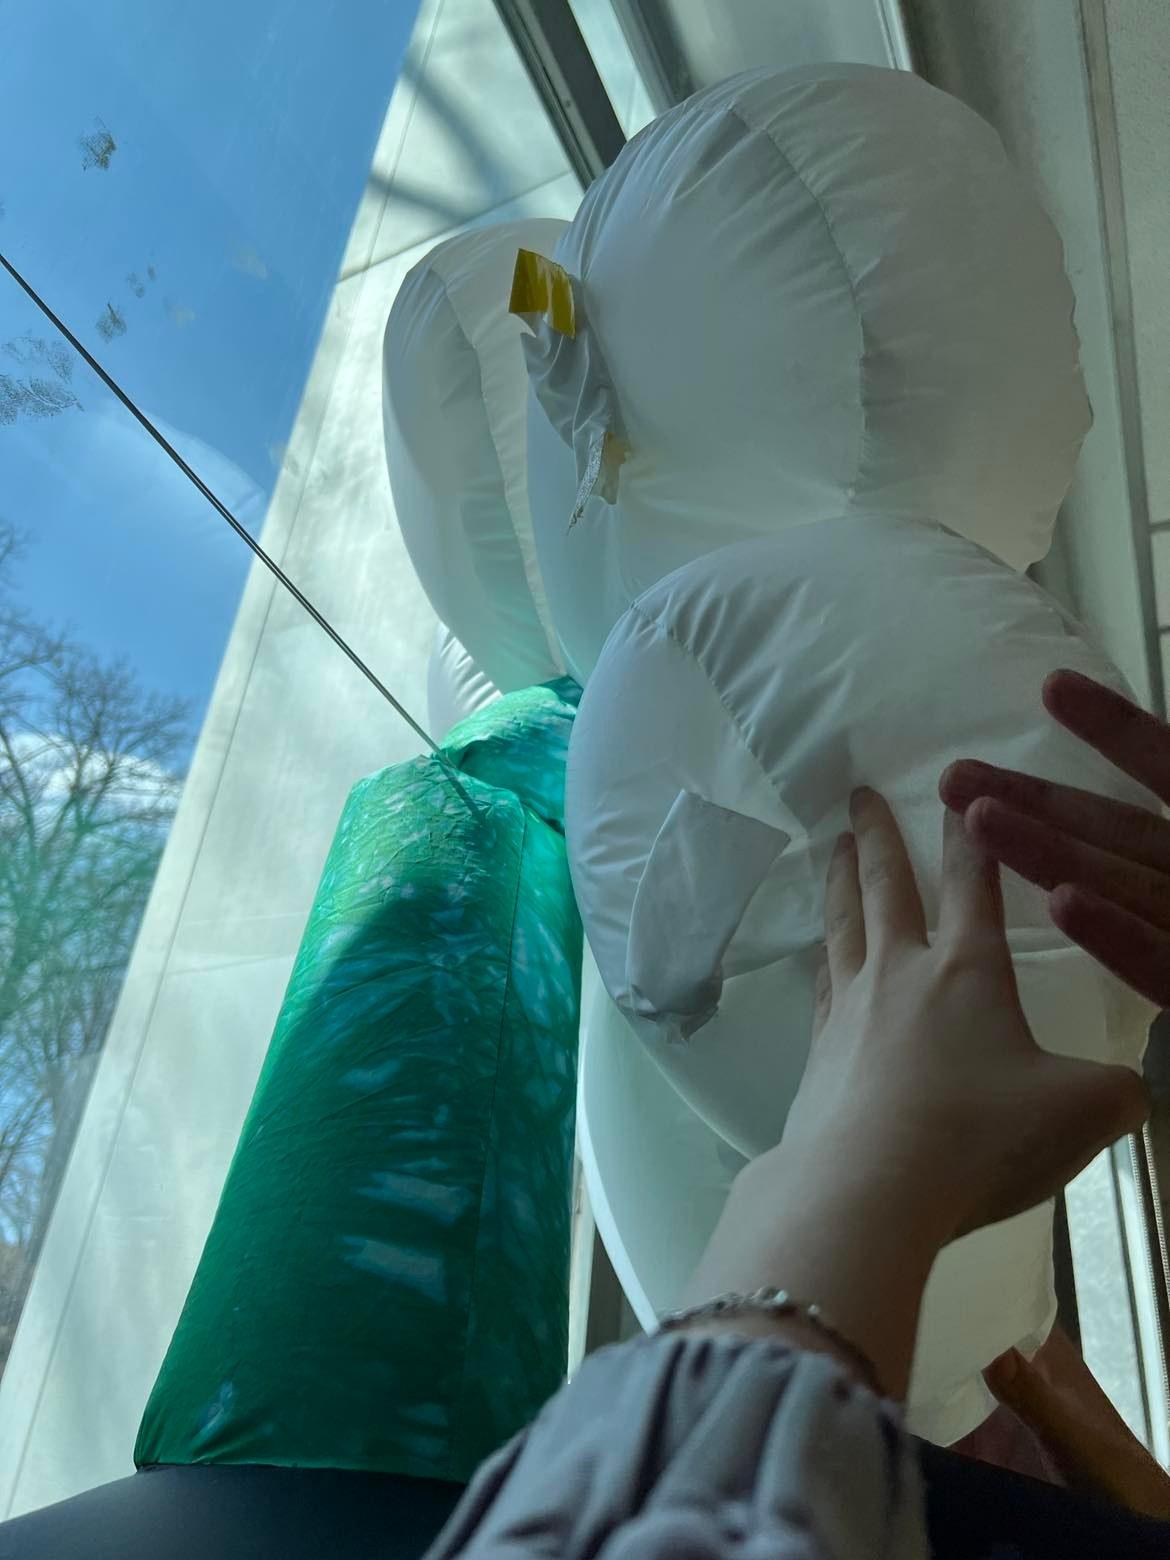
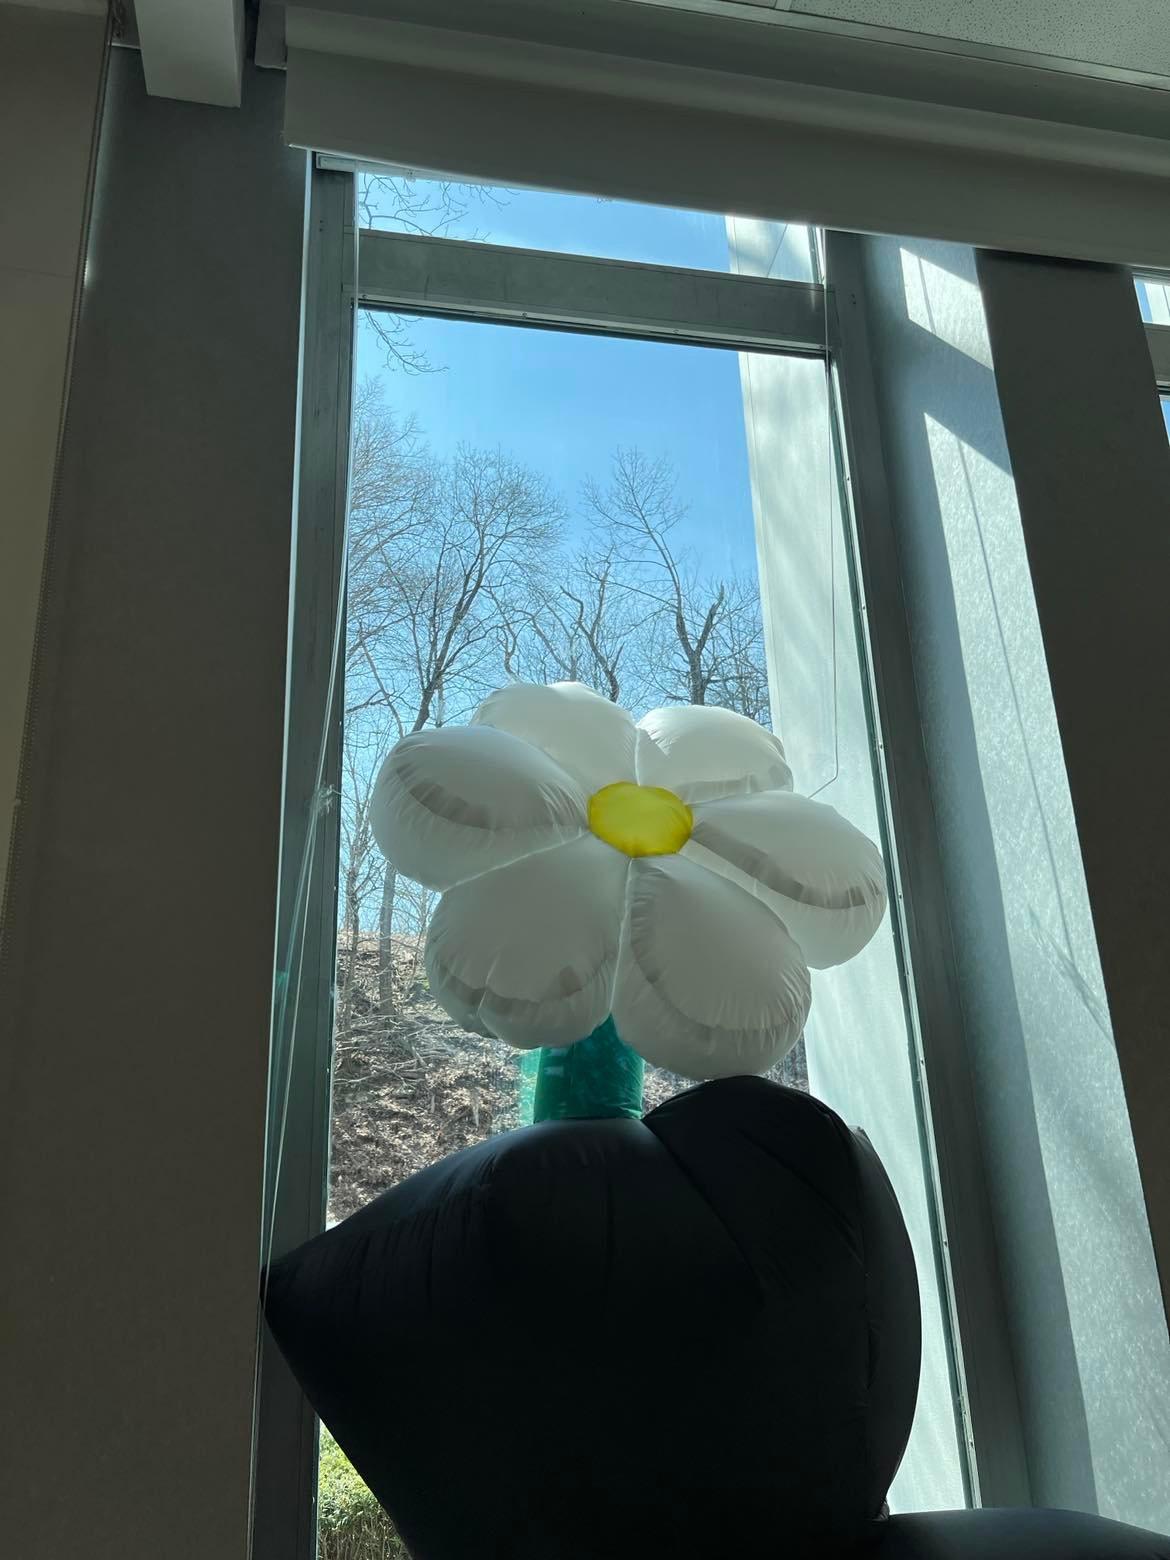
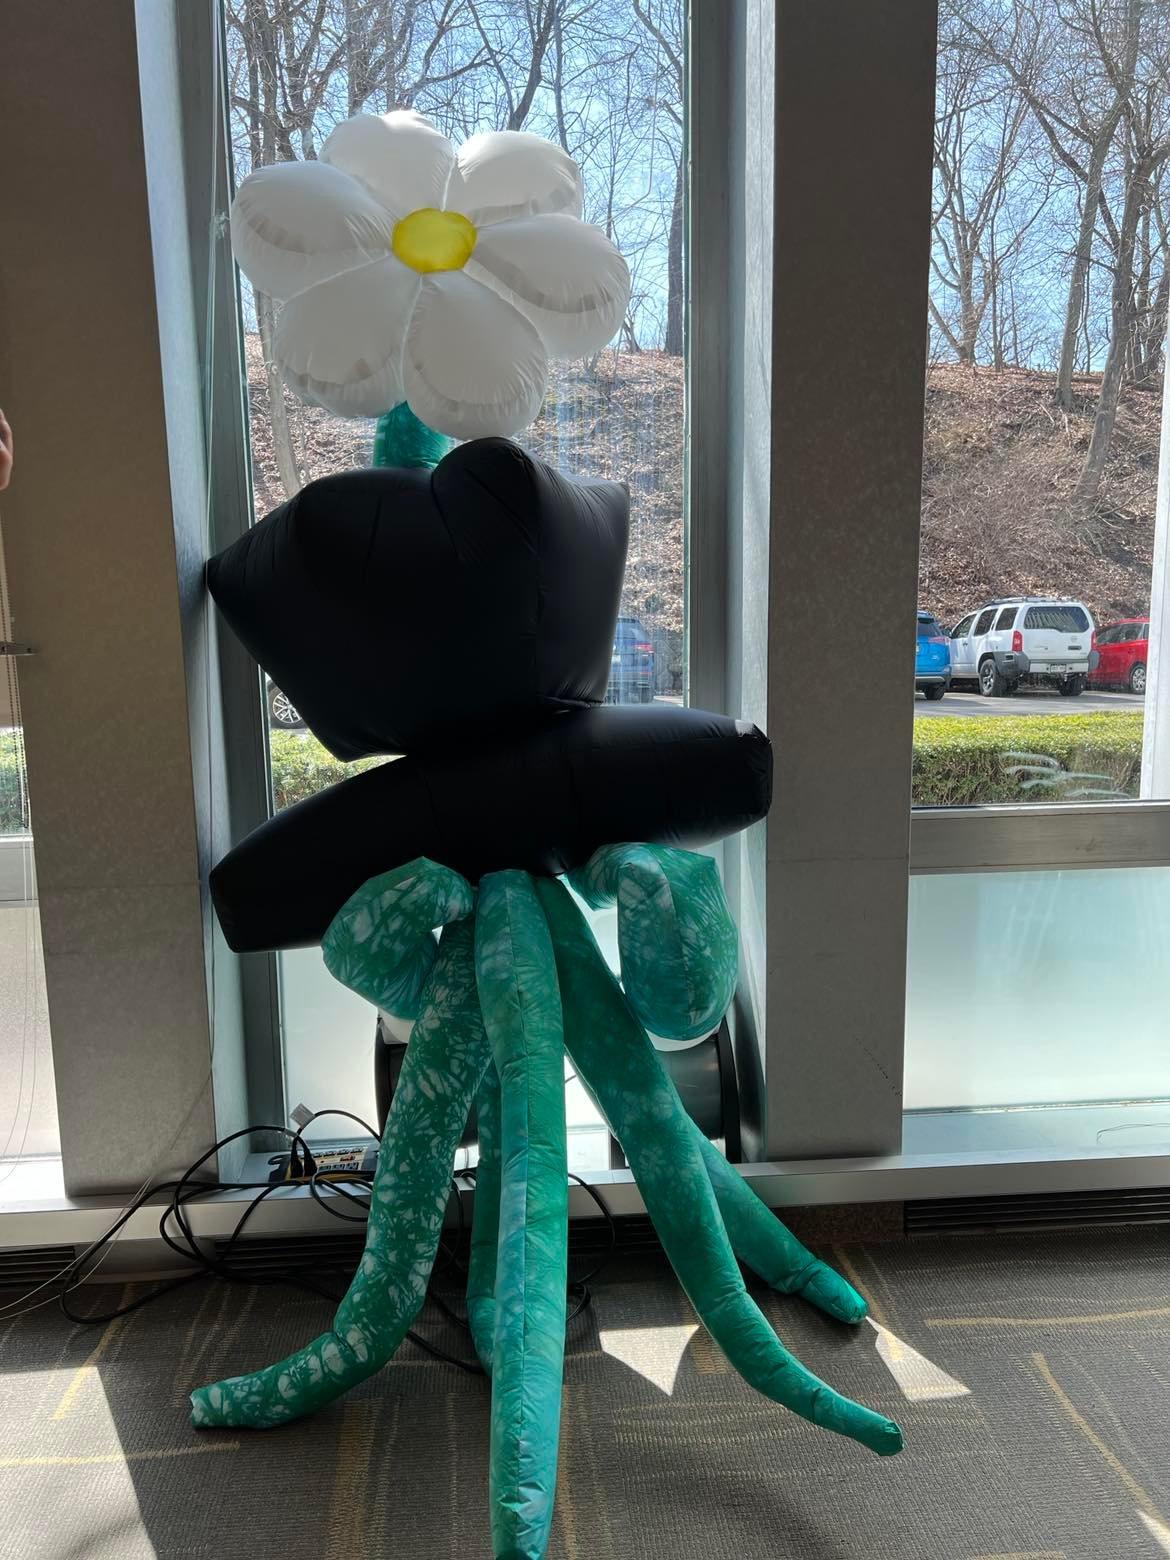
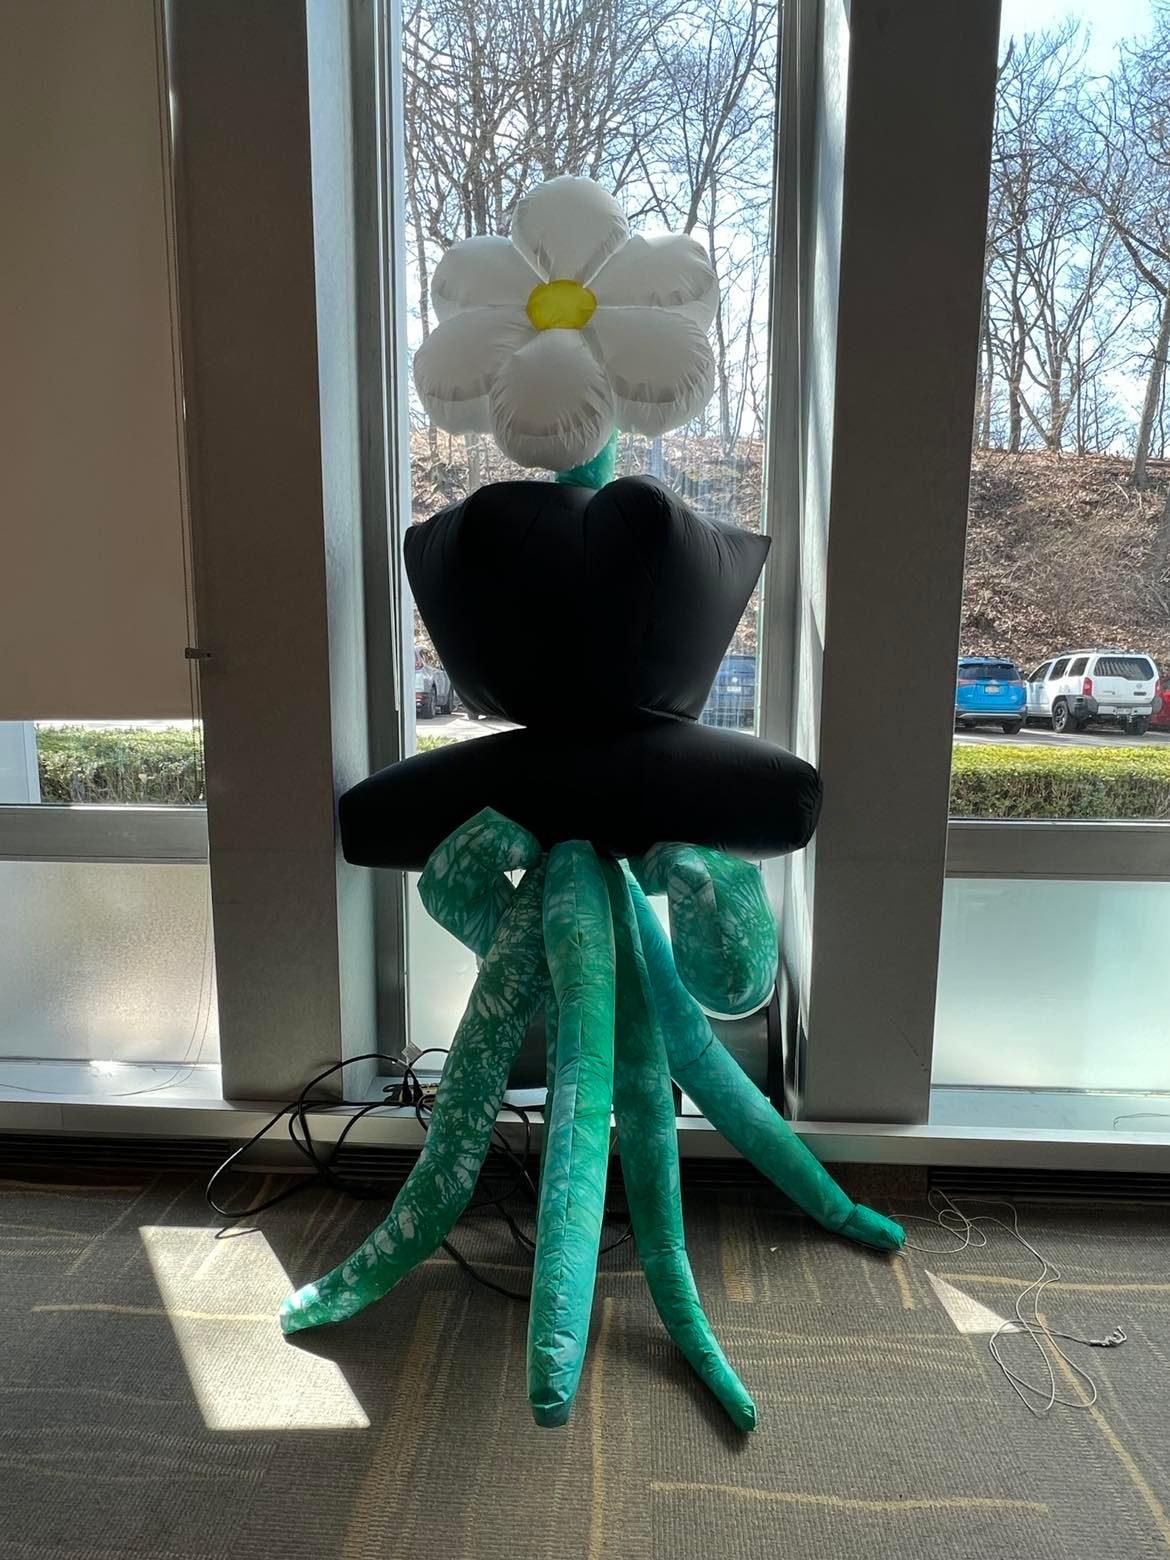
Our final piece consists of a flower, flower stem, flower pot, table, roots, and connection between roots to the fan. The flower & flower pot pieces are inspired by Sophia’s first Push/Pull assignment and the roots are inspired by Douglas’ first Push/Pull assignment. We split up the design and construction of these pieces based on whose original piece we were referring to and its location. We then both designed the pieces that are needed to build the different inflatable parts and checked in with each other to get each other’s opinions. We then constructed the pieces separately. Sophia mainly worked on the flower, flower stem, and flower pot. And Douglas mainly worked on the table, roots, and the connection between the roots and the fan. After we both completed our pieces, we met to connect them and inflated the final piece to test it out.
More specifically, for the flower piece, we chose yellow and white because we want to embody the innocence, beauty, simplicity, and joy of flowers found in the wild like daisies. We also wanted to make the daisy symmetrical and delicate. It was sewn 2/3 by hand and 1/3 by machine. Unlike the daisy, we want the roots to grow out more freely and each with unique shapes and sizes. The form of the roots is a mix of organic and free-hand drawings to create the long winding roots. The other parts: table, flower pot, and stem were constructed based on specific measurements so that it makes connecting each piece easier. After putting together the pieces, we added two places for airflow and attached them like roots.
Discoveries:
We realized that measurements are difficult because even if they are perfect, imperfect stitching can add tension that affects the true size when inflated. We had really specific measurements that we wanted to use to make the pieces. Because we know our piece would fit between the window area, we took the measurements of the window. We also noted how tall and how large we want the final inflatable to be. We used these measurements to make our pieces. Imperfect sewing and tension of the thread in high-density areas caused the final outcome to not be the originally intended size.
We also realized the importance of working in small pieces until we need to connect them to make bigger pieces. One of the guest speakers mentioned this and we used this strategy. It made the construction process easier. For example, for the flower piece. Sophia first made all the petals then connected them to each other. and then when she completed the flower, stem, and all the pot pieces, she put everything together. This was much easier than adding to one piece as it could get too big and hard to work with. Lastly, sometimes it might be easier to just hand sew instead of putting in too many pins, especially when working with material that is sticky on one side.
Successes:
We think the piece was effective in eliciting a meaning of seeing the power and beauty of life not without the rough and expansive foundation upon which it grows. We also find it a success that with such a large piece, that had such tiny sewn connections, we managed to build a piece that retained air very well and inflated with the help of two fans. We also thought the overall placement of the inflatable really added to the project. It gave us natural sunlight which worked well for the flower. The glass window allowed us to see outside and the real plants outside added to the root design.
Challenges:
We had several challenges. One of them was being able to imagine the 3d piece being 2d and really thinking about what are the smaller pieces required to build it. Doing the measurements for the pot was also difficult because only two of the 6 sides are the same measurements, all the other pieces are different so each piece has a specific place it belongs. It was also difficult to install the pieces to each other. Because of the changes in weight, the connection of different pieces changes the overall design of the inflatable. Going forward we will try to practice understanding better where the support comes from during installation and how to design the inflatable in order to be durable and have a longer inflated life.