Color Grids and Gradients
Learning Objectives
- Practice using nested loops.
- Practice making image properties (location, color) depend on loop variables.
Participation
In this lab/recitation, you will write some p5.js programs that use the techniques you’ve learned in class so far. The goal here is not just to get the programs done as quickly as possible, but also to help your peers if they get stuck and to discuss alternate ways to solve the same problems. You will be put into breakout rooms in Zoom to work on your code and then discuss your answers with each other, or to help each other if you get stuck. Then we will return to discuss the results together as a group.
For each problem, you will start with a copy of the uncompressed template-p5only.zip in a folder named lab-05. Rename the folder as andrewID-05-A, andrewID-05-B, etc. as appropriate.
A. One-dimensional Color Gradient
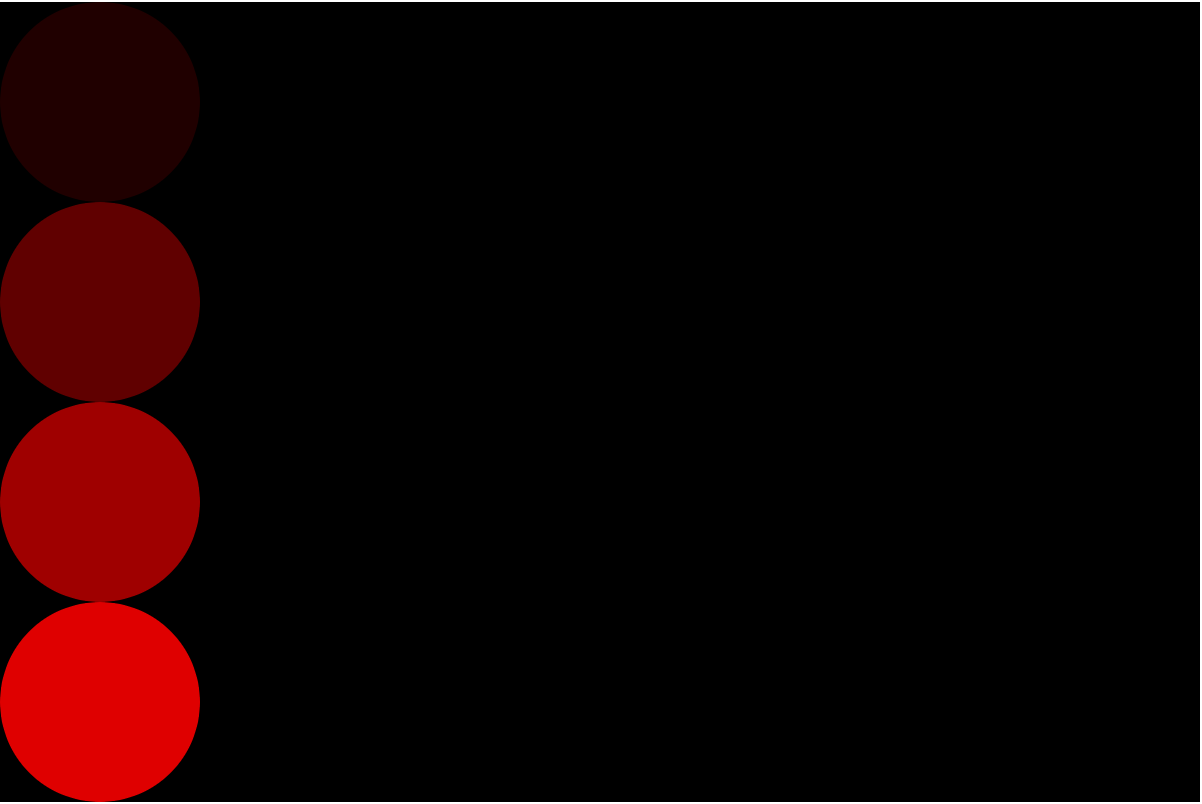
Write a p5.js sketch in the folder andrewID-05-A that draws this picture using a for loop. Canvas is 600×400, circle width (and height, it’s a circle after all) is 100. The color is close to black at the top and close to red at the bottom, but you can see in this picture that the color is not full black at the top, in this case because the center of the circle is at 50, not 0. For this exercise, you will write a single loop that sets the fill color with some amount of red, and have green and blue set to 0. The amount of red will depend on the iteration. For example, for the four circles below, you might set the red component to 10, 90, 170, 250. The amount of change in red should be constant (e.g. in this sequence, each value is 80 more than the previous value).

B. Nested Loops
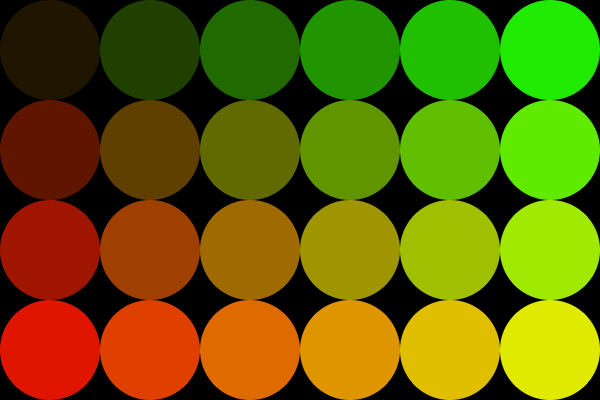
Make a copy of your answer to exercise A into a new folder andrewID-05-B. Add an inner loop to your previous program to create this image (or something close to it):

Use the following code as a starting point to create the image above:
|
1 2 3 4 5 6 7 8 9 10 11 12 13 14 15 16 17 18 |
function setup() { createCanvas(600, 400); noStroke(); } function draw() { background(0); drawGrid(); noLoop(); } function drawGrid() { for (var y = 50; y < height + 50; y += 100) { for (var x = 50; x < width + 50; x += 100) { //color gradient needs to be implemented ellipse(x, y, 100, 100); } } } |
In the image, the RED component of the RGB color increases vertically from about 0 to about 255 (e.g. 10 to 250 in steps of 80). The GREEN component increases horizontally from about 0 to about 255. (For example, you might increase the green component from left to right from 10 to 250 as well, but the increase for each column would not be 80; what would it be?).
Modify the “starter” program to produce the image above. Use only multiplication, division and/or addition to compute color values from x and y.
C. Generalizing gradient
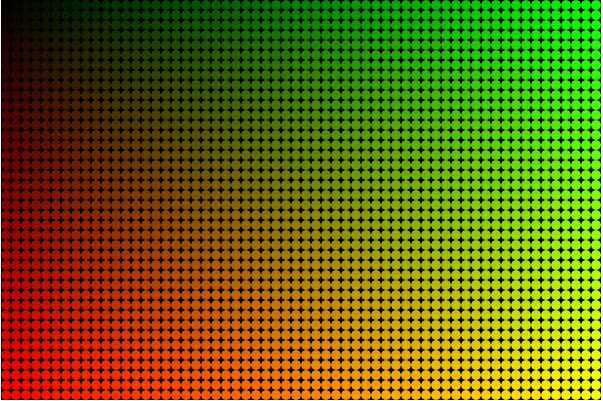
Make a copy of your answer to exercise B into a new folder andrewID-05-C. Modify your program to make the following starting image (circle diameter and spacing is 10). Challenge: Define a global variable (var size = 10; ) and see if you can remove all “magic numbers” (i.e. numbers that are tied to a specific spacing only) so that changing size will change the circle size and spacing.

Once you have this programmed, replace “noLoop();” with “size = mouseX / 10 + 10;” and see if it works! If you’ve removed all of the “magic numbers”, then the grid of circles will scale larger or smaller as your mouse moves left and right with the color gradient adjusting to the number of circles drawn.
D. Challenge Problem: using maps
Highly recommended if you are comfortable with creating “mappings” or transformations from loop variable values to coordinates, colors, and sizes by scaling (multiplication) and shifting (addition/subtraction).
Make a copy of your answer to exercise C into a new folder andrewID-05-D. Rewrite the nested loop program (the original color grid) using the map function to help with choosing the correct color value.
ALSO: You can try to write a separate function to draw something other than a circle (but the same general size) and then have draw call this to draw each shape in the appropriate color.
Handin
At the end of the lab, zip the lab-05 folder (whatever you got done) and submit it to Autolab. Do not worry if you did not complete all of the programming problems but you should have made it through problems A and B, and you should have some attempt at problem C.
![[OLD SEMESTER] 15-104 • Introduction to Computing for Creative Practice](wp-content/uploads/2023/09/stop-banner.png)